|
|
PBP Commentary |
Coming up we have a super heavyweight MMA rules bout between Money Support (ranked 25331 p4p, 3072 weight class) and Money Bull (ranked 215 p4p, 121 weight class). Over to our ring announcer for the fighter introductions!
 |
|
 |
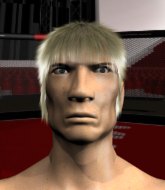
| 225 cm
18
300
0 - 4 - 0 |
|
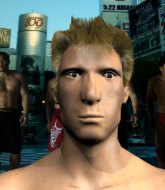
225 cm
25
300
4 - 0 - 1 |
BJJ Blue Belt
Brawler
Good chin |
|
BJJ Blue Belt
Decent boxing
Knockout power |
|
| |
|
Ladies and gentlemen. This fight is 3 rounds, in the super heavyweight division.
Introducing the fighter to my left, fighting out of the red corner.
With a record of 0 - 4 - 0, fighting out of Sydney, Money Support!
And introducing the fighter to my right, fighting out of the blue corner.
With a record of 4 - 0 - 1, fighting out of Sydney, Money Bull!
The judges for this bout are Summer Carpenter, Steve Erwin and Donatello Bradman.

The bell rings for round one and we are underway!
Bull tries to land with a swinging hook to the body but Support was well out of range. Poor timing from Bull.
Bull avoids a kick to the body.
Support fails to land the takedown.
Support looks to score with a combo but nothing lands.
Bull is looking for the big counter here.
Support misses with a takedown
and Bull counters with a crisp hook to the side of the head.
Bull misses with a takedown attempt - Support sprawls well and throws a nice strike on the way out which just misses.
Bull shoots in looking for a takedown but Support manages to keep the fight standing, pushing Bull's face into the canvas for good measure before circling away.
Support went nuts there looking for a big combo counter but none of the flurry connected.
We've had a slow start to the round here - hopefully the action picks up.

Bull drives through and clinches with Support against the cage.
Support misses with a punch on the inside.
Support tries to jump guard but he falls flat on his backside. Bull smiles and moves away.
That's three failed takedown attempts in the round for Money Support. That's going to take a lot out of him.
Support shoots in looking for a takedown but Bull manages to keep the fight standing, pushing Support's face into the canvas for good measure before circling away.
Despite the aggression on Bull's face he doesn't fully commit to the counter.
Support will have to do better than that with his takedown attempts.
Bull tries to counter by closing the distance.

That's one minute gone in the round.
No luck with that takedown attempt from Support.
Bull shoots for a double leg takedown but Support sprawls well. He's pushed Bull's face into the mat and manages to get back to his feet relatively easily.
Bull throws a looping left and ducks down for a takedown. He's got his arms around Support's waist but Support gets an underhook and avoids the takedown by throwing Bull off to one side.
Bull moves into range and clinches up with Support.
Bull stops a takedown attempt from Support.
Support tries to pull guard but Bull won't allow it.
Bull prevents Support from breaking the clinch.
Bull tries to score a body lock takedown but Support shows good agility there to stay on his feet.
Support drops to a knee looking for a takedown but Bull gets the underhooks and prevents it.
Support is trying to slow down the pace in the clinch, to catch his breath.

That's two minutes gone in the round.
Support is working for takedown but Bull is calmly controlling the position for now.
Bull stalls.
Bull drops down for a takedown but doesn't get it.
Support just leaning against Bull, taking a breather.
Support fails to pull the fight into his guard.

Bull has managed to pull guard. Let's see whether he can work an aggressive guard. It will also be interesting to see what tactics Support uses from the top position.
Bull has a closed guard, preventing anything of note from happening. Perhaps he's looking to stall.

That's three minutes gone in the round.
Support trying to control the position from guard on top but Bull is wriggling around, looking for whatever he can.
Support being controlled here momentarily.
Support stops Bull from standing up.
Bull trying to strike off his back.
The fighters are pressed up against the cage, both looking to find a bit of space to work.

That's four minutes gone in the round.
The crowd are showing their displeasure at the lack of action as loud boos ring out around the arena.

Bull looking for submissions from the bottom here. Moving his hips around, possibly looking for an armbar.
The referee is pacing around the two fighters, thinking about a standup.

Bull kicks Support off and gets to his feet.
Nice takedown defense from Bull. No joy for Support on that attempt.
Bull closes the distance and clinches up with Support, looking for a takedown. Bull pushes Support against the cage but Support circles to the side and manages to break the clinch.
Support tries to clinch there but Bull circles away.
Support wants to clinch.
Bull drops down looking to force a counter takedown but Support defends it well.
Boooooooooooooooooooo!!! God, this has been a terrible round. Come on you two, sort yourselves out!
Bull tries to score a power double leg takedown but Support sees that one coming and sprawls well. That will dishearten Bull somewhat.
And that is the end of the round. The fighters go back to their corners.
Money Bull dominated that round.
OK. That's time! The bell goes and we're back to the action.

Support tries to clinch but Bull moves out of range.
Bull tried to score with a low kick but Support checks it.
Support fails in his attempt to clinch.
Bull closes the distance and presses his opponent up against the cage.

Support breaks the clinch.
Bull shoots in for a takedown but Support shows good takedown defense there and keeps this one on the feet.
Bull clinches up against the cage.
Support breaks from the clinch.
Bull moves into the clinch successfully.
We've had a slow start to the round here - hopefully the action picks up.
Bull has managed to pull guard. Let's see whether he can work an aggressive guard. It will also be interesting to see what tactics Support uses from the top position.
Bull working from the bottom, still in full guard. He's managed to get a loose triangle. Support doesn't seem to be doing much to defend here, obviously he feels comfortable in the position. Support manages to throw the legs off his shoulder and he's back into guard - no problem.
Bull has his hands on Support's head, controlling the position.
That's one minute gone in the round.
Bull is working an open guard here, looking to improve his position. No doubt that will leave him open to counters but at least he's being more offensive.
The ref warns both fighters not to hold the cage as they work up against the meshing.
Support is looking to work some ground and pound but Bull has wrist control.
Bull looking to hit a scissor sweep but Support is one step ahead there.
Bull bucks up whilst keeping hold of a body lock, managing to reverse the position. Now he's in top in Support's guard.

Bull not doing a lot at the moment. He'll have to show some more aggression or the fight will get stood up.
That's two minutes gone in the round.
The crowd are showing their displeasure at the lack of action as loud boos ring out around the arena.
Support not looking particularly offensive just at the moment.
Bull sitting in guard, not really doing much.
Bull sneaks a leg through and gets to half guard. That was like a knife through butter how easily he passed Support's guard.
Bull is figuring out what he wants to do next.

Bull escapes and gets back to his feet.
Support shoots for a takedown but Bull saw that one coming a mile off and avoided it easily.
That's three minutes gone in the round.
Support is looking to take this fight into the clinch.
Support changes levels and looks for a double leg takedown. Bull tries to avoid it but Support manages to keep hold of a leg and drag Bull to the ground. Bull escapes though and pops straight back up to his feet.
Bull drives through and clinches with Support against the cage.
Support jumps guard but Bull stands there with Support around his waist. Support gives up and drops back to his feet. We remain in the clinch.
That's three failed takedown attempts in the round for Money Support. That's going to take a lot out of him.
Bull is trying to pull guard but Support has him pressed against the cage.

Bull escapes the clinch and we're back to striking.
Support misses with a body kick.
Bull tries a counter takedown but it's more of a dummy move, and he uses it to push himself away.
Bull gets to the clinch - let's see what his plan is here.
Support gets double underhooks to prevent a takedown attempt from Bull.
Bull tries to work over Support's body with a swooping hook but it only glances the target.
That's four minutes gone in the round.
Support has a body lock and is looking for a takedown. Bull is bouncing around trying to prevent the takedown and somehow he has indeed managed to stay on his feet.
Bull is looking to take this one to the mat.
Bull is pressed up against the cage. Support has hold of a leg and is looking to drag Bull down to the mat. Bull avoids the attempt though and has circled away. We're back to striking at a distance.
Bull pivots as if he's going to throw a leg kick but stops half way.
A telegraphed takedown attempt from Bull is defended easily by Support.
Bull shoots in for a double leg but Support sprawls well. That's going to sap some energy.
Boooooooooooooooooooo!!! God, this has been a terrible round. Come on you two, sort yourselves out!
Support gets tackled into the cage by Bull. Bull maintains the clinch.
Support pushes off and circles away, back to the middle of the mat.
Money Bull seems to be getting the better of the standup.
Bull shoots in for a double leg but Support sprawls well. That's going to sap some energy.
And that is the end of the round. The fighters go back to their corners.
Money Bull showed his class in that round. I'd imagine he'll take it on all the scorecards.
The fighters get back to their feet, the hooter sounds and we're back to the action! This is the final round!

Bull gets to the clinch - let's see what his plan is here.
Bull has been the more effective fighter overall so far.
Bull changes levels and goes for a takedown here. Support fights it off and pushes away nicely.
Support tries to clinch there but Bull circles away.
Support gets tackled into the cage by Bull. Bull maintains the clinch.
Bull prevents a takedown attempt there.
Support gets double underhooks to prevent a takedown attempt from Bull.
Support breaks from the clinch.
We've had a slow start to the round here - hopefully the action picks up.
Support doesn't manage to clinch there - Bull circles away.
And Bull tries to counter it with a takedown but Support pushes his down on his head and steps out.
Bull dives in for a single leg takedown but Support sprawls and the fighters end up clinched against the cage.
Money Support has stuffed three takedown attempts in the round now. That's going to take a lot out of Money Bull.
Bull shoots in and drives through. Support sprawls well.
That's one minute gone in the round.
A punch combination from Bull misses.
As Bull tries to get set, Support tries to push him back and clinch up but Bull manages to avoid the attempt.
Support tries to bum rush Bull with a series of wild strikes but Bull uses good footwork to avoid the assault.
Support throws a combination but comes up with nothing but fresh air.
Bull unleashes a big counter combination but Support bobs and weaves and avoids any damage.
Bull misses with a body kick.
Support avoids the head kick by Bull.
Support attempts a counter takedown but Bull avoids it well and moves away.
Support fails with an attempt to clinch.
Support shoots in for a double leg but Bull sprawls well. That's going to sap some energy.
Bull misses with a takedown attempt - Support sprawls well and throws a nice strike on the way out which just misses.
Support tries to counter by moving into the clinch but Bull manages to circle out of the way.
Bull takes a big intake of breath there - he's definitely tired.
Bull takes the fight into the clinch.
Bull changes levels and goes for a takedown here. Support fights it off and pushes away nicely.
That's two minutes gone in the round.
Support leaves Bull with his face pressed against the mat as he sprawls beautifully, defending against a solid takedown attempt.
It looked like Support was looking amped, ready to throw a big counter but didn't commit.
A head kick misses from Support.
Bull avoids the head kick by Support.
Nice takedown defense from Bull. No joy for Support on that attempt.
Bull defends well against a solid takedown attempt from Support.
Bull circles away from the clinch attempt
and Bull counters with a straight right hand.
Bull fakes with an overhand right and moves in to clinch with Support, pushing him back against the cage.
Fantastic stuff here - a very entertaining period of action, which has drawn cheers from the crowd.
Bull drops to a knee looking for a takedown but Support gets the underhooks and prevents it.
That's three minutes gone in the round.

Support jumps guard.
Bull stands up from guard. Let's bang!
Support defends well against a solid takedown attempt from Bull.
Money Support is looking to throw some combinations by the looks of things.
Bull shoots for a double leg takedown but Support sprawls well. He's pushed Bull's face into the mat and manages to get back to his feet relatively easily.
Bull tries to bum rush Support with a series of wild strikes but Support uses good footwork to avoid the assault.
Horrible takedown attempt by Bull or perhaps it was just good defense by Support, which made it look bad.
Support is trying to close the distance and clinch up, after that failed offence from Bull.
Bull slips a jab and a cross from Support.
Bull looks frustrated there after his takedown attempt is stuffed easily.
That's four minutes gone in the round.
Support fakes and then throws a beautiful body shot. Bull looks a bit winded and takes a step backwards to take a breath.
Support fails with the takedown.
Bull blocks a head kick by Support.
Bull gets a clinch.
Bull is trying to pull guard but being pressed up against the cage enables Support to keep the fight standing.
The crowd thankful this round is nearly over.
Bull avoiding damage.
Bull breaks the clinch.
And that's the end of the fight!
I would just about give that final round to Money Bull.
I've got Bull winning every round here. Surely the decision will go his way and he'll pick up a well deserved decision victory. Over to the ring announcer for the scorecards.
Ladies and gentlemen, after 3 rounds of action, we go to the scorecards for a decision.
Judge Summer Carpenter scores the fight 28:29
Judge Steve Erwin scores the fight 27:30
Judge Donatello Bradman scores the fight 27:30
In favor of your winner, by unanimous decision... Money Bull!
|
|
|
|
|
|
|
|
|
|
|
|
|
|
|
|
|
|
|
|
|
|
|
| S |
C
A |
G |
S |
C
B |
G |
|
S |
C |
G |
|
energy
A | B |
|
hype
A | B |
|
pop
A | B |
|
mgr
A | B |
|
FIGHT
RATING
31% |
|
|
|
|
|
|
