|
|
PBP Commentary |
Coming up we have a lightweight MMA rules bout between Myles Murray (ranked 3586 p4p, 2117 weight class) and Riley Hatfield (ranked 389 p4p, 237 weight class). Hatfield is bobbing his head along to his entrance song: Alabama - Bishop Gunn. Over to our ring announcer for the fighter introductions!
 |
|
 |
| 172 cm
21
155
2 - 3 - 0 |
|
174 cm
20
160
3 - 1 - 0 |
Good wrestling
World class MT
Cardio machine |
|
BJJ Purple Belt
Lethal high kicks
Granite chin |
|
| |
|
Ladies and gentlemen. This fight is 3 rounds, in the lightweight division.
Introducing the fighter to my left, fighting out of the red corner.
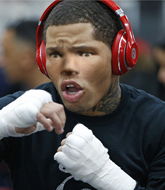
With a record of 2 - 3 - 0, fighting out of St Petersburg, Myles Murray!
And introducing the fighter to my right, fighting out of the blue corner.
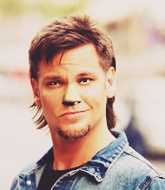
With a record of 3 - 1 - 0, fighting out of Amsterdam, Riley Hatfield!
The judges for this bout are Jack Bonds, Timothy Bukovac and Don Winkell.

The bell rings for round one and we are underway!
Murray misses with a takedown attempt - Hatfield sprawls well and throws a nice strike on the way out which just misses.
Hatfield connects with a leg kick.
Hatfield throws out a loose jab but Murray uses good head movement to avoid it.

Murray rushes Hatfield and pushes him back against the cage in a clinch.
Hatfield avoiding damage as Murray throws knees to the body.
Hatfield tries a knee to the head but he's missed.
Hatfield misses with a punch on the inside.
Hatfield looking to stall.
Hatfield wants to stall.

Hatfield breaks the clinch.
We've had a slow start to the round here - hopefully the action picks up.
Hatfield looks to land a left hand but Murray moved out of range nicely.
Hatfield just misses with a punch to the body.
Murray keeping his hands up high there, blocking the jab from Hatfield.
Hatfield misses the jab.
Hatfield moves into range and throws a combination. A nice jab followed by a hook to the body.
Hatfield throws a head kick that misses.

That's one minute gone in the round.
Some bone on bone action there as Murray checks a low kick. Luckily it wasn't a particularly hard one.

Murray changes levels and drives through with a really nice takedown into side control. Hatfield looks really pissed at himself for not defending that better.
Murray tries to move into full mount but can't pass Hatfield's legs.
Murray prevents Hatfield from escaping the position.
Hatfield defending against the ground and pound.
Hatfield wants to get back to his feet but Murray is dominant here and he's now got Hatfield's back!

Hatfield is trying to shake Murray off. He's managed it and has hopped back to his feet! Murray won't be happy about giving up the dominant position.
Hatfield jabs Murray to the body, keeping him at a distance.
Murray wants to clinch up but Hatfield keeps it at a distance.
Murray is looking light on his feet compared to last time was saw him fight.
Hatfield throws a jab when Murray was well out of range.
The crowd cheering loudly, showing their appreciation for the quality fight we're seeing here.
Murray shoots in for a takedown. "I don't think so" says Hatfield as he avoids it easily.
Hatfield looks like he wants to counter punch here.
Murray uses some good footwork to avoid the body shot by Hatfield.
Murray appears to be looking for a big counter.

That's two minutes gone in the round.
Murray closes the distance and clinches.
Murray dictating the pace here, as the fighters clinch against the cage.
Hatfield escapes the clinch and we're back to striking.
Murray wants to clinch up but Hatfield keeps it at a distance.
Hatfield misses with a straight left.
Hatfield throws an overhand right that lands on Murray's shoulder, as Murray tries to avoid the shot.
Hatfield bobbing and weaving, closes the distance and lands a hook to the side of Murray's head.
Murray blocks a jab.
Hatfield misses with an uppercut
and Murray counters with a head kick.
Riley Hatfield is looking to keep the fight on the feet at all costs.
Murray tries to drive through with a takedown attempt but Hatfield defends well and Murray ends up having to push Hatfield into the cage where they will battle it out in the clinch.
Hatfield looked like he wanted to counter with a punch but didn't throw it.
That's three failed takedown attempts in the round for Myles Murray. That's going to take a lot out of him.
Hatfield wants to break the clinch but can't.
A head punch blocked on the inside by Murray.
Murray blocking some punches.
Hatfield pushes off and circles away, back to the middle of the mat.
Hatfield scores with a three punch combo!
Murray tries to score a power double leg takedown but Hatfield sees that one coming and sprawls well. That will dishearten Murray somewhat.
A little jabbing left from Hatfield on the counter but it doesn't find it's target.

That's three minutes gone in the round.
Hatfield leaves Murray with his face pressed against the mat as he sprawls beautifully, defending against a solid takedown attempt.
An inside leg kick lands from Hatfield.
Hatfield lands with a thumping leg kick.
Hatfield takes a step towards his opponent and connects with a left hand, before circling away.
Hatfield loads up on a big right hand but Murray slips the punch.
Murray shoots in for a takedown but doesn't get it.
Hatfield misses with a low kick as Murray jumps back.
Murray attempts a counter takedown but Hatfield avoids it well and moves away.
Hatfield avoids the head kick by Murray.
Murray ducks under a wild hook from Hatfield.
Hatfield pivots, looking for a leg kick but Murray is out of range and Hatfield settles back down.
Hatfield misses the shot to the body.
Murray is looking to clinch but Hatfield is avoiding it.
Hatfield throws a combination but it was largely blocked by Murray.
Hatfield lands with a right hand.
Murray takes a shot to the eye socket. That's gotta hurt.

That's four minutes gone in the round.
Murray slips a jab from Hatfield.
Murray steps to the side to avoid the strikes from Hatfield.
Murray is looking to counter the offense by Hatfield and move into the clinch.
Hatfield bobbing and weaving, closes the distance and lands a hook to the side of Murray's head.
We've seen a great period of action over the last minute or so - credit to both fighters for going all out!
Hatfield connects with a right hand. Murray shakes it off.
Murray misses with a takedown attempt - Hatfield sprawls well and throws a nice strike on the way out which just misses.
Hatfield throws a leg kick but Murray sees it coming and checks it nicely.
Hatfield works his jab well there, keeping his opponent at a distance.
Hatfield is the aggressor but that punch slipped nicely by Murray.
Hatfield misses with a hook. Murray ducked under it nicely.
Hatfield scores with a sloppy punch to the body. Not much technique there but it did the business.
Hatfield misses with a low kick as Murray jumps back.
Hatfield goes for a spinning back kick but it misses.
Hatfield lands three nice shots there - that looked like it hurt!
Murray dodges the punch combination from Hatfield.
Hatfield wants to slow Murray down by chopping away at his legs.
As Hatfield tries to get set, Murray tries to push him back and clinch up but Hatfield manages to avoid the attempt.
And that is the end of the round. The fighters go back to their corners.
Riley Hatfield dominated that round.
OK. That's time! The bell goes and we're back to the action.

Hatfield throws a leg kick that misses.
Hatfield throws out a powerful jab.
Hatfield swinging wildly here.
Murray throws a quick counter head kick but Hatfield was just out of range.
Hatfield looking to throw a kick but he's pulled out of it.
Nice sprawl there from Hatfield as Murray shoots in.
Hatfield throws a head kick that misses and slips in the process. He scrambles back to his feet and the fighters circle.
Murray has managed to clinch.

Murray pushes off and circles away, back to the middle of the mat.
Murray shoots in for a takedown but Hatfield shows good takedown defense there and keeps this one on the feet.
Hatfield moves into range and lands a nice leg kick.
Sloppy strikes from Hatfield. Those never looked like landing.
Riley Hatfield seems to be the more aggressive standup fighter in this bout.
We've had a slow start to the round here - hopefully the action picks up.
Murray thows a body kick. Hatfield tries to catch it but that hurt him.
A telegraphed right hand from Hatfield misses the target.
Hatfield swings away but doesn't land with a series of punches.
Hatfield throws a looping overhand right but Murray ducks down to avoid it.
Hatfield throws an overhand right that lands on Murray's shoulder, as Murray tries to avoid the shot.
As Hatfield looks to move away, Murray throws a big counter combo but Hatfield just gets out of the way.
Myles Murray is looking to throw some combinations by the looks of things.
Murray throws a nice looking combination but Hatfield bobs and weaves to avoid any damage.
That's one minute gone in the round.
Murray throws a series of punches but Hatfield avoids them all with ease.
It seemed like Hatfield was going to counter with the hook but didn't fully commit to it.
Murray blocks a jab.
Murray on the wrong end of a nice hook.
Hatfield misses with a hook. Murray ducked under it nicely.
Hatfield fakes with a right hand and throws a good leg kick, right into the thigh. That had to hurt Murray.
Murray shoots in but Hatfield avoids the takedown attempt easily.
That's three failed takedown attempts in the round for Myles Murray. That's going to take a lot out of him.
Hatfield stuffs the takedown attempt from Murray. Murray gets slowly back to his feet.
Hatfield lands a jab followed by a nice looking cross.
Murray drops his hands and takes a jab to the jaw for his troubles.
Hatfield throws a half hearted mid kick.
Murray misses with a series of wild punches.
Hatfield buckles his opponent's knee momentarily with a nice leg kick.
That's two minutes gone in the round.
Murray shoots in for a double leg but Hatfield sprawls well. That's going to sap some energy.
This is a great period of action - very entertaining stuff!
Murray tries to check a leg kick but that clearly hurt him.
Murray will have to do better than that with his takedown attempts.
Hatfield tries to land with a swinging hook to the body but Murray was well out of range. Poor timing from Hatfield.
A jab lands there for Hatfield.
Riley Hatfield seems to be getting the better of the standup.
Hatfield lunges in with swinging rights and lefts but Murray circles away quickly and effectively.
Murray takes a jab right on the nose. That must have hurt but he shrugs his shoulders and looks to return the favor.
Murray ducks under a wild hook from Hatfield.
Hatfield has been the more effective fighter overall so far.
Hatfield connects with a solid leg kick.
Murray tries to clinch there but Hatfield circles away.
Hatfield looked like he wanted to counter with a punch but didn't throw it.
Murray looks to land a combination but Hatfield avoids it well.
Hatfield connects with a right hand. Murray shakes it off.
Hatfield works Murray's body with a nice hook.
A thudding body kick lands there by Hatfield!
Murray shoots in for a takedown. "Ole!" shouts Hatfield as he jumps to the side.
Murray chopped to the floor by a nice leg kick but he springs right back up before Hatfield can pounce on him.
Murray is hobbling a little on that front leg after taking quite a few leg kicks so far in this fight.
That's three minutes gone in the round.
Hatfield misses with a looping left.
Hatfield swings wildly with a hook that is half blocked by Murray.
Murray looks shocked there as he takes a right hand to the temple.
Horrible takedown attempt by Murray or perhaps it was just good defense by Hatfield, which made it look bad.
Hatfield scores with a nice head shot.
Hatfield looking to take his opponent's legs away with the low kicks.
Good shot there by Hatfield.
Hatfield keeps the fight on the outside.
Murray shoots in for a takedown. He's persisting with it as Hatfield sprawls well. Hatfield wins this battle and keeps the fight standing. Murray gets slowly back to his feet.
A head kick misses from Murray.
Hatfield throws a head kick that looked like it stung.

Murray is rocked!
Hatfield drops Murray with a big left hand! Murray is injured, injured bad! Hatfield jumps in and finished him with strikes! The fight is over!
Ladies and gentlemen, after 4:59 of round 2, we have a winner by way of TKO (Strikes). Riley Hatfield!
A victorious Riley Hatfield thanked his army of followers in his post fight interview, telling people to make sure they follow him on Twitter.
|
|
|
|
|
|
|
|
|
|
|
|
|
|
|
|
|
|
|
|
|
|
|
| S |
C
A |
G |
S |
C
B |
G |
|
S |
C |
G |
|
energy
A | B |
|
hype
A | B |
|
pop
A | B |
|
mgr
A | B |
|
FIGHT
RATING
70% |
|
|
|
|
|
|
