|
TWGC 45 (170lbs, D3): Las Vegas Qualifier - Round 1 PBP Commentary |
Co-main event
|
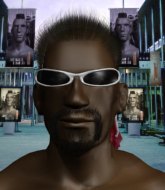
This TWGC bout is 1 fifteen minute round in the welterweight division. Introducing today's competitors. In the red corner, competing out of Tokyo, with a TWGC record of 0 wins and 0 losses; Dildo Baggins! And in the blue corner, fighting out of Helsinki, with a TWGC record of 0 wins and 0 losses; Freaky Max!
The judges for this bout are George Francis, Cecil Peabody and Chris Downing.
The fighters connect hands in the middle of the mat and we are under way.#CL2#
Max gets a clinch.
Max prevents a takedown attempt there.
Max's coach down at Ruttos gym was telling us pre-fight that they have been working on Max's balance. Obviously they view that as a key factor in the outcome of this fight.
Max prevents the takedown attempt.
#TD2#
Max pulls guard effortlessly.
Max has his hands on Baggins's head, controlling the position.
Max tries to land a sweep but no joy.
Baggins has to be careful here, sitting in the guard of a superior BJJ player.
Baggins trying to control the position from guard on top but Max is wriggling around, looking for whatever he can.
The fighters are pressed up against the cage, both looking to find a bit of space to work.
We've had a slow start to the round here - hopefully the action picks up.
Baggins looking to sit in guard and control but Max gets the butterfly guard and sweeps. He's now in the guard on the top. Score +2 for sweep to guard / half guard: Baggins (0) vs (2) Max
Max postures up.
#T1#
Baggins wants to sweep here but Max controlling him for the moment.
Max controlling from the top position.
Baggins looking to sweep here. No luck so far.
Baggins looking to control the pace of the fight rather than finish it. #T2#
Max sitting in guard here, content to control.
Baggins looking to hit a scissor sweep but Max is one step ahead there.
Baggins can't do much from the bottom at the moment, as Max controls the pace.#T3#
Let's hope that Max has the urge to step up the pace any second now because for the last 15 or 20 seconds he's just been holding on tight.#T4#
Baggins is avoiding any damage by keeping wrist control.
Max stands up and looks to throw the legs aside to pass to side control. Baggins swivels though and keeps the full guard. #SUB#
Baggins escapes his hips to the side and looks to be working for an armbar. Max gives him a little smile and shakes his head. No chance.
Max controls from within his opponent's guard. #T5#
Max is fighting to break Baggins's control of his arms but Baggins is doing a good job of controlling the position at the moment.
Baggins on his back here. We all know that wrestlers don't like being on their back so let's see if Baggins tries to get out of the position.
Max stays in close to Baggins's body and controls the position.
Baggins really does look like a pencil wearing a pair of gloves. Let's hope he has a gameplan to suit that ridiculous body shape.
Baggins managing to control the position. #T6#
Baggins continues to stall.
Max controls the pace of the fight for a moment.#T7#
Max won't allow Baggins to sweep him here.
Baggins looking to sweep using the butterfly guard but Max puts pay to that idea as he passes nicely into half guard.
Baggins wants to control but Max is keeping busy.
#T8#
Baggins manages to get to full guard.
Baggins trying to control the position.
#SUB#
Max avoids a guillotine attempt easily.
Max is just sitting in guard, looking to avoid any submissions. #T9#
We're seeing a lot of stalling here from Max.
Baggins working a defensive guard here.
The ref warns both fighters not to hold the cage as they work up against the meshing.#SUB#
Baggins looking for submissions from the bottom here. Moving his hips around, possibly looking for an armbar.
#T10#
Baggins looking for a sweep. Not yet Baggins, not yet.
Max controlling from the top position.
Max advances to half guard.
Max wants to pass the guard but Baggins is defending well.
Max works his way into full mount! Score +3 for passing guard: Baggins (0) vs (5) Max#T11#
Max tucks in and makes sure he doesn't lose the dominant position.
Baggins is looking to get to half guard.
Max is trying to take his opponent's back.
Baggins tries to lock up and control but Max gives him a forearm to the face and pushes him away.#T12#
Max controlling the position easily from mount.
Baggins really trying hard to get back to half guard here.
#T13#
Baggins tries to hold on but Max postures up.
Baggins tries to reverse the position but Max maintains control.
Max looking to control and managing it successfully.
Baggins wants to control but Max is having none of it.#T14#
Baggins is trying to escape the mount.
Max sitting in mount, just looking to control for the moment.
Boooooooooooooooooooo!!! God, this has been a terrible round. Come on you two, sort yourselves out!
Max takes Baggins's back. Score +3 for taking back: Baggins (0) vs (8) Max
And that's the end of the fight!
Max wins on points by 8 to 0. |
|
|
|
Main event
|
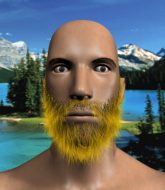
This TWGC bout is 1 fifteen minute round in the welterweight division. Introducing today's competitors. In the red corner, competing out of Hilo, with a TWGC record of 0 wins and 0 losses; Fiya Patron! And in the blue corner, fighting out of Las Vegas, with a TWGC record of 23 wins and 60 losses; Walter Wiener!
The judges for this bout are Gwen Towbar, Chris Downing and Daniel Franklin.
Let's get this grappling contest under way! Who will be victorious?#CL#
Patron pushes Wiener up against the cage in a clinch.
Wiener looking for a takedown. #TD#
Patron pulls Wiener into guard.
Patron might be looking to lock onto one of his opponent's long limbs for a submission, whilst we're on the ground.#SUB2#
Wiener is holding a leg here, probably looking for an ankle lock - he drops back and goes for it! Patron is in trouble! Is it all over??? No! Patron has escaped and now he's on top! Score +2 for sweep to guard / half guard: Patron (2) vs (0) Wiener
Patron sitting in guard, not really doing much.
Wiener keeping full guard, as Patron tries to pass.
Wiener is trying to keep Patron in close.
The fighters are pressed up against the cage, both looking to find a bit of space to work.
We've had a slow start to the round here - hopefully the action picks up.
Patron advances to half guard.
Patron performing his best blanket impression for a moment.
Patron passes the half guard and he's now in mount! Big trouble for Wiener! Score +3 for passing guard: Patron (5) vs (0) Wiener#T1#
Patron controlling from the full mount.
We get told so often about how wrestlers don't like to be on their backs. Let's see if Wiener can do anything to dispel that myth.
Wiener is a painfully thin specimen of a man. You do wonder whether a good body kick would snap him clean in two.
Patron pushing the pace here, looking to move to his opponents back and work for a finish.
#T2#
Wiener is desperately trying to get back to half guard.
Patron controlling from mount.
Wiener wants to control but Patron is having none of it.
Wiener is wriggling around here but as he tries to escape, Patron has taken his back.
Score +3 for taking back: Patron (8) vs (0) Wiener
Patron biding his time, looking for the opening.
#T3##T4#
Wiener wants to control his opponent's hands but Patron gets his hands free.
I would not like to be Wiener right now.
#T5#
Wiener trying to control the hands but Patron breaks the grip.
The ref warns both fighters not to hold the cage as they work up against the meshing.
Wiener is defending well here and trying to improve his position.
Patron has good solid back control here.
Patron's ground tactics aren't going to win him many fans. Let's hope he's got fireworks for us if he gets back to his feet because he's not doing much on the ground.
Further stalling from Patron.#T6#
Wiener tries to roll but Patron sticks to his back.
A bit of a pause in the action here. Patron controlling the positon.
If it seems like I'm not saying a lot, it's just because Patron is stinking the place up with his stalling.#T7#
Wiener is trying to break free.
Patron slows the pace down here. Having a little breather whilst he's in a dominant position, looking to rest and regain some energy, ready to go for the finish.
#T8#
Patron is hanging on to Wiener's back as he tries to escape.
Patron trying to secure his dominant position for a moment - making sure Wiener doesn't escape. #T9#
Patron continues to stall.
Wiener trying to control the action but Patron just sinks the hooks in.
Wiener is trying to avoid being dragged into an even worse position than he's already in but Patron is staying active.
Wiener is defending well here and trying to improve his position.
#T10#
Patron biding his time, looking for the opening.
Patron has controlled the position for a good 20 seconds, which will no doubt be starting to frustrate his opponent.
Wiener is defending well here and trying to improve his position.
Patron just keeping the dominant position. He can't wait too long though, otherwise the referee will stand them back up.
#T11#
More hug and hope from Patron.
Patron controlling well, preventing Wiener from escaping the position.
#T12#
I would not like to be Wiener right now.
#T13#
Patron avoiding Wiener 's attempts to control his hands.
Patron slows the pace down here. Having a little breather whilst he's in a dominant position, looking to rest and regain some energy, ready to go for the finish.
Wiener trying to control the action but Patron just sinks the hooks in.
Patron biding his time, controlling Wiener. #T14#
Boooooooooooooooooooo!!! God, this has been a terrible round. Come on you two, sort yourselves out!
And that's the end of the fight!
Patron takes the fight on points by 8 to 0.
After winning the bout, Fiya Patron thanked all his fans and promised he'd do even better in his next fight. The crowd seemed to love his humility. |
|
|
|
|
|
|