|
TWGC 40 (185lbs, D4): Helsinki Qualifier - Round 1 PBP Commentary |
Undercard bout
|
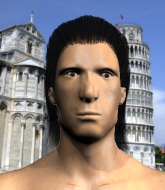
This TWGC bout is 1 fifteen minute round in the middleweight division. Introducing today's competitors. In the red corner, competing out of Los Angeles, with a TWGC record of 0 wins and 0 losses; Ryan Gordon! And in the blue corner, fighting out of Los Angeles, with a TWGC record of 0 wins and 0 losses; Jon Alexander!
The judges for this bout are Tarja Halkonen, Marco Blurström and Arvi Lind.
The fighters connect hands in the middle of the mat and we are under way.#TD#
A momentary lapse in concentration from Alexander enables Gordon to shoot in and score with a neat double leg. Alexander manages to secure a closed guard as the fighters hit the mat. Score +2 for takedown into guard / half guard: Gordon (2) vs (0) Alexander#SUB2#
Alexander looking for submissions off his back, moving his hips, looking for an opening.
Gordon slows down the pace of the fight for a moment. He'll need to remain active if he doesn't want to see the fight stood back up.
Gordon has controlled the position for a good 20 seconds, which will no doubt be starting to frustrate his opponent.
Alexander can't keep his opponent in guard - Gordon advances to half guard, no doubt looking to mount.
Gordon content to sit in half guard and control for a moment.
We've had a slow start to the round here - hopefully the action picks up.
Gordon passes to full mount! Score +3 for passing guard: Gordon (5) vs (0) Alexander#SUB#
Gordon is looking to secure an arm. He's managed it! He's pivoting for an armbar - that looks tight! But Alexander has managed to get out of it and now he's in a dominant position. Nice work from Alexander! Score +2 for sweep to guard / half guard: Gordon (5) vs (2) Alexander#T1#
Alexander pressing down on his opponent's thigh, looking to pass guard. Gordon is keeping the position for now.
Gordon manages to sweep nicely, so he's now on top. Alexander manages to get himself to full guard.
Score +2 for sweep to guard / half guard: Gordon (7) vs (2) Alexander
Gordon passes easily into side control. Nice work. Score +3 for passing guard: Gordon (10) vs (2) Alexander
Alexander being controlled for a moment.
Alexander is looking to regain half guard here but Gordon keeps moving and retains side control.
Gordon in side control, just content to control the action for now. #T2#
Gordon seems to have a rather negative gameplan on the ground. He seems keen to just score the takedown and hold down Alexander for as long as he can get away with.
Alexander really doesn't want to stay on the ground with Gordon. If he can't get it back to his feet, it's only a matter of time before he'll be tapping out.#SUB#
Gordon is looking to finish here, going for an Americana. Alexander knows the correct defense though, so he's OK. #SUB#
Gordon working hard here to secure a kimura but he's not really in the right position for it. #T3##SUB#
Gordon is trying to land an Americana. He has the arm isolated but Alexander is keeping cool and he's avoided the danger for now.
Gordon is looking to take a break and control but Alexander is keeping him honest, looking to work from the bottom.
Gordon is going to have to think about doing something other than just controlling because Alexander is managing to avoid having the position dictated to him.
The fighters are pressed up against the cage, both looking to find a bit of space to work.
A lull in the action here.
We've been informed that Alexander has been working hard on his conditioning in the buildup to the fight.#T4#
Gordon's ground tactics aren't going to win him many fans. Let's hope he's got fireworks for us if he gets back to his feet because he's not doing much on the ground.#SUB#
Gordon looking for an arm triangle but it's way too loose to do anything.
Gordon controls the position. #SUB#
Gordon is trying to land an Americana. He has the arm isolated but Alexander is keeping cool and he's avoided the danger for now.
The ref warns both fighters not to hold the cage as they work up against the meshing.#SUB#
Gordon is trying to get an arm triangle but Alexander is defending well. #SUB#
Gordon tries for a kimura. Not really close to a finish though. #T5##SUB#
Gordon thinks about going for a far side armbar but bails out and retains the dominant position instead. #SUB#
Gordon working hard here to secure a kimura but he's not really in the right position for it. #SUB#
Gordon tries for a kimura. Not really close to a finish though.
Alexander is trying to get back to half guard.#T6##SUB#
Gordon is trying to land an Americana. He has the arm isolated but Alexander is keeping cool and he's avoided the danger for now.
Alexander trying to remain calm as Gordon controls from the top position.#SUB#
Gordon working hard here to secure a kimura but he's not really in the right position for it. #SUB#
Gordon thinks about going for a far side armbar but bails out and retains the dominant position instead.
Alexander is letting Gordon control him for a moment. #T7##SUB#
Gordon looking for an arm triangle but it's way too loose to do anything.
Alexander is looking to reverse the position.
Gordon controls the position. #SUB#
Gordon working hard here to secure a kimura but he's not really in the right position for it.
Alexander is trying to escape the position but Gordon is controlling the position. #T8##SUB#
Gordon is looking to finish here, going for an Americana. Alexander knows the correct defense though, so he's OK. #SUB#
Gordon is trying to get an arm triangle but Alexander is defending well.
Gordon trying to control the action but Alexander is working from the bottom.
Alexander struggling a bit here.
Gordon controls the position from side control.
Gordon definitely looks more muscular than last time we saw him fight.#T9#
Alexander is not content to let Gordon control the position. #SUB#
Gordon tries for a kimura but Alexander is defending well.
Gordon happy to just control the position for now. #T10#
Gordon continues to stall.
Alexander is trying to improve his position.
Gordon is moving around in side control but his primary objective seems to be to maintain the position.
Further stalling from Gordon.#SUB#
Gordon thinks about going for a far side armbar but bails out and retains the dominant position instead.
Gordon just content to control the position. #T11##SUB#
Gordon wants to work for a kimura but he's foiled early by Alexander, who protects the arm well. #SUB#
Gordon tries for a kimura. Not really close to a finish though. #SUB#
Gordon swings around for an armbar but Alexander sees it coming a mile off and turns beautifully into Gordon's guard. Score +2 for sweep to guard / half guard: Gordon (10) vs (4) Alexander
Gordon managing to control the position.
There's a bit of a scramble here and now Gordon is on top in guard.
Score +2 for sweep to guard / half guard: Gordon (12) vs (4) Alexander#T12#
Gordon advances position into side control! Score +3 for passing guard: Gordon (15) vs (4) Alexander
Alexander tries to bench press Gordon off him but Gordon keeps the position.
Gordon taking a breather here. #SUB#
Gordon tries for a kimura but Alexander is defending well. #SUB#
Gordon tries for an arm triangle. That looks pretty tight to me. Is this one over!?! Possibly, maybe, no Gordon has let go of the choke. Obviously it wasn't as tight as we thought!
Alexander is letting Gordon control him for a moment. #T13##SUB#
Gordon is trying to get an arm triangle but Alexander is defending well. #SUB#
Gordon tries for an arm triangle. That looks pretty tight to me. Is this one over!?! Possibly, maybe, no Gordon has let go of the choke. Obviously it wasn't as tight as we thought! #SUB#
Gordon working hard here to secure a kimura but he's not really in the right position for it. #SUB#
Gordon tries for a kimura but Alexander is defending well. #SUB#
Gordon looking for an arm triangle but it's way too loose to do anything. #T14#
Gordon controls the position.
Alexander is trying to control Gordon's posture but Gordon avoids it.
Gordon happy to just control the position for now.
Boooooooooooooooooooo!!! God, this has been a terrible round. Come on you two, sort yourselves out!
And that's the end of the fight!
Gordon takes the fight on points by 15 to 4.
After winning the bout, Ryan Gordon thanked all his fans and promised he'd do even better in his next fight. The crowd seemed to love his humility. |
|
|
|
Undercard bout
|
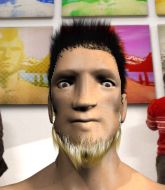
This TWGC bout is 1 fifteen minute round in the middleweight division. Introducing today's competitors. In the red corner, competing out of Las Vegas, with a TWGC record of 0 wins and 0 losses; Patrick Bateman! And in the blue corner, fighting out of New York, with a TWGC record of 0 wins and 0 losses; Doug Wayne!
The judges for this bout are Marco Blurström, Matti Vanhoillinen and Anni Minnemäki.
The fighters bow as they face eachother in the middle of the mat and we are under way.#CL2#
Wayne drives through and clinches with Bateman against the cage.
#TD2#
Wayne has managed to pull guard. Let's see whether he can work an aggressive guard. It will also be interesting to see what tactics Bateman uses from the top position.
Bateman wants to control from the top but Wayne keeps moving.
A real slowdown in the pace of the fight for a moment, as Wayne holds on and takes a little breather.
Bateman trying to control but Wayne is working from the bottom.
Bateman looking to sit in guard and control but Wayne gets the butterfly guard and sweeps. He's now in the guard on the top. Score +2 for sweep to guard / half guard: Bateman (0) vs (2) Wayne
Bateman wants to sweep but no luck.
We've had a slow start to the round here - hopefully the action picks up.#SUB#
Bateman has his foot on Wayne's thigh. He's trying to push off and get in position for a triangle, I think. Wayne works his way back into a safe position though.
Bateman keeping full guard, as Wayne tries to pass.
Wayne advances position into side control! Score +3 for passing guard: Bateman (0) vs (5) Wayne#T1#
Wayne staying calm.
Wayne's corner are shouting for him to control the position and he seems happy to oblige.
More stalling from Wayne.#T2##SUB2#
Wayne tries for an arm triangle. That looks pretty tight to me. Is this one over!?! Possibly, maybe, no Wayne has let go of the choke. Obviously it wasn't as tight as we thought!
A lull in the action here.#SUB2#
Wayne working hard here to secure a kimura but he's not really in the right position for it.
Bateman is trying to get back to half guard.
Wayne moves into full mount! Score +2 for reaching mount: Bateman (0) vs (7) Wayne
The fighters are pressed up against the cage, both looking to find a bit of space to work.#T3#
Bateman tries to lock up and control but Wayne gives him a forearm to the face and pushes him away.
Wayne takes Bateman's back. Could be looking for a rear naked choke here - either way, Bateman is in trouble. Score +3 for taking back: Bateman (0) vs (10) Wayne#SUB2#
Wayne is working for a rear naked choke. Bateman is not defending it well and Wayne has tightened it up quickly! This could be all over! Bateman refuses to tap and goes to sleep, forcing the referee to intervene. A little trickle of blood came out of Bateman's nose as his head slumped to the floor. That is naaaasty!
Ladies and gentlemen, after 3:45 of round 1, we have a winner by way of Submission (RNC). Doug Wayne! |
|
|
|
Co-main event
|
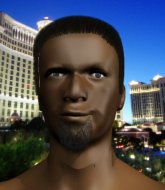
This TWGC bout is 1 fifteen minute round in the middleweight division. Introducing today's competitors. In the red corner, competing out of Helsinki, with a TWGC record of 0 wins and 0 losses; Spiffy Pippin! And in the blue corner, fighting out of Hilo, with a TWGC record of 0 wins and 0 losses; Mo Lee!
The judges for this bout are Roosa Järviläinen, Anni Minnemäki and Ben Zyskovitsi.
The fighters connect hands in the middle of the mat and we are under way.
Pippin shoots in for a takedown. "Ole!" shouts Lee as he jumps to the side. #CL#
Pippin closes the distance and pushes Lee back into the cage.
Pippin is trying to work for a single leg takedown but Lee pulls him back up using the underhooks.
Lee tries for a takedown. No joy.
Lee has Pippin pressed up against the cage and is working for takedown. Pippin manages to improve position though and keeps the fight standing.
Pippin stops a takedown attempt from Lee.
Spiffy Pippin has stuffed three takedown attempts in the round now. That's going to take a lot out of Mo Lee.
Lee has hold of a leg and is looking for a trip takedown. Pippin avoids it nicely though and we remain in the clinch.#TD#
Pippin pulls guard.
We've had a slow start to the round here - hopefully the action picks up.
Lee trying to control the position from guard on top but Pippin is wriggling around, looking for whatever he can. #SUB#
Pippin is working actively off his back, looking to secure an arm or perhaps work for a triangle.
The ref warns both fighters not to hold the cage as they work up against the meshing.#SUB#
Pippin has his foot on Lee's thigh. He's trying to push off and get in position for a triangle, I think. Lee works his way back into a safe position though.#T1#
Pippin wants to sweep but no luck.
Pippin managing to control the position. #SUB#
Pippin looking for submissions off his back, moving his hips, looking for an opening.
Lee looking to pass the guard.
Pippin has control of Lee's left arm, preventing Lee from doing any damage. #T2#
Lee wants to control from the top but Pippin keeps moving.
Lee stopping the sweep attempt from Pippin.
Pippin has a closed guard, preventing anything of note from happening. Perhaps he's looking to stall. #SUB#
Pippin is working actively off his back, looking to secure an arm or perhaps work for a triangle.
Pippin is pulling down on Lee's head to control his posture. #T3##SUB#
Pippin has a loose triangle. He'll be looking to tighten that up but Lee can see exactly what he's planning and manages to posture up and free himself. #SUB#
Pippin working from the bottom, still in full guard. He's managed to get a loose triangle. Lee doesn't seem to be doing much to defend here, obviously he feels comfortable in the position. Lee manages to throw the legs off his shoulder and he's back into guard - no problem.
Lee trying to control but Pippin is working from the bottom. #T4##SUB2#
Lee drops back for a leg but he's not going to get it - he lets go and Pippin dives on top into guard. Score +2 for sweep to guard / half guard: Pippin (2) vs (0) Lee
Lee not looking particularly offensive just at the moment.
Pippin slows down the pace of the fight, as he sits in guard.
Pippin has controlled the position for a good 20 seconds, which will no doubt be starting to frustrate his opponent.
Lee trying to keep a closed guard but Pippin is proving a slippery customer.
#T5#
Pippin stands and throws Lee's legs to the side, diving into side control. Score +3 for passing guard: Pippin (5) vs (0) Lee#SUB#
Pippin goes for an armbar here - this could be all over! But no, Lee has escaped beautifully and is now on top in side control! Oh, that's unlucky for Pippin but great work by Lee. Score +4 for clean sweep to past guard: Pippin (5) vs (4) Lee
Pippin is trying to escape the position but Lee is controlling the position.
Pippin wants to control but Lee postures up.
Pippin is positioning himself to get back to half guard.
Pippin keeps Lee under control for a moment.#T6#
Pippin wants to control but Lee postures up.
Pippin is looking to regain half guard here but Lee keeps moving and retains side control.
Pippin is sneaking out the side here. He's bucked Lee off and has taken his back! Score +4 for clean sweep to past guard: Pippin (9) vs (4) Lee#SUB#
Lee defending nicely against the rear naked choke attempt.
Lee rolls, trying to escape but Pippin keeps control of the position.
Lee is persisting with the attempt to improve his position.#T7##SUB#
Lee fending off the submission attempt from Pippin. #SUB#
Lee defending nicely against the rear naked choke attempt.
#SUB#
Pippin working for the choke.
Pippin has good solid back control here.
Lee tries to escape the position.
#T8##SUB#
Pippin is working hard for the rear naked choke here.
Lee wants to control his opponent's hands but Pippin gets his hands free.
What can Lee do to escape this position? He's going to have to figure it out pretty quick if he wants to stay in the fight!
#SUB#
Pippin looking for the choke but no joy. #T9##SUB#
Lee fending off the submission attempt from Pippin.
Pippin biding his time, looking for the opening.
Lee tries to escape the position.
#SUB#
Pippin looking for the RNC. #T10##SUB#
Pippin is remaining active here, looking for the choke. The more discerning members of the crowd will appreciate his efforts.
Lee trying to control the action but Pippin just sinks the hooks in.
Lee is really stuck here.
#SUB#
Pippin has his hand under the chin of his opponent looking for the choke. He's nearly got it! This one could be all over! But no, Lee has freed his hand and lives to survive another
well, another couple of seconds at least!
Lee wants to control his opponent's hands but Pippin gets his hands free. #T11#
I really don't envy Lee right now.
Pippin really has the hooks in deep now - there seems like no escape for Lee.#SUB#
Pippin has his hand under the chin of his opponent looking for the choke. He's nearly got it! This one could be all over! But no, Lee has freed his hand and lives to survive another
well, another couple of seconds at least!
Pippin slows the pace down here. Having a little breather whilst he's in a dominant position, looking to rest and regain some energy, ready to go for the finish.
Lee is trying to break free.
#SUB#
Pippin looking to break Lee's wrist control so he can sink in the choke. Lee remaining controlled and patient though - he really has to keep calm otherwise Pippin will wrap this one up with the rear naked choke!#T12#
Pippin controlling well, preventing Lee from escaping the position.
So, who will make the next big move? In this position it could be crucial.
#SUB#
Pippin tightening his grip on Lee, looking for the choke.
Pippin is hanging on to Lee's back as he tries to escape.
#SUB#
Pippin patiently working for the choke. Which fighter will keep their nerve here?#SUB#
Pippin is persistently looking for the submission but Lee is defending it well.
#T13##SUB#
Pippin is looking to finish the fight by rear naked choke. Lee knows exactly what he's got planned though, so he's defending well. Maybe a few strikes would soften Lee for a finish.
Pippin keeps control of the position easily here as Lee tries to buck him off.
#SUB#
Lee is having to fend off submission attempts from Pippin, who is looking to sink in the choke. Pippin doesn't have the hooks in though and Lee manages to reverse position! He's now on top, in his opponent's guard. Score +2 for sweep to guard / half guard: Pippin (9) vs (6) Lee#SUB#
Pippin is throwing his legs up, looking for submissions. Lee is aware though and is defending well.#T14#
Lee wants to control from the top but Pippin keeps moving.
Boooooooooooooooooooo!!! God, this has been a terrible round. Come on you two, sort yourselves out!
Lee trying to pass the guard. He's being very persistent here but Pippin manages to land a sweep and now he's on top! Score +2 for sweep to guard / half guard: Pippin (11) vs (6) Lee
And that's the end of the fight!
Pippin takes the fight on points by 11 to 6. |
|
|
|
Main event
|
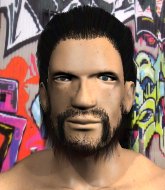
This TWGC bout is 1 fifteen minute round in the middleweight division. Introducing today's competitors. In the red corner, competing out of New York, with a TWGC record of 0 wins and 0 losses; Chayton Catawanee! And in the blue corner, fighting out of Las Vegas, with a TWGC record of 0 wins and 0 losses; Bella Miele!
The judges for this bout are Ben Zyskovitsi, Roosa Järviläinen and Tarja Halkonen.
The official calls the fighters to the middle and the contest is under way.
Miele fails with the takedown#CL#
and Catawanee moves into the clinch.
Miele is working on a leg, looking for a takedown but Catawanee is defending well.#TD#
Catawanee decides to pull guard.
Miele wants to pass the guard but Catawanee is keeping the position.#SUB#
Catawanee is looking for a triangle here but Miele uses the submission attempt to pass into side control.
Score +3 for passing guard: Catawanee (0) vs (3) Miele
Catawanee tries to buck Miele off but Miele is having none of it.
We've had a slow start to the round here - hopefully the action picks up.#SUB2#
Miele thinks about going for a far side armbar but bails out and retains the dominant position instead. #T1#
Catawanee is looking to reverse the position.
Catawanee gets back to half guard.
Miele is trying to control the action in half guard but Catawanee is working away on the bottom, looking perhaps to get back to full guard.
Catawanee knows he needs to get back to his feet asap. He's simply no match for Miele on the ground.
Catawanee holds on for dear life, maintaining half guard for now.
Miele is trying to control the action in half guard but Catawanee is working away on the bottom, looking perhaps to get back to full guard.
Catawanee is looking for a sweep. Miele is wise to his cunning plan and keeps the top position.
Catawanee is positioning himself well to prevent Miele advancing to mount. #T2#
Catawanee is looking to improve his position.
#SUB2#
Miele is trying to work for a kimura but Catawanee is defending well.
#SUB2#
Miele is trying to work for a kimura. This could be trouble! No, Catawanee has managed to free his arm - good work.
Miele looking to pass the half guard. Not this time. #T3#
Catawanee is staying active underneath Miele, who seems content to just control the action from this position. #SUB#
Catawanee is looking to sinch up a guillotine here but Miele pulls his head out easily.
Miele wants to control but Catawanee is keeping him busy.
Catawanee is controlling Miele's position as best he can from this difficult position.
Miele is looking to take a break and control but Catawanee is keeping him honest, looking to work from the bottom.
Miele is looking to advance position but Catawanee won't allow it.
Catawanee definitely looks more muscular than last time we saw him fight.#T4##SUB#
Catawanee looking for submissions from an awkward position here.#SUB2#
Miele is looking for a kimura. It's going to be difficult to finish that from half guard though and Catawanee defends it well.
Catawanee is looking to regain full guard. Not this time though.
Miele is looking to advance position but Catawanee won't allow it. #T5#
Miele passes to full mount! Score +3 for passing guard: Catawanee (0) vs (6) Miele#SUB2#
Miele has control of Catawanee's right arm, working for a kimura. It's a bit of a token attempt though and Catawanee regains control of the situation pretty easily.
The ref warns both fighters not to hold the cage as they work up against the meshing.
Catawanee is squirming around, avoiding Miele's attempts to control the action.
Catawanee tries to reverse the position but Miele maintains control.
The fighters are pressed up against the cage, both looking to find a bit of space to work.#T6#
Catawanee has given up his back here.
Score +3 for taking back: Catawanee (0) vs (9) Miele
Miele struggling to keep hold of the position.
#SUB2#
Miele looking to break Catawanee's wrist control so he can sink in the choke. Catawanee remaining controlled and patient though - he really has to keep calm otherwise Miele will wrap this one up with the rear naked choke!
Catawanee is in bad spot here.
#SUB2#
Miele looking to break Catawanee's wrist control so he can sink in the choke. Catawanee remaining controlled and patient though - he really has to keep calm otherwise Miele will wrap this one up with the rear naked choke!#T7##SUB2#
Catawanee preventing the rear naked choke attempt from Miele.
Catawanee is really stuck here.
#SUB2#
Miele working from the back looking to end the fight with a rear naked choke. Catawanee is doing well to defend. Miele seems to have got his hand under the chin though and he's sunk the choke in! Catawanee is forced to tap and this one is over!
Ladies and gentlemen, after 7:40 of round 1, we have a winner by way of Submission (RNC). Bella Miele! |
|
|
|
|
|
|