 |
QFC Tournament 1163 Round 1 PBP Commentary |
Undercard bout
|
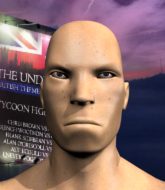
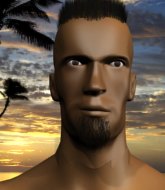
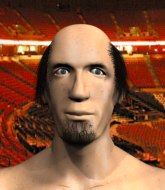
Coming up we have a light heavyweight MMA rules bout between Nagato Uzumaki (ranked 4261 p4p, 4282 weight class) and John Don (ranked 0 p4p, 0 weight class). We have two fighters making their debuts here, so let's see who comes out of this one with their first professional victory.
 |
|
 |
| 180 cm
23
205
0 - 0 - 0 |
|
180 cm
21
205
0 - 0 - 0 |
BJJ White Belt
Solid Muay Thai
Inexperienced |
|
BJJ White Belt
Decent boxing
Granite chin |
|
| |
|
Ladies and gentlemen. This fight is 3 rounds, in the light heavyweight division.
Introducing the fighter to my left, fighting out of the red corner.
With a record of 0 - 0 - 0, fighting out of Tokyo, Nagato Uzumaki!
And introducing the fighter to my right, fighting out of the blue corner.
With a record of 0 - 0 - 0, fighting out of Tokyo, John Don!
The judges for this bout are Tatsuya Matsuyama, Shigeki Fujiwara and Yasuomi Hirokawa.

The bell rings for round one and we are underway!

Uzumaki looking for a takedown here - he's got it.
Don is trying to control the position but Uzumaki postures up.
Don working a defensive guard but Uzumaki manages to pass into side control anyway.
Don manages to get one leg in to regain half guard.
Uzumaki could do with losing a few pounds - he looks very soft around the mid section, to put it politely.
Don is looking to improve his position.
Uzumaki controlling the action here.
The ref warns both fighters not to hold the cage as they work up against the meshing.
Don wants to control but Uzumaki is keeping busy and won't allow it.
We've had a slow start to the round here - hopefully the action picks up.
Don tries to get to full guard but Uzumaki has control of the leg.
Don has no desire to be mounted, so is trying to control. Uzumaki is working away from the top position though.

That's one minute gone in the round.
Uzumaki working Don over with strikes.
Don is trying to control but can't.
Uzumaki takes advantage of the dominant position to land a couple of big hammer fists.
Don wants to control but Uzumaki is keeping busy and won't allow it.
Don is trying to stand back up but Uzumaki is controlling him

Uzumaki stands up out of the half guard.
Don tries to clinch but Uzumaki is having none of it.
Uzumaki is looking to counter with head kicks.
John Don seems to be the more aggressive standup fighter in this bout.
Uzumaki drives through with a takedown into guard.
Uzumaki distracts Don with his right hand and drops a big elbow with his other arm.
Uzumaki postures up.
Don wants to stand up but Uzumaki is controlling him.

That's two minutes gone in the round.
Uzumaki trying to pass the guard but can't manage it just yet.
We get told so often about how wrestlers don't like to be on their backs. Let's see if Don can do anything to dispel that myth.
Uzumaki chips away with some ground and pound.
Don throws some sloppy strikes off his back.
Uzumaki not doing a lot at the moment. He'll have to show some more aggression or the fight will get stood up.
Don trying to control the position.
The referee looks like he's ready to step in and stand the fighters back up.
Uzumaki postures up and scores with a shot to the body and a follow up elbow to the head.
Uzumaki looking to pass the guard.
Uzumaki stays in close to Don's body and controls the position.

That's three minutes gone in the round.
Don is looking to stand up but Uzumaki isn't so interested in that idea.

The ref stands the fighters back up due to a lack of activity.
Uzumaki feints and then dives in with a takedown. That was a long way out but the feint bought him enough time to close the distance and complete the takedown. Now we'll play guard for a bit and see who can get the better of that position.
Uzumaki looking to pass the guard.
Uzumaki postures up.
Uzumaki lands a couple of elbows.
The fighters are pressed up against the cage, both looking to find a bit of space to work.
Uzumaki stands up from guard. Let's bang!
Don throws a right and a left that both miss.

Uzumaki has closed the distance and engaged Don in a clinch.
Don stalling in the clinch.

That's four minutes gone in the round.
A short right from Don on the inside.
Uzumaki managing to block the knees to the body from Don.
Don looks winded!
Don effectively controlling the action here.
Uzumaki jumps into guard, dragging Don to the mat.
Don trying to control but Uzumaki is working from the bottom.
Don is fighting to break Uzumaki's control of his arms but Uzumaki is doing a good job of controlling the position at the moment.
Don prevents Uzumaki from getting back to his feet.
The crowd thankful this round is nearly over.
Uzumaki being controlled here, momentarily.
Don in full guard, throwing the ground and pound. No damage this time.
And that is the end of the round. The fighters go back to their corners.
Nagato Uzumaki dominated that round.
Well, the break between rounds is over. Let's get back to the scrappin!


Don gets in close and instigates a clinch.
Don misses with an elbow over the top.

Don ties up his opponent against the cage and manages to drag the fight down to the ground. Don no doubt will be looking to work submissions from his guard.
Uzumaki is intent on slowing down the pace of the fight, simply looking to control.

Don is throwing his legs up, looking for submissions. Uzumaki is aware though and is defending well.
Uzumaki trying to pass the guard but can't manage it just yet.
Don looking to control the pace of the fight rather than finish it.
Don is looking to get back to his feet but can't, whilst Uzumaki is controlling him.
We've had a slow start to the round here - hopefully the action picks up.
Uzumaki won't allow Don to sweep him here.
That's one minute gone in the round.
Uzumaki stands and steps away. Don gets to his feet too and we're back to the striking game.
Don stuns Uzumaki with a nice body shot, before stepping back out of range.
Don tries to close the distance and clinch up against the cage but Uzumaki paws at him with a jab and circles away.
Don fails with the takedown
and Uzumaki counters into the clinch. Nicely done.
Don is breathing heavily.
Don tries to stall but Uzumaki uses the opportunity to gain a better position.

Uzumaki breaks the clinch and we're back to striking at distance.
Nice body kick from Uzumaki.
Uzumaki darts in and clinches Don up against the cage.
Don pulls guard successfully.
Uzumaki wants to control from the top but Don keeps moving.
Don keeping full guard, as Uzumaki tries to pass.
That's two minutes gone in the round.
Uzumaki is taking a break and basically stalling. The referee will not allow him to do that for long.
Don wants to control the position but Uzumaki says "no thanks buddy" and passes to half guard.
Uzumaki decides to stand and escape the position.
Don stuffs the takedown.
Uzumaki closes the distance and gets a trip takedown into side control. Don quickly recovers to half guard.
Fantastic stuff here - a very entertaining period of action, which has drawn cheers from the crowd.
Don is looking to escape.
Uzumaki wants to free his trapped foot but Don is holding on for dear life with his legs.
Uzumaki takes a deep breath and rests his weight momentarily on top of his opponent, to control the position.
Don wants to control but Uzumaki is keeping busy and won't allow it.
That's three minutes gone in the round.
Don is trying to stand.

Uzumaki is trying to work for a kimura. This could be trouble! No, Don has managed to free his arm - good work.
Uzumaki wants to pass the guard but Don is defending well.
If this pace continues, the referee will definitely step in and force a standup.
Uzumaki is working for submissions here but there's nothing on.
The referee has decided to stand the fighters back up, so we'll restart on the feet.
Uzumaki gets to the clinch - let's see what his plan is here.
Uzumaki is trying to pull guard but Don turns him against the cage and we stay in the clinch.
Don tries to pull guard but Uzumaki forces him back to his feet, against the cage.
That's four minutes gone in the round.
There's not a lot going on here and the crowd are letting the fighters know they're not willing to tolerate a lack of action.
Don displaying some good clinch control by pressing Uzumaki up against the cage.
Don working hard to break the clinch.
Don drops to a knee looking for a takedown but Uzumaki gets the underhooks and prevents it.
Nagato Uzumaki has stuffed three takedown attempts in the round now. That's going to take a lot out of John Don.
Don misses with a knee to the head.
Uzumaki breaks from the clinch.
Uzumaki drives through with a takedown into guard.
Don wants to get back to his feet but Uzumaki passes into half guard.
The crowd thankful this round is nearly over.

Uzumaki content to sit in half guard and control for a moment.
And that is the end of the round. The fighters go back to their corners.
Nagato Uzumaki dominated that second round.
OK. That's time! The bell goes and we're back to the action. So, we enter the final round. Let's see if either fighter can bring us a finish, or whether we're going to the judges scorecards.

Uzumaki drives through with a really nice takedown into side control.
Don manages to work his way to half guard, despite Uzumaki's best efforts.
Nagato Uzumaki overall seems to be getting the better of the ground position in the fight so far.
Don is refusing to be controlled, as Uzumaki sits in half guard.
Uzumaki wants to pass to mount but Don is defending the position.
We've had a slow start to the round here - hopefully the action picks up.
Ground and pound from Uzumaki.
Don is looking for a sweep. Uzumaki is wise to his cunning plan and keeps the top position.
Uzumaki is figuring out what he wants to do next.
That's one minute gone in the round.
Uzumaki trying to control from half guard but Don is working away.
Uzumaki working Don over with strikes.

Don has one foot on Uzumaki's thigh - he pushes off and manages to get back to his feet.
Uzumaki shoots in from a long way out. He's driving through with the takedown attempt and he eventually gets it, landing in Don's guard.
Both fighters are breathing heavily.
Uzumaki controlling from the guard. I say controlling but really, he's stalling.
Don is trying to keep Uzumaki in close.
Don being controlled here, momentarily.
That's two minutes gone in the round.
Uzumaki scoring with punches to the head and body.
Don is trying to stand up but he's not managed so far.
Don is looking to sweep but instead, Uzumaki has passed into half guard.
Uzumaki is just content to waste time from the top position. Don takes advantage of the situation and regains full guard.
Don is working from a closed guard but he's struggling to control his opponent.
That's three minutes gone in the round.
Don has his hands on Uzumaki's head, controlling the position.
Uzumaki showing good wrestling skills to control the position.
Don not looking particularly offensive just at the moment.
The referee claps his hands together and tells the fighters to work.
Uzumaki wants to pass the guard but Don is keeping the position.
The referee has decided to stand the fighters back up, so we'll restart on the feet.
Don fails in his attempt to clinch.
Uzumaki closes the distance and looks for a trip takedown... aaaand he's got it - Uzumaki lands in his opponent's guard.
That's four minutes gone in the round.
Uzumaki gets to his feet. Don looking to butt scoot but the ref puts an end to that. On your feet son!
Don shoots in for a double leg but Uzumaki sprawls well. That's going to sap some energy.
John Don has stepped it up - he knows he needs a finish here!
Uzumaki bobs and weaves into range and then changes levels and scores with a nice takedown into side control.
Uzumaki looking for an arm triangle but it's way too loose to do anything.
Uzumaki is really dominating this fight. Is there anything that Don can do to turn this around?
Don gets back to half guard.
The crowd thankful this round is nearly over.
Uzumaki trying to control the pace.
And that's the end of the fight!
Nagato Uzumaki showed his dominance in that final round.
Well Uzumaki has outscored his opponent in every aspect of the fight today. Only a scarily incompetent judge or two will keep him from a well deserved win... Over to the ring announcer for the scorecards.
Ladies and gentlemen, after 3 rounds of action, we go to the scorecards for a decision.
Judge Tatsuya Matsuyama scores the fight for Nagato Uzumaki!
Judge Shigeki Fujiwara scores the fight for Nagato Uzumaki!
Judge Yasuomi Hirokawa scores the fight for Nagato Uzumaki!
Nagato Uzumaki wins by unanimous decision!
In defeat, John Don stepped up to the mic, saying 'It is what it is, I'll be back better.'.
|
|
|
|
|
|
|
|
|
|
|
|
|
|
|
|
|
|
|
|
|
|
|
| S |
C
A |
G |
S |
C
B |
G |
|
S |
C |
G |
|
energy
A | B |
|
hype
A | B |
|
pop
A | B |
|
mgr
A | B |
|
FIGHT
RATING
36% |
|
|
|
|
|
|
|
Undercard bout
|
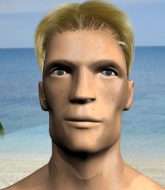
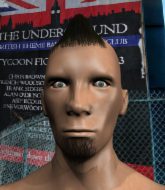
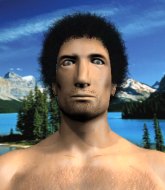
Coming up we have a light heavyweight MMA rules bout between Tomas Alcaraz (ranked 4398 p4p, 4279 weight class) and Jamie Bono (ranked 0 p4p, 0 weight class). We have two fighters making their debuts here, so let's see who comes out of this one with their first professional victory.
 |
|
 |
| 180 cm
22
150
0 - 0 - 0 |
|
180 cm
21
185
0 - 0 - 0 |
BJJ Blue Belt
Solid boxing
Good chin |
|
BJJ White Belt
Decent boxing
Heavy handed |
|
| |
|
Ladies and gentlemen. This fight is 3 rounds, in the light heavyweight division.
Introducing the fighter to my left, fighting out of the red corner.
With a record of 0 - 0 - 0, fighting out of Tokyo, Tomas Alcaraz!
And introducing the fighter to my right, fighting out of the blue corner.
With a record of 0 - 0 - 0, fighting out of Tokyo, Jamie Bono!
The judges for this bout are Yasuomi Hirokawa, Sosuke Kotani and Tatsuya Matsuyama.
The bell rings for round one and we are underway!
Sloppy strikes from Bono. Those never looked like landing.
Bono throws a couple of head shots and lands with the final one - a decent hook, which struck Alcaraz on the side of the head.
Bono keeps his opponent at a distance with a nice jab.
Bono wants to clinch up but Alcaraz keeps it at a distance.
Bono throws a left and a right that both miss
and Alcaraz counters with a good right hand that lands right on the jaw.
Bono lands with a nice body punch.

Bono drops Alcaraz with a hook right on the temple. He thinks about going to the ground but Alcaraz looks back up at him and smiles so Bono waves him back to his feet - he obviously thinks he can knock him out after that shot landed.
 Alcaraz is rocked! Alcaraz is rocked!
The fans in attendance giving it up for the two fighters, who have really let it all hang out in the last minute or so!
Bono misses with a head kick.
Oh Alcaraz is still all over the place! His legs are completely gone! Will he be able to recover?!!
Bono wants to land a leg kick but Alcaraz is out of range.
Alcaraz wants to take advantage of his opponent's missed offense by moving into the clinch.
Alcaraz seems to have got his legs back now.
Alcaraz moves into range and clinches up with Bono.
Bono lands a right hand that snaps the head of Alcaraz backwards.
Alcaraz jumps guard but Bono turns him against the cage and keeps the fight standing.
Bono tries to land a shot to the body but it's blocked.
Good anti-grappling being displayed by Bono as Alcaraz tries to tie him up.
Bono leaning his opponent against the cage.
That's one minute gone in the round.
Alcaraz is trying to pull guard but Bono has him pressed against the cage.
Bono lands a right hand.

Bono breaks the clinch and we return to the middle of the mat.
Alcaraz shoots in for a takedown. "Ole!" shouts Bono as he jumps to the side.
That's three failed takedown attempts in the round for Tomas Alcaraz. That's going to take a lot out of him.
Horrible takedown attempt by Alcaraz or perhaps it was just good defense by Bono, which made it look bad.
Alcaraz slips a straight right by Bono.
Alcaraz is trying to close the distance and clinch up, after that failed offence from Bono.
Alcaraz has taken the fight to the clinch.
Bono has Alcaraz pressed against the cage, preventing Alcaraz from circling away and getting back to striking at range.
Alcaraz wants to take the fight to the mat but Bono manages to get underhooks and keep the fight in the clinch.
Bono unloads a knee to the mid-section. Alcaraz lets out a prehistoric sounding urrrrgh.
Alcaraz is breathing heavily.
Bono breaks the clinch and we return to the middle of the mat.
Bono gets a clinch.
That's two minutes gone in the round.
Bono stays in close to his opponent and throws a right hand to the body.
The fighters are pressed against the cage, as the pace of the fight slows.
Bono unloads a knee to the mid-section. Alcaraz lets out a prehistoric sounding urrrrgh.
Some stalling of biblical proportions here from Bono.
Bono pushes off and circles away, back to the middle of the mat.
Bono has Alcaraz up against the cage in a clinch.
This has been an exciting period of action!
Alcaraz tries to take the fight to the ground by pulling guard but can't manage it.
Bono controlling the action here for a moment.
Bono displaying some good clinch control by pressing Alcaraz up against the cage.
That's three minutes gone in the round.
Bono lands a short shot on the inside that snaps the head of Alcaraz backwards.
Bono lands a nice uppercut.
Bono leaning against his opponent.
Still in the clinch, Bono scores with a nice short uppercut.
Bono is trying to wear down his opponent with knees to the body.
Bono pressing his opponent against the cage.
Alcaraz avoiding damage as Bono throws knees to the body.
Bono holding his opponent close, against the cage.
Alcaraz blocks a knee to the body. He'll have a nicely bruised forearm in the morning.
That's four minutes gone in the round.
Alcaraz blocks a knee to the body. He'll have a nicely bruised forearm in the morning.
Alcaraz scores with a hook to the body.
Bono lands a good knee to the midsection. Alcaraz won't want to take too many of those.
Some stalling of biblical proportions here from Bono.
Bono is looking to score with knees to the body. Maybe he'll change it up and go body then head. Alcaraz is defending well for now.
Bono works for underhooks and lands a body shot in the process.
Bono gets double underhooks to prevent a takedown attempt from Alcaraz.
Bono has Alcaraz pressed against the cage, preventing Alcaraz from circling away and getting back to striking at range.
Bono leaning against his opponent.
Bono cracks Alcaraz with a nice body shot.
Bono's corner calls for him to break the clinch, which he does.
Wooooo! Give it up for these two warriors! They are putting on a show!
Bono moves into range and clinches up with Alcaraz.
And that is the end of the round. The fighters go back to their corners.
Jamie Bono dominated that round.
Well, the break between rounds is over. Let's get back to the scrappin!
Bono closes the distance and presses his opponent up against the cage.
Bono lands a nice uppercut.
Jamie Bono seems to be working more effectively in the clinch in the fight so far.
A right handed body shot lands from Bono.
A short body shot lands from Bono as the two fighters clinch.
Bono can't find room to land a body shot as Alcaraz controls the action.
Alcaraz avoiding damage as Bono throws knees to the body.
Bono breaks the clinch and we return to the middle of the mat.
Bono misses with a series of wild punches.
Alcaraz instigates a clinch.
We've had a slow start to the round here - hopefully the action picks up.
Alcaraz managing to block the knees to the body from Bono.
Bono has been the more effective fighter overall so far.
Alcaraz blocks a knee to the body. He'll have a nicely bruised forearm in the morning.
Bono lands a left hand that snaps the head of Alcaraz backwards.
Bono has Alcaraz pushed against the cage.
That's one minute gone in the round.
Bono prevents the takedown attempt.
Bono pushes Alcaraz back against the cage and unloads with a body punch.
Both fighters are absolutely exhausted here.
Bono misses with a body punch.
Bono lands an elbow inside that Alcaraz shrugs off.
Bono pushes Alcaraz back against the cage and lands a hook to the side of the head.
Bono slowing the pace effectively.
Alcaraz prevents a body shot from Bono.
Alcaraz has Bono pressed up against the cage and is working for takedown. Bono manages to improve position though and keeps the fight standing.
Nice elbow from Bono.
Bono tries to land knees in the clinch but Alcaraz avoids the damage to the body.
Bono creates a bit of space for himself and sneaks an elbow through Alcaraz's defenses.
Bono's corner are urging him to control the action in the clinch for a moment, rather than mount any serious offense. I'm sure the crowd appreciate those instructions... not.
Bono pushes off and circles away, back to the middle of the mat.
That's two minutes gone in the round.
Bono misses with a wild body shot.
As Bono looks to move away, Alcaraz throws a big counter combo but Bono just gets out of the way.
Alcaraz keeps the fight on the outside.
Bono clinches up with Alcaraz and pushes him back against the cage.
Bono breaks the clinch and we're back to striking at distance.
Bono has taken the fight to the clinch.
Wooooo! Give it up for these two warriors! They are putting on a show!
Bono tries to land a knee to the body but he is off balance and Alcaraz avoids it.
Bono lands with a quick shot inside that doesn't really do much damage.
Bono scores with a hook to the body.
Bono struggles to land a body shot inside as Alcaraz controls his hands.
Alcaraz tries to score a body lock takedown but Bono shows good agility there to stay on his feet.
That's three failed takedown attempts in the round for Tomas Alcaraz. That's going to take a lot out of him.
Bono lands with a quick shot inside that doesn't really do much damage.
Alcaraz is trying to work out of this bad position, with his back against the cage.
That's three minutes gone in the round.
Alcaraz is trying to force a seperation but Bono has the dominant position.
Alcaraz is looking for a takedown up against the cage. Bono gets underhooks though and prevents the takedown attempt.
Bono pressing his opponent against the cage.
Bono misses with a knee strike.
The referee calls for Bono to work.
Alcaraz wants to take the fight to the mat but Bono manages to get underhooks and keep the fight in the clinch.
Bono misses the knee to the body. Nice hip positioning from Alcaraz.
Bono manages to break the clinch.
Tomas Alcaraz is looking to throw some combinations by the looks of things.
Bono rushes Alcaraz and presses him up against the cage.
Bono effectively controlling the action here.
Bono stops a takedown attempt from Alcaraz.
That's four minutes gone in the round.
Alcaraz on the defensive, avoiding the knees to the body.
Alcaraz wants to strike at distance but he can't break free of the clinch.
Bono tries to land a knee to the body but he is off balance and Alcaraz avoids it.
Bono misses the knee to the body. Nice hip positioning from Alcaraz.
A frustrated look appears on Alcaraz's face as he tries to break the clinch.
Alcaraz looking to stall.
Alcaraz wants to break the clinch but can't.
Stalling in the clinch from Bono.
Bono holding his opponent close, against the cage.
Bono lands a right hand.
And that is the end of the round. The fighters go back to their corners.
Jamie Bono showed his class in that round. I'd imagine he'll take it on all the scorecards.
The referee calls time. The cornermen exit stage left and we're back to business. This is the final round!
Alcaraz takes one on the chin but keeps coming.
Alcaraz moves into the clinch.
Alcaraz tries to take the fight to the ground by pulling guard but can't manage it.
Bono breaks the clinch and we're back to striking at distance.
Alcaraz shoots in for a takedown - he's clinched up with Bono but Bono pushes him off and we're back to square one.
Bono tries to land with a swinging hook to the body but Alcaraz was well out of range. Poor timing from Bono.
Alcaraz seemed to be looking to counter by closing the distance.
Alcaraz gets tackled into the cage by Bono. Bono maintains the clinch.
Bono working some nice short punches in the clinch.
Bono working some nice short punches in the clinch.
We've had a slow start to the round here - hopefully the action picks up.
Bono working Alcaraz over with knees to the body.
Bono tries a knee to the head but he's missed.
A real battle for position is taking place between these two warriors.
Both fighters are breathing heavily.
The referee calls for Bono to work.
Bono is trying to wear down his opponent with knees to the body.
That's one minute gone in the round.
A hook to the body from Bono.
Bono lands with a right to the head.
Alcaraz blocks an elbow strike from Bono.
Bono lands a nice knee to the body.
Bono lands with a quick shot inside that doesn't really do much damage.
A short uppercut from Bono.
Bono tries to land knees in the clinch but Alcaraz avoids the damage to the body.
A short right hand to the side of the head by Bono.
Bono creates a bit of space for himself and sneaks an elbow through Alcaraz's defenses.
Bono with the Thai clinch, lands a knee to the head.
Still in the clinch, Bono scores with a nice short uppercut.
The crowd cheering loudly, showing their appreciation for the quality fight we're seeing here.
Bono with an attempt at a knee that misses.
Bono misses the knee to the body. Nice hip positioning from Alcaraz.
That's two minutes gone in the round.
Bono lands a right uppercut that snaps the head of Alcaraz backwards.
Bono has Alcaraz pressed against the cage.
Bono trying to land knees to the body.
Alcaraz managing to block the knees to the body from Bono.
Bono prevents a takedown attempt there.
That's three failed takedown attempts in the round for Tomas Alcaraz. That's going to take a lot out of him.
Bono scores with a shot to the side of Alcaraz's head.
A shot in the inside from Bono.
Bono manages to break the clinch.
Bono gets a clinch.
Bono using the Thai clinch to land knees to the body.
Bono breaks the clinch and we're back to striking at distance.
That's three minutes gone in the round.
The crowd cheers as Bono lands an impressive looking overhand right. Alcaraz doesn't seem phased though.
Bono throws a hook to the side of Alcaraz's head but Alcaraz sees it coming and ducks under it beautifully.
Bono has managed to clinch.
Bono is looking to score with knees to the body. Maybe he'll change it up and go body then head. Alcaraz is defending well for now.
Bono tries to land knees in the clinch but Alcaraz avoids the damage to the body.
Alcaraz tries to pull guard but Bono holds him up against the cage and eventually Alcaraz drops back down to his feet.
Alcaraz takes a shot to the head.
Bono lands an elbow inside.
A short body shot lands from Bono as the two fighters clinch.
A short right hand to the side of the head by Bono.
Bono escapes the clinch and we're back to striking.
Bono throws a combination but comes up with nothing but fresh air.
That's four minutes gone in the round.
Bono showing good head movement there, avoiding the strikes from Alcaraz.
Bono takes the fight into the clinch.
Wooooo! Give it up for these two warriors! They are putting on a show!
Alcaraz jumps guard but Bono stands there with Alcaraz around his waist. Alcaraz gives up and drops back to his feet. We remain in the clinch.
Jamie Bono is fighting for a decision here - he's started to take the cautious approach.
Bono has Alcaraz pushed against the cage.
Bono lands a knee to the body.
Bono working Alcaraz over with knees to the body.
Tomas Alcaraz has stepped it up - he knows he needs a finish here!
Bono manages to break the clinch.
And that's the end of the fight!
Jamie Bono comfortably won the final round on my scorecard.
Well Bono has outworked and out performed his opponent in all aspects of the game today. He was simply too good and the decision should be no more than a formality. Over to the ring announcer for the scorecards.
Ladies and gentlemen, after 3 rounds of action, we go to the scorecards for a decision.
Judge Yasuomi Hirokawa scores the fight for Jamie Bono!
Judge Sosuke Kotani scores the fight for Jamie Bono!
Judge Tatsuya Matsuyama scores the fight for Jamie Bono!
Jamie Bono wins by unanimous decision!
An out of breath Jamie Bono thanked his loyal fans in his post fight interview, giving them credit for his success over the course of his career.
|
|
|
|
|
|
|
|
|
|
|
|
|
|
|
|
|
|
|
|
|
|
|
| S |
C
A |
G |
S |
C
B |
G |
|
S |
C |
G |
|
energy
A | B |
|
hype
A | B |
|
pop
A | B |
|
mgr
A | B |
|
FIGHT
RATING
56% |
|
|
|
|
|
|
|
Undercard bout
|
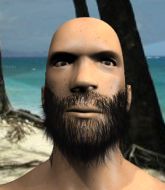
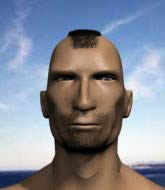
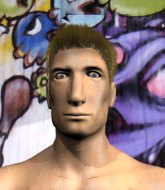
Coming up we have a light heavyweight MMA rules bout between Johnny Fury (ranked 4379 p4p, 4258 weight class) and Jin Kimura (ranked 0 p4p, 0 weight class). We have two fighters making their debuts here, so let's see who comes out of this one with their first professional victory.
 |
|
 |
| 199 cm
23
211
0 - 0 - 0 |
|
175 cm
19
180
0 - 0 - 0 |
BJJ White Belt
Solid Muay Thai
Good chin |
|
BJJ Purple Belt
Counter fighter
Solid chin |
|
| |
|
Ladies and gentlemen. This fight is 3 rounds, in the light heavyweight division.
Introducing the fighter to my left, fighting out of the red corner.
With a record of 0 - 0 - 0, fighting out of Tokyo, Johnny Fury!
And introducing the fighter to my right, fighting out of the blue corner.
With a record of 0 - 0 - 0, fighting out of Tokyo, Jin Kimura!
The judges for this bout are Yukihiro Yamamoto, Shigeki Sano and Ren Mimura.
The bell rings for round one and we are underway!
Fury rushes Kimura and pushes him back against the cage in a clinch.
Kimura jumps guard.
The ref warns both fighters not to hold the cage as they work up against the meshing.
Fury controls the pace of the fight for a moment.
Fury knows he needs to get back to his feet asap. He's simply no match for Kimura on the ground.
Fury scoring with some ground and pound.
Kimura working a defensive guard here.
Fury stands and steps away. Kimura gets to his feet too and we're back to the striking game.
Kimura stuffs a takedown. It's all about dictating where the fight takes place and Kimura wants it to stay on the feet.
The fight moves into the clinch position.
Kimura is looking for a takedown.
We've had a slow start to the round here - hopefully the action picks up.
Still in the clinch, Fury scores with a nice short uppercut.
Fury lands a takedown into guard.
Fury is looking to stand up but Kimura won't let him.
That's one minute gone in the round.
Fury stays in close to Kimura's body and controls the position.
Kimura escapes his hips to the side and looks to be working for an armbar. Fury gives him a little smile and shakes his head. No chance.
Kimura doesn't do any damage with a couple of strikes from the bottom.
Fury got a little sloppy there for a moment and Kimura has worked his way into a loose triangle - can he finish it?! No, Fury has managed to get both his arms back between Kimura's legs - danger averted.
Fury looking to improve position, pressing down on Kimura's thigh with his hand. Kimura seems to be working to lock up a guilotine though... is Fury paying attention? Apparently not! He's locked it up tight! Fury's face has turned purple! Will he tap? Will he! YES! He's tapped! Kimura picked his opening and made it count! Great finish!
Ladies and gentlemen, after 1:53 of round 1, we have a winner by way of Submission (Guillotine). Jin Kimura!
|
|
|
|
|
|
|
|
|
|
|
|
|
|
|
|
|
|
|
|
|
|
|
| S |
C
A |
G |
S |
C
B |
G |
|
S |
C |
G |
|
energy
A | B |
|
hype
A | B |
|
pop
A | B |
|
mgr
A | B |
|
FIGHT
RATING
53% |
|
|
|
|
|
|
|
Undercard bout
|
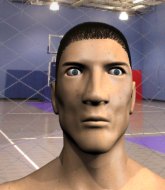
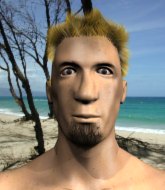
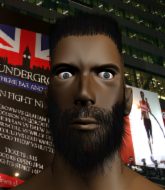
Coming up we have a light heavyweight MMA rules bout between Tin Ping Lo Chie (ranked 4378 p4p, 4333 weight class) and Harry Kupote (ranked 192 p4p, 553 weight class). We have two fighters making their debuts here, so let's see who comes out of this one with their first professional victory.
 |
|
 |
| 176 cm
23
205
0 - 0 - 0 |
|
187 cm
18
205
0 - 0 - 0 |
BJJ Purple Belt
Basic striking
Good in bed |
|
BJJ White Belt
Excellent boxer
Heavy handed |
|
| |
|
Ladies and gentlemen. This fight is 3 rounds, in the light heavyweight division.
Introducing the fighter to my left, fighting out of the red corner.
With a record of 0 - 0 - 0, fighting out of Tokyo, Tin Ping Lo Chie!
And introducing the fighter to my right, fighting out of the blue corner.
With a record of 0 - 0 - 0, fighting out of Tokyo, Harry Kupote!
The judges for this bout are Sosuke Kotani, Taro Takaoka and Yukihiro Shimada.
The bell rings for round one and we are underway!
Lo Chie fakes an overhand right and shoots for a takedown. Kupote sprawls well initially but Lo Chie persists and gets the takedown into half guard.
Kupote tries to push off, looking to stand up, but Lo Chie manages to move to mount!
Lo Chie raining down shots from the mount!
Kupote has given up his back here. Will Lo Chie look for the submission or keep pounding away?
Kupote is trying to break free.
Kupote won't enjoy being in this position. Lo Chie looking for the choke. Oh... he's slipped the arm under the neck - Kupote is tapping - it's over boys! Lo Chie picks up the submission victory!
Ladies and gentlemen, after 0:44 of round 1, we have a winner by way of Submission (RNC). Tin Ping Lo Chie!
|
|
|
|
|
|
|
|
|
|
|
|
|
|
|
|
|
|
|
|
|
|
|
| S |
C
A |
G |
S |
C
B |
G |
|
S |
C |
G |
|
energy
A | B |
|
hype
A | B |
|
pop
A | B |
|
mgr
A | B |
|
FIGHT
RATING
100% |
|
|
|
|
|
|
|
Undercard bout
|
Coming up we have a light heavyweight MMA rules bout between Shane White (ranked 4254 p4p, 4342 weight class) and Ogunkeye Igwe (ranked 0 p4p, 0 weight class). We have two fighters making their debuts here, so let's see who comes out of this one with their first professional victory.
 |
|
 |
| 177 cm
23
170
0 - 0 - 0 |
|
194 cm
23
212
0 - 0 - 0 |
Dangerous GnP
Counter fighter
Granite chin |
|
BJJ White Belt
Solid Muay Thai
Determined |
|
| |
|
Ladies and gentlemen. This fight is 3 rounds, in the light heavyweight division.
Introducing the fighter to my left, fighting out of the red corner.
With a record of 0 - 0 - 0, fighting out of Tokyo, Shane White!
And introducing the fighter to my right, fighting out of the blue corner.
With a record of 0 - 0 - 0, fighting out of Tokyo, Ogunkeye Igwe!
The judges for this bout are Yuuki Gou, Hirohito Nitta and Yasuomi Hirokawa.
The bell rings for round one and we are underway!
White takes one on the button.
 It looks like Shane White has been cut. It looks like Shane White has been cut.
Igwe scores with a nice head shot.
Igwe feints and then winds up with a huge right hand that connects perfectly and sends White sprawling to the canvas! White rolls over backwards and springs off the cage and manages to regain his footing - how acrobatic! Oh, he's still wobbly - can Igwe finish him?!
The crowd are loving this. Great action here.
White looking for a takedown here - he's got it.
White working from the guard for now, landing some ground and pound.
White with a nice head shot there.
White missing there with some ground and pound from the guard.
Igwe has a closed guard, preventing anything of note from happening. Perhaps he's looking to stall.
Igwe utilising some decent striking defenses from the guard, preventing the ground and pound.
White might be looking to lock onto one of his opponent's long limbs for a submission, whilst we're on the ground.
White loading up with the ground and pound but he's missing more than he's landing in this flurry.
A big thud reverberates around the arena there as White accidentally thumps the mat. Hopefully he's not broken his hand.
A big thud reverberates around the arena there as White accidentally thumps the mat. Hopefully he's not broken his hand.
White cracks Igwe with a solid left hand.
That's one minute gone in the round.
Igwe has White pulled in close to control his posture.
White in full guard, throwing the ground and pound. No damage this time.
White drops back looking for a leg! Igwe is in trouble here! The fighters roll with the hold and Igwe manages to kick White off! White jumps back into Igwe's guard.
White postures up in Igwe's guard and throws a big left but Igwe blocks it.
White missing there with some ground and pound from the guard.
White throwing strikes from guard but Igwe blocks nicely.
White lands a couple of elbows.
That's two minutes gone in the round.
Neither fighter has done anything of merit for a good minute or two here and the crowd are not happy about it.
White makes a bit of distance and scores with some ground and pound, still in guard.
Igwe can't keep his opponent in guard - White advances to half guard, no doubt looking to mount.
White thows a huge punch but Igwe dodges it nicely.
White has been looking to land a fair amount of strikes on the ground. He might be looking to soften his opponent up in order to work for a submission.
White moves nicely into side control.
Igwe is working to avoid the ground and pound but White connects with a decent elbow.
Igwe is trying to improve his position.
Igwe on the wrong end of some ground and pound.
White misses with the ground and pound.
White wants to lay and pray for a moment but Igwe keeps working.
Sloppy strikes there by White.
That's three minutes gone in the round.
White is chipping away with strikes.
White in side control, throwing shots but Igwe defends.
White misses with the ground and pound.
Igwe wants to control but White postures up.
White scores with a couple of nice shots to the head there. The referee takes a look at Igwe to see if he's OK.
White creates some space and throws a big elbow, but Igwe sees it coming and moves his head just enough to avoid the strike.
White wants to work for a kimura but he's foiled early by Igwe, who protects the arm well.
White is chipping away with strikes.
White misses with the ground and pound.
The fighters are pressed up against the cage, both looking to find a bit of space to work.
Igwe parries the strikes from White easily there. White is wary of posturing up too much because it might enable Igwe to escape.
White scoring with punches from side control.
Igwe struggling a bit here.
Igwe tries to buck White off but White is having none of it.
That's four minutes gone in the round.
White in side control, throwing shots but Igwe defends.
White in side control lands a decent elbow.
White misses with an attempted head punch from side control.
Igwe can't do much from the bottom here.
Igwe tries to buck White off but White is having none of it.
White in side control, throwing shots but Igwe defends.
Igwe is trying to control White's posture but White avoids it.
Igwe is positioning himself to get back to half guard.
White wants to control but Igwe is keeping him busy.
And that is the end of the round. The fighters go back to their corners.
Shane White dominated that round.
The cut man is working on Shane White's cut.
Well, the break between rounds is over. Let's get back to the scrappin!
Igwe lands a nice shot that snaps White's head back.
White on the wrong end of a decent looking cross there.
Igwe feints a straight left to the body, then turns around with a flashy move and hits Whites jaw with a dramatic spinning back fist!
Igwe moves into range and connects with a jab.
White changes levels and looks for a double leg takedown. Igwe tries to avoid it but White manages to keep hold of a leg and drag Igwe to the ground. Igwe escapes though and pops straight back up to his feet.
White takes one to the chin there.
Shane White's cut is getting worse.
Igwe feints and then winds up with a huge right hand that connects perfectly and sends White sprawling to the canvas! White rolls over backwards and springs off the cage and manages to regain his footing - how acrobatic! Oh, he's still wobbly - can Igwe finish him?!
White is rocked!
We've seen a great period of action over the last minute or so - credit to both fighters for going all out!
Igwe connects with a picture perfect right hand that knocks White out cold! This one is over in a flash!
Ladies and gentlemen, after 0:41 of round 2, we have a winner by way of KO (Punch). Ogunkeye Igwe!
|
|
|
|
|
|
|
|
|
|
|
|
|
|
|
|
|
|
|
|
|
|
|
| S |
C
A |
G |
S |
C
B |
G |
|
S |
C |
G |
|
energy
A | B |
|
hype
A | B |
|
pop
A | B |
|
mgr
A | B |
|
FIGHT
RATING
51% |
|
|
|
|
|
|
|
Undercard bout
|
Coming up we have a light heavyweight MMA rules bout between Takashi Morimoto (ranked 4380 p4p, 4220 weight class) and Chico Bravo (ranked 0 p4p, 0 weight class). We have two fighters making their debuts here, so let's see who comes out of this one with their first professional victory.
 |
|
 |
| 186 cm
23
205
0 - 0 - 0 |
|
185 cm
18
195
0 - 0 - 0 |
Good wrestling
Basic striking
Granite chin |
|
BJJ White Belt
Excellent MT
Solid chin |
|
| |
|
Ladies and gentlemen. This fight is 3 rounds, in the light heavyweight division.
Introducing the fighter to my left, fighting out of the red corner.
With a record of 0 - 0 - 0, fighting out of Tokyo, Takashi Morimoto!
And introducing the fighter to my right, fighting out of the blue corner.
With a record of 0 - 0 - 0, fighting out of Tokyo, Chico Bravo!
The judges for this bout are Shigeki Sano, Tatsuya Matsuyama and Shirou Masuda.
The bell rings for round one and we are underway!
Bravo tries to sprawl but Morimoto drives through with a takedown into half guard.
Morimoto drops an elbow to the side of Bravo's head.
Bravo wants to control but Morimoto is keeping busy.
Morimoto has been looking to land a fair amount of strikes on the ground. He might be looking to soften his opponent up in order to work for a submission.
Morimoto lands a big shot. The thud that echoes around the arena is like music to the fans' ears.
Morimoto trying to control the pace.
Morimoto looks to score some points with some ground and pound.
Morimoto takes advantage of the dominant position to land a couple of big hammer fists.
Morimoto is scoring with some nice ground and pound from the dominant position.
Morimoto working the head and body with strikes.
 Bravo is rocked! Bravo is rocked!
Fantastic stuff here - a very entertaining period of action, which has drawn cheers from the crowd.
Morimoto is sitting in half guard. He's postured up and lands a nice elbow. Oh, Bravo is hurt! He's hurt bad - Morimoto fires away with more strikes and the referee jumps in to save Bravo from any more punishment! Congratulations to Morimoto! Great finish!
Ladies and gentlemen, after 1:55 of round 1, we have a winner by way of TKO (Strikes). Takashi Morimoto!
|
|
|
|
|
|
|
|
|
|
|
|
|
|
|
|
|
|
|
|
|
|
|
| S |
C
A |
G |
S |
C
B |
G |
|
S |
C |
G |
|
energy
A | B |
|
hype
A | B |
|
pop
A | B |
|
mgr
A | B |
|
FIGHT
RATING
93% |
|
|
|
|
|
|
|
Co-main event
|
Coming up we have a light heavyweight MMA rules bout between Haiden Surz (ranked 2993 p4p, 4240 weight class) and Kenji Yamazaki (ranked 0 p4p, 0 weight class). We have two fighters making their debuts here, so let's see who comes out of this one with their first professional victory.
 |
|
 |
| 190 cm
18
190
0 - 0 - 0 |
|
188 cm
18
205
0 - 0 - 0 |
BJJ Blue Belt
Good kicks
Big heart |
|
Good wrestler
Basic striking
Heavy handed |
|
| |
|
Ladies and gentlemen. This fight is 3 rounds, in the light heavyweight division.
Introducing the fighter to my left, fighting out of the red corner.
With a record of 0 - 0 - 0, fighting out of Tokyo, Haiden Surz!
And introducing the fighter to my right, fighting out of the blue corner.
With a record of 0 - 0 - 0, fighting out of Tokyo, Kenji Yamazaki!
The judges for this bout are Yuuki Gou, Yukihiro Shimada and Yukihiro Yamamoto.
The bell rings for round one and we are underway!
The fight moves into the clinch position.
A right hand to the body from Yamazaki.
A short right from Yamazaki.
Yamazaki lands with a left to the head.
Surz is trying to pull guard but Yamazaki turns him against the cage and we stay in the clinch.
Yamazaki drops Surz onto one knee with a big uppercut from the clinch! Surz is propped up by the cage and works his way back to his feet!
Surz is rocked!
We've seen a great period of action over the last minute or so - credit to both fighters for going all out!
Yamazaki pushes Surz against the cage. Yamazaki is working some dirty boxing. Yamazaki pushes off with a quick right hook! Surz goes down! Surz tries to stand but stumbles back to his kness! Yamazaki moves in to finish and the ref steps in to prevent any more damage!
Ladies and gentlemen, after 0:30 of round 1, we have a winner by way of TKO (Strikes). Kenji Yamazaki!
A very excited looking Kenji Yamazaki made sure he remembered to thank all the fans both in the arena and on the internet. He said all the coolest people spend all day on MMA websites, which got a big reaction.
|
|
|
|
|
|
|
|
|
|
|
|
|
|
|
|
|
|
|
|
|
|
|
| S |
C
A |
G |
S |
C
B |
G |
|
S |
C |
G |
|
energy
A | B |
|
hype
A | B |
|
pop
A | B |
|
mgr
A | B |
|
FIGHT
RATING
100% |
|
|
|
|
|
|
|
Main event
|
Coming up we have a light heavyweight MMA rules bout between Royce Morgan (ranked 4230 p4p, 4280 weight class) and Ice General (ranked 0 p4p, 0 weight class). We have two fighters making their debuts here, so let's see who comes out of this one with their first professional victory.
 |
|
 |
| 192 cm
18
205
0 - 0 - 0 |
|
178 cm
19
185
0 - 0 - 0 |
BJJ White Belt
Excellent MT
Good chin |
|
BJJ Purple Belt
Brawler
Tends to cut |
|
| |
|
Ladies and gentlemen. This fight is 3 rounds, in the light heavyweight division.
Introducing the fighter to my left, fighting out of the red corner.
With a record of 0 - 0 - 0, fighting out of Tokyo, Royce Morgan!
And introducing the fighter to my right, fighting out of the blue corner.
With a record of 0 - 0 - 0, fighting out of Tokyo, Ice General!
The judges for this bout are Tatsuya Matsuyama, Shigeki Sano and Ren Mimura.
The bell rings for round one and we are underway!
General avoids the head kick by Morgan.
General avoids the body shot from Morgan.
Morgan connects with a body shot that sends General's belly button to the back.
General fails with a takedown attempt from distance.
General blocks a head kick by Morgan.
A big right from Morgan misses.
Morgan fails with an attempt to clinch.
General shoots in with a takedown attempt and he has Morgan pinned against the cage. Morgan gets the underhooks and manages to circle away.
General closes the distance and presses his opponent up against the cage.
We've had a slow start to the round here - hopefully the action picks up.
General misses with a punch on the inside.
General drops down for a takedown but doesn't get it.
Royce Morgan has stuffed three takedown attempts in the round now. That's going to take a lot out of Ice General.
Morgan looks like he'd prefer to be striking at range right now.
That's one minute gone in the round.
Morgan doesn't land with the attempted body shot.
Morgan tries to land knees in the clinch but General avoids the damage to the body.
General stays in close to his opponent and throws a right hand to the body.
Morgan tries to circle away but General has him pinned against the cage.
Morgan escapes the clinch and we're back to striking.
General fails with a takedown attempt.
Morgan takes a swing at General's ribcage but misses.
Morgan tries to land with a swinging hook to the body but General was well out of range. Poor timing from Morgan.
Morgan shoots in for a takedown but General shows good takedown defense.
Morgan tries to keep at a distance but General has taken the fight into the clinch.
Morgan looks like he'd prefer to be striking at range right now.
Morgan wants to break the clinch but can't.
General misses the knee to the body. Nice hip positioning from Morgan.
Morgan wants to get back to striking at distance but General won't allow it.
That's two minutes gone in the round.
General pulls guard effortlessly.
Morgan wants to stand up, so he's looking to wriggle free of General's closed guard. He's half up but General has locked on to an arm! Uh oh! General pivots and extends the arm, Morgan falls face first to the mat and taps??... does he?? YES! He's tapping! Excellent counter grappling there by General! Well done that man!
Ladies and gentlemen, after 2:23 of round 1, we have a winner by way of Submission (Armbar). Ice General!
|
|
|
|
|
|
|
|
|
|
|
|
|
|
|
|
|
|
|
|
|
|
|
| S |
C
A |
G |
S |
C
B |
G |
|
S |
C |
G |
|
energy
A | B |
|
hype
A | B |
|
pop
A | B |
|
mgr
A | B |
|
FIGHT
RATING
39% |
|
|
|
|
|
|
|
|
|
|

