|
020 Grappling 2 PBP Commentary |
Undercard bout
|
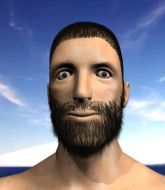
This TWGC bout is 1 fifteen minute round in the super heavyweight division. Introducing today's competitors. In the red corner, competing out of Tokyo, with a TWGC record of 0 wins and 1 losses; Ty Wong! And in the blue corner, fighting out of Amsterdam, with a TWGC record of 0 wins and 0 losses; The Island Sparbot!
The judges for this bout are Wagner Zegers, Daniel Blasius and Albert Achterberg.
Let's get this grappling contest under way! Who will be victorious?
Sparbot wants to clinch up but Wong keeps it at a distance.#CL#
Wong moves into the clinch successfully.
Sparbot wants a takedown but no success here.
#TD#
Wong pulls guard successfully.
Sparbot stopping the sweep attempt from Wong.
Sparbot passes Wong's right leg, so he's now in half guard.
The fighters are pressed up against the cage, both looking to find a bit of space to work.
Wong slips a foot under and gets full guard. Nice work.
Wong is working the butterfly guard. He manages to land a nice scissor sweep and is now in half guard on the top. Nice move. Score +2 for sweep to guard / half guard: Wong (2) vs (0) Sparbot
We've had a slow start to the round here - hopefully the action picks up.
Sparbot wants to improve his position but Wong is controlling well.
#SUB#
Wong seems to be looking for submissions.
#T1#
Wong is controlling the pace.
Wong wants to pass to mount but Sparbot is defending the position. #SUB#
Wong is working for a submission of some sort.
Wong content to control rather than advance. #T2#
Wong passes the half guard and he's now in mount! Big trouble for Sparbot! Score +3 for passing guard: Wong (5) vs (0) Sparbot
Wong prevents Sparbot from getting the reversal.
Wong trying to control but he's not successful this time.
Wong wants to control the action but instead Sparbot gets a body lock and reverses into Wong's guard! Nice work! Score +2 for sweep to guard / half guard: Wong (5) vs (2) Sparbot
Wong working a defensive guard here.
#T3#
Sparbot trying to move into half guard but instead Wong has managed to sweep! Score +2 for sweep to guard / half guard: Wong (7) vs (2) Sparbot
Sparbot is working from a closed guard but he's struggling to control his opponent.
Sparbot looking for a sweep. Not yet Sparbot, not yet.
Wong trying to control the position from guard on top but Sparbot is wriggling around, looking for whatever he can. #SUB#
Wong thinks about going for a leg but decides against it, in order to maintain the position.
Wong looks to be in better condition than last time we saw him fight. Obviously he's been working hard on his cardio.
Wong's corner is telling him to maintain position.
Sparbot keeping moving, preventing Wong from controlling successfully.
Wong controlling from the top position. #T4#
Sparbot looking to sweep here. No luck so far.
Sparbot not looking particularly offensive just at the moment.
Wong sitting in guard here, content to control.
Wong won't allow Sparbot to sweep him here.
Wong looking to sit in guard and control but Sparbot gets the butterfly guard and sweeps. He's now in the guard on the top. Score +2 for sweep to guard / half guard: Wong (7) vs (4) Sparbot#SUB#
Wong has a loose triangle. He'll be looking to tighten that up but Sparbot can see exactly what he's planning and manages to posture up and free himself. #T5##SUB#
Wong working from the bottom, still in full guard. He's managed to get a loose triangle. Sparbot doesn't seem to be doing much to defend here, obviously he feels comfortable in the position. Sparbot manages to throw the legs off his shoulder and he's back into guard - no problem.
Wong keeping full guard, as Sparbot tries to pass. #SUB#
Wong has a loose triangle. He'll be looking to tighten that up but Sparbot can see exactly what he's planning and manages to posture up and free himself. #SUB#
Wong looking for submissions from the bottom here. Moving his hips around, possibly looking for an armbar.
Sparbot advances position into side control! Score +3 for passing guard: Wong (7) vs (7) Sparbot#T6#
Wong is positioning himself to get back to half guard.
Sparbot moving around in side mount but really he's just happy to control for now.
Sparbot trying to control the action but Wong is working from the bottom.
Wong sneaks a leg under to get back to half guard.#T7#
Wong is working for an escape here. He's hooked one of Sparbot's legs and he's managed to sneak out and take Sparbot's back! Score +4 for clean sweep to past guard: Wong (11) vs (7) Sparbot
Wong biding his time, looking for the opening.
Wong wants to control but Sparbot manages to buck him off and is now in Wong's guard! Nice work there by Sparbot! Score +2 for sweep to guard / half guard: Wong (11) vs (9) Sparbot
Sparbot stopping the sweep attempt from Wong.
Sparbot slows down the pace of the fight for a moment. He'll need to remain active if he doesn't want to see the fight stood back up.
Sparbot wants to control from the top but Wong keeps moving.
Sparbot is fighting to break Wong's control of his arms but Wong is doing a good job of controlling the position at the moment.
Sparbot postures up.
#T8#
Sparbot wants to control from the top but Wong keeps moving.
Wong manages to sweep nicely, so he's now on top. Sparbot manages to get himself to full guard.
Score +2 for sweep to guard / half guard: Wong (13) vs (9) Sparbot
Sparbot looking to control the pace of the fight rather than finish it.
Wong controls the pace of the fight for a moment.
Wong trying to control but Sparbot is working from the bottom. #T9#
Sparbot is trying to control the position but Wong postures up.
Sparbot looking to sweep here. No luck so far.
The ref warns both fighters not to hold the cage as they work up against the meshing.
Wong engaging in some classic timewasting tactics. #SUB#
Wong drops back for a leg! It's a sloppy attempt though and Wong jumps back into guard quickly, to retain the dominant position.
Wong wants to control from the top but Sparbot keeps moving.
Wong seems content to control from guard here. He's going to have to remain active though if he doesn't want to get stood back up.
Wong seems to have a rather negative gameplan on the ground. He seems keen to just score the takedown and hold down Sparbot for as long as he can get away with.#T10##SUB#
Wong drops back for a leg but he's not going to get it - he lets go and Sparbot dives on top into guard. Score +2 for sweep to guard / half guard: Wong (13) vs (11) Sparbot
Wong looking to hit a scissor sweep but Sparbot is one step ahead there.
Wong trying to control the position.
Sparbot really doesn't want to stay on the ground with Wong. If he can't get it back to his feet, it's only a matter of time before he'll be tapping out.
Sparbot trying to control the position from guard on top but Wong is wriggling around, looking for whatever he can.
Sparbot looking to pass the guard. #T11#
Sparbot content to stall in guard here. #SUB#
Sparbot avoids a guillotine attempt easily.
#SUB#
Wong is active off his back here, looking for submissions.
Sparbot looking to sit in guard and control but Wong gets the butterfly guard and sweeps. He's now in the guard on the top. Score +2 for sweep to guard / half guard: Wong (15) vs (11) Sparbot#SUB#
Wong drops back for a leg but he's not going to get it - he lets go and Sparbot dives on top into guard. Score +2 for sweep to guard / half guard: Wong (15) vs (13) Sparbot#T12#
Sparbot passes easily into side control. Nice work. Score +3 for passing guard: Wong (15) vs (16) Sparbot
Sparbot is looking to take a break and control but Wong is keeping him honest, looking to work from the bottom.
Wong sneaks back into half guard.
Wong is doing well to avoid being mounted. He's controlling the position at the moment.
Sparbot controlling the action here. #T13#
Wong is staying active underneath Sparbot, who seems content to just control the action from this position. #SUB#
Wong is looking to sinch up a guillotine here but Sparbot pulls his head out easily.
Wong is trying to get back to full guard.
Wong manages to get to full guard.
#T14#
Sparbot tries to free his leg and advance position but Wong is retaining full guard. #SUB#
Wong looking for a triangle here. Sparbot is fighting it but it looks tight! Wong pulls the arm across and this one won't last much longer! Nope, Sparbot is tapping out - this one is all over!
Ladies and gentlemen, after 14:37 of round 1, we have a winner by way of Submission (Triangle Choke). Ty Wong!
Ty Wong gave a mention to 020 Clothing in his post fight interview. That will please them (and hopefully generate some sales). |
|
|
|
Co-main event
|
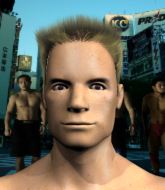
This TWGC bout is 1 fifteen minute round in the super heavyweight division. Introducing today's competitors. In the red corner, competing out of Hilo, with a TWGC record of 0 wins and 0 losses; Lue Randle! And in the blue corner, fighting out of Las Vegas, with a TWGC record of 4 wins and 1 losses; Ispa Murhapuro!
The judges for this bout are Saam Ante, Patrick Alders and Paul Aken.
The official calls the fighters to the middle and the contest is under way.#CL2#
Murhapuro moves into the clinch successfully.
Murhapuro tries to pull guard but Randle holds him up against the cage and eventually Murhapuro drops back down to his feet.
Murhapuro fails to pull guard.
Randle has hold of a leg and is looking for a trip takedown. Murhapuro avoids it nicely though and we remain in the clinch.
Murhapuro told us before the fight that he's been working on his elbows. An under utilised technique these days - let's see if it can sway the outcome of the fight.
Murhapuro is trying to pull guard but Randle turns him against the cage and we stay in the clinch.
Lue Randle has stuffed three takedown attempts in the round now. That's going to take a lot out of Ispa Murhapuro.
Randle stops a takedown attempt from Murhapuro.
Murhapuro drops down for a takedown but doesn't get it.
Murhapuro jumps guard but Randle stands there with Murhapuro around his waist. Murhapuro gives up and drops back to his feet. We remain in the clinch.
#TD#
Murhapuro is fighting off a takedown attempt but Randle is just too persistent for him and manages to trip Murhapuro to the mat. Murhapuro regains guard as soon as the fighters hit the mat. Score +2 for takedown into guard / half guard: Randle (2) vs (0) Murhapuro
Randle sitting in guard, not really doing much.
We've had a slow start to the round here - hopefully the action picks up.#SUB#
Randle drops back, looking for a kneebar! Murhapuro looks panicked! The fighters roll across the mat, one looking to finish, one looking to escape. Murhapuro looks to have wriggled free... Yes, he's got his leg free and he's dived into side control! Good work there from Murhapuro! Score +4 for clean sweep to past guard: Randle (2) vs (4) Murhapuro
Randle tries to buck Murhapuro off but Murhapuro is having none of it.#T1#
Randle is moving his hips around well on the bottom and has managed to get back to half guard.
Randle desperately trying to maintain half guard. #SUB#
Randle is looking to sinch up a guillotine here but Murhapuro pulls his head out easily.
Murhapuro is figuring out what he wants to do next.
Randle keeps control of the position for the meantime.
Randle makes his way to full guard. A much better position for Randle.
The fighters are pressed up against the cage, both looking to find a bit of space to work.#T2##SUB#
Randle is looking for a guillotine. You can't force these things though and Murhapuro defends well.
Murhapuro really doesn't want to stay on the ground with Randle. If he can't get it back to his feet, it's only a matter of time before he'll be tapping out.
Randle trying to control the position.
#SUB#
Randle working from the bottom, still in full guard. He's managed to get a loose triangle. Murhapuro doesn't seem to be doing much to defend here, obviously he feels comfortable in the position. Murhapuro manages to throw the legs off his shoulder and he's back into guard - no problem.
Randle tries to land a sweep but no joy. #T3#
Randle working a defensive guard here.
Murhapuro must be cautious of submissions here, given that his opponent has the superior Jiu Jitsu.#SUB#
Randle has his foot on Murhapuro's thigh. He's trying to push off and get in position for a triangle, I think. Murhapuro works his way back into a safe position though.#SUB#
Randle looking for submissions off his back, moving his hips, looking for an opening.
#SUB#
Murhapuro got a little sloppy there for a moment and Randle has worked his way into a loose triangle - can he finish it?! No, Murhapuro has managed to get both his arms back between Randle's legs - danger averted.#SUB#
Randle escapes his hips to the side and looks to be working for an armbar. Murhapuro gives him a little smile and shakes his head. No chance.
Randle wants to control here, rather than go for any submissions from the bottom. At least for now.
Randle will need to keep those long limbs tucked in whilst he's on the ground, to prevent any submissions.#T4#
Randle looking to control.
#SUB#
Randle working from the bottom, still in full guard. He's managed to get a loose triangle. Murhapuro doesn't seem to be doing much to defend here, obviously he feels comfortable in the position. Murhapuro manages to throw the legs off his shoulder and he's back into guard - no problem.
Randle looking to hit a scissor sweep but Murhapuro is one step ahead there. #SUB#
Randle had isolated an arm as going for a kimura. Murhapuro defends it easily.#SUB#
Randle is throwing his legs up, looking for submissions. Murhapuro is aware though and is defending well.#T5##SUB#
Randle throwing his legs up looking for a triangle.
#SUB#
Randle looking for submissions from the bottom here. Moving his hips around, possibly looking for an armbar.
#SUB#
Randle working from the bottom, still in full guard. He's managed to get a loose triangle. Murhapuro doesn't seem to be doing much to defend here, obviously he feels comfortable in the position. Murhapuro manages to throw the legs off his shoulder and he's back into guard - no problem. #SUB#
Randle is looking for a guillotine. You can't force these things though and Murhapuro defends well.#SUB#
Randle is looking for a triangle but Murhapuro pushes his legs off easily.
#T6#
Randle can't do much from the bottom at the moment, as Murhapuro controls the pace.#SUB#
Randle looking for submissions from the bottom here. Moving his hips around, possibly looking for an armbar.
Murhapuro looking to pass the guard.
Murhapuro trying to control the position from guard on top but Randle is wriggling around, looking for whatever he can. #SUB#
Randle looking for submissions from the bottom here. Moving his hips around, possibly looking for an armbar.
#T7##SUB#
Randle had isolated an arm as going for a kimura. Murhapuro defends it easily.
Murhapuro trying to move into half guard but instead Randle has managed to sweep! Score +2 for sweep to guard / half guard: Randle (4) vs (4) Murhapuro
Randle is just sitting in guard, looking to avoid any submissions. #SUB#
Randle drops back for a leg but he's not going to get it - he lets go and Murhapuro dives on top into guard. Score +2 for sweep to guard / half guard: Randle (4) vs (6) Murhapuro#SUB#
Randle escapes his hips to the side and looks to be working for an armbar. Murhapuro gives him a little smile and shakes his head. No chance.
Randle wants to sweep but no luck.
The ref warns both fighters not to hold the cage as they work up against the meshing.#T8##SUB#
Randle has a loose triangle. He'll be looking to tighten that up but Murhapuro can see exactly what he's planning and manages to posture up and free himself.
Randle trying to keep a closed guard but Murhapuro is proving a slippery customer.
Murhapuro engaging in some classic timewasting tactics.
Randle trying to control the position.
#SUB#
Randle looking for submissions off his back, moving his hips, looking for an opening.
#T9#
Murhapuro won't allow Randle to sweep him here. #SUB#
Randle has his foot on Murhapuro's thigh. He's trying to push off and get in position for a triangle, I think. Murhapuro works his way back into a safe position though.
Randle keeping full guard, as Murhapuro tries to pass.
Murhapuro trying to control but Randle is working from the bottom. #SUB#
Randle looking for submissions from the bottom here. Moving his hips around, possibly looking for an armbar.
#SUB#
Randle is looking for a guillotine. You can't force these things though and Murhapuro defends well.#T10#
Randle keeping full guard, as Murhapuro tries to pass. #SUB#
Murhapuro got a little sloppy there for a moment and Randle has worked his way into a loose triangle - can he finish it?! No, Murhapuro has managed to get both his arms back between Randle's legs - danger averted.#SUB#
Randle has an omoplata and is looking to use it perhaps as a submission or perhaps to transition. Murhapuro is in a bit of discomfort here, but he's managed to free himself and has dived into side control! That didn't work out too well for Randle. Score +3 for passing guard: Randle (4) vs (9) Murhapuro
Randle gets back to half guard.
Randle tries to roll over but Murhapuro keeps him under control.#T11#
Randle is working for an escape here. He's hooked one of Murhapuro's legs and he's managed to sneak out and take Murhapuro's back! Score +4 for clean sweep to past guard: Randle (8) vs (9) Murhapuro#SUB#
Randle patiently working for the choke. Which fighter will keep their nerve here?#SUB#
Murhapuro defends a rear naked choke attempt by controlling one of Randle's arms. #SUB#
Randle is working for the choke. I would put my money on him to finish from this position. He's rolled onto his back and has dragged Murhapuro with him. Murhapuro is trying to defend but Randle has an arm under the chin now! Murhapuro grimaces and is forced to tap out!
Ladies and gentlemen, after 12:55 of round 1, we have a winner by way of Submission (RNC). Lue Randle!
A very excited looking Lue Randle rambled incoherently for about 5 minutes post fight about how awesome he is. It was kinda funny for a while but then everyone got annoyed. |
|
|
|
Main event
|
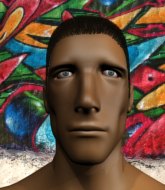
This TWGC bout is 1 fifteen minute round in the super heavyweight division. Introducing today's competitors. In the red corner, competing out of Amsterdam, with a TWGC record of 1 wins and 0 losses; Emil Gustafsson! And in the blue corner, fighting out of Amsterdam, with a TWGC record of 1 wins and 0 losses; Woodie Maykit!
The judges for this bout are Daniel Blasius, Radbod Blank and Paul Aken.
The fighters connect hands in the middle of the mat and we are under way.
Maykit shoots in for a takedown but Gustafsson shows good takedown defense there and keeps this one on the feet.
A telegraphed takedown attempt from Maykit is defended easily by Gustafsson.
Gustafsson tries to clinch up against the cage, rushing in to close the distance. Maykit manages to break the clinch and circles back to the middle of the mat.
Gustafsson doesn't manage to clinch there - Maykit circles away.
Gustafsson fails with an attempt to clinch.
Maykit shoots for a double leg takedown but Gustafsson sprawls well. He's pushed Maykit's face into the mat and manages to get back to his feet relatively easily.
Emil Gustafsson has stuffed three takedown attempts in the round now. That's going to take a lot out of Woodie Maykit.
Maykit closes this distance looking for a takedown but Gustafsson circles away.
Gustafsson stuffs the takedown.
The fight stays on the outside here - Gustafsson looks like he's thinking about clinching though.
Maykit closes the distance and clinches up with Gustafsson, looking for a takedown. Maykit pushes Gustafsson against the cage but Gustafsson circles to the side and manages to break the clinch.
We've had a slow start to the round here - hopefully the action picks up.
Maykit keeps the fight on the outside.
Gustafsson definitely looks more muscular than last time we saw him fight.
Gustafsson wants to clinch up but Maykit keeps it at a distance.#TD#
Gustafsson shoots in for a takedown! He's got it and he's managed to land in side control! That's better than Gustafsson was expecting from the takedown attempt, I'm sure! Score +4 for clean takedown past guard: Gustafsson (4) vs (0) Maykit
Maykit is positioning himself to get back to half guard. #T1#
Gustafsson is looking to take a break and control but Maykit is keeping him honest, looking to work from the bottom.
Maykit tries to buck Gustafsson off but Gustafsson is having none of it.#SUB#
Gustafsson tries for a kimura. Not really close to a finish though. #SUB#
Gustafsson is trying to get an arm triangle but Maykit is defending well.
Maykit tries to get back to half guard but can't.
Maykit wants to control but Gustafsson postures up.
Gustafsson trying to control the action but Maykit is working from the bottom.
Gustafsson will need to keep those long limbs tucked in whilst he's on the ground, to prevent any submissions.#T2#
Maykit gets one leg under and gets the fight to half guard. #SUB#
Gustafsson is working for a submission of some sort.
Maykit is pressing down on Gustafsson's left leg trying to get back to full guard. He's managed it.#SUB2#
Maykit working for a triangle but Gustafsson defends it easily.
Maykit tries to land a sweep but no joy. #SUB2#
Maykit is active off his back here, looking for submissions.
Gustafsson trying to control the position from guard on top but Maykit is wriggling around, looking for whatever he can. #T3##SUB2#
Maykit has his foot on Gustafsson's thigh. He's trying to push off and get in position for a triangle, I think. Gustafsson works his way back into a safe position though.#SUB#
Gustafsson drops back looking for a leg! Maykit is in trouble here! The fighters roll with the hold and Maykit manages to kick Gustafsson off! Gustafsson jumps back into Maykit's guard.
The ref warns both fighters not to hold the cage as they work up against the meshing.
Maykit wants to sweep but no luck. #SUB2#
Maykit looking for submissions from the bottom here. Moving his hips around, possibly looking for an armbar.
Gustafsson preventing the sweep.
Maykit is working the butterfly guard. He manages to land a nice scissor sweep and is now in half guard on the top. Nice move. Score +2 for sweep to guard / half guard: Gustafsson (4) vs (2) Maykit
Gustafsson wants to control but Maykit is keeping busy and won't allow it.
Gustafsson is looking to improve his position.
#T4##SUB2#
Maykit is working for a submission of some sort.
Maykit is pressing down on Gustafsson's thigh, looking to free his foot. Gustafsson is holding on for now. #SUB2#
Maykit is sneakily working for an arm triangle but Gustafsson sees it coming and defends easily.#SUB2#
Maykit is looking for a kimura. It's going to be difficult to finish that from half guard though and Gustafsson defends it well.
Maykit is looking to advance position but Gustafsson won't allow it. #T5#
Maykit has freed up his trapped foot and advances to mount. Score +3 for passing guard: Gustafsson (4) vs (5) Maykit
Maykit is dominating on the ground here - he's now on his opponent's back, looking to sink in the hooks. Gustafsson is in real trouble.
Score +3 for taking back: Gustafsson (4) vs (8) Maykit
Gustafsson is really stuck here.
#SUB2#
Maykit has his hand under the chin of his opponent looking for the choke. He's nearly got it! This one could be all over! But no, Gustafsson has freed his hand and lives to survive another� well, another couple of seconds at least!
Well, with Maykit on his back, surely it's only a matter of time before Gustafsson is tapping out... Can he escape the position?
Gustafsson breaks Maykit's hooks off and manages to turn into his guard.
Score +2 for sweep to guard / half guard: Gustafsson (6) vs (8) Maykit
Gustafsson wants to control from the top but Maykit keeps moving. #SUB2#
Maykit has his foot on Gustafsson's thigh. He's trying to push off and get in position for a triangle, I think. Gustafsson works his way back into a safe position though.#T6##SUB2#
Maykit is working actively off his back, looking to secure an arm or perhaps work for a triangle.
Maykit looking for a sweep. Not yet Maykit, not yet.
Maykit is working the butterfly guard. He manages to land a nice scissor sweep and is now in half guard on the top. Nice move. Score +2 for sweep to guard / half guard: Gustafsson (6) vs (10) Maykit
Gustafsson keeping control of the leg, stopping his opponent passing to mount.
Maykit wants to pass the guard but Gustafsson is defending well.
Gustafsson wants to get back to full guard.#SUB2#
Maykit is thinking about going for an arm triangle but he can't free his leg.
#T7#
Maykit uses his free foot to push down on Gustafsson's thigh. Eventually he works his other foot free and he's advanced to mount - this is trouble for Gustafsson. Score +3 for passing guard: Gustafsson (6) vs (13) Maykit
Gustafsson is writhing around trying to get back to his feet.
Maykit wants to take his opponent's back but he's not managed it. #SUB2#
Maykit is in full mount, looking to secure a guillotine but Gustafsson is surviving well by controlling Maykit's body position as best he can.
Gustafsson stops Maykit from taking his back. Still, being mounted isn't any better. #T8##SUB2#
Maykit jumps to side control looking for an arm triangle but Gustafsson manages to avoid the submission attempt.
Gustafsson wants to control but Maykit postures up.
Gustafsson sneaks back into half guard.
Gustafsson moves into full guard.
The fighters are pressed up against the cage, both looking to find a bit of space to work.
Gustafsson keeping full guard, as Maykit tries to pass. #SUB2#
Maykit thinks about going for a leg but decides against it, in order to maintain the position.
Gustafsson can't keep his opponent in guard - Maykit advances to half guard, no doubt looking to mount. #T9#
Gustafsson is looking for a sweep. Maykit is wise to his cunning plan and keeps the top position.
Gustafsson is pressing down on Maykit's left leg trying to get back to full guard. He's managed it.#SUB2#
Maykit drops back for a leg but he's not going to get it - he lets go and Gustafsson dives on top into guard. Score +2 for sweep to guard / half guard: Gustafsson (8) vs (13) Maykit
Gustafsson controls from within his opponent's guard. #SUB2#
Maykit is actively looking for submissions from his back. He's worked himself a little space on the bottom and seems to be going for a triangle. No, he's switched into an armbar! That was slick! Gustafsson rolls with it to try and escape but Maykit cranks on the arm and Gustafsson is forced to tap out! This one is aaaaaaaaall over!
Ladies and gentlemen, after 9:52 of round 1, we have a winner by way of Submission (Armbar). Woodie Maykit! |
|
|
|
|
|
|