 |
Friday Night Fights 1 PBP Commentary |
Undercard bout
|
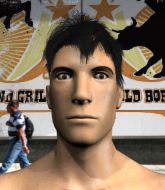
Coming up we have a heavyweight MMA rules bout between Roman Bellic (ranked 24913 p4p, 4513 weight class) and Kyoto Fujiwara (ranked 534 p4p, 446 weight class). Over to our ring announcer for the fighter introductions!
 |
|
 |
| 180 cm
19
235
1 - 2 - 0 |
|
178 cm
18
220
0 - 0 - 0 |
BJJ White Belt
Brawler
Likes comics |
|
BJJ Blue Belt
Brawler
Solid chin |
|
| |
|
Ladies and gentlemen. This fight is 3 rounds, in the heavyweight division.
Introducing the fighter to my left, fighting out of the red corner.
With a record of 1 - 2 - 0, fighting out of New York, Roman Bellic!
And introducing the fighter to my right, fighting out of the blue corner.
With a record of 0 - 0 - 0, fighting out of Tokyo, Kyoto Fujiwara!
The judges for this bout are Hirohito Nitta, Yukihiro Yamamoto and Shigeki Fujiwara.

The bell rings for round one and we are underway!
Fujiwara dives in and grabs Bellic's left leg, looking for a takedown. Bellic pushes down on Fujiwara's head and hops out.
Fujiwara closes this distance looking for a takedown but Bellic circles away.
Bellic walks forward and throws out a flicking leg kick. Fujiwara checks it nicely though, as he moves to the side.

Bellic forces Fujiwara back against the ropes and clinches.
Bellic wants a takedown but no success here.
Bellic is pressed up against the ropes. Fujiwara has hold of a leg and is looking to drag Bellic down to the mat. Bellic avoids the attempt though and has circled away. We're back to striking at a distance.
Roman Bellic has stuffed three takedown attempts in the round now. That's going to take a lot out of Kyoto Fujiwara.
Fujiwara chopped to the floor by a nice leg kick but he springs right back up before Bellic can pounce on him.
Bellic clinches.

Bellic's corner calls for him to break the clinch, which he does.
We've had a slow start to the round here - hopefully the action picks up.
Bellic is looking to take this fight into the clinch.
Fujiwara wants to counter the offense by Bellic and move into the clinch position.
Fujiwara with a poor takedown
and Bellic counters with a three punch combination, finished off with a leg kick. Nice work.
Bellic really is a fat lump.

Bellic drops down and drives through with a powerful takedown into guard.
Fujiwara looks winded!
The crowd cheering loudly, showing their appreciation for the quality fight we're seeing here.
Bellic is just sitting in guard, looking to avoid any submissions.

That's one minute gone in the round.
Bellic makes a bit of distance and scores with some ground and pound, still in guard.
Fujiwara throwing some rather feeble looking strikes off his back.
Bellic wants to stand but Fujiwara has a closed guard, so he can't escape.
The fighters are tangled up in the ropes here. We might need a restart if the fighters can't break free themselves.
Fujiwara being controlled here, momentarily.
Fujiwara looking to hit a scissor sweep but Bellic is one step ahead there.
Bellic has decided he wants to stand but the closed guard of Fujiwara is proving hard to escape from.

The referee has motioned to the fighters to stand back up.

That's two minutes gone in the round.
Well. There's a bit of a lull in the action here and the crowd are starting to get restless.
Fujiwara gets caught on his heels momentarily as he allows Bellic to score an easy takedown into full guard.
Bellic has decided he wants to stand but the closed guard of Fujiwara is proving hard to escape from.
Fujiwara looking to hit a scissor sweep but Bellic is one step ahead there.
Bellic lands a nice shot whilst sitting in his opponent's guard.

That's three minutes gone in the round.
Bellic postures up and lands some nice ground and pound.
Bellic keeps in close for a moment and lands a decent shot to the side of Fujiwara's head.
Bellic wanted to stand there but Fujiwara had control of the position.

Fujiwara manages to wriggle out and sneak his way back up to his feet, so the fighters are now clinched up against the ropes.
Bellic fails to pull the fight into his guard.
Bellic tries to land a knee to the body but he is off balance and Fujiwara avoids it.
Fujiwara is looking to take this one to the mat.

That's four minutes gone in the round.
Bellic's corner calls for him to break the clinch, which he does.
Bellic fails with a takedown attempt.
Bellic tries to drive through with a takedown attempt but Fujiwara defends well and Bellic ends up having to push Fujiwara into the ropes where they will battle it out in the clinch.
Bellic gets double underhooks to prevent a takedown attempt from Fujiwara.
Bellic breaks from the clinch.

Bellic tries to keep at a distance but Fujiwara has taken the fight into the clinch.
The crowd thankful this round is nearly over.
Bellic keeps control of Fujiwara as he tries to wriggle out of the double underhooks.
Bellic tries for a takedown. No joy.
And that is the end of the round. The fighters go back to their corners.
Roman Bellic dominated that round.
The corners get their ten second warning. Both fighters stand from their stools and stare each other down, ready to get back to the action.

Bellic moves in looking to clinch but Fujiwara pushes him off.
Fujiwara tries to grapple but his opponent circles
and Bellic counters with a lovely straight right hand!
Bellic shoots in with a takedown attempt and he has Fujiwara pinned against the ropes. Fujiwara gets the underhooks and manages to circle away.
Bellic sets himself, and Fujiwara steps forward looking for the clinch! Bellic avoids it this time.
Fujiwara is looking to clinch but Bellic is avoiding it.
Fujiwara tries to close the distance and clinch but Bellic swats him to one side with an open hand palm strike and circles away.
We've had a slow start to the round here - hopefully the action picks up.
Fujiwara has Bellic up against the ropes in a clinch.
Fujiwara has Bellic pressed against the ropes, preventing Bellic from circling away and getting back to striking at range.

Fujiwara escapes the clinch and we're back to striking.
That's one minute gone in the round.
Bellic dives in and grabs Fujiwara's left leg, looking for a takedown. Fujiwara pushes down on Bellic's head and hops out.
Bellic is really dominating this fight. Is there anything that Fujiwara can do to turn this around?
Bellic misses with a half-hearted attempt at a head kick.
Nice takedown defense from Fujiwara. No joy for Bellic on that attempt.
That's three failed takedown attempts in the round for Roman Bellic. That's going to take a lot out of him.
Both fighters are absolutely exhausted here.
Fujiwara throws a combination but comes up with nothing but fresh air.
Bellic has his takedown stuffed
and Fujiwara holds on and brings the fighters into a clinch.
Bellic tries to take the fight to the ground by pulling guard but can't manage it.

Fujiwara jumps guard.
Bellic stopping the sweep attempt from Fujiwara.
Bellic trying to control but Fujiwara is working from the bottom.
Fujiwara has Bellic pulled in close to control his posture.
That's two minutes gone in the round.

Fujiwara looking for submissions from the bottom here. Moving his hips around, possibly looking for an armbar.
Fujiwara is throwing his legs up, looking for submissions. Bellic is aware though and is defending well.
Bellic is just sitting in guard, looking to avoid any submissions.
It looks like the ref is thinking about a standup.
Fujiwara trying to strike off his back.
The referee has stepped in and called for a break in the action. We'll restart on the feet.
Fujiwara with a lazy takedown attempt
and Bellic counters with a kick to the head that grazes his opponent. Fujiwara is lucky that one didn't land flush.
That's three minutes gone in the round.
Bellic shoots in but no luck this time.
Bellic shoots in for a takedown but Fujiwara shows good takedown defense there and keeps this one on the feet.
Fujiwara misses with a low kick as Bellic jumps back.
Bellic appears to be looking for a counter takedown.
Fujiwara tries to drive through with a takedown attempt but Bellic defends well and Fujiwara ends up having to push Bellic into the ropes where they will battle it out in the clinch.
Bellic gets a clinch.
Bellic breaks the clinch.
A telegraphed takedown attempt from Bellic is defended easily by Fujiwara.
Bellic tries for a takedown but Fujiwara circles away easily
and Fujiwara counters by moving into the clinch.
That's four minutes gone in the round.
Bellic misses with a punch to the body.
Bellic is trying to pull guard but Fujiwara turns him against the ropes and we stay in the clinch.
Fujiwara's corner calls for him to break the clinch, which he does.
Fujiwara instigates a clinch.
Fujiwara tries to circle away but Bellic has him pinned against the ropes.
Fujiwara jumps guard.
Fujiwara controls Bellic momentarily but Bellic frees himself.
Bellic wants to get up but he can't break Fujiwara's closed guard. He needs to be careful trying to break the legs open, as he's open to submissions here.
Boooooooooooooooooooo!!! God, this has been a terrible round. Come on you two, sort yourselves out!
Bellic stands up and looks to throw the legs aside to pass to side control. Fujiwara swivels though and keeps the full guard.
And that is the end of the round. The fighters go back to their corners.
Kyoto Fujiwara showed his class in that round. I'd imagine he'll take it on all the scorecards.
That's time! Bellic's corner gives him a slap on the ass as he gets ready to fight. Ladies and gentlemen, this is the final round!

Bellic tries to score a power double leg takedown but Fujiwara sees that one coming and sprawls well. That will dishearten Bellic somewhat.
Bellic throws a low kick but his opponent is out of range.
Bellic displays good takedown defense there as he swats away a double leg from Fujiwara.
Bellic wants to clinch.
Roman Bellic is looking to throw some combinations by the looks of things.
We've had a slow start to the round here - hopefully the action picks up.
Fujiwara gets a clinch.
Fujiwara takes a big intake of breath there - he's definitely tired.
That's one minute gone in the round.
Fujiwara manages to break the clinch.
Fujiwara stuffs a takedown. It's all about dictating where the fight takes place and Fujiwara wants it to stay on the feet.
Nice sprawl there from Bellic as Fujiwara shoots in.
Fujiwara gets a clinch.
Fujiwara breaks from the clinch.
Fujiwara moves out of range of the strikes.
Bellic shoots in and drives through. Fujiwara sprawls well.
That's three failed takedown attempts in the round for Roman Bellic. That's going to take a lot out of him.
Fujiwara fails with a takedown attempt.
Bellic tries to clinch but Fujiwara moves out of range.
Fujiwara wants to counter the offense by Bellic and move into the clinch position.
That's two minutes gone in the round.
Fujiwara displays good takedown defense there as he swats away a double leg from Bellic.
Bellic tries to clinch but is not successful on this occasion.
Bellic fails with a rather predictable takedown attempt.
Fujiwara fakes high and shoots in for a takedown but Bellic avoids it really well and circles away.
Roman Bellic is winning the standup battle so far.
Bellic tries to shoot in for a takedown. He's got hold of a leg but Fujiwara swivels and escapes.
Bellic fails with an attempt to clinch.
Nice takedown defense from Bellic. No joy for Fujiwara on that attempt.
That's three minutes gone in the round.
Fujiwara shoots in but doesn't get the takedown
and Bellic counters with a three punch combination, finished off with a leg kick. Nice work.
Bellic misses with a body kick.
Fujiwara is looking for the big counter here.
Bellic shoots in from a long way out. He's driving through with the takedown attempt and he eventually gets it, landing in Fujiwara's guard.

Fujiwara is edging up against the ropes. He's using the ropes to get back to his feet. Nice work there - the fighters are clinched.
Fujiwara manages to pull guard. Let's see whether he can land a sub off his back.
Fujiwara wants to hit a sweep here but Bellic passes into full mount! Oh no, disaster for Fujiwara there!
The crowd are loving this. Great action here.
Bellic tries to control but Fujiwara wriggling away.
The fighters are trapped in the ropes so we're going to have a reposition here. The ref calls for a break and repositions the fighters in the center of the ring.
That's four minutes gone in the round.
Fujiwara is wriggling around trying to escape.
Bellic trying to control but Fujiwara is having none of it.

Bellic stands up from the dominant position, so we're back on the feet.
The crowd thankful this round is nearly over.
Bellic moves into range and throws a lovely three punch combination.
And that's the end of the fight!
That was a close round. You could make an argument for either fighter but I would give it to Roman Bellic.
I think Bellic has won this one but let's see what the judges have to say. Over to the ring announcer for the scorecards.
Ladies and gentlemen, after 3 rounds of action, we go to the scorecards for a decision.
Judge Hirohito Nitta scores the fight for Roman Bellic!
Judge Yukihiro Yamamoto scores the fight for Kyoto Fujiwara!
Judge Shigeki Fujiwara scores the fight for Roman Bellic!
Roman Bellic wins by split decision!
|
|
|
|
|
|
|
|
|
|
|
|
|
|
|
|
|
|
|
|
|
|
|
| S |
C
A |
G |
S |
C
B |
G |
|
S |
C |
G |
|
energy
A | B |
|
hype
A | B |
|
pop
A | B |
|
mgr
A | B |
|
FIGHT
RATING
36% |
|
|
|
|
|
|
|
Undercard bout
|
Coming up we have a lightweight MMA rules bout between Toyotomi Hideyoshi (ranked 3840 p4p, 5614 weight class) and Yuanwei Fenfang (ranked 413 p4p, 483 weight class). Yuanwei Fenfang has the better chin. Will he look to stand and bang today?
 |
|
 |
| 170 cm
26
155
5 - 0 - 0 |
|
184 cm
20
162
0 - 0 - 0 |
Decent wrestler
Basic striking
Self confident |
|
Good wrestler
Counter fighter
Powerful |
|
| |
|
Ladies and gentlemen. This fight is 5 rounds, in the lightweight division.
Introducing the fighter to my left, fighting out of the red corner.
With a record of 5 - 0 - 0, fighting out of Tokyo, Toyotomi Hideyoshi!
And introducing the fighter to my right, fighting out of the blue corner.
With a record of 0 - 0 - 0, fighting out of Tokyo, Yuanwei Fenfang!
The judges for this bout are Yasuomi Hirokawa, Yukihiro Shimada and Hirohito Nitta.
The bell rings for round one and we are underway!
Hideyoshi darts in looking for a takedown but Fenfang gets double underhooks and turns Hideyoshi into the ropes.
Fenfang is loading up here, looking for a big counter of his own.
Hideyoshi has Fenfang pressed up against the ropes and is working for takedown. Fenfang manages to improve position though and keeps the fight standing.
Fenfang is trying to work out of this bad position, with his back against the ropes.
Fenfang manages to break the clinch.
Fenfang works the jab nicely.
Hideyoshi shoots for a double leg takedown but Fenfang sprawls well. He's pushed Hideyoshi's face into the mat and manages to get back to his feet relatively easily.
A little jabbing left from Fenfang on the counter but it doesn't find it's target.
That's three failed takedown attempts in the round for Toyotomi Hideyoshi. That's going to take a lot out of him.
Hideyoshi forces Fenfang back against the ropes and clinches.
Fenfang manages to break the clinch.
Fenfang throws a jab, cross combination which is slipped
and Hideyoshi counters with a shoot takedown into half guard.
We could do with one of the fighters taking the initiative a bit more on the ground - they're both waiting to capitalize on a mistake.
Fenfang trying to control but Hideyoshi postures up.
Fenfang might have to switch it up a bit here because his efforts to control Hideyoshi haven't been going to plan, at least at the current moment in time.
Hideyoshi is keeping good posture, landing some ground and pound.
That's one minute gone in the round.
Fenfang looking for submissions off his back.
Hideyoshi tries to stand but can't do so whilst Fenfang controls his leg.
Fenfang wants to get back to his feet.
Hideyoshi is just sitting in half guard, waiting for something to happen.
Fenfang is trying to stand.
Hideyoshi trying to mount his opponent but Fenfang defends it.
Fenfang looking for submissions off his back.

Hideyoshi is sneakily working for an arm triangle but Fenfang sees it coming and defends easily.
That's two minutes gone in the round.
Neither fighter has done anything of merit for a good minute or two here and the crowd are not happy about it.
Hideyoshi wants to control but Fenfang is keeping him busy.
Hideyoshi prevents Fenfang from standing back up.
Hideyoshi keeping composed on the top, looking to control the action.
Fenfang is looking for a sweep. Hideyoshi is wise to his cunning plan and keeps the top position.
Fenfang missing with punches from the bottom.
The referee has decided to stand the fighters back up, so we'll restart on the feet.
Hideyoshi doesn't succeed with the takedown
and Fenfang counters with a lovely straight right hand!
Hideyoshi is breathing heavily.
Fenfang scores with a sloppy punch to the body. Not much technique there but it did the business.
Fenfang feints a straight left to the body, then turns around with a flashy move and hits Hideyoshis jaw with a dramatic spinning back fist!
Fenfang lands with a nice combination. Hideyoshi backs away looking to recover.
That's three minutes gone in the round.
Fenfang digs a good body shot into Hideyoshi's ribs.
Hideyoshi tries to clinch
and Fenfang counters with a three punch combo that has Hideyoshi backing up. Hideyoshi nods at Fenfang to acknowledge the strikes.
 Hideyoshi is rocked! Hideyoshi is rocked!
Fenfang scores with a nice right hand.
Oh Hideyoshi is still all over the place! His legs are completely gone! Will he be able to recover?!!
Fenfang lands an uppercut out of nowhere! Hideyoshi falls backwards - clearly groggy! Fenfang dives in and finishes the fight with more strikes for a TKO finish!
Ladies and gentlemen, after 3:25 of round 1, we have a winner by way of TKO (Strikes). Yuanwei Fenfang!
|
|
|
|
|
|
|
|
|
|
|
|
|
|
|
|
|
|
|
|
|
|
|
| S |
C
A |
G |
S |
C
B |
G |
|
S |
C |
G |
|
energy
A | B |
|
hype
A | B |
|
pop
A | B |
|
mgr
A | B |
|
FIGHT
RATING
34% |
|
|
|
|
|
|
|
Undercard bout
|
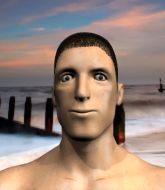
Coming up we have a super heavyweight MMA rules bout between Lachlan Peters (ranked 24823 p4p, 4515 weight class) and Ichinojo Takashi (ranked 238 p4p, 211 weight class). Over to our ring announcer for the fighter introductions!
 |
|
 |
| 194 cm
26
285
2 - 2 - 0 |
|
190 cm
25
300
0 - 0 - 0 |
BJJ Blue Belt
Solid boxing
Granite chin |
|
BJJ White Belt
Decent boxing
Powerful |
|
| |
|
Ladies and gentlemen. This fight is 3 rounds, in the super heavyweight division.
Introducing the fighter to my left, fighting out of the red corner.
With a record of 2 - 2 - 0, fighting out of Sydney, Lachlan Peters!
And introducing the fighter to my right, fighting out of the blue corner.
With a record of 0 - 0 - 0, fighting out of Tokyo, Ichinojo Takashi!
The judges for this bout are Ren Mimura, Tatsuya Matsuyama and Shigeki Sano.
The bell rings for round one and we are underway!
Peters is looking to clinch but Takashi is avoiding it.
Takashi leaves Peters with his face pressed against the mat as he sprawls beautifully, defending against a solid takedown attempt.
Takashi dodges the punch combination from Peters.
Peters throws a right and a left that Takashi avoids nicely.
Peters avoids a punch combination nicely.
Some wild striking there from Takashi.
We've had a slow start to the round here - hopefully the action picks up.
Peters shoots for a takedown but Takashi saw that one coming a mile off and avoided it easily.
Peters wants to clinch
and Takashi counters with a nice double leg into side control. Peters won't be happy with that.
Peters is trying to control Takashi's posture but Takashi avoids it.
That's one minute gone in the round.
Takashi is looking to take a break and control but Peters is keeping him honest, looking to work from the bottom.
Peters tries to improve position but can't.
Takashi looking to punish the body of his opponent here but Peters is avoiding damage well.
Takashi is looking to finish here, going for an Americana. Peters knows the correct defense though, so he's OK.
Takashi really doesn't want to stay on the ground with Peters. If he can't get it back to his feet, it's only a matter of time before he'll be tapping out.
Takashi tries for an arm triangle. That looks pretty tight to me. Is this one over!?! Possibly, maybe, no Takashi has let go of the choke. Obviously it wasn't as tight as we thought!
That's two minutes gone in the round.
A few boos can be heard. I'm sure they will multiply if the fighters don't pick up the pace.
Takashi working away.
Takashi trying to control the position but Peters is working away.
Takashi in side control, trying to ground and pound but not landing this time.
Peters struggling a bit here.
Takashi tries to land with some ground and pound but misses.
That's three minutes gone in the round.
Takashi tries to advance to mount but can't.
Takashi controlling the position.
The referee decides to stand the fighters back up.
Peters dives in and grabs Takashi's left leg, looking for a takedown. Takashi pushes down on Peters's head and hops out.
That's three failed takedown attempts in the round for Lachlan Peters. That's going to take a lot out of him.
Takashi throws a combination but it was largely blocked by Peters.
Takashi fails to land the takedown.
Peters was looking to counter that last move with a shot to the body but he didn't commit.
Takashi fails with a rather predictable takedown attempt.
Peters misses with a takedown attempt - Takashi sprawls well and throws a nice strike on the way out which just misses.
That's four minutes gone in the round.
Peters shakes his hands off, looking to compose himself, but takes a jab to the jaw whilst he does it.
Takashi throws a looping left and ducks down for a takedown. He's got his arms around Peters's waist but Peters gets an underhook and avoids the takedown by throwing Takashi off to one side.
Peters feinted there with a counter leg kick.
Peters tries a switch kick but it misses it's target.
Takashi throws a head kick that misses.
Takashi looks winded!
Peters stuffs the takedown attempt from Takashi. Takashi gets slowly back to his feet.
Peters is trying hard to land a takedown here. Takashi sprawls well and keeps this one on the feet.
Boooooooooooooooooooo!!! God, this has been a terrible round. Come on you two, sort yourselves out!
Peters tries to drive through with a takedown attempt but Takashi defends well and Peters ends up having to push Takashi into the ropes where they will battle it out in the clinch.
Takashi is trying to pull guard but being pressed up against the ropes enables Peters to keep the fight standing.
Takashi escapes the clinch and we're back to striking.
And that is the end of the round. The fighters go back to their corners.
Ichinojo Takashi dominated that round.
The fighters get back to their feet, the hooter sounds and we're back to the action!
Takashi closes the distance and looks for a trip takedown... aaaand he's got it - Takashi lands in his opponent's guard.

Peters manages to wriggle out and sneak his way back up to his feet, so the fighters are now clinched up against the ropes.
A head punch blocked on the inside by Takashi.
Takashi breaks the clinch and we return to the middle of the mat.
Peters shoots in and drives through. Takashi sprawls well.
Takashi throws a head kick that looked like it stung.
Takashi shoots in for a takedown. He's persisting with it as Peters sprawls well. Peters wins this battle and keeps the fight standing. Takashi gets slowly back to his feet.
Takashi is breathing heavily.
Takashi shoots in for a double leg but Peters sprawls well. That's going to sap some energy.
That's one minute gone in the round.
Peters throws a head kick but Takashi moves out of range.
Peters blocks a low kick nicely.
Takashi ducks down and throws a hook to the body but Peters moves away.
Ichinojo Takashi seems to be getting the better of the standup.
Takashi has a takedown stuffed.
Lachlan Peters has stuffed three takedown attempts in the round now. That's going to take a lot out of Ichinojo Takashi.
Peters tries for a takedown but Takashi sees it coming a mile off and avoids it easily.
Takashi with the counter takedown but Peters avoids it easily.
Takashi fails with an attempt to clinch.
A punch combination from Peters misses.
Takashi gets his takedown attempt stuffed easily
and Peters counters with a three punch combo that has Takashi backing up. Takashi nods at Peters to acknowledge the strikes.
Peters gets a clinch.
That's two minutes gone in the round.
Peters is trying to slow down the pace of the fight but Takashi is keeping busy.
Peters pulls guard successfully.
Takashi won't allow Peters to get back to his feet.
Takashi must be cautious of submissions here, given that his opponent has the superior Jiu Jitsu.
Takashi preventing the sweep.
Takashi trying to control the position from guard on top but Peters is wriggling around, looking for whatever he can.
Peters trying to keep a closed guard but Takashi is proving a slippery customer.
Takashi throws a big elbow that misses.
That's three minutes gone in the round.
Takashi prevents Peters from getting back to his feet.
Takashi slows down the pace of the fight for a moment. He'll need to remain active if he doesn't want to see the fight stood back up.
The referee decides to stand the fighters back up.
Peters throws a leg kick that misses.
Peters shoots in but doesn't get the takedown
and Takashi counters by moving into the clinch. Good anticipation by Takashi.
Takashi content to slow the pace in the clinch.
Takashi stops a takedown attempt from Peters.
Takashi has Peters pressed against the ropes, preventing Peters from circling away and getting back to striking at range.
Takashi decides to pull guard.
Takashi tries to land a sweep but no joy.
The fighters are tangled up in the ropes here. We might need a restart if the fighters can't break free themselves.
That's four minutes gone in the round.
Peters is pushing down on Takashi's leg trying to pass to half guard. Takashi is fighting to maintain full guard but Peters has managed to sneak the leg through.
Takashi tries to get to full guard but Peters has control of the leg.
Takashi trying to control here.
Takashi manages to get to full guard.
The crowd thankful this round is nearly over.
Takashi is trying to keep Peters in close.
And that is the end of the round. The fighters go back to their corners.
Lachlan Peters dominated that second round.
The minute break is over - no more time for sponges and pep talks - back to the action! Let's hear some noise people - this is the final round!
Takashi looks for a takedown but Peters sprawls well.
Peters is looking to clinch but Takashi is avoiding it.
Peters shoots in looking for a double leg takedown. Takashi defends it nicely.
Takashi darts in looking for a takedown but Peters gets double underhooks and turns Takashi into the ropes.
Peters looks for a takedown here. Will he get it? Takashi is fending him off so far but Peters persists. Nope, Takashi circles away and we're back to standing.
We've had a slow start to the round here - hopefully the action picks up.
Takashi fakes with an overhand right and moves in to clinch with Peters, pushing him back against the ropes.
Peters tries to pull guard but Takashi forces him back to his feet, against the ropes.
That's three failed takedown attempts in the round for Lachlan Peters. That's going to take a lot out of him.
Takashi escapes the clinch and we're back to striking.
Both fighters are breathing heavily.
Takashi tries to score a power double leg takedown but Peters sees that one coming and sprawls well. That will dishearten Takashi somewhat.
That's one minute gone in the round.
Takashi throws a head kick that misses and slips in the process. He scrambles back to his feet and the fighters circle.
A head kick misses from Peters.
Takashi drops down looking to force a counter takedown but Peters defends it well.
Nice sprawl there from Peters as Takashi shoots in.
Peters pulls out of a head kick attempt.
A nice side step and Takashi releases a counter shot to the body, but it doesn't find it's home.
Takashi drives through with a takedown into guard.
Peters wants to sweep here but Takashi controlling him for the moment.
Takashi trying to control but Peters is working from the bottom.
Peters seems keen to control Takashi's posture.
That's two minutes gone in the round.
Peters wants to stand but Takashi is controlling the position.
Peters looking for a sweep. Not yet Peters, not yet.
Takashi trying to control but Peters is working from the bottom.
The referee claps his hands together and tells the fighters to work.
Peters looking for a guillotine here but Takashi defends easily.
The referee has decided to stand the fighters back up, so we'll restart on the feet.
Takashi fails with a takedown attempt.
That's three minutes gone in the round.
Peters dives in and grabs Takashi's left leg, looking for a takedown. Takashi pushes down on Peters's head and hops out.
Takashi looks for a takedown. He's got it. We're now in half guard.
Peters is looking for a sweep. Takashi is wise to his cunning plan and keeps the top position.
Takashi is trying to control. Peters wants to improve his position but can't escape this time.
Peters is looking to improve his position.
Takashi is trying to control the action in half guard but Peters is working away on the bottom, looking perhaps to get back to full guard.
That's four minutes gone in the round.
Peters tries to kick Takashi off but Takashi keeps his base steady and stays in half guard.
Takashi trying to control the action but Peters is working from the bottom.
Nice strikes from Takashi there.
Peters keeping his head moving to avoid the ground and pound.
The referee has decided to stand the fighters back up, so we'll restart on the feet.
Peters goes for a double leg but Takashi avoids the attempt and the two fighters end up clinched against the ropes as Takashi continues to drive forward.
Takashi escapes the clinch and we're back to striking.
Boooooooooooooooooooo!!! God, this has been a terrible round. Come on you two, sort yourselves out!
Takashi closes the distance and clinches.
Peters has hold of a leg and is looking for a trip takedown. Takashi avoids it nicely though and we remain in the clinch.
Lachlan Peters has stepped it up - he knows he needs a finish here!
Ichinojo Takashi is fighting for a decision here - he's started to take the cautious approach.
Takashi just leaning against Peters, taking a breather.
And that's the end of the fight!
Ichinojo Takashi comfortably won the final round on my scorecard.
Well Takashi has outworked and out performed his opponent in all aspects of the game today. He was simply too good and the decision should be no more than a formality. Over to the ring announcer for the scorecards.
Ladies and gentlemen, after 3 rounds of action, we go to the scorecards for a decision.
Judge Ren Mimura scores the fight for Ichinojo Takashi!
Judge Tatsuya Matsuyama scores the fight for Ichinojo Takashi!
Judge Shigeki Sano scores the fight for Ichinojo Takashi!
Ichinojo Takashi wins by unanimous decision!
|
|
|
|
|
|
|
|
|
|
|
|
|
|
|
|
|
|
|
|
|
|
|
| S |
C
A |
G |
S |
C
B |
G |
|
S |
C |
G |
|
energy
A | B |
|
hype
A | B |
|
pop
A | B |
|
mgr
A | B |
|
FIGHT
RATING
33% |
|
|
|
|
|
|
|
Co-main event
|
Coming up we have a middleweight MMA rules bout between Masahito Tamura (ranked 24820 p4p, 4531 weight class) and Tommy Reynolds (ranked 551 p4p, 480 weight class). Masahito Tamura has the edge in experience - let's see if he can make that count tonight.
 |
|
 |
| 180 cm
21
195
2 - 1 - 0 |
|
191 cm
18
193
0 - 0 - 0 |
BJJ Blue Belt
Counter fighter
KO power |
|
BJJ Purple Belt
Brawler
Determined |
|
| |
|
Ladies and gentlemen. This fight is 3 rounds, in the middleweight division.
Introducing the fighter to my left, fighting out of the red corner.
With a record of 2 - 1 - 0, fighting out of Tokyo, Masahito Tamura!
And introducing the fighter to my right, fighting out of the blue corner.
With a record of 0 - 0 - 0, fighting out of Sydney, Tommy Reynolds!
The judges for this bout are Sosuke Kotani, Yukihiro Yamamoto and Yuuki Gou.
The bell rings for round one and we are underway!
Nice sprawl there from Tamura as Reynolds shoots in.
Reynolds throws a right and a left that Tamura avoids nicely.
Reynolds is looking for a takedown here. He's shot in and has managed to get it, finishing up in Tamura's half guard.
Reynolds is working for submissions here but there's nothing on.
Tamura might be looking to lock onto one of his opponent's long limbs for a submission, whilst we're on the ground.
Tamura throws a sloppy strike from the bottom. He's now off balance and Reynolds manages to pass to side control.
Tamura knows he needs to get back to his feet asap. He's simply no match for Reynolds on the ground.
Reynolds wants to work for a kimura but he's foiled early by Tamura, who protects the arm well.
We've had a slow start to the round here - hopefully the action picks up.
Tamura is looking to reverse the position.
That's one minute gone in the round.
Tamura gets one leg under and gets the fight to half guard.
Reynolds passes the guard and advances to mount!
Tamura tries to get back to half guard but can't.
Reynolds misses with a head shot.
Reynolds unloads with some shots from mount but Tamura bucks and avoids them well.
That's two minutes gone in the round.
Reynolds throwing shots from mount but they're not landing.
Tamura tries to get back to half guard but can't.
Reynolds trying to control but Tamura is having none of it.
Reynolds tries to stand up but he's trapped just for the moment.
Reynolds tries to control but Tamura wriggling away.
Reynolds with some aggressive grappling here. He's looking for submissions here, rather than waiting for the opportunity to counter.
That's three minutes gone in the round.
Tamura tries to reverse the position but Reynolds maintains control.
Reynolds fakes a shot to the body and cracks his opponent in the head. Nice ground and pound there!
Tamura is trying to escape the mount.
Reynolds scores with a couple of good head shots there.
That's four minutes gone in the round.
Reynolds trying to control but he's not successful this time.
Tamura is in all sorts of trouble here.
Reynolds looking to control but Tamura is working nicely, looking to advance position himself.
The fighters are trapped in the ropes so we're going to have a reposition here. The ref calls for a break and repositions the fighters in the center of the ring.
Reynolds lands with some strikes.
Tamura is trying to escape the mount.
Tamura is breathing heavily.
Boooooooooooooooooooo!!! God, this has been a terrible round. Come on you two, sort yourselves out!
Reynolds tries to control but Tamura wriggling away.
And that is the end of the round. The fighters go back to their corners.
Tommy Reynolds dominated that round.
That's the end of the interval. I'm sure that seemed a lot quicker than a minute for our two fighters! Back to the action.
Reynolds shoots in but Tamura avoids the takedown attempt easily.
Tamura shoots in looking for a single leg takedown. Reynolds is trying to defend but Tamura finishes it well and ends up in half guard. Let's see if he can advance position further.
Reynolds tries to get to full guard but Tamura has control of the leg.
We've had a slow start to the round here - hopefully the action picks up.
Reynolds trying to control but Tamura postures up.
Reynolds regains full guard. Nicely done.
That's one minute gone in the round.
Tamura trying to control the position from guard on top but Reynolds is wriggling around, looking for whatever he can.
Reynolds wants to control here, rather than go for any submissions from the bottom. At least for now.
Tamura trying to control the position from guard on top but Reynolds is wriggling around, looking for whatever he can.
The referee wants the fighters to be more active or he's going to reset them on the feet.
Tamura is holding a leg here, probably looking for an ankle lock - he drops back and goes for it! Reynolds is in trouble! Is it all over??? No! Reynolds has escaped and now he's on top!

Tamura is looking for a triangle here but Reynolds uses the submission attempt to pass into side control.
Both fighters are absolutely exhausted here.
That's two minutes gone in the round.
Reynolds trying to control the position but Tamura is working away.
Reynolds in side control, trying to ground and pound but not landing this time.
Tamura wants to get back to his feet.
That's three minutes gone in the round.
Reynolds wants to control but Tamura is keeping him busy.
Reynolds tries to stand but Tamura is controlling his head.
Tamura manages to land a sweep and he's now on top! Lovely Jiu Jitsu!
Tamura seems to be working for a kimura but Reynolds defends the submission attempt.
Reynolds regains full guard. Nicely done.
That's four minutes gone in the round.
Tamura trying to pass the guard. He's being very persistent here but Reynolds manages to land a sweep and now he's on top!
Reynolds has been the more effective fighter overall so far.
Tamura being controlled here, momentarily.
Reynolds trying to control but Tamura is working from the bottom.
Boooooooooooooooooooo!!! God, this has been a terrible round. Come on you two, sort yourselves out!
Reynolds controls the pace of the fight for a moment.
And that is the end of the round. The fighters go back to their corners.
Tommy Reynolds showed his class in that round. I'd imagine he'll take it on all the scorecards.
That's time! Back to the action! This is the final round!
Tamura avoids the clinch attempt nicely.
Reynolds throws the overhand right but ducks down into a quick takedown attempt. Tamura was covering up waiting for the punch and Reynolds finishes the takedown easily into guard.
Reynolds slows down the pace of the fight, as he sits in guard.
Tamura escapes his hips to the side and looks to be working for an armbar. Reynolds gives him a little smile and shakes his head. No chance.
Both fighters are breathing heavily.
We've had a slow start to the round here - hopefully the action picks up.
Reynolds throwing elbows and punches but not connecting, as Tamura works some decent striking defense from the bottom.
That's one minute gone in the round.
Reynolds passes Tamura's left leg - he's now in half guard.
Reynolds is looking for an arm triangle, whilst trying to pass to side control. Tamura doesn't seem that keen to cooperate though. No luck this time Reynolds.
Reynolds is looking for a kimura here.
That's two minutes gone in the round.
It looks like Reynolds is going to stand back up.
Reynolds wants to lay and pray for a moment but Tamura keeps working.
Neither fighter is being very active at the moment, with Reynolds in particular looking to stall.
That's three minutes gone in the round.
Tamura actively working from the bottom here.
Reynolds is working hard to pass the guard. He's done it - he's now in full mount! Trouble for Tamura!
Reynolds fakes a shot to the body and cracks his opponent in the head. Nice ground and pound there!
Reynolds has hold of an arm here, looking to extend it. He's committed to the armbar attempt here! Will he get it?! Yes! Tamura is forced to tap!
Ladies and gentlemen, after 3:59 of round 3, we have a winner by way of Submission (Armbar). Tommy Reynolds!
|
|
|
|
|
|
|
|
|
|
|
|
|
|
|
|
|
|
|
|
|
|
|
| S |
C
A |
G |
S |
C
B |
G |
|
S |
C |
G |
|
energy
A | B |
|
hype
A | B |
|
pop
A | B |
|
mgr
A | B |
|
FIGHT
RATING
31% |
|
|
|
|
|
|
|
Main event
|
Coming up we have a bantamweight MMA rules bout between Mitsuhiro Ishida (ranked 3698 p4p, 4691 weight class) and Antonio Ruas (ranked 212 p4p, 249 weight class). Antonio Ruas struggled to make weight for this fight. He only made it down to 137.0lbs at the first attempt and had to take the additional two hours to make the official bout weight. Let's see how much it's taken out of him. Mitsuhiro Ishida has the edge in experience - let's see if he can make that count tonight.
 |
|
 |
| 168 cm
26
142
3 - 0 - 0 |
|
175 cm
25
147
0 - 0 - 0 |
BJJ Purple Belt
Basic striking
Good chin |
|
BJJ White Belt
Excellent boxer
Heavy handed |
|
| |
|
Ladies and gentlemen. This fight is 5 rounds, for the bantamweight championship of the world!
Introducing the champion to my left, fighting out of the red corner.
With a record of 3 - 0 - 0, fighting out of Tokyo, Mitsuhiro Ishida!
And introducing the challenger to my right, fighting out of the blue corner.
With a record of 0 - 0 - 0, fighting out of Tokyo, Antonio Ruas!
The judges for this bout are Hirohito Nitta, Tatsuya Matsuyama and Sosuke Kotani.
The bell rings for round one and we are underway!
Ishida shoots in looking for a single leg takedown. Ruas is trying to defend but Ishida finishes it well and ends up in half guard. Let's see if he can advance position further.
Ruas pushes Ishida off but Ishida dives into side control.
Ruas is trying to get back to half guard. He's pushing on Ishida's leg. Oh but that's left an opportunity for Ishida! He's got an arm triangle... it looks tight! He's rotating and Ruas has tapped! This one is allllll over!
Ladies and gentlemen, after 0:22 of round 1, we have a winner by way of Submission (Arm Triangle). Mitsuhiro Ishida!
Mitsuhiro Ishida is the new bantamweight champion!
|
|
|
|
|
|
|
|
|
|
|
|
|
|
|
|
|
|
|
|
|
|
|
| S |
C
A |
G |
S |
C
B |
G |
|
S |
C |
G |
|
energy
A | B |
|
hype
A | B |
|
pop
A | B |
|
mgr
A | B |
|
FIGHT
RATING
100% |
|
|
|
|
|
|
|
|
|
|
