 |
NYFE: Combat Challenge NYC PBP Commentary |
Undercard bout
|
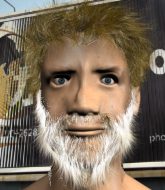
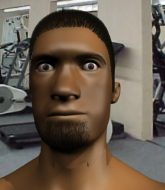
Coming up we have a super heavyweight MMA rules bout between Henry Hawk (ranked 0 p4p, 0 weight class) and Tarub Golteb (ranked 0 p4p, 0 weight class). Over to our ring announcer for the fighter introductions!
 |
|
 |
| 205 cm
25
300 lbs
1 - 1 - 0 |
|
180 cm
25
290 lbs
1 - 1 - 0 |
BJJ Brown Belt
Brawler
KO power |
|
BJJ Blue Belt
Decent boxing
Determined |
|
| |
|
Ladies and gentlemen. This fight is 3 rounds, in the super heavyweight division.
Introducing the fighter to my left, fighting out of the red corner.
With a record of
1 - 1 - 0, fighting out of New York, Henry Hawk!
And introducing the fighter to my right, fighting out of the blue corner.
With a record of
1 - 1 - 0, fighting out of New York, Tarub Golteb!
The judges for this bout are Dean Styles, Russell Pearce and Chad Campbell.

The bell rings for round one and we are underway!
Hawk shoots in with a takedown attempt and he has Golteb pinned against the cage. Golteb gets the underhooks and manages to circle away.
Hawk is trying hard to land a takedown here. Golteb sprawls well and keeps this one on the feet.
Golteb displays good takedown defense there as he swats away a double leg from Hawk.
That's three failed takedown attempts in the round for Henry Hawk. That's going to take a lot out of him.
Hawk misses with a series of wild punches.
Golteb doesn't manage to clinch there - Hawk circles away.
Golteb throws a sloppy head kick and Hawk moves out of range easily.
Hawk lands with a good body shot.

Golteb shoots in for a takedown and gets it. Oh and he's advanced to full mount straight away.
Golteb looks gassed!
Hawk is desperately trying to improve his position but Golteb has a good base and remains in mount.
Golteb throwing strikes but Hawk uses the opportunity to regain half guard.
Golteb really doesn't want to stay on the ground with Hawk. If he can't get it back to his feet, it's only a matter of time before he'll be tapping out.
Golteb trying to control the pace.
Hawk makes his way to full guard. A much better position for Hawk.

That's one minute gone in the round.
Golteb with a flurry of punches that miss.

Golteb has a momentary lapse of concentration, allowing Hawk to throw up a leg and lock on what appears to be a pretty tight triangle! Golteb is fighting it off but it's all too little too late - Hawk pulls down on the head and he's put Golteb to sleep! This one is all over!
Ladies and gentlemen, after 1:36 of round 1, we have a winner by way of Submission (Triangle). Henry Hawk!
|
|
|
|
|
|
|
|
|
|
|
|
|
|
|
|
|
|
|
|
|
|
|
| S |
C
A |
G |
S |
C
B |
G |
|
S |
C |
G |
|
energy
A | B |
|
hype
A | B |
|
pop
A | B |
|
mgr
A | B |
|
FIGHT
RATING
57% |
|
|
|
|
|
|
|
Undercard bout
|
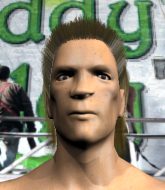
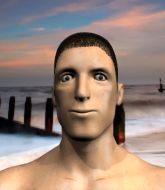
Coming up we have a welterweight MMA rules bout between Jon Lowry (ranked 0 p4p, 0 weight class) and Digger Murray (ranked 0 p4p, 0 weight class). Over to our ring announcer for the fighter introductions!
 |
|
 |
| 178 cm
25
179 lbs
0 - 0 - 0 |
|
184 cm
18
182 lbs
0 - 1 - 0 |
BJJ Purple Belt
Solid boxing
Very strong |
|
BJJ Blue Belt
Basic striking
Heavy handed |
|
| |
|
Ladies and gentlemen. This fight is 3 rounds, in the welterweight division.
Introducing the fighter to my left, fighting out of the red corner.
With a record of
0 - 0 - 0, fighting out of New York, Jon Lowry!
And introducing the fighter to my right, fighting out of the blue corner.
With a record of
0 - 1 - 0, fighting out of New York, Digger Murray!
The judges for this bout are Eddie Farnsworth, Joseph Jones and David Schapiro.
The bell rings for round one and we are underway!
Lowry rushes forward with a series of wild hooks but Murray moves out of range and avoids them all easily.

Lowry closes the distance and presses his opponent up against the cage.
Lowry tries to break free but Murray pushes him back against the cage.
A frustrated look appears on Murray's face as he tries to break the clinch.
Murray wants to break free. God knows he wants to breaaaak freeee.
Murray is trying to work out of this bad position, with his back against the cage.

Lowry breaks the clinch and we're back to striking at distance.
We've had a slow start to the round here - hopefully the action picks up.
Murray will need to close the distance a bit before he attacks - that leg kick was thrown from too far away.
Murray scores with a slapping inside leg kick.
Lowry scores with a nice one two combo and darts back out of range to avoid anything coming in the opposite direction.

It looks like Digger Murray has been cut.
Murray avoids a punch combination nicely.
That's one minute gone in the round.
Lowry blocks the body kick.
Murray attempts a low kick but it misses it's target.
Murray looking to take his opponent's legs away with the low kicks.
Murray finds nothing but air with that leg kick attempt.
Murray will need to tighten up his combinations if he doesn't want to gas himself out, swinging at thin air.
Lowry clinches up with Murray and pushes him back against the cage.
Murray wants to break free. God knows he wants to breaaaak freeee.
Lowry fails to pull the fight into his guard.
Murray wants to strike at distance but he can't break free of the clinch.

That's two minutes gone in the round.
A lull in the action here being met with boos from the crowd.
Murray is trying to work out of this bad position, with his back against the cage.
Murray is trying to break free.
Murray breaks the clinch.
Digger Murray seems to be the more aggressive standup fighter in this bout.
Murray falls off balance throwing a combination
and Lowry counters with a shoot takedown into half guard.
Lowry is keen to just control but Murray is a slippery customer.
Lowry is looking for a kimura but he's never going to get it from there.
Lowry content to sit in half guard and control for a moment.

That's three minutes gone in the round.
Lowry trying to control the action but Murray is working from the bottom.

That's four minutes gone in the round.
The crowd are hurling abuse towards the fighters... You can hardly blame them though because there isn't a lot going on in the fight.

The referee decides to stand the fighters back up, due to lack of activity on the part of Jon Lowry.
Lowry will need to tighten up his combinations if he doesn't want to gas himself out, swinging at thin air.
Lowry instigates a clinch.
Lowry can't break the clinch.
Murray is looking to break free of the clinch but Lowry has double underhooks.
Lowry tries to pull guard but can't drag his opponent to the mat. Murray just stands there and leans against the cage.
Lowry has Murray pressed against the cage, preventing Murray from circling away and getting back to striking at range.
And that�s the end of the round � the fighters go back to their corners.
Jon Lowry dominated that round.
The cut man is working on Digger Murray's cut.
OK. That's time! The bell goes and we're back to the action.

Murray throws a jab, cross combination which is slipped
and Lowry counters by clinching up.
Lowry breaks from the clinch.
Jon Lowry is looking to throw some combinations by the looks of things.
Murray throws a nice looking combination but Lowry bobs and weaves to avoid any damage.
A right-left combo lands from Murray.
Lowry misses with a takedown attempt. He shot from a bit too far out.
Lowry takes a shot to the nose. Hopefully that hasn't broken it.
Lowry lands a jab-cross combination.
Lowry is looking to chop away at Murray's legs.
Lowry throws a combination that misses
and Murray counters with a low kick, right behind Lowry 's knee.
Murray connects with a looping left hand that seems like it dazed Lowry momentarily.
Lowry moves out of range of the body kick from Murray.
Lowry gets a clinch.
Lowry working hard to break the clinch.
That's one minute gone in the round.
Murray working hard to break the clinch.
Murray is trying to break the clinch but Lowry has him pressed against the cage.
Murray looks like he'd prefer to be striking at range right now.
Lowry has managed to pull guard. Let's see whether he can work an aggressive guard. It will also be interesting to see what tactics Murray uses from the top position.
Lowry pulls Murray in close to his closed guard and prevents Murray from doing any damage or advancing position.
Lowry is working an open guard here, looking to improve his position. No doubt that will leave him open to counters but at least he's being more offensive.
That's two minutes gone in the round.
Neither fighter has done anything of merit for a good minute or two here and the crowd are not happy about it.
Lowry controlling Murray's posture.
Murray trying to control the position from guard on top but Lowry is wriggling around, looking for whatever he can.
That's three minutes gone in the round.
Murray postures up.
Lowry wants to sweep here but Murray controlling him for the moment.
Lowry looking for submissions from the bottom here. Moving his hips around, possibly looking for an armbar.
Lowry being controlled here, momentarily.
That's four minutes gone in the round.
The crowd are hurling abuse towards the fighters... You can hardly blame them though because there isn't a lot going on in the fight.
Murray wants to control from the top but Lowry keeps moving.
Murray avoids a guillotine attempt easily.
Murray really doesn't want to stay on the ground with Lowry. If he can't get it back to his feet, it's only a matter of time before he'll be tapping out.
Lowry tries to land a sweep but no joy.
And that�s the end of the round � the fighters go back to their corners.
Jon Lowry dominated that second round.
The cut man is working on Digger Murray's cut.
The fighters' corners scream their final instructions, as the referee calls time. Here we go, back to the action! This is the final round!

Murray avoids the clinch attempt nicely.
Murray throws a nice inside leg kick.
Murray misses with a wild combination.
Lowry closes the distance and clinches.
Lowry successfully pulls guard.
Lowry had isolated an arm as going for a kimura. Murray defends it easily.
Murray wants to control from the top but Lowry keeps moving.
That's one minute gone in the round.
Murray might have to switch it up a bit here because his efforts to control Lowry kaven't been going to plan, at least at the current moment in time.
Murray would like to get this fight back to the feet but can't get free from the closed guard.
Lowry avoiding any damage from the ground and pound.
Lowry pulls Murray in close to prevent any damage.
Digger Murray has stepped it up - he knows he needs a finish here!
That's two minutes gone in the round.
There's not a lot going on here and the crowd are letting the fighters know they're not willing to tolerate a lack of action.
Lowry wants to sweep but no luck.
Murray trying to control the position from guard on top but Lowry is wriggling around, looking for whatever he can.
It looks like we're going to have a standup here. Neither fighter is doing enough on the ground.
Lowry fakes with an overhand right and moves in to clinch with Murray, pushing him back against the cage.
Murray can't break the clinch.
Murray tries to circle away but Lowry has him pinned against the cage.
That's three minutes gone in the round.
Murray wants to break the clinch but can't.
Murray wants to strike at distance but he can't break free of the clinch.
Lowry jumps into guard, dragging Murray to the mat.
Lowry is working an open guard here, looking to improve his position. No doubt that will leave him open to counters but at least he's being more offensive.
Murray stands over his opponent and dives in with a flying punch! Lowry throws up his legs and catches Murray in a triangle! Oh this looks tight! Murray tries to escape but he's forced to tap! Wow, fantastic work there by Lowry! That came out of nowhere!
Ladies and gentlemen, after 3:57 of round 3, we have a winner by way of Submission (Triangle Choke). Jon Lowry!
|
|
|
|
|
|
|
|
|
|
|
|
|
|
|
|
|
|
|
|
|
|
|
| S |
C
A |
G |
S |
C
B |
G |
|
S |
C |
G |
|
energy
A | B |
|
hype
A | B |
|
pop
A | B |
|
mgr
A | B |
|
FIGHT
RATING
32% |
|
|
|
|
|
|
|
Undercard bout
|
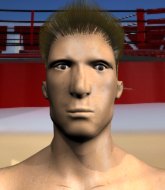
Coming up we have a lightweight MMA rules bout between Nathan Ames (ranked 0 p4p, 0 weight class) and Chris Phelps (ranked 0 p4p, 0 weight class). Ames comes to the cage accompanied by Break down the walls. These two fighters really are very evenly matched on the feet - it will be fascinating to see who can assert themselves in that aspect of the fight.
 |
|
 |
| 185 cm
19
166 lbs
4 - 0 - 0 |
|
178 cm
18
165 lbs
0 - 0 - 0 |
Good takedowns
Basic striking
Granite chin |
|
BJJ Blue Belt
Brawler
Granite chin |
|
| |
|
Ladies and gentlemen. This fight is 3 rounds, in the lightweight division.
Introducing the fighter to my left, fighting out of the red corner.
With a record of
4 - 0 - 0, fighting out of New York, Nathan Ames!
And introducing the fighter to my right, fighting out of the blue corner.
With a record of
0 - 0 - 0, fighting out of New York, Chris Phelps!
The judges for this bout are Lou da Vinci, Columbo Gatti and Alyssa Summers.
The bell rings for round one and we are underway!
Ames misses with a body shot. Nice footwork from Phelps.
Phelps tries for a takedown but Ames sees it coming a mile off and avoids it easily.
Phelps misses with a head kick.
Phelps shoots in for a takedown - he's clinched up with Ames but Ames pushes him off and we're back to square one.
Ames misses with a wild body shot.
A really sloppy takedown attempt there from Phelps.
Nathan Ames has stuffed three takedown attempts in the round now. That's going to take a lot out of Chris Phelps.
Ames shoots in with a lovely double leg takedown. Phelps manages to land in full guard to minimise the damage.
Ames throwing strikes but missing.
Phelps trying to keep a closed guard but Ames is proving a slippery customer.
Phelps wants to sweep but no luck.
Phelps really doesn't want to stay on the ground with Ames. If he can't get it back to his feet, it's only a matter of time before he'll be tapping out.
Ames content to strike from guard, landing some decent shots.
It looks like Chris Phelps has been cut.
Ames throwing strikes but missing.
That's one minute gone in the round.
Ames advances position into side control!
The fighters are pressed up against the cage, both looking to find a bit of space to work.
Ames is looking for a kimura. He might have it! No, Phelps has escaped the position, nice work there.
Ames misses with the ground and pound.
Ames misses with an attempted head punch from side control.
Phelps tries to buck Ames off but Ames is having none of it.
Phelps is trying to escape and get back to his feet.
Ames throws a strike aimed at the side of Phelps's head but Phelps avoids it well.
That's two minutes gone in the round.
Phelps is looking to regain half guard here but Ames keeps moving and retains side control.
Ames working hard here to secure a kimura but he's not really in the right position for it.
Ames is trying to land an Americana. He has the arm isolated but Phelps is keeping cool and he's avoided the danger for now.
Ames is working to tighten is grip on Phelps's neck. He's isolated an arm and is working for an arm triangle. Phelps has recognised the danger and is trying to turn with the submission but Ames is really squeezing tight and eventually Phelps passes out! Ames breaks the hold and jumps onto the cage to celebrate! Submission of the night, I'd say!
Ladies and gentlemen, after 2:55 of round 1, we have a winner by way of Submission (Arm Triangle). Nathan Ames!
|
|
|
|
|
|
|
|
|
|
|
|
|
|
|
|
|
|
|
|
|
|
|
| S |
C
A |
G |
S |
C
B |
G |
|
S |
C |
G |
|
energy
A | B |
|
hype
A | B |
|
pop
A | B |
|
mgr
A | B |
|
FIGHT
RATING
51% |
|
|
|
|
|
|
|
Undercard bout
|
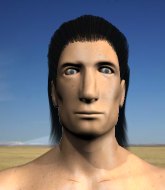
Coming up we have a light heavyweight MMA rules bout between Dayne Carter (ranked 0 p4p, 0 weight class) and Tommy Thigpen (ranked 0 p4p, 0 weight class). Dayne Carter has the edge in experience - let's see if he can make that count tonight.
 |
|
 |
| 190 cm
22
212 lbs
1 - 0 - 0 |
|
187 cm
25
217 lbs
0 - 1 - 0 |
BJJ White Belt
Excellent boxer
Very strong |
|
BJJ Blue Belt
Excellent boxer
Heavy handed |
|
| |
|
Ladies and gentlemen. This fight is 3 rounds, in the light heavyweight division.
Introducing the fighter to my left, fighting out of the red corner.
With a record of
1 - 0 - 0, fighting out of New York, Dayne Carter!
And introducing the fighter to my right, fighting out of the blue corner.
With a record of
0 - 1 - 0, fighting out of New York, Tommy Thigpen!
The judges for this bout are John Kavanagh, John Roberts and Eddie Farnsworth.
The bell rings for round one and we are underway!
Carter swinging wildly here.
Thigpen looks to score with a combo but nothing lands.
Carter fakes with the hands and throws a leg kick but Thigpen is out of range.
Thigpen walks into a left hand.
Carter fakes high and swings low for a body shot but Thigpen manages to avoid it.
Thigpen throws a head kick but Carter moves out of range.
Thigpen fakes a jab and throws a low kick but Carter checks it well.
Carter throws a lazy right hand but Thigpen sees it coming a mile off and sidesteps it easily.
Carter misses the shot to the body.
Carter throws a jab but it's blocked by Thigpen.
Carter throws a lazy right hand but Thigpen sees it coming a mile off and sidesteps it easily.
We've had a slow start to the round here - hopefully the action picks up.
Thigpen ducks under a wild hook from Carter.
Thigpen swings wildly with a couple of big hooks
and Carter counters with a good right hand that lands right on the jaw.
Jab from Carter.
Thigpen blocks a head kick by Carter.
Thigpen throws a body kick that misses.
That's one minute gone in the round.
Carter throws an overhand right that lands on Thigpen's shoulder, as Thigpen tries to avoid the shot.
Carter jabbing away but nothing is landing.
Carter pushing out the jab but it's not landing.
Carter throws a looping overhand right but Thigpen ducks down to avoid it.
Carter lands a head shot.
Dayne Carter seems to be the more aggressive standup fighter in this bout.
Carter chopped to the floor by a nice leg kick but he springs right back up before Thigpen can pounce on him.
Thigpen connects with a lovely jab that went straight through the gap between Carter's hands.
Thigpen moves into the clinch successfully.
Carter's corner calls for him to break the clinch, which he does.
Carter lands a jab followed by a nice looking cross.
It looks like Tommy Thigpen has been cut.
Thigpen connects with a leg kick. He turned his hip over nicely there.
Carter throws a jab, cross combination which is slipped
and Thigpen counters with a leg kick.
Thigpen showing good head movement there, avoiding the strikes from Carter.
Carter will need to tighten up his combinations if he doesn't want to gas himself out, swinging at thin air.
That's two minutes gone in the round.
Thigpen is looking to clinch.
Carter throws the left hand but Thigpen avoids the punch easily.
Thigpen looking to land some kicks to the body here.
Carter throws a right hand that Thigpen ducks under and follows up with a left that Thigpen also avoids with ease.
Thigpen falls off balance throwing a combination
and Carter counters with a straight punch to the midsection.
Fantastic stuff here - a very entertaining period of action, which has drawn cheers from the crowd.
Carter lands with a nice body punch.
Dayne Carter is looking to keep the fight on the feet at all costs.
Thigpen takes a jab on the nose there. A little bit of blood seems to be coming out. Hopefully that won't affect his breathing.
Thigpen shoots in looking for a double leg takedown. Carter defends it nicely.
Carter throws a head kick but Thigpen moves out of range.
Thigpen throws a body kick that sends a sickening thudding noise reverberating around the arena.
That's three minutes gone in the round.
Thigpen swings away with a leg kick that misses.
Carter throws a combination that misses
and Thigpen counters with an inside leg kick.
Carter throws a left and a right that both miss
and Thigpen counters with a slapping leg kick.
No joy there for Carter, who threw a few shots but didn't land.
Carter lands a head shot.
Thigpen goes to the watering hole and comes back with a big thumbs up from the judges as he scores a three punch combo.
Thigpen works over Carter's head and body with a nice combination.
Carter throws the left hand but Thigpen avoids the punch easily.
Carter throws a jab but it's blocked by Thigpen.
Carter gets cracked with a nice right hand there by Thigpen.
Carter walks straight into an uppercut. Luckily it didn't land flush.
Carter throws a nice looking combination but Thigpen bobs and weaves to avoid any damage.
Carter showing good head movement there, avoiding the strikes from Thigpen.
Carter throws out a token jab with nothing on it.
That's four minutes gone in the round.
A solid leg kick lands there for Thigpen.
Thigpen showing good head movement there, avoiding the strikes from Carter.
Carter dodges the punch combination from Thigpen.
Carter throws a good cross that connects.
Thigpen misses with a few strikes there.
Thigpen scores with a slapping inside leg kick.
Thigpen tries a switch kick but it misses it's target.
Thigpen fails in his attempt to clinch.
As the round comes to an end the crowd are showing their appreciation for a great round of action.
Thigpen throws a mid kick that lands with a slap.
Carter moves out of range as Thigpen throws a body kick.
Carter swings wildly with a couple of big hooks
and Thigpen counters with a thumping low kick.
And that�s the end of the round � the fighters go back to their corners.
Dayne Carter dominated that round.
The cut man is working on Tommy Thigpen's cut.
The minute break is over - no more time for sponges and pep talks - back to the action!
Carter tries to check the leg kick but that clearly hurt him.
Carter misses with a looping right.
Carter thows a left - swing and a miss!
Carter misses with a jab to the body
and Thigpen counters with a thumping low kick.
Carter throws a jab, cross combination which is slipped
so Thigpen counters with a double leg into guard. Good agility.
Carter looking for submissions off his back, moving his hips, looking for an opening.
Thigpen not doing a lot at the moment. He'll have to show some more aggression or the fight will get stood up.
Carter looking for submissions off his back, moving his hips, looking for an opening.
Both fighters are absolutely exhausted here.
Thigpen wants to control from the top but Carter keeps moving.
That's one minute gone in the round.
Carter has a loose triangle. He'll be looking to tighten that up but Thigpen can see exactly what he's planning and manages to posture up and free himself.
Carter had isolated an arm as going for a kimura. Thigpen defends it easily.
Thigpen controls the pace of the fight for a moment.
That's two minutes gone in the round.
The crowd are showing their displeasure at the lack of action as loud boos ring out around the arena.
The referee has ruled that neither fighter is active enough on the ground and has stood them back up.
Thigpen's corner calls for a 1,2 combination and Thigpen duly obliges.
Thigpen throws a head kick that half lands.
A shot to the body from Carter misses
and Thigpen counters with a good, hard body kick but Carter shrugs it off.
Carter is the aggressor but that punch slipped nicely by Thigpen.
Carter throws a leg kick that is checked
and Thigpen counters with a lovely shot to the body.
A right-left combo lands from Thigpen.
Thigpen tries to clinch there but Carter circles away.
Thigpen tries to clinch up but Carter circles away and keeps his distance.
A slow jab from Carter misses its intended target.
Carter gets taken down but at least he's managed to land in guard.
Carter keeping moving, preventing Thigpen from controlling successfully.
That's three minutes gone in the round.
Carter can't do much from the bottom at the moment, as Thigpen controls the pace.
Carter working a defensive guard here.
That's four minutes gone in the round.
Neither fighter has done anything of merit for a good minute or two here and the crowd are not happy about it.
Carter has a loose triangle. He'll be looking to tighten that up but Thigpen can see exactly what he's planning and manages to posture up and free himself.
Thigpen trying to control the position from guard on top but Carter is wriggling around, looking for whatever he can.
Thigpen looking to sit in guard and control but Carter gets the butterfly guard and sweeps. He's now in the guard on the top.
Carter looking to pass the guard.
And that�s the end of the round � the fighters go back to their corners.
Tommy Thigpen showed his class in that round. I'd imagine he'll take it on all the scorecards.
The cut man is working on Tommy Thigpen's cut.
That's the end of the round. The referee orders the cornermen out of the cage so we can get back down to business. So, we enter the final round. Let's see if either fighter can bring us a finish, or whether we're going to the judges scorecards.
Thigpen looks to land a body kick but Carter moved away.
Carter is pinned up against the cage taking some big shots here. The referee is looking closely deciding whether he should stop the fight.
Carter is hobbling a little on that front leg after taking quite a few leg kicks so far in this fight.
Thigpen is trying hard to land a takedown here. Carter sprawls well and keeps this one on the feet.
Carter darts in and out, connecting with a jab.
Thigpen ducks low and lands a nice hook to the body of his opponent.
Thigpen tries to bum rush Carter with a series of wild strikes but Carter uses good footwork to avoid the assault.
Tommy Thigpen seems to be getting the better of the standup.
Thigpen looking to take his opponent's legs away with the low kicks.
Carter lands a glancing blow to the side of Thigpen's head.
Carter swings wildly with a couple of big hooks
and Thigpen counters with a nice jab to the body that keeps Carter thinking.
Thigpen defending well as Carter loads up on a big left hand.
Carter looks to land a right hand but Thigpen moved out of range.
Carter swings wildly with a couple of big hooks
and Thigpen counters with a good low kick that Carter was not able to check.
Thigpen lands with a nice body punch.
Thigpen on the wrong end of a vicious looking body shot.
That's one minute gone in the round.
Carter throws a combination that misses
and Thigpen counters with a leg kick.
Both fighters are breathing heavily.
Thigpen showing good head movement there, avoiding the strikes from Carter.
Carter swings wildly with a couple of big hooks
and Thigpen counters with a series of strikes. Carter will be more careful next time no doubt.
Thigpen throws a one two combo.
Carter pushing out the jab but it's not landing.
Carter slaps away a takedown attempt from Thigpen, before circling back to the center of the mat.
Carter misses with a hook to the body
and Thigpen counters with a left and a right that stings Carter.
Carter swings for the body but Thigpen moves out of range.
Carter misses with a combination
and Thigpen moves into the clinch.
Thigpen tries to circle away but Carter has him pinned against the cage.
A frustrated look appears on Thigpen's face as he tries to break the clinch.
That's two minutes gone in the round.
Thigpen has had enough of the clinch but Carter keeps him there for the moment.
Thigpen manages to break the clinch.
Carter connects with a good right hand that stumbles Thigpen. Thigpen circles away out of range and recomposes himself.
Thigpen throws a series of strikes that have Carter backpedaling.
Thigpen moves out of range as Carter strikes.
Thigpen throws a wild combination but nothing lands.
Carter swings and misses with a hook to the body.
Carter throws a jab, cross combination which is slipped
and Thigpen counters by moving into the clinch. Good anticipation by Thigpen.
Thigpen is looking to break free of the clinch but Carter has double underhooks.
That's three minutes gone in the round.
Carter escapes the clinch and we're back to striking.
A nice combination there by Thigpen.
Carter loads up on a big right hand but Thigpen slips the punch.
Thigpen dances in quickly and lands a nice inside leg kick on Carter. That did some damage!
Thigpen stalks Carter and leaps in with a furious combination of punches. Uppercuts and crosses smash into Carter's face. Carter staggers backwards, shaken.
Carter dodges the punch combination from Thigpen.
Thigpen falls off balance throwing a combination
and Carter counters with a one-two to the body.
Carter throws a combination that misses
and Thigpen counters with a one-two to the body.
Thigpen throws a jab to the body, straight down the pipe. Boom. That sent Carter stumbling backwards but he manages to regain his composure quickly.
Dayne Carter is looking to throw some combinations by the looks of things.
Thigpen tries to clinch up.
That's four minutes gone in the round.
Thigpen scores a trip takedown into side control. Nice.
An elbow from Thigpen crashes against the mat.
Thigpen trying to control the action but Carter is working from the bottom.
Thigpen has control of an arm but Carter manages to advance to Thigpen's back!
Carter controlling well, preventing Thigpen from escaping the position.
The crowd applaud the fighters efforts here as the round comes to an end.
Carter has the hooks sunk in and you can see the will to fight slowly draining out of Thigpen's body.
This has been an exciting period of action!
And that's the end of the fight!
Tommy Thigpen comfortably won the final round on my scorecard.
Well Thigpen has outworked and out performed his opponent in all aspects of the game today. He was simply too good and the decision should be no more than a formality. Over to the ring announcer for the scorecards.
Ladies and gentlemen, after 3 rounds of action, we go to the scorecards for a decision.
Judge John Kavanagh scores the fight 28:29
Judge John Roberts scores the fight 28:29
Judge Eddie Farnsworth scores the fight 28:29
In favor of your winner, by unanimous decision... Tommy Thigpen!
|
|
|
|
|
|
|
|
|
|
|
|
|
|
|
|
|
|
|
|
|
|
|
| S |
C
A |
G |
S |
C
B |
G |
|
S |
C |
G |
|
energy
A | B |
|
hype
A | B |
|
pop
A | B |
|
mgr
A | B |
|
FIGHT
RATING
61% |
|
|
|
|
|
|
|
Undercard bout
|
|
|
|
Co-main event
|
Coming up we have a heavyweight MMA rules bout between Tommy Reddinger (ranked 0 p4p, 0 weight class) and Nick Wonder (ranked 0 p4p, 0 weight class). Over to our ring announcer for the fighter introductions!
 |
|
 |
| 190 cm
21
270 lbs
2 - 0 - 0 |
|
198 cm
19
275 lbs
0 - 1 - 0 |
BJJ White Belt
Excellent boxer
Granite chin |
|
BJJ Blue Belt
Brawler
Heavy handed |
|
| |
|
Ladies and gentlemen. This fight is 3 rounds, in the heavyweight division.
Introducing the fighter to my left, fighting out of the red corner.
With a record of
2 - 0 - 0, fighting out of New York, Tommy Reddinger!
And introducing the fighter to my right, fighting out of the blue corner.
With a record of
0 - 1 - 0, fighting out of New York, Nick Wonder!
The judges for this bout are David Schapiro, Jorge Garcia and Dean Styles.
The bell rings for round one and we are underway!
Wonder with poor footwork there. He got himself in a bit of a tangle, enabling Reddinger to score with a decent uppercut.
It looks like Nick Wonder has been cut.
This has been an exciting period of action!
Wonder throws a sloppy head kick and Reddinger moves out of range easily.
Reddinger blocks a head kick by Wonder.
Reddinger lands a body shot.
Wonder looks gassed!
Reddinger lands an uppercut out of nowhere! Wonder falls backwards - clearly groggy! Reddinger dives in and finishes the fight with more strikes for a TKO finish!
Ladies and gentlemen, after 0:13 of round 1, we have a winner by way of TKO (Strikes). Tommy Reddinger!
|
|
|
|
|
|
|
|
|
|
|
|
|
|
|
|
|
|
|
|
|
|
|
| S |
C
A |
G |
S |
C
B |
G |
|
S |
C |
G |
|
energy
A | B |
|
hype
A | B |
|
pop
A | B |
|
mgr
A | B |
|
FIGHT
RATING
100% |
|
|
|
|
|
|
|
Main event
|
Coming up we have a welterweight MMA rules bout between Hercules Belvedere (ranked 0 p4p, 0 weight class) and Ricky Burke (ranked 0 p4p, 0 weight class). Belvedere comes to the cage accompanied by Lupe Fiasco - Superstar. Hercules Belvedere has the edge in experience - let's see if he can make that count tonight.
 |
|
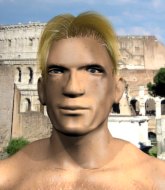 |
| 185 cm
21
180 lbs
3 - 0 - 0 |
|
188 cm
25
175 lbs
1 - 0 - 0 |
BJJ Brown Belt
Counter striker
Cuts easily |
|
BJJ White Belt
Decent boxing
Heavy handed |
|
| |
|
Ladies and gentlemen. This fight is 3 rounds, in the welterweight division.
Introducing the fighter to my left, fighting out of the red corner.
With a record of
3 - 0 - 0, fighting out of New York, Hercules Belvedere!
And introducing the fighter to my right, fighting out of the blue corner.
With a record of
1 - 0 - 0, fighting out of New York, Ricky Burke!
The judges for this bout are Joseph Jones, Russell Pearce and Bruno Lombardi.
The bell rings for round one and we are underway!
Burke is looking for a takedown here. He's shot in and has managed to get it, finishing up in Belvedere's half guard.
Burke wants to lay and pray for a moment but Belvedere keeps working.
The fighters are pressed up against the cage, both looking to find a bit of space to work.
Burke trying to pass the guard but Belvedere defending well.
Burke looks to land a strike but Belvedere avoids it nicely and regains full guard.
Belvedere is trying to control the position from the bottom.
Belvedere is really struggling to control Burke but he's trying to hold on to the position.
Burke trying to control but Belvedere is working from the bottom.
The referee decides to stand the fighters back up.
Burke takes a step towards his opponent and connects with a left hand, before circling away.
It looks like Hercules Belvedere has been cut.
That's one minute gone in the round.
Burke will need to tighten up his combinations if he doesn't want to gas himself out, swinging at thin air.
Burke swings for the body but Belvedere moves out of range.
Burke misses with a wild body shot.
Burke misses with a wild body shot.
Burke darts in and lands a nice takedown into half guard.
Belvedere regains full guard. Nicely done.
Burke really doesn't want to stay on the ground with Belvedere. If he can't get it back to his feet, it's only a matter of time before he'll be tapping out.
Burke wants to control from the top but Belvedere keeps moving.
Burke pressing down on his opponent's thigh, looking to pass guard. Belvedere is keeping the position for now.
Burke sitting in guard here, content to control.
Belvedere is active off his back here, looking for submissions.
That's two minutes gone in the round.
Belvedere is working an open guard here, looking to improve his position. No doubt that will leave him open to counters but at least he's being more offensive.
Belvedere utilising some decent striking defenses from the guard, preventing the ground and pound.
Burke throws a sloppy strike and Belvedere has hooked up an armbar on the loose arm! He's turned and extended fully! Burke is forced to tap! Great BJJ from Belvedere!
Ladies and gentlemen, after 2:40 of round 1, we have a winner by way of Submission (Armbar). Hercules Belvedere!
|
|
|
|
|
|
|
|
|
|
|
|
|
|
|
|
|
|
|
|
|
|
|
| S |
C
A |
G |
S |
C
B |
G |
|
S |
C |
G |
|
energy
A | B |
|
hype
A | B |
|
pop
A | B |
|
mgr
A | B |
|
FIGHT
RATING
55% |
|
|
|
|
|
|
|
|
|
|

