 |
The Island Season 14, 135 lbs, Round 1 PBP Commentary |
Undercard bout
|
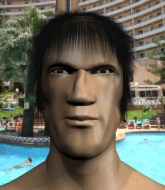
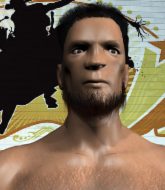
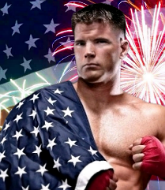
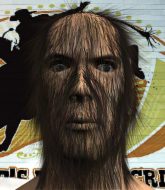
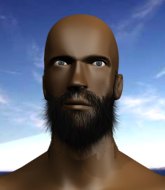
Coming up we have a bantamweight MMA rules bout between Kamil Decaukas (ranked 2617 p4p, 525 weight class) and Jeremy King (ranked 162 p4p, 37 weight class). King has chosen Hail to the King - Avenged Sevenfold as his entrance music. Jeremy King has the power to score a knockout today if he connects clean with Kamil Decaukas's chin.
 |
|
 |
| 165 cm
27
140
6 - 4 - 0 |
|
169 cm
27
135
7 - 2 - 0 |
Good wrestling
Basic striking
Very strong |
|
BJJ Blue Belt
Excellent MT
Granite chin |
|
| |
|
Ladies and gentlemen. This fight is 3 rounds, in the bantamweight division.
Introducing the fighter to my left, fighting out of the red corner.
With a record of 6 - 4 - 0, fighting out of The Island, Kamil Decaukas!
And introducing the fighter to my right, fighting out of the blue corner.
With a record of 7 - 2 - 0, fighting out of The Island, Jeremy King!
The judges for this bout are Bart Greer, Daniel Franklin and Dirk Anderson.

The bell rings for round one and we are underway!
Decaukas swings widly with a right hand
and King counters with a good right hand that lands right on the jaw.
Decaukas uses good head movement to avoid the hook from King.

King gets caught on his heels momentarily as he allows Decaukas to score an easy takedown into full guard.
Decaukas wants to control from the top but King keeps moving.
King tries to land a sweep but no joy.
The ref warns both fighters not to hold the cage as they work up against the meshing.
Decaukas trying to move into half guard but instead King has managed to sweep!

Decaukas is trying to control the position but King postures up.
We've had a slow start to the round here - hopefully the action picks up.

Decaukas working from the bottom, still in full guard. He's managed to get a loose triangle. King doesn't seem to be doing much to defend here, obviously he feels comfortable in the position. King manages to throw the legs off his shoulder and he's back into guard - no problem.
Decaukas is looking for a triangle but King pushes his legs off easily.

That's one minute gone in the round.
King got a little sloppy there for a moment and Decaukas has worked his way into a loose triangle - can he finish it?! No, King has managed to get both his arms back between Decaukas's legs - danger averted.
King looking to control the position here, rather than advance.
King must be cautious of submissions here, given that his opponent has the superior Jiu Jitsu.
Decaukas is looking for a triangle but King pushes his legs off easily.
Decaukas working for a triangle but King defends it easily.
Decaukas trying to keep a closed guard but King is proving a slippery customer.

That's two minutes gone in the round.
Decaukas seems keen to control rather than go for a submission, at least for now.
Decaukas working for submissions but it's allowed King to get to half guard.
Decaukas is trying is best to control the position here.
Decaukas's ground tactics aren't going to win him many fans. Let's hope he's got fireworks for us if he gets back to his feet because he's not doing much on the ground.

King escapes and gets back to his feet.
Decaukas scores with a takedown into King's guard.
Decaukas thinks about going for a leg but decides against it, in order to maintain the position.

That's three minutes gone in the round.
Decaukas is holding a leg here, probably looking for an ankle lock - he drops back and goes for it! King is in trouble! Is it all over??? No! King has escaped and now he's on top!
Decaukas has his foot on King's thigh. He's trying to push off and get in position for a triangle, I think. King works his way back into a safe position though.
Decaukas isolates an arm and boxes in a triangle. King stacks Decaukas on his neck as he steps over and passes to the side. He's now in a much more dominant position where he can look to do some serious damage. Nice move by King!
Decaukas struggling a bit here.
Decaukas tries to buck King off but King is having none of it.

That's four minutes gone in the round.
You can see the frustration on Decaukas's face, being in this tough position on the bottom.
Decaukas is looking for a sweep.
Decaukas wants to control but King postures up.
King tries to get to his feet but he's trapped momentarily.
Decaukas manages to land a sweep and he's now on top! Lovely Jiu Jitsu!
Decaukas frees up his trapped foot and advances to mount.
Decaukas tries to control but King wriggling away.
Decaukas goes for an armbar but he's fallen flat on his backside there and now King is on top in guard.
And that is the end of the round. The fighters go back to their corners.
That was a close round but I would say that Kamil Decaukas will probably get the nod.
Well, the break between rounds is over. Let's get back to the scrappin!

Decaukas tries to clinch
letting King counter with a right hand.
King connects with a nice looking jab.
King moves away from the strike by Decaukas.
No luck for Decaukas with that takedown attempt.
Decaukas shoots in for a double leg but King sprawls well. That's going to sap some energy.
King throws a nice looking combination but Decaukas bobs and weaves to avoid any damage.
Decaukas misses with a lunging right hand
and King counters with a good right hand that lands right on the jaw.
 Decaukas is rocked! Decaukas is rocked!
King misses with the combination.
Oh Decaukas is still all over the place! His legs are completely gone! Will he be able to recover?!!
Decaukas gets caught by a big overhand right and goes down! King gets on top of him and starts throwing some serious punches until the ref intervenes and stops the fight!
Ladies and gentlemen, after 0:42 of round 2, we have a winner by way of TKO (Strikes). Jeremy King!
A relieved looking Jeremy King thanked the fans for their support and gave the usual line about them being amazing. They seemed to believe that he actually meant it.
|
|
|
|
|
|
|
|
|
|
|
|
|
|
|
|
|
|
|
|
|
|
|
| S |
C
A |
G |
S |
C
B |
G |
|
S |
C |
G |
|
energy
A | B |
|
hype
A | B |
|
pop
A | B |
|
mgr
A | B |
|
FIGHT
RATING
41% |
|
|
|
|
|
|
|
Undercard bout
|
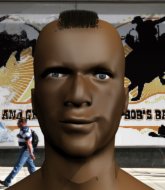
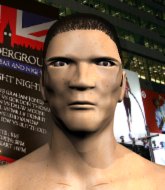
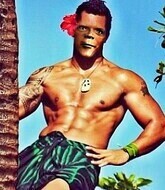
Coming up we have a bantamweight MMA rules bout between Bhutan Bro (ranked 1051 p4p, 1206 weight class) and Toshiro Hitsugaya (ranked 0 p4p, 88 weight class). Toshiro Hitsugaya has the eye of the tiger tonight.
 |
|
 |
| 181 cm
25
145
9 - 1 - 0 |
|
170 cm
27
146
7 - 4 - 0 |
BJJ White Belt
Great elbows
Granite chin |
|
Decent wrestler
Excellent MT
Good gas tank |
|
| |
|
Ladies and gentlemen. This fight is 3 rounds, in the bantamweight division.
Introducing the fighter to my left, fighting out of the red corner.
With a record of 9 - 1 - 0, fighting out of The Island, Bhutan Bro!
And introducing the fighter to my right, fighting out of the blue corner.
With a record of 7 - 4 - 0, fighting out of The Island, Toshiro Hitsugaya!
The judges for this bout are Peter Branson, Sandra Marshall and Winston Alpacca.
The bell rings for round one and we are underway!
Hitsugaya misses with the combination.

Bro moves into the clinch.
Hitsugaya is looking to break free of the clinch but Bro has double underhooks.
Hitsugaya lands a right hand that snaps the head of Bro backwards.
Hitsugaya looks like he'd prefer to be striking at range right now.
Bro throws a head punch that misses.
Bro definitely looks more muscular than last time we saw him fight.
Hitsugaya lands with a right to the head.
Bro pushes off an throws an elbow but Hitsugaya leans to the side and avoids it. We're back to clinching against the cage.
An uppercut on the inside fails to land for Bro.
Hitsugaya can't break the clinch.
Bro throws an elbow but it's blocked.
Bro throws a punch but it's blocked by Hitsugaya.
Bro fails to land with a short punch on the inside.
We've had a slow start to the round here - hopefully the action picks up.
Hitsugaya is trying to push Bro away but Bro has him pressed against the cage, so he's going nowhere.
Hitsugaya wants to get back to striking at distance but Bro won't allow it.

Hitsugaya escapes the clinch and we're back to striking.
Bro tries to clinch up.
Hitsugaya throws out a token jab with nothing on it.
Bro moves in looking to clinch but Hitsugaya pushes him off.
That's one minute gone in the round.
Bro tries to clinch but Hitsugaya moves away
and Hitsugaya counters with a stiff right hand.
Bro takes a jab on the nose. He smiles like he loves it and keeps coming.
Hitsugaya's coach down at Elite Island Training was telling us pre-fight that they have been working on Hitsugaya's balance. Obviously they view that as a key factor in the outcome of this fight.
Bhutan Bro seems to be the more aggressive standup fighter in this bout.
Bro tries to clinch but is not successful on this occasion.
Bro clinches.
Hitsugaya tries to break free but Bro pushes him back against the cage.
A head punch on the inside from Bro fails to land.
Bro lands a nice elbow from the clinch.
Bro swings wildly with an uppercut but Hitsugaya uses good head movement to avoid it.
Bro swings away with an uppercut that misses.
Hitsugaya working hard to break the clinch.
Hitsugaya blocks a couple of punches on the inside.
Bro throws a head punch that misses.
Hitsugaya blocks an elbow strike.
Bro misses with a short punch on the inside.
Hitsugaya's corner calls for him to break the clinch, which he does.
Hitsugaya scores with the left hand. Bro knows he should have avoided that one.
Bro has taken the fight to the clinch.
Wooooo! Give it up for these two warriors! They are putting on a show!
Bro fails to land with a short punch on the inside.
Bro misses with an elbow over the top.
A right hand to the body from Hitsugaya.
That's two minutes gone in the round.
Hitsugaya is leaning against Bro and scores with a nice uppercut to the body.
Bro throws a punch but it's blocked by Hitsugaya.
Nice body punch from Hitsugaya - that landed with a thud.
Bro pushes off and fires off an elbow that misses, before clinching up again, against the cage.
Hitsugaya throws a blind hook that connects with the side of Bros head.
Bro really does look like a pencil wearing a pair of gloves. Let's hope he has a gameplan to suit that ridiculous body shape.
Bro throws a punch but it's blocked by Hitsugaya.
Hitsugaya escapes the clinch and we're back to striking.
Bro tries to clinch but fails miserably
and Hitsugaya counters with a good right hand that lands right on the jaw.
Bro tries to clinch but is not successful on this occasion.
Hitsugaya doesn't fully commit to the body shot counter.
Hitsugaya will need to tighten up his combinations if he doesn't want to gas himself out, swinging at thin air.
Hitsugaya throws a right and a left that both miss.
Bro tries to clinch up against the cage, rushing in to close the distance. Hitsugaya manages to break the clinch and circles back to the middle of the mat.
Bro closes the distance and pushes Hitsugaya back into the cage.
Hitsugaya avoids the elbow strike from Bro, against the cage.
Bro swings away with an uppercut that misses.
With the two fighters working up against the cage, Bro just misses with a elbow thrown towards Hitsugaya's brow.
A short left from Hitsugaya.
A short right from Hitsugaya.
That's three minutes gone in the round.
Hitsugaya manages to break the clinch.
Bro tries to clinch but Hitsugaya is having none of it.
Bro tries to clinch but is not successful on this occasion.
Hitsugaya misses the jab.
Bro tries to clinch but is not successful on this occasion.
A telegraphed right hand from Hitsugaya misses the target.
Bro moves in looking to clinch but Hitsugaya pushes him off.
A telegraphed right hand from Hitsugaya misses the target.
Bro is looking to take this fight into the clinch.
Hitsugaya avoids the clinch attempt nicely.
Bro doesn't manage to clinch there - Hitsugaya circles away.
Hitsugaya keeps the fight on the outside.
Bro tries to clinch there but Hitsugaya circles away.
Bro moves in looking to clinch but Hitsugaya pushes him off.
A slow jab from Hitsugaya misses its intended target.
Hitsugaya ducks down and throws a hook to the body but Bro moves away.
Bro moves into the clinch.
Bro working aggressively here.
Bro creates a bit of distance and throws an elbow that only just misses.
That's four minutes gone in the round.
Hitsugaya lands a right uppercut that snaps the head of Bro backwards.
A head punch on the inside from Bro fails to land.
Hitsugaya breaks the clinch and we return to the middle of the mat.
Bro doesn't manage to clinch there - Hitsugaya circles away.
Bro is looking to clinch but Hitsugaya is avoiding it.
Hitsugaya swings away with a counter right hand but no contact made.
Bro moves in looking to clinch but Hitsugaya pushes him off.
Hitsugaya ducks down and throws a hook to the body but Bro moves away.
Bro tries to clinch but is not successful on this occasion.
Fantastic stuff here - a very entertaining period of action, which has drawn cheers from the crowd.
Bro moves in looking to clinch but Hitsugaya pushes him off.
Bro takes a shot right to the bread basket.
The fight stays on the outside here - Bro looks like he's thinking about clinching though.
Bro wants to clinch up but Hitsugaya keeps it at a distance.
Hitsugaya thows a left - swing and a miss!
Bro takes a jab right on the nose. That must have hurt but he shrugs his shoulders and looks to return the favor.
Bro fails with an attempt to clinch.
Hitsugaya looks like he wants to counter punch here.
Hitsugaya misses with a wild body shot.
Bro is looking to take this fight into the clinch.
Hitsugaya throws out a counter right but Bro avoids it with no problem.
Bro slips a jab from Hitsugaya.
And that is the end of the round. The fighters go back to their corners.
Toshiro Hitsugaya dominated that round.
The fighters get back to their feet, the hooter sounds and we're back to the action!
Bro is looking to take this fight into the clinch.
Bro fails in his attempt to clinch.
Hitsugaya tests Bro's chin there with a solid looking shot.
Bro fails in his attempt to clinch.
Bro moves in looking to clinch but Hitsugaya pushes him off.
Bro forces Hitsugaya back against the cage and clinches.
Hitsugaya blocks an uppercut.
Bro has a couple of punches blocked by Hitsugaya.
Hitsugaya blocks an elbow strike from Bro.
A frustrated look appears on Hitsugaya's face as he tries to break the clinch.
Bro throws an elbow but it misses.
Bro throws an elbow but it's blocked.
Bro throws an elbow but it's blocked.
We've had a slow start to the round here - hopefully the action picks up.
Bro misses with an elbow over the top.
Bro misses with some punches.
Bro throws a nice elbow but it doesn't land.
An uppercut on the inside fails to land for Bro.
An uppercut to the body lands inside from Hitsugaya.
Hitsugaya breaks the clinch.
That's one minute gone in the round.
Bro moves away from the strike by Hitsugaya.
Hitsugaya throws a jab but it's blocked by Bro.
Hitsugaya lands with a hook. Bro tried to avoid it but it clipped the top of his head.
Hitsugaya lands a straight punch to the body, keeping Bro at a distance.
Hitsugaya keeps the fight on the outside.
Bro fails with an attempt to clinch.
Hitsugaya misses with the combination.
Hitsugaya avoids the clinch attempt nicely.
Bro tries to clinch up but Hitsugaya circles away and keeps his distance.
Hitsugaya swings away with a counter right hand but no contact made.
Bro tries to close the distance and clinch but Hitsugaya swats him to one side with an open hand palm strike and circles away.
Hitsugaya looks like he wants to counter punch here.
Bro slips a jab from Hitsugaya.
Toshiro Hitsugaya seems to be getting the better of the standup.
Hitsugaya keeps the fight on the outside.
Bro uses decent footwork to sidestep a right hand from Hitsugaya.
Hitsugaya avoids the clinch attempt nicely.
Hitsugaya looked like he wanted to counter with a punch but didn't throw it.
Hitsugaya scores with a nice looking left hook and follows it up with an uppercut!
Bro takes a big uppercut there. He seems a bit wobbly but no, he's OK.
Fantastic stuff here - a very entertaining period of action, which has drawn cheers from the crowd.
Bro fails in his attempt to clinch.
A little jabbing left from Hitsugaya on the counter but it doesn't find it's target.
Bro tries to close the distance and clinch up against the cage but Hitsugaya paws at him with a jab and circles away.
Hitsugaya unleashes a big counter combination but Bro bobs and weaves and avoids any damage.
Hitsugaya thows a left - swing and a miss!
That's two minutes gone in the round.
Bro wants to clinch up but Hitsugaya keeps it at a distance.
Bro is looking to clinch.
Hitsugaya might want to mix his strikes up a bit more. He's just going for head shots at the moment and that can become a bit predictable.
Bro tries to clinch but Hitsugaya is having none of it.
Hitsugaya fakes and then throws a beautiful body shot. Bro looks a bit winded and takes a step backwards to take a breath.
A cross from Hitsugaya lands.
Hitsugaya connects with a jab.
Hitsugaya cracks Bro with a right hand to the side of the head.
Bro instigates a clinch.
Hitsugaya tries to land a shot to the body but it's blocked.
Hitsugaya blocks an elbow strike.
Hitsugaya breaks the clinch and we return to the middle of the mat.
Bro fails with an attempt to clinch.
Hitsugaya lands a head shot.
Nice jab there from Hitsugaya.
Bro tries to clinch but is not successful on this occasion.
Hitsugaya keeps the fight on the outside.
Hitsugaya is moving around nicely and scores here with a single head shot.
Hitsugaya keeps the fight on the outside.
Bro wants to clinch up but Hitsugaya keeps it at a distance.
That's three minutes gone in the round.
Hitsugaya circles away from the clinch attempt.
Bro tries to close the distance and clinch up against the cage but Hitsugaya paws at him with a jab and circles away.
Bro walks straight into an uppercut. Luckily it didn't land flush.
Hitsugaya has been the more effective fighter overall so far.
Hitsugaya throws a shot to the body.
Bro tries to close the distance and clinch up against the cage but Hitsugaya paws at him with a jab and circles away.
Hitsugaya swings away with a counter right hand but no contact made.
Bro tries to close the distance and clinch but Hitsugaya swats him to one side with an open hand palm strike and circles away.
Hitsugaya throws a shot to the body.
Hitsugaya lands a body shot.
Hitsugaya scores with a shot to the body.
Hitsugaya fails to land with a series of punches.
Bro tries to clinch but is not successful on this occasion.
Hitsugaya scores with a three punch combo!
 It looks like Bhutan Bro has been cut. It looks like Bhutan Bro has been cut.
Fantastic stuff here - a very entertaining period of action, which has drawn cheers from the crowd.
Bro tries to clinch but Hitsugaya is having none of it.
Hitsugaya circles away from the clinch attempt.
A countering left hand to the body from Hitsugaya misses.
Bro fails in his attempt to clinch.
And an attempted straight right on the counter from Hitsugaya! But no joy.
Hitsugaya swats away the attempt to clinch by Bro.
The fight moves into the clinch position.
Bhutan Bro has scored more points in the clinch so far.
That's four minutes gone in the round.
Bro pushes off and fires off an elbow that misses, before clinching up again, against the cage.
Bro misses with the head strike.
Hitsugaya manages to break the clinch.
Hitsugaya misses with a hook. Bro ducked under it nicely.
Bro tries to close the distance and clinch up against the cage but Hitsugaya paws at him with a jab and circles away.
Hitsugaya circles away from the clinch attempt.
Bro tries to clinch but is not successful on this occasion.
Bro wants to clinch up but Hitsugaya keeps it at a distance.
Hitsugaya throws out a counter right but Bro avoids it with no problem.
Hitsugaya dips down and scores with a jab to the body.
Hitsugaya swats away the attempt to clinch by Bro.
Bro tries to clinch there but Hitsugaya circles away.
Hitsugaya swats away the attempt to clinch by Bro.
Bro tries to close the distance and clinch up against the cage but Hitsugaya paws at him with a jab and circles away.
Bro tries to clinch
and Hitsugaya counters with a straight right hand.
Bro tries to clinch but Hitsugaya is having none of it.
And that is the end of the round. The fighters go back to their corners.
Toshiro Hitsugaya showed his class in that round. I'd imagine he'll take it on all the scorecards.
The cut man is working on Bhutan Bro's cut.
That's time! Bro's corner gives him a slap on the ass as he gets ready to fight. This is the final round!

Hitsugaya throws a series of punches but Bro avoids them all with ease.
Bro tries to counter by clinching up but Hitsugaya breaks away and moves out of range.
Bro fails in his attempt to clinch.
Bro avoids the body shot from Hitsugaya.
Bro tries to clinch up against the cage, rushing in to close the distance. Hitsugaya manages to break the clinch and circles back to the middle of the mat.
Hitsugaya paws at his opponent with the jab and then lunges in with a straight, right on the button.
Bro tries to clinch up against the cage, rushing in to close the distance. Hitsugaya manages to break the clinch and circles back to the middle of the mat.
Bro uses good head movement to avoid the hook from Hitsugaya.
Bro moves in looking to clinch but Hitsugaya pushes him off.
Bro tries to close the distance and clinch up but Hitsugaya swats him away and circles back towards the center.
A nice combination there by Hitsugaya.
Hitsugaya throws a hard body shot but it just misses.
Bro wants to clinch up but Hitsugaya keeps it at a distance.
Bro has taken the fight to the clinch.
Hitsugaya blocks an elbow strike from Bro.
Hitsugaya wants to break free but Bro has control.
Hitsugaya breaks from the clinch.
Hitsugaya circles away from the clinch attempt.
A big right from Hitsugaya misses.
Hitsugaya misses with a straight right.
That's one minute gone in the round.
Bro avoids the body shot from Hitsugaya.
Bro wants to clinch.
Hitsugaya missing with a left hand there. Bro was out of range so wasted energy throwing that one.
Bro tries to clinch but Hitsugaya moves out of range.
It seemed like Hitsugaya was going to counter with the hook but didn't fully commit to it.
Bro closes the distance looking to clinch
and Hitsugaya cracks him with a counter punch right on the button.
Hitsugaya lunges at Bro with a hook that half lands and is half blocked by Bro's hand.
Hitsugaya throws out a loose jab but Bro uses good head movement to avoid it.
Hitsugaya throws an uppercut from half a mile away. Bro sees it coming and avoids it easily.
Bro doesn't manage to clinch there - Hitsugaya circles away.
Hitsugaya lands a jab. Then a cross. Then finally a nice hook to the body. Good work there by Hitsugaya.
Hitsugaya fails to land with a series of punches.
Bro wants to take advantage of his opponent's missed offense by moving into the clinch.
A decent looking cross lands there for Hitsugaya.
Hitsugaya swings away but doesn't land with a series of punches.
Hitsugaya looks to throw the jab but Bro is out of range.
Fantastic stuff here - a very entertaining period of action, which has drawn cheers from the crowd.
Bro moves in looking to clinch but Hitsugaya pushes him off.
That's two minutes gone in the round.
Bro wants to clinch.
Hitsugaya swats away the attempt to clinch by Bro.
Hitsugaya avoids the clinch attempt nicely.
A cross from Hitsugaya lands.
Bro fails in his attempt to clinch.
Hitsugaya punishes Bro's body with a nice straight punch.
Hitsugaya thows a left - swing and a miss!
Hitsugaya looks to score with a jab to the body but Bro is just out of range.
Hitsugaya swats away the attempt to clinch by Bro.
Bro avoids the body shot from Hitsugaya.
Bro tries to close the distance and clinch but Hitsugaya swats him to one side with an open hand palm strike and circles away.
Bro is looking to clinch.
Bro wants to clinch.
That's three minutes gone in the round.
Bro ducks under a wild hook from Hitsugaya.
Hitsugaya connects with a lovely right hand, straight down the pipe.
Hitsugaya avoids the clinch attempt nicely.
A jab from Hitsugaya misses.
Bro displays some good footwork, moving neatly out of range as Hitsugaya throws out the jab.
Bro moves in looking to clinch but Hitsugaya pushes him off.
Bro moves to clinch but Hitsugaya breaks away
and Hitsugaya counters nicely by changing levels and landing a hook to the body.
Bro tries to clinch but Hitsugaya is having none of it.
Bro tries to clinch up but Hitsugaya circles away and keeps his distance.
Toshiro Hitsugaya is fighting for a decision here - he's started to take the cautious approach.
Hitsugaya keeps the fight on the outside.
Bro is looking to clinch but Hitsugaya is avoiding it.
Bro moves out of range as Hitsugaya strikes.
Hitsugaya lands with a nice body punch.
Hitsugaya throws a big shot that misses.
Bro takes a shot to the nose. Hopefully that hasn't broken it.
Bro tries to clinch but Hitsugaya moves out of range.
Bro wants to clinch up but Hitsugaya keeps it at a distance.
Hitsugaya lands with an uppercut that bounces Bro off the cage and back into range.
That's four minutes gone in the round.
Hitsugaya uses good footwork to get in and out, landing a nice hook.
This has been an exciting period of action!
Bro takes a body punch that cleary hurt but he's trying not to show any weakness.
Hitsugaya throws out a loose jab but Bro uses good head movement to avoid it.
Hitsugaya throws a jab but it's blocked by Bro.
Bro tries to close the distance and clinch up but Hitsugaya swats him away and circles back towards the center.
The fight stays on the outside here - Bro looks like he's thinking about clinching though.
Bro tries to close the distance and clinch up against the cage but Hitsugaya paws at him with a jab and circles away.
Bro is looking to clinch but Hitsugaya is avoiding it.
Bro tries to clinch up
and Hitsugaya counters with a shot to the ribs. That looked like it hurt.
Hitsugaya swats away the attempt to clinch by Bro.
Bro tries to close the distance and clinch up but Hitsugaya swats him away and circles back towards the center.
Hitsugaya ducks down and throws a hook to the body.
Bro tries to close the distance and clinch up but Hitsugaya swats him away and circles back towards the center.
Bhutan Bro has stepped it up - he knows he needs a finish here!
Bro missing with a left hand there. Hitsugaya was out of range so wasted energy throwing that one.
Hitsugaya swings away with a counter right hand but no contact made.
The fighters circling - Bro throws out the jab but it was never going to land.
And that's the end of the fight!
Toshiro Hitsugaya comfortably won the final round on my scorecard.
I've got Hitsugaya winning every round here. Surely the decision will go his way and he'll pick up a well deserved decision victory. Over to the ring announcer for the scorecards.
Ladies and gentlemen, after 3 rounds of action, we go to the scorecards for a decision.
Judge Peter Branson scores the fight for Toshiro Hitsugaya!
Judge Sandra Marshall scores the fight for Toshiro Hitsugaya!
Judge Winston Alpacca scores the fight for Toshiro Hitsugaya!
Toshiro Hitsugaya wins by unanimous decision!
A very excited looking Toshiro Hitsugaya rambled incoherently for about 5 minutes post fight about how awesome he is. It was kinda funny for a while but then everyone got annoyed.
|
|
|
|
|
|
|
|
|
|
|
|
|
|
|
|
|
|
|
|
|
|
|
| S |
C
A |
G |
S |
C
B |
G |
|
S |
C |
G |
|
energy
A | B |
|
hype
A | B |
|
pop
A | B |
|
mgr
A | B |
|
FIGHT
RATING
70% |
|
|
|
|
|
|
|
Undercard bout
|
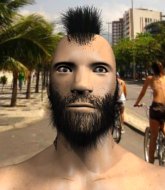
Coming up we have a bantamweight MMA rules bout between George Porter (ranked 2303 p4p, 934 weight class) and Buzz Bullard (ranked 0 p4p, 66 weight class). These two fighters really are very evenly matched on the feet - it will be fascinating to see who can assert themselves in that aspect of the fight.
 |
|
 |
| 165 cm
25
138
6 - 2 - 0 |
|
170 cm
27
143
8 - 4 - 0 |
BJJ White Belt
Excellent MT
Experienced |
|
BJJ Purple Belt
Solid Muay Thai
Powerful |
|
| |
|
Ladies and gentlemen. This fight is 3 rounds, in the bantamweight division.
Introducing the fighter to my left, fighting out of the red corner.
With a record of 6 - 2 - 0, fighting out of The Island, George Porter!
And introducing the fighter to my right, fighting out of the blue corner.
With a record of 8 - 4 - 0, fighting out of The Island, Buzz Bullard!
The judges for this bout are Sandra Marshall, Peter Branson and Winston Alpacca.
The bell rings for round one and we are underway!
Porter looks to land a right hand but Bullard moved out of range.
A jab lands there for Porter.
Nice cross by Bullard.
Porter ducks down and throws a hook to the body but Bullard moves away.
Bullard changes levels for a counter takedown but doesn't follow through with his attempt.

Bullard gets a clinch.
Bullard throws a punch but it's blocked by Porter.
Bullard looks more muscular than last time we saw him. He must have been on the weights.
Bullard blocking some punches.
Bullard digs a right hand underneath Porter's ribcage. Porter let out a lung full of air as it connected.
Bullard goes for a body shot but it's blocked.
Porter misses with a hook to the ribs.
Good anti-grappling being displayed by Bullard as Porter tries to tie him up.

Bullard wants the takedown. Porter is fighting it off but Bullard persists and manages to bring the fight to the ground, ending up in Porter's guard against the cage.
Bullard trying to land body shots but he keeps hitting the mat.
Bullard scoring with some ground and pound.
Porter looking to control.
Porter knows he needs to get back to his feet asap. He's simply no match for Bullard on the ground.
Bullard controlling from the guard. I say controlling but really, he's stalling.
That's one minute gone in the round.
Bullard passes into half guard.
Bullard working Porter over with strikes.
Bullard passes the half guard and he's now in mount! Big trouble for Porter!
Bullard has the superior BJJ but he's also working some ground strikes into his gameplan.

Bullard looking for a guillotine from mount but Porter is having none of it.
The fighters are pressed up against the cage, both looking to find a bit of space to work.
Bullard working away from the top, dropping strikes.
Bullard fakes a shot to the body and cracks his opponent in the head. Nice ground and pound there!
Porter on his back here. We all know that wrestlers don't like being on their back so let's see if Porter tries to get out of the position.
Bullard is working on an americana here. Ooh, that looks pretty nasty! Nope, Porter has managed to escape the submission attempt.
That's two minutes gone in the round.
The crowd are loving this. Great action here.
A nice elbow there by Bullard.
Bullard punching from mount but Porter doing a good job of avoiding damage.
The ref warns both fighters not to hold the cage as they work up against the meshing.
Porter tries to hold on but Bullard pushes him away.
Bullard is in full mount, looking to secure a guillotine but Porter is surviving well by controlling Bullard's body position as best he can.
Porter tries to lock up and control but Bullard gives him a forearm to the face and pushes him away.
Porter in a bad spot here, taking shots to the head.
Bullard scores with a couple of good head shots there.
Bullard lands an elbow that was bordering on illegal but the referee lets it go with a warning.
Bullard lands with some vicious ground and pound - can Porter hang on?
That's three minutes gone in the round.
Bullard is in full mount, looking to secure a guillotine but Porter is surviving well by controlling Bullard's body position as best he can.
Bullard trying to control but Porter is having none of it.
Bullard scoring with some good ground and pound from mount here. Will he manage to finish Porter?
Bullard working from mount. He moves in close and looks like he might be going for an arm triangle... He's hopped off to the side and he's transitioned into an Anaconda choke. Porter turning a nasty shade of purple. He's refusing to tap but he's gone! He's out! The ref rips Bullard off and cradles Porter's limp body as Bullard celebrates with his corner.
Ladies and gentlemen, after 3:50 of round 1, we have a winner by way of Submission (Anaconda Choke). Buzz Bullard!
A very excited looking Buzz Bullard made sure he remembered to thank all the fans both in the arena and on the internet. He said all the coolest people spend all day on MMA websites, which got a big reaction.
|
|
|
|
|
|
|
|
|
|
|
|
|
|
|
|
|
|
|
|
|
|
|
| S |
C
A |
G |
S |
C
B |
G |
|
S |
C |
G |
|
energy
A | B |
|
hype
A | B |
|
pop
A | B |
|
mgr
A | B |
|
FIGHT
RATING
58% |
|
|
|
|
|
|
|
Undercard bout
|
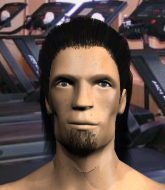
Coming up we have a bantamweight MMA rules bout between Willie Dixon (ranked 634 p4p, 2578 weight class) and Mirko Zoccato (ranked 46 p4p, 0 weight class). Willie Dixon has the edge in experience - let's see if he can make that count tonight.
 |
|
 |
| 160 cm
20
138
8 - 2 - 1 |
|
167 cm
26
145
5 - 0 - 0 |
Good wrestling
Counter fighter
Granite chin |
|
Powerful takedowns
Counter fighter
Powerful |
|
| |
|
Ladies and gentlemen. This fight is 3 rounds, in the bantamweight division.
Introducing the fighter to my left, fighting out of the red corner.
With a record of 8 - 2 - 1, fighting out of The Island, Willie Dixon!
And introducing the fighter to my right, fighting out of the blue corner.
With a record of 5 - 0 - 0, fighting out of The Island, Mirko Zoccato!
The judges for this bout are Daniel Franklin, Santiago Holmes and Sandra Marshall.
The bell rings for round one and we are underway!
Dixon throws an uppercut from half a mile away. Zoccato sees it coming and avoids it easily.
Dixon jabs Zoccato to the body, keeping him at a distance.
Dixon jabbing away but nothing is landing.
Dixon throws a body shot but no joy.
Zoccato lets it all go there with a big combo counter but none of the punches connected.
Dixon misses with a wild body shot.
We've had a slow start to the round here - hopefully the action picks up.
Dixon throws a hard body shot but it just misses.
Zoccato throws a big counter head kick but Dixon avoids it with no problem.
Zoccato blocks a jab.
Dixon takes a swing at Zoccato's ribcage but misses.
Zoccato is loading up here, looking for a big counter of his own.
That's one minute gone in the round.
Dixon misses with a wild body shot.
Dixon connects with a body shot.
Dixon misses with a body shot.
Dixon swings and misses with a hook to the body.
Dixon lands a nice hook to Zoccato's body. Zoccato takes it in his stride and looks to land his own strikes.
Dixon jabbing away but nothing is landing.
Dixon misses with a body shot.
Despite the aggression on Zoccato's face he doesn't fully commit to the counter.
That's two minutes gone in the round.
Dixon misses with a body shot.
Zoccato swings away with a counter right hand but no contact made.
Dixon sizes up Zoccato with a pawing jab and scores with a straight right down the middle.
Dixon scores with a punch to the head.
Dixon's corner calls for a 1-2. Dixon obliges with the 1 part as he scores the single shot and moves back out of range.
Dixon swings wildly with a right hand that was never going to find it's target.
Zoccato doesn't fully commit to the body shot counter.
Zoccato uses decent footwork to sidestep a right hand from Dixon.
Zoccato appears to be waiting to throw a counter punch to the body.
Dixon misses with a body shot. Nice footwork from Zoccato.
Dixon moves out of the way of the counter high kick fromZoccato.
That's three minutes gone in the round.
Dixon is moving around nicely and scores here with a single head shot.
Dixon ducks low and lands a nice hook to the body of his opponent.
Dixon throws a body shot but no joy.
Zoccato looks like he wanted to counter with a high kick but didn't throw it.
Dixon misses with a body shot.
Dixon definitely looks more muscular than last time we saw him fight.
A swing and a miss from Dixon.
Zoccato looked like he wanted to counter with a punch but didn't throw it.
Dixon is looking to wear down Zoccato with body shots, infact he's throwing more body shots than head shots at the moment.
Dixon misses with a straight right.
Dixon lands with a hook. Zoccato tried to avoid it but it clipped the top of his head.
Zoccato's coach down at Elite Island Training was telling us pre-fight that they have been working on Zoccato's balance. Obviously they view that as a key factor in the outcome of this fight.
Dixon thows a left - swing and a miss!
As Dixon backs off Zoccato throws a huge counter combo but Dixon manages to avoid it all.
That's four minutes gone in the round.
A looping hook to the body misses from Dixon. Zoccato does a little dance to reset his feet.
Zoccato is clearly looking to counter with head kicks.
Dixon tries to land with a swinging hook to the body but Zoccato was well out of range. Poor timing from Dixon.
Zoccato looks like he wants to counter punch here.
Dixon lands a right hook to the body.
Zoccato defending well as Dixon loads up on a big left hand.
Zoccato throws a counter combo.
Zoccato ducks under an overhand right and circles away with a smile on his face.
Zoccato throws out a counter right but Dixon avoids it with no problem.
The crowd thankful this round is nearly over.
Dixon smiles there as he lands a nice right hand right on the button.
Dixon misses with a body shot. Nice footwork from Zoccato.
As Dixon backs off Zoccato throws a huge counter combo but Dixon manages to avoid it all.
And that is the end of the round. The fighters go back to their corners.
Willie Dixon dominated that round.
That's time! Back to the action!
Dixon waving his hands out in front of him, looking to distract Zoccato.
A big right from Dixon misses.
Dixon scores with a jab.
Zoccato avoids a lazy jab quite easily.
Zoccato takes a body punch that cleary hurt but he's trying not to show any weakness.
We've had a slow start to the round here - hopefully the action picks up.
Dixon throws a hard body shot but it just misses.
Despite the aggression on Zoccato's face he doesn't fully commit to the counter.
Both these guys seem content to just stand up and trade with each other but Zoccato might want to think about changing up his gameplan a bit because over the course of the fight, Dixon has got the better of the exchanges.
Dixon's corner calls for a 1-2. Dixon obliges with the 1 part as he scores the single shot and moves back out of range.
Dixon misses with a body shot. Nice footwork from Zoccato.
Zoccato looks like he wants to counter punch here.
That's one minute gone in the round.
Dixon fakes high and swings low for a body shot but Zoccato manages to avoid it.
Zoccato is loading up here, looking for a big counter of his own.
Dixon throws a hook to the body but it doesn't connect.
Dixon connects with a lovely jab that went straight through the gap between Zoccato's hands.
Dixon misses with a body shot.
Zoccato is clearly looking to counter with head kicks.
Willie Dixon is winning the standup battle so far.
Dixon throws a hook but Zoccato blocks it.
Zoccato is looking for the big counter here.
Dixon misses with a straight right.
Dixon misses with a wild body shot.
Zoccato is looking for the big counter here.
That's two minutes gone in the round.
Zoccato keeping a good distance there, avoiding the body shot.
Mirko Zoccato is looking to throw some combinations by the looks of things.
Zoccato slips a straight right by Dixon.
Zoccato unleashes a big counter combination but Dixon bobs and weaves and avoids any damage.
Dixon looks to score with a jab to the body but Zoccato is just out of range.
Despite the aggression on Zoccato's face he doesn't fully commit to the counter.
Dixon just misses with a punch to the body.
Nice straight punches there by Dixon. You know Roy Jones Jr respects the hands of Dixon.
Zoccato avoids the body shot from Dixon.
Zoccato unleashes a big counter combination but Dixon bobs and weaves and avoids any damage.
Dixon pushing out the jab but it's not landing.
Zoccato is looking for the big counter here.
That's three minutes gone in the round.
A telegraphed right hand from Dixon misses the target.
Zoccato unleashes a big counter combination but Dixon bobs and weaves and avoids any damage.
Zoccato walks into a left hand.
Dixon with a nice cross.
Zoccato keeping a good distance there, avoiding the body shot.
As Dixon backs off Zoccato throws a huge counter combo but Dixon manages to avoid it all.
Dixon swings wildly with a right hand that was never going to find it's target.
Zoccato was about to counter that last move with a leg kick but changes his mind.
Dixon misses with a wild body shot.
Dixon works Zoccato's body with a nice hook.
That's four minutes gone in the round.
Dixon tries to land with a swinging hook to the body but Zoccato was well out of range. Poor timing from Dixon.
Dixon moves out of the way of the counter high kick fromZoccato.
A telegraphed right hand from Dixon misses the target.
Dixon misses with a body shot. Nice footwork from Zoccato.
A nice side step and Zoccato releases a counter shot to the body, but it doesn't find it's home.
Dixon uses good footwork to get in and out, landing a nice hook.
Zoccato keeping a good distance there, avoiding the body shot.
Dixon takes a swing at Zoccato's ribcage but misses.
Zoccato throws a counter combo.
Boooooooooooooooooooo!!! God, this has been a terrible round. Come on you two, sort yourselves out!
A big left from Dixon misses.
Zoccato is clearly looking to counter with head kicks.
And that is the end of the round. The fighters go back to their corners.
Willie Dixon dominated that second round.
Well, the break between rounds is over. Let's get back to the scrappin! This is the final round!
Dixon missing with a left hand there. Zoccato was out of range so wasted energy throwing that one.
Zoccato appears to be waiting to throw a counter punch to the body.
Zoccato slips under a jab from Dixon.
Dixon scores with a reasonable looking shot to the body. Zoccato doesn't seem bothered though.
Dixon is the aggressor but that punch slipped nicely by Zoccato.
Zoccato is loading up here, looking for a big counter of his own.
Zoccato uses some good footwork to avoid the body shot by Dixon.
Zoccato flicks out a counter leg kick but Dixon steps away.
We've had a slow start to the round here - hopefully the action picks up.
Dixon looks to score with a jab to the body but Zoccato is just out of range.
A nice side step and Zoccato releases a counter shot to the body, but it doesn't find it's home.
Willie Dixon seems to be the more aggressive standup fighter in this bout.
Dixon changes levels and scores with a jab to the body.
Zoccato slips a jab from Dixon.
That's one minute gone in the round.
Dixon swings for the body but Zoccato moves out of range.
Dixon looks to throw the jab but Zoccato is out of range.
Zoccato is loading up here, looking for a big counter of his own.
Dixon throws a hook to the body but it doesn't connect.
Zoccato flicks out a counter leg kick but Dixon steps away.
Nice defenses there by Zoccato.
Dixon looks to score with a jab to the body but Zoccato is just out of range.
Zoccato is clearly trying to counter these attacks from Dixon with a body shot.
Dixon throws a hard body shot but it just misses.
Dixon takes a swing at Zoccato's ribcage but misses.
Zoccato is loading up here, looking for a big counter of his own.
Mirko Zoccato has stepped it up - he knows he needs a finish here!
That's two minutes gone in the round.
The crowd are getting on the fighters' backs, as the pace has dropped off in the last minute or so.
Dixon catches Zoccato with a nice straight right. He seems pissed - ooooh, it's on now! On like donkey kong!
Dixon looks to score with a jab to the body but Zoccato is just out of range.
Zoccato ducks under an overhand right and circles away with a smile on his face.
Zoccato lets it all go there with a big combo counter but none of the punches connected.
Dixon throws a body shot but no joy.
Zoccato raises up his leg as if looking to counter with a high kick.
Dixon swings for the body but Zoccato moves out of range.
Dixon throws a shot from downtown. Zoccato moves away and avoids it.
Dixon swings and misses with a hook to the body.
That's three minutes gone in the round.
Dixon just misses with a punch to the body.
Zoccato lets it all go there with a big combo counter but none of the punches connected.
Zoccato uses good footwork to avoid the strikes from Dixon.
Zoccato is loading up here, looking for a big counter of his own.
Dixon takes a swing at Zoccato's ribcage but misses.
Zoccato looked like he wanted to counter with a punch but didn't throw it.
Dixon misses the body punch
and Zoccato counters with a straight right hand.
Zoccato displays some good footwork, moving neatly out of range as Dixon throws out the jab.
Dixon wings a very wild body shot but it does the job and lands to the midsection.
Dixon pushing out the jab but it's not landing.
As Dixon backs off Zoccato throws a huge counter combo but Dixon manages to avoid it all.
That's four minutes gone in the round.
Dixon lunges in with an uppercut that skims his opponent's chin.
A telegraphed right hand from Dixon misses the target.
Dixon takes a swing at Zoccato's ribcage but misses.
Dixon lands a really nice looking cross but Zoccato seems unphased.
Dixon misses with a looping right.
Zoccato appears to be waiting to throw a counter punch to the body.
Boooooooooooooooooooo!!! God, this has been a terrible round. Come on you two, sort yourselves out!
Dixon ducks down and throws a hook to the body but Zoccato moves away.
Willie Dixon is fighting for a decision here - he's started to take the cautious approach.
Dixon looks to score with a jab to the body but Zoccato is just out of range.
And that's the end of the fight!
Willie Dixon showed his dominance in that final round.
Well Dixon has outscored his opponent in every aspect of the fight today. Only a scarily incompetent judge or two will keep him from a well deserved win... Over to the ring announcer for the scorecards.
Ladies and gentlemen, after 3 rounds of action, we go to the scorecards for a decision.
Judge Daniel Franklin scores the fight for Willie Dixon!
Judge Santiago Holmes scores the fight for Willie Dixon!
Judge Sandra Marshall scores the fight for Willie Dixon!
Willie Dixon wins by unanimous decision!
During a confident post fight interview, Willie Dixon thanked all his fans. He seemed very genuine when describing how motivated his fans keep him.
|
|
|
|
|
|
|
|
|
|
|
|
|
|
|
|
|
|
|
|
|
|
|
| S |
C
A |
G |
S |
C
B |
G |
|
S |
C |
G |
|
energy
A | B |
|
hype
A | B |
|
pop
A | B |
|
mgr
A | B |
|
FIGHT
RATING
30% |
|
|
|
|
|
|
|
Undercard bout
|
Coming up we have a bantamweight MMA rules bout between Theodore Bundy (ranked 2462 p4p, 786 weight class) and Stan Man (ranked 149 p4p, 53 weight class). Well, the cameraman is lingering on a pretty young lady for a bit too long there. Keep your eyes on the prize buddy or you'll miss the fighter intros!
 |
|
 |
| 165 cm
27
135
4 - 6 - 0 |
|
165 cm
27
143
9 - 4 - 1 |
Decent wrestler
Excellent boxer
Very strong |
|
Good wrestler
Counter fighter
Powerful |
|
| |
|
Ladies and gentlemen. This fight is 3 rounds, in the bantamweight division.
Introducing the fighter to my left, fighting out of the red corner.
With a record of 4 - 6 - 0, fighting out of The Island, Theodore Bundy!
And introducing the fighter to my right, fighting out of the blue corner.
With a record of 9 - 4 - 1, fighting out of The Island, Stan Man!
The judges for this bout are Daniel Franklin, Bart Greer and Winston Alpacca.
The bell rings for round one and we are underway!
Bundy scores with a jab. Man acknowledges it with a nod of the head.
Bundy tests Man's chin there with a solid looking shot.
Man drops his hands momentarily and Bundy takes advantage with a crisp shot to the head.
Man uses good footwork to avoid the strikes from Bundy.
Bundy pushing out the jab but it's not landing.
Man shoots in for a takedown - he's clinched up with Bundy but Bundy pushes him off and we're back to square one.
We've had a slow start to the round here - hopefully the action picks up.
Bundy scores with a nice right hand.
Man misses with a takedown attempt
and Bundy counters with a quick right hand to the jaw.
That's one minute gone in the round.
Man get stunned by a cross and takes another one on the button. Man stumbles backwards and tries to bounce back off the cage but Bundy runs in and jumps on him with a leaping lead hook that puts him out! Wow, that was highlight reel stuff! Awesome finish!
Ladies and gentlemen, after 1:06 of round 1, we have a winner by way of KO (Punch). Theodore Bundy!
Theodore Bundy spent the whole post fight interview bigging himself up. It didn't go down that well with the fans after a while as they thought it was a bit arrogant.
|
|
|
|
|
|
|
|
|
|
|
|
|
|
|
|
|
|
|
|
|
|
|
| S |
C
A |
G |
S |
C
B |
G |
|
S |
C |
G |
|
energy
A | B |
|
hype
A | B |
|
pop
A | B |
|
mgr
A | B |
|
FIGHT
RATING
63% |
|
|
|
|
|
|
|
Undercard bout
|
Coming up we have a bantamweight MMA rules bout between Nicky Manu (ranked 815 p4p, 1505 weight class) and Semen Voribiev (ranked 54 p4p, 104 weight class). Manu comes into the arena with Welcome to the Opera - Anyma & Grimes blaring out of the sound system. Nicky Manu has the better chin. Will he look to stand and bang today?
 |
|
 |
| 169 cm
20
145
9 - 4 - 0 |
|
163 cm
26
135
8 - 4 - 0 |
Good wrestling
Counter fighter
Very strong |
|
Good wrestler
Basic striking
Knockout power |
|
| |
|
Ladies and gentlemen. This fight is 3 rounds, in the bantamweight division.
Introducing the fighter to my left, fighting out of the red corner.
With a record of 9 - 4 - 0, fighting out of The Island, Nicky Manu!
And introducing the fighter to my right, fighting out of the blue corner.
With a record of 8 - 4 - 0, fighting out of The Island, Semen Voribiev!
The judges for this bout are Michael Johnstone, Winston Alpacca and Dirk Anderson.
The bell rings for round one and we are underway!
Voribiev uses decent footwork to sidestep a right hand from Manu.
Voribiev with a poor takedown
and Manu counters with a crisp hook to the side of the head.
Voribiev slips under a jab from Manu.
Manu scores with a jab to the jaw.
Semen Voribiev seems to be the more aggressive standup fighter in this bout.
Voribiev fails with a takedown attempt.
Voribiev throws a predictable looking body shot
and Voribiev takes a counter punch right on the button for his troubles.
 Voribiev is rocked! Voribiev is rocked!
Voribiev drops his hands momentarily. Manu doesn't need a second invitation, landing a shot to the temple. Voribiev staggers and falls to the mat and the ref dives in to save him from any more punishment. Voribiev doesn't seem happy with the stoppage but he was done.
Ladies and gentlemen, after 0:38 of round 1, we have a winner by way of KO (Punch). Nicky Manu!
Nicky Manu thanked the fans post fight for their support.
|
|
|
|
|
|
|
|
|
|
|
|
|
|
|
|
|
|
|
|
|
|
|
| S |
C
A |
G |
S |
C
B |
G |
|
S |
C |
G |
|
energy
A | B |
|
hype
A | B |
|
pop
A | B |
|
mgr
A | B |
|
FIGHT
RATING
92% |
|
|
|
|
|
|
|
Co-main event
|
Coming up we have a bantamweight MMA rules bout between Viggo Andolini (ranked 1170 p4p, 1155 weight class) and Bhutan Brother (ranked 83 p4p, 82 weight class). Both these guys have really solid chins. Will we see a standup war or will they both decide that a knockout is unlikely and try to win the fight elsewhere?
 |
|
 |
| 167 cm
26
140
7 - 2 - 0 |
|
225 cm
25
280
9 - 2 - 0 |
Decent wrestler
Excellent MT
Granite chin |
|
BJJ White Belt
Great elbows
Powerful |
|
| |
|
Ladies and gentlemen. This fight is 3 rounds, in the bantamweight division.
Introducing the fighter to my left, fighting out of the red corner.
With a record of 7 - 2 - 0, fighting out of The Island, Viggo Andolini!
And introducing the fighter to my right, fighting out of the blue corner.
With a record of 9 - 2 - 0, fighting out of The Island, Bhutan Brother !
The judges for this bout are Winston Alpacca, Peter Branson and Daniel Franklin.
The bell rings for round one and we are underway!
Brother avoids the body shot from Andolini.
Brother on the wrong end of a vicious looking body shot.
Andolini fakes high and swings low for a body shot but Brother manages to avoid it.
Brother doesn't manage to clinch there - Andolini circles away.
Andolini appears to be looking for a counter punch to the body.
Brother gets caught by a big overhand right and goes down! Andolini gets on top of him and starts throwing some serious punches until the ref intervenes and stops the fight!
Ladies and gentlemen, after 0:15 of round 1, we have a winner by way of TKO (Strikes). Viggo Andolini!
|
|
|
|
|
|
|
|
|
|
|
|
|
|
|
|
|
|
|
|
|
|
|
| S |
C
A |
G |
S |
C
B |
G |
|
S |
C |
G |
|
energy
A | B |
|
hype
A | B |
|
pop
A | B |
|
mgr
A | B |
|
FIGHT
RATING
100% |
|
|
|
|
|
|
|
Main event
|
Coming up we have a bantamweight MMA rules bout between Colby Taylor (ranked 398 p4p, 2850 weight class) and Andre Driver (ranked 28 p4p, 175 weight class). Both these guys have really solid chins. Will we see a standup war or will they both decide that a knockout is unlikely and try to win the fight elsewhere?
 |
|
 |
| 170 cm
27
145
10 - 1 - 1 |
|
178 cm
26
142
4 - 3 - 0 |
BJJ Brown Belt
Basic striking
Granite chin |
|
BJJ Brown Belt
Decent boxing
Powerful |
|
| |
|
Ladies and gentlemen. This fight is 3 rounds, in the bantamweight division.
Introducing the fighter to my left, fighting out of the red corner.
With a record of 10 - 1 - 1, fighting out of The Island, Colby Taylor!
And introducing the fighter to my right, fighting out of the blue corner.
With a record of 4 - 3 - 0, fighting out of The Island, Andre Driver!
The judges for this bout are Peter Branson, Bart Greer and Sandra Marshall.
The bell rings for round one and we are underway!
Taylor throws a monster uppercut resembling something out of street fighter but it doesn't land.
Driver has been spending a lot of time sparring his boxing in the run up to the fight, trying to sharpen up those hands and look for a knockout.
Taylor swings for the body but Driver moves out of range.
Taylor bobbing and weaving, closes the distance and lands a hook to the side of Driver's head.
Taylor misses with a hook. Driver ducked under it nicely.
Taylor swings wildly with a right hand that was never going to find it's target.
Driver is pinned up against the cage taking some big shots here. The referee is looking closely deciding whether he should stop the fight.
Taylor connects with a nice looking jab.
Driver keeping a good distance there, avoiding the body shot.
Good shot there by Taylor.
Driver lands three nice shots there - that looked like it hurt!
Driver connects with a looping left hand that seems like it dazed Taylor momentarily.
The crowd cheering loudly, showing their appreciation for the quality fight we're seeing here.
Taylor misses with a lunging right hand
and Driver counters with a nice uppercut.
Driver is a painfully thin specimen of a man. You do wonder whether a good body kick would snap him clean in two.
Driver lands a glancing blow to the side of Taylor's head.
Taylor misses with a hook. Driver ducked under it nicely.
Driver waving his hands out in front of him, looking to distract Taylor.
Taylor takes the fight into the clinch.
That's one minute gone in the round.
Taylor blocks a couple of punches on the inside.
Driver lands with a good tight uppercut to the head.
Taylor jumps into guard, dragging Driver to the mat.
Taylor definitely looks more muscular than last time we saw him fight.
Driver wants to control from the top but Taylor keeps moving.
The ref warns both fighters not to hold the cage as they work up against the meshing.
Driver won't allow Taylor to sweep him here.
Taylor wants to control here, rather than go for any submissions from the bottom. At least for now.
Driver throws a big right hand that misses.
Taylor is pulling down on Driver's head to control his posture.
Taylor working the defensive guard well to avoid strikes from Driver.
Taylor is throwing his legs up, looking for submissions. Driver is aware though and is defending well.
Driver throwing strikes but missing.
Taylor is working an open guard here, looking to improve his position. No doubt that will leave him open to counters but at least he's being more offensive.
That's two minutes gone in the round.
Taylor is looking for a triangle but Driver pushes his legs off easily.
Taylor is trying to control the position but Driver postures up.
Taylor had isolated an arm as going for a kimura. Driver defends it easily.
Driver has the superior BJJ but he's also working some ground strikes into his gameplan.
Driver trying to control but Taylor is working from the bottom.
Taylor pulls Driver in close to his closed guard and prevents Driver from doing any damage or advancing position.
Driver preventing the sweep.
Driver trying to control but Taylor is working from the bottom.
Taylor managing to control the position.
The fighters are starting to perspire pretty heavily.
Taylor looking to hit a scissor sweep but Driver is one step ahead there.
That's three minutes gone in the round.
Taylor utilising some decent striking defenses from the guard, preventing the ground and pound.
Taylor working from the bottom, still in full guard. He's managed to get a loose triangle. Driver doesn't seem to be doing much to defend here, obviously he feels comfortable in the position. Driver manages to throw the legs off his shoulder and he's back into guard - no problem.
Taylor is working from a closed guard but he's struggling to control his opponent.
Taylor preventing the ground and pound from doing any damage.
Taylor escapes his hips to the side and looks to be working for an armbar. Driver gives him a little smile and shakes his head. No chance.
Taylor has control of Driver's left arm, preventing Driver from doing any damage.
Driver drops back looking for a heel hook - he quickly realises he's not going to get it but Taylor manages to dive on top of him before he can escape and now Driver has Taylor in his guard.

That's four minutes gone in the round.
Driver is trying to control the position from the bottom.
Driver looking for submissions from the bottom here. Moving his hips around, possibly looking for an armbar.
Taylor is stalling in the full guard.
Driver looks to be working for a triangle here. Oh, it looks like he might have it! Taylor has picked Driver up and slammed him! Driver can't keep hold of the triangle and Taylor manages to pass to side control!
Driver is trying to improve his position.
A lull in the action here.
And that is the end of the round. The fighters go back to their corners.
Colby Taylor dominated that round.
The fighters get back to their feet, the hooter sounds and we're back to the action!
Driver slips a jab from Taylor.
Driver with a jab.
Taylor moves into the clinch successfully.
Taylor working on landing some head shots here - that one got through nicely.
Driver blocks an uppercut.
Taylor working some nice short punches in the clinch.
Taylor has managed to pull guard. Let's see whether he can work an aggressive guard. It will also be interesting to see what tactics Driver uses from the top position.
Driver is fighting to break Taylor's control of his arms but Taylor is doing a good job of controlling the position at the moment.
Taylor bucks up whilst keeping hold of a body lock, managing to reverse the position. Now he's in top in Driver's guard.
Driver working from the bottom, still in full guard. He's managed to get a loose triangle. Taylor doesn't seem to be doing much to defend here, obviously he feels comfortable in the position. Taylor manages to throw the legs off his shoulder and he's back into guard - no problem.
Driver isolates an arm and boxes in a triangle. Taylor stacks Driver on his neck as he steps over and passes to the side. He's now in a much more dominant position where he can look to do some serious damage. Nice move by Taylor!
Driver being controlled for a moment.
The fighters are pressed up against the cage, both looking to find a bit of space to work.
That's one minute gone in the round.
Driver is positioning himself to get back to half guard.
Taylor in side control, just content to control the action for now.
Taylor continues to stall.
That's two minutes gone in the round.
There's not a lot going on here and the crowd are letting the fighters know they're not willing to tolerate a lack of action.
Driver is looking for a sweep.
Taylor remains in side control and seems content to stay there. It's a versatile position from which he can work both strikes and submissions, whilst maintaining that control, so maybe he'll sit here for a while.
Driver tries to work a leg under to get back to half guard but Taylor wriggles his own leg back out and remains in side control.
Driver keeps trying to improve his position.
Taylor just content to control the position.
That's three minutes gone in the round.
Driver is looking to reverse the position.
Taylor in side control, just content to control the action for now.
Driver stops Taylor from passing to mount.
You can see the frustration on Driver's face as Taylor controls the position.

The referee has motioned to the fighters to stand back up.
Taylor misses with a body shot
and Driver counters with a straight right hand.
Driver slips under a jab.
That's four minutes gone in the round.
Taylor takes a swing at Driver's ribcage but misses.
Driver looked like he wanted to counter with a punch but didn't throw it.
Driver shakes his hands off, looking to compose himself, but takes a jab to the jaw whilst he does it.
Taylor misses with a body shot
enabling Driver to counter with a crisp jab.
Taylor has managed to clinch.
Taylor working on landing some head shots here - that one got through nicely.
Taylor misses with a body punch.
A head punch blocked on the inside by Taylor.
A head punch on the inside from Taylor fails to land.
Taylor successfully pulls guard.
Taylor is working from a closed guard but he's struggling to control his opponent.
Taylor is really dominating this fight. Is there anything that Driver can do to turn this around?
Driver trying to control the position from guard on top but Taylor is wriggling around, looking for whatever he can.
The crowd thankful this round is nearly over.
Driver throwing strikes but missing.
Wooooo! Give it up for these two warriors! They are putting on a show!
Taylor wants to sweep here but Driver controlling him for the moment.
And that is the end of the round. The fighters go back to their corners.
Colby Taylor dominated that second round.
That's the end of the interval. I'm sure that seemed a lot quicker than a minute for our two fighters! Back to the action. This is the final round!
Driver getting the better of the striking in that exchange.
Driver lands a nice shot that snaps Taylor's head back.
Driver scores with the left hand. Taylor knows he should have avoided that one.
The fighters circling - Driver throws out the jab but it was never going to land.
Driver tries to bum rush Taylor with a series of wild strikes but Taylor uses good footwork to avoid the assault.
Taylor closes the distance and presses his opponent up against the cage.
Driver prevents a body shot from Taylor.
Taylor lands a nice uppercut.
Taylor jumps guard.
Taylor looking for submissions from the bottom here. Moving his hips around, possibly looking for an armbar.
Driver trying to control but Taylor is working from the bottom.
Taylor controlling Driver's posture.
That's one minute gone in the round.
Driver throws a big elbow that misses.
Driver drops back, looking for a kneebar! Taylor looks panicked! The fighters roll across the mat, one looking to finish, one looking to escape. Taylor looks to have wriggled free... Yes, he's got his leg free and he's dived into side control! Good work there from Taylor!
Driver tries to bench press Taylor off him but Taylor keeps the position.
Colby Taylor overall seems to be getting the better of the ground position in the fight so far.
You can see the frustration on Driver's face, being in this tough position on the bottom.
Driver tries to improve position but can't.
Driver misses with a strike from the bottom.
Taylor controls the position from side control.
That's two minutes gone in the round.
Taylor has knee on belly and moves into mount.
Taylor is looking to work his way around to Driver's back. He needs to be careful though, as he's in danger of losing this dominant position.
Driver wants to control but Taylor is having none of it.
Driver is looking to get to half guard.
Driver wants to hold on but Taylor pushes him away.
Driver is trying to reverse the position but instead Taylor has taken his back - oops!
That's three minutes gone in the round.
You know, I was talking to some of our celebrities at ringside tonight and they were split right down the middle on who was going to win this fight.
Driver tries to escape but Taylor has the hooks in and won't let him break free.
Driver trying to control the hands but Taylor won't let him.
Driver is trying to get back to his feet but Taylor has full control of the position and if anything, Driver has just worked his way into a worse spot.
Colby Taylor is fighting for a decision here - he's started to take the cautious approach.
Taylor keeps control of the position as Driver tries to break free.
Driver is being controlled on the ground here - he must escape this position otherwise surely the end is near.
Driver tries to roll but Taylor sticks to his back.
That's four minutes gone in the round.
Neither fighter has done anything of merit for a good minute or two here and the crowd are not happy about it.
Taylor controlling the position well here. Driver rolled but Taylor kept the hooks locked in and stayed in the dominant position.
Boooooooooooooooooooo!!! God, this has been a terrible round. Come on you two, sort yourselves out!
Andre Driver has stepped it up - he knows he needs a finish here!
And that's the end of the fight!
Colby Taylor showed his dominance in that final round.
Well I reckon that's a shut out for Taylor, winning every round. Will the judges agree? They are the ones who matter, even if they are often depressingly incompetent. Over to the ring announcer for the scorecards.
Ladies and gentlemen, after 3 rounds of action, we go to the scorecards for a decision.
Judge Peter Branson scores the fight for Colby Taylor!
Judge Bart Greer scores the fight for Colby Taylor!
Judge Sandra Marshall scores the fight for Colby Taylor!
Colby Taylor wins by unanimous decision!
|
|
|
|
|
|
|
|
|
|
|
|
|
|
|
|
|
|
|
|
|
|
|
| S |
C
A |
G |
S |
C
B |
G |
|
S |
C |
G |
|
energy
A | B |
|
hype
A | B |
|
pop
A | B |
|
mgr
A | B |
|
FIGHT
RATING
36% |
|
|
|
|
|
|
|
|
|
|
