 |
CFC 515 PBP Commentary |
Undercard bout
|
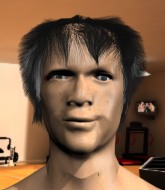
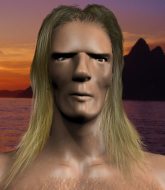
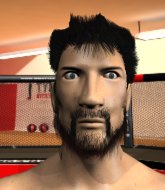
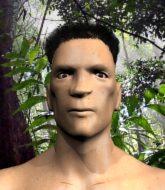
Coming up we have a light heavyweight MMA rules bout between Enrich Aldrich (ranked 25078 p4p, 5673 weight class) and Carson Ledger (ranked 557 p4p, 539 weight class). Chooooooooon! I think Aldrich might be my favorite fighter, now he's come out to Loser. I'm sure you'll be fascinated to know that I was talking to some pointless Z list celebrity before the fight and he thought that Carson Ledger was going to win. Let's see if he was right.
 |
|
 |
| 200 cm
25
212
0 - 2 - 0 |
|
186 cm
25
212
0 - 1 - 0 |
BJJ Blue Belt
Solid Muay Thai
KO power |
|
BJJ Brown Belt
Basic striking
Solid chin |
|
| |
|
Ladies and gentlemen. This fight is 3 rounds, in the light heavyweight division.
Introducing the fighter to my left, fighting out of the red corner.
With a record of 0 - 2 - 0, fighting out of New York, Enrich Aldrich!
And introducing the fighter to my right, fighting out of the blue corner.
With a record of 0 - 1 - 0, fighting out of Helsinki, Carson Ledger!
The judges for this bout are Don Winkell, Frank Antenori and Timothy Bukovac.

The bell rings for round one and we are underway!
Ledger tries to shoot in for a takedown. He's got hold of a leg but Aldrich swivels and escapes.

Aldrich drives through and clinches with Ledger against the cage.
Aldrich working some nice short punches in the clinch.
Aldrich using the Thai clinch to land knees to the body.
Ledger misses with a punch on the inside.
Ledger fails to pull the fight into his guard.
Ledger wants to take the fight to the mat but Aldrich manages to get underhooks and keep the fight in the clinch.
Enrich Aldrich has stuffed three takedown attempts in the round now. That's going to take a lot out of Carson Ledger.
Aldrich comes over the top with an elbow. That landed flush.
Ledger tries for a takedown but Aldrich manages to get underhooks.
Aldrich holding his opponent close, against the cage.
Aldrich lands a body punch - he's looking to wear down Ledger.
We've had a slow start to the round here - hopefully the action picks up.
A left hand lands to the body for Aldrich.
Ledger looks winded!
A right handed body shot lands from Aldrich.
Aldrich connects with a nasty looking knee right to Ledger's face.

Aldrich has Ledger pressed up against the cage. He's trying to work for a single leg takedown. Aldrich pulls back from the cage and twists to the side, sending Ledger tumbling to the mat - Aldrich dives into Ledger's guard.
The crowd are loving this. Great action here.
Aldrich with a flurry of punches that miss.

That's one minute gone in the round.
Aldrich content to stall in guard here.
Aldrich's ground tactics aren't going to win him many fans. Let's hope he's got fireworks for us if he gets back to his feet because he's not doing much on the ground.
Aldrich will need to keep those long limbs tucked in whilst he's on the ground, to prevent any submissions.
The ref warns both fighters not to hold the cage as they work up against the meshing.

Ledger looking for submissions from the bottom but instead Aldrich passes into side control.
Aldrich knows he needs to get back to his feet asap. He's simply no match for Ledger on the ground.

That's two minutes gone in the round.
The crowd are showing their displeasure at the lack of action as loud boos ring out around the arena.
Aldrich controls the position from side control.
The strikes coming from Aldrich are missing the target in this wave of attacks.
Ledger is letting Aldrich control him for a moment.
Aldrich in side control, throwing shots but Ledger defends.
The fighters are starting to perspire pretty heavily.
Aldrich takes a little break here. Ledger wants to take advantage but he is being controlled well.

That's three minutes gone in the round.
Further stalling from Aldrich.
Ledger is trying to stand back up. He's worked his way up against the cage but Aldrich has just dragged him back down to the mat.
The fighters are pressed up against the cage, both looking to find a bit of space to work.
Aldrich working the ground and pound but Ledger is defending the strikes.
The referee asks Aldrich politely if he wouldn't mind getting on with it and actually doing something. Aldrich prefers to stall for the moment though.
The referee is pacing around the two fighters, thinking about a standup.
Ledger is trying to control Aldrich's posture but Aldrich avoids it.

The ref stands the fighters back up due to a lack of activity.

Ledger takes the fight into the clinch.
Aldrich tightens his grip and picks Ledger up, before dumping him to the ground. Ledger manages to land in guard.

That's four minutes gone in the round.
Aldrich is frustrating his opponent with some stalling tactics from top position.
Ledger has been taking part in the yoga sessions down at IMMA Gym of Elite ASS. Presumably he's going to look for a slick submission... Or maybe he's looking to avoid one.
Ledger not looking particularly offensive just at the moment.
Aldrich pressing down on his opponent's thigh, looking to pass guard. Ledger is keeping the position for now.
Ledger working from the bottom, still in full guard. He's managed to get a loose triangle. Aldrich doesn't seem to be doing much to defend here, obviously he feels comfortable in the position. Aldrich manages to throw the legs off his shoulder and he's back into guard - no problem.
The crowd thankful this round is nearly over.
Ledger trying to control the position.
And that is the end of the round. The fighters go back to their corners.
Enrich Aldrich dominated that round.
The fighters get back to their feet, the hooter sounds and we're back to the action!

Ledger has taken the fight to the clinch.
Ledger is looking for a takedown up against the cage. Aldrich gets underhooks though and prevents the takedown attempt.
A short right from Aldrich on the inside.
Ledger has dropped down and is looking to force the takedown but it's defended by Aldrich after a bit of a struggle.
Aldrich is defending well against a takedown attempt.
Enrich Aldrich has stuffed three takedown attempts in the round now. That's going to take a lot out of Carson Ledger.
Aldrich using the Thai clinch to land knees to the body.
Ledger tries for a takedown but Aldrich manages to get underhooks.
Aldrich lands a takedown into guard.
Aldrich seems content to control from guard here. He's going to have to remain active though if he doesn't want to get stood back up.
We've had a slow start to the round here - hopefully the action picks up.

Ledger is working an open guard so Aldrich takes the opportunity to get back to his feet.
That's one minute gone in the round.
Aldrich lands a jab followed by a nice looking cross.
Aldrich tries to bum rush Ledger with a series of wild strikes but Ledger uses good footwork to avoid the assault.
Nice body kick from Aldrich.
Ledger gets his takedown attempt stuffed easily
and Aldrich counters with a left and a right that stings Ledger.
Ledger drives through and clinches with Aldrich against the cage.
Ledger wants a takedown.

Aldrich escapes the clinch and we're back to striking.
Aldrich gets in close and instigates a clinch.
Ledger tries to score a body lock takedown but Aldrich shows good agility there to stay on his feet.
Ledger is breathing heavily.
Ledger has a body lock and is looking for a takedown. Aldrich is bouncing around trying to prevent the takedown and somehow he has indeed managed to stay on his feet.
Aldrich turns his back and goes for a hip toss. It's a bit messy but it gets the job done and Aldrich manages to end up in side control.
That's two minutes gone in the round.
Fantastic stuff here - a very entertaining period of action, which has drawn cheers from the crowd.
A lull in the action here.
Aldrich stands up and we're back to a striking position.
No luck for Ledger with that takedown attempt.
Aldrich closes the distance and pushes Ledger back into the cage.
Aldrich lands a nice knee to the body.
Aldrich has double underhooks and is working for a body lock takedown. He's got it. The fighters land in half guard but Ledger regains guard immediately.
Aldrich is stalling in the full guard.
Ledger looking for submissions from the bottom but instead Aldrich passes into side control.
Enrich Aldrich overall seems to be getting the better of the ground position in the fight so far.
That's three minutes gone in the round.
A lull in the action here.
Aldrich is really dominating this fight. Is there anything that Ledger can do to turn this around?
If it seems like I'm not saying a lot, it's just because Aldrich is stinking the place up with his stalling.
Ledger is looking for a sweep.
That's four minutes gone in the round.
Neither fighter has done anything of merit for a good minute or two here and the crowd are not happy about it.
Aldrich content to control the pace. The referee will try and keep them active though.
Aldrich has controlled the position for a good 20 seconds, which will no doubt be starting to frustrate his opponent.
Ledger regains half guard.
Aldrich not throwing his punches with enough precision this time.
And that is the end of the round. The fighters go back to their corners.
Enrich Aldrich dominated that second round.
That's the end of the round. The referee orders the cornermen out of the cage so we can get back down to business. So, we enter the final round. Let's see if either fighter can bring us a finish, or whether we're going to the judges scorecards.

Ledger fails miserably with a takedown attempt.
Aldrich gets a clinch.
Aldrich has picked Ledger up - he's going for a ride! Aldrich dumps his opponent to the mat with a thud and settles into half guard.
Aldrich perhaps working for something from half guard, or maybe not. It looks like he's just sitting there.
Ledger punching from the bottom.
Aldrich stands, ready to strike. The ref makes him back up and allows Ledger to get to his feet.
Aldrich clinches up against the cage.
We've had a slow start to the round here - hopefully the action picks up.
Come on Aldrich - let's have some action - none of this stalling nonsense.
Ledger letting Aldrich take a breather here.
Aldrich lands a takedown into guard.
Aldrich is standing up over Ledger. Ledger looks to escape but Aldrich dives into side control.
That's one minute gone in the round.

Aldrich decides to take the fight back to the feet.
Danga de danga de dang - Aldrich scores with a four punch combination!
Ledger goes for a double leg but Aldrich avoids the attempt and the two fighters end up clinched against the cage as Aldrich continues to drive forward.
Aldrich forces Ledger back against the cage and clinches.
Knees in the clinch landing for Aldrich.
A head punch blocked on the inside by Aldrich.
Aldrich lands a left hand that snaps the head of Ledger backwards.
Aldrich has double underhooks and is working for a body lock takedown. He's got it. The fighters land in half guard but Ledger regains guard immediately.
The crowd cheering loudly, showing their appreciation for the quality fight we're seeing here.
Ledger can't do much from the bottom at the moment, as Aldrich controls the pace.
That's two minutes gone in the round.
Aldrich tries to stand but Ledger is controlling from the bottom.
Aldrich avoids a guillotine attempt easily.
Aldrich's corner is telling him to maintain position.
That's three minutes gone in the round.
Aldrich postures up.
Aldrich tries to free his leg and advance position but Ledger is retaining full guard.
Ledger is looking to stand up but Aldrich isn't so interested in that idea.
Ledger is looking for a triangle but Aldrich pushes his legs off easily.
Aldrich is stalling in the full guard.
Ledger avoiding any damage from the ground and pound.
That's four minutes gone in the round.
The crowd are starting to boo a lack of action.
Ledger utilising some decent striking defenses from the guard, preventing the ground and pound.
Aldrich missing there with some ground and pound from the guard.
The referee is pacing around the two fighters, thinking about a standup.
Ledger had isolated an arm as going for a kimura. Aldrich defends it easily.
Aldrich slips effortlessly into side control - very nice.
Enrich Aldrich is fighting for a decision here - he's started to take the cautious approach.
Ledger tries to slip a leg under to move to half guard but Aldrich presses down on the leg and jumps into full mount!
Aldrich content just to control the position here.
And that's the end of the fight!
Enrich Aldrich showed his dominance in that final round.
Well Aldrich has outscored his opponent in every aspect of the fight today. Only a scarily incompetent judge or two will keep him from a well deserved win... Over to the ring announcer for the scorecards.
Ladies and gentlemen, after 3 rounds of action, we go to the scorecards for a decision.
Judge Don Winkell scores the fight 30:27
Judge Frank Antenori scores the fight 30:27
Judge Timothy Bukovac scores the fight 30:27
In favor of your winner, by unanimous decision... Enrich Aldrich!
Enrich Aldrich made sure to mention his sponsor, PWNAGE™ in his post fight interview.
In defeat, Carson Ledger stepped up to the mic, saying 'I'm not worried about an outcome, I just want an income. '.
|
|
|
|
|
|
|
|
|
|
|
|
|
|
|
|
|
|
|
|
|
|
|
| S |
C
A |
G |
S |
C
B |
G |
|
S |
C |
G |
|
energy
A | B |
|
hype
A | B |
|
pop
A | B |
|
mgr
A | B |
|
FIGHT
RATING
39% |
|
|
|
|
|
|
|
Undercard bout
|
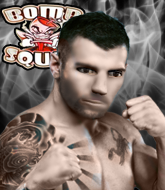
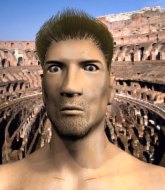
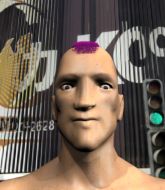
Coming up we have a heavyweight MMA rules bout between Lark Bizzy (ranked 5514 p4p, 5392 weight class) and Bingo Bongo (ranked 530 p4p, 528 weight class). Bingo Bongo has the power to score a knockout today if he connects clean with Lark Bizzy's chin.
 |
|
 |
| 209 cm
25
265
0 - 1 - 0 |
|
182 cm
25
270
0 - 1 - 0 |
BJJ White Belt
Excellent boxer
Big heart |
|
BJJ Blue Belt
Brawler
Tends to cut |
|
| |
|
Ladies and gentlemen. This fight is 3 rounds, in the heavyweight division.
Introducing the fighter to my left, fighting out of the red corner.
With a record of 0 - 1 - 0, fighting out of Los Angeles, Lark Bizzy!
And introducing the fighter to my right, fighting out of the blue corner.
With a record of 0 - 1 - 0, fighting out of Hilo, Bingo Bongo!
The judges for this bout are Jack Bonds, Percy O'Donnell and Timothy Bukovac.
The bell rings for round one and we are underway!
A telegraphed takedown attempt from Bongo is defended easily by Bizzy.
Bizzy changes levels looking for a counter takedown but doesn't commit.
No luck for Bongo with that takedown attempt.
Bizzy shoots in for a takedown and gets it.
The ref warns both fighters not to hold the cage as they work up against the meshing.
Bongo manages to get to full guard.
We've had a slow start to the round here - hopefully the action picks up.
Bongo looking to hit a scissor sweep but Bizzy is one step ahead there.
That's one minute gone in the round.
Bizzy trying to control the position from guard on top but Bongo is wriggling around, looking for whatever he can.
Bizzy will need to keep those long limbs tucked in whilst he's on the ground, to prevent any submissions.
Bizzy works over Bongo with some ground and pound from guard.
Bongo is working an open guard here, looking to improve his position. No doubt that will leave him open to counters but at least he's being more offensive.
Bongo has his hands on Bizzy's head, controlling the position.
Bongo wants to stand and escape but Bizzy is having none of it.
That's two minutes gone in the round.
The crowd are getting on the fighters' backs, as the pace has dropped off in the last minute or so.
Bongo wants to sweep but no luck.
Bongo avoiding any damage from the ground and pound.
Bizzy knows he needs to get back to his feet asap. He's simply no match for Bongo on the ground.
Bongo avoiding any damage from the ground and pound.
If this pace continues, the referee will definitely step in and force a standup.
Bizzy definitely looks more muscular than last time we saw him fight.
Bizzy throws a strike but Bongo rolls with it and manages to sweep. Now he's in guard on top.
Bizzy seems keen to control Bongo's posture.
Bizzy looking to sweep using the butterfly guard but Bongo puts pay to that idea as he passes nicely into half guard.
Bongo is trying to control. Bizzy wants to improve his position but can't escape this time.
Bongo takes a deep breath and rests his weight momentarily on top of his opponent, to control the position.
That's three minutes gone in the round.
It looks like Bongo might be adopting somewhat of a lay and pray gameplan here, which I'm sure won't go down too well with the paying fans in attendance... Or the ring announcers come to think of it.
Bizzy is looking for a sweep. Bongo is wise to his cunning plan and keeps the top position.
Bongo throwing shots but they're hitting the canvas more than the man.
The ref stands the fighters back up due to a lack of activity.
Bongo darts in looking for a takedown but Bizzy gets double underhooks and turns Bongo into the cage.
Lark Bizzy has stuffed three takedown attempts in the round now. That's going to take a lot out of Bingo Bongo.
Bizzy closes the distance and scores a nice trip takedown into half guard. Bongo did well to prevent Bizzy getting side control.
Bongo wants to get back to his feet.
Bongo gets back to full guard.
Bizzy controlling from the guard. I say controlling but really, he's stalling.
Our spies down at at H!lo inform us that Bongo has really been working on his submissions in the buildup to this fight. Will it pay off?
That's four minutes gone in the round.
Bizzy trying to control but Bongo is working from the bottom.
Bongo seems keen to control rather than go for a submission, at least for now.
There's a bit of a scramble here and now Bongo is on top in guard.
Boooooooooooooooooooo!!! God, this has been a terrible round. Come on you two, sort yourselves out!
Bongo wants to control from the top but Bizzy keeps moving.
Bongo stopping the sweep attempt from Bizzy.
And that is the end of the round. The fighters go back to their corners.
A close round but Bingo Bongo will probably get the nod.
The referee calls time. The cornermen exit stage left and we're back to business.

Bongo fakes a strike and closes the distance, dragging Bizzy to the ground. Bongo is now in Bizzy's guard.
Bizzy wants to get back to his feet but he's too absorbed in his own little project and Bongo manages to pass to side control.

Bongo is taking a breather. Bizzy says something to him but it's hard to make out. Perhaps he's telling him to get on with it and actually do something.
Bizzy is trying to maintain the position but Bongo is very close to passing his half guard.
Bongo wants to take a breather but Bizzy is having none of it.
We've had a slow start to the round here - hopefully the action picks up.
Bizzy trying to control but Bongo postures up.
Bongo not doing much here.
That's one minute gone in the round.
Bongo not landing any meaningful shots this time.
Neither fighter is being very active at the moment, with Bongo in particular looking to stall.
Bizzy has no desire to be mounted, so is trying to control. Bongo is working away from the top position though.
The referee calls for the fighters to work.
Bizzy is trying to maintain the position but Bongo is very close to passing his half guard.
The referee wants the fighters to be more active or he's going to reset them on the feet.
That's two minutes gone in the round.
The crowd are starting to boo a lack of action.
Bongo is looking to pass the guard... He's managed it - he's now in full mount!
The fighters are pressed up against the cage, both looking to find a bit of space to work.
Bongo takes a little breather and maintains the position. The referee will be looking for him to stay active from such a dominant position though.
Bizzy wants to control but Bongo is having none of it.
Bongo takes a little breather and maintains the position. The referee will be looking for him to stay active from such a dominant position though.
Bongo thowing strikes but they're hitting the gloves, not doing any damage.
That's three minutes gone in the round.
Bongo landing strikes, looking to finish!
Bongo avoids the attempt from Bizzy to control.
Bongo controlling his opponent.
Bizzy on his back here. We all know that wrestlers don't like being on their back so let's see if Bizzy tries to get out of the position.
Bongo tries to control but Bizzy wriggling away.
Bizzy tries to reverse the position but Bongo maintains control.
Bongo sitting in mount, just looking to control for the moment.
That's four minutes gone in the round.
Bizzy tries to lock up and control but Bongo gives him a forearm to the face and pushes him away.
Boooooooooooooooooooo!!! God, this has been a terrible round. Come on you two, sort yourselves out!
Bizzy is squirming around, avoiding Bongo's attempts to control the action.
Bongo controlling the pace for now.
And that is the end of the round. The fighters go back to their corners.
Bingo Bongo showed his class in that round. I'd imagine he'll take it on all the scorecards.
The fighters get back to their feet, the hooter sounds and we're back to the action! And we move into the final round!
Bongo shoots for a takedown but Bizzy saw that one coming a mile off and avoided it easily.
Bongo gets a double leg takedown into Bizzy's guard.
Bongo forces his way into half guard.
Bongo sitting and controlling from the half guard.
Let's hope that Bongo has the urge to step up the pace any second now because for the last 15 or 20 seconds he's just been holding on tight.
We've had a slow start to the round here - hopefully the action picks up.
Bongo seems very keen to just sit and control from half guard but Bizzy does not like that idea so much and is remaining active off his back.
That's one minute gone in the round.
Bongo not doing much here.
Bongo is trying to control the action in half guard but Bizzy is working away on the bottom, looking perhaps to get back to full guard.
Bongo controlling the action here.
Bongo is continuing to stall.
The referee decides to stand the fighters back up.
That's two minutes gone in the round.
My god... these two guys really need to pick up the pace or everyone will leave to go get a beer.
A telegraphed takedown attempt from Bongo is defended easily by Bizzy.
Bizzy scores to the head and body with a nice combination!
 It looks like Bingo Bongo has been cut. It looks like Bingo Bongo has been cut.
Bizzy slaps away a takedown attempt from Bongo, before circling back to the center of the mat.
Lark Bizzy has stuffed three takedown attempts in the round now. That's going to take a lot out of Bingo Bongo.
Bizzy avoids the clinch attempt nicely.
Bizzy appears to be looking for a counter takedown.
Bizzy fakes and then throws a beautiful body shot. Bongo looks a bit winded and takes a step backwards to take a breath.
Bingo Bongo seems to be the more aggressive standup fighter in this bout.
Bizzy lunges in with swinging rights and lefts but Bongo circles away quickly and effectively.
A really sloppy takedown attempt there from Bongo.
Bongo takes a big intake of breath there - he's definitely tired.
That's three minutes gone in the round.
Bizzy lands with a cross.
Bongo tries to move into range but Bizzy moves to the side and lands with a nice right hand.
Bongo moves into the clinch.
Bizzy tries to break the clinch but Bongo is controlling the position.
Bongo goes for a takedown in the clinch but Bizzy prevents it.
Bizzy has had enough of the clinch but Bongo keeps him there for the moment.
Bizzy working aggressively here.
Bizzy tries to circle away but Bongo has him pinned against the cage.
Bongo drops to a knee looking for a takedown but Bizzy gets the underhooks and prevents it.
That's four minutes gone in the round.
Bizzy wants the takedown. Bongo is fighting it off but Bizzy persists and manages to bring the fight to the ground, ending up in Bongo's guard against the cage.
Bizzy controlling from the top position.
Bingo Bongo is fighting for a decision - hopefully he's judged it right and he's actually winning the fight.
Bizzy trying to control but Bongo is working from the bottom.
Lark Bizzy has stepped it up - he knows he needs a finish here!
Boooooooooooooooooooo!!! God, this has been a terrible round. Come on you two, sort yourselves out!
Bizzy is going to have to think about doing something other than just controlling because Bongo is managing to avoid having the position dictated to him.

Bongo manages to wriggle out and sneak his way back up to his feet, so the fighters are now clinched up against the cage.
And that's the end of the fight!
Lark Bizzy showed his dominance in that final round.
I think Bongo has won this one but let's see whether the judges agree with me. Over to the ring announcer for the scorecards.
Ladies and gentlemen, after 3 rounds of action, we go to the scorecards for a decision.
Judge Jack Bonds scores the fight 28:29
Judge Percy O'Donnell scores the fight 28:29
Judge Timothy Bukovac scores the fight 28:29
In favor of your winner, by unanimous decision... Bingo Bongo!
|
|
|
|
|
|
|
|
|
|
|
|
|
|
|
|
|
|
|
|
|
|
|
| S |
C
A |
G |
S |
C
B |
G |
|
S |
C |
G |
|
energy
A | B |
|
hype
A | B |
|
pop
A | B |
|
mgr
A | B |
|
FIGHT
RATING
25% |
|
|
|
|
|
|
|
Undercard bout
|
Coming up we have a welterweight MMA rules bout between Mafuso Lamoto (ranked 4506 p4p, 5506 weight class) and Frankie Rodriguez (ranked 470 p4p, 537 weight class). Frankie Rodriguez will no doubt be trying to keep this one on the feet, where he has a distinct advantage.
 |
|
 |
| 162 cm
25
173
0 - 0 - 0 |
|
183 cm
25
170
0 - 1 - 0 |
BJJ Purple Belt
Brawler
Granite chin |
|
BJJ Blue Belt
Brawler
Granite chin |
|
| |
|
Ladies and gentlemen. This fight is 3 rounds, in the welterweight division.
Introducing the fighter to my left, fighting out of the red corner.
With a record of 0 - 0 - 0, fighting out of Hilo, Mafuso Lamoto!
And introducing the fighter to my right, fighting out of the blue corner.
With a record of 0 - 1 - 0, fighting out of Montreal, Frankie Rodriguez !
The judges for this bout are Jack Bonds, Frank Antenori and Don Winkell.
The bell rings for round one and we are underway!
A decent looking body kick lands there for Rodriguez .
Lamoto shoots in for a takedown but Rodriguez shows good takedown defense there and keeps this one on the feet.
Rodriguez lands a leg kick and bounces back out of range.
Lamoto closes the distance, clinches up and gets a nice trip takedown into side control. Very smooth.
Lamoto decides to stand up, so the ref orders Rodriguez to his feet.
Rodriguez lands with a nice low kick. That'll leave a bruise.
Rodriguez gets in close and instigates a clinch.
Rodriguez lands an elbow that stopped Lamoto in his tracks for a moment.
Rodriguez lands a knee to the head.
The crowd cheering loudly, showing their appreciation for the quality fight we're seeing here.
Rodriguez lands an elbow inside that Lamoto shrugs off.
Rodriguez lands an elbow that stopped Lamoto in his tracks for a moment.
Lamoto letting Rodriguez take a breather here.
Rodriguez connects with a knee to the head.
That's one minute gone in the round.
Rodriguez lands a knee to the body.
Lamoto tries to pull guard but Rodriguez forces him back to his feet, against the cage.
Rodriguez lands a glancing elbow in the clinch.
Lamoto fails to pull the fight into his guard.
That's three failed takedown attempts in the round for Mafuso Lamoto. That's going to take a lot out of him.
Rodriguez pushes Lamoto back against the cage and lands a hook to the side of the head.
Lamoto tries to circle away but Rodriguez has him pinned against the cage.
Lamoto has had enough of the clinch but Rodriguez keeps him there for the moment.
Rodriguez working Lamoto over with knees to the body.
Rodriguez lands an elbow just above Lamoto 's eye.
Lamoto takes a knee right on the jaw!
Lamoto stalls.
Lamoto tries to pull guard but Rodriguez holds him up against the cage and eventually Lamoto drops back down to his feet.
That's two minutes gone in the round.
Lamoto has managed to pull guard. Let's see whether he can work an aggressive guard. It will also be interesting to see what tactics Rodriguez uses from the top position.
Rodriguez postures up and scores with a shot to the body and a follow up elbow to the head.

Lamoto throwing his legs up looking for a triangle.
The fans in attendance giving it up for the two fighters, who have really let it all hang out in the last minute or so!
Lamoto working from the bottom, still in full guard. He's managed to get a loose triangle. Rodriguez doesn't seem to be doing much to defend here, obviously he feels comfortable in the position. Oh but Lamoto is tightening it up a little... Rodriguez has to be careful here... He's got his foot tucked under now, this looks tight! Rodriguez reacted too slowly and this one could be over in a matter of seconds! YES! Rodriguez taps out! Nice BJJ there by Lamoto!
Ladies and gentlemen, after 2:48 of round 1, we have a winner by way of Submission (Triangle Choke). Mafuso Lamoto!
|
|
|
|
|
|
|
|
|
|
|
|
|
|
|
|
|
|
|
|
|
|
|
| S |
C
A |
G |
S |
C
B |
G |
|
S |
C |
G |
|
energy
A | B |
|
hype
A | B |
|
pop
A | B |
|
mgr
A | B |
|
FIGHT
RATING
56% |
|
|
|
|
|
|
|
Undercard bout
|
Coming up we have a middleweight MMA rules bout between Hugh Jaqueman (ranked 5567 p4p, 4265 weight class) and David Lett (ranked 493 p4p, 451 weight class). David Lett acknowledges the crowd's support as he enters the cage.
 |
|
 |
| 188 cm
25
195
0 - 1 - 0 |
|
180 cm
25
185
1 - 1 - 0 |
BJJ Purple Belt
Counter fighter
Cuts easily |
|
Good takedowns
Counter fighter
Determined |
|
| |
|
Ladies and gentlemen. This fight is 3 rounds, in the middleweight division.
Introducing the fighter to my left, fighting out of the red corner.
With a record of 0 - 1 - 0, fighting out of Hilo, Hugh Jaqueman!
And introducing the fighter to my right, fighting out of the blue corner.
With a record of 1 - 1 - 0, fighting out of Montreal, David Lett!
The judges for this bout are Timothy Bukovac, Frank Antenori and Percy O'Donnell.
The bell rings for round one and we are underway!
Jaqueman shoots in for a takedown and gets it. Let's see what he's got on the mat.
Lett working from the bottom, still in full guard. He's managed to get a loose triangle. Jaqueman doesn't seem to be doing much to defend here, obviously he feels comfortable in the position. Oh but Lett is tightening it up a little... Jaqueman has to be careful here... He's got his foot tucked under now, this looks tight! Jaqueman reacted too slowly and this one could be over in a matter of seconds! YES! Jaqueman taps out! Nice BJJ there by Lett!
Ladies and gentlemen, after 0:18 of round 1, we have a winner by way of Submission (Triangle Choke). David Lett!
In his post fight interview, David Lett started talking himself up. Luckily his charisma kept the crowd on side and gave him a good reception.
|
|
|
|
|
|
|
|
|
|
|
|
|
|
|
|
|
|
|
|
|
|
|
| S |
C
A |
G |
S |
C
B |
G |
|
S |
C |
G |
|
energy
A | B |
|
hype
A | B |
|
pop
A | B |
|
mgr
A | B |
|
FIGHT
RATING
100% |
|
|
|
|
|
|
|
Undercard bout
|
Coming up we have a middleweight MMA rules bout between Vadym Yashchenko (ranked 3701 p4p, 3957 weight class) and Adam Lenz (ranked 415 p4p, 436 weight class). Adam Lenz will no doubt be trying to keep this one on the feet, where he has a distinct advantage.
 |
|
 |
| 190 cm
25
194
1 - 0 - 0 |
|
183 cm
25
185
2 - 1 - 0 |
Good wrestling
Brawler
Cardio machine |
|
BJJ Blue Belt
Brawler
Determined |
|
| |
|
Ladies and gentlemen. This fight is 3 rounds, in the middleweight division.
Introducing the fighter to my left, fighting out of the red corner.
With a record of 1 - 0 - 0, fighting out of Sydney, Vadym Yashchenko!
And introducing the fighter to my right, fighting out of the blue corner.
With a record of 2 - 1 - 0, fighting out of Montreal, Adam Lenz!
The judges for this bout are Timothy Bukovac, Frank Antenori and Jack Bonds.
The bell rings for round one and we are underway!
Lenz shoots in for a takedown and gets it. Let's see what he's got on the mat.
Yashchenko looking to control.
Lenz must be cautious of submissions here, given that his opponent has the superior Jiu Jitsu.
Lenz trying to control the position from guard on top but Yashchenko is wriggling around, looking for whatever he can.
Lenz preventing the sweep.
Lenz postures up.
Yashchenko is working the butterfly guard. He manages to land a nice scissor sweep and is now in half guard on the top. Nice move.
We've had a slow start to the round here - hopefully the action picks up.
Yashchenko slips a nice elbow through Lenz's hands, connecting with Lenz's forehead.
Yashchenko is looking to stall here but Lenz recovers full guard.
Yashchenko being controlled here momentarily.
That's one minute gone in the round.
Yashchenko scoring with punches to the head and body.
Yashchenko scoring with punches to the head and body.
Lenz escapes his hips to the side and looks to be working for an armbar. Yashchenko gives him a little smile and shakes his head. No chance.
Lenz has momentary wrist control but Yashchenko slips an elbow through the middle.
Yashchenko trying to control the position from guard on top but Lenz is wriggling around, looking for whatever he can.
Yashchenko working from the guard for now, landing some ground and pound.
Yashchenko works over Lenz with some ground and pound from guard.
That's two minutes gone in the round.
Yashchenko content to sit in guard, stalling... Great. Oh but he could get punished here because Lenz has locked up a guillotine! Lenz's face is contorted as he sqeezes tight on the submission attempt - will he finish? Yashchenko is holding on here and Lenz must be using up a lot of energy. Yashchenko has gone limp! He's out! He's out cold! Lenz gets to his feet, tossing aside his stricken foe. Arms raised, he milks the applause from the crowd. Great submission!
Ladies and gentlemen, after 2:23 of round 1, we have a winner by way of Submission (Guillotine). Adam Lenz!
|
|
|
|
|
|
|
|
|
|
|
|
|
|
|
|
|
|
|
|
|
|
|
| S |
C
A |
G |
S |
C
B |
G |
|
S |
C |
G |
|
energy
A | B |
|
hype
A | B |
|
pop
A | B |
|
mgr
A | B |
|
FIGHT
RATING
39% |
|
|
|
|
|
|
|
Undercard bout
|
Coming up we have a middleweight MMA rules bout between Maskar Flugamine (ranked 3583 p4p, 3064 weight class) and Uncle Ben (ranked 403 p4p, 361 weight class). Maskar Flugamine has a significant reach advantage - let's see if he can make it count.
 |
|
 |
| 188 cm
25
199
1 - 0 - 0 |
|
175 cm
25
190
2 - 0 - 0 |
Good wrestling
Brawler
Inexperienced |
|
BJJ White Belt
Excellent MT
Powerful |
|
| |
|
Ladies and gentlemen. This fight is 3 rounds, in the middleweight division.
Introducing the fighter to my left, fighting out of the red corner.
With a record of 1 - 0 - 0, fighting out of Rio de Janeiro, Maskar Flugamine!
And introducing the fighter to my right, fighting out of the blue corner.
With a record of 2 - 0 - 0, fighting out of New York, Uncle Ben!
The judges for this bout are Frank Antenori, Jack Bonds and Percy O'Donnell.
The bell rings for round one and we are underway!
Ben shoots in for a takedown! He's got it and he's managed to land in side control! That's better than Ben was expecting from the takedown attempt, I'm sure!
Flugamine avoids any damage from the ground and pound of Ben.
The fighters are pressed up against the cage, both looking to find a bit of space to work.
Flugamine manages to work his way to half guard, despite Ben's best efforts.
Ben trying to control from half guard but Flugamine is working away.
Flugamine is looking to improve his position.
Flugamine keeping control of the position.
Flugamine is looking to regain full guard. Not this time though.
We've had a slow start to the round here - hopefully the action picks up.
The fighters are battling for position here. Flugamine manages to regain full guard. Nice work.
Flugamine pulls Ben in close to prevent any damage.
Ben throws a strike but Flugamine rolls with it and manages to sweep. Now he's in guard on top.
The ref warns both fighters not to hold the cage as they work up against the meshing.
That's one minute gone in the round.
Flugamine drops back, looking for a kneebar! Ben looks panicked! The fighters roll across the mat, one looking to finish, one looking to escape. Ben looks to have wriggled free... Yes, he's got his leg free and he's dived into side control! Good work there from Ben!
Flugamine is sneaking out the side here. He's bucked Ben off and has taken his back!
Flugamine punishes Ben with strikes from the back mount.
It looks like Uncle Ben has been cut.
Ben defends a rear naked choke attempt by controlling one of Flugamine's arms.
Flugamine scores with punches and elbows.
Flugamine lands shots from the back.
Flugamine keeps control of the position easily here as Ben tries to buck him off.
Ben trying to control the position but Flugamine manages to sink in the hooks.
That's two minutes gone in the round.
Flugamine has Ben flattened out and is raining down punches.
This is a great period of action - very entertaining stuff!
Flugamine looking to soften up his opponent with punches.
Ben is taking damage to the body and head.
Flugamine scores with punches to the body.
Flugamine has his opponent's back and is working for the choke.
Flugamine lands with a couple of good shots - one to the side of the head and one questionable shot that could be viewed as to the back of the head but the referee lets it go.
Flugamine lands a shot to the body.
Flugamine looking for the RNC.
Oooh a big shot gets through from Flugamine. Many more shots like that and the referee will have to think about stepping in!
That has opened up Uncle Ben's cut even more.
Flugamine has his opponent's back and is working for the choke.
Flugamine trying to secure his dominant position for a moment - making sure Ben doesn't escape.
Flugamine landing with strikes.
Ben defends a rear naked choke attempt by controlling one of Flugamine's arms.
That's three minutes gone in the round.
Flugamine has Ben flattened out and is raining down punches.
Flugamine avoiding Ben 's attempts to control his hands.
Ben really doesn't want to stay on the ground with Flugamine. If he can't get it back to his feet, it's only a matter of time before he'll be tapping out.
Flugamine struggling to keep hold of the position.
Flugamine has been looking to land a fair amount of strikes on the ground. He might be looking to soften his opponent up in order to work for a submission.
Flugamine is looking cool and calm here, just waiting for a good opportunity to attack and finish the fight from this dominant position.
Ben is staying cool under pressure, defending well against the rear naked choke attempt from his opponent.
Flugamine is landing with strikes. Ben can't take much more of this.
Flugamine controlling the position well here. Ben rolled but Flugamine kept the hooks locked in and stayed in the dominant position.
That's four minutes gone in the round.
Flugamine is working hard for the rear naked choke here.
Ben looking very determined here, making life difficult for Flugamine.
Flugamine is looking to finish with some ground and pound!
Ben trying to control but not successfully.
Flugamine has his opponent's back and is working for the choke.
Flugamine scores with strikes from the back.
The cut above Uncle Ben's eye is starting to cause him problems now.
Ben is taking damage to the body and head.
And that is the end of the round. The fighters go back to their corners.
Maskar Flugamine dominated that round.
The cut man is working on Uncle Ben's cut.
The fighters get back to their feet, the hooter sounds and we're back to the action!
Flugamine tries to score a power double leg takedown but Ben sees that one coming and sprawls well. That will dishearten Flugamine somewhat.
Ben shoots in for a takedown! He's got it and he's managed to land in side control! That's better than Ben was expecting from the takedown attempt, I'm sure!
Ben throwing ground and pound but whilst doing so, he forgets to control position and Flugamine works his way back to half guard. Good composure under pressure.
Ben throwing punches and elbows but they're not doing any damage.
Flugamine is doing well to control the position and prevent Ben from advancing to side control.
We've had a slow start to the round here - hopefully the action picks up.
Ben throwing shots but Flugamine is blocking nicely.
Flugamine controlling the position for now.
Flugamine has controlled the position for a good 20 seconds, which will no doubt be starting to frustrate his opponent.
Flugamine is really dominating this fight. Is there anything that Ben can do to turn this around?
That's one minute gone in the round.
Flugamine gets back to full guard.
Ben is looking to work some ground and pound but Flugamine has wrist control.
Flugamine pulls Ben in close to prevent any damage.
Maskar Flugamine overall seems to be getting the better of the ground position in the fight so far.
Flugamine lands a beautiful sweep and he's now moved into his opponent's guard.
Flugamine works over Ben with some ground and pound from guard.
Uncle Ben's cut is absolute horrible now. This looks like something out of a horror film with blood covering both fighters.
The referee calls the doctor in to look at Uncle Ben's cut. Oh no, the doctor has called an end to the bout!
Ladies and gentlemen, after 2:57 of round 2, we have a winner by way of TKO (Cut). Maskar Flugamine!
The defeated Uncle Ben had this to say: 'He has to ride with me'.
|
|
|
|
|
|
|
|
|
|
|
|
|
|
|
|
|
|
|
|
|
|
|
| S |
C
A |
G |
S |
C
B |
G |
|
S |
C |
G |
|
energy
A | B |
|
hype
A | B |
|
pop
A | B |
|
mgr
A | B |
|
FIGHT
RATING
30% |
|
|
|
|
|
|
|
Undercard bout
|
Coming up we have a light heavyweight MMA rules bout between Antonio Prilla (ranked 2934 p4p, 3217 weight class) and Al Fry (ranked 389 p4p, 421 weight class). Both these guys have solid standup skills and neither is particularly fantastic on the ground, so let's hope for a nice standup war!
 |
|
 |
| 188 cm
25
215
3 - 1 - 0 |
|
208 cm
25
208
1 - 0 - 0 |
BJJ White Belt
Excellent MT
Self confident |
|
BJJ White Belt
Excellent boxer
Granite chin |
|
| |
|
Ladies and gentlemen. This fight is 3 rounds, in the light heavyweight division.
Introducing the fighter to my left, fighting out of the red corner.
With a record of 3 - 1 - 0, fighting out of Las Vegas, Antonio Prilla!
And introducing the fighter to my right, fighting out of the blue corner.
With a record of 1 - 0 - 0, fighting out of Hilo, Al Fry!
The judges for this bout are Timothy Bukovac, Percy O'Donnell and Jack Bonds.
The bell rings for round one and we are underway!
Prilla misses with the combination.
Prilla misses with a combination
and Fry counters with a good right hand that lands right on the jaw.
Prilla tries a switch kick but it misses it's target.
Prilla misses the shot to the body.
Prilla throws a body shot but no joy.
Fry wants to counter with a clinch but Prilla pushes him away.
Fry blocks a head kick by Prilla.
Fry drops down looking to force a counter takedown but Prilla defends it well.
A right-left combo lands from Fry.
Prilla throws a head kick that misses and slips in the process. He scrambles back to his feet and the fighters circle.
We've had a slow start to the round here - hopefully the action picks up.
Prilla lands a jab-cross combination.
Fry takes a kick to the side of the head.
Prilla definitely looks more muscular than last time we saw him fight.
This has been an exciting period of action!
Prilla pulls out of a head kick attempt.
Fry tries a counter takedown but it's more of a dummy move, and he uses it to push himself away.
Prilla tries a head kick but it misses.
Prilla swings away with a body shot that misses
letting Fry counter with a right hand.
Fry is a painfully thin specimen of a man. You do wonder whether a good body kick would snap him clean in two.
That's one minute gone in the round.
Prilla takes a body punch but keeps moving.
Fry avoids the head kick by Prilla.
Fry unleashes a big counter combination but Prilla bobs and weaves and avoids any damage.
Fry lands with an uppercut that bounces Prilla off the cage and back into range.
Prilla pulls out of a head kick attempt.
Fry unleashes a big counter combination but Prilla bobs and weaves and avoids any damage.
Fry lands a jab followed by a nice looking cross.
Fry misses with a jab, cross combination.
Prilla dodges the punch combination from Fry.
Fry throws a nice looking combination but Prilla bobs and weaves to avoid any damage.
Prilla tries a head kick but it misses.
Fry is using his reach advantage to land shots from outside his opponent's range.
A head kick from Prilla lands but Fry takes it in his stride.
Sloppy strikes from Prilla. Those never looked like landing.
This is a great period of action - very entertaining stuff!
Prilla tries a head kick but it misses.
Fry lands a straight punch to the body, keeping Prilla at a distance.
That's two minutes gone in the round.
Fry tests Prilla's chin there with a solid looking shot.
Fry lands a right hook to the body.
Prilla dodges the punch combination from Fry.
Prilla is looking to counter with a shot to the body.
Al Fry is looking to keep the fight on the feet at all costs.
Fry fakes high and swings low for a body shot but Prilla manages to avoid it.
Prilla throws a head kick but Fry moves out of range.
Boom, another hit is landed. "You're gunna get knocked out" taunts Fry, as that shot connected.
Nice uppercut lands for Fry. That snapped Prilla's head back.
Fry walks forward, straight into a front kick from Prilla.
Prilla tries a head kick but it misses.
A head kick misses from Prilla.
Fry unleashes a big counter combination but Prilla bobs and weaves and avoids any damage.
That's three minutes gone in the round.
An inside leg kick lands from Prilla.
A head kick misses from Prilla.
Prilla is looking to land body kicks.
Prilla throws a body kick but he wasn't in range.
Fry tries to counter by closing the distance.
Prilla connects with a body shot that sends Fry's belly button to the back.
A swing and a miss from Prilla.
Prilla takes one to the chin there.
Donk. Fry catches Prilla right on the button with a cross.
Prilla goes for a spinning back kick but it misses.
Fry tries to counter by closing the distance.
Prilla scores with a head kick. Fry tried to block it but didn't get his arm up in time.
Fry misses with a few strikes there.
Prilla closes the distance and takes a jab right on the nose as he does so.
Prilla delivers a nice body kick.
That's four minutes gone in the round.
This is a great period of action - very entertaining stuff!
A head kick misses from Prilla.
Prilla misses with the combination.
A punch lands to the side of Prilla 's head but he takes it in his stride.
Prilla misses with a body shot.
Prilla takes a jab on the nose there. A little bit of blood seems to be coming out. Hopefully that won't affect his breathing.
Fry avoids the head kick by Prilla.
A low kick from Prilla is predictable there
and Fry counters with a nice uppercut.
Prilla tries a switch kick but it misses it's target.
Prilla misses with a half-hearted attempt at a head kick.
Prilla is breathing heavily.
Prilla throws a sloppy head kick and Fry moves out of range easily.
Prilla throws a sloppy head kick and Fry moves out of range easily.
And that is the end of the round. The fighters go back to their corners.
A close round but Al Fry will probably get the nod.
OK. That's time! The bell goes and we're back to the action.
Prilla throws a head kick that misses and slips in the process. He scrambles back to his feet and the fighters circle.
A lazy body kick from Prilla
and Fry counters with a stiff right hand.
Fry throws a hard body shot but it just misses.
An attempted straight right counter from Prilla misses the target.
Prilla fakes high and shoots in for a takedown but Fry avoids it really well and circles away.
Boom, another hit is landed. "You're gunna get knocked out" taunts Fry, as that shot connected.
We've had a slow start to the round here - hopefully the action picks up.
Fry throws a combination that misses
and Prilla counters with a flying knee. Nice.
Fry works the jab nicely.
Prilla's hands are dropping dangerously low here and Fry connects clean with a right hook that sends him down to one knee! Prilla scrambles back to his feet.
Prilla tries a head kick but it misses.
Fry now looks to counter with a shot at the body.
A looping hook to the body misses from Prilla. Fry does a little dance to reset his feet.
That's one minute gone in the round.
Prilla looks to score with a combo but nothing lands.
Fry will need to tighten up his combinations if he doesn't want to gas himself out, swinging at thin air.
Prilla swung with a counter punch to the body but it didn't connect.
Fry takes a kick to the side of the head.
Prilla takes a punch to the jaw and another one to the bread basket.
Fry misses with a jab, cross combination.
Prilla throws a head kick that misses and slips in the process. He scrambles back to his feet and the fighters circle.
Fry is looking for the big counter here.
Prilla scores with a sloppy right hand. Fry should have avoided that one.
Fry avoids the head kick by Prilla.
Fry steps in looking to clinch after the strikes miss from Prilla.
Fry moving in and out of range nicely, whilst landing the scoring shot.
Fry throws a combination but it was largely blocked by Prilla.
Prilla swings and misses with a hook to the body.
That's two minutes gone in the round.
We've seen a great period of action over the last minute or so - credit to both fighters for going all out!
Fry defending well as Prilla loads up on a big left hand.
Fry tries to bum rush Prilla with a series of wild strikes but Prilla uses good footwork to avoid the assault.
Prilla throws a head kick that connects with a bit of head and a bit of hand.
Prilla is looking to wear down Fry with body shots, infact he's throwing more body shots than head shots at the moment.
Prilla avoids the body shot from Fry.
Fry cracks a nice hook into Prilla's ribs.
Fry throws a series of punches but Prilla avoids them all with ease.
Prilla is looking to counter with a shot to the body.
Fry tests Prilla's chin there with a solid looking shot.
Fry takes a solid shot to the body. That one hurt him but he's trying not to show it.
Antonio Prilla seems to be the more aggressive standup fighter in this bout.
Prilla instigates a clinch.
Prilla breaks from the clinch.
Fry takes a thudding leg kick, right into the meat of the thigh.
That's three minutes gone in the round.
Prilla misses with a half-hearted attempt at a head kick.
Prilla tries to clinch up.
Prilla tries a switch kick but it misses it's target.
Prilla tries to clinch but Fry moves away
enabling Fry to counter with a crisp jab.
Prilla looks to land a body kick but Fry moved away.
Both fighters are absolutely exhausted here.
Fry throws a combination but comes up with nothing but fresh air.
Prilla connects with a high kick.
Prilla tries to close the distance and clinch up against the cage but Fry paws at him with a jab and circles away.
A head kick misses from Prilla.
Nice body punch from Fry.
A combination from Fry does no damage.
A counter left hand to the body from Prilla misses its target.
Fry connects with a crisp jab.
Antonio Prilla is looking to throw some combinations by the looks of things.
That's four minutes gone in the round.
Fry misses with the combination.
Fry avoids the clinch attempt nicely.
Prilla sets himself, and Fry steps forward looking for the clinch! Prilla avoids it this time.
Prilla throws a sloppy head kick and Fry moves out of range easily.
Prilla tries a head kick but it misses.
Prilla sets himself, and Fry steps forward looking for the clinch! Prilla avoids it this time.
Al Fry seems to be getting the better of the standup.
The crowd are loving this. Great action here.
Fry takes a step back and watches a body kick go sailing past his mid section.
Prilla misses with a head kick.
Prilla lands with a kick to the temple. Fry shrugs as if to say "is that all you've got?"
Fry works over Prilla's head and body with a nice combination.
Good leg kick by Prilla.
Fry stuns Prilla with a nice body shot, before stepping back out of range.
A looping hook to the body misses from Prilla. Fry does a little dance to reset his feet.
And that is the end of the round. The fighters go back to their corners.
A close second round but Al Fry will probably get the nod - 10:9.
OK. That's time! The bell goes and we're back to the action. This is the final round!
Fry throws a nice looking combination but Prilla bobs and weaves to avoid any damage.
Fry has used his reach advantage pretty well so far tonight.
Fry misses with a series of wild punches.
Prilla is looking to counter with a body kick.
Fry lunges in with an uppercut that skims his opponent's chin.
Fry misses with a jab and misses with a cross straight after too.
Prilla fails to land with the punch combination there - jab, cross, hook, miss, miss, miss.
Prilla lands with a nice body kick.
Prilla throws a sloppy head kick and Fry moves out of range easily.
We've had a slow start to the round here - hopefully the action picks up.
Prilla plants his feet and lands a nice head kick!
Fry avoids the head kick by Prilla.
Both fighters are breathing heavily.
Prilla uses some good footwork to avoid the body shot by Fry.
Prilla looks like he's developed a pretty tasty lump over his left eye. He'll need to avoid taking much more damage to that.
Prilla misses with a low kick.
That's one minute gone in the round.
Prilla throws a head kick that misses
The fighters are starting to perspire pretty heavily.
and Fry counters with a three punch combination, finished off with a leg kick. Nice work.
Fry scores with a one two! Prilla had his feet all tangled up there and couldn't avoid the strikes.
Prilla throws a hard body shot but it just misses.
Prilla throws a sloppy head kick and Fry moves out of range easily.
Fry lands a nice shot to the body.
Prilla throws a head kick but Fry moves out of range.
Fry lands a vicious shot with the stealth of a sniper and the strength of a viper. Are vipers that strong? I can think of lots of things that are stronger than a viper - not many rhyme with sniper though.
Prilla throws a hook to the body but it doesn't connect.
Fry throws a right hand that Prilla ducks under and follows up with a left that Prilla also avoids with ease.
Prilla tries a head kick but it misses.
Fry now looks to counter with a shot at the body.
Prilla throws a front kick that sends Fry stumbling back into the cage.
The crowd are loving this. Great action here.
Fry lands a beauty of a right hand that gets the crowd cheering.
That's two minutes gone in the round.
Prilla just misses with a punch to the body.
Prilla waving his hands out in front of him, looking to distract Fry.
Prilla gets a clinch.
Prilla breaks the clinch and we're back to striking at distance.
Fry moving in and out of range nicely, whilst landing the scoring shot.
Prilla fails to land with a series of punches.
Prilla throws a head kick that misses.
Prilla tries a head kick but it misses.
Fry throws a nice looking combination but Prilla bobs and weaves to avoid any damage.
Fry sizes up Prilla with a pawing jab and scores with a straight right down the middle.
Prilla misses with a half-hearted attempt at a head kick.
Fry throws a combination but comes up with nothing but fresh air.
It looked like Prilla was looking amped, ready to throw a big counter but didn't commit.
That's three minutes gone in the round.
Prilla takes one on the button.
Fry scores with a reasonable looking shot to the body. Prilla doesn't seem bothered though.
Fry avoids the head kick by Prilla.
Prilla on the wrong end of a nice hook.
Prilla waving his hands out in front of him, looking to distract Fry.
Fry misses with a jab, cross combination.
A right-left combo lands from Prilla.
Fry stuffs the takedown.
Fry tries a counter takedown but it's more of a dummy move, and he uses it to push himself away.
Fry cracks Prilla with a good jab.
Fry swats away the attempt to clinch by Prilla.
That's four minutes gone in the round.
Fry lands with a nice body punch.
Prilla missing with a left hand there. Fry was out of range so wasted energy throwing that one.
Prilla takes a punch right to his stomach. That took the wind out of him momentarily.
The fans in attendance giving it up for the two fighters, who have really let it all hang out in the last minute or so!
Fry throws a nice looking combination but Prilla bobs and weaves to avoid any damage.
Prilla tries to clinch up against the cage, rushing in to close the distance. Fry manages to break the clinch and circles back to the middle of the mat.
Fry connects with a jab.
Fry stalks Prilla and leaps in with a furious combination of punches. Uppercuts and crosses smash into Prilla's face. Prilla staggers backwards, shaken.
A combination from Fry does no damage.
A head kick misses from Prilla.
Prilla takes one on the chin but seems OK.
Antonio Prilla has stepped it up - he knows he needs a finish here!
Al Fry is fighting for a decision - hopefully he's judged it right and he's actually winning the fight.
Fry cracks Prilla with a right hand to the side of the head.
And that's the end of the fight!
Al Fry comfortably won the final round on my scorecard.
I've got Fry winning every round here. Surely the decision will go his way and he'll pick up a well deserved decision victory. Over to the ring announcer for the scorecards.
Ladies and gentlemen, after 3 rounds of action, we go to the scorecards for a decision.
Judge Timothy Bukovac scores the fight 27:30
Judge Percy O'Donnell scores the fight 28:29
Judge Jack Bonds scores the fight 28:30
In favor of your winner, by unanimous decision... Al Fry!
|
|
|
|
|
|
|
|
|
|
|
|
|
|
|
|
|
|
|
|
|
|
|
| S |
C
A |
G |
S |
C
B |
G |
|
S |
C |
G |
|
energy
A | B |
|
hype
A | B |
|
pop
A | B |
|
mgr
A | B |
|
FIGHT
RATING
68% |
|
|
|
|
|
|
|
Undercard bout
|
Coming up we have a light heavyweight MMA rules bout between Thomas Mahi Ai (ranked 2002 p4p, 2559 weight class) and John Knox (ranked 275 p4p, 347 weight class). Mahi Ai comes to the cage accompanied by Ewan Dobson - Haunted By Hell. John Knox will no doubt be trying to keep this one on the feet, where he has a distinct advantage.
 |
|
 |
| 194 cm
25
215
2 - 0 - 0 |
|
185 cm
25
215
1 - 0 - 0 |
BJJ White Belt
Excellent MT
Good chin |
|
BJJ White Belt
Excellent boxer
Solid chin |
|
| |
|
Ladies and gentlemen. This fight is 3 rounds, in the light heavyweight division.
Introducing the fighter to my left, fighting out of the red corner.
With a record of 2 - 0 - 0, fighting out of London, Thomas Mahi Ai!
And introducing the fighter to my right, fighting out of the blue corner.
With a record of 1 - 0 - 0, fighting out of New York, John Knox!
The judges for this bout are Don Winkell, Timothy Bukovac and Jack Bonds.
The bell rings for round one and we are underway!
The fight stays on the outside here - Mahi Ai looks like he's thinking about clinching though.
Mahi Ai clinches up against the cage.
Knox is trying to break free.
Knox is trying to break the clinch but Mahi Ai is controlling him.
Knox wants to push off and get back to the center of the mat but Mahi Ai has him pressed against the cage.
Mahi Ai tries to work over Knox's body with a swooping hook but it only glances the target.
Knox blocks a couple of punches on the inside.
We've had a slow start to the round here - hopefully the action picks up.
Knox blocking some punches.
A quick uppercut on the inside from Mahi Ai.
Knox wants to break the clinch but can't.
Mahi Ai misses with a punch to the body.
That's one minute gone in the round.
Mahi Ai throws a punch but it's blocked by Knox.
Mahi Ai misses with some punches.
Knox is trying to break the clinch but Mahi Ai is controlling him.
Mahi Ai pushes Knox back against the cage and unloads with a body punch.
Mahi Ai definitely looks more muscular than last time we saw him fight.
Knox tries to break the clinch but Mahi Ai is controlling the position.
Mahi Ai misses with a shot to the kidneys.
Mahi Ai misses with a punch to the body.
Mahi Ai tries to work over Knox's body with a swooping hook but it only glances the target.
Knox is trying to work out of this bad position, with his back against the cage.
A left hand lands to the body for Mahi Ai.
Mahi Ai scores with a shoulder strike.
Knox blocks a body shot from Mahi Ai.
That's two minutes gone in the round.
Mahi Ai works on Knox's body with a couple of short punches.
Mahi Ai misses with a shot to the kidneys.
Mahi Ai struggles to land a body shot inside as Knox controls his hands.
Mahi Ai gets through Knox's defenses to land a nice punch to the side of the head.
Mahi Ai swings wildly with an uppercut but Knox uses good head movement to avoid it.
A head punch on the inside from Mahi Ai fails to land.
Mahi Ai struggles to land a body shot inside as Knox controls his hands.
Mahi Ai misses with a punch to the body.
Mahi Ai misses with a hook from the clinch.
A head punch on the inside from Mahi Ai fails to land.
Mahi Ai tries a shoulder strike but it doesn't do any damage.
That's three minutes gone in the round.
Mahi Ai swings away with an uppercut that misses.
Mahi Ai lands a shot to the body.
Mahi Ai lands with a good tight uppercut to the head.
Mahi Ai lands with a good tight uppercut to the head.
Mahi Ai misses with a hook to the ribs.
Knox blocks a punch to the side of the head.
Mahi Ai misses with a hook to the ribs.
A head punch blocked on the inside by Knox.
Mahi Ai lands a nice looking hook to the body, against the cage.
Knox looks winded!
Mahi Ai swings away with an uppercut that misses.
Mahi Ai throws a punch but it's blocked by Knox.
Mahi Ai lands with a short head shot on the inside.
That's four minutes gone in the round.
Mahi Ai lands an uppercut.
Mahi Ai misses with a body punch.
Knox wants to break free. God knows he wants to breaaaak freeee.
Mahi Ai tries a shoulder strike but it doesn't do any damage.
Mahi Ai lands a shoulder strike that jolts his opponent's head backwards.
Wooooo! Give it up for these two warriors! They are putting on a show!
A short uppercut from Mahi Ai.
Mahi Ai lands with a right to the head.
Knox wants to break free but Mahi Ai has control.
Mahi Ai tries a shoulder strike but it doesn't do any damage.
With the fighters clinched against the cage, Mahi Ai creates a bit of distance for himself and scores with a nice uppercut.
Mahi Ai tries a body shot but Knox blocks it.
A left hand lands to the body for Mahi Ai.
And that is the end of the round. The fighters go back to their corners.
Thomas Mahi Ai dominated that round.
Well, the break between rounds is over. Let's get back to the scrappin!
Mahi Ai slips under a jab.
Knox gets tackled into the cage by Mahi Ai. Mahi Ai maintains the clinch.
Mahi Ai throws a head punch that misses.
Mahi Ai breaks the clinch and we're back to striking at distance.
Mahi Ai clinches up against the cage.
Mahi Ai is really dominating this fight. Is there anything that Knox can do to turn this around?
Knox wants to strike at distance but he can't break free of the clinch.
Mahi Ai can't find room to land a body shot as Knox controls the action.
Knox blocking some punches.
Mahi Ai misses with a punch on the inside.
Thomas Mahi Ai has scored more points in the clinch so far.
We've had a slow start to the round here - hopefully the action picks up.
Knox is looking to break free of the clinch but Mahi Ai has double underhooks.
Mahi Ai tries a body shot but Knox blocks it.
Mahi Ai misses with a short punch on the inside.
Knox wants to get back to striking at distance but Mahi Ai won't allow it.
We've been informed that Knox has been working hard on his conditioning in the buildup to the fight.
That's one minute gone in the round.
An uppercut on the inside fails to land for Mahi Ai.
Mahi Ai tries a body shot but Knox blocks it.
Mahi Ai pushes Knox back against the cage and lands a hook to the side of the head.
Mahi Ai struggles to land a body shot inside as Knox controls his hands.
Mahi Ai tries to throw a body punch but Knox avoids it by throwing Mahi Ai back against the cage.
A hook to the body from Mahi Ai.
Mahi Ai tried to land a shot to the body but connects with Knox's elbow.
Mahi Ai keeps control of Knox as he tries to wriggle out of the double underhooks.
Knox looks like he'd prefer to be striking at range right now.
Mahi Ai lands a nice shot to the body.
Knox is breathing heavily.
Mahi Ai lands a shoulder strike that jolts his opponent's head backwards.
That's two minutes gone in the round.
Mahi Ai misses with a shot to the kidneys.
Knox blocks a body shot from Mahi Ai.
Mahi Ai stays in close to his opponent and throws a right hand to the body.
Knox takes a shot to the head.
Knox blocks a couple of punches on the inside.
Mahi Ai tries to throw a body punch but Knox avoids it by throwing Mahi Ai back against the cage.
Mahi Ai keeps control of Knox as he tries to wriggle out of the double underhooks.
Mahi Ai lands a right hand that snaps the head of Knox backwards.
Mahi Ai tries to land a shot to the body but it's blocked.
Mahi Ai has a couple of punches blocked by Knox.
Knox blocks a body shot from Mahi Ai.
A short left from Mahi Ai.
That's three minutes gone in the round.
Mahi Ai fails to land with a short punch on the inside.
Mahi Ai misses with a shot to the kidneys.
Mahi Ai tries a body shot but Knox blocks it.
Mahi Ai misses with a shot to the kidneys.
Knox's head jolts backwards as he takes an uppercut right on the button!
With the fighters clinched against the cage, Mahi Ai creates a bit of distance for himself and scores with a nice uppercut.
Mahi Ai scores with a hook to the body.
Knox blocking some punches.
Mahi Ai misses with a hook from the clinch.
A head punch blocked on the inside by Knox.
Mahi Ai lands a nice shot to the body.
Mahi Ai misses with a body punch.
That's four minutes gone in the round.
Mahi Ai swings away with an uppercut that misses.
Mahi Ai tries a body shot but Knox blocks it.
Mahi Ai misses with a short punch on the inside.
Mahi Ai fails to land with a short punch on the inside.
Nice body punch from Mahi Ai - that landed with a thud.
A short uppercut from Mahi Ai.
Mahi Ai tries a shoulder strike but it doesn't do any damage.
Nice body punch from Mahi Ai - that landed with a thud.
The crowd thankful this round is nearly over.
Mahi Ai lands a hook to the side of the head.
We've seen a great period of action over the last minute or so - credit to both fighters for going all out!
Knox blocks a punch to the side of the head.
Knox blocks a body shot from Mahi Ai.
And that is the end of the round. The fighters go back to their corners.
Thomas Mahi Ai dominated that second round.
The fighters get back to their feet, the hooter sounds and we're back to the action! And we move into the final round!
Mahi Ai wants to clinch up but Knox keeps it at a distance.
Knox let fly with a counter punch to the body but it didn't land.
A punch lands to the side of Knox 's head but he takes it in his stride.
Mahi Ai throws a lazy uppercut
and Knox counters with a series of strikes. Mahi Ai will be more careful next time no doubt.
Mahi Ai has taken the fight to the clinch.
Mahi Ai swings away with an uppercut that misses.
Mahi Ai gets through Knox's defenses to land a nice punch to the side of the head.
Mahi Ai throws a head punch that misses.
A head punch blocked on the inside by Knox.
We've had a slow start to the round here - hopefully the action picks up.
Mahi Ai can't find room to land a body shot as Knox controls the action.
Mahi Ai throws a punch but it's blocked by Knox.
Mahi Ai prevents Knox from breaking the clinch.
Mahi Ai lands a right hand that snaps the head of Knox backwards.
That's one minute gone in the round.
A short left from Mahi Ai.
Knox is trying to force a seperation but Mahi Ai has the dominant position.
Mahi Ai makes some space for himself and lands an uppercut.
Mahi Ai prevents Knox from breaking the clinch.
Mahi Ai lands a hook that snaps the head of Knox backwards.
Mahi Ai scores with a nice hook to the head.
Knox blocks an uppercut.
Mahi Ai gets through Knox's defenses to land a nice punch to the side of the head.
Knox has had enough of the clinch and is looking to separate.
Mahi Ai can't find room to land a body shot as Knox controls the action.
Mahi Ai has a couple of punches blocked by Knox.
Mahi Ai struggles to land a body shot inside as Knox controls his hands.
That's two minutes gone in the round.
A head punch blocked on the inside by Knox.
Knox wants to get back to striking at distance but Mahi Ai won't allow it.
Mahi Ai tries to throw a body punch but Knox avoids it by throwing Mahi Ai back against the cage.
Knox blocking some punches.
Mahi Ai struggles to land a body shot inside as Knox controls his hands.
A hook to the body from Mahi Ai.
Knox takes a big intake of breath there - he's definitely tired.
Mahi Ai misses with a hook from the clinch.
Mahi Ai swings away with an uppercut that misses.
Mahi Ai is leaning against Knox and scores with a nice uppercut to the body.
This has been an exciting period of action!
Mahi Ai misses with a punch to the body.
An uppercut to the body lands inside from Mahi Ai.
That's three minutes gone in the round.
Knox blocks a couple of punches on the inside.
Mahi Ai scores with a nice hook to the head.
Mahi Ai scores with a hook to the body.
Mahi Ai tries a body shot but Knox blocks it.
Knox prevents a body shot from Mahi Ai.
Mahi Ai struggles to land a body shot inside as Knox controls his hands.
Thomas Mahi Ai is fighting for a decision here - he's started to take the cautious approach.
Knox is trying to work out of this bad position, with his back against the cage.
Mahi Ai doesn't land with the attempted body shot.
Mahi Ai keeps the fight in the clinch, despite Knox's efforts to push away.
John Knox has stepped it up - he knows he needs a finish here!
That's four minutes gone in the round.
Knox wants to break the clinch but can't.
Mahi Ai misses with a punch to the body.
Mahi Ai lands with a light punch inside.
The crowd thankful this round is nearly over.
Knox blocking some punches.
Mahi Ai lands a right hand that snaps the head of Knox backwards.
And that's the end of the fight!
Thomas Mahi Ai showed his dominance in that final round.
Well I reckon that's a shut out for Mahi Ai, winning every round. Will the judges agree? They are the ones who matter, even if they are often depressingly incompetent. Over to the ring announcer for the scorecards.
Ladies and gentlemen, after 3 rounds of action, we go to the scorecards for a decision.
Judge Don Winkell scores the fight 30:25
Judge Timothy Bukovac scores the fight 30:25
Judge Jack Bonds scores the fight 30:25
In favor of your winner, by unanimous decision... Thomas Mahi Ai!
Post fight, Thomas Mahi Ai took to the microphone: 'Thank you to all the fans & please do check out White Gorilla (1529) & PWNAGE™ (5868) who have kindly sponsored me.'.
|
|
|
|
|
|
|
|
|
|
|
|
|
|
|
|
|
|
|
|
|
|
|
| S |
C
A |
G |
S |
C
B |
G |
|
S |
C |
G |
|
energy
A | B |
|
hype
A | B |
|
pop
A | B |
|
mgr
A | B |
|
FIGHT
RATING
39% |
|
|
|
|
|
|
|
Co-main event
|
Coming up we have a welterweight MMA rules bout between Edmond Chabazian (ranked 1804 p4p, 2717 weight class) and William Maxey (ranked 243 p4p, 346 weight class). William Maxey will no doubt be trying to keep this one on the feet, where he has a distinct advantage.
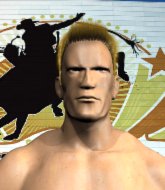 |
|
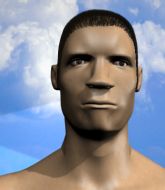 |
| 184 cm
25
184
5 - 0 - 0 |
|
180 cm
25
179
3 - 1 - 0 |
Good takedowns
Brawler
Big heart |
|
BJJ Blue Belt
Excellent MT
Very confident |
|
| |
|
Ladies and gentlemen. This fight is 3 rounds, in the welterweight division.
Introducing the fighter to my left, fighting out of the red corner.
With a record of 5 - 0 - 0, fighting out of Los Angeles, Edmond Chabazian!
And introducing the fighter to my right, fighting out of the blue corner.
With a record of 3 - 1 - 0, fighting out of London, William Maxey!
The judges for this bout are Jack Bonds, Frank Antenori and Timothy Bukovac.
The bell rings for round one and we are underway!
Maxey lands with a kick to the temple. Chabazian shrugs as if to say "is that all you've got?"
Chabazian closes the distance and clinches up with Maxey, looking for a takedown. Chabazian pushes Maxey against the cage but Maxey circles to the side and manages to break the clinch.
Maxey throws a mid kick that lands with a slap.
Maxey lands a leg kick. The shin dug right into the meat of the thigh.
Maxey scores with a reasonable looking shot to the body. Chabazian doesn't seem bothered though.
Thud! ouch! good body kick from Maxey - that will leave a mark!
Chabazian scores with a takedown into Maxey's guard.
Chabazian is just sitting in guard, looking to avoid any submissions.
Maxey looks more muscular than last time we saw him. He must have been on the weights.
Chabazian got a little sloppy there for a moment and Maxey has worked his way into a loose triangle - can he finish it?! No, Chabazian has managed to get both his arms back between Maxey's legs - danger averted.
Chabazian trying to pass the guard. He's being very persistent here but Maxey manages to land a sweep and now he's on top!
Wooooo! Give it up for these two warriors! They are putting on a show!
Chabazian is pulling down on Maxey's head. It's preventing any offense from Maxey, at least for the moment.
Chabazian working for a triangle but Maxey defends it easily.
That's one minute gone in the round.
Maxey slips nicely into half guard.
Chabazian holds on for dear life, maintaining half guard for now.
Maxey is trying to control the action in half guard but Chabazian is working away on the bottom, looking perhaps to get back to full guard.
Chabazian keeping hold of Maxey's head, controlling as best he can.
Chabazian makes his way to full guard. A much better position for Chabazian.
Chabazian is active off his back here, looking for submissions.
Chabazian looking to try and escape his hips here, looking for a submission. It looks like he's going for a triangle but Maxey is defending well. Chabazian quickly switches to an armbar and extends the arm! Maxey has no choice but to tap, to a very quick submission! Wow, that was lightning fast! Chabazian celebrates on the cage, with the crowd.
Ladies and gentlemen, after 2:18 of round 1, we have a winner by way of Submission (Armbar). Edmond Chabazian!
|
|
|
|
|
|
|
|
|
|
|
|
|
|
|
|
|
|
|
|
|
|
|
| S |
C
A |
G |
S |
C
B |
G |
|
S |
C |
G |
|
energy
A | B |
|
hype
A | B |
|
pop
A | B |
|
mgr
A | B |
|
FIGHT
RATING
52% |
|
|
|
|
|
|
|
Main event
|
Coming up we have a middleweight MMA rules bout between Matteo Chibaclov (ranked 1671 p4p, 3527 weight class) and Michael McPherson (ranked 216 p4p, 401 weight class). Matteo Chibaclov has the edge in experience - let's see if he can make that count tonight.
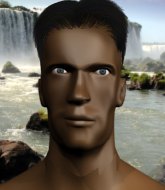 |
|
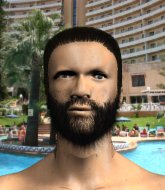 |
| 187 cm
25
195
6 - 0 - 0 |
|
185 cm
25
185
1 - 0 - 0 |
Good takedowns
Brawler
Big heart |
|
BJJ White Belt
Decent boxing
Heavy handed |
|
| |
|
Ladies and gentlemen. This fight is 3 rounds, in the middleweight division.
Introducing the fighter to my left, fighting out of the red corner.
With a record of 6 - 0 - 0, fighting out of Rio de Janeiro, Matteo Chibaclov!
And introducing the fighter to my right, fighting out of the blue corner.
With a record of 1 - 0 - 0, fighting out of Sydney, Michael McPherson!
The judges for this bout are Jack Bonds, Don Winkell and Percy O'Donnell.
The bell rings for round one and we are underway!
A nice combination there by McPherson.
Chibaclov tries for a takedown but McPherson circles away easily
and McPherson counters with a stiff right hand.
McPherson displays good takedown defense there as he swats away a double leg from Chibaclov.
A punch combination from McPherson misses.
Chibaclov darts in looking for a takedown but McPherson gets double underhooks and turns Chibaclov into the cage.
That's three failed takedown attempts in the round for Matteo Chibaclov. That's going to take a lot out of him.

McPherson manages to break the clinch.
Chibaclov looks to have improved his striking defense since last time we saw him fight.
Chibaclov with a lazy takedown attempt
and McPherson counters with a shot to the ribs. That looked like it hurt.
Nice takedown defense from McPherson. No joy for Chibaclov on that attempt.
Horrible takedown attempt by Chibaclov or perhaps it was just good defense by McPherson, which made it look bad.
McPherson keeps the fight standing with a nice sprawl.
A momentary lapse in concentration from Chibaclov enables McPherson to shoot in and score with a neat double leg. Chibaclov manages to secure a closed guard as the fighters hit the mat.
The fans in attendance giving it up for the two fighters, who have really let it all hang out in the last minute or so!
Chibaclov wants to control here, rather than go for any submissions from the bottom. At least for now.
McPherson trying to control the position from guard on top but Chibaclov is wriggling around, looking for whatever he can.
That's one minute gone in the round.
Chibaclov lands a beautiful sweep and he's now moved into his opponent's guard.
McPherson really doesn't want to stay on the ground with Chibaclov. If he can't get it back to his feet, it's only a matter of time before he'll be tapping out.
Chibaclov stays in close to McPherson's body and controls the position.
Chibaclov thinks about going for a leg but decides against it, in order to maintain the position.
Chibaclov trying to control but McPherson is working from the bottom.
Chibaclov pushing down on McPherson's thigh, trying to pass to half guard. He's managed it... Nice work.
McPherson is defending against the submission attempts here by Chibaclov.
Chibaclov with a momentary lay and pray from half guard.
We get told so often about how wrestlers don't like to be on their backs. Let's see if McPherson can do anything to dispel that myth.
That's two minutes gone in the round.
Chibaclov is pressing down on McPherson's thigh, looking to free his foot. McPherson is holding on for now.
Chibaclov prevents McPherson from improving his position.
Chibaclov trying to control the action but McPherson is working from the bottom.
Chibaclov is looking to pass the guard... He's managed it - he's now in full mount!
Chibaclov prevents McPherson from getting the reversal.
Chibaclov tries to control but McPherson wriggling away.
McPherson taking shots to the head.
That's three minutes gone in the round.
Chibaclov controlling from the full mount.
Chibaclov looking to secure an arm triangle but McPherson defends it well.
McPherson tries to hold on but Chibaclov postures up.
Chibaclov lands an elbow that was bordering on illegal but the referee lets it go with a warning.
McPherson looks winded!
McPherson is wriggling around here but as he tries to escape, Chibaclov has taken his back.
Chibaclov has the rear naked choke here! This is very bad for McPherson! Can he survive? No! He's out! Chibaclov gets to his feet and celebrates with his cornermen. He looks absolutely delighted. In the post fight interviews he takes time to thank his parents and everyone who has believed in him from the start. How sweet.
Ladies and gentlemen, after 3:58 of round 1, we have a winner by way of Submission (RNC). Matteo Chibaclov!
|
|
|
|
|
|
|
|
|
|
|
|
|
|
|
|
|
|
|
|
|
|
|
| S |
C
A |
G |
S |
C
B |
G |
|
S |
C |
G |
|
energy
A | B |
|
hype
A | B |
|
pop
A | B |
|
mgr
A | B |
|
FIGHT
RATING
43% |
|
|
|
|
|
|
|
|
|
|
