|
TWGC 37 (155lbs, D1): Finals - Round 2 PBP Commentary |
Co-main event
|
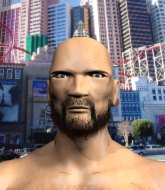
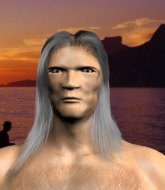
This TWGC bout is 1 fifteen minute round in the lightweight division. Introducing today's competitors. In the red corner, competing out of London, with a TWGC record of 2 wins and 1 losses; Kazuo Imanari! And in the blue corner, fighting out of New York, with a TWGC record of 28 wins and 11 losses; John Lee!
The judges for this bout are James Glass, Sam Margolis and Chris Edwards.
The official calls the fighters to the middle and the contest is under way.
Imanari shoots in for a takedown - he's clinched up with Lee but Lee pushes him off and we're back to square one.#CL2#
Lee gets to the clinch - let's see what his plan is here.#TD2#
Lee has double underhooks and is working for a body lock takedown. He's got it. The fighters land in half guard but Imanari regains guard immediately. Score +2 for takedown into guard / half guard: Imanari (0) vs (2) Lee
Lee stands up and looks to throw the legs aside to pass to side control. Imanari swivels though and keeps the full guard.
Lee stays in close to Imanari's body and controls the position.
Imanari looking to sweep here. No luck so far.
We've had a slow start to the round here - hopefully the action picks up.
Lee stays in close to Imanari's body and controls the position.
It looks like Lee might be adopting somewhat of a lay and pray gameplan here, which I'm sure won't go down too well with the paying fans in attendance... Or the ring announcers come to think of it.#T1#
Imanari wants to hit a sweep here but Lee passes into full mount! Oh no, disaster for Imanari there! Score +3 for passing guard: Imanari (0) vs (5) Lee
Lee seems to be looking to move to his opponent's back but Imanari is holding on tight.
The ref warns both fighters not to hold the cage as they work up against the meshing.
Lee looking to control and managing it successfully.
Lee prevents Imanari from getting the reversal.#T2#
Lee takes a little breather and maintains the position. The referee will be looking for him to stay active from such a dominant position though.
Imanari can't escape the position.
Lee pushing the pace here, looking to move to his opponents back and work for a finish.
Lee tucks in and makes sure he doesn't lose the dominant position.
Imanari is desperately trying to get back to half guard.
#T3#
Lee controlling from the full mount.
Imanari wants to hold on but Lee pushes him away.
Imanari looking to escape from mount but he's given up his back! Score +3 for taking back: Imanari (0) vs (8) Lee
You can see the frustration on Imanari's face
He knows he is in trouble unless he improves his position sooner rather than later.
Good control from Lee.
The fighters are pressed up against the cage, both looking to find a bit of space to work.
Imanari is trying to break free.
Imanari is in a tricky position but he's been working on his transitions down at Arcalimon Top Team, so we'll see if he gets out of it.#T4#
Lee trying to secure his dominant position for a moment - making sure Imanari doesn't escape.
Lee's corner are shouting for him to control the position and he seems happy to oblige.
Lee doesn't have the hooks in and Imanari manages to turn into his guard.
Score +2 for sweep to guard / half guard: Imanari (2) vs (8) Lee
Imanari trying to control but Lee is working from the bottom. #T5#
Imanari being controlled here momentarily.
Imanari is intent on slowing down the pace of the fight, simply looking to control.
Lee has his hands on Imanari's head, controlling the position. #T6#
Lee is trying to control the position from the bottom.
Lee has his hands on Imanari's head, controlling the position.
Lee looking to hit a scissor sweep but Imanari is one step ahead there. #T7#
Imanari wants to pass the guard but Lee is keeping the position.
Lee working a defensive guard here.
Imanari passes easily into side control. Nice work. Score +3 for passing guard: Imanari (5) vs (8) Lee
Imanari trying to control the action but Lee is working from the bottom.
Imanari just content to control the position. #T8#
Lee is trying to improve his position.
Imanari trying to control the position but Lee is working away.
Lee struggling a bit here.
Lee is looking to reverse the position.
Lee felt the need to train up his defensive grappling in the buildup to the fight. Presumably he was expecting to be in a difficult position like this, so let's see if he can get out of it.#T9#
Lee is sneaking out the side here. He's bucked Imanari off and has taken his back! Score +4 for clean sweep to past guard: Imanari (5) vs (12) Lee
What can Imanari do to escape this position? He's going to have to figure it out pretty quick if he wants to stay in the fight!
Lee keeps control of the position as Imanari tries to break free.
A bit of a pause in the action here. Lee controlling the positon.
Imanari rolls, trying to escape but Lee keeps control of the position.
#T10#
Lee is riding his opponent, not letting Imanari buck him off.
Lee is not going to allow Imanari to sit and survive in this position.
Lee trying to control momentarily.
Imanari looks to control his opponent's hands but he's not mananging it at the moment.
Lee has good solid back control here. #T11#
Let's hope that Lee has the urge to step up the pace any second now because for the last 15 or 20 seconds he's just been holding on tight.#T12#
Imanari just trying to survive but Lee is wriggling into a better position, looking to finish.
What can Imanari do to escape this position? He's going to have to figure it out pretty quick if he wants to stay in the fight!
Imanari tries to roll but Lee sticks to his back.
Lee trying to secure his dominant position for a moment - making sure Imanari doesn't escape. #T13#
Lee is continuing to stall.
I really don't envy Imanari right now.
Imanari trying to control but he's just got himself in more trouble.
Lee wants to control but Imanari manages to buck him off and is now in Lee's guard! Nice work there by Imanari! Score +2 for sweep to guard / half guard: Imanari (7) vs (12) Lee
Lee tries to land a sweep but no joy. #T14#
Lee pulls Imanari in close to his closed guard and prevents Imanari from doing any damage or advancing position.
Imanari wants to pass the guard but Lee is keeping the position.
Imanari wants to control from the top but Lee keeps moving.
Lee wants to sweep but no luck.
Boooooooooooooooooooo!!! God, this has been a terrible round. Come on you two, sort yourselves out!
Imanari looking to sit in guard and control but Lee gets the butterfly guard and sweeps. He's now in the guard on the top. Score +2 for sweep to guard / half guard: Imanari (7) vs (14) Lee
Imanari being controlled here, momentarily.
And that's the end of the fight!
Lee wins on points by 14 to 7.
After winning the bout, John Lee thanked all his fans and promised he'd do even better in his next fight. The crowd seemed to love his humility. |
|
|
|
Main event
|
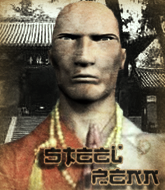
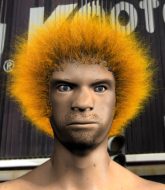
This TWGC bout is 1 fifteen minute round in the lightweight division. Introducing today's competitors. In the red corner, competing out of Los Angeles, with a TWGC record of 39 wins and 24 losses; Bjj Steel! And in the blue corner, fighting out of Los Angeles, with a TWGC record of 3 wins and 0 losses; Conor Larkin!
The judges for this bout are Colin Fotheringham, Phil Schofield and James Atkins.
The fighters bow as they face eachother in the middle of the mat and we are under way.#TD2#
Larkin changes levels and drives through with a really nice takedown into side control. Steel looks really pissed at himself for not defending that better. Score +4 for clean takedown past guard: Steel (0) vs (4) Larkin
The ref warns both fighters not to hold the cage as they work up against the meshing.
Steel is trying to control Larkin's posture but Larkin avoids it. #SUB2#
Larkin tries for an arm triangle. That looks pretty tight to me. Is this one over!?! Possibly, maybe, no Larkin has let go of the choke. Obviously it wasn't as tight as we thought!
Larkin taking a breather here.
Larkin tries to cartwheel into mount but he doesn't manage it.
We've had a slow start to the round here - hopefully the action picks up.
Larkin controls the position from side control.#T1#
Steel tries to work a leg under to get back to half guard but Larkin wriggles his own leg back out and remains in side control.
Larkin slows the pace down.
Larkin tries to move to mount but Steel blocks the move with his legs.
Steel is looking to regain half guard here but Larkin keeps moving and retains side control.
Steel isn't going anywhere.
Steel really is built like a bowling ball. I wonder if he'd roll if you pushed him down a hill...
Steel wants to control but Larkin postures up.
Steel might be looking to lock onto one of his opponent's long limbs for a submission, whilst we're on the ground.#T2#
Steel prevents Larkin from moving into mount.
Steel tries to get back to half guard but can't.
Steel looking for a sweep but Larkin has passed into full mount! Oh no! Score +2 for reaching mount: Steel (0) vs (6) Larkin
Steel wants to control but Larkin is having none of it.
Steel looks out of his depth in this position - he's holding on tight.
Larkin controlling from mount. #T3#
Steel tries to hold on but Larkin postures up.
Steel is squirming around, avoiding Larkin's attempts to control the action.
Larkin tucks in and makes sure he doesn't lose the dominant position.
Steel is in all sorts of trouble here.
#T4#
Larkin content just to control the position here.
Steel is trying to escape the mount.
Steel tries to hold on but Larkin pushes him away.
Larkin controlling his opponent.
Larkin wants to control the pace but Steel is squirming around nicely. #T5#
Larkin controlling from mount.
Steel tries to get back to half guard but can't.
The fighters are pressed up against the cage, both looking to find a bit of space to work.
Larkin controlling from the full mount. #SUB2#
Larkin is in full mount, looking to secure a guillotine but Steel is surviving well by controlling Larkin's body position as best he can.
Steel is looking to improve his position but Larkin isn't that keen on the idea.#T6#
Larkin controlling from the full mount.
Steel is looking to improve his position but Larkin isn't that keen on the idea.
Steel tries to lock up and control but Larkin gives him a forearm to the face and pushes him away.
Larkin controlling from mount. #T7#
Steel working to try and regain half guard.
Steel tries to lock up and control but Larkin gives him a forearm to the face and pushes him away.
Steel is working to get back to half guard.
Larkin sitting in mount, just looking to control for the moment.
Steel tries to hold on but Larkin postures up.
Larkin controlling the pace for now. #T8#
Steel holds on to Larkin around his waist, trying desperately to prevent any attacks.
Larkin controlling his opponent.
Steel is looking to get to half guard.#T9#
Larkin content just to control the position here.
Steel is trying desperately to improve position.
Larkin avoids the attempt from Steel to control.
Larkin takes a little breather and maintains the position. The referee will be looking for him to stay active from such a dominant position though.#T10#
Steel just holding on.
Steel is trying desperately to improve position.
Larkin controlling the pace for now.
Larkin wants to control the pace but Steel is squirming around nicely.
Steel sneaks a leg back under and regains half guard and is working straight away to try and get back to guard. He hasn't managed just yet though.#T11#
Larkin takes a deep breath and rests his weight momentarily on top of his opponent, to control the position.
Steel is looking to control Larkin's leg but it's slowly edging free. Can Steel avoid being mounted?
Larkin prevents Steel from improving his position.
Larkin uses his free foot to push down on Steel's thigh. Eventually he works his other foot free and he's advanced to mount - this is trouble for Steel. Score +3 for passing guard: Steel (0) vs (9) Larkin
Steel tries to hold on but Larkin pushes him away.
Larkin controlling from the full mount.
Steel can't escape the position.
#T12#
Steel tries to hold on but Larkin pushes him away.
Larkin content just to control the position here.
Let's hope that Larkin has the urge to step up the pace any second now because for the last 15 or 20 seconds he's just been holding on tight.
Larkin prevents Steel from getting the reversal.
Steel is writhing around trying to get back to his feet.
Larkin content just to control the position here.
Steel tries to reverse the position but Larkin maintains control.#T13#
Steel is working hard here to advance position.
Larkin tucks in and makes sure he doesn't lose the dominant position.
Steel is wriggling around trying to escape.
#T14#
Larkin takes a little breather and maintains the position. The referee will be looking for him to stay active from such a dominant position though.
We're seeing a lot of stalling here from Larkin.
Boooooooooooooooooooo!!! God, this has been a terrible round. Come on you two, sort yourselves out!
Larkin trying to control but Steel is having none of it.
And that's the end of the fight!
Larkin wins on points by 9 to 0.
Our winner, Conor Larkin, made sure he spent some time buttering up the crowd during his post fight interview, which will no doubt bring him a few more fans. |
|
|
|
|
|
|