 |
T1 PBP Commentary |
Undercard bout
|
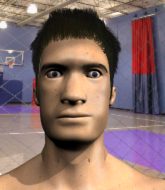
Coming up we have a super heavyweight MMA rules bout between Maki Damchaigym (ranked 24417 p4p, 5339 weight class) and Yushi Sakura (ranked 214 p4p, 185 weight class). Both fighters look fresh as a daisy as they make their way towards the cage.
 |
|
 |
| 175 cm
24
145
3 - 3 - 0 |
|
180 cm
24
152
5 - 3 - 0 |
BJJ White Belt
Excellent MT
Experienced |
|
BJJ White Belt
Good kicks
Solid chin |
|
| |
|
Ladies and gentlemen. This fight is 3 rounds, in the super heavyweight division.
Introducing the fighter to my left, fighting out of the red corner.
With a record of 3 - 3 - 0, fighting out of Tokyo, Maki Damchaigym!
And introducing the fighter to my right, fighting out of the blue corner.
With a record of 5 - 3 - 0, fighting out of Tokyo, Yushi Sakura!
The judges for this bout are Kenichi Hosakawa, Yukihiro Yamamoto and Tatsuya Matsuyama.

The bell rings for round one and we are underway!
Sakura is looking to clinch but Damchaigym is avoiding it.
Damchaigym blocks a head kick by Sakura.
Maki Damchaigym seems to be the more aggressive standup fighter in this bout.

Damchaigym gets in close and instigates a clinch.
Damchaigym tries to pull guard but Sakura forces him back to his feet, against the cage.

Sakura manages to break the clinch.
Sakura throws a nice head kick!
Horrible takedown attempt by Damchaigym or perhaps it was just good defense by Sakura, which made it look bad.
Damchaigym misses with a body kick.
We've had a slow start to the round here - hopefully the action picks up.
Damchaigym fails with a takedown attempt.
Sakura raises up his leg as if looking to counter with a high kick.
That's three failed takedown attempts in the round for Maki Damchaigym. That's going to take a lot out of him.
No luck with that takedown attempt from Damchaigym.

That's one minute gone in the round.
Sakura tries to clinch up but Damchaigym circles away and keeps his distance.
Sakura wants to clinch.
Damchaigym half commits to a counter takedown before pushing away, out of range.
Sakura keeps the fight standing with a nice sprawl.
Damchaigym tries to clinch but fails miserably
and Sakura counters with a lovely straight right hand!

Sakura instigates a clinch.
Sakura misses with a punch on the inside.
Sakura swings wildly with an uppercut but Damchaigym uses good head movement to avoid it.
A head punch on the inside from Sakura fails to land.

That's two minutes gone in the round.
Sakura escapes the clinch and we're back to striking.
Damchaigym tries to keep at a distance but Sakura has taken the fight into the clinch.
Sakura misses with the head strike.
Sakura lands a right uppercut that snaps the head of Damchaigym backwards.
Damchaigym blocks an uppercut.
Sakura wants to push off and get back to the center of the mat but Damchaigym has him pressed against the cage.
Damchaigym tries to pull guard but can't drag his opponent to the mat. Sakura just stands there and leans against the cage.
Sakura tries to circle away but Damchaigym has him pinned against the cage.

Damchaigym breaks the clinch and we're back to striking at distance.
Sakura tries to close the distance and clinch but Damchaigym swats him to one side with an open hand palm strike and circles away.
A slapping leg kick lands for Damchaigym.
Damchaigym fails to land the takedown.
Sakura throws a big counter head kick but Damchaigym avoids it with no problem.

That's three minutes gone in the round.
Damchaigym lands a slapping body shot.
Sakura gets to the clinch - let's see what his plan is here.
Sakura wants to strike at distance but he can't break free of the clinch.
Our sources have told us that Damchaigym has been working on his knees in the buildup to the fight.
Sakura escapes the clinch and we're back to striking.
Sakura blocks a head kick by Damchaigym.
Nice sprawl there from Sakura as Damchaigym shoots in.
Damchaigym tries for a takedown but Sakura circles away easily
and Sakura counters with a series of strikes. Damchaigym will be more careful next time no doubt.
Sakura fakes with an overhand right and moves in to clinch with Damchaigym, pushing him back against the cage.
Sakura misses with some punches.
Damchaigym blocks an uppercut.

That's four minutes gone in the round.
A head punch blocked on the inside by Damchaigym.
Damchaigym blocks a couple of punches on the inside.
Damchaigym lands a right hand.
Sakura breaks the clinch and we're back to striking at distance.
Sakura clinches.
The fans in attendance giving it up for the two fighters, who have really let it all hang out in the last minute or so!
Sakura breaks from the clinch.
Damchaigym throws a shot to the body.
Sakura closes the distance and pushes Damchaigym back into the cage.
Sakura wants to get back to striking at distance but Damchaigym won't allow it.
Sakura lands a right uppercut that snaps the head of Damchaigym backwards.
Sakura looks like he'd prefer to be striking at range right now.
Sakura tries to work over Damchaigym's body with a swooping hook but it only glances the target.
Damchaigym lands a right uppercut that snaps the head of Sakura backwards.
Sakura swings away with an uppercut that misses.
Damchaigym takes a shot to the head.
And that is the end of the round. The fighters go back to their corners.
Yushi Sakura dominated that round.
That's time! Damchaigym's corner gives him a slap on the ass as he gets ready to fight.

Damchaigym shoots in looking for a takedown but Sakura manages to keep the fight standing, pushing Damchaigym's face into the canvas for good measure before circling away.
Damchaigym throws a push kick but Sakura slaps the foot to one side.
The fight moves into the clinch position.
Damchaigym holding his opponent close, against the cage.
Sakura scores with an uppercut up the middle.
Damchaigym blocks a couple of punches on the inside.
Sakura lands with a short head shot on the inside.
Sakura missing with knees to the body.
We've had a slow start to the round here - hopefully the action picks up.
Sakura scores with a hook to the body.
Sakura tries a shoulder strike but it doesn't do any damage.
Damchaigym changes levels and goes for a takedown here. Sakura fights it off and pushes away nicely.
Damchaigym gets tackled into the cage by Sakura. Sakura maintains the clinch.
That's one minute gone in the round.
Damchaigym tries to jump guard but he falls flat on his backside. Sakura smiles and moves away.
That's three failed takedown attempts in the round for Maki Damchaigym. That's going to take a lot out of him.
Sakura clinches.
Sakura swings away with an uppercut that misses.
Sakura scores with an uppercut up the middle.
Damchaigym jumps guard but Sakura turns him against the cage and keeps the fight standing.
Sakura misses with the head strike.
Sakura breaks the clinch and we return to the middle of the mat.
Damchaigym throws a left and a right that both miss
and Sakura counters with a nice jab to the body that keeps Damchaigym thinking.
Damchaigym gets to the clinch - let's see what his plan is here.
We are yet to see a takedown attempt from Sakura in the fight. On paper you would think he is the more dominant ground fighter so let's see if these unusual tactics pay off.
Sakura wants to break free. God knows he wants to breaaaak freeee.
That's two minutes gone in the round.
Damchaigym blocks an uppercut.
Damchaigym is working hard here but doesn't seem to be able to control effectively, up against the cage.
Sakura misses with a short punch on the inside.
Sakura lands a hook to the side of the head.
Damchaigym blocks a punch to the side of the head.
Sakura has a couple of punches blocked by Damchaigym.
A nice right hand lands inside from Sakura.
Sakura lands a left hand that snaps the head of Damchaigym backwards.
Wooooo! Give it up for these two warriors! They are putting on a show!
Damchaigym jumps guard but Sakura stands there with Damchaigym around his waist. Damchaigym gives up and drops back to his feet. We remain in the clinch.
Damchaigym has dropped down and is looking to force the takedown but it's defended by Sakura after a bit of a struggle.
Damchaigym breaks from the clinch.
Sakura gets a clinch.
Yushi Sakura seems to be working more effectively in the clinch in the fight so far.
A left hand lands to the body for Sakura.
Sakura has been the more effective fighter overall so far.
Both fighters are absolutely exhausted here.
With the fighters clinched against the cage, Sakura creates a bit of distance for himself and scores with a nice uppercut.
That's three minutes gone in the round.
Sakura misses with the head strike.
Sakura misses with some punches.
Sakura lands a nice uppercut.
Sakura misses with the head strike.
Sakura swings wildly with an uppercut but Damchaigym uses good head movement to avoid it.
Sakura throws a head punch that misses.
Sakura has a couple of punches blocked by Damchaigym.
Sakura swings away with an uppercut that misses.
Damchaigym wants to break free. God knows he wants to breaaaak freeee.
Sakura breaks from the clinch.
Damchaigym with a lazy takedown attempt
and Sakura counters with a stiff right hand.
Yushi Sakura is looking to keep the fight on the feet at all costs.
Damchaigym tries to drive through with a takedown attempt but Sakura defends well and Damchaigym ends up having to push Sakura into the cage where they will battle it out in the clinch.
Sakura breaks the clinch and we're back to striking at distance.
Sakura darts in and out, connecting with a jab.
That's four minutes gone in the round.
Decent striking displayed by Damchaigym there.
Sakura tries to clinch but Damchaigym is having none of it.
Damchaigym appears to be looking for a counter takedown.
Sakura closes the distance and clinches.
A short right from Sakura.
The crowd are loving this. Great action here.
Sakura pushes off and circles away, back to the middle of the mat.
Sakura closes the distance and pushes Damchaigym back into the cage.
Sakura manages to break the clinch.
Damchaigym tries for a takedown but Sakura sees it coming a mile off and avoids it easily.
Sakura throws a counter combo.
Sakura has taken the fight to the clinch.
Sakura lands a right hand.
Damchaigym blocks a punch to the side of the head.
A nice left hand lands by Sakura.
And that is the end of the round. The fighters go back to their corners.
Yushi Sakura showed his class in that round. I'd imagine he'll take it on all the scorecards.
The minute break is over - no more time for sponges and pep talks - back to the action! This is the final round!

Damchaigym fails miserably with a takedown attempt.
Damchaigym looks for a takedown here. Will he get it? Sakura is fending him off so far but Damchaigym persists. Nope, Sakura circles away and we're back to standing.
Sakura throws a counter combo.
Sakura has Damchaigym up against the cage in a clinch.
A head punch on the inside from Sakura fails to land.
Sakura manages to break the clinch.
Sakura looks for the body kick but Damchaigym saw that one coming.
Sakura closes the distance and clinches.
We've had a slow start to the round here - hopefully the action picks up.
Sakura lands with a left to the head.
Sakura has had enough of the clinch and is looking to separate.
Sakura misses with a hook from the clinch.
Sakura prevents the takedown attempt.
That's three failed takedown attempts in the round for Maki Damchaigym. That's going to take a lot out of him.
Sakura lands a hook that snaps the head of Damchaigym backwards.
That's one minute gone in the round.
A head punch on the inside from Sakura fails to land.
Damchaigym's corner calls for him to break the clinch, which he does.
Yushi Sakura seems to be getting the better of the standup.
Damchaigym tries to keep at a distance but Sakura has taken the fight into the clinch.
Sakura lands a body shot.
Sakura throws a punch but it's blocked by Damchaigym.
Sakura misses with some punches.
Sakura breaks the clinch.
Maki Damchaigym is looking to throw some combinations by the looks of things.
Sakura clinches up with Damchaigym and pushes him back against the cage.
Sakura lands a left hand that snaps the head of Damchaigym backwards.
Sakura struggles to land a body shot inside as Damchaigym controls his hands.
Damchaigym fails to pull the fight into his guard.
Sakura breaks the clinch and we're back to striking at distance.
No luck with that takedown attempt from Damchaigym.
Both fighters are breathing heavily.
That's two minutes gone in the round.
Sakura rushes Damchaigym and pushes him back against the cage in a clinch.

Damchaigym jumps guard.
Sakura controls from within his opponent's guard.
Sakura pushing down on Damchaigym's thigh, trying to pass to half guard. He's managed it... Nice work.
Fantastic stuff here - a very entertaining period of action, which has drawn cheers from the crowd.
Sakura looks over to his corner - he wants some instructions but his corner are not responding.

Sakura wants to work for an arm triangle but Damchaigym is really keeping half guard well and defending the submission attempt.
That's three minutes gone in the round.
Sakura passes the half guard and he's now in mount! Big trouble for Damchaigym!
Damchaigym is in a horrible position here. Sakura smacks him with another shot as he tries to escape the position.
Sakura sitting in mount, just looking to control for the moment.
Damchaigym tries to control Sakura's body but Sakura pushes him off. Damchaigym squirms to his side and now Sakura has his back!
That's four minutes gone in the round.
Damchaigym defends a prolonged rear naked choke attempt and turns nicely into his opponent's guard.
Damchaigym won't allow Sakura to sweep him here.
Sakura controlling Damchaigym's posture.
The ref warns both fighters not to hold the cage as they work up against the meshing.
Maki Damchaigym has stepped it up - he knows he needs a finish here!
Yushi Sakura is fighting for a decision here - he's started to take the cautious approach.
The crowd thankful this round is nearly over.
And that's the end of the fight!
Yushi Sakura comfortably won the final round on my scorecard.
Well Sakura has outworked and out performed his opponent in all aspects of the game today. He was simply too good and the decision should be no more than a formality. Over to the ring announcer for the scorecards.
Ladies and gentlemen, after 3 rounds of action, we go to the scorecards for a decision.
Judge Kenichi Hosakawa scores the fight for Yushi Sakura!
Judge Yukihiro Yamamoto scores the fight for Yushi Sakura!
Judge Tatsuya Matsuyama scores the fight for Yushi Sakura!
Yushi Sakura wins by unanimous decision!
|
|
|
|
|
|
|
|
|
|
|
|
|
|
|
|
|
|
|
|
|
|
|
| S |
C
A |
G |
S |
C
B |
G |
|
S |
C |
G |
|
energy
A | B |
|
hype
A | B |
|
pop
A | B |
|
mgr
A | B |
|
FIGHT
RATING
49% |
|
|
|
|
|
|
|
Undercard bout
|
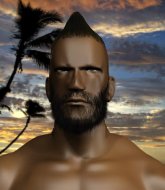
Coming up we have a super heavyweight MMA rules bout between Capitan Fairtex (ranked 24657 p4p, 5174 weight class) and Ren Hashimoto (ranked 230 p4p, 182 weight class). Both fighters look fresh as a daisy as they make their way towards the cage.
 |
|
 |
| 173 cm
26
135
2 - 3 - 0 |
|
170 cm
19
135
1 - 3 - 0 |
BJJ White Belt
Great elbows
KO power |
|
BJJ White Belt
Brawler
Tends to cut |
|
| |
|
Ladies and gentlemen. This fight is 3 rounds, in the super heavyweight division.
Introducing the fighter to my left, fighting out of the red corner.
With a record of 2 - 3 - 0, fighting out of Tokyo, Capitan Fairtex!
And introducing the fighter to my right, fighting out of the blue corner.
With a record of 1 - 3 - 0, fighting out of Tokyo, Ren Hashimoto!
The judges for this bout are Sosuke Kotani, Shigeki Sano and Yuuki Gou.
The bell rings for round one and we are underway!
Fairtex doesn't succeed with the takedown
and Hashimoto counters into the clinch. Nicely done.
Fairtex keeps control of Hashimoto as he tries to wriggle out of the double underhooks.
Hashimoto with a knee to the head.
Fairtex breaks from the clinch.

Hashimoto closes the distance and gets a trip takedown into side control. Fairtex quickly recovers to half guard.
Fairtex is trying to stand.
Hashimoto is trying to control. Fairtex wants to improve his position but can't escape this time.
Hashimoto looking to pass the half guard. Not this time.
We've had a slow start to the round here - hopefully the action picks up.
Fairtex is refusing to be controlled, as Hashimoto sits in half guard.
Hashimoto slows the pace down in half guard.
That's one minute gone in the round.
Hashimoto is looking for a kimura but he's never going to get it from there.
Hashimoto controlling the action here.
The referee wants the fighters to be more active or he's going to reset them on the feet.
Hashimoto is trying to control. Fairtex wants to improve his position but can't escape this time.

The referee has motioned to the fighters to stand back up.
Hashimoto fails with the takedown
and Fairtex counters with a one-two to the body.
That's two minutes gone in the round.
Fairtex bobs and weaves into range and then changes levels and scores with a nice takedown into side control.
Hashimoto can't do much from the bottom here.
Fairtex in side control lands a nice looking series of punches and elbows.
 Hashimoto is rocked! Hashimoto is rocked!
The ref warns both fighters not to hold the cage as they work up against the meshing.

Fairtex swings around for an armbar but Hashimoto sees it coming a mile off and turns beautifully into Fairtex's guard.
Fairtex is trying to control the position from the bottom.
Hashimoto is trying to work a guillotine from the top, or something like that? Don't know how he thinks he's going to get a finish from there.
Fantastic stuff here - a very entertaining period of action, which has drawn cheers from the crowd.
Hashimoto loading up with the ground and pound but he's missing more than he's landing in this flurry.
That's three minutes gone in the round.
Hashimoto looking to sit in guard and control but Fairtex gets the butterfly guard and sweeps. He's now in the guard on the top.

Hashimoto has Fairtex pulled in close to control his posture.

Hashimoto is scooting his butt against the cage and has managed to get back to his feet. Fairtex presses him back against the cage, presumably looking to take the fight back to the mat.
Hashimoto is looking for a takedown up against the cage. Fairtex gets underhooks though and prevents the takedown attempt.
Hashimoto is looking to break free of the clinch but Fairtex has double underhooks.
Fairtex gets an overhook and lands an elbow to the side of the head.
 It looks like Ren Hashimoto has been cut. It looks like Ren Hashimoto has been cut.
Fairtex escapes the clinch and we're back to striking.
Fairtex lands a straight punch to the body, keeping Hashimoto at a distance.
Fairtex pushes Hashimoto up against the cage in a clinch.
Hashimoto is trying to pull guard but Fairtex has him pressed against the cage.
Capitan Fairtex has stuffed three takedown attempts in the round now. That's going to take a lot out of Ren Hashimoto.
Hashimoto looks winded!
That's four minutes gone in the round.
Fairtex pulls guard successfully.
Fairtex escapes his hips to the side and looks to be working for an armbar. Hashimoto gives him a little smile and shakes his head. No chance.
We've seen a great period of action over the last minute or so - credit to both fighters for going all out!
Hashimoto in full guard, throwing the ground and pound. No damage this time.
Hashimoto trying to control the position from guard on top but Fairtex is wriggling around, looking for whatever he can.
Hashimoto postures up.
Hashimoto throwing strikes from guard but Fairtex blocks nicely.

Fairtex is working an open guard so Hashimoto takes the opportunity to get back to his feet.
And that is the end of the round. The fighters go back to their corners.
That was a close round but I would say that Capitan Fairtex will probably get the nod.
The cut man is working on Ren Hashimoto's cut.
That's the end of the interval. I'm sure that seemed a lot quicker than a minute for our two fighters! Back to the action.
Fairtex circles away from the clinch attempt.
Hashimoto closes the distance and gets a double leg, slamming Fairtex to the mat! Fairtex manages to get full guard.
Hashimoto trying to control the position from guard on top but Fairtex is wriggling around, looking for whatever he can.
Hashimoto wants to pass the guard but Fairtex is keeping the position.
Fairtex has Hashimoto pulled in close to control his posture.
Hashimoto won't allow Fairtex to sweep him here.
We've had a slow start to the round here - hopefully the action picks up.
A real slowdown in the pace of the fight for a moment, as Fairtex holds on and takes a little breather.
Fairtex wants to sweep but no luck.
That's one minute gone in the round.
Hashimoto wants to control from the top but Fairtex keeps moving.
The referee must be thinking about standing these guys back up.
Fairtex not looking particularly offensive just at the moment.
The referee has decided to stand the fighters back up, so we'll restart on the feet.
Hashimoto fails with the takedown
and Fairtex counters with a quick right hand to the jaw.
Hashimoto is looking to clinch.
Fairtex throws a right and a left that Hashimoto avoids nicely.
Hashimoto is looking to land body kicks.
It looked like Fairtex was looking amped, ready to throw a big counter but didn't commit.
Capitan Fairtex is looking to throw some combinations by the looks of things.
Hashimoto tries to close the distance and clinch up against the cage but Fairtex paws at him with a jab and circles away.
Fairtex feinted with a counter takedown.
Hashimoto keeps the fight on the outside.
Fairtex closes the distance and gets a double leg, slamming Hashimoto to the mat! Hashimoto manages to get full guard.
That's two minutes gone in the round.
Hashimoto keeping full guard, as Fairtex tries to pass.
Fairtex wants to control from the top but Hashimoto keeps moving.
Hashimoto looking to hit a scissor sweep but Fairtex is one step ahead there.
Hashimoto bucks up whilst keeping hold of a body lock, managing to reverse the position. Now he's in top in Fairtex's guard.

Hashimoto trying to control but Fairtex is working from the bottom.
Fairtex trying to punch from his back but it's not doing any damage.
That's three minutes gone in the round.
Fairtex is trying to control the position from the bottom.
Hashimoto controlling from the guard. I say controlling but really, he's stalling.
The fighters are pressed up against the cage, both looking to find a bit of space to work.
Fairtex not looking particularly offensive just at the moment.
Hashimoto won't allow Fairtex to sweep him here.
Hashimoto wants to control from the top but Fairtex keeps moving.
The referee has motioned to the fighters to stand back up.
That's four minutes gone in the round.
A lull in the action here being met with boos from the crowd.
Hashimoto looks for a takedown. He's got it. We're now in half guard.
Fairtex tries to kick Hashimoto off in order to stand up. Hashimoto Avoids the leg push though and dives into side control.
Fairtex trying to remain calm as Hashimoto controls from the top position.
Hashimoto has had enough of the ground for now and decides to stand.
Hashimoto changes levels and drives through with a really nice takedown into side control. Fairtex looks really pissed at himself for not defending that better.
Hashimoto is breathing heavily.
The crowd thankful this round is nearly over.
Hashimoto decides to stand back up.
Hashimoto with a nice calf kick.
Hashimoto drives through with a takedown into guard.

The fighters are working up against the cage. Fairtex manages to wriggle his way back to his feet, so the fighters are now clinched against the cage.
And that is the end of the round. The fighters go back to their corners.
A close second round but Ren Hashimoto will probably get the nod - 10:9.
The cut man is working on Ren Hashimoto's cut.
The fighters' corners scream their final instructions, as the referee calls time. Here we go, back to the action! Let's get this one finished - here comes the final round!
Hashimoto shoots in for a takedown. "I don't think so" says Fairtex as he avoids it easily.
Fairtex stuffs the takedown attempt from Hashimoto. Hashimoto gets slowly back to his feet.
Hashimoto dives in and scores a takedown into Fairtex's guard.
Fairtex pushes Hashimoto off and scrambles back to his feet.
Fairtex closes the distance and looks for a trip takedown... aaaand he's got it - Fairtex lands in his opponent's guard.
Hashimoto is looking to stand back up... there's a bit of a scramble and Fairtex dives into side control.
Wooooo! Give it up for these two warriors! They are putting on a show!
Hashimoto takes a big intake of breath there - he's definitely tired.
Hashimoto prevents Fairtex from moving into mount.
That's one minute gone in the round.
Hashimoto can't do much from the bottom here.
The referee tells the fighters to keep busy.
Hashimoto tries to control but Fairtex manages to take his back.
Fairtex looking for the choke from the back.
Fairtex trying to control momentarily.
Fairtex gets his hands free as Hashimoto looks to control.
That's two minutes gone in the round.
Hashimoto is really stuck here.
Fairtex not allowing Hashimoto to control his hands.
Fairtex is working really hard to secure the rear naked choke. Hashimoto defends successfully for a significant amount of time. Both fighters are looking very determined.
Fairtex has his arm under Hashimoto's chin here. Game over son! Fairtex squeezes tightly and Hashimoto is forced to tap out!
Ladies and gentlemen, after 2:51 of round 3, we have a winner by way of Submission (RNC). Capitan Fairtex!
|
|
|
|
|
|
|
|
|
|
|
|
|
|
|
|
|
|
|
|
|
|
|
| S |
C
A |
G |
S |
C
B |
G |
|
S |
C |
G |
|
energy
A | B |
|
hype
A | B |
|
pop
A | B |
|
mgr
A | B |
|
FIGHT
RATING
52% |
|
|
|
|
|
|
|
Co-main event
|
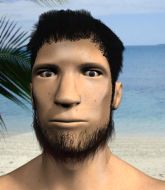
Coming up we have a super heavyweight MMA rules bout between Hoshifumi Nagasa (ranked 4791 p4p, 23661 weight class) and Clinton Strong (ranked 171 p4p, 240 weight class). Man, I cannot wait for this one!
 |
|
 |
| 165 cm
21
145
1 - 5 - 0 |
|
180 cm
22
135
8 - 6 - 0 |
BJJ White Belt
Good knees
Experienced |
|
BJJ Brown Belt
Brawler
Knockout power |
|
| |
|
Ladies and gentlemen. This fight is 3 rounds, in the super heavyweight division.
Introducing the fighter to my left, fighting out of the red corner.
With a record of 1 - 5 - 0, fighting out of Tokyo, Hoshifumi Nagasa!
And introducing the fighter to my right, fighting out of the blue corner.
With a record of 8 - 6 - 0, fighting out of Amsterdam, Clinton Strong !
The judges for this bout are Shigeki Sano, Ren Mimura and Sosuke Kotani.
The bell rings for round one and we are underway!
A nice leg kick lands there from Nagasa.
Nagasa tries a switch kick but it misses it's target.
Strong throws a looping left and ducks down for a takedown. He's got his arms around Nagasa's waist but Nagasa gets an underhook and avoids the takedown by throwing Strong off to one side.
Strong drives through with a takedown into Nagasa's guard. Let's see what he can do from the top position.
Nagasa is trying to control the position from the bottom.
Strong not doing a lot at the moment. He'll have to show some more aggression or the fight will get stood up.
Strong is a painfully thin specimen of a man. You do wonder whether a good body kick would snap him clean in two.
Strong with a couple of shots to the head there. Not particularly brutal.
We've had a slow start to the round here - hopefully the action picks up.
Strong lands a couple of decent looking shots.
Strong with a couple of shots to the head there. Not particularly brutal.
Strong lands a couple of decent looking shots.
That's one minute gone in the round.
Strong slips nicely into half guard.
Strong keeping composed on the top, looking to control the action.
Nagasa trying to control here.
Strong sitting and controlling from the half guard.
Strong landing with strikes to the body and head, softening up his opponent.
Nagasa wants to improve his position but Strong is controlling well.
Strong escapes and gets back to his feet.
Strong slips a jab and a cross from Nagasa.
A momentary lapse in concentration from Nagasa enables Strong to shoot in and score with a neat double leg. Nagasa manages to secure a closed guard as the fighters hit the mat.
Nagasa is wriggling around but Strong manages to pass to half guard.
That's two minutes gone in the round.
Nagasa knows he needs to get back to his feet asap. He's simply no match for Strong on the ground.
Strong is scoring with some nice ground and pound from the dominant position.
Strong is just sitting in half guard, waiting for something to happen.
Strong 's corner are shouting for him to control the position and he seems happy to oblige.
The fighters are going at a pretty good pace and they're both starting to sweat now.
Strong working over Nagasa with some ground and pound. Nagasa looks like he wants out of this position, which is understandable.
The crowd are loving this. Great action here.
Strong has hold of the far side arm. He's working for the Kimura, can Nagasa defend it? Strong steps over the head and cranks it - Nagasa is tapping out! That was textbook stuff right there - nice submission victory for Strong !
Ladies and gentlemen, after 2:51 of round 1, we have a winner by way of Submission (Kimura). Clinton Strong !
|
|
|
|
|
|
|
|
|
|
|
|
|
|
|
|
|
|
|
|
|
|
|
| S |
C
A |
G |
S |
C
B |
G |
|
S |
C |
G |
|
energy
A | B |
|
hype
A | B |
|
pop
A | B |
|
mgr
A | B |
|
FIGHT
RATING
42% |
|
|
|
|
|
|
|
Main event
|
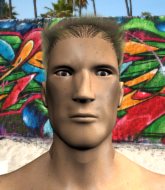
Coming up we have a super heavyweight MMA rules bout between Luka Doncic (ranked 4916 p4p, 4930 weight class) and Paulo Kimura (ranked 176 p4p, 178 weight class). Both fighter's entrance songs getting the crowd jumping here.
 |
|
 |
| 200 cm
23
230
4 - 2 - 0 |
|
177 cm
22
148
2 - 5 - 0 |
BJJ White Belt
Solid boxing
Good chin |
|
BJJ White Belt
Good kicks
Knockout power |
|
| |
|
Ladies and gentlemen. This fight is 3 rounds, in the super heavyweight division.
Introducing the fighter to my left, fighting out of the red corner.
With a record of 4 - 2 - 0, fighting out of Tokyo, Luka Doncic!
And introducing the fighter to my right, fighting out of the blue corner.
With a record of 2 - 5 - 0, fighting out of Tokyo, Paulo Kimura!
The judges for this bout are Shigeki Sano, Sosuke Kotani and Shirou Masuda.
The bell rings for round one and we are underway!
Doncic closes the distance and clinches.
Doncic is working for takedown but Kimura is calmly controlling the position for now.
Doncic pushes off and circles away, back to the middle of the mat.
Kimura throws a series of punches but Doncic avoids them all with ease.
Doncic wants to clinch up but Kimura keeps it at a distance.
No joy there for Doncic, who threw a few shots but didn't land.
Kimura with a body punch. A glancing blow.
Kimura misses with the combination.
Doncic throws a combination but comes up with nothing but fresh air.
A shot to the body from Doncic misses
and Kimura counters with a straight right hand.
Doncic tries to clinch but Kimura moves out of range.
Doncic drives through and clinches with Kimura against the cage.
Kimura breaks the clinch and we return to the middle of the mat.
Luka Doncic seems to be the more aggressive standup fighter in this bout.

Doncic lands a left and a right that send Kimura crashing to the mat, dazed. Doncic thinks about following him to the mat but decides to wave him back up to his feet!
Kimura is rocked!
It looks like Paulo Kimura has been cut.
This has been an exciting period of action!
Doncic tries to clinch but fails miserably
enabling Kimura to counter with a crisp jab.
Kimura works Doncic's body with a nice hook.
Kimura connects with a body shot that sends Doncic's belly button to the back.
Doncic tries to clinch but fails miserably
and Kimura counters with a nice uppercut.
Kimura throws a combination but it was largely blocked by Doncic.
Kimura lands with a two punch combination before moving back out of range.
 It looks like Luka Doncic has been cut. It looks like Luka Doncic has been cut.
That's one minute gone in the round.
Kimura misses with a few strikes there.
Doncic darts in and clinches Kimura up against the cage.
Kimura pushes off and circles away, back to the middle of the mat.
Doncic tries to clinch but Kimura is having none of it.
Kimura circles away from the clinch attempt
and Kimura counters with a one-two to the body.
Doncic tries to clinch up against the cage, rushing in to close the distance. Kimura manages to break the clinch and circles back to the middle of the mat.
Doncic tries to clinch up.
Kimura tries to counter by closing the distance.
Kimura scores with a three punch combo!
Kimura circles away from the clinch attempt
enabling Kimura to counter with a crisp jab.
Kimura moves into range and throws a combination. A nice jab followed by a hook to the body.
The fans in attendance giving it up for the two fighters, who have really let it all hang out in the last minute or so!
Doncic is looking to take this fight into the clinch.
Kimura swings away with a counter right hand but no contact made.
Kimura displaying good standup as he scores with a three punch combination.
That's two minutes gone in the round.
Kimura throws a right hand that Doncic ducks under and follows up with a left that Doncic also avoids with ease.
Kimura throws a series of punches but Doncic avoids them all with ease.
Kimura looks winded!
Doncic forces Kimura back against the cage and clinches.
A bit of stalling here from Kimura.
Doncic pulls guard successfully.
Doncic had isolated an arm as going for a kimura. Kimura defends it easily.
Doncic working away from the bottom but not quite defensive enough there because Kimura has passed into half guard!
Doncic wants to improve his position but Kimura is controlling well.
That's three minutes gone in the round.
Kimura trying to pass the guard but Doncic defending well.
Doncic scrambles, trying to get to his feet, but Kimura manages to mount him!
Doncic is just holding on here. Kimura manages to take his back.
Kimura just keeping the dominant position. He can't wait too long though, otherwise the referee will stand them back up.
Doncic staying busy and making it hard for Kimura to control.
That's four minutes gone in the round.
Kimura gets his hands free as Doncic looks to control.
Doncic is trying to break free.
Doncic is working hard here to advance position.
Kimura working for the rear naked choke here. He's got one arm under but Doncic is defending well. A couple of punches soften him up though and Kimura has tightened the hold! This one could be all over! It is! Doncic taps out!
Ladies and gentlemen, after 4:38 of round 1, we have a winner by way of Submission (RNC). Paulo Kimura!
|
|
|
|
|
|
|
|
|
|
|
|
|
|
|
|
|
|
|
|
|
|
|
| S |
C
A |
G |
S |
C
B |
G |
|
S |
C |
G |
|
energy
A | B |
|
hype
A | B |
|
pop
A | B |
|
mgr
A | B |
|
FIGHT
RATING
62% |
|
|
|
|
|
|
|
|
|
|
