 |
QFC Tournament 1106 Round 1 PBP Commentary |
Undercard bout
|
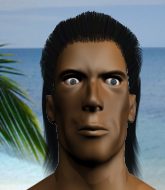
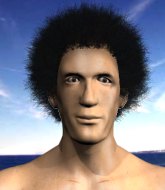
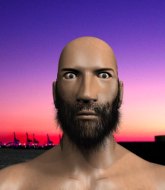
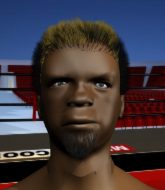
Coming up we have a featherweight MMA rules bout between Max Jared (ranked 4564 p4p, 3101 weight class) and Jake Laden (ranked 0 p4p, 0 weight class). We have two fighters making their debuts here, so let's see who comes out of this one with their first professional victory.
 |
|
 |
| 177 cm
20
145
0 - 0 - 0 |
|
188 cm
20
145
0 - 0 - 0 |
BJJ White Belt
Brawler
KO power |
|
BJJ White Belt
Basic striking
Determined |
|
| |
|
Ladies and gentlemen. This fight is 3 rounds, in the featherweight division.
Introducing the fighter to my left, fighting out of the red corner.
With a record of 0 - 0 - 0, fighting out of Hilo, Max Jared!
And introducing the fighter to my right, fighting out of the blue corner.
With a record of 0 - 0 - 0, fighting out of Hilo, Jake Laden!
The judges for this bout are Colin Fray, Ryoma Takatsuka and Paul Gruel.

The bell rings for round one and we are underway!

A momentary lapse in concentration from Jared enables Laden to shoot in and score with a neat double leg. Jared manages to secure a closed guard as the fighters hit the mat.

Jared has his feet on Laden's hips. He pushes off and gets to his feet. Nice work.
Laden shoots in for a takedown and gets it. Let's see what he's got on the mat.
Laden must be cautious of submissions here, given that his opponent has the superior Jiu Jitsu.
Laden with a flurry of punches that miss.
Laden is a painfully thin specimen of a man. You do wonder whether a good body kick would snap him clean in two.
Jared working the defensive guard well to avoid strikes from Laden.
Laden lands a couple of digs.
Laden landing some decent shots from guard.
Fantastic stuff here - a very entertaining period of action, which has drawn cheers from the crowd.

Jared looking for a triangle here. Laden is fighting it but it looks tight! Jared pulls the arm across and this one won't last much longer! Nope, Laden is tapping out - this one is all over!
Ladies and gentlemen, after 0:42 of round 1, we have a winner by way of Submission (Triangle Choke). Max Jared!
|
|
|
|
|
|
|
|
|
|
|
|
|
|
|
|
|
|
|
|
|
|
|
| S |
C
A |
G |
S |
C
B |
G |
|
S |
C |
G |
|
energy
A | B |
|
hype
A | B |
|
pop
A | B |
|
mgr
A | B |
|
FIGHT
RATING
100% |
|
|
|
|
|
|
|
Undercard bout
|
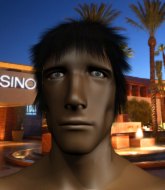
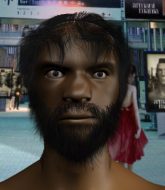
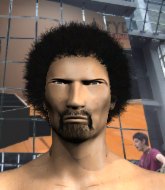
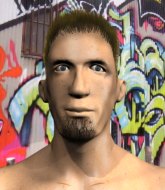
Coming up we have a featherweight MMA rules bout between Buster Hyman (ranked 4835 p4p, 4444 weight class) and Ray Hoola (ranked 0 p4p, 0 weight class). Hoola has chosen Alvin & The Chipmunks - Christmas song as his entrance music. We have two fighters making their debuts here, so let's see who comes out of this one with their first professional victory.
 |
|
 |
| 178 cm
23
150
0 - 0 - 0 |
|
178 cm
23
152
0 - 0 - 0 |
BJJ White Belt
Excellent boxer
Granite chin |
|
BJJ Blue Belt
Solid Muay Thai
Tends to cut |
|
| |
|
Ladies and gentlemen. This fight is 3 rounds, in the featherweight division.
Introducing the fighter to my left, fighting out of the red corner.
With a record of 0 - 0 - 0, fighting out of Hilo, Buster Hyman!
And introducing the fighter to my right, fighting out of the blue corner.
With a record of 0 - 0 - 0, fighting out of Hilo, Ray Hoola!
The judges for this bout are Micheangelo Fripello, Jeff Smith and Josh West.
The bell rings for round one and we are underway!

Hyman has taken the fight to the clinch.
A real battle for position is taking place between these two warriors.

Hoola breaks the clinch and we're back to striking at distance.

Hoola gets caught flat footed, as Hyman shoots in with a quick takedown into guard.

Hoola has managed to wall walk up one of the corner posts to get back to his feet. Hyman is pushing him up against the cage, looking to control the position.
Hoola tries to throw a body punch but Hyman avoids it by throwing Hoola back against the cage.
Hyman tries to score a body lock takedown but Hoola shows good agility there to stay on his feet.
Hoola has Hyman pushed against the cage.
Hyman looks like he'd prefer to be striking at range right now.
Hoola misses with the head strike.
Hyman wants to push off and get back to the center of the mat but Hoola has him pressed against the cage.
Hoola dictating the pace here, as the fighters clinch against the cage.
Hyman tries to score a body lock takedown but Hoola shows good agility there to stay on his feet.
Hoola escapes the clinch and we're back to striking.
Hoola lands with a good body shot.
This is a great period of action - very entertaining stuff!
Hoola scores with a punch to the gut of his opponent.

That's one minute gone in the round.
Hyman clinches up against the cage.
Hyman jumps guard but his hands slip and he falls flat on his back. Well, he's made himself look a right mug there, as Hoola walks away with a smile on his face. Hyman gets slowly back to his feet and shakes his head.
That's three failed takedown attempts in the round for Buster Hyman. That's going to take a lot out of him.
Hoola gets caught on his heels momentarily as he allows Hyman to score an easy takedown into full guard.
Hoola is edging up against the cage. He's using the cage to get back to his feet. Nice work there - the fighters are clinched.
Hyman tries to break free but Hoola pushes him back against the cage.
Hyman working hard to break the clinch.
Hoola lands a left hand.
The referee is keeping an eye on Hoola - much more stalling and he will separate the fighters.
Hoola stalling here - the referee won't stand for too much of that.
A frustrated look appears on Hyman's face as he tries to break the clinch.

That's two minutes gone in the round.
A short right from Hoola.
Stalling in the clinch from Hoola.
This has been an exciting period of action!
Hyman being controlled against the cage.
Hyman has hold of a leg and is looking for a trip takedown. Hoola avoids it nicely though and we remain in the clinch.
Hyman wants the takedown. Hoola is fighting it off but Hyman persists and manages to bring the fight to the ground, ending up in Hoola's guard against the cage.
Hoola has his feet on Hyman's hips. He pushes off and gets to his feet. Nice work.
Ray Hoola seems to be the more aggressive standup fighter in this bout.
Hoola looks to throw the jab but Hyman is out of range.

Hoola clinches up against the cage.
Hyman is looking for a takedown.
Hyman is trying to pull guard but being pressed up against the cage enables Hoola to keep the fight standing.
Hyman is trying to pull guard but being pressed up against the cage enables Hoola to keep the fight standing.
Hoola leaning his opponent against the cage.
Hoola tries to score a body lock takedown but Hyman shows good agility there to stay on his feet.

That's three minutes gone in the round.
Hoola keeps control of Hyman as he tries to wriggle out of the double underhooks.
Hoola misses with a body punch.
Hyman lands a takedown into guard.
Hoola kicks Hyman off and gets to his feet.
Hyman tries a switch kick but it misses it's target.
Hoola tries to close the distance and clinch but Hyman swats him to one side with an open hand palm strike and circles away.
Hyman feinted with a counter takedown.
Hoola is looking to take this fight into the clinch.
Hoola lands with a two punch combination before moving back out of range.
Hyman darts in and lands a nice takedown into half guard.
Hoola makes some distance and scrambles quickly back to his feet. Nice work!

That's four minutes gone in the round.
The crowd cheering loudly, showing their appreciation for the quality fight we're seeing here.
Hoola looks shocked there as he takes a right hand to the temple.
A momentary lapse in concentration from Hoola enables Hyman to shoot in and score with a neat double leg. Hoola manages to secure a closed guard as the fighters hit the mat.
Hoola is edging up against the cage. He's using the cage to get back to his feet. Nice work there - the fighters are clinched.
Still in the clinch, Hoola scores with a nice short uppercut.
Hoola is trying to slow down the pace of the fight but Hyman is keeping busy.
Hoola dictating the pace here, as the fighters clinch against the cage.
Hyman tries to pull guard but Hoola won't allow it.
The crowd applaud the fighters' efforts here as the round comes to an end.
Hyman is stalling here. The referee will be looking to step in if he doesn't pick up the pace.
A short left from Hoola.
And that is the end of the round. The fighters go back to their corners.
Ray Hoola dominated that round.
The fighters get back to their feet, the hooter sounds and we're back to the action!

Hoola scores with a sloppy right hand. Hyman should have avoided that one.
Hoola scores with a jab to the head.
Hoola scores with a punch to the head.
Hoola has been the more effective fighter overall so far.
Hoola scores with a jab to the jaw of his opponent.
Hyman dips down and scores with a jab to the body.
Nice sprawl there from Hoola as Hyman shoots in.
It seemed like Hoola was going to counter with the hook but didn't fully commit to it.
Hyman decides to change it up a bit and drives through with a nice takedown into half guard.
Hoola manages to escape and get back to his feet!
This has been an exciting period of action!
Hoola throws a sloppy body shot
and Hyman counters with a two punch combo.
Hyman closes the distance and clinches.
Hoola struggles to land a body shot inside as Hyman controls his hands.
Hoola lands a nice shot to the body.
Hoola swings wildly with an uppercut but Hyman uses good head movement to avoid it.
Hoola is leaning against Hyman and scores with a nice uppercut to the body.
That's one minute gone in the round.
Hoola lands a nice looking hook to the body, against the cage.
Hoola manages to get underhooks and slows down the pace for a moment.
Hoola doesn't land with the attempted body shot.
Hoola works for underhooks and lands a body shot in the process.
An uppercut on the inside fails to land for Hoola.
Hyman is trying to break the clinch but Hoola has him pressed against the cage.
Hoola goes for a body shot but it's blocked.
Ray Hoola seems to be working more effectively in the clinch in the fight so far.
Hoola is defending well against a takedown attempt.
Hyman gets control of Hoola's arms and successfully pulls guard. Hyman will no doubt be looking for submissions off his back.
Hyman is working actively off his back, looking to secure an arm or perhaps work for a triangle.
Hyman knows he needs to get back to his feet asap. He's simply no match for Hoola on the ground.

Hoola is trying to work a guillotine from the top, or something like that? Don't know how he thinks he's going to get a finish from there.
That's two minutes gone in the round.
Hoola wants to control from the top but Hyman keeps moving.
Hyman working a defensive guard but Hoola passes into half guard.
Hoola is sneakily working for an arm triangle but Hyman sees it coming and defends easily.
Hoola seems very keen to just sit and control from half guard but Hyman does not like that idea so much and is remaining active off his back.
Neither fighter is being very active at the moment, with Hoola in particular looking to stall.
That's three minutes gone in the round.
Hyman tries to get to full guard but Hoola has control of the leg.
Hoola not doing much here.
Hoola tries to pass to full mount but Hyman defends it.
Hoola wants to lay and pray for a moment but Hyman keeps working.
Hoola moves nicely into side control.
Hyman on his back here. We all know that wrestlers don't like being on their back so let's see if Hyman tries to get out of the position.
That's four minutes gone in the round.
The crowd are showing their displeasure at the lack of action as loud boos ring out around the arena.
Hyman tries to buck Hoola off but Hoola is having none of it.
The fighters are pressed up against the cage, both looking to find a bit of space to work.
Hoola trying to control the action but Hyman is working from the bottom.
Hoola tries for an arm triangle. That looks pretty tight to me. Is this one over!?! Possibly, maybe, no Hoola has let go of the choke. Obviously it wasn't as tight as we thought!
Hyman is trying to work for a sweep but Hoola has mounted him!
Hoola working to secure an arm triangle but it's not happening for him just yet.
And that is the end of the round. The fighters go back to their corners.
Ray Hoola showed his class in that round. I'd imagine he'll take it on all the scorecards.
That's the end of the round. The referee orders the cornermen out of the cage so we can get back down to business. Let's hear some noise people - this is the final round!

Hyman on the wrong end of a nice hook.
Hoola blocks the body kick.
Hyman scores with a jab to the body.
Hoola swings wildly with a couple of big hooks
and Hyman counters by clinching up.
Hoola prevents the takedown attempt.
Hoola breaks from the clinch.
Hoola pushes forward with a 1-2 combination that forces Hyman back to the cage. Hoola follows up with a solid lead hook to the liver.
Hoola connects with a looping right hand.
Hoola swats away the attempt to clinch by Hyman.
We've had a slow start to the round here - hopefully the action picks up.
Hyman moves into the clinch successfully.
Hyman working hard to break the clinch.
Hoola working aggressively here.
That's one minute gone in the round.
Hyman tries to break free but Hoola pushes him back against the cage.
Hoola breaks the clinch and we're back to striking at distance.
Hyman fails miserably with a takedown attempt.
A looping hook to the body misses from Hoola. Hyman does a little dance to reset his feet.
Hyman moves his head to the side to avoid a jab but walks straight into a cross.
Hyman tries to close the distance and clinch up against the cage but Hoola paws at him with a jab and circles away.
Hoola throws a wild combination but nothing lands.
Hoola tries to clinch up but Hyman circles away and keeps his distance.
Hoola pushes forward with a 1-2 combination that forces Hyman back to the cage. Hoola follows up with a solid lead hook to the liver.
Hoola works the jab nicely.
Hyman shoots in for a takedown. "Ole!" shouts Hoola as he jumps to the side.
That's three failed takedown attempts in the round for Buster Hyman. That's going to take a lot out of him.
Hyman on the wrong end of a nice jab.
That's two minutes gone in the round.
Hoola misses with a straight right.
Hoola throws a combination that misses
and Hyman counters with a three punch combo that has Hoola backing up. Hoola nods at Hyman to acknowledge the strikes.
Wooooo! Give it up for these two warriors! They are putting on a show!
Hoola stuffs the takedown attempt from Hyman. Hyman gets slowly back to his feet.
Hyman tries to clinch up.
Hyman has his head snapped back a nice jab. A little nod from Hyman there as he acknowledges the shot.
Hoola misses with a double jab.
Hyman appears to be looking for a big counter.
Hoola defends well against a solid takedown attempt from Hyman.
Hoola throws a hard body shot but it just misses.
Hoola stuns Hyman with a nice body shot, before stepping back out of range.
Hyman shoots for a double leg takedown but Hoola sprawls well. He's pushed Hyman's face into the mat and manages to get back to his feet relatively easily.
Both fighters are breathing heavily.
Hoola uses good footwork to get in and out, landing a nice hook.
Hoola tries to clinch up against the cage, rushing in to close the distance. Hyman manages to break the clinch and circles back to the middle of the mat.
Hyman showing good head movement there, avoiding the strikes from Hoola.
That's three minutes gone in the round.
Hyman closes this distance looking for a takedown but Hoola circles away.
A jab from Hoola does it's job there.
Hyman tries to close the distance and clinch but Hoola swats him to one side with an open hand palm strike and circles away.
Hyman gets tackled into the cage by Hoola. Hoola maintains the clinch.
Both fighters working to control the clinch.
Hoola fails to land with a short punch on the inside.
Hoola is trying to stall.
The pace really dropping off here, momentarily.
Hyman throws a vicious knee straight up the middle but Hoola blocks it with crossed arms.
That's four minutes gone in the round.
Hyman jumps guard but Hoola stands there with Hyman around his waist. Hyman gives up and drops back to his feet. We remain in the clinch.
A body shot lands from Hoola.
Hoola scores with an uppercut up the middle.
Come on Hoola - let's have some action - none of this stalling nonsense.
Hoola lands a hook that snaps the head of Hyman backwards.
Hoola trying to stall but Hyman improves his position.
Hyman is trying to pull guard but Hoola has him pressed against the cage.
Hoola lands a body punch.
Hoola doesn't land with the attempted body shot.
Hoola's corner calls for him to break the clinch, which he does.
Hoola throws out a token jab with nothing on it.
Buster Hyman has stepped it up - he knows he needs a finish here!
Ray Hoola is fighting for a decision here - he's started to take the cautious approach.
Hoola punishes Hyman's body with a nice straight punch.
And that's the end of the fight!
Ray Hoola comfortably won the final round on my scorecard.
Well Hoola has outworked and out performed his opponent in all aspects of the game today. He was simply too good and the decision should be no more than a formality. Over to the ring announcer for the scorecards.
Ladies and gentlemen, after 3 rounds of action, we go to the scorecards for a decision.
Judge Micheangelo Fripello scores the fight for Ray Hoola!
Judge Jeff Smith scores the fight for Ray Hoola!
Judge Josh West scores the fight for Ray Hoola!
Ray Hoola wins by unanimous decision!
A relieved looking Ray Hoola thanked the fans for their support and gave the usual line about them being amazing. They seemed to believe that he actually meant it.
|
|
|
|
|
|
|
|
|
|
|
|
|
|
|
|
|
|
|
|
|
|
|
| S |
C
A |
G |
S |
C
B |
G |
|
S |
C |
G |
|
energy
A | B |
|
hype
A | B |
|
pop
A | B |
|
mgr
A | B |
|
FIGHT
RATING
62% |
|
|
|
|
|
|
|
Undercard bout
|
Coming up we have a featherweight MMA rules bout between Tinnakorn Srisawat (ranked 5231 p4p, 5127 weight class) and Deivson Barros (ranked 439 p4p, 0 weight class). We have two fighters making their debuts here, so let's see who comes out of this one with their first professional victory.
 |
|
 |
| 168 cm
23
134
0 - 0 - 0 |
|
180 cm
18
130
0 - 0 - 0 |
BJJ Purple Belt
Solid Muay Thai
Good chin |
|
BJJ Blue Belt
Brawler
Enjoys gardening |
|
| |
|
Ladies and gentlemen. This fight is 3 rounds, in the featherweight division.
Introducing the fighter to my left, fighting out of the red corner.
With a record of 0 - 0 - 0, fighting out of Hilo, Tinnakorn Srisawat!
And introducing the fighter to my right, fighting out of the blue corner.
With a record of 0 - 0 - 0, fighting out of Hilo, Deivson Barros!
The judges for this bout are Chris Saunders, Paul Gruel and Colin Fray.
The bell rings for round one and we are underway!
Srisawat throws a body kick but he wasn't in range.
Barros looks like he wanted to counter with a high kick but didn't throw it.
Srisawat walks forward and throws out a flicking leg kick. Barros checks it nicely though, as he moves to the side.
Srisawat lands with a nice low kick. That'll leave a bruise.
Barros keeping at a good range here, avoiding a leg kick.
Barros closes the distance and clinches up, looking for a takedown. He shifts his weight and gets a nice trip into half guard.
Barros is a painfully thin specimen of a man. You do wonder whether a good body kick would snap him clean in two.
Barros stalling.
Srisawat might be looking to lock onto one of his opponent's long limbs for a submission, whilst we're on the ground.
We've had a slow start to the round here - hopefully the action picks up.
It looks like Barros might be adopting somewhat of a lay and pray gameplan here, which I'm sure won't go down too well with the paying fans in attendance... Or the ring announcers come to think of it.
That's one minute gone in the round.
Srisawat has no desire to be mounted, so is trying to control. Barros is working away from the top position though.
Barros trying to control the pace.
Barros wants to lay and pray for a moment but Srisawat keeps working.
Srisawat looking for submissions from an awkward position here.
Still in half guard, Barros seems content to control.
The ref warns both fighters not to hold the cage as they work up against the meshing.
That's two minutes gone in the round.
The crowd are hurling abuse towards the fighters... You can hardly blame them though because there isn't a lot going on in the fight.

The referee has decided to stand the fighters back up, so we'll restart on the feet.
An inside leg kick lands from Srisawat.
Tinnakorn Srisawat seems to be the more aggressive standup fighter in this bout.
Barros fakes a jab and throws a low kick but Srisawat checks it well.
Barros swinging wildly here.
Srisawat appears to be looking for a counter punch to the body.
Barros gets a clinch.
Srisawat trying to land knees to the body.
Barros successfully pulls guard.
Srisawat trying to control the position from guard on top but Barros is wriggling around, looking for whatever he can.
The fighters are pressed up against the cage, both looking to find a bit of space to work.
Srisawat stands up and looks to throw the legs aside to pass to side control. Barros swivels though and keeps the full guard.
That's three minutes gone in the round.
Srisawat stopping the sweep attempt from Barros.
Srisawat wants to control from the top but Barros keeps moving.
Srisawat drops back looking for a leg! Barros is in trouble here! The fighters roll with the hold and Barros manages to kick Srisawat off! Srisawat jumps back into Barros's guard.
Barros is working an open guard here, looking to improve his position. No doubt that will leave him open to counters but at least he's being more offensive.
Srisawat works a leg free and moves into half guard.
Srisawat is working for a kimura but Barros is defending it quite comfortably.
That's four minutes gone in the round.
The crowd are getting on the fighters' backs, as the pace has dropped off in the last minute or so.
Barros actively working from the bottom here.
Srisawat seems very keen to just sit and control from half guard but Barros does not like that idea so much and is remaining active off his back.
Barros gets full guard.
Boooooooooooooooooooo!!! God, this has been a terrible round. Come on you two, sort yourselves out!
Barros is controlling Srisawat's posture.
Srisawat controls the pace of the fight for a moment.
And that is the end of the round. The fighters go back to their corners.
Deivson Barros dominated that round.
The minute break is over - no more time for sponges and pep talks - back to the action!
A combination from Barros does no damage.
A chopping leg kick lands by Srisawat.
Barros looking to shoot here. He's gone for it and he's landed a takedown into side control! Oh, that's bad for Srisawat!
Srisawat wants to control but Barros postures up.
Srisawat is moving his hips around well on the bottom and has managed to get back to half guard.

Barros decides to stand up and try his luck on the feet.
Srisawat buckles his opponent's knee momentarily with a nice leg kick.
Barros fakes a strike and closes the distance, dragging Srisawat to the ground. Barros is now in Srisawat's guard.
Srisawat escapes his hips to the side and looks to be working for an armbar. Barros gives him a little smile and shakes his head. No chance.
Wooooo! Give it up for these two warriors! They are putting on a show!
Barros looking to control the position here, rather than advance.
That's one minute gone in the round.
Barros looking to pass the guard.
Barros passes easily into side control. Nice work.
Barros fails to land a wild elbow strike.
Barros advances nicely into full mount.
That's two minutes gone in the round.
Neither fighter has done anything of merit for a good minute or two here and the crowd are not happy about it.
Barros controlling his opponent.
Srisawat wants to control but Barros is having none of it.
Barros trying to control but Srisawat is having none of it.
Srisawat wants to control but Barros is having none of it.
Barros thowing strikes but they're hitting the gloves, not doing any damage.
That's three minutes gone in the round.
Barros controlling the pace for now.
Barros avoids the attempt from Srisawat to control.
Barros sitting in mount, just looking to control for the moment.
Srisawat wants to control but Barros is having none of it.
That's four minutes gone in the round.
The crowd are getting on the fighters' backs, as the pace has dropped off in the last minute or so.
Srisawat regains half guard.
Barros has been the more effective fighter overall so far.
Srisawat wants to control but Barros is keeping busy.
Srisawat tries to roll over but Barros keeps him under control.
Srisawat moves into full guard.
Boooooooooooooooooooo!!! God, this has been a terrible round. Come on you two, sort yourselves out!
Srisawat trying to control the position.
And that is the end of the round. The fighters go back to their corners.
Deivson Barros showed his class in that round. I'd imagine he'll take it on all the scorecards.
The fighters' corners scream their final instructions, as the referee calls time. Here we go, back to the action! This is the final round!
A momentary lapse in concentration from Srisawat enables Barros to shoot in and score with a neat double leg. Srisawat manages to secure a closed guard as the fighters hit the mat.
Srisawat looking for a guillotine here but Barros defends easily.
Barros gets to his feet - Srisawat follows without any prompting.
Deivson Barros is looking to throw some combinations by the looks of things.
Srisawat misses with a shot to the body
and Barros holds on and brings the fighters into a clinch.
We've had a slow start to the round here - hopefully the action picks up.
Srisawat misses the knee to the body. Nice hip positioning from Barros.
Barros jumps guard and drags Srisawat to the mat. He's obviously going to be looking for submissions off his back.
Barros looking to control but Srisawat passes into half guard.
Srisawat is working for submissions here but there's nothing on.
Barros really doesn't want to stay on the ground with Srisawat. If he can't get it back to his feet, it's only a matter of time before he'll be tapping out.
That's one minute gone in the round.
Barros pushes Srisawat off looking to stand but Srisawat dives back in and keeps control.
Barros is looking to regain full guard. Not this time though.
Srisawat is looking for a kimura but Barros is holding onto that half guard position, so it's hard for Srisawat to get the leverage.
Srisawat is working for submissions here but there's nothing on.
Srisawat is trying for a guillotine from the top but the pressure isn't in the right place so Barros is just riding it out for now. Srisawat eventually gives up the hold.
Srisawat wants to work for an arm triangle but Barros is really keeping half guard well and defending the submission attempt.
That's two minutes gone in the round.
The crowd are getting on the fighters' backs, as the pace has dropped off in the last minute or so.
Barros wants to control but Srisawat is keeping busy.
Srisawat is looking for an arm triangle, whilst trying to pass to side control. Barros doesn't seem that keen to cooperate though. No luck this time Srisawat.
Srisawat is working for a kimura but Barros is defending it quite comfortably.
That's three minutes gone in the round.
Barros trying to control from the bottom.
Barros tries to get to full guard but Srisawat has control of the leg.
Barros is trying to control but can't.
Deivson Barros has got the better of the ground game so far.
Srisawat is trying to work for a kimura but Barros is defending well.
Srisawat is keen to just control but Barros is a slippery customer.
That's four minutes gone in the round.
A few boos can be heard. I'm sure they will multiply if the fighters don't pick up the pace.
Barros is controlling Srisawat's trapped leg to prevent Srisawat from advancing to side control.
The referee has stepped in and called for a break in the action. We'll restart on the feet.
Barros tries to check a leg kick but that clearly hurt him.
Barros stumbles momentarily as he takes a strong leg kick from Srisawat.
Tinnakorn Srisawat has stepped it up - he knows he needs a finish here!
Srisawat tries to clinch up against the cage, rushing in to close the distance. Barros manages to break the clinch and circles back to the middle of the mat.
Barros throws the overhand right but ducks down into a quick takedown attempt. Srisawat was covering up waiting for the punch and Barros finishes the takedown easily into guard.
Barros takes a big intake of breath there - he's definitely tired.
Srisawat escapes his hips to the side and looks to be working for an armbar. Barros gives him a little smile and shakes his head. No chance.
And that's the end of the fight!
That was a close round. You could make an argument for either fighter but I would give it to Tinnakorn Srisawat.
I think Barros has won this one but let's see whether the judges agree with me. Over to the ring announcer for the scorecards.
Ladies and gentlemen, after 3 rounds of action, we go to the scorecards for a decision.
Judge Chris Saunders scores the fight for Deivson Barros!
Judge Paul Gruel scores the fight for Deivson Barros!
Judge Colin Fray scores the fight for Deivson Barros!
Deivson Barros wins by unanimous decision!
|
|
|
|
|
|
|
|
|
|
|
|
|
|
|
|
|
|
|
|
|
|
|
| S |
C
A |
G |
S |
C
B |
G |
|
S |
C |
G |
|
energy
A | B |
|
hype
A | B |
|
pop
A | B |
|
mgr
A | B |
|
FIGHT
RATING
28% |
|
|
|
|
|
|
|
Undercard bout
|
Coming up we have a featherweight MMA rules bout between Garry Newman (ranked 0 p4p, 4462 weight class) and Fire Truck (ranked 0 p4p, 144 weight class). We have two fighters making their debuts here, so let's see who comes out of this one with their first professional victory.
 |
|
 |
| 176 cm
23
145
0 - 0 - 0 |
|
178 cm
23
155
0 - 0 - 0 |
BJJ White Belt
Excellent MT
Self confident |
|
Good wrestler
Brawler
Solid chin |
|
| |
|
Ladies and gentlemen. This fight is 3 rounds, in the featherweight division.
Introducing the fighter to my left, fighting out of the red corner.
With a record of 0 - 0 - 0, fighting out of Hilo, Garry Newman!
And introducing the fighter to my right, fighting out of the blue corner.
With a record of 0 - 0 - 0, fighting out of Hilo, Fire Truck!
The judges for this bout are Roger Salmon, Chris Saunders and Micheangelo Fripello.
The bell rings for round one and we are underway!
Truck lunges in with swinging rights and lefts but Newman circles away quickly and effectively.
Newman fakes high and shoots in for a takedown but Truck avoids it really well and circles away.
Newman gets caught on his heels momentarily as he allows Truck to score an easy takedown into full guard.
Truck is stalling in the full guard.
We've had a slow start to the round here - hopefully the action picks up.
Truck passes Newman's right leg, so he's now in half guard.
Neither fighter is being very active at the moment, with Truck in particular looking to stall.
That's one minute gone in the round.
Newman preventing any damage for now, controlling his opponent's head.
Truck decides to stand up.
Newman darts in looking for a takedown but Truck gets double underhooks and turns Newman into the cage.
Truck is working for takedown but Newman is calmly controlling the position for now.
Newman has a body lock and is looking for a takedown. Truck is bouncing around trying to prevent the takedown and somehow he has indeed managed to stay on his feet.
That's three failed takedown attempts in the round for Garry Newman. That's going to take a lot out of him.
Newman lands with a short shot to the head.
Newman manages to pull guard. Let's see whether he can land a sub off his back.
Truck is working Newman over from the guard. He should look to pass the guard and do a little more damage with these strikes.
Truck is working Newman over from the guard. He should look to pass the guard and do a little more damage with these strikes.
Newman working a defensive guard here.
That's two minutes gone in the round.
Truck works over Newman with some ground and pound from guard.
Truck lands a couple of elbows.
Truck advances position into side control!
A bit of a lull in the action. I'm sure it will pick up again soon... even if the ref has to physically pick them up and put them back on their feet.
Truck scoring with punches and elbows.
Truck working away.
Newman takes a nasty elbow to the side of the head.
 Newman is rocked! Newman is rocked!
The crowd are loving this. Great action here.
Newman tries to control but Truck manages to take his back.
Oh Newman is still in real trouble! Will he be able to recover?!!
Truck is working really hard to secure the rear naked choke. Newman defends successfully for a significant amount of time. Both fighters are looking very determined.
Truck looking for the choke from the back.
That's three minutes gone in the round.
Truck is working the ground and pound here and the referee is taking a close look at Newman. He must escape soon or this one will be stopped.
Truck softening up his opponent with strikes here.
Truck looking for the choke but no joy.
Truck has the hooks sunk in and you can see the will to fight slowly draining out of Newman's body.
Newman just trying to survive but Truck is wriggling into a better position, looking to finish.
Newman seems to have got his legs back now.
The ref warns both fighters not to hold the cage as they work up against the meshing.
Newman grimaces as he takes a shot to the body.
Newman is trying to get back to his feet but he's not managed it yet.
Truck is controlling his opponent, waiting for an opportunity to finish.
Truck is throwing strikes from the back here. Oh that last one was to the back of the head. Truck gets a warning from the referee. He throws another strike to the back of the head straight away though and the referee has seen enough. He breaks up the two fighters and stands them back up. Truck gets a real talking to here and is lucky not to get a point deducted. Truck apologises and we restart here on the feet.
That's four minutes gone in the round.
Newman goes for a spinning back kick but it misses.
Truck looks for a takedown here. Will he get it? Newman is fending him off so far but Truck persists. Nope, Newman circles away and we're back to standing.
The fight moves into the clinch position.
Newman is trying to slow down the pace of the fight but Truck is keeping busy.

Newman breaks the clinch.
Newman gets in close and instigates a clinch.
Newman is trying to stall.
A head punch blocked on the inside by Newman.
This is a great period of action - very entertaining stuff!
Newman is trying to pull guard but Truck turns him against the cage and we stay in the clinch.
Truck throws a nice elbow but it doesn't land.
And that is the end of the round. The fighters go back to their corners.
Fire Truck dominated that round.
The referee calls time. The cornermen exit stage left and we're back to business.
Truck gets a clinch.
Newman tries to break free but Truck pushes him back against the cage.
Truck working hard to break the clinch.
Newman breaks the clinch and we return to the middle of the mat.
Truck clinches up against the cage.
Newman trying to stall but Truck improves his position.
The pace really dropping off here, momentarily.
Newman lands an elbow inside.
Newman tries to jump guard but he falls flat on his backside. Truck smiles and moves away.
We've had a slow start to the round here - hopefully the action picks up.
Newman fails with a takedown attempt from distance.
Truck is looking to take this fight into the clinch.
Truck takes the fight into the clinch.
That's one minute gone in the round.
Come on Newman - let's have some action - none of this stalling nonsense.
Truck fails to pull the fight into his guard.
Truck is clearly stalling here... Pick up the pace son.
Truck has dropped down and is looking to force the takedown but it's defended by Newman after a bit of a struggle.
Newman is working for takedown but Truck is calmly controlling the position for now.
That's three failed takedown attempts in the round for Garry Newman. That's going to take a lot out of him.
Truck keeps control of Newman as he tries to wriggle out of the double underhooks.
Truck has had enough of the clinch and is looking to separate.
Newman prevents Truck from breaking the clinch.
Newman is looking to take this one to the mat.
Newman drops down looking for an ankle pick but Truck pulls his leg out and moves away.
Truck shoots for a takedown but Newman saw that one coming a mile off and avoided it easily.
That's two minutes gone in the round.
The crowd are starting to boo a lack of action.
Truck bobs and weaves into range and then changes levels and scores with a nice takedown into side control.
Truck has been the more effective fighter overall so far.
Truck wants to lay and pray for a moment but Newman keeps working.
Newman tries to work a leg under to get back to half guard but Truck wriggles his own leg back out and remains in side control.
Newman on the wrong end of some ground and pound.
Newman takes an elbow right on the bridge of the nose and winces in pain.
Truck is chipping away with strikes.
Truck working the ground and pound.
Truck working away.
Newman is looking for a sweep.
That's three minutes gone in the round.
Truck taking a breather here.
Newman knows he needs to get back to his feet asap. He's simply no match for Truck on the ground.
Newman is trying to get back to half guard.
Truck is looking to finish here, going for an Americana. Newman knows the correct defense though, so he's OK.
Newman is looking for a sweep.
Newman being controlled for a moment.
That's four minutes gone in the round.
The crowd are starting to boo a lack of action.
Newman is trying to control Truck's posture but Truck avoids it.
Newman takes a big shot right to the temple there but he's taken it well.
Truck cracks Newman with an elbow. That is naaassty.
Truck working the head and body with strikes.
Truck lands a knee to the body and follows it up with some ground and pound to the head. That will wear Newman down.
The crowd thankful this round is nearly over.
A big shot lands for Truck! That's hurt Newman! Will he recover? Truck fires away with more strikes and the referee has to step in to stop the fight!
Ladies and gentlemen, after 4:57 of round 2, we have a winner by way of TKO (Strikes). Fire Truck!
|
|
|
|
|
|
|
|
|
|
|
|
|
|
|
|
|
|
|
|
|
|
|
| S |
C
A |
G |
S |
C
B |
G |
|
S |
C |
G |
|
energy
A | B |
|
hype
A | B |
|
pop
A | B |
|
mgr
A | B |
|
FIGHT
RATING
41% |
|
|
|
|
|
|
|
Undercard bout
|
Coming up we have a featherweight MMA rules bout between Way Ehram (ranked 4989 p4p, 3102 weight class) and Gregon Dome (ranked 0 p4p, 0 weight class). We have two fighters making their debuts here, so let's see who comes out of this one with their first professional victory.
 |
|
 |
| 180 cm
23
155
0 - 0 - 0 |
|
178 cm
20
144
0 - 0 - 0 |
Good wrestling
Basic striking
Cuts easily |
|
BJJ Purple Belt
Brawler
Very confident |
|
| |
|
Ladies and gentlemen. This fight is 3 rounds, in the featherweight division.
Introducing the fighter to my left, fighting out of the red corner.
With a record of 0 - 0 - 0, fighting out of Hilo, Way Ehram!
And introducing the fighter to my right, fighting out of the blue corner.
With a record of 0 - 0 - 0, fighting out of Hilo, Gregon Dome!
The judges for this bout are Josh West, Chris Saunders and Micheangelo Fripello.
The bell rings for round one and we are underway!
Ehram feints and as Dome raises his hands in defense, Ehram changes levels and drives through with a takedown into guard.
Dome lands a beautiful sweep and he's now moved into his opponent's guard.

Ehram is looking for a triangle here but Dome uses the submission attempt to pass into side control.
Ehram looking for a sweep but Dome has passed into full mount! Oh no!
Ehram is desperately trying to get back to half guard.
We've had a slow start to the round here - hopefully the action picks up.
Dome is in full mount, looking to secure a guillotine but Ehram is surviving well by controlling Dome's body position as best he can.
Ehram is working to get back to half guard.
Dome thuds his fist into the canvas! Oooouch!
That's one minute gone in the round.
Dome looking to secure an arm triangle but Ehram defends it well.
The ref warns both fighters not to hold the cage as they work up against the meshing.
Ehram is trying to escape the mount.
Ehram wants to control but Dome is having none of it.
Dome throwing sloppy strikes, which aren't doing any damage.
Dome tries to control but Ehram wriggling away.
Ehram tries to hold on but Dome pushes him away.
That's two minutes gone in the round.
Dome can't quite control the action as he would like just now, as Ehram is looking to escape.
Dome is working close to his opponent, looking to work a submission by the looks of things. Oh, he's managed to get a guillotine from mount as his opponent reached up! That looks tiiiiight! Will he tap? YES, he's tapped! Impressive submission by Dome!
Ladies and gentlemen, after 2:27 of round 1, we have a winner by way of Submission (Guillotine). Gregon Dome!
|
|
|
|
|
|
|
|
|
|
|
|
|
|
|
|
|
|
|
|
|
|
|
| S |
C
A |
G |
S |
C
B |
G |
|
S |
C |
G |
|
energy
A | B |
|
hype
A | B |
|
pop
A | B |
|
mgr
A | B |
|
FIGHT
RATING
40% |
|
|
|
|
|
|
|
Undercard bout
|
Coming up we have a featherweight MMA rules bout between Davi Miranda (ranked 4672 p4p, 5002 weight class) and Andy Cruise (ranked 0 p4p, 0 weight class). Miranda comes to the cage accompanied by Auditorium. We have two fighters making their debuts here, so let's see who comes out of this one with their first professional victory.
 |
|
 |
| 180 cm
18
145
0 - 0 - 0 |
|
175 cm
18
155
0 - 0 - 0 |
BJJ Purple Belt
Basic striking
Cuts easily |
|
BJJ White Belt
Decent boxing
Tends to cut |
|
| |
|
Ladies and gentlemen. This fight is 3 rounds, in the featherweight division.
Introducing the fighter to my left, fighting out of the red corner.
With a record of 0 - 0 - 0, fighting out of Hilo, Davi Miranda!
And introducing the fighter to my right, fighting out of the blue corner.
With a record of 0 - 0 - 0, fighting out of Hilo, Andy Cruise!
The judges for this bout are Josh West, Chris Saunders and Jeff Smith.
The bell rings for round one and we are underway!
Cruise gets the takedown into side control.
Cruise trying to control the action but Miranda is working from the bottom.
Miranda is trying to get back to half guard.
Cruise is looking to take a break and control but Miranda is keeping him honest, looking to work from the bottom.
Miranda is looking for a sweep.
Cruise is pausing for a moment. What's he doing? It looks like he's clearing his nose. Oh dude! He's shot a load of snot all down Miranda's shoulder. That is not cool.
We've had a slow start to the round here - hopefully the action picks up.
Cruise wants to stand but Miranda is controlling his arm.
Miranda manages to land a sweep and he's now on top! Lovely Jiu Jitsu!
That's one minute gone in the round.
Cruise wants to get back to full guard.
Cruise trying to control here.
Cruise moves into full guard.
Cruise really doesn't want to stay on the ground with Miranda. If he can't get it back to his feet, it's only a matter of time before he'll be tapping out.
Cruise looking to sweep here. No luck so far.
Cruise has an active guard here but Miranda has managed to pass into half guard.
Cruise looks winded!
Miranda scoring with strikes to the body and head.
Cruise is defending against the submission attempts here by Miranda.
Miranda is trying to work for a kimura. This could be trouble! No, Cruise has managed to free his arm - good work.
That's two minutes gone in the round.
Cruise is defending against the submission attempts here by Miranda.
Miranda is trying for a kimura here. Cruise looks like he's in a lot of pain... and he's tapping out! Miranda wins by kimura!
Ladies and gentlemen, after 2:42 of round 1, we have a winner by way of Submission (Kimura). Davi Miranda!
A relieved looking Davi Miranda thanked the fans for their support and gave the usual line about them being amazing. They seemed to believe that he actually meant it.
|
|
|
|
|
|
|
|
|
|
|
|
|
|
|
|
|
|
|
|
|
|
|
| S |
C
A |
G |
S |
C
B |
G |
|
S |
C |
G |
|
energy
A | B |
|
hype
A | B |
|
pop
A | B |
|
mgr
A | B |
|
FIGHT
RATING
43% |
|
|
|
|
|
|
|
Co-main event
|
Coming up we have a featherweight MMA rules bout between Tommy Toehold (ranked 4582 p4p, 4990 weight class) and Wade Samuel (ranked 0 p4p, 0 weight class). We have two fighters making their debuts here, so let's see who comes out of this one with their first professional victory.
 |
|
 |
| 172 cm
23
152
0 - 0 - 0 |
|
177 cm
23
156
0 - 0 - 0 |
Good takedowns
Basic striking
Likes comics |
|
BJJ White Belt
Good kicks
Determined |
|
| |
|
Ladies and gentlemen. This fight is 3 rounds, in the featherweight division.
Introducing the fighter to my left, fighting out of the red corner.
With a record of 0 - 0 - 0, fighting out of Hilo, Tommy Toehold!
And introducing the fighter to my right, fighting out of the blue corner.
With a record of 0 - 0 - 0, fighting out of Hilo, Wade Samuel!
The judges for this bout are Chris Saunders, Jeff Smith and Micheangelo Fripello.
The bell rings for round one and we are underway!
Samuel tries to clinch up against the cage, rushing in to close the distance. Toehold manages to break the clinch and circles back to the middle of the mat.
Samuel tries to close the distance and clinch but Toehold swats him to one side with an open hand palm strike and circles away.
Samuel gets caught on his heels momentarily as he allows Toehold to score an easy takedown into full guard.
We could do with one of the fighters taking the initiative a bit more on the ground - they're both waiting to capitalize on a mistake.
Toehold content to stall in guard here.
Toehold sneaks a leg through and gets to half guard. That was like a knife through butter how easily he passed Samuel's guard.
We've had a slow start to the round here - hopefully the action picks up.
Toehold in half guard on the top. He's looking for a kimura... He's got it locked and he's managed to free his trapped foot. Samuel tries to escape but it's on too tight and he has to tap! Great BJJ skills there from Toehold!
Ladies and gentlemen, after 1:57 of round 1, we have a winner by way of Submission (Kimura). Tommy Toehold!
|
|
|
|
|
|
|
|
|
|
|
|
|
|
|
|
|
|
|
|
|
|
|
| S |
C
A |
G |
S |
C
B |
G |
|
S |
C |
G |
|
energy
A | B |
|
hype
A | B |
|
pop
A | B |
|
mgr
A | B |
|
FIGHT
RATING
56% |
|
|
|
|
|
|
|
Main event
|
Coming up we have a featherweight MMA rules bout between Bryce Mitchell (ranked 5007 p4p, 5232 weight class) and Lou Dime (ranked 0 p4p, 440 weight class). We have two fighters making their debuts here, so let's see who comes out of this one with their first professional victory.
 |
|
 |
| 175 cm
18
145
0 - 0 - 0 |
|
181 cm
23
153
0 - 0 - 0 |
BJJ Purple Belt
Brawler
Good chin |
|
BJJ White Belt
Excellent boxer
Granite chin |
|
| |
|
Ladies and gentlemen. This fight is 3 rounds, in the featherweight division.
Introducing the fighter to my left, fighting out of the red corner.
With a record of 0 - 0 - 0, fighting out of Hilo, Bryce Mitchell!
And introducing the fighter to my right, fighting out of the blue corner.
With a record of 0 - 0 - 0, fighting out of Hilo, Lou Dime!
The judges for this bout are Josh West, Paul Gruel and Roger Salmon.
The bell rings for round one and we are underway!
Dime avoids the clinch attempt nicely.
No joy there for Dime, who threw a few shots but didn't land.
Dime shoots in for a double leg but Mitchell sprawls well. That's going to sap some energy.
Dime misses with a takedown attempt - Mitchell sprawls well and throws a nice strike on the way out which just misses.
Mitchell looks for a takedown. He's got it. We're now in half guard.
We get told so often about how wrestlers don't like to be on their backs. Let's see if Dime can do anything to dispel that myth.
Mitchell wants to stand but Dime has hold of a leg and an arm, so he's trapped for now.
Mitchell content to control rather than advance.
We've had a slow start to the round here - hopefully the action picks up.
That's one minute gone in the round.
Mitchell is looking for a kimura. It's going to be difficult to finish that from half guard though and Dime defends it well.
Dime is looking for a sweep. Mitchell is wise to his cunning plan and keeps the top position.
Mitchell takes advantage of the dominant position to land a couple of big hammer fists.
The ref warns both fighters not to hold the cage as they work up against the meshing.
Mitchell content to sit in half guard and control for a moment.
Dime is looking to improve his position.
That's two minutes gone in the round.
Dime flails away from the bottom but he's not doing any damage.
The fighters are pressed up against the cage, both looking to find a bit of space to work.
Mitchell is taking a breather. Dime says something to him but it's hard to make out. Perhaps he's telling him to get on with it and actually do something.
Mitchell is trying to work for a kimura but Dime is defending well.
Mitchell is just sitting in half guard, waiting for something to happen.
That's three minutes gone in the round.
Dime wants to control but Mitchell passes into side.
Mitchell tries for a kimura but Dime is defending well.
Mitchell just content to control the position.
That's four minutes gone in the round.
Dime is trying to get back to half guard.
Dime wants to control but Mitchell postures up.
Dime looks to move to half guard but instead Mitchell has passed into mount! Damn!
Dime really trying hard to get back to half guard here.
Boooooooooooooooooooo!!! God, this has been a terrible round. Come on you two, sort yourselves out!
Mitchell looking to control and managing it successfully.
The crowd growing excited in anticipation of a finish here! Right on cue, Mitchell cracks his opponent with a massive right hand that draws loud cheers!
And that is the end of the round. The fighters go back to their corners.
Bryce Mitchell dominated that round.
The referee calls time. The cornermen exit stage left and we're back to business.
Dime lands a nice looking body shot.
Mitchell looking to score a takedown here. Dime is defending well but Mitchell drives through and ends up in Dime's guard.
Mitchell postures up and scores with a shot to the body and a follow up elbow to the head.
Dime can't do much from the bottom at the moment, as Mitchell controls the pace.
Mitchell passes into half guard.
Mitchell is thwarting Dime's attempts to control the position.
We've had a slow start to the round here - hopefully the action picks up.
Dime is looking to regain full guard. Not this time though.
Bryce Mitchell overall seems to be getting the better of the ground position in the fight so far.
Mitchell is looking for a kimura. It's going to be difficult to finish that from half guard though and Dime defends it well.
That's one minute gone in the round.
Mitchell uses his free foot to push down on Dime's thigh. Eventually he works his other foot free and he's advanced to mount - this is trouble for Dime.
Mitchell raining down hammerfists from mount.
Mitchell is landing with some decent strikes but Dime is trying to advance his position so the referee is letting the fight continue.
Dime is wriggling around here but as he tries to escape, Mitchell has taken his back.
Mitchell has the hooks in and he's looking for a rear naked choke here. Dime is defending well but eventually Mitchell manages to get an arm under the chin and he's locked on the RNC! Dime has no choice but to tap now! He does! This one is all over!
Ladies and gentlemen, after 2:56 of round 2, we have a winner by way of Submission (RNC). Bryce Mitchell!
|
|
|
|
|
|
|
|
|
|
|
|
|
|
|
|
|
|
|
|
|
|
|
| S |
C
A |
G |
S |
C
B |
G |
|
S |
C |
G |
|
energy
A | B |
|
hype
A | B |
|
pop
A | B |
|
mgr
A | B |
|
FIGHT
RATING
33% |
|
|
|
|
|
|
|
|
|
|
