|
ENIGMA SUB WRESTLING 6 PBP Commentary |
Undercard bout
|
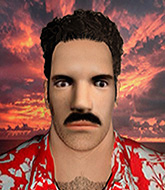
This TWGC bout is 1 fifteen minute round in the heavyweight division. Introducing today's competitors. In the red corner, competing out of Las Vegas, with a TWGC record of 0 wins and 0 losses; Scott Dolton! And in the blue corner, fighting out of Los Angeles, with a TWGC record of 11 wins and 8 losses; Xandao Couceiro!
The judges for this bout are Alec Ball, Ian Loll and Trevor Gratis.
The fighters bow as they face eachother in the middle of the mat and we are under way.
Couceiro closes the distance and clinches up with Dolton, looking for a takedown. Couceiro pushes Dolton against the cage but Dolton circles to the side and manages to break the clinch.#TD#
Dolton drives through with a takedown into guard. Score +2 for takedown into guard / half guard: Dolton (2) vs (0) Couceiro
Dolton is intent on slowing down the pace of the fight, simply looking to control.
Dolton sneaks a leg through and gets to half guard. That was like a knife through butter how easily he passed Couceiro's guard. #SUB2#
Couceiro is looking to sinch up a guillotine here but Dolton pulls his head out easily. #SUB2#
Couceiro looking for subs from the bottom but Dolton mounts him! Score +3 for passing guard: Dolton (5) vs (0) Couceiro
Couceiro tries to hold on but Dolton pushes him away.
We've had a slow start to the round here - hopefully the action picks up.
Couceiro is looking to improve his position but Dolton isn't that keen on the idea.
The ref warns both fighters not to hold the cage as they work up against the meshing.
Dolton avoids the attempt from Couceiro to control.#T1#
Couceiro is looking to improve his position but Dolton isn't that keen on the idea.
Dolton has been talking about how he's improved his wrestling in the run up to the fight so let's see if that's enough to sway the balance.
Dolton trying to control but he's not successful this time.
Couceiro is writhing around trying to get back to his feet.
Dolton takes a little breather and maintains the position. The referee will be looking for him to stay active from such a dominant position though.
Couceiro is wriggling around trying to escape.
Dolton trying to control but he's not successful this time.
Couceiro is looking to improve his position but Dolton isn't that keen on the idea.#T2#
Couceiro is squirming around, avoiding Dolton's attempts to control the action.
Couceiro is wriggling around trying to escape.
Couceiro has found himself in a tricky position here. He's been working his transitions in training so let's see if he can work his way out of it.
Couceiro wants to control but Dolton is having none of it.
Couceiro regains half guard.
Couceiro wants to improve his position but Dolton is controlling well.
The fighters are going at a pretty good pace and they're both starting to sweat now.
Couceiro tries to regain full guard. Instead though, Dolton has advanced to mount. Uh oh. Score +3 for passing guard: Dolton (8) vs (0) Couceiro#T3#
Dolton controlling the position easily from mount.
Dolton trying to control but Couceiro is having none of it.
Couceiro tries to lock up and control but Dolton gives him a forearm to the face and pushes him away.#T4#
Dolton trying to control but he's not successful this time.
Couceiro can't escape the position.
Dolton controlling the pace for now.
Dolton tries to control but Couceiro wriggling away.
Couceiro is working to get back to half guard.
#T5#
Dolton controlling the position easily from mount.
Couceiro is wriggling around trying to escape.
Couceiro is still trying to improve position.
Couceiro keeps trying to improve his position.
Dolton can't quite control the action as he would like just now, as Couceiro is looking to escape.
Couceiro is desperately trying to improve his position but Dolton has a good base and remains in mount.#T6#
Dolton avoids the attempt from Couceiro to control.
Couceiro tries to reverse the position but Dolton maintains control.
Dolton wants to control the pace but Couceiro is squirming around nicely.
Couceiro is working to get back to half guard.
Couceiro tries to hold on but Dolton pushes him away. #T7#
Dolton prevents Couceiro from getting the reversal.
Couceiro is persisting with the attempt to improve his position.
The fighters are pressed up against the cage, both looking to find a bit of space to work.
Couceiro regains half guard.
Couceiro slips a foot under and gets full guard. Nice work.
Dolton stands up and looks to throw the legs aside to pass to side control. Couceiro swivels though and keeps the full guard. #SUB2#
Couceiro escapes his hips to the side and looks to be working for an armbar. Dolton gives him a little smile and shakes his head. No chance.
Couceiro is trying to hold Dolton in close to prevent damage but Dolton has managed to pass into half guard.
#T8#
Dolton prevents Couceiro from improving his position.#SUB#
Dolton is looking for a kimura here.
Dolton is looking to advance position but Couceiro won't allow it.
Couceiro trying to control here.
#SUB2#
Couceiro looking for submissions off his back.#T9##SUB#
Dolton is working for a kimura but Couceiro is defending it quite comfortably.
Dolton is looking to advance position but Couceiro won't allow it.
Dolton is trying to control the action in half guard but Couceiro is working away on the bottom, looking perhaps to get back to full guard. #SUB2#
Couceiro looking for submissions from an awkward position here.
Dolton tries to pass to full mount but Couceiro defends it. #T10#
Dolton prevents Couceiro from improving his position.
Couceiro controlling the position for now.
Couceiro is trying to get back to full guard.
Dolton seems very keen to just sit and control from half guard but Couceiro does not like that idea so much and is remaining active off his back. #T11##SUB2#
Couceiro looking for submissions off his back.
Dolton content to control rather than advance.
Couceiro wants to control but Dolton is keeping busy and won't allow it.
Dolton wants to control but Couceiro is keeping him busy.
Couceiro is looking to control Dolton's leg but it's slowly edging free. Can Couceiro avoid being mounted?
Couceiro is refusing to be controlled, as Dolton sits in half guard. #SUB2#
Couceiro is looking to sinch up a guillotine here but Dolton pulls his head out easily. #T12#
Couceiro is trying to get back to full guard.
Dolton is just sitting in half guard, waiting for something to happen.#SUB2#
Couceiro looking for a kimura from the bottom but Dolton passes into side control! Score +3 for passing guard: Dolton (11) vs (0) Couceiro
Dolton wants to control but Couceiro is keeping him busy.
Couceiro is looking for a sweep.
Dolton is pausing for a moment. What's he doing? It looks like he's clearing his nose. Oh dude! He's shot a load of snot all down Couceiro's shoulder. That is not cool.
Couceiro is trying to improve his position.#T13#
Couceiro is trying to control Dolton's posture but Dolton avoids it.
Dolton trying to control the action but Couceiro is working from the bottom.
Couceiro is trying to control Dolton's posture but Dolton avoids it.
Dolton is looking to take a break and control but Couceiro is keeping him honest, looking to work from the bottom.
Dolton working away.#T14#
Couceiro tries to bench press Dolton off him but Dolton keeps the position.
Couceiro holds on tight, trying to prevent any damage.
Dolton working away.
Couceiro is positioning himself to get back to half guard.
Couceiro trying to control but Dolton flips him over like a cheap hooker and has his back! Score +3 for taking back: Dolton (14) vs (0) Couceiro
Couceiro rolls and manages to get back to half guard. Nicely done.
Dolton is pressing down on Couceiro's thigh, looking to free his foot. Couceiro is holding on for now.
Boooooooooooooooooooo!!! God, this has been a terrible round. Come on you two, sort yourselves out!
Dolton wants to lay and pray for a moment but Couceiro keeps working.
And that's the end of the fight!
Dolton takes the fight on points by 14 to 0.
An out of breath Scott Dolton thanked his loyal fans in his post fight interview, giving them credit for his success over the course of his career. |
|
|
|
Undercard bout
|
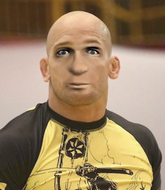
This TWGC bout is 1 fifteen minute round in the super heavyweight division. Introducing today's competitors. In the red corner, competing out of Las Vegas, with a TWGC record of 1 wins and 1 losses; Thorvald Nansen! And in the blue corner, fighting out of Amsterdam, with a TWGC record of 11 wins and 10 losses; Bubba Rolls!
The judges for this bout are Elvis Blanc, Alec Ball and Dillan Fox.
The official calls the fighters to the middle and the contest is under way.#CL2#
Rolls clinches.
Nansen is defending well against a takedown attempt.
Nansen is looking for a takedown.
Nansen tries to score a body lock takedown but Rolls shows good agility there to stay on his feet.
Nansen is looking for a takedown up against the cage. Rolls gets underhooks though and prevents the takedown attempt.
That's three failed takedown attempts in the round for Thorvald Nansen. That's going to take a lot out of him.
Nansen drops to a knee looking for a takedown but Rolls gets the underhooks and prevents it.
Nansen can't get the takedown.
Nansen wants a takedown.
#TD#
Nansen has Rolls pressed up against the cage. He's trying to work for a single leg takedown. Nansen pulls back from the cage and twists to the side, sending Rolls tumbling to the mat - Nansen dives into Rolls's guard. Score +2 for takedown into guard / half guard: Nansen (2) vs (0) Rolls
Nansen wants to pass the guard but Rolls is keeping the position.
We've had a slow start to the round here - hopefully the action picks up.
Nansen won't allow Rolls to sweep him here.
Nansen wants to pass the guard but Rolls is keeping the position.
We've been hearing that Nansen has been drilling a lot of ground and pound in training, so let's see if he get the finish.
Nansen trying to control but Rolls is working from the bottom. #T1#
Nansen stands and throws Rolls's legs to the side, diving into side control. Score +3 for passing guard: Nansen (5) vs (0) Rolls
Rolls is not content to let Nansen control the position.
Rolls is sneaking out the side here. He's bucked Nansen off and has taken his back! Score +4 for clean sweep to past guard: Nansen (5) vs (4) Rolls
Nansen looks to control his opponent's hands but he's not mananging it at the moment.
Nansen rolls, trying to escape but Rolls keeps control of the position.
#SUB2#
Rolls is working for the rear naked choke. He has one arm under the chin but Nansen has hold of the other arm. A bit of a stalemate here. #SUB2#
Nansen preventing the rear naked choke attempt from Rolls. #T2#
Nansen breaks Rolls's hooks off and manages to turn into his guard.
Score +2 for sweep to guard / half guard: Nansen (7) vs (4) Rolls
Nansen advances to half guard.
Nansen tries to pass the half guard into mount. Rolls knows what he's doing though and prevents the attempt.
Rolls tries to get to full guard but Nansen has control of the leg.
Rolls is doing well to control the position and prevent Nansen from advancing to side control.
Rolls is looking to improve his position.
#SUB#
Nansen is trying to work for a kimura. This could be trouble! No, Rolls has managed to free his arm - good work. #T3##SUB#
Nansen is working for submissions here but there's nothing on.
Rolls slips a foot under and gets full guard. Nice work.#SUB#
Nansen drops back, looking for a kneebar! Rolls looks panicked! The fighters roll across the mat, one looking to finish, one looking to escape. Rolls looks to have wriggled free... Yes, he's got his leg free and he's dived into side control! Good work there from Rolls! Score +4 for clean sweep to past guard: Nansen (7) vs (8) Rolls
Nansen struggling a bit here.
Nansen is trying to get back to half guard.#T4##SUB2#
Rolls is looking to finish here, going for an Americana. Nansen knows the correct defense though, so he's OK.
Nansen gives up the full mount - oops, sloppy defensive grappling there! Score +2 for reaching mount: Nansen (7) vs (10) Rolls
Nansen is squirming around, avoiding Rolls's attempts to control the action.
Rolls controlling his opponent. #T5#
Rolls wants to control but instead Nansen manages to regain half guard.
Nansen tries to roll over but Rolls keeps him under control.
The ref warns both fighters not to hold the cage as they work up against the meshing.
Rolls seems very keen to just sit and control from half guard but Nansen does not like that idea so much and is remaining active off his back.
Nansen wants to get back to full guard.
Nansen wants to control but Rolls is keeping busy.
Nansen wants to sweep but Rolls has passed to side control! Score +3 for passing guard: Nansen (7) vs (13) Rolls
Nansen tries to buck Rolls off but Rolls is having none of it.
Nansen sneaks a leg under to get back to half guard.
Nansen moves into full guard.
#T6##SUB#
Nansen escapes his hips to the side and looks to be working for an armbar. Rolls gives him a little smile and shakes his head. No chance. #SUB#
Rolls got a little sloppy there for a moment and Nansen has worked his way into a loose triangle - can he finish it?! No, Rolls has managed to get both his arms back between Nansen's legs - danger averted.
Nansen looking to sweep here. No luck so far.
Rolls is taking a break and basically stalling. The referee will not allow him to do that for long. #SUB#
Nansen looking for submissions off his back, moving his hips, looking for an opening.
Rolls passes into half guard.
Nansen is positioning himself well to prevent Rolls advancing to mount. #T7#
Nansen trying to control but Rolls postures up.
Nansen is pressing down on Rolls's left leg trying to get back to full guard. He's managed it.
Nansen trying to control the position.
Rolls advances to half guard. #SUB2#
Rolls is looking for a kimura here.
Nansen is not content to let Rolls control the position.
The fighters are pressed up against the cage, both looking to find a bit of space to work.#T8##SUB#
Rolls moves into side control, avoiding a weak kimura attempt from Nansen. Score +3 for passing guard: Nansen (7) vs (16) Rolls
Nansen is trying to control Rolls's posture but Rolls avoids it.
Nansen looks to move to half guard but instead Rolls has passed into mount! Damn! Score +2 for reaching mount: Nansen (7) vs (18) Rolls
Nansen is wriggling around trying to escape.
Nansen sneaks a leg back under and regains half guard and is working straight away to try and get back to guard. He hasn't managed just yet though.#T9#
Nansen trying to control here.
Nansen is looking to improve his position.
Rolls is controlling the pace.
Rolls is looking to take a break and control but Nansen is keeping him honest, looking to work from the bottom.
Nansen has no desire to be mounted, so is trying to control. Rolls is working away from the top position though.
Nansen is not content to let Rolls control the position.#T10#
Nansen wants to control the action here but instead Rolls manages to pass to full mount! Score +3 for passing guard: Nansen (7) vs (21) Rolls
Nansen is working to get back to half guard.
Nansen slips a leg in and gets back to half guard.
Nansen wants to get back to full guard.
Rolls tries to pass to full mount but Nansen defends it.
Nansen tries to get to full guard but Rolls has control of the leg.
Nansen moves his hips nicely and gets into full guard.#T11#
Nansen keeping moving, preventing Rolls from controlling successfully. #SUB#
Nansen working away from the bottom but not quite defensive enough there because Rolls has passed into half guard!
Nansen tries to roll over but Rolls keeps him under control.
Nansen tries to regain full guard. Instead though, Rolls has advanced to mount. Uh oh. Score +3 for passing guard: Nansen (7) vs (24) Rolls
Nansen is just holding on here. Rolls manages to take his back.
Score +3 for taking back: Nansen (7) vs (27) Rolls#T12##SUB2#
Nansen fending off the submission attempt from Rolls.
A lull in the action here.
Well,Nansen is on his way to losing a decision here. Can he use his experience to pull something off in the closing minutes?
Nansen breaks Rolls's hooks off and manages to turn into his guard.
Score +2 for sweep to guard / half guard: Nansen (9) vs (27) Rolls
Rolls pulls Nansen in close to prevent any damage.
Rolls bucks up whilst keeping hold of a body lock, managing to reverse the position. Now he's in top in Nansen's guard. Score +2 for sweep to guard / half guard: Nansen (9) vs (29) Rolls#T13#
Rolls won't allow Nansen to sweep him here.
Rolls stands up and looks to throw the legs aside to pass to side control. Nansen swivels though and keeps the full guard.
Nansen wants to sweep but no luck.
Rolls showing good wrestling skills to control the position.
Nansen keeping full guard, as Rolls tries to pass.
Rolls trying to control but Nansen is working from the bottom. #SUB#
Nansen looking for submissions from the bottom here. Moving his hips around, possibly looking for an armbar.
#T14#
Nansen lands a beautiful sweep and he's now moved into his opponent's guard. Score +2 for sweep to guard / half guard: Nansen (11) vs (29) Rolls
Nansen tries to free his leg and advance position but Rolls is retaining full guard.
Rolls tries to land a sweep but no joy.
Nansen pushes down on Rolls's leg and manages to get into half guard.
Well, if Nansen is going to just lie there, perhaps we should talk about what we're having for dinner tonight
I'm having a ham and pineapple pizza
Yum. Can't wait.
Boooooooooooooooooooo!!! God, this has been a terrible round. Come on you two, sort yourselves out!
Nansen trying to pass the guard but Rolls defending well.
Nansen works his foot free and advances to mount. Score +3 for passing guard: Nansen (14) vs (29) Rolls
And that's the end of the fight!
Rolls wins on points by 29 to 14.
Thorvald Nansen was interviewed post fight and said 'Hinga dinga durgen'. |
|
|
|
Undercard bout
|
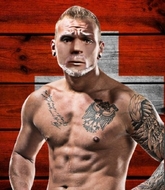
This TWGC bout is 1 fifteen minute round in the super heavyweight division. Introducing today's competitors. In the red corner, competing out of Los Angeles, with a TWGC record of 7 wins and 2 losses; Jorgen Kruth! And in the blue corner, fighting out of Los Angeles, with a TWGC record of 0 wins and 0 losses; Nick Law!
The judges for this bout are Dillan Fox, Alec Ball and Ian Loll.
The official calls the fighters to the middle and the contest is under way.#TD#
Kruth feints and then dives in with a takedown. That was a long way out but the feint bought him enough time to close the distance and complete the takedown. Now we'll play guard for a bit and see who can get the better of that position. Score +2 for takedown into guard / half guard: Kruth (2) vs (0) Law#SUB2#
Law is working actively off his back, looking to secure an arm or perhaps work for a triangle. #SUB#
Kruth is trying to work a guillotine from the top, or something like that? Don't know how he thinks he's going to get a finish from there.
The ref warns both fighters not to hold the cage as they work up against the meshing.#SUB2#
Law is looking for a triangle but Kruth pushes his legs off easily.
Kruth seems content to control from guard here. He's going to have to remain active though if he doesn't want to get stood back up.
Kruth seems to have a rather negative gameplan on the ground. He seems keen to just score the takedown and hold down Law for as long as he can get away with.
Kruth won't allow Law to sweep him here.
The fighters are pressed up against the cage, both looking to find a bit of space to work.
Kruth sitting in guard, not really doing much.
We've had a slow start to the round here - hopefully the action picks up.#SUB2#
Law working away from the bottom but not quite defensive enough there because Kruth has passed into half guard!
Law is a painfully thin specimen of a man. You do wonder whether a good body kick would snap him clean in two.#SUB#
Kruth has hold of the far side arm. He's working for the Kimura, can Law defend it? Kruth steps over the head and cranks it - Law is tapping out! That was textbook stuff right there - nice submission victory for Kruth!
Ladies and gentlemen, after 1:05 of round 1, we have a winner by way of Submission (Kimura). Jorgen Kruth!
After the big win, Jorgen Kruth made sure to do all the important stuff like thanking his sponsors Maximum Human Performance and telling the interviewer how much he loves him. |
|
|
|
Co-main event
|
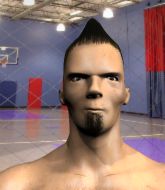
This TWGC bout is 1 fifteen minute round in the super heavyweight division. Introducing today's competitors. In the red corner, competing out of New York, with a TWGC record of 2 wins and 2 losses; Lalo Jimenez! And in the blue corner, fighting out of Los Angeles, with a TWGC record of 51 wins and 37 losses; Tyrone Sparxx!
The judges for this bout are Dillan Fox, William Peck and Ian Loll.
The fighters bow as they face eachother in the middle of the mat and we are under way.
Sparxx shoots in looking for a takedown. Jimenez tries to sprawl out of it but Sparxx keeps driving through. The fighters are pinned against the cage. Jimenez manages to get underhooks and after a bit of a struggle, circles away and we're back to standing.
Jimenez looks to have improved his striking defense since last time we saw him fight.#TD#
Jimenez shoots in looking for a single leg takedown. Sparxx is trying to defend but Jimenez finishes it well and ends up in half guard. Let's see if he can advance position further. Score +2 for takedown into guard / half guard: Jimenez (2) vs (0) Sparxx
Sparxx has his hands clasped together around Jimenez's back. He's all about the action.#SUB#
Jimenez is working for a kimura but Sparxx is defending it quite comfortably.
We've had a slow start to the round here - hopefully the action picks up.
Jimenez is looking to stall here but Sparxx recovers full guard. #T1#
Sparxx working a defensive guard here.
Jimenez looking to pass the guard.
The ref warns both fighters not to hold the cage as they work up against the meshing.
Sparxx keeping moving, preventing Jimenez from controlling successfully.
Jimenez slips nicely into half guard.
Sparxx wants to improve his position but Jimenez is controlling well.
Sparxx won't allow Jimenez to pass to mount. #T2#
Jimenez is looking to pass the guard... He's managed it - he's now in full mount! Score +3 for passing guard: Jimenez (5) vs (0) Sparxx
Sparxx has found himself in a tricky position here. He's been working his transitions in training so let's see if he can work his way out of it.
Jimenez can't quite control the action as he would like just now, as Sparxx is looking to escape.
Sparxx wants to control but Jimenez is having none of it.#SUB#
Jimenez is looking to secure an arm. He's managed it! He's pivoting for an armbar - that looks tight! But Sparxx has managed to get out of it and now he's in a dominant position. Nice work from Sparxx! Score +2 for sweep to guard / half guard: Jimenez (5) vs (2) Sparxx
Jimenez pulls Sparxx in close to his closed guard and prevents Sparxx from doing any damage or advancing position.#T3#
Jimenez is working from a closed guard but he's struggling to control his opponent.#SUB#
Jimenez looking for submissions off his back, moving his hips, looking for an opening.
#SUB#
Jimenez looking for subs off his back but Sparxx has passed one foot through into half guard.
Sparxx is just sitting in half guard, waiting for something to happen.#T4#
Sparxx's corner are shouting for him to control the position and he seems happy to oblige.
More stalling from Sparxx.
Jimenez is not content to let Sparxx control the position.#T5##SUB2#
Sparxx is trying to work for a kimura. This could be trouble! No, Jimenez has managed to free his arm - good work.
Sparxx prevents Jimenez from improving his position.
Sparxx controlling the action here.
Jimenez is trying to get back to full guard.#T6#
Jimenez is trying to control but can't.
Sparxx trying to control the pace.
Jimenez trying to control here.
Jimenez makes his way to full guard. A much better position for Jimenez.#SUB#
Jimenez is looking for a triangle but Sparxx pushes his legs off easily.
Sparxx won't allow Jimenez to sweep him here. #T7#
Sparxx passes Jimenez's left leg - he's now in half guard.
Jimenez wants to get back to full guard.
Sparxx is figuring out what he wants to do next.
Let's hope that Sparxx has the urge to step up the pace any second now because for the last 15 or 20 seconds he's just been holding on tight.
Jimenez trying to control here.
The referee calls for the fighters to work.
#T8#
Jimenez gets back to full guard.
Sparxx controlling from the top position.
Sparxx with more of the same as he continues to hold on.
Jimenez looking for a sweep. Not yet Jimenez, not yet. #T9#
Sparxx trying to pass the guard but can't manage it just yet.
Jimenez wants to sweep but no luck.
Sparxx showing good wrestling skills to control the position.
Jimenez looking for a sweep. Not yet Jimenez, not yet. #SUB#
Jimenez escapes his hips to the side and looks to be working for an armbar. Sparxx gives him a little smile and shakes his head. No chance.
The fighters are pressed up against the cage, both looking to find a bit of space to work.#T10#
Sparxx passes Jimenez's left leg - he's now in half guard.
Sparxx with a momentary lay and pray from half guard.
Jimenez wants to improve his position but Sparxx is controlling well.
Sparxx is controlling the pace.
#T11#
It looks like Sparxx might be adopting somewhat of a lay and pray gameplan here, which I'm sure won't go down too well with the paying fans in attendance... Or the ring announcers come to think of it.
Jimenez is trying to get back to full guard.
Sparxx is figuring out what he wants to do next.#SUB2#
Sparxx seems like he's working for an arm triangle here. He's freed his trapped foot and he's rotating nicely. Jimenez is in big trouble! He's tapping out! This one is aaaaaaaaaaaall over!
Ladies and gentlemen, after 12:57 of round 1, we have a winner by way of Submission (Arm Triangle). Tyrone Sparxx!
In his post fight interview, Tyrone Sparxx started talking himself up. Luckily his charisma kept the crowd on side and gave him a good reception. |
|
|
|
Main event
|
This TWGC bout is 1 fifteen minute round in the super heavyweight division. Introducing today's competitors. In the red corner, competing out of London, with a TWGC record of 1 wins and 0 losses; Ronaldo Gomes! And in the blue corner, fighting out of Hilo, with a TWGC record of 0 wins and 0 losses; Alexandro Uson Villaruz!
The judges for this bout are Alec Ball, Dillan Fox and Ian Loll.
The fighters bow as they face eachother in the middle of the mat and we are under way.#TD#
Gomes looking to shoot here. He's gone for it and he's landed a takedown into side control! Oh, that's bad for Villaruz! Score +4 for clean takedown past guard: Gomes (4) vs (0) Villaruz
Villaruz can't do much from the bottom here.
Gomes controlling the position.
Gomes moves into full mount! Score +2 for reaching mount: Gomes (6) vs (0) Villaruz
Villaruz is working to get back to half guard.
Gomes with some aggressive grappling here, looking for the finish.
Gomes avoids the attempt from Villaruz to control.
We've had a slow start to the round here - hopefully the action picks up.
Villaruz is looking to get to half guard.
Gomes looking to control and managing it successfully.
Villaruz really trying hard to get back to half guard here.
#T1#
Gomes works his way to his opponent's back.
Score +3 for taking back: Gomes (9) vs (0) Villaruz#SUB#
Gomes is working really hard to secure the rear naked choke. Villaruz defends successfully for a significant amount of time. Both fighters are looking very determined.
The ref warns both fighters not to hold the cage as they work up against the meshing.
Gomes is hanging on to Villaruz's back as he tries to escape.
Good control from Gomes.#SUB#
Gomes is working really hard to secure the rear naked choke. Villaruz defends successfully for a significant amount of time. Both fighters are looking very determined. #SUB#
Gomes is looking to finish the fight by rear naked choke. Villaruz knows exactly what he's got planned though, so he's defending well. Maybe a few strikes would soften Villaruz for a finish.
Villaruz trying to control the position but Gomes manages to sink in the hooks. #T2#
The fighters are starting to perspire pretty heavily.#SUB#
Gomes looking for the choke from the back.
The fighters are pressed up against the cage, both looking to find a bit of space to work.
Gomes keeps control of the position as Villaruz tries to break free.
#SUB#
Gomes is persistently looking for the submission but Villaruz is defending it well.
#SUB#
Gomes has the rear naked choke here! This is very bad for Villaruz! Can he survive? No! He's out! Gomes gets to his feet and celebrates with his cornermen. He looks absolutely delighted. In the post fight interviews he takes time to thank his parents and everyone who has believed in him from the start. How sweet.
Ladies and gentlemen, after 2:40 of round 1, we have a winner by way of Submission (RNC). Ronaldo Gomes!
Our winner, Ronaldo Gomes, made sure he spent some time buttering up the crowd during his post fight interview, which will no doubt bring him a few more fans. |
|
|
|
|
|
|