 |
SENSEI FC 18 PBP Commentary |
Undercard bout
|
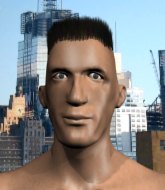
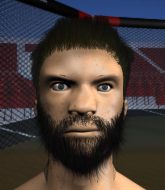
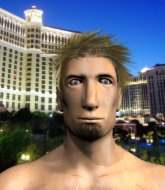
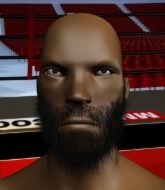
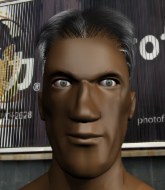
Coming up we have a heavyweight MMA rules bout between Sam Bass (ranked 6935 p4p, 25452 weight class) and Penny Wise (ranked 669 p4p, 718 weight class). These two fighters really are very evenly matched on the feet - it will be fascinating to see who can assert themselves in that aspect of the fight.
 |
|
 |
| 200 cm
19
275
0 - 2 - 0 |
|
194 cm
26
265
0 - 3 - 0 |
BJJ Blue Belt
Excellent MT
Cardio machine |
|
Decent wrestler
Decent boxing
Experienced |
|
| |
|
Ladies and gentlemen. This fight is 3 rounds, in the heavyweight division.
Introducing the fighter to my left, fighting out of the red corner.
With a record of 0 - 2 - 0, fighting out of New York, Sam Bass!
And introducing the fighter to my right, fighting out of the blue corner.
With a record of 0 - 3 - 0, fighting out of St Petersburg, Penny Wise!
The judges for this bout are Kenichi Hosakawa, Shigeki Fujiwara and Taro Takaoka.

The bell rings for round one and we are underway!
Bass looks shocked there as he takes a right hand to the temple.
Wise scores with a decent looking hook.
Bass lands a body shot.
Wise looks winded!
Bass tests Wise's chin there with a solid looking shot.
 It looks like Penny Wise has been cut. It looks like Penny Wise has been cut.
Bass scores with a jab to the head.
Bass flashes Wise a smile before throwing a beast of a right hand, straight down the pipe. Wise's eyes follow the hand right onto his nose, taking in it's full glory... and then darkness. Wise crumples to the floor! He's out cold! Bass punches the air and yells at the top of his lungs - yeeeeeeeeeeah!!!! This one is all over!
Ladies and gentlemen, after 0:20 of round 1, we have a winner by way of KO (Punch). Sam Bass!
Sam Bass seemed lost for words in his post fight interview but he remembered to thank his fans and directed everyone to his website.
|
|
|
|
|
|
|
|
|
|
|
|
|
|
|
|
|
|
|
|
|
|
|
| S |
C
A |
G |
S |
C
B |
G |
|
S |
C |
G |
|
energy
A | B |
|
hype
A | B |
|
pop
A | B |
|
mgr
A | B |
|
FIGHT
RATING
100% |
|
|
|
|
|
|
|
Undercard bout
|
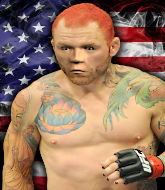
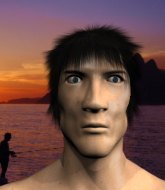
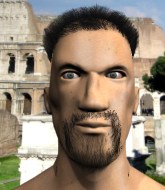
Coming up we have a light heavyweight MMA rules bout between Razan Hase (ranked 25339 p4p, 25265 weight class) and Pablo Asprilla (ranked 699 p4p, 695 weight class). Razan Hase could well score a knockout today. He has the power to get to Pablo Asprilla's chin.
 |
|
 |
| 192 cm
19
211
0 - 2 - 0 |
|
185 cm
19
204
0 - 2 - 0 |
BJJ Blue Belt
Excellent boxer
Granite chin |
|
BJJ White Belt
Excellent MT
Good gas tank |
|
| |
|
Ladies and gentlemen. This fight is 3 rounds, in the light heavyweight division.
Introducing the fighter to my left, fighting out of the red corner.
With a record of 0 - 2 - 0, fighting out of London, Razan Hase!
And introducing the fighter to my right, fighting out of the blue corner.
With a record of 0 - 2 - 0, fighting out of Amsterdam, Pablo Asprilla!
The judges for this bout are Yuuki Gou, Yukihiro Yamamoto and Yukihiro Shimada.
The bell rings for round one and we are underway!
Asprilla takes one on the chin but seems OK.
Hase comes forward and lands a shot to the body, then darts back out of range.
A big right from Hase misses.
Asprilla tries to counter by closing the distance.
Asprilla throws a looping overhand right but Hase ducks down to avoid it.
Hase throwing a counter right hand but Asprilla manages to avoid it.
Asprilla fakes high and swings low for a body shot but Hase manages to avoid it.
A punch lands to the side of Hase 's head but he takes it in his stride.
Hase scores with a big left there. The judges will like that one.
It looks like Pablo Asprilla has been cut.
Hase lands with a nice body punch.
Hase seems to be moving with more speed, compared to his last bout. He must have been working on that in the gym.
A jab from Asprilla does it's job there.
Asprilla throws out a loose jab but Hase uses good head movement to avoid it.
Hase with a jab.
The crowd are loving this. Great action here.
Hase throws a hook to the body but it doesn't connect.
Asprilla checks a low kick from Hase.
Hase looks to land a left hand but Asprilla moved out of range nicely.
Asprilla lands a slapping body shot.
Asprilla checks the leg kick.
Hase defending well as Asprilla loads up on a big left hand.
Hase swings and misses with a hook to the body.
Asprilla looks to score with a jab to the body but Hase is just out of range.
Hase throws a combination but comes up with nothing but fresh air.
Hase walks forward and throws a big overhand right! Asprilla drops to the floor like a sack of potatoes! Hase swarms on him with more punches until the referee wrestles him away from Asprilla's unconscious body! Wow, that was brutal!
Ladies and gentlemen, after 0:59 of round 1, we have a winner by way of TKO (Strikes). Razan Hase!
Razan Hase very nearly forgot to thank Kore Fight Nutrition amongst all the excitement of his win but just as the interview came to a close, he screamed their name. Hopefully he'll get a few nice freebies in the mail as a thank you.
|
|
|
|
|
|
|
|
|
|
|
|
|
|
|
|
|
|
|
|
|
|
|
| S |
C
A |
G |
S |
C
B |
G |
|
S |
C |
G |
|
energy
A | B |
|
hype
A | B |
|
pop
A | B |
|
mgr
A | B |
|
FIGHT
RATING
91% |
|
|
|
|
|
|
|
Undercard bout
|
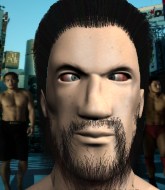
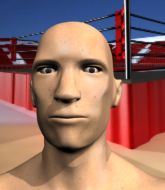
Coming up we have a light heavyweight MMA rules bout between Petr Sirotek (ranked 25050 p4p, 6603 weight class) and Ryan Bowers (ranked 718 p4p, 626 weight class). Sirotek comes to the cage accompanied by Igraj moja Hrvatska. Ryan Bowers has the power to score a knockout today if he connects clean with Petr Sirotek's chin.
 |
|
 |
| 177 cm
26
209
2 - 2 - 0 |
|
188 cm
19
206
0 - 1 - 0 |
BJJ Blue Belt
Brawler
Good chin |
|
BJJ Purple Belt
Solid Muay Thai
Granite chin |
|
| |
|
Ladies and gentlemen. This fight is 3 rounds, in the light heavyweight division.
Introducing the fighter to my left, fighting out of the red corner.
With a record of 2 - 2 - 0, fighting out of London, Petr Sirotek!
And introducing the fighter to my right, fighting out of the blue corner.
With a record of 0 - 1 - 0, fighting out of St Petersburg, Ryan Bowers!
The judges for this bout are Sosuke Kotani, Yukihiro Yamamoto and Yuuki Gou.
The bell rings for round one and we are underway!

Sirotek shoots in for a takedown from distance. He catches Bowers napping and manages to drive through into side control!

Sirotek stands up.
Bowers with a body punch. A glancing blow.
Nice straight punches there by Bowers. You know Roy Jones Jr respects the hands of Bowers.
Sirotek misses with a head kick.
Bowers let fly with a counter punch to the body but it didn't land.
Sirotek misses with a takedown
and Bowers cracks him with a counter punch right on the button.
Bowers has been working on his striking defense in training and it's paying off as Sirotek is landing a low percentage of strikes.
Bowers scores with a nice right hand.
We've seen a great period of action over the last minute or so - credit to both fighters for going all out!
Sirotek misses with a takedown attempt

and Bowers counters with a crisp right hand that drops Sirotek! Bowers lets Sirotek back up to his feet, looking for a finish!
 It looks like Petr Sirotek has been cut. It looks like Petr Sirotek has been cut.
Petr Sirotek seems to be the more aggressive standup fighter in this bout.
Sirotek takes a punch right to his stomach. That took the wind out of him momentarily.
Sirotek is breathing heavily.

That's one minute gone in the round.
Sirotek loses concentration momentarily and Bowers pounces with a three punch combo! Right, left, right! Sirotek crashes face first to the mat, out cold! Bowers finishes this one with a fantastically precise combo! Great stuff.
Ladies and gentlemen, after 1:09 of round 1, we have a winner by way of KO (Punches). Ryan Bowers!
Ryan Bowers thanked the fans post fight for their support.
Petr Sirotek spoke after the fight, saying 'Thanks to my family, my friends and my trainers and also my sponsors. I'LL BE BACK!'.
|
|
|
|
|
|
|
|
|
|
|
|
|
|
|
|
|
|
|
|
|
|
|
| S |
C
A |
G |
S |
C
B |
G |
|
S |
C |
G |
|
energy
A | B |
|
hype
A | B |
|
pop
A | B |
|
mgr
A | B |
|
FIGHT
RATING
89% |
|
|
|
|
|
|
|
Undercard bout
|
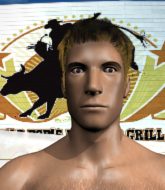
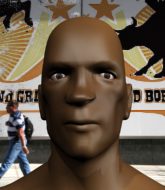
Coming up we have a welterweight MMA rules bout between Tommy Belfort (ranked 6243 p4p, 6445 weight class) and Matt Murdok (ranked 583 p4p, 591 weight class). Belfort's ring entrance music is that housewives' favourite, Flight of the Eagle. Both these guys have really solid chins. Will we see a standup war or will they both decide that a knockout is unlikely and try to win the fight elsewhere?
 |
|
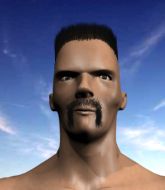 |
| 190 cm
21
180
1 - 1 - 0 |
|
177 cm
25
180
0 - 1 - 0 |
Good wrestling
Basic striking
Very strong |
|
BJJ Blue Belt
Great elbows
Heavy handed |
|
| |
|
Ladies and gentlemen. This fight is 3 rounds, in the welterweight division.
Introducing the fighter to my left, fighting out of the red corner.
With a record of 1 - 1 - 0, fighting out of Las Vegas, Tommy Belfort!
And introducing the fighter to my right, fighting out of the blue corner.
With a record of 0 - 1 - 0, fighting out of Sydney, Matt Murdok!
The judges for this bout are Yukihiro Shimada, Yukihiro Yamamoto and Taro Takaoka.
The bell rings for round one and we are underway!
Murdok throws a two punch combo that lands nicely.
Murdok blocks a jab.
Murdok is looking to take this fight into the clinch.
Murdok has done a lot of speed work in the buildup to this fight.
Murdok doesn't manage to clinch there - Belfort circles away.
Murdok moves in looking to clinch but Belfort pushes him off.
Murdok throws a combination but comes up with nothing but fresh air.
Belfort connects with a jab.
Belfort throws a right and a left that Murdok avoids nicely.
Matt Murdok seems to be the more aggressive standup fighter in this bout.
Murdok closes the distance and lands a one-two.
Belfort misses with a body shot.
Belfort jabbing away but nothing is landing.
Belfort throws out a loose jab but Murdok uses good head movement to avoid it.
Murdok throws a counter combo.
Belfort misses with an uppercut. Murdok saw that one coming.
This is a great period of action - very entertaining stuff!
Belfort just misses with a punch to the body.
Murdok doesn't manage to clinch there - Belfort circles away.
Murdok misses with a jab and misses with a cross straight after too.
Belfort is on the wrong end of a nice combination from Murdok.
Murdok scores with a nice one two combo and darts back out of range to avoid anything coming in the opposite direction.
Belfort dodges the punch combination from Murdok.
That's one minute gone in the round.
Murdok takes a body punch that cleary hurt but he's trying not to show any weakness.
Belfort misses with a wild body shot.
Belfort dips down and scores with a jab to the body.
Murdok misses with a jab and misses with a cross straight after too.
A little feinted left hand from Belfort on the counter but he doesn't commit to it.
Belfort throws a jab but it's blocked by Murdok.
Murdok misses with a series of wild punches.
Belfort looks shocked there as he takes a right hand to the temple.
Belfort avoids a punch combination nicely.
A lazy left from Belfort finds it's target.
Belfort misses with a straight right.
Murdok staying out of range there.
Murdok throws a counter combo.
Nice shot by Belfort.

That's two minutes gone in the round.
Belfort misses the shot to the body.
Belfort fails to land with a series of punches.
This is a great period of action - very entertaining stuff!
Belfort keeps the fight standing with a nice sprawl.
Murdok stalks Belfort and leaps in with a furious combination of punches. Uppercuts and crosses smash into Belfort's face. Belfort staggers backwards, shaken.
Murdok tries to clinch but Belfort moves out of range.
Murdok throws a nice looking combination but Belfort bobs and weaves to avoid any damage.
Murdok with a hook.

Murdok has managed to clinch.
Murdok misses with a punch to the body.

Murdok pushes off and circles away, back to the middle of the mat.
Belfort throws a hook to the body but it doesn't connect.
Belfort jabs Murdok right on the nose. Murdok blinks but takes it well.
Belfort misses with a hook.
Murdok throws a wild combination but nothing lands.
It looked like Belfort wanted to counter with a hook but didn't fully commit.
Murdok fails to land with the punch combination there - jab, cross, hook, miss, miss, miss.
Belfort takes a step towards his opponent and connects with a left hand, before circling away.

That's three minutes gone in the round.
Belfort is the aggressor but that punch slipped nicely by Murdok.
Murdok tries to clinch but is not successful on this occasion.
Belfort looks to be in better condition than last time we saw him fight. Obviously he's been working hard on his cardio.
Murdok is working the combinations to good effect here.
Murdok throws a right hand that Belfort ducks under and follows up with a left that Belfort also avoids with ease.
Belfort misses with a looping right.
A left and a right from Murdok both land. Nice combination.
Belfort is using his reach advantage well here, landing the more effective single shots from range.
No joy there for Murdok, who threw a few shots but didn't land.
Belfort missing with a left hand there. Murdok was out of range so wasted energy throwing that one.
Belfort swings and misses with a hook to the body.
Belfort scores with a crisp jab that stopped Murdok in his tracks.
Belfort waving his hands out in front of him, looking to distract Murdok.
As Belfort backs off Murdok throws a huge counter combo but Belfort manages to avoid it all.
The crowd cheers as Murdok lands an impressive looking overhand right. Belfort doesn't seem phased though.
Murdok looks to land a combination but Belfort avoids it well.
Murdok tries to close the distance and clinch but Belfort swats him to one side with an open hand palm strike and circles away.
Belfort throws an overhand right that lands on Murdok's shoulder, as Murdok tries to avoid the shot.
Murdok avoids a lazy jab quite easily.
Murdok is looking for the big counter here.
Belfort pushing out the jab but it's not landing.
The fans in attendance giving it up for the two fighters, who have really let it all hang out in the last minute or so!
Belfort has his head snapped back a nice jab. A little nod from Belfort there as he acknowledges the shot.

That's four minutes gone in the round.
Nice defenses there by Murdok.
Murdok tries to clinch up.
Belfort swats away the attempt to clinch by Murdok.
Murdok swings away but doesn't land with a series of punches.
Murdok looks to score with a combo but nothing lands.
A counter left hand to the body from Belfort misses its target.
Murdok scores to the head and body with a nice combination!
Murdok displaying good standup as he scores with a three punch combination.
A cross from Murdok lands.
A right-left combo lands from Murdok.
Belfort throws a hard body shot but it just misses.
Murdok throws a right and a left that both miss.
Belfort swings wildly with a right hand that was never going to find it's target.
The crowd applaud the fighters' efforts here as the round comes to an end.

Murdok closes the distance and looks for a trip takedown... aaaand he's got it - Murdok lands in his opponent's guard.
Murdok looks winded!
There's a bit of a scramble here and now Belfort is on top in guard.

And that is the end of the round. The fighters go back to their corners.
Matt Murdok dominated that round.
The minute break is over - no more time for sponges and pep talks - back to the action!

Belfort misses the shot to the body.
Murdok has managed to clinch.
Murdok lands a shoulder strike.
A real battle for position is taking place between these two warriors.

Belfort manages to break the clinch.
Murdok takes a shot to the nose. Hopefully that hasn't broken it.
Belfort misses with a straight left.
Matt Murdok is looking to throw some combinations by the looks of things.
Murdok displaying good standup as he scores with a three punch combination.
Belfort takes a jab right on the kisser.
Murdok scores with a jab to the jaw of his opponent.
Belfort misses with a wild body shot.
As Belfort backs off Murdok throws a huge counter combo but Belfort manages to avoid it all.
Belfort throws a jab when Murdok was well out of range.
The fight stays on the outside here - Murdok looks like he's thinking about clinching though.
Belfort misses with a straight right.
The crowd are loving this. Great action here.
Belfort stuffs the takedown attempt from Murdok. Murdok gets slowly back to his feet.
Belfort is trying to close the distance and clinch up, after that failed offence from Murdok.
Belfort takes a swing at Murdok's ribcage but misses.
That's one minute gone in the round.
Murdok feints a jab promting Belfort to slip. Murdok then demonstrates his capabilities by jabbing again. Belfort slips again and ducks right into an uppercut.

Belfort takes the fight into the clinch.
Murdok lands a nice shot to the body.
Murdok lands an elbow inside that Belfort shrugs off.
It looks like Tommy Belfort has been cut.
Belfort's corner calls for him to break the clinch, which he does.
Belfort misses with a hook. Murdok ducked under it nicely.
Murdok works over Belfort's head and body with a nice combination.
Belfort misses the jab.
Belfort throws a hook but Murdok avoids it easily.
Belfort missing with a left hand there. Murdok was out of range so wasted energy throwing that one.
Matt Murdok seems to be getting the better of the standup.
Belfort throws a jab but it's blocked by Murdok.
Murdok wants to clinch.
Murdok has been the more effective fighter overall so far.
Murdok keeps his opponent at a distance with a nice jab.
That's two minutes gone in the round.
This has been an exciting period of action!
Murdok displays some good footwork, moving neatly out of range as Belfort throws out the jab.
Belfort misses the jab.
Murdok misses with a jab, cross combination.
Murdok tries to close the distance and clinch but Belfort swats him to one side with an open hand palm strike and circles away.
Belfort wants to take advantage of his opponent's missed offense by moving into the clinch.
Belfort is on the wrong end of a nice combination from Murdok.
Belfort misses with a looping left.
Murdok tries to bum rush Belfort with a series of wild strikes but Belfort uses good footwork to avoid the assault.
Murdok fails to land with a series of punches.
Murdok looks to land a combination. Belfort sees it coming but can only parry a couple of the shots.
Murdok throws a combination but it was largely blocked by Belfort.
Belfort tries to land with a swinging hook to the body but Murdok was well out of range. Poor timing from Belfort.
Belfort tries to close the distance and clinch up against the cage but Murdok paws at him with a jab and circles away.
Belfort throws a hard body shot but it just misses.
A combination from Murdok does no damage.
Belfort takes a swing at Murdok's ribcage but misses.
That's three minutes gone in the round.
Murdok rushes forward with a series of wild hooks but Belfort moves out of range and avoids them all easily.
Murdok tries to shoot in for a takedown. He's got hold of a leg but Belfort swivels and escapes.
Murdok is breathing heavily.
Belfort tries to close the distance and clinch up but Murdok swats him away and circles back towards the center.
Murdok misses with a double jab.
Belfort throwing a counter right hand but Murdok manages to avoid it.
Belfort cracks Murdok with a nice right hand that draws applause from the crowd.
Belfort missing with a left hand there. Murdok was out of range so wasted energy throwing that one.
Belfort misses with a straight left.
Murdok works over Belfort's head and body with a nice combination.
A combination from Murdok does no damage.
Murdok fails to land with a series of punches.
Murdok throws a shot from downtown. Belfort moves away and avoids it.
Murdok walks straight into a jab right on the nose. That one stung - he's blinking and trying to clear his head.
Belfort connects with a lovely jab that went straight through the gap between Murdok's hands.
This is a great period of action - very entertaining stuff!
Belfort throws out a loose jab but Murdok uses good head movement to avoid it.
Belfort misses with an uppercut.
A little jabbing left from Murdok on the counter but it doesn't find it's target.
Belfort connects with a jab.
Belfort tests Murdok's chin there with a solid looking shot.
That's four minutes gone in the round.
Murdok tries to clinch up but Belfort circles away and keeps his distance.
A punch combination from Murdok misses.
The fighters circling - Belfort throws out the jab but it was never going to land.
Murdok tries to clinch up against the cage, rushing in to close the distance. Belfort manages to break the clinch and circles back to the middle of the mat.
Belfort tries to land with a swinging hook to the body but Murdok was well out of range. Poor timing from Belfort.
Murdok lands with a right hand.
Belfort swings wildly with a right hand that was never going to find it's target.
Belfort throws a wild combination but nothing lands.
Murdok misses with the combination.
Murdok throws a right hand that Belfort ducks under and follows up with a left that Belfort also avoids with ease.
Belfort's hands are dropping dangerously low here and Murdok connects clean with a right hook that sends him down to one knee! Belfort scrambles back to his feet.
The crowd applaud the fighters' efforts here as the round comes to an end.
Belfort swings and misses with a hook to the body.
Murdok fakes with an overhand right and moves in to clinch with Belfort, pushing him back against the cage.
Belfort's corner calls for him to break the clinch, which he does.
Murdok moves out of range of the strikes.
And that is the end of the round. The fighters go back to their corners.
Matt Murdok showed his class in that round. I'd imagine he'll take it on all the scorecards.
The cut man is working on Tommy Belfort's cut.
The fighters' corners scream their final instructions, as the referee calls time. Here we go, back to the action! Let's hear some noise people - this is the final round!

Murdok stooping low to avoid any incoming strikes and then lunges in with an uppercut come cross that lands flush.
Belfort just misses with a punch to the body.
Murdok tries to close the distance and clinch but Belfort swats him to one side with an open hand palm strike and circles away.
Murdok tries to clinch up but Belfort circles away and keeps his distance.
Belfort lands a glancing blow to the side of Murdok's head.
Murdok works over Belfort's head and body with a nice combination.
Murdok looks to land a combination but Belfort avoids it well.
Murdok slips in close and lands a nice hook before moving back out of range.
Murdok moves out of range of the strikes.
Belfort looks like he's developed a pretty tasty lump over his left eye. He'll need to avoid taking much more damage to that.
Murdok looks to score with a combo but nothing lands.
A counter left hand to the body from Belfort misses its target.
Murdok moves out of range of the strikes.
Belfort throws a shot from downtown. Murdok moves away and avoids it.
Belfort gets in close and instigates a clinch.
A right handed body shot lands from Murdok.
We've seen a great period of action over the last minute or so - credit to both fighters for going all out!
Murdok wants to break free but Belfort has control.
Murdok lands a right uppercut that snaps the head of Belfort backwards.
Belfort tries to land a knee to the body but he is off balance and Murdok avoids it.
Belfort gets an overhook and lands an elbow to the side of the head.
That's one minute gone in the round.
Murdok misses with the head strike.
Belfort is leaning against Murdok and scores with a nice uppercut to the body.
Murdok takes a big intake of breath there - he's definitely tired.
Belfort breaks the clinch and we return to the middle of the mat.
A swing and a miss from Belfort.
Belfort throws an overhand right that lands on Murdok's shoulder, as Murdok tries to avoid the shot.
Murdok might want to mix his strikes up a bit more. He's just going for head shots at the moment and that can become a bit predictable.
A combination from Murdok does no damage.
Belfort misses with a straight left.
Belfort jabs. That one connects to the head of his opponent.
Murdok takes a really solid shot there but just smiles back and shrugs his shoulders.
A telegraphed right hand from Belfort misses the target.
Belfort throws a shot from downtown. Murdok moves away and avoids it.
Belfort just misses with a punch to the body.
Belfort scores with a sloppy punch to the body. Not much technique there but it did the business.
Belfort tries to clinch there but Murdok circles away.
Belfort slips a jab and a cross from Murdok.
Murdok slips a straight right by Belfort.
Tommy Belfort has stepped it up - he knows he needs a finish here!
That's two minutes gone in the round.
Jab, cross, leg kick. Nice combination by Murdok!
We've seen a great period of action over the last minute or so - credit to both fighters for going all out!
Belfort misses with a body shot. Nice footwork from Murdok.
And an attempted straight right on the counter from Murdok! But no joy.
Murdok throws a series of punches but Belfort moves out of range.
Belfort waving his hands out in front of him, looking to distract Murdok.
Belfort throws a hard body shot but it just misses.
Belfort drives through and clinches with Murdok against the cage.
Belfort's corner calls for him to break the clinch, which he does.
Belfort fakes high and swings low for a body shot but Murdok manages to avoid it.
A right-left combo lands from Murdok.
Murdok keeping a good distance there, avoiding the body shot.
Some wild striking there from Murdok.
Belfort is looking to counter punch.
Belfort throws a monster uppercut resembling something out of street fighter but it doesn't land.
Murdok throws a wild combination but nothing lands.
Murdok uses some good footwork to avoid the body shot by Belfort.
Belfort throws a jab but it's blocked by Murdok.
Matt Murdok is fighting for a decision - hopefully he's judged it right and he's actually winning the fight.
That's three minutes gone in the round.
Murdok lands a two punch combo.
Murdok throws a series of strikes that have Belfort backpedaling.
Belfort blocks a leg kick.
Belfort was looking to counter that move with a punch but didn't quite pull the trigger.
Murdok looks to land a combination. Belfort sees it coming but can only parry a couple of the shots.
Belfort throws a hook but Murdok avoids it easily.
A shot to the liver by Belfort. Beautiful body shot.
Belfort lands with a right hand.
Belfort misses with a body shot.
Belfort scores with a straight right hand, right through his opponent's guard.
The crowd are loving this. Great action here.
Murdok fails to land with the punch combination there - jab, cross, hook, miss, miss, miss.
Murdok moves out of range as Belfort strikes.
Murdok throws a couple of head shots and lands with the final one - a decent hook, which struck Belfort on the side of the head.
Belfort throws a hook to the body but it doesn't connect.
Murdok wants to clinch.
That's four minutes gone in the round.
Murdok drops down and drives through with a powerful takedown into guard.
Belfort tries to land a sweep but no joy.
Murdok wants to control from the top but Belfort keeps moving.
Belfort has control of Murdok's left arm, preventing Murdok from doing any damage.
Belfort keeping moving, preventing Murdok from controlling successfully.
Belfort keeping full guard, as Murdok tries to pass.
And that's the end of the fight!
I would just about give that final round to Matt Murdok.
Well Murdok has outworked and out performed his opponent in all aspects of the game today. He was simply too good and the decision should be no more than a formality. Over to the ring announcer for the scorecards.
Ladies and gentlemen, after 3 rounds of action, we go to the scorecards for a decision.
Judge Yukihiro Shimada scores the fight 27:30
Judge Yukihiro Yamamoto scores the fight 27:30
Judge Taro Takaoka scores the fight 27:30
In favor of your winner, by unanimous decision... Matt Murdok!
Tommy Belfort was interviewed post fight and said 'Get the fork away from me all of you!!'.
|
|
|
|
|
|
|
|
|
|
|
|
|
|
|
|
|
|
|
|
|
|
|
| S |
C
A |
G |
S |
C
B |
G |
|
S |
C |
G |
|
energy
A | B |
|
hype
A | B |
|
pop
A | B |
|
mgr
A | B |
|
FIGHT
RATING
82% |
|
|
|
|
|
|
|
Undercard bout
|
Coming up we have a middleweight MMA rules bout between Ispa Murska (ranked 5415 p4p, 5492 weight class) and Kenjiro Oka (ranked 582 p4p, 587 weight class). Well, I have no idea who's going to take this one!
 |
|
 |
| 181 cm
19
189
0 - 0 - 0 |
|
186 cm
19
193
0 - 2 - 0 |
BJJ Purple Belt
Excellent boxer
Granite chin |
|
BJJ Blue Belt
Basic striking
Good gas tank |
|
| |
|
Ladies and gentlemen. This fight is 3 rounds, in the middleweight division.
Introducing the fighter to my left, fighting out of the red corner.
With a record of 0 - 0 - 0, fighting out of London, Ispa Murska!
And introducing the fighter to my right, fighting out of the blue corner.
With a record of 0 - 2 - 0, fighting out of London, Kenjiro Oka!
The judges for this bout are Shirou Masuda, Ren Mimura and Yukihiro Shimada.
The bell rings for round one and we are underway!
Murska lunges in with swinging rights and lefts but Oka circles away quickly and effectively.
A looping hook to the body misses from Murska. Oka does a little dance to reset his feet.
A big left from Oka misses.
Oka scores with a punch to the gut of his opponent.
Murska stooping low to avoid any incoming strikes and then lunges in with an uppercut come cross that lands flush.
Murska misses with a wild body shot.
Oka takes a jab right on the nose. That must have hurt but he shrugs his shoulders and looks to return the favor.
Murska looks to land a combination but Oka avoids it well.
Murska loads up on a big right hand but Oka slips the punch.
Oka shoots in for a takedown. "I don't think so" says Murska as he avoids it easily.
Murska appears to be looking for a counter punch to the body.
Oka looks to score with a jab to the body but Murska is just out of range.
Murska lands with a cross to side of his opponent's head.
Well, he's not going to score with shots like that. A lazy body kick attempt from Oka.
Murska appears to be looking for a big counter.
A combination from Murska does no damage.
Wooooo! Give it up for these two warriors! They are putting on a show!
Murska throws a right and a left that both miss.
Oka fakes a head shot and lands one to the body.
Oka looks more muscular than last time we saw him. He must have been on the weights.
Left hook, right uppercut from Murska.
Oka ducks under a wild hook from Murska.
Oka just misses with a punch to the body.
That's one minute gone in the round.
Oka fakes a head shot and lands one to the body.
Murska throws a combination. Oka tries to block but a couple of punches get through.
Oka looks to score with a jab to the body but Murska is just out of range.
Oka looks to score with a jab to the body but Murska is just out of range.
Murska tries to counter by moving into the clinch but Oka manages to circle out of the way.
Murska showing good head movement there, avoiding the strikes from Oka.
Murska throws a jab but it's blocked by Oka.
Murska fakes high and swings low for a body shot but Oka manages to avoid it.
Murska comes forward and lands a shot to the body, then darts back out of range.
Oka thuds a left hand into Murska's body.
Oka is throwing a lot of body shots here, looking to wear down Murska rather than just go for the knockout.
Oka swings and misses with a hook to the body.
Oka fakes a jab and then connects with a hook.
Murska misses with a straight right.
Murska looks to throw the jab but Oka is out of range.
We've seen a great period of action over the last minute or so - credit to both fighters for going all out!
Oka ducks under an overhand right and circles away with a smile on his face.
Ispa Murska is looking to keep the fight on the feet at all costs.
Oka throws a jab but it's blocked by Murska.
Murska uses decent footwork to sidestep a right hand from Oka.
That's two minutes gone in the round.
A looping hook to the body misses from Murska. Oka does a little dance to reset his feet.
Oka shoots in and drives through. Murska sprawls well.
Donk. Murska catches Oka right on the button with a cross.
Oka fakes a head shot and lands one to the body.
Murska scores with a jab to the body.
Murska will need to tighten up his combinations if he doesn't want to gas himself out, swinging at thin air.
Oka tries to move into range but Murska moves to the side and lands with a nice right hand.
Oka waving his hands out in front of him, looking to distract Murska.
Oka swings and misses with a hook to the body.
Oka looks to score with a combo but nothing lands.
Murska pushing out the jab but it's not landing.
A left and a right from Oka both land. Nice combination.
Murska feints a jab promting Oka to slip. Murska then demonstrates his capabilities by jabbing again. Oka slips again and ducks right into an uppercut.
Murska slips a jab and a cross from Oka.
Oka tries a head kick but it misses.
That's three minutes gone in the round.
Murska throws a jab but it's blocked by Oka.
Oka shoots in but no luck this time.
Ispa Murska has stuffed three takedown attempts in the round now. That's going to take a lot out of Kenjiro Oka.
Murska with a nice cross.
A swing and a miss from Murska.
Oka blocks a jab.
Oka tries to land with a swinging hook to the body but Murska was well out of range. Poor timing from Oka.
Murska thuds his right hand into Oka's forehead from close range. That could be painful for both fighters.
Murska has taken the fight to the clinch.
Oka is trying to pull guard but Murska has him pressed against the cage.
Oka has had enough of the clinch and is looking to separate.
Oka is trying to work for a single leg takedown but Murska pulls him back up using the underhooks.
Murska working on landing some head shots here - that one got through nicely.
Murska lands punches inside but they're not really causing much damage.
Murska prevents a takedown attempt there.
Murska lands a short shot on the inside that snaps the head of Oka backwards.
Oka is trying to work for a single leg takedown but Murska pulls him back up using the underhooks.
That's four minutes gone in the round.
Murska lands a body shot.
A body shot lands from Murska.
This has been an exciting period of action!
Murska lands a right hand that snaps the head of Oka backwards.
Murska scores with a hook to the body.
Oka looks winded!
Murska scores with an uppercut up the middle.
Oka tries for a takedown but Murska manages to get underhooks.
Oka misses with some punches.
Murska makes some space for himself and lands an uppercut.
Oka takes a shot to the head.
Murska scores with a shot to the side of Oka's head.
Murska lands with a quick shot inside that doesn't really do much damage.
Murska lands a right hand that snaps the head of Oka backwards.
Oka is trying to pull guard but Murska has him pressed against the cage.
Murska scores with a hook to the body.
The crowd applaud the fighters' efforts here as the round comes to an end.
Murska lands a hook to the body. It's hard to tell if that hurt Oka or not.
Both fighters working to control the clinch.
Murska stalling the fight.
Murska throws a hook to the body. More of an arm punch but it's all scoring with the judges.
Oka is trying to work for a single leg takedown but Murska pulls him back up using the underhooks.
And that is the end of the round. The fighters go back to their corners.
Ispa Murska dominated that round.
The minute break is over - no more time for sponges and pep talks - back to the action!
Murska throws out a powerful jab.
Oka misses with a hook. Murska ducked under it nicely.
A big left from Murska misses.
Kenjiro Oka is looking to throw some combinations by the looks of things.
Oka misses the shot to the body.
Murska lands a jab. Then a cross. Then finally a nice hook to the body. Good work there by Murska.
The fight moves into the clinch position.
A short left from Murska.
Oka is looking to break free of the clinch but Murska has double underhooks.
Murska pushes Oka back against the cage and unloads with a body punch.
An uppercut to the body lands inside from Murska.
Murska lands a body punch.
Nice body punch from Murska.
Murska lands with a left to the head.
Murska scores with a shoulder strike.
Oka is breathing heavily.
Fantastic stuff here - a very entertaining period of action, which has drawn cheers from the crowd.
A shot in the inside from Murska.
Murska scores with a shot to the side of Oka's head.
Oka wants to strike at distance but he can't break free of the clinch.
Murska is really dominating this fight. Is there anything that Oka can do to turn this around?
Murska scores with a shot to the side of Oka's head.
That's one minute gone in the round.
Murska lands a shot to the body.
Murska leaning his opponent against the cage.
Oka is looking to take this one to the mat.
Good body shot from Murska.
Some stalling of biblical proportions here from Murska.
Murska stalling.
A quick uppercut on the inside from Murska.
Oka looking for a takedown.
Murska is pushing Oka up against the cage, for a bit of lean and pray action. Action being used the in the loosest possible sense of the word.
The fighters are starting to perspire pretty heavily.
Murska lands a left hand that snaps the head of Oka backwards.
Oka is looking to take this one to the mat.
Ispa Murska has stuffed three takedown attempts in the round now. That's going to take a lot out of Kenjiro Oka.
Oka wants to take the fight to the mat but Murska manages to get underhooks and keep the fight in the clinch.
A short left from Murska.
A shot in the inside from Murska.
That's two minutes gone in the round.
A short uppercut from Murska.
Oka looking for a takedown.
Oka looking for a takedown.
Murska cracks Oka with a nice body shot.
Murska taking a break, stalling in the clinch.
A short right hand to the side of the head by Murska.
The crowd cheering loudly, showing their appreciation for the quality fight we're seeing here.
Murska stays in close to his opponent and throws a right hand to the body.
Nice body punch from Murska.
Murska is leaning against Oka and scores with a nice uppercut to the body.
Murska works on Oka's body with a couple of short punches.
The pace slowing considerably in the clinch, as Murska takes a break from that fighting nonsense to think about the finer things in life.
Ispa Murska has scored more points in the clinch so far.
Murska lands with a good tight uppercut to the head.
Murska lands on the inside with an uppercut.
A short left from Murska.
A short left from Murska.
Murska lands with a good tight uppercut to the head.
Murska leaning against his opponent.
That's three minutes gone in the round.
Murska lands punches inside but they're not really causing much damage.
A body shot lands from Murska.
Murska lands a shot to the body.
A short uppercut from Murska.
Murska lands with a light punch inside.
Oka takes a shot to the head.
A nice left hand lands by Murska.
Murska is struggling to control the position.
Murska lands a nice shot to the body.
Murska lands a short shot on the inside that snaps the head of Oka backwards.
Murska lands with a left to the head.
Murska is pressed up against the cage. Oka has hold of a leg and is looking to drag Murska down to the mat. Murska avoids the attempt though and has circled away. We're back to striking at a distance.
Oka dives in and grabs Murska's left leg, looking for a takedown. Murska pushes down on Oka's head and hops out.
Murska throws a combination but comes up with nothing but fresh air.
The crowd are loving this. Great action here.
Nice defenses there by Oka.
Oka motions for Murska to come forward. Oka throws a leg kick but it misses it's target.
Murska lands a jab, followed by a cross and another cross, as Oka backs up against the cage.
That's four minutes gone in the round.
Murska uses some good footwork to avoid the body shot by Oka.
Murska clinches up against the cage.
Murska lands with a short shot to the head.
Oka is trying to pull guard but being pressed up against the cage enables Murska to keep the fight standing.
Good body shot from Murska.
Murska lands a left hand that snaps the head of Oka backwards.
Murska lands with a quick shot inside that doesn't really do much damage.
Murska scores with a shot to the side of Oka's head.
Murska lands on the inside with an uppercut.
 Oka is rocked! Oka is rocked!
Murska lands a shoulder strike that jolts his opponent's head backwards.
Oka is still on wobbly legs! Can Murska finish him?
Oka is trying to work for a single leg takedown but Murska pulls him back up using the underhooks.
Murska lands with a good tight uppercut to the head.
Murska is leaning against Oka and scores with a nice uppercut to the body.
Oka is working for takedown but Murska is calmly controlling the position for now.
Murska scores with an uppercut up the middle.
The crowd applaud the fighters' efforts here as the round comes to an end.
Murska is clearly stalling here... Pick up the pace son.
Murska pushes Oka back against the cage and unloads with a body punch.
An uppercut to the body lands inside from Murska.
Murska lands with a quick shot inside that doesn't really do much damage.
A quick uppercut on the inside from Murska.
And that is the end of the round. The fighters go back to their corners.
Ispa Murska dominated that second round.
The referee calls time. The cornermen exit stage left and we're back to business. This is the final round!
Murska walks forward and throws a big overhand right! Oka drops to the floor like a sack of potatoes! Murska swarms on him with more punches until the referee wrestles him away from Oka's unconscious body! Wow, that was brutal!
Ladies and gentlemen, after 0:05 of round 3, we have a winner by way of TKO (Strikes). Ispa Murska!
|
|
|
|
|
|
|
|
|
|
|
|
|
|
|
|
|
|
|
|
|
|
|
| S |
C
A |
G |
S |
C
B |
G |
|
S |
C |
G |
|
energy
A | B |
|
hype
A | B |
|
pop
A | B |
|
mgr
A | B |
|
FIGHT
RATING
87% |
|
|
|
|
|
|
|
Undercard bout
|
Coming up we have a lightweight MMA rules bout between Ajin Heceda (ranked 2943 p4p, 6549 weight class) and Lucky Hollow (ranked 324 p4p, 553 weight class). Heceda kept the crowd waiting but all that was forgotten when his ring entrance music started. The incomparable musical genius that is Believer. Hollow has chosen Rihanna Wrist as his entrance music. This should be fireworks!
 |
|
 |
| 160 cm
17
150
1 - 0 - 0 |
|
184 cm
17
165
0 - 1 - 0 |
Good wrestling
Basic striking
Granite chin |
|
BJJ Purple Belt
Decent boxing
Solid chin |
|
| |
|
Ladies and gentlemen. This fight is 3 rounds, in the lightweight division.
Introducing the fighter to my left, fighting out of the red corner.
With a record of 1 - 0 - 0, fighting out of Hilo, Ajin Heceda!
And introducing the fighter to my right, fighting out of the blue corner.
With a record of 0 - 1 - 0, fighting out of New York, Lucky Hollow!
The judges for this bout are Shigeki Fujiwara, Yasuomi Hirokawa and Ren Mimura.
The bell rings for round one and we are underway!
Heceda moves out of range of the leg kick from Hollow.
Hollow throws an overhand right that lands on Heceda's shoulder, as Heceda tries to avoid the shot.
Heceda drives through and clinches with Hollow against the cage.
Heceda fails to pull the fight into his guard.
Heceda pulls guard effortlessly.
Hollow is looking to stand up but Heceda won't let him.
Hollow wants to pass the guard but Heceda is keeping the position.
Heceda has a closed guard, preventing Hollow from standing up.

Hollow got a little sloppy there for a moment and Heceda has worked his way into a loose triangle - can he finish it?! No, Hollow has managed to get both his arms back between Heceda's legs - danger averted.
We've had a slow start to the round here - hopefully the action picks up.
Heceda has control of Hollow's left arm, preventing Hollow from doing any damage.
Heceda might be looking to lock onto one of his opponent's long limbs for a submission, whilst we're on the ground.
Hollow got a little sloppy there for a moment and Heceda has worked his way into a loose triangle - can he finish it?! No, Hollow has managed to get both his arms back between Heceda's legs - danger averted.
There's a bit of a scramble here and now Heceda is on top in guard.
That's one minute gone in the round.
Hollow keeping full guard, as Heceda tries to pass.
Heceda slips nicely into half guard.
That's two minutes gone in the round.
The crowd are starting to boo a lack of action.
Heceda passes to side control.
Heceda has worked his way into a potential kimura here. Hollow is trying to get out of the position but his squirming has just got him deeper into trouble. Heceda yanks on the arm and Hollow is forced to tap due to a very painful looking submission! Nice work by Heceda.
Ladies and gentlemen, after 2:29 of round 1, we have a winner by way of Submission (Kimura). Ajin Heceda!
Our winner, Ajin Heceda, made sure he spent some time buttering up the crowd during his post fight interview, which will no doubt bring him a few more fans.
|
|
|
|
|
|
|
|
|
|
|
|
|
|
|
|
|
|
|
|
|
|
|
| S |
C
A |
G |
S |
C
B |
G |
|
S |
C |
G |
|
energy
A | B |
|
hype
A | B |
|
pop
A | B |
|
mgr
A | B |
|
FIGHT
RATING
34% |
|
|
|
|
|
|
|
Undercard bout
|
Coming up we have a featherweight MMA rules bout between Masayuki Araki (ranked 4196 p4p, 4550 weight class) and Jevon Grimson (ranked 383 p4p, 400 weight class). Both fighters look pumped up here. Let's hope this is a good fight!
 |
|
 |
| 172 cm
18
151
0 - 1 - 0 |
|
169 cm
18
145
0 - 2 - 0 |
BJJ Purple Belt
Basic striking
Cardio machine |
|
BJJ Blue Belt
Basic striking
Solid chin |
|
| |
|
Ladies and gentlemen. This fight is 3 rounds, in the featherweight division.
Introducing the fighter to my left, fighting out of the red corner.
With a record of 0 - 1 - 0, fighting out of London, Masayuki Araki!
And introducing the fighter to my right, fighting out of the blue corner.
With a record of 0 - 2 - 0, fighting out of New York, Jevon Grimson!
The judges for this bout are Yuuki Gou, Tatsuya Matsuyama and Shirou Masuda.
The bell rings for round one and we are underway!
Grimson throws a right and a left that Araki avoids nicely.
A jab from Araki misses.
Grimson scores with a slapping inside leg kick.
Araki throws a body kick that misses
and Grimson counters with a shoot takedown into half guard.
Araki wants to get back to full guard.
Grimson is thwarting Araki's attempts to control the position.
Araki actively working from the bottom here.
Araki is looking to control Grimson's leg but it's slowly edging free. Can Araki avoid being mounted?
The ref warns both fighters not to hold the cage as they work up against the meshing.

Grimson is working for a kimura but Araki is defending it quite comfortably.
Araki gets back to full guard.
We've had a slow start to the round here - hopefully the action picks up.
Grimson wants to control from the top but Araki keeps moving.
Grimson avoids a guillotine attempt easily.
Araki has improved his flexibility recently so we will have to see if he can use that to his advantage.
Both fighters have adopted an aggressive gameplan on the ground!
Araki is working actively off his back, looking to secure an arm or perhaps work for a triangle.
That's one minute gone in the round.
Grimson drops back looking for a leg! Araki is in trouble here! The fighters roll with the hold and Araki manages to kick Grimson off! Grimson jumps back into Araki's guard.
Araki looking for submissions from the bottom here. Moving his hips around, possibly looking for an armbar.
Araki has his foot on Grimson's thigh. He's trying to push off and get in position for a triangle, I think. Grimson works his way back into a safe position though.
Grimson is trying to work a guillotine from the top, or something like that? Don't know how he thinks he's going to get a finish from there.
Grimson trying to pass the guard but can't manage it just yet.
Araki lands a beautiful sweep and he's now moved into his opponent's guard.
The fighters are pressed up against the cage, both looking to find a bit of space to work.
Araki trying to control but Grimson is working from the bottom.
Araki sitting in guard, not really doing much.
That's two minutes gone in the round.
Grimson tries to land a sweep but no joy.
Araki is frustrating his opponent with some stalling tactics from top position.
Araki passes Grimson's left leg - he's now in half guard.
Grimson on the receiving end of some nice ground and pound.
Araki is trying a forearm choke
I don't think that's going to do much at this level of the game.
Grimson gets back to full guard.
Araki working some ground and pound from guard but it's not doing any damage.
Araki tries to free his leg and advance position but Grimson is retaining full guard.
That's three minutes gone in the round.
Grimson is trying to control the position but Araki postures up.
Araki pushing down on Grimson's thigh, trying to pass to half guard. He's managed it... Nice work.
Araki trying to control the action but Grimson is working from the bottom.
Araki tries to pass the half guard into mount. Grimson knows what he's doing though and prevents the attempt.
Araki is working hard here to advance position.
Grimson is working for an escape here. He's hooked one of Araki's legs and he's managed to sneak out and take Araki's back!
Araki showing good submission defense here.
Araki looks to control his opponent's hands but he's not mananging it at the moment.
Grimson looking for the choke but no joy.
Araki tries to escape the position - he's now mounted. Is that better or worse? Hard to tell!
That's four minutes gone in the round.
Araki tries to hold on but Grimson pushes him away.
Grimson lands a couple of nice shots there from mount.
Araki wants to hold on but Grimson pushes him away.
Araki sneaks a leg back under and regains half guard and is working straight away to try and get back to guard. He hasn't managed just yet though.
Grimson is trying for a guillotine from the top but the pressure isn't in the right place so Araki is just riding it out for now. Grimson eventually gives up the hold.
Grimson looks winded!
Grimson wants to lay and pray for a moment but Araki keeps working.
Araki is looking to control Grimson's leg but it's slowly edging free. Can Araki avoid being mounted?
The fighters are battling for position here. Araki manages to regain full guard. Nice work.
And that is the end of the round. The fighters go back to their corners.
A close round but Jevon Grimson will probably get the nod.
OK. That's time! The bell goes and we're back to the action.
Grimson throws a shot to the body.
Araki drives through with a really nice takedown into side control.
You can see the frustration on Grimson's face, being in this tough position on the bottom.
Grimson might have to switch it up a bit here because his efforts to control Araki haven't been going to plan, at least at the current moment in time.
Araki is trying to land an Americana. He has the arm isolated but Grimson is keeping cool and he's avoided the danger for now.
You can see the frustration on Grimson's face, being in this tough position on the bottom.
Grimson regains half guard.
We've had a slow start to the round here - hopefully the action picks up.
Araki perhaps working for something from half guard, or maybe not. It looks like he's just sitting there.
Araki is trying to control. Grimson wants to improve his position but can't escape this time.
Araki scores with a couple of good hammerfists.
Araki is sneakily working for an arm triangle but Grimson sees it coming and defends easily.
Still in half guard, Araki seems content to control.
That's one minute gone in the round.
Grimson tries to get to full guard but Araki has control of the leg.
Araki takes advantage of the dominant position to land a couple of big hammer fists.
Araki is looking for a kimura but he's never going to get it from there.
Araki wants to take a breather but Grimson is having none of it.
Araki is looking for a kimura. It's going to be difficult to finish that from half guard though and Grimson defends it well.
Araki prevents Grimson from improving his position.
Araki not doing much here.
That's two minutes gone in the round.
Araki wants to lay and pray for a moment but Grimson keeps working.
Araki not throwing his punches with enough precision this time.
Grimson avoiding damage under a succession of punches from Araki.
Grimson is looking to improve his position.
Araki with a momentary lay and pray from half guard.
Araki is trying to control the action in half guard but Grimson is working away on the bottom, looking perhaps to get back to full guard.
Araki is keeping good posture, landing some ground and pound.
Grimson is trying to defend against the ground and pound but Araki scores with a couple of nice shots.
Araki is trying for a guillotine from the top but the pressure isn't in the right place so Grimson is just riding it out for now. Araki eventually gives up the hold.
Araki drops an elbow to the side of Grimson's head.
That's three minutes gone in the round.
Araki thumps the canvas. Not on purpose obviously - he just missed Grimson's head.
Araki content to control rather than advance.
Araki has controlled the position for a good 20 seconds, which will no doubt be starting to frustrate his opponent.
Grimson keeping hold of Araki's head, controlling as best he can.
Grimson trying to control here.
Araki passes the guard and advances to mount!
Araki lands a big elbow.
Araki pushing the pace here, looking to move to his opponents back and work for a finish.
That's four minutes gone in the round.
Araki jumps to side control looking for an arm triangle but Grimson manages to avoid the submission attempt.
Araki working the ground and pound.
Araki is looking to take a break and control but Grimson is keeping him honest, looking to work from the bottom.
Araki landing with strikes to the head and body from side control.
Grimson is moving his hips around well on the bottom and has managed to get back to half guard.
Araki takes advantage of the dominant position to land a couple of big hammer fists.
Grimson keeps control of the position for the meantime.
Araki seems very keen to just sit and control from half guard but Grimson does not like that idea so much and is remaining active off his back.
The crowd thankful this round is nearly over.
Araki is looking for a kimura. It's going to be difficult to finish that from half guard though and Grimson defends it well.
Araki lands a big shot. The thud that echoes around the arena is like music to the fans' ears.
And that is the end of the round. The fighters go back to their corners.
Masayuki Araki dominated that second round.
That's the end of the round. The referee orders the cornermen out of the cage so we can get back down to business. Let's hear some noise people - this is the final round!
Grimson tries a switch kick but it misses it's target.
Araki fakes an overhand right and shoots for a takedown. Grimson sprawls well initially but Araki persists and gets the takedown into half guard.
Araki is trying to control the action in half guard but Grimson is working away on the bottom, looking perhaps to get back to full guard.
Grimson is trying to control but can't.
Araki prevents Grimson from improving his position.
Grimson is refusing to be controlled, as Araki sits in half guard.
Araki trying to mount his opponent but Grimson defends it.
Grimson tries to roll over but Araki keeps him under control.
Araki slips a nice elbow through Grimson's hands, connecting with Grimson's forehead.
We've had a slow start to the round here - hopefully the action picks up.
Araki controlling the action here.
Araki is trying a forearm choke
I don't think that's going to do much at this level of the game.
Araki throwing shots but they're hitting the canvas more than the man.
That's one minute gone in the round.
Grimson has no desire to be mounted, so is trying to control. Araki is working away from the top position though.
Araki working over Grimson with some ground and pound. Grimson looks like he wants out of this position, which is understandable.
Araki is looking to advance position but Grimson won't allow it.
Araki is looking to take a break and control but Grimson is keeping him honest, looking to work from the bottom.
Araki passes to side control.
Araki tries for an arm triangle. That looks pretty tight to me. Is this one over!?! Possibly, maybe, no Araki has let go of the choke. Obviously it wasn't as tight as we thought!
Grimson isn't going anywhere.
Araki wants to lay and pray for a moment but Grimson keeps working.
That's two minutes gone in the round.
Grimson tries to work a leg under to get back to half guard but Araki wriggles his own leg back out and remains in side control.
Araki working away diligently from side control. Landing strikes effectively there - that will score him some points on the judges scorecards.
Araki is looking to take a break and control but Grimson is keeping him honest, looking to work from the bottom.
Check out the look on Araki's face as he threw that strike - that's one determined fighter!
Araki thinks about going for a far side armbar but bails out and retains the dominant position instead.
Masayuki Araki overall seems to be getting the better of the ground position in the fight so far.
Grimson parries the strikes from Araki easily there. Araki is wary of posturing up too much because it might enable Grimson to escape.
Araki lands a knee to the body and follows it up with some ground and pound to the head. That will wear Grimson down.
Grimson is not content to let Araki control the position.
That's three minutes gone in the round.
Grimson is positioning himself to get back to half guard.
Grimson takes a big intake of breath there - he's definitely tired.
Araki controlling the position from side mount.
Araki tries for an arm triangle. That looks pretty tight to me. Is this one over!?! Possibly, maybe, no Araki has let go of the choke. Obviously it wasn't as tight as we thought!
Araki wants to work for a kimura but he's foiled early by Grimson, who protects the arm well.
Grimson on the wrong end of some ground and pound.
That's four minutes gone in the round.
Araki cracks Grimson with an elbow. That is naaassty.
Araki tries for an arm triangle. That looks pretty tight to me. Is this one over!?! Possibly, maybe, no Araki has let go of the choke. Obviously it wasn't as tight as we thought!
Araki wants to control but Grimson is keeping him busy.
Grimson is looking to regain half guard here but Araki keeps moving and retains side control.
Araki is trying to get an arm triangle but Grimson is defending well.
Araki lands a knee to the body and a forearm to the face.
Boooooooooooooooooooo!!! God, this has been a terrible round. Come on you two, sort yourselves out!
You can see the frustration on Grimson's face, being in this tough position on the bottom.
Araki wants to control but Grimson is keeping him busy.
Grimson sneaks a leg under to get back to half guard.
And that's the end of the fight!
Masayuki Araki showed his dominance in that final round.
I think Araki has won this one but let's see what the judges have to say. Over to the ring announcer for the scorecards.
Ladies and gentlemen, after 3 rounds of action, we go to the scorecards for a decision.
Judge Yuuki Gou scores the fight 29:28
Judge Tatsuya Matsuyama scores the fight 29:28
Judge Shirou Masuda scores the fight 30:28
In favor of your winner, by unanimous decision... Masayuki Araki!
|
|
|
|
|
|
|
|
|
|
|
|
|
|
|
|
|
|
|
|
|
|
|
| S |
C
A |
G |
S |
C
B |
G |
|
S |
C |
G |
|
energy
A | B |
|
hype
A | B |
|
pop
A | B |
|
mgr
A | B |
|
FIGHT
RATING
34% |
|
|
|
|
|
|
|
Undercard bout
|
Coming up we have a light heavyweight MMA rules bout between Masa Saitoh (ranked 3556 p4p, 4172 weight class) and Romero Castilho (ranked 427 p4p, 486 weight class). Masa Saitoh has the better chin. Will he look to stand and bang today?
 |
|
 |
| 182 cm
19
205
1 - 0 - 0 |
|
185 cm
23
209
0 - 1 - 0 |
BJJ Purple Belt
Counter fighter
Good chin |
|
BJJ White Belt
Good kicks
Determined |
|
| |
|
Ladies and gentlemen. This fight is 3 rounds, in the light heavyweight division.
Introducing the fighter to my left, fighting out of the red corner.
With a record of 1 - 0 - 0, fighting out of St Petersburg, Masa Saitoh!
And introducing the fighter to my right, fighting out of the blue corner.
With a record of 0 - 1 - 0, fighting out of New York, Romero Castilho!
The judges for this bout are Yuuki Gou, Shirou Masuda and Hirohito Nitta.
The bell rings for round one and we are underway!
Saitoh shoots in and scores a nice double leg takedown into half guard.
Saitoh trying to control from half guard but Castilho is working away.
Saitoh throwing punches and elbows but they're not doing any damage.
Saitoh not doing much here.
The two fighters exchange a few words. I couldn't hear what they were saying but maybe it's more fun if you make it up yourself. Saitoh connects with a nice short shot to Castilho's temple.
We've had a slow start to the round here - hopefully the action picks up.
Saitoh drops an elbow to the side of Castilho's head.
Ground and pound from Saitoh.
Castilho is in trouble now - Saitoh has advanced to mount!
Saitoh scoring with strikes but Castilho is staying in there.
That's one minute gone in the round.
Saitoh cracks Castilho with a nasty head shot there - the crowd let out an audible gasp there, as the noise reverberated around the arena.
Saitoh scores with a couple of good head shots there.
Castilho is rocked!
Saitoh landing strikes from the mount.
Castilho is still in real trouble! Can Saitoh finish him?
Saitoh lands a nice shot to the head.
Saitoh lands a couple of good shots and Castilho has given up his back, trying to escape the position!
Saitoh lands a series of strikes from the back and Castilho goes limp! The ref jumps in to save him!
Ladies and gentlemen, after 1:42 of round 1, we have a winner by way of TKO (Strikes). Masa Saitoh!
|
|
|
|
|
|
|
|
|
|
|
|
|
|
|
|
|
|
|
|
|
|
|
| S |
C
A |
G |
S |
C
B |
G |
|
S |
C |
G |
|
energy
A | B |
|
hype
A | B |
|
pop
A | B |
|
mgr
A | B |
|
FIGHT
RATING
73% |
|
|
|
|
|
|
|
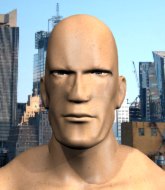
Co-main event
|
Coming up we have a light heavyweight MMA rules bout between Shozo Amisaki (ranked 3476 p4p, 5295 weight class) and Donny Young (ranked 419 p4p, 538 weight class). I'm sure you'll be fascinated to know that I was talking to some pointless Z list celebrity before the fight and he thought that Donny Young was going to win. Let's see if he was right.
 |
|
 |
| 183 cm
19
215
2 - 1 - 0 |
|
187 cm
21
215
0 - 0 - 0 |
BJJ Blue Belt
Brawler
Cardio machine |
|
BJJ White Belt
Good kicks
Tends to cut |
|
| |
|
Ladies and gentlemen. This fight is 3 rounds, in the light heavyweight division.
Introducing the fighter to my left, fighting out of the red corner.
With a record of 2 - 1 - 0, fighting out of London, Shozo Amisaki!
And introducing the fighter to my right, fighting out of the blue corner.
With a record of 0 - 0 - 0, fighting out of Hilo, Donny Young!
The judges for this bout are Shirou Masuda, Ren Mimura and Shigeki Fujiwara.
The bell rings for round one and we are underway!
Amisaki misses with a body shot.
Amisaki with a nice calf kick.
Amisaki is looking to clinch.
Amisaki scores with a spinning back kick!
Amisaki throws a body punch but Young moves out of range.
Amisaki goes for a spinning back kick but it misses.
Young with the counter takedown but Amisaki avoids it easily.
A punch lands to the side of Young 's head but he takes it in his stride.
It looks like Donny Young has been cut.
Amisaki definitely looks more muscular than last time we saw him fight.
Amisaki throws a head kick that misses.
Young throws a lazy head kick
and Amisaki counters by moving into the clinch.
Amisaki tries a knee to the head but he's missed.
A frustrated look appears on Young's face as he tries to break the clinch.
We've had a slow start to the round here - hopefully the action picks up.
Amisaki creates a bit of distance and throws an elbow that only just misses.
Young blocks the elbow strike.
Amisaki lands an elbow inside.
Amisaki tries to land knees in the clinch but Young avoids the damage to the body.
That's one minute gone in the round.
With the fighters up against the cage, Amisaki throws an elbow but misses.
Young blocks the elbow strike.
Young manages to break the clinch.
Well, he's not going to score with shots like that. A lazy body kick attempt from Amisaki.
Amisaki slips under a jab.
A counter left hand to the body from Amisaki misses its target.
Amisaki gets to the clinch - let's see what his plan is here.
Amisaki throws an elbow that misses.
Young blocks an elbow strike from Amisaki.
Amisaki throws an elbow but it's blocked.
Young avoids the elbow strike from Amisaki, against the cage.
Young tries to break free but Amisaki pushes him back against the cage.
Amisaki trying to land knees to the body.
Amisaki misses with a knee to the head.
Amisaki throws an elbow but it's blocked.
Young managing to block the knees to the body from Amisaki.
That's two minutes gone in the round.
Young avoiding damage as Amisaki throws knees to the body.
Young is trying to break the clinch but Amisaki is controlling him.
Amisaki looks to throw an elbow but misses.
Young wants to break free but Amisaki has control.
Amisaki misses with some punches.
Young blocks a knee to the body. He'll have a nicely bruised forearm in the morning.
Amisaki misses with a knee strike.
Young is looking to break free of the clinch but Amisaki has double underhooks.
Young is trying to break the clinch but Amisaki is controlling him.
Young blocks a couple of punches on the inside.
Amisaki throws an elbow that misses.
With the fighters up against the cage, Amisaki throws an elbow but misses.
Amisaki with the Thai clinch. He's looking to land a big knee but he's not managed it this time.
This has been an exciting period of action!
Young blocks an elbow strike from Amisaki.
Amisaki tries a body shot but Young blocks it.
That's three minutes gone in the round.
Young blocks a body shot from Amisaki.
Amisaki trying to land knees to the body.
Amisaki tries a knee to the head but Young blocks it.
Amisaki tries to land knees in the clinch but Young avoids the damage to the body.
Young is trying to force a seperation but Amisaki has the dominant position.
Amisaki lands a knee to the head.
Amisaki goes for a body shot but it's blocked.
Young blocks the elbow strike.
Young breaks the clinch and we return to the middle of the mat.
Amisaki scores with a leg kick.
Young throws a head kick that Amisaki semi-blocks.
A head kick by Young misses
and Amisaki counters by moving into the clinch.
Young avoids the elbow strike from Amisaki, against the cage.
Young blocks an elbow strike from Amisaki.
That's four minutes gone in the round.
Young pushes off and circles away, back to the middle of the mat.
Amisaki looks to score with a jab to the body but Young is just out of range.
Young lets it all go there with a big combo counter but none of the punches connected.
A head kick misses from Young.
Young throws a sloppy head kick and Amisaki moves out of range easily.
The fans in attendance giving it up for the two fighters, who have really let it all hang out in the last minute or so!
Amisaki lands an overhand right.
Young is rocked!
That has opened up Donny Young's cut even more.
Shozo Amisaki seems to be the more aggressive standup fighter in this bout.
Amisaki moves into the clinch.
Young is still on wobbly legs! Can Amisaki finish him?
Amisaki creates a bit of space for himself and rocks Young with a big uppercut! Young tries to clinch up but Amisaki pushes him back against the cage and lands another monster strike that crumples Young to the mat! Young covers up and Amisaki unloads with more strikes until the referee steps in to end the bout!
Ladies and gentlemen, after 4:32 of round 1, we have a winner by way of TKO (Punches). Shozo Amisaki!
Shozo Amisaki very nearly forgot to thank Kore Fight Nutrition amongst all the excitement of his win but just as the interview came to a close, he screamed their name. Hopefully he'll get a few nice freebies in the mail as a thank you.
|
|
|
|
|
|
|
|
|
|
|
|
|
|
|
|
|
|
|
|
|
|
|
| S |
C
A |
G |
S |
C
B |
G |
|
S |
C |
G |
|
energy
A | B |
|
hype
A | B |
|
pop
A | B |
|
mgr
A | B |
|
FIGHT
RATING
42% |
|
|
|
|
|
|
|
Main event
|
Coming up we have a heavyweight MMA rules bout between Pekka White (ranked 1672 p4p, 2128 weight class) and Vladamir Fedetenko (ranked 239 p4p, 290 weight class). Pekka White has the edge in experience - let's see if he can make that count tonight.
 |
|
|
| 195 cm
26
265
4 - 0 - 0 |
|
200 cm
26
270
3 - 0 - 0 |
BJJ White Belt
Excellent MT
Cardio machine |
|
BJJ White Belt
Excellent MT
Granite chin |
|
| |
|
Ladies and gentlemen. This fight is 5 rounds, for the heavyweight championship of the world!
Introducing the champion to my left, fighting out of the red corner.
With a record of 4 - 0 - 0, fighting out of Helsinki, Pekka White!
And introducing the challenger to my right, fighting out of the blue corner.
With a record of 3 - 0 - 0, fighting out of St Petersburg, Vladamir Fedetenko!
The judges for this bout are Yasuomi Hirokawa, Kenichi Hosakawa and Yukihiro Shimada.
The bell rings for round one and we are underway!
White with poor footwork there. He got himself in a bit of a tangle, enabling Fedetenko to score with a decent uppercut.
White misses with a straight right.
White wants to clinch but Fedetenko slips to the side
and Fedetenko counters with a lovely straight right hand!
White moves to clinch but Fedetenko breaks away
and Fedetenko counters with a straight right hand.
Fedetenko takes the fight into the clinch.
White pushes Fedetenko back against the cage and lands a hook to the side of the head.
White tries a body shot but Fedetenko blocks it.
Fedetenko lands a nice looking hook to the body, against the cage.
Fedetenko blocking some punches.
Fedetenko looks more muscular than last time we saw him. He must have been on the weights.
Fedetenko lands a shot to the body.
White's head jolts backwards as he takes an uppercut right on the button!
White tries to throw a body punch but Fedetenko avoids it by throwing White back against the cage.
A short body shot lands from Fedetenko as the two fighters clinch.
White is breathing heavily.
The crowd are loving this. Great action here.
Fedetenko scores with an uppercut up the middle.
Fedetenko lands a shoulder strike that jolts his opponent's head backwards.
White misses with the head strike.
With the fighters clinched against the cage, Fedetenko creates a bit of distance for himself and scores with a nice uppercut.
Fedetenko presses White against the cage and delivers a mid-strength body shot.
Fedetenko works on White's body with a couple of short punches.
That's one minute gone in the round.
Fedetenko lands a body shot.
Fedetenko lands a shoulder strike that jolts his opponent's head backwards.
Fedetenko scores with a hook to the body.
Fedetenko lands a right uppercut that snaps the head of White backwards.
 White is rocked! White is rocked!
A hook to the body from Fedetenko.
Oh White is still all over the place! His legs are completely gone! Will he be able to recover?!!
White definitely looks more muscular than last time we saw him fight.
A right hand to the body from Fedetenko.
Fedetenko presses White against the cage and delivers a mid-strength body shot.
White seems to have got his legs back now.
Fedetenko lands a shoulder strike that jolts his opponent's head backwards.
A right hand to the body from Fedetenko.
Fedetenko throws a hook to the body. More of an arm punch but it's all scoring with the judges.
Fedetenko lands with a light punch inside.
Fedetenko lands a big right hand that drops White! The killer instinct kicks in and Fedetenko finishes his opponent with a series of strikes from mount. A dominating finish by Fedetenko!
Ladies and gentlemen, after 1:39 of round 1, we have a winner by way of TKO (Strikes). Vladamir Fedetenko!
Vladamir Fedetenko is the new heavyweight champion!
Our winner, Vladamir Fedetenko, made sure he spent some time buttering up the crowd during his post fight interview, which will no doubt bring him a few more fans.
|
|
|
|
|
|
|
|
|
|
|
|
|
|
|
|
|
|
|
|
|
|
|
| S |
C
A |
G |
S |
C
B |
G |
|
S |
C |
G |
|
energy
A | B |
|
hype
A | B |
|
pop
A | B |
|
mgr
A | B |
|
FIGHT
RATING
68% |
|
|
|
|
|
|
|
|
|
|
