|
TWGC 36 (205lbs, D2): Las Vegas Qualifier - Round 2 PBP Commentary |
Co-main event
|
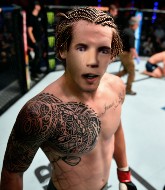
This TWGC bout is 1 fifteen minute round in the light heavyweight division. Introducing today's competitors. In the red corner, competing out of Los Angeles, with a TWGC record of 1 wins and 1 losses; Hick Diaz! And in the blue corner, fighting out of Rio de Janeiro, with a TWGC record of 1 wins and 1 losses; Vitorio Santos!
The judges for this bout are Frank Dennis, Stewart Dunkirk and Alan Glass.
The official calls the fighters to the middle and the contest is under way.#CL#
Diaz clinches with his opponent.
#TD#
Diaz has hold of one of Santos's legs. Santos is fighting the takedown attempt but Diaz gets the trip and lands the takedown into guard. Score +2 for takedown into guard / half guard: Diaz (2) vs (0) Santos
Diaz looking to control the position here, rather than advance.
Diaz wants to pass the guard but Santos is keeping the position.
Santos tries to land a sweep but no joy. #SUB2#
Santos looking for submissions off his back, moving his hips, looking for an opening.
Diaz is intent on slowing down the pace of the fight, simply looking to control.
We've had a slow start to the round here - hopefully the action picks up.#SUB2#
Santos looking for submissions off his back, moving his hips, looking for an opening.
#SUB2#
Santos is looking for a triangle here but Diaz uses the submission attempt to pass into side control.
Score +3 for passing guard: Diaz (5) vs (0) Santos
Santos tries to work a leg under to get back to half guard but Diaz wriggles his own leg back out and remains in side control.
The fighters are pressed up against the cage, both looking to find a bit of space to work.#T1#
Santos being controlled for a moment.
Santos sneaks a leg under to get back to half guard.
Santos tries to get to full guard but Diaz has control of the leg.
Diaz takes a deep breath and rests his weight momentarily on top of his opponent, to control the position.#SUB2#
Santos looking to work for a kimura from the bottom.
Diaz works his foot free and advances to mount. Score +3 for passing guard: Diaz (8) vs (0) Santos
Santos bucks up and manages to get a nice reversal! He's in guard on the top - nicely done! Score +2 for sweep to guard / half guard: Diaz (8) vs (2) Santos#T2#
Diaz is adopting a defensive guard.
Santos preventing the sweep. #SUB2#
Santos drops back for a leg! It's a sloppy attempt though and Santos jumps back into guard quickly, to retain the dominant position.
Santos tries to free his leg and advance position but Diaz is retaining full guard.
Santos keeps trying to improve his position.
Santos showing good wrestling skills to control the position.
Diaz is trying to control the position from the bottom.
Diaz keeping full guard, as Santos tries to pass. #T3#
Diaz looking to control.
Diaz keeping full guard, as Santos tries to pass.
Diaz pulls Santos in close to his closed guard and prevents Santos from doing any damage or advancing position.
Diaz can't keep his opponent in guard - Santos advances to half guard, no doubt looking to mount.
Santos is thwarting Diaz's attempts to control the position.#SUB2#
Santos seems to be working for a kimura but Diaz defends the submission attempt.
Santos wants to pass the guard but Diaz is defending well. #SUB2#
Santos is trying for a guillotine from the top but the pressure isn't in the right place so Diaz is just riding it out for now. Santos eventually gives up the hold. #SUB2#
Santos is looking for a kimura but Diaz is holding onto that half guard position, so it's hard for Santos to get the leverage. #T4#
Diaz manages to get to full guard.
Santos passes Diaz's left leg - he's now in half guard.
Diaz trying to control but Santos postures up.
Diaz gets back to full guard.
Santos wants to pass the guard but Diaz is keeping the position.
Diaz tries to land a sweep but no joy.
Santos trying to control but Diaz is working from the bottom.
Diaz is trying to keep Santos in close.
#T5#
Santos tries to free his leg and advance position but Diaz is retaining full guard.
Santos is persisting with the attempt to improve his position.
Santos wants to control from the top but Diaz keeps moving.
The ref warns both fighters not to hold the cage as they work up against the meshing.
Diaz controls Santos momentarily but Santos frees himself.
Santos stands up and looks to throw the legs aside to pass to side control. Diaz swivels though and keeps the full guard. #SUB2#
Santos thinks about going for a leg but decides against it, in order to maintain the position.
Diaz seems keen to control rather than go for a submission, at least for now.
Santos wants to pass the guard but Diaz is keeping the position.
Santos passes into half guard. #T6#
Diaz is holding on to half guard well.
Santos seems very keen to just sit and control from half guard but Diaz does not like that idea so much and is remaining active off his back. #SUB2#
Santos is thinking about going for an arm triangle but he can't free his leg.
#SUB2#
Santos wants to work for an arm triangle but Diaz is really keeping half guard well and defending the submission attempt.
Diaz is looking to improve his position.
Diaz is trying to maintain the position but Santos is very close to passing his half guard.#SUB2#
Santos looking for a kimura but he'll have to free his other leg if he wants to finish that. Perhaps he's just using it as a distraction technique.
Diaz regains full guard. Nicely done. #T7##SUB#
Diaz has his foot on Santos's thigh. He's trying to push off and get in position for a triangle, I think. Santos works his way back into a safe position though.
Santos pushes down on Diaz's leg and manages to get into half guard.
Diaz has no desire to be mounted, so is trying to control. Santos is working away from the top position though.
Diaz is in a bad position, trying to hold on for dear life but he is really struggling to maintain any sort of control.#SUB#
Diaz looking for submissions off his back.#SUB2#
Santos is looking for a kimura. It's going to be difficult to finish that from half guard though and Diaz defends it well.
Santos trying to pass the guard but Diaz defending well. #SUB2#
Santos is trying for a guillotine from the top but the pressure isn't in the right place so Diaz is just riding it out for now. Santos eventually gives up the hold. #T8#
Diaz wants to get back to full guard.
Diaz keeping hold of Santos's head, controlling as best he can. #SUB2#
Santos is trying to work for a kimura but Diaz is defending well.
Santos is thwarting Diaz's attempts to control the position.
Diaz is concentrating on defense, preventing Santos from advancing position. #T9#
Diaz is trying to control but can't.
Diaz is controlling Santos's position as best he can from this difficult position.
Santos content to sit in half guard and control for a moment. #SUB2#
Santos is trying a forearm choke
I don't think that's going to do much at this level of the game.
Santos wants to pass the guard but Diaz is defending well. #SUB2#
Santos is looking for an arm triangle, whilst trying to pass to side control. Diaz doesn't seem that keen to cooperate though. No luck this time Santos.
Diaz is trying to control but can't.
#T10##SUB2#
Santos looking for a kimura but he'll have to free his other leg if he wants to finish that. Perhaps he's just using it as a distraction technique.
#SUB2#
Santos is working for a kimura but Diaz is defending it quite comfortably.
Diaz is working for an escape here. He's hooked one of Santos's legs and he's managed to sneak out and take Santos's back! Score +4 for clean sweep to past guard: Diaz (12) vs (2) Santos
Diaz tries to get the hooks in deep but Santos pushed the leg off.
Santos tries to break free.
I would not like to be Santos right now.
Santos tries to escape but Diaz has the hooks in and won't let him break free. #T11#
Diaz controlling from the back.
The crowd hopeful of a finish here - Diaz's supporters are on their feet, screaming for him to go for the rear naked choke.
Santos wants to control his opponent's hands but Diaz gets his hands free.
What can Santos do to escape this position? He's going to have to figure it out pretty quick if he wants to stay in the fight!
Santos is in bad spot here.
Well,Diaz is on his way to losing a decision here. Can he use his experience to pull something off in the closing minutes?#T12#
Good control from Diaz.
Santos is really stuck here.
What can Santos do to escape this position? He's going to have to figure it out pretty quick if he wants to stay in the fight!
Santos is trying to break free.
Diaz wants to control the position but Santos frees himself and scrambles - Diaz manages to regain control in side control.
Diaz passes to full mount! That's big trouble for Santos! Score +2 for reaching mount: Diaz (14) vs (2) Santos
Santos regains half guard.
Santos wants to improve his position but Diaz is controlling well.
Diaz seems content to maintain position for now, rather than mounting any offense. #SUB#
Diaz is trying to work for a kimura. This could be trouble! No, Santos has managed to free his arm - good work. #T13##SUB2#
Santos is looking to sinch up a guillotine here but Diaz pulls his head out easily.
Diaz stalling.
Santos is staying active underneath Diaz, who seems content to just control the action from this position.
Santos wants to improve his position but Diaz is controlling well.
Diaz is keen to just control but Santos is a slippery customer.
Diaz is taking a breather. Santos says something to him but it's hard to make out. Perhaps he's telling him to get on with it and actually do something.
Diaz is trying to control. Santos wants to improve his position but can't escape this time. #T14#
Diaz is really struggling to control Santos but he's trying to hold on to the position.#SUB2#
Santos looking for submissions from an awkward position here.
Santos wants to improve his position but Diaz is controlling well.
Diaz keeping composed on the top, looking to control the action.
Santos is looking to regain full guard. Not this time though.
Boooooooooooooooooooo!!! God, this has been a terrible round. Come on you two, sort yourselves out!#SUB2#
Santos looking to work for a kimura from the bottom.
And that's the end of the fight!
Diaz takes the fight on points by 14 to 2.
After winning the bout, Hick Diaz thanked all his fans and promised he'd do even better in his next fight. The crowd seemed to love his humility. |
|
|
|
Main event
|
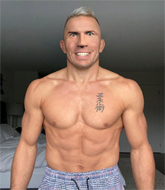
This TWGC bout is 1 fifteen minute round in the light heavyweight division. Introducing today's competitors. In the red corner, competing out of Helsinki, with a TWGC record of 6 wins and 0 losses; Liam St. Georges ! And in the blue corner, fighting out of Rio de Janeiro, with a TWGC record of 1 wins and 1 losses; Slon Mamontov!
The judges for this bout are Stewart Dunkirk, Daniel Franklin and Frank Dennis.
The fighters connect hands in the middle of the mat and we are under way.#TD2#
Mamontov closes the distance, clinches up and gets a nice trip takedown into side control. Very smooth. Score +4 for clean takedown past guard: St. Georges (0) vs (4) Mamontov
Mamontov controls the position from side control.
Mamontov tries to advance to mount but can't.
St. Georges holds on tight, trying to prevent any damage.
Mamontov tries to move into full mount but can't pass St. Georges 's legs.
St. Georges manages to land a sweep and he's now on top! Lovely Jiu Jitsu! Score +2 for sweep to guard / half guard: St. Georges (2) vs (4) Mamontov
Mamontov has a hand on St. Georges 's thigh, trying to get back to full guard. St. Georges takes advantage of the position though and mounts him! Score +3 for passing guard: St. Georges (5) vs (4) Mamontov
We've had a slow start to the round here - hopefully the action picks up.
St. Georges can't quite control the action as he would like just now, as Mamontov is looking to escape.
Mamontov really trying hard to get back to half guard here.
#T1#
Mamontov tries to hold on but St. Georges postures up.
St. Georges prevents Mamontov from getting the reversal.
St. Georges tucks in and makes sure he doesn't lose the dominant position.
Mamontov is trying to escape the mount.
St. Georges wants to control the pace but Mamontov is squirming around nicely.
The fighters are pressed up against the cage, both looking to find a bit of space to work.
Mamontov is looking to improve his position but St. Georges isn't that keen on the idea.
St. Georges looking to control but Mamontov is working nicely, looking to advance position himself.
Mamontov is desperately trying to get back to half guard.
#T2#
St. Georges controlling from the full mount.
Mamontov is writhing around trying to get back to his feet.
Mamontov really trying hard to get back to half guard here.
St. Georges content just to control the position here.
Mamontov tries to reverse the position but St. Georges maintains control.#T3#
St. Georges tucks in and makes sure he doesn't lose the dominant position.
Mamontov is squirming around, avoiding St. Georges 's attempts to control the action.
Mamontov tries to lock up and control but St. Georges gives him a forearm to the face and pushes him away.
Mamontov is trying to escape the mount.
St. Georges tucks in and makes sure he doesn't lose the dominant position.
Mamontov is wriggling around trying to escape.
#T4#
Mamontov gets back to half guard.
St. Georges works his foot free and advances to mount. Score +3 for passing guard: St. Georges (8) vs (4) Mamontov
Mamontov is in all sorts of trouble here.
St. Georges controlling from the full mount. #SUB#
St. Georges is working for a guillotine from mount but Mamontov frees his head quite easily.
St. Georges trying to control but Mamontov is having none of it.
The ref warns both fighters not to hold the cage as they work up against the meshing.
St. Georges is going to have to think about doing something other than just controlling because Mamontov is managing to avoid having the position dictated to him.#T5#
Mamontov tries to hold on but St. Georges pushes him away. #SUB#
Mamontov defends a decent attempt at a guillotine from St. Georges .
St. Georges takes a little breather and maintains the position. The referee will be looking for him to stay active from such a dominant position though.#T6#
Mamontov is writhing around trying to get back to his feet.
St. Georges content just to control the position here.
St. Georges avoids the attempt from Mamontov to control.
St. Georges controlling the pace for now.
Mamontov is working to get back to half guard.
Mamontov keeps trying to improve his position.#T7#
St. Georges tries to control but Mamontov wriggling away.
St. Georges controlling from the full mount. #SUB#
St. Georges is going oldschool here, as he tries to force Mamontov to tap using a forearm choke. This isn't 1993 though, so Mamontov shrugs it off. #SUB#
St. Georges wants to finish this one by submission but Mamontov is holding onto his waist, trying to prevent any attacks from St. Georges .
Mamontov is squirming around, avoiding St. Georges 's attempts to control the action. #SUB#
St. Georges is going oldschool here, as he tries to force Mamontov to tap using a forearm choke. This isn't 1993 though, so Mamontov shrugs it off.
Mamontov bucks up and manages to get a nice reversal! He's in guard on the top - nicely done! Score +2 for sweep to guard / half guard: St. Georges (8) vs (6) Mamontov
St. Georges looking to hit a scissor sweep but Mamontov is one step ahead there. #T8#
St. Georges looking to control.
St. Georges is working the butterfly guard. He manages to land a nice scissor sweep and is now in half guard on the top. Nice move. Score +2 for sweep to guard / half guard: St. Georges (10) vs (6) Mamontov
Mamontov is looking to improve his position.
Mamontov trying to control but St. Georges postures up.
St. Georges wants to pass to mount but Mamontov is defending the position.
St. Georges is looking to pass the guard... He's managed it - he's now in full mount! Score +3 for passing guard: St. Georges (13) vs (6) Mamontov#T9#
St. Georges looking to control and managing it successfully.
Mamontov working to try and regain half guard.
Mamontov is persisting with the attempt to improve his position.#SUB#
St. Georges with some aggressive grappling here. He's looking for submissions here, rather than waiting for the opportunity to counter.
We've been hearing that St. Georges has been drilling a lot of ground and pound in training, so let's see if he get the finish.
Mamontov tries to reverse the position but St. Georges maintains control.
Mamontov is squirming around, avoiding St. Georges 's attempts to control the action. #T10##SUB#
St. Georges looking for a guillotine from mount but Mamontov is having none of it.
St. Georges trying to control but he's not successful this time.
St. Georges controlling from the full mount.
St. Georges trying to control but Mamontov is having none of it.
St. Georges takes a little breather and maintains the position. The referee will be looking for him to stay active from such a dominant position though.#T11#
Mamontov is desperately trying to improve his position but St. Georges has a good base and remains in mount.
St. Georges wants to control but Mamontov has made it back to half guard. Nice work.
Mamontov has no desire to be mounted, so is trying to control. St. Georges is working away from the top position though.#SUB2#
Mamontov actively working from the bottom here.
Mamontov tries to roll over but St. Georges keeps him under control.
Mamontov has no desire to be mounted, so is trying to control. St. Georges is working away from the top position though.
St. Georges trying to pass the guard but Mamontov defending well. #T12#
Mamontov is not content to let St. Georges control the position.
St. Georges controlling the pace.
Mamontov is looking to improve his position.
Mamontov is trying is best to control the position here.
Mamontov manages to get to full guard.
Mamontov controls St. Georges momentarily but St. Georges frees himself. #T13#
St. Georges advances position into side control! Score +3 for passing guard: St. Georges (16) vs (6) Mamontov
St. Georges controls the position from side control.#SUB#
St. Georges tries for an arm triangle. That looks pretty tight to me. Is this one over!?! Possibly, maybe, no St. Georges has let go of the choke. Obviously it wasn't as tight as we thought!
St. Georges has knee on belly and moves into mount. Score +2 for reaching mount: St. Georges (18) vs (6) Mamontov
St. Georges avoids the attempt from Mamontov to control.#T14#
St. Georges trying to control but he's not successful this time.
Mamontov is trying to escape the mount.
St. Georges can't quite control the action as he would like just now, as Mamontov is looking to escape.
Mamontov is working to get back to half guard.
Mamontov is squirming around, avoiding St. Georges 's attempts to control the action.
Boooooooooooooooooooo!!! God, this has been a terrible round. Come on you two, sort yourselves out!
And that's the end of the fight!
St. Georges takes the fight on points by 18 to 6.
Liam St. Georges really struggled to get his t-shirt on before his hand was raised. Making sure that Conviction logo gets some air time is pretty tricky when you're all sweaty. |
|
|
|
|
|
|