 |
SSSD 52: Luciano/Rize PBP Commentary |
Undercard bout
|
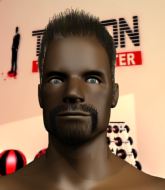
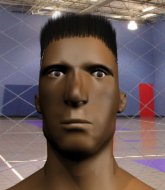
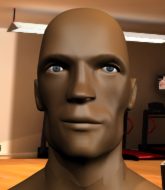
Coming up we have a lightweight MMA rules bout between Landon Miranda (ranked 25020 p4p, 5220 weight class) and Cody Griffith (ranked 687 p4p, 554 weight class). Miranda comes to the cage accompanied by Your Eyes. Cody Griffith has the better chin. Will he look to stand and bang today?
 |
|
 |
| 181 cm
19
159
3 - 5 - 0 |
|
175 cm
26
164
1 - 2 - 0 |
BJJ White Belt
Counter fighter
Experienced |
|
BJJ Blue Belt
Counter fighter
Solid chin |
|
| |
|
Ladies and gentlemen. This fight is 3 rounds, in the lightweight division.
Introducing the fighter to my left, fighting out of the red corner.
With a record of 3 - 5 - 0, fighting out of Los Angeles, Landon Miranda!
And introducing the fighter to my right, fighting out of the blue corner.
With a record of 1 - 2 - 0, fighting out of New York, Cody Griffith!
The judges for this bout are Topper Green, Winston Howard and Francis DeMontford.

The bell rings for round one and we are underway!
Griffith avoids the head kick by Miranda.

Griffith has closed the distance and engaged Miranda in a clinch.
Griffith landing knees to the head.
 It looks like Landon Miranda has been cut. It looks like Landon Miranda has been cut.

Griffith manages to break the clinch.
Miranda with a lazy takedown attempt
and Griffith counters with a straight punch to the midsection.
Griffith lands a jab followed by a nice looking cross.
Griffith gets to the clinch - let's see what his plan is here.
Griffith lands an uppercut.
Griffith pushes Miranda back against the cage and lands a hook to the side of the head.
This is a great period of action - very entertaining stuff!
Miranda has Griffith pushed against the cage.
Miranda swings away with an uppercut that misses.

That's one minute gone in the round.
Griffith digs a right hand into Miranda's ribs. Those have got to be taking their toll on Miranda's gas tank.
Griffith lands a hook to the side of the head.
 Miranda is rocked! Miranda is rocked!
Miranda blocks an uppercut.
Oh Miranda is still all over the place! His legs are completely gone! Will he be able to recover?!!
Miranda is trying to break the clinch but Griffith is controlling him.
Griffith throws a punch but it's blocked by Miranda.
A head punch blocked on the inside by Miranda.
Griffith misses with the head strike.
Griffith swings wildly with an uppercut but Miranda uses good head movement to avoid it.
Miranda takes an elbow to the temple.
Griffith has Miranda pressed against the cage. He pushes Miranda back and as he springs towards him off the cage, Griffith throws a beautiful elbow that sends Miranda crashing to the floor! Griffith piles on the pressure with more strikes! Miranda is flailing away but he's not defending himself and the referee steps in to stop the fight!
Ladies and gentlemen, after 1:28 of round 1, we have a winner by way of TKO (Strikes). Cody Griffith!
Landon Miranda spoke after the fight, saying 'Hey, good fight man'.
|
|
|
|
|
|
|
|
|
|
|
|
|
|
|
|
|
|
|
|
|
|
|
| S |
C
A |
G |
S |
C
B |
G |
|
S |
C |
G |
|
energy
A | B |
|
hype
A | B |
|
pop
A | B |
|
mgr
A | B |
|
FIGHT
RATING
61% |
|
|
|
|
|
|
|
Undercard bout
|
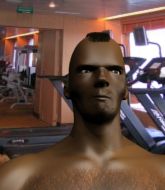
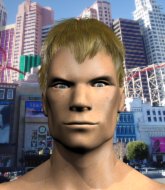
Coming up we have a featherweight MMA rules bout between Joey Fasoli (ranked 6033 p4p, 5960 weight class) and Simon Terrier (ranked 435 p4p, 434 weight class). Both fighters will be looking to make this an exciting fight for the fans, I'm sure!
 |
|
 |
| 174 cm
18
145
0 - 1 - 0 |
|
178 cm
25
150
0 - 1 - 0 |
BJJ Blue Belt
Brawler
KO power |
|
BJJ White Belt
Excellent boxer
Determined |
|
| |
|
Ladies and gentlemen. This fight is 3 rounds, in the featherweight division.
Introducing the fighter to my left, fighting out of the red corner.
With a record of 0 - 1 - 0, fighting out of Montreal, Joey Fasoli!
And introducing the fighter to my right, fighting out of the blue corner.
With a record of 0 - 1 - 0, fighting out of London, Simon Terrier!
The judges for this bout are Francis DeMontford, Chris Dean and Summer Carpenter.
The bell rings for round one and we are underway!
Fasoli misses with a jab, cross combination.
A little jabbing left from Terrier on the counter but it doesn't find it's target.
Terrier lands with a nice combination. Fasoli backs away looking to recover.
Fasoli definitely looks more muscular than last time we saw him fight.
Fasoli on the receiving end of a decent leg kick there by Terrier. Terrier obviously looking to wear him down.
Terrier will need to tighten up his combinations if he doesn't want to gas himself out, swinging at thin air.
A punch combination from Terrier misses.

Fasoli closes the distance and presses his opponent up against the cage.
Fasoli wants to get back to striking at distance but Terrier won't allow it.
Terrier tries to break free but Fasoli pushes him back against the cage.
Fasoli has had enough of the clinch and is looking to separate.
Fasoli tries to circle away but Terrier has him pinned against the cage.
We've had a slow start to the round here - hopefully the action picks up.
A head punch blocked on the inside by Terrier.
Fasoli misses with a body punch.
Fasoli softening up his opponent with strikes, against the cage.
Fasoli tried to land a shot to the body but connects with Terrier's elbow.
Fasoli misses with a shot to the kidneys.
That's one minute gone in the round.
Fasoli has had enough of the clinch but Terrier keeps him there for the moment.
Terrier can't break the clinch.
A right handed body shot lands from Fasoli.
Terrier wants to strike at distance but he can't break free of the clinch.
Terrier tries a shoulder strike but it doesn't do any damage.
Terrier lands a nice elbow.
Terrier blocks an uppercut.
Terrier blocks an uppercut.
Terrier looks like he'd prefer to be striking at range right now.
Terrier wants to break free. God knows he wants to breaaaak freeee.
Fasoli lands a short shot on the inside that snaps the head of Terrier backwards.
Fasoli is trying to force a seperation but Terrier has the dominant position.
Terrier looks more muscular than last time we saw him. He must have been on the weights.
A head punch on the inside from Fasoli fails to land.
Fasoli lands a shoulder strike.

That's two minutes gone in the round.
Fasoli lands a left hand that snaps the head of Terrier backwards.
Fasoli prevents Terrier from breaking the clinch.
Terrier lands a hook that snaps the head of Fasoli backwards.
Terrier has had enough of the clinch and is looking to separate.
Terrier escapes the clinch and we're back to striking.
Terrier fails with an attempt to clinch.
Fasoli moves into the clinch successfully.
Fasoli tries to break free but Terrier pushes him back against the cage.
Terrier is trying to work out of this bad position, with his back against the cage.
A short body shot lands from Fasoli as the two fighters clinch.
Fasoli wants to get back to striking at distance but Terrier won't allow it.
Fasoli has had enough of the clinch and is looking to separate.
Fasoli wants to break free. God knows he wants to breaaaak freeee.
Terrier manages to break the clinch.
Fasoli scores with a nice strike.
 Terrier is rocked! Terrier is rocked!

That's three minutes gone in the round.
A jab lands there for Terrier.
Terrier is still on wobbly legs! Can Fasoli finish him?
Terrier's corner calls for a 1, 2 combination and Terrier duly obliges.
Terrier seems to have recovered his senses.
Fasoli clinches up with Terrier and pushes him back against the cage.
Fasoli tries a body shot but Terrier blocks it.
Fasoli misses with a body punch.
Terrier wants to push off and get back to the center of the mat but Fasoli has him pressed against the cage.
An uppercut to the body lands inside from Fasoli.
Fasoli misses with a punch to the body.
Fasoli tries to work over Terrier's body with a swooping hook but it only glances the target.
A hook to the body from Fasoli.
Terrier lands with a light punch inside.
Fasoli softening up his opponent with strikes, against the cage.
Terrier is trying to force a seperation but Fasoli has the dominant position.

That's four minutes gone in the round.
Terrier breaks from the clinch.
Terrier misses with a wild combination.
Terrier gets tackled into the cage by Fasoli. Fasoli maintains the clinch.
We've seen a great period of action over the last minute or so - credit to both fighters for going all out!
Fasoli works on Terrier's body with a couple of short punches.
A short left from Fasoli.
With the fighters clinched against the cage, Fasoli creates a bit of distance for himself and scores with a nice uppercut.

Fasoli breaks the clinch.
Terrier pushing out the jab but it's not landing.
Fasoli is looking to counter punch.
Fasoli walks into a jab.
Simon Terrier seems to be the more aggressive standup fighter in this bout.
Fasoli closes the distance and presses his opponent up against the cage.
Fasoli wants to break the clinch but can't.
An uppercut on the inside fails to land for Fasoli.
And that is the end of the round. The fighters go back to their corners.
That was a close round but I would say that Joey Fasoli will probably get the nod.
The corners get their ten second warning. Both fighters stand from their stools and stare each other down, ready to get back to the action.

Fasoli drives through and clinches with Terrier against the cage.
Terrier is trying to push Fasoli away but Fasoli has him pressed against the cage, so he's going nowhere.
Terrier wants to strike at distance but he can't break free of the clinch.
Terrier manages to break the clinch.
Fasoli takes a big uppercut there. He seems a bit wobbly but no, he's OK.
Fasoli moves into range and clinches up with Terrier.
Fasoli wants to break free. God knows he wants to breaaaak freeee.
Terrier lands a nice elbow from the clinch.
Terrier has Fasoli pressed against the cage, preventing Fasoli from circling away and getting back to striking at range.
Joey Fasoli has scored more points in the clinch so far.
Fasoli wants to push off and get back to the center of the mat but Terrier has him pressed against the cage.
We've had a slow start to the round here - hopefully the action picks up.
Good body shot from Fasoli.
Fasoli tries to circle away but Terrier has him pinned against the cage.
Fasoli breaks the clinch and we're back to striking at distance.
Terrier throws a right and a left that both miss.
The fighters are starting to perspire pretty heavily.
Terrier jabs Fasoli to the body, keeping him at a distance.
That's one minute gone in the round.
Terrier is looking to clinch.
Terrier throws a body shot but no joy.
Terrier throws out a token jab with nothing on it.
Fasoli pushes Terrier up against the cage in a clinch.
Fasoli doesn't land with the attempted body shot.
Fasoli can't break the clinch.
A short body shot lands from Fasoli as the two fighters clinch.
A left hand lands to the body for Fasoli.
Fasoli throws a head punch that misses.
A short right from Fasoli on the inside.
Terrier is trying to break the clinch but Fasoli has him pressed against the cage.
Fasoli lands with a good tight uppercut to the head.
Fasoli misses with a hook to the ribs.
Fasoli misses with a hook to the ribs.
That's two minutes gone in the round.
An uppercut on the inside fails to land for Terrier.
Fasoli goes for a body shot but it's blocked.
Fasoli lands a nice uppercut.
Terrier breaks the clinch and we're back to striking at distance.
Terrier gets to the clinch - let's see what his plan is here.
A nice right hand lands inside from Fasoli.
Terrier is trying to force a seperation but Fasoli has the dominant position.
Fasoli has not gone for a single takedown so far in this fight, which seems like a very strange tactic when you consider that he has the superior wrestling and BJJ.
Fasoli wants to break free. God knows he wants to breaaaak freeee.
Terrier tries to circle away but Fasoli has him pinned against the cage.
Fasoli has had enough of the clinch and is looking to separate.
Terrier can't break the clinch.
A short right from Fasoli.
Wooooo! Give it up for these two warriors! They are putting on a show!
Terrier wants to break free but Fasoli has control.
Fasoli wants to break free but Terrier has control.
That's three minutes gone in the round.
Terrier throws a nice elbow but it doesn't land.
Terrier prevents a body shot from Fasoli.
Fasoli working hard to break the clinch.
Terrier is trying to push Fasoli away but Fasoli has him pressed against the cage, so he's going nowhere.
Terrier wants to break the clinch but can't.
Terrier breaks from the clinch.
Fasoli misses with a left hand
and Terrier counters with a quick right hand to the jaw.
Terrier throws a right hand that Fasoli ducks under and follows up with a left that Fasoli also avoids with ease.
Left hook, right uppercut from Fasoli.
Fasoli clinches up against the cage.
Fasoli swings away with an uppercut that misses.
Fasoli is trying to push Terrier away but Terrier has him pressed against the cage, so he's going nowhere.
Fasoli swings away with an uppercut that misses.
That's four minutes gone in the round.
Terrier wants to push off and get back to the center of the mat but Fasoli has him pressed against the cage.
Terrier wants to break free. God knows he wants to breaaaak freeee.
Terrier is trying to break free.
Fasoli tries to break free but Terrier pushes him back against the cage.
Fasoli is really dominating this fight. Is there anything that Terrier can do to turn this around?
Fasoli tries to circle away but Terrier has him pinned against the cage.
Fasoli misses with a body punch.
Terrier is looking to break free of the clinch but Fasoli has double underhooks.
Fasoli looks like he'd prefer to be striking at range right now.
Fasoli tries to break free but Terrier pushes him back against the cage.
Terrier has Fasoli pressed against the cage, preventing Fasoli from circling away and getting back to striking at range.
Fasoli wants to strike at distance but he can't break free of the clinch.
Fasoli prevents Terrier from breaking the clinch.
Fasoli tries to break free but Terrier pushes him back against the cage.
Fasoli wants to break free but Terrier has control.
And that is the end of the round. The fighters go back to their corners.
Joey Fasoli dominated that second round.
That's time! Fasoli's corner gives him a slap on the ass as he gets ready to fight. This is the final round!

Fasoli rushes Terrier and presses him up against the cage.
Terrier tries to break free but Fasoli pushes him back against the cage.
Terrier tries to break the clinch but Fasoli is controlling the position.
An uppercut on the inside fails to land for Fasoli.
Fasoli tries to circle away but Terrier has him pinned against the cage.
A frustrated look appears on Terrier's face as he tries to break the clinch.
Fasoli works on Terrier's body with a couple of short punches.
Fasoli digs a right hand into Terrier's ribs. Those have got to be taking their toll on Terrier's gas tank.
Fasoli has Terrier pressed against the cage, preventing Terrier from circling away and getting back to striking at range.
An uppercut on the inside fails to land for Fasoli.
We've had a slow start to the round here - hopefully the action picks up.
Fasoli keeps control of Terrier as he tries to wriggle out of the double underhooks.
Fasoli can't find room to land a body shot as Terrier controls the action.
Fasoli is trying to break the clinch but Terrier is controlling him.
Fasoli working on landing some head shots here - that one got through nicely.
That's one minute gone in the round.
Fasoli is leaning against Terrier and scores with a nice uppercut to the body.
Fasoli keeps control of Terrier as he tries to wriggle out of the double underhooks.
Terrier takes a big intake of breath there - he's definitely tired.
Fasoli has a couple of punches blocked by Terrier.
Fasoli lands with a light punch inside.
Terrier is trying to break the clinch but Fasoli has him pressed against the cage.
Fasoli is looking to break free of the clinch but Terrier has double underhooks.
Fasoli swings wildly with an uppercut but Terrier uses good head movement to avoid it.
Fasoli lands with a quick shot inside that doesn't really do much damage.
Fasoli misses with a body punch.
A frustrated look appears on Fasoli's face as he tries to break the clinch.
Fasoli misses with a punch to the body.
Fasoli misses with a body punch.
Terrier breaks from the clinch.
That's two minutes gone in the round.
Fasoli closes the distance and presses his opponent up against the cage.
Terrier takes a shot to the head.
Fasoli lands a nice shot to the body.
Fasoli breaks from the clinch.
Joey Fasoli is looking to throw some combinations by the looks of things.
Fasoli is looking to clinch but Terrier is avoiding it.
Terrier looks to land a right hand but Fasoli moved out of range.
Terrier throws a right hand that Fasoli ducks under and follows up with a left that Fasoli also avoids with ease.
Simon Terrier seems to be getting the better of the standup.
Terrier keeps the fight on the outside.
Terrier cracks Fasoli with a good jab.
Terrier takes a shot to the nose. Hopefully that hasn't broken it.
We've seen a great period of action over the last minute or so - credit to both fighters for going all out!
Fasoli looks to score with a combo but nothing lands.
Fasoli closes the distance and clinches.
Fasoli is leaning against Terrier and scores with a nice uppercut to the body.
Terrier is looking to break free of the clinch but Fasoli has double underhooks.
That's three minutes gone in the round.
Terrier keeps control of Fasoli as he tries to wriggle out of the double underhooks.
Fasoli struggles to land a body shot inside as Terrier controls his hands.
Fasoli blocks an uppercut.
Terrier misses with a hook to the ribs.
Fasoli tries to throw a body punch but Terrier avoids it by throwing Fasoli back against the cage.
Fasoli keeps control of Terrier as he tries to wriggle out of the double underhooks.
Fasoli wants to strike at distance but he can't break free of the clinch.
Fasoli tries to break free but Terrier pushes him back against the cage.
Fasoli tries to throw a body punch but Terrier avoids it by throwing Fasoli back against the cage.
Fasoli tries to work over Terrier's body with a swooping hook but it only glances the target.
Terrier has Fasoli pressed against the cage, preventing Fasoli from circling away and getting back to striking at range.
Fasoli working aggressively here.
Terrier is trying to work out of this bad position, with his back against the cage.
That's four minutes gone in the round.
A lull in the action here being met with boos from the crowd.
Terrier tries to circle away but Fasoli has him pinned against the cage.
Fasoli doesn't land with the attempted body shot.
Terrier wants to push off and get back to the center of the mat but Fasoli has him pressed against the cage.
Fasoli lands a nice looking hook to the body, against the cage.
Fasoli misses with a body punch.
Terrier wants to break free. God knows he wants to breaaaak freeee.
Simon Terrier has stepped it up - he knows he needs a finish here!
Fasoli makes some space for himself and lands an uppercut.
Fasoli digs a right hand into Terrier's ribs. Those have got to be taking their toll on Terrier's gas tank.
Fasoli wants to strike at distance but he can't break free of the clinch.
Terrier is trying to work out of this bad position, with his back against the cage.
The crowd thankful this round is nearly over.
Fasoli misses with a shot to the kidneys.
Terrier blocks a body shot from Fasoli.
Joey Fasoli is fighting for a decision here - he's started to take the cautious approach.
Fasoli wants to break free. God knows he wants to breaaaak freeee.
And that's the end of the fight!
Joey Fasoli showed his dominance in that final round.
Well I reckon that's a shut out for Fasoli, winning every round. Will the judges agree? They are the ones who matter, even if they are often depressingly incompetent. Over to the ring announcer for the scorecards.
Ladies and gentlemen, after 3 rounds of action, we go to the scorecards for a decision.
Judge Francis DeMontford scores the fight 30:27
Judge Chris Dean scores the fight 30:27
Judge Summer Carpenter scores the fight 30:27
In favor of your winner, by unanimous decision... Joey Fasoli!
Joey Fasoli spent the whole post fight interview bigging himself up. It didn't go down that well with the fans after a while as they thought it was a bit arrogant.
|
|
|
|
|
|
|
|
|
|
|
|
|
|
|
|
|
|
|
|
|
|
|
| S |
C
A |
G |
S |
C
B |
G |
|
S |
C |
G |
|
energy
A | B |
|
hype
A | B |
|
pop
A | B |
|
mgr
A | B |
|
FIGHT
RATING
41% |
|
|
|
|
|
|
|
Undercard bout
|
Coming up we have a welterweight MMA rules bout between Bob Franker (ranked 5607 p4p, 5735 weight class) and Nauru Mahato (ranked 585 p4p, 591 weight class). Nauru Mahato has the better chin. Will he look to stand and bang today?
 |
|
 |
| 185 cm
26
180
1 - 1 - 0 |
|
190 cm
25
180
0 - 1 - 0 |
BJJ White Belt
Decent elbows
Cardio machine |
|
BJJ White Belt
Excellent boxer
Determined |
|
| |
|
Ladies and gentlemen. This fight is 3 rounds, in the welterweight division.
Introducing the fighter to my left, fighting out of the red corner.
With a record of 1 - 1 - 0, fighting out of Sydney, Bob Franker!
And introducing the fighter to my right, fighting out of the blue corner.
With a record of 0 - 1 - 0, fighting out of Sydney, Nauru Mahato!
The judges for this bout are Hugh Johnson, Chris Dean and Ben Hemmingworth.
The bell rings for round one and we are underway!
The fighters circle momentarily. Mahato darts into range and connects with a nice straight punch.
Mahato swings wildly with a couple of big hooks
and Franker counters with a three punch combination, finished off with a leg kick. Nice work.
Franker circles away from the clinch attempt.
Nauru Mahato seems to be the more aggressive standup fighter in this bout.
Franker tries to clinch but Mahato moves out of range.
Franker is looking to clinch.
Mahato connects with a looping left hand that seems like it dazed Franker momentarily.
Mahato lands a vicious shot with the stealth of a sniper and the strength of a viper. Are vipers that strong? I can think of lots of things that are stronger than a viper - not many rhyme with sniper though.
Franker forces Mahato back against the cage and clinches.
Mahato is stalling here. The referee will be looking to step in if he doesn't pick up the pace.
Franker avoids a wild elbow strike from Mahato.
Mahato escapes the clinch and we're back to striking.
Mahato lands with a nice combination. Franker backs away looking to recover.
The crowd cheering loudly, showing their appreciation for the quality fight we're seeing here.
Mahato shoots in but no luck this time.
That's one minute gone in the round.
Mahato throws a combination that misses
and Franker counters with a right hand to the body.
Mahato misses with a combination
and Franker counters with a nice jab to the body that keeps Mahato thinking.
Franker fakes with an overhand right and moves in to clinch with Mahato, pushing him back against the cage.
Franker avoids a wild elbow strike from Mahato.
Mahato content to slow the pace in the clinch.
Mahato manages to break the clinch.
Mahato looks more muscular than last time we saw him. He must have been on the weights.
Mahato throws a combination. Franker tries to block but a couple of punches get through.
A really sloppy takedown attempt there from Mahato.
Mahato looks winded!
Franker clinches up against the cage.
That's two minutes gone in the round.
Franker works for underhooks and lands a body shot in the process.
Franker pushes Mahato back against the cage and lands a hook to the side of the head.
Mahato has a couple of punches blocked by Franker.
Mahato is trying to push Franker away but Franker has him pressed against the cage, so he's going nowhere.
I was talking to Franker's coach per-fight and he was telling me that they'd been working on the clinch in the runup to this fight.
Mahato pushes off and fires off an elbow that misses, before clinching up again, against the cage.
The fans in attendance giving it up for the two fighters, who have really let it all hang out in the last minute or so!
Mahato misses with the head strike.
Mahato tries to break free but Franker pushes him back against the cage.
Mahato is trying to push Franker away but Franker has him pressed against the cage, so he's going nowhere.
Franker prevents Mahato from breaking the clinch.
A frustrated look appears on Mahato's face as he tries to break the clinch.
That's three minutes gone in the round.
Mahato has had enough of the clinch but Franker keeps him there for the moment.
Franker tries a shoulder strike but it doesn't do any damage.
Mahato can't break the clinch.
Franker lands with a short shot to the head.
Mahato can't break the clinch.
Mahato has had enough of the clinch and is looking to separate.
Mahato misses with a hook from the clinch.
Mahato is trying to break free.
Mahato's corner calls for him to break the clinch, which he does.
Franker circles away from the clinch attempt.
Franker was looking to counter that last move with a shot to the body but he didn't commit.
Mahato fakes with an overhand right and moves in to clinch with Franker, pushing him back against the cage.
That's four minutes gone in the round.
Mahato is trying to break free.
Nice elbow from Franker.
Franker lands punches inside but they're not really causing much damage.
Franker lands a shoulder strike.
A battle for position here, against the cage.
A short left from Franker.
Franker lands a nice uppercut.
Mahato tries to circle away but Franker has him pinned against the cage.
Mahato tries to break the clinch but Franker is controlling the position.
And that is the end of the round. The fighters go back to their corners.
That was a close round but I would say that Bob Franker will probably get the nod.
Well, the break between rounds is over. Let's get back to the scrappin!
Franker tries to clinch up but Mahato circles away and keeps his distance.
Mahato shoots in but no luck this time.
Mahato shoots in for a double leg but Franker sprawls well. That's going to sap some energy.
Mahato fails miserably with a takedown attempt.
Bob Franker has stuffed three takedown attempts in the round now. That's going to take a lot out of Nauru Mahato.
Franker has taken the fight to the clinch.
Mahato jumps guard but Franker stands there with Mahato around his waist. Mahato gives up and drops back to his feet. We remain in the clinch.
Mahato trying to stall but Franker improves his position.
Mahato is breathing heavily.
We've had a slow start to the round here - hopefully the action picks up.
Franker lands with a short shot to the head.
Mahato is trying to break the clinch but Franker is controlling him.
That's one minute gone in the round.
Franker is working Mahato over against the cage.
Mahato escapes the clinch and we're back to striking.
Mahato has managed to clinch.
Franker keeps control of Mahato as he tries to wriggle out of the double underhooks.
Mahato is working hard here but doesn't seem to be able to control effectively, up against the cage.
Mahato is trying to work out of this bad position, with his back against the cage.
Mahato can't break the clinch.
Mahato manages to break the clinch.
Mahato fails with a takedown attempt from distance.
Mahato fails to land with a series of punches.
Franker seem to be loading up, looking for a big counter.
That's two minutes gone in the round.
Franker clinches up with Mahato and pushes him back against the cage.
Franker lands with a short head shot on the inside.
Mahato tries to work over Franker's body with a swooping hook but it only glances the target.
A short right from Franker on the inside.
Mahato is looking to control Franker's arms but Franker gets an underhook and turns him. Now Mahato has his back to the cage.
A nice glancing elbow lands by Franker.
Franker lands a right hand.
Both fighters working to control the clinch.
Mahato is trying to break free.
Franker throws a blind hook that connects with the side of Mahatos head.
The crowd are loving this. Great action here.
Franker lands a damaging elbow.
That's three minutes gone in the round.
Mahato can't break the clinch.
Mahato tries to break the clinch but Franker is controlling the position.
Mahato wants to break free but Franker has control.
Mahato blocks a couple of punches on the inside.
Mahato is trying to force a seperation but Franker has the dominant position.
Mahato wants to break free but Franker has control.
Good body shot from Franker.
Franker is really dominating this fight. Is there anything that Mahato can do to turn this around?
A nice right hand lands inside from Franker.
Mahato creates a bit of distance and throws an elbow that only just misses.
Mahato is trying to force a seperation but Franker has the dominant position.
That's four minutes gone in the round.
Well. There's a bit of a lull in the action here and the crowd are starting to get restless.
Both fighters working to control the clinch.
Franker swings wildly with an uppercut but Mahato uses good head movement to avoid it.
Mahato looks like he'd prefer to be striking at range right now.
Franker working on landing some head shots here - that one got through nicely.
Mahato is trying to break free.
Mahato is looking to control Franker's arms but Franker gets an underhook and turns him. Now Mahato has his back to the cage.
Mahato wants to break free. God knows he wants to breaaaak freeee.
The crowd thankful this round is nearly over.
An uppercut on the inside fails to land for Mahato.
A short right hand to the side of the head by Franker.
And that is the end of the round. The fighters go back to their corners.
Bob Franker dominated that second round.
Well, the break between rounds is over. Let's get back to the scrappin! Let's hear some noise people - this is the final round!
Franker tries to close the distance and clinch up but Mahato swats him away and circles back towards the center.
Mahato tries to clinch up against the cage, rushing in to close the distance. Franker manages to break the clinch and circles back to the middle of the mat.
Mahato throws a hook to the body but it doesn't connect.
Franker was looking to counter that last move with a shot to the body but he didn't commit.
Mahato throws a hook but Franker blocks it.
Bob Franker is looking to throw some combinations by the looks of things.
Mahato misses with a double jab.
A quick step to the side and Franker tries to counter with a shot to the body but it doesn't connect.
Franker moves into the clinch.
Mahato escapes the clinch and we're back to striking.
Mahato looks to score with a combo but nothing lands.
Franker appears to be looking for a counter punch to the body.
Mahato misses with a jab, cross combination.
We've had a slow start to the round here - hopefully the action picks up.
Mahato gets tackled into the cage by Franker. Franker maintains the clinch.
Mahato wants to strike at distance but he can't break free of the clinch.
Franker lands with a good tight uppercut to the head.
Mahato jumps guard but Franker turns him against the cage and keeps the fight standing.
Mahato takes a big intake of breath there - he's definitely tired.
That's one minute gone in the round.
Franker pushes Mahato back against the cage and lands a hook to the side of the head.
A head punch on the inside from Franker fails to land.
Mahato is trying to push Franker away but Franker has him pressed against the cage, so he's going nowhere.
Bob Franker has scored more points in the clinch so far.
A quick uppercut on the inside from Franker.
Mahato wants to break free. God knows he wants to breaaaak freeee.
Mahato has had enough of the clinch and is looking to separate.
Mahato is trying to work out of this bad position, with his back against the cage.
Mahato has had enough of the clinch but Franker keeps him there for the moment.
Mahato blocks an uppercut.
Franker swings away with an uppercut that misses.
That's two minutes gone in the round.
Franker misses with a hook from the clinch.
Mahato can't break the clinch.
Franker lands with a left to the head.
Mahato misses with a knee to the head.
Mahato is trying to work out of this bad position, with his back against the cage.
Franker misses with some punches.
Mahato tries to break free but Franker pushes him back against the cage.
Mahato wants to break free. God knows he wants to breaaaak freeee.
Mahato has had enough of the clinch and is looking to separate.
Mahato blocking some punches.
That's three minutes gone in the round.
Franker scores with an uppercut up the middle.
Mahato looks like he'd prefer to be striking at range right now.
Franker swings wildly with an uppercut but Mahato uses good head movement to avoid it.
Franker lands with a good tight uppercut to the head.
Franker lands a hook that snaps the head of Mahato backwards.
Mahato leaning against his opponent.
Franker has Mahato pressed against the cage, preventing Mahato from circling away and getting back to striking at range.
Mahato is trying to slow down the pace of the fight but Franker is keeping busy.
Mahato is trying to push Franker away but Franker has him pressed against the cage, so he's going nowhere.
That's four minutes gone in the round.
Franker lands with a good tight uppercut to the head.
A shot in the inside from Franker.
Franker misses with some punches.
Mahato is trying to work out of this bad position, with his back against the cage.
Mahato wants to break free. God knows he wants to breaaaak freeee.
Mahato tries to pull guard but Franker won't allow it.
Mahato escapes the clinch and we're back to striking.
The crowd thankful this round is nearly over.
Mahato goes for a spinning back kick but it misses.
Franker was looking to counter that last move with a shot to the body but he didn't commit.
Mahato fails with an attempt to clinch.
Nauru Mahato has stepped it up - he knows he needs a finish here!
Bob Franker is fighting for a decision here - he's started to take the cautious approach.
Mahato swings wildly with a right hand that was never going to find it's target.
And that's the end of the fight!
Bob Franker showed his dominance in that final round.
Well I reckon that's a shut out for Franker, winning every round. Will the judges agree? They are the ones who matter, even if they are often depressingly incompetent. Over to the ring announcer for the scorecards.
Ladies and gentlemen, after 3 rounds of action, we go to the scorecards for a decision.
Judge Hugh Johnson scores the fight 30:27
Judge Chris Dean scores the fight 30:27
Judge Ben Hemmingworth scores the fight 30:27
In favor of your winner, by unanimous decision... Bob Franker!
|
|
|
|
|
|
|
|
|
|
|
|
|
|
|
|
|
|
|
|
|
|
|
| S |
C
A |
G |
S |
C
B |
G |
|
S |
C |
G |
|
energy
A | B |
|
hype
A | B |
|
pop
A | B |
|
mgr
A | B |
|
FIGHT
RATING
37% |
|
|
|
|
|
|
|
Undercard bout
|
Coming up we have a light heavyweight MMA rules bout between Daisuke Arai (ranked 5014 p4p, 5082 weight class) and Ryozo Nishimura (ranked 578 p4p, 587 weight class). We have two fighters making their debuts here, so let's see who comes out of this one with their first professional victory.
 |
|
 |
| 187 cm
18
221
0 - 0 - 0 |
|
186 cm
18
220
0 - 0 - 0 |
BJJ Purple Belt
Counter fighter
Cardio machine |
|
BJJ White Belt
Solid Muay Thai
Good gas tank |
|
| |
|
Ladies and gentlemen. This fight is 3 rounds, in the light heavyweight division.
Introducing the fighter to my left, fighting out of the red corner.
With a record of 0 - 0 - 0, fighting out of Las Vegas, Daisuke Arai!
And introducing the fighter to my right, fighting out of the blue corner.
With a record of 0 - 0 - 0, fighting out of London, Ryozo Nishimura!
The judges for this bout are Topper Green, Darius Henderson and Donatello Bradman.
The bell rings for round one and we are underway!
Arai throws a right and a left that both miss.
Arai throws a hook to the side of Nishimura's head but Nishimura sees it coming and ducks under it beautifully.
Arai pushing out the jab but it's not landing.
Ryozo Nishimura seems to be the more aggressive standup fighter in this bout.
Nishimura misses with a leg kick

and Arai counters with a driving takedown into guard. Nice work there by Arai.

Nishimura has butterfly guard. He's looking to stand up here. He pushes Arai off him and springs to his feet nicely. The crowd applauds.
Arai looks for a takedown. He's got it. We're now in half guard.
The crowd are loving this. Great action here.
Arai looks over to his corner - he wants some instructions but his corner are not responding.

Arai maintaining the dominant position here and is working for a kimura. He's locked it up! Nishimura could be in real trouble here! He's trying to wriggle out but Arai has cracked it and Nishimura is screaming in pain - he's tapped out! Great finish by Arai!
Ladies and gentlemen, after 1:59 of round 1, we have a winner by way of Submission (Kimura). Daisuke Arai!
|
|
|
|
|
|
|
|
|
|
|
|
|
|
|
|
|
|
|
|
|
|
|
| S |
C
A |
G |
S |
C
B |
G |
|
S |
C |
G |
|
energy
A | B |
|
hype
A | B |
|
pop
A | B |
|
mgr
A | B |
|
FIGHT
RATING
83% |
|
|
|
|
|
|
|
Undercard bout
|
Coming up we have a middleweight MMA rules bout between Kohinata Minoru Ii (ranked 2271 p4p, 4234 weight class) and Jonathan Couturier (ranked 327 p4p, 533 weight class). Both these guys have really solid chins. Will we see a standup war or will they both decide that a knockout is unlikely and try to win the fight elsewhere?
 |
|
 |
| 185 cm
26
186
4 - 2 - 0 |
|
187 cm
20
201
3 - 4 - 0 |
BJJ White Belt
Excellent MT
Granite chin |
|
BJJ Blue Belt
Excellent MT
Good gas tank |
|
| |
|
Ladies and gentlemen. This fight is 3 rounds, in the middleweight division.
Introducing the fighter to my left, fighting out of the red corner.
With a record of 4 - 2 - 0, fighting out of London, Kohinata Minoru Ii!
And introducing the fighter to my right, fighting out of the blue corner.
With a record of 3 - 4 - 0, fighting out of Tokyo, Jonathan Couturier!
The judges for this bout are Steve Erwin, Ron Honeybunn and Skip Squint.
The bell rings for round one and we are underway!
Couturier throws a hook to the body but it doesn't connect.
Couturier loads up on a big right hand but Minoru Ii slips the punch.
Minoru Ii throws a body shot but no joy.
Couturier doesn't fully commit to the body shot counter.
Nice defenses there by Minoru Ii.
Couturier throws a hook to the body but it doesn't connect.
Couturier with a nice cross.
Couturier misses the jab.
Minoru Ii tries to close the distance and clinch but Couturier swats him to one side with an open hand palm strike and circles away.
Couturier has been spending a lot of time sparring his boxing in the run up to the fight, trying to sharpen up those hands and look for a knockout.
Couturier throws a lazy right hand but Minoru Ii sees it coming a mile off and sidesteps it easily.
Minoru Ii moves in looking to clinch but Couturier pushes him off.
Minoru Ii moving in and out of range nicely, whilst landing the scoring shot.
We've had a slow start to the round here - hopefully the action picks up.
Minoru Ii gets to the clinch - let's see what his plan is here.
Couturier lands a hook that snaps the head of Minoru Ii backwards.
The referee is keeping an eye on Couturier - much more stalling and he will separate the fighters.
Couturier misses with some punches.
Couturier slowing the pace effectively.
Minoru Ii throws a head punch that misses.
That's one minute gone in the round.
A short right from Couturier.
Minoru Ii lands an uppercut.
A quick uppercut on the inside from Couturier.
Couturier blocks a body shot from Minoru Ii.
Still in the clinch, Couturier scores with a nice short uppercut.
Couturier has a couple of punches blocked by Minoru Ii.
Couturier prevents a body shot from Minoru Ii.
Couturier misses with a punch on the inside.
Couturier stalling the fight.
Minoru Ii swings wildly with an uppercut but Couturier uses good head movement to avoid it.
Minoru Ii swings away with an uppercut that misses.
Couturier controlling the action here for a moment.
A bit of stalling here from Couturier.
Minoru Ii softening up his opponent with strikes, against the cage.
Couturier blocks a body shot from Minoru Ii.
Couturier throws a punch but it's blocked by Minoru Ii.
Minoru Ii lands punches inside but they're not really causing much damage.
Couturier blocks a body shot from Minoru Ii.
Couturier slowing the pace effectively.
That's two minutes gone in the round.
This has been an exciting period of action!
Couturier dictating the pace here, as the fighters clinch against the cage.
Couturier trying to stall but Minoru Ii improves his position.
Couturier tries to stall but Minoru Ii uses the opportunity to gain a better position.
The ref breaks the fighters up, due to lack of action by Jonathan Couturier.
Couturier on the wrong end of an overhand right that came out of nowhere.
Couturier scores with a punch to the head.
Minoru Ii gets in close and instigates a clinch.
Minoru Ii can't find room to land a body shot as Couturier controls the action.
A right hook to the body lands for Minoru Ii.
Couturier tried to land a shot to the body but connects with Minoru Ii's elbow.
Minoru Ii tries to land a shot to the body but it's blocked.
A left hand lands to the body for Minoru Ii.
Minoru Ii misses with a punch to the body.
Minoru Ii lands a body punch in the clinch.
Couturier looks winded!
With the fighters clinched against the cage, Minoru Ii creates a bit of distance for himself and scores with a nice uppercut.
Minoru Ii lands a shot to the body.
Minoru Ii can't find room to land a body shot as Couturier controls the action.
Couturier taking a breather.
Minoru Ii goes for a body shot but it's blocked.
Couturier tries a shoulder strike but it doesn't do any damage.
That's three minutes gone in the round.
Minoru Ii digs a right hand underneath Couturier's ribcage. Couturier let out a lung full of air as it connected.
Minoru Ii misses with a body punch.
Minoru Ii tried to land a shot to the body but connects with Couturier's elbow.
Couturier lands an uppercut.
Couturier tries to throw a body punch but Minoru Ii avoids it by throwing Couturier back against the cage.
Good body shot from Minoru Ii.
A short right from Couturier.
Minoru Ii lands a hook to the side of the head.
Couturier lands a right uppercut that snaps the head of Minoru Ii backwards.
Minoru Ii misses with a hook to the ribs.
Good body shot from Minoru Ii.
Minoru Ii struggles to land a body shot inside as Couturier controls his hands.
Couturier blocks a body shot from Minoru Ii.
Minoru Ii digs a right hand underneath Couturier's ribcage. Couturier let out a lung full of air as it connected.
Minoru Ii misses with a body punch.
Minoru Ii scores with a hook to the body.
Minoru Ii lands a body shot.
Minoru Ii lands on the inside with an uppercut.
Minoru Ii lands a left hand.
This is a great period of action - very entertaining stuff!
A shot in the inside from Minoru Ii.
Minoru Ii lands a left hand.
A short uppercut from Minoru Ii.
That's four minutes gone in the round.
Minoru Ii lands a hook to the body. It's hard to tell if that hurt Couturier or not.
Minoru Ii goes for a body shot but it's blocked.
Minoru Ii lands a shoulder strike.
Minoru Ii misses with a shot to the kidneys.
Minoru Ii tries to throw a body punch but Couturier avoids it by throwing Minoru Ii back against the cage.
Minoru Ii lands a body punch - he's looking to wear down Couturier.
Minoru Ii is leaning against Couturier and scores with a nice uppercut to the body.
Couturier prevents a body shot from Minoru Ii.
Minoru Ii tries to work over Couturier's body with a swooping hook but it only glances the target.
Minoru Ii lands a left hand that snaps the head of Couturier backwards.
Minoru Ii lands a body punch in the clinch.
Couturier is trying to slow down the pace in the clinch, to catch his breath.
Minoru Ii lands a body shot.
Minoru Ii lands a shot to the body.
Minoru Ii misses with a punch to the body.
Minoru Ii blocks a punch to the side of the head.
Minoru Ii misses with a body punch.
Minoru Ii tried to land a shot to the body but connects with Couturier's elbow.
Minoru Ii tries to land a shot to the body but it's blocked.
Minoru Ii lands a right hand that snaps the head of Couturier backwards.
And that is the end of the round. The fighters go back to their corners.
Kohinata Minoru Ii dominated that round.
OK. That's time! The bell goes and we're back to the action.
A big left from Couturier misses.
Couturier clinches with his opponent.
Minoru Ii lands with a short head shot on the inside.
Couturier misses with the head strike.
Couturier prevents a body shot from Minoru Ii.
Minoru Ii lands punches inside but they're not really causing much damage.
Minoru Ii lands a nice uppercut.
An uppercut on the inside fails to land for Minoru Ii.
An uppercut on the inside fails to land for Minoru Ii.
An uppercut on the inside fails to land for Couturier.
A body shot lands from Minoru Ii.
Couturier struggles to land a body shot inside as Minoru Ii controls his hands.
Minoru Ii struggles to land a body shot inside as Couturier controls his hands.
Minoru Ii softening up his opponent with strikes, against the cage.
Minoru Ii lands a shoulder strike.
A short body shot lands from Minoru Ii as the two fighters clinch.
Minoru Ii pushes Couturier back against the cage and unloads with a body punch.
Fantastic stuff here - a very entertaining period of action, which has drawn cheers from the crowd.
Minoru Ii lands a right hand.
Minoru Ii misses with a hook to the ribs.
Couturier is breathing heavily.
Minoru Ii misses with a shot to the kidneys.
Minoru Ii lands a right hand that snaps the head of Couturier backwards.
Minoru Ii is really dominating this fight. Is there anything that Couturier can do to turn this around?
That's one minute gone in the round.
Minoru Ii lands a left hand.
Kohinata Minoru Ii has scored more points in the clinch so far.
Minoru Ii struggles to land a body shot inside as Couturier controls his hands.
Minoru Ii can't find room to land a body shot as Couturier controls the action.
Minoru Ii lands a right uppercut that snaps the head of Couturier backwards.
Minoru Ii tries to land a shot to the body but it's blocked.
Minoru Ii lands with a right to the head.
Couturier is looking to control Minoru Ii's arms but Minoru Ii gets an underhook and turns him. Now Couturier has his back to the cage.
Minoru Ii blocks a punch to the side of the head.
Couturier throws a head punch that misses.
Minoru Ii lands a hook that snaps the head of Couturier backwards.
Minoru Ii misses with a hook to the ribs.
Minoru Ii lands a nice shot to the body.
Couturier can't find room to land a body shot as Minoru Ii controls the action.
Minoru Ii tries a body shot but Couturier blocks it.
Minoru Ii misses with a body punch.
Minoru Ii lands a hook to the side of the head.
With the fighters clinched against the cage, Minoru Ii creates a bit of distance for himself and scores with a nice uppercut.
Minoru Ii doesn't land with the attempted body shot.
Minoru Ii tries to work over Couturier's body with a swooping hook but it only glances the target.
Minoru Ii blocks a punch to the side of the head.
Nice body punch from Minoru Ii - that landed with a thud.
That's two minutes gone in the round.
Couturier lands with a right to the head.
This has been an exciting period of action!
Minoru Ii misses with some punches.
A nice right hand lands inside from Minoru Ii.
A head punch on the inside from Couturier fails to land.
Minoru Ii lands with a left to the head.
 It looks like Jonathan Couturier has been cut. It looks like Jonathan Couturier has been cut.
Couturier's head jolts backwards as he takes an uppercut right on the button!
Minoru Ii goes for a body shot but it's blocked.
Couturier misses with a hook from the clinch.
Minoru Ii tries to land a shot to the body but it's blocked.
Couturier looking to slow down the pace here.
Minoru Ii throws a blind hook that connects with the side of Couturiers head.
Couturier is trying to stall.
Minoru Ii tries to throw a body punch but Couturier avoids it by throwing Minoru Ii back against the cage.
Minoru Ii misses with a punch to the body.
Minoru Ii lands on the inside with an uppercut.
Minoru Ii misses with a body punch.
Couturier prevents a body shot from Minoru Ii.
Minoru Ii doesn't land with the attempted body shot.
Couturier is trying to maintain a safe position but Minoru Ii gets an underhook and turns Couturier into the cage.
That's three minutes gone in the round.
Minoru Ii misses with a body punch.
Minoru Ii digs a right hand into Couturier's ribs. Those have got to be taking their toll on Couturier's gas tank.
Couturier throws a head punch that misses.
Both guys are working to get underhooks.
Minoru Ii can't find room to land a body shot as Couturier controls the action.
Minoru Ii struggles to land a body shot inside as Couturier controls his hands.
A body shot lands from Minoru Ii.
A hook to the body from Minoru Ii.
Minoru Ii lands with a quick shot inside that doesn't really do much damage.
Minoru Ii lands with a quick shot inside that doesn't really do much damage.
Minoru Ii scores with an uppercut up the middle.
With the fighters clinched against the cage, Minoru Ii creates a bit of distance for himself and scores with a nice uppercut.
Minoru Ii makes some space for himself and lands an uppercut.
Minoru Ii digs a right hand underneath Couturier's ribcage. Couturier let out a lung full of air as it connected.
A short right from Minoru Ii.
Good body shot from Minoru Ii.
Minoru Ii can't find room to land a body shot as Couturier controls the action.
Minoru Ii lands a nice looking hook to the body, against the cage.
We've seen a great period of action over the last minute or so - credit to both fighters for going all out!
Minoru Ii scores with a nice hook to the head.
Minoru Ii lands a left hand that snaps the head of Couturier backwards.
That's four minutes gone in the round.
Nice body punch from Minoru Ii - that landed with a thud.
Minoru Ii lands a body punch.
Minoru Ii goes for a body shot but it's blocked.
Minoru Ii presses Couturier against the cage and delivers a mid-strength body shot.
Minoru Ii tries to throw a body punch but Couturier avoids it by throwing Minoru Ii back against the cage.
Nice body punch from Minoru Ii.
Minoru Ii cracks Couturier with a nice body shot.
Minoru Ii tries to work over Couturier's body with a swooping hook but it only glances the target.
Minoru Ii lands with a left to the head.
Minoru Ii makes some space for himself and lands an uppercut.
Minoru Ii tried to land a shot to the body but connects with Couturier's elbow.
Minoru Ii tried to land a shot to the body but connects with Couturier's elbow.
Minoru Ii working on landing some head shots here - that one got through nicely.
Minoru Ii doesn't land with the attempted body shot.
Minoru Ii goes for a body shot but it's blocked.
A right hand to the body from Minoru Ii.
The crowd applaud the fighters' efforts here as the round comes to an end.
Couturier prevents a body shot from Minoru Ii.
Minoru Ii struggles to land a body shot inside as Couturier controls his hands.
Couturier misses with a hook from the clinch.
Minoru Ii tries to throw a body punch but Couturier avoids it by throwing Minoru Ii back against the cage.
Minoru Ii misses with a body punch.
And that is the end of the round. The fighters go back to their corners.
Kohinata Minoru Ii dominated that second round.
The cut man is working on Jonathan Couturier's cut.
That's time! Minoru Ii's corner gives him a slap on the ass as he gets ready to fight. So, we enter the final round. Let's see if either fighter can bring us a finish, or whether we're going to the judges scorecards.
Minoru Ii is looking to clinch but Couturier is avoiding it.
Couturier circles away from the clinch attempt.
Couturier scores with a reasonable looking shot to the body. Minoru Ii doesn't seem bothered though.
Couturier throws out a token jab with nothing on it.
Minoru Ii is looking to counter the offense by Couturier and move into the clinch.
Minoru Ii fails in his attempt to clinch.
Minoru Ii uses some good footwork to avoid the body shot by Couturier.
Minoru Ii tries to clinch but is not successful on this occasion.
Minoru Ii has managed to clinch.
An uppercut to the body lands inside from Minoru Ii.
Minoru Ii lands a left hand that snaps the head of Couturier backwards.
We've had a slow start to the round here - hopefully the action picks up.
Minoru Ii lands with a short head shot on the inside.
Couturier throws a head punch that misses.
Couturier stalling in the clinch but Minoru Ii improves position.
Couturier is trying to maintain a safe position but Minoru Ii gets an underhook and turns Couturier into the cage.
Couturier seems frustrated at his inability to get double underhooks.
Couturier is looking to control Minoru Ii's arms but Minoru Ii gets an underhook and turns him. Now Couturier has his back to the cage.
Couturier takes a big intake of breath there - he's definitely tired.
Couturier is trying to maintain a safe position but Minoru Ii gets an underhook and turns Couturier into the cage.
Minoru Ii softening up his opponent with strikes, against the cage.
That's one minute gone in the round.
Minoru Ii scores with a nice hook to the head.
Minoru Ii tries a body shot but Couturier blocks it.
A body shot lands from Minoru Ii.
Couturier misses with a short punch on the inside.
A head punch blocked on the inside by Minoru Ii.
Minoru Ii lands a shoulder strike that jolts his opponent's head backwards.
Minoru Ii misses with a shot to the kidneys.
Minoru Ii misses with a hook to the ribs.
Minoru Ii tries to work over Couturier's body with a swooping hook but it only glances the target.
Couturier is trying to maintain a safe position but Minoru Ii gets an underhook and turns Couturier into the cage.
Minoru Ii lands a body punch in the clinch.
Couturier fails to land with a short punch on the inside.
Minoru Ii tried to land a shot to the body but connects with Couturier's elbow.
Minoru Ii tries a shoulder strike but it doesn't do any damage.
Minoru Ii can't find room to land a body shot as Couturier controls the action.
Nice body punch from Minoru Ii - that landed with a thud.
Minoru Ii tried to land a shot to the body but connects with Couturier's elbow.
Minoru Ii lands a hook to the side of the head.
A short right from Minoru Ii.
Minoru Ii blocking some punches.
Couturier swings wildly with an uppercut but Minoru Ii uses good head movement to avoid it.
That's two minutes gone in the round.
Couturier wants to stall.
Minoru Ii misses with a shot to the kidneys.
Minoru Ii struggles to land a body shot inside as Couturier controls his hands.
Couturier trying to stall but Minoru Ii improves his position.
Minoru Ii working some nice short punches in the clinch.
The crowd are loving this. Great action here.
Couturier blocks a couple of punches on the inside.
Come on Couturier - let's have some action - none of this stalling nonsense.
Minoru Ii pushes Couturier back against the cage and lands a hook to the side of the head.
Couturier lands a body shot.
Minoru Ii doesn't land with the attempted body shot.
Minoru Ii lands a body punch.
Minoru Ii digs a right hand underneath Couturier's ribcage. Couturier let out a lung full of air as it connected.
Minoru Ii misses with a hook to the ribs.
Minoru Ii digs a right hand into Couturier's ribs. Those have got to be taking their toll on Couturier's gas tank.
Minoru Ii working on landing some head shots here - that one got through nicely.
Minoru Ii lands a short shot on the inside that snaps the head of Couturier backwards.
Minoru Ii doesn't land with the attempted body shot.
That's three minutes gone in the round.
Nice body punch from Minoru Ii - that landed with a thud.
Minoru Ii tries to throw a body punch but Couturier avoids it by throwing Minoru Ii back against the cage.
A nice right hand lands inside from Minoru Ii.
Minoru Ii tries a body shot but Couturier blocks it.
Minoru Ii lands a body punch - he's looking to wear down Couturier.
A short uppercut from Minoru Ii.
Minoru Ii tried to land a shot to the body but connects with Couturier's elbow.
Good body shot from Minoru Ii.
Minoru Ii softening up his opponent with strikes, against the cage.
Minoru Ii lands a body shot.
Jonathan Couturier has stepped it up - he knows he needs a finish here!
A body shot lands from Minoru Ii.
Minoru Ii throws a blind hook that connects with the side of Couturiers head.
Minoru Ii lands an uppercut.
Minoru Ii tries a body shot but Couturier blocks it.
A body shot lands from Minoru Ii.
A short left from Minoru Ii.
Minoru Ii lands a body shot in the clinch.
This has been an exciting period of action!
Minoru Ii is leaning against Couturier and scores with a nice uppercut to the body.
Minoru Ii misses with a hook to the ribs.
A nice left hand lands by Minoru Ii.
That's four minutes gone in the round.
A body shot lands from Minoru Ii.
Minoru Ii lands a short shot on the inside that snaps the head of Couturier backwards.
Couturier prevents a body shot from Minoru Ii.
A short left from Minoru Ii.
Nice body punch from Minoru Ii - that landed with a thud.
Minoru Ii tried to land a shot to the body but connects with Couturier's elbow.
Minoru Ii lands with a good tight uppercut to the head.
Minoru Ii lands with a good tight uppercut to the head.
Both guys are working to get underhooks.
Minoru Ii blocks a body shot from Couturier.
Minoru Ii misses with a hook to the ribs.
Couturier blocks a body shot from Minoru Ii.
Minoru Ii lands with a right to the head.
Minoru Ii lands with a short shot to the head.
Couturier is rocked!
A nice right hand lands inside from Minoru Ii.
Couturier is still on wobbly legs! Can Minoru Ii finish him?
A head punch on the inside from Couturier fails to land.
Couturier lands a left hand.
Minoru Ii cracks Couturier with a nice body shot.
Minoru Ii doesn't land with the attempted body shot.
Kohinata Minoru Ii is fighting for a decision here - he's started to take the cautious approach.
Minoru Ii lands with a right to the head.
Nice body punch from Minoru Ii - that landed with a thud.
And that's the end of the fight!
Kohinata Minoru Ii showed his dominance in that final round.
Well I reckon that's a shut out for Minoru Ii, winning every round. Will the judges agree? They are the ones who matter, even if they are often depressingly incompetent. Over to the ring announcer for the scorecards.
Ladies and gentlemen, after 3 rounds of action, we go to the scorecards for a decision.
Judge Steve Erwin scores the fight 30:27
Judge Ron Honeybunn scores the fight 30:27
Judge Skip Squint scores the fight 30:27
In favor of your winner, by unanimous decision... Kohinata Minoru Ii!
Kohinata Minoru Ii seemed lost for words in his post fight interview but he remembered to thank his fans and directed everyone to his website.
|
|
|
|
|
|
|
|
|
|
|
|
|
|
|
|
|
|
|
|
|
|
|
| S |
C
A |
G |
S |
C
B |
G |
|
S |
C |
G |
|
energy
A | B |
|
hype
A | B |
|
pop
A | B |
|
mgr
A | B |
|
FIGHT
RATING
74% |
|
|
|
|
|
|
|
Undercard bout
|
Coming up we have a light heavyweight MMA rules bout between Kambei Shimada (ranked 1162 p4p, 3481 weight class) and Robert Munson (ranked 158 p4p, 450 weight class). Shimada comes to the cage accompanied by Seven Samurai. Both fighters look fresh as a daisy as they make their way towards the cage.
 |
|
 |
| 195 cm
26
215
6 - 1 - 0 |
|
188 cm
22
210
2 - 1 - 0 |
Decent wrestler
Great elbows
Granite chin |
|
BJJ Brown Belt
World class MT
Good gas tank |
|
| |
|
Ladies and gentlemen. This fight is 3 rounds, in the light heavyweight division.
Introducing the fighter to my left, fighting out of the red corner.
With a record of 6 - 1 - 0, fighting out of Montreal, Kambei Shimada!
And introducing the fighter to my right, fighting out of the blue corner.
With a record of 2 - 1 - 0, fighting out of Los Angeles, Robert Munson!
The judges for this bout are Damien Edna, Topper Green and Skip Squint.
The bell rings for round one and we are underway!
Shimada closes the distance and presses his opponent up against the cage.
Munson's head jolts backwards as he takes an uppercut right on the button!
Munson can't find room to land a body shot as Shimada controls the action.
Shimada throws a punch but it's blocked by Munson.
Munson misses with a punch on the inside.
Munson working some nice short punches in the clinch.
Shimada presses Munson against the cage and delivers a mid-strength body shot.
Munson lands a nice uppercut.
Shimada scores with an uppercut up the middle.
Shimada misses with a shot to the kidneys.
Munson lands a nice elbow.
Munson lands a glancing elbow in the clinch.
It looks like Kambei Shimada has been cut.
A nice left hand lands by Shimada.
This is a great period of action - very entertaining stuff!
Shimada tries to land a shot to the body but it's blocked.
Munson throws a punch but it's blocked by Shimada.
Shimada misses with a shot to the kidneys.
Munson pushes Shimada back against the cage and unloads with a body punch.
Shimada working aggressively here.
Munson looks to throw an elbow but misses.
Shimada misses with a punch on the inside.
Shimada throws a punch but it's blocked by Munson.
A short right hand to the side of the head by Munson.
That's one minute gone in the round.
Shimada breaks the clinch and we're back to striking at distance.
Munson lands an overhand left. A wild punch that just about connected.
Shimada swings for the body but Munson moves out of range.
Munson takes a shot right to the bread basket.
Munson paws at his opponent with the jab and then lunges in with a straight, right on the button.
Shimada throws a combination that misses
and Shimada takes a counter punch right on the button for his troubles.
Munson blocks a jab.
A little jabbing left from Munson on the counter but it doesn't find it's target.
Shimada looks to clinch
enabling Munson to counter with a crisp jab.
Munson scores with a jab to the body.
Shimada with a jab.
Shimada throws an off balance right hand
and Munson counters with a quick right hand to the jaw.
This has been an exciting period of action!
Shimada wants to clinch.
That's two minutes gone in the round.
Munson throws a body kick that digs right into the meat.
Shimada throws a looping overhand right but Munson ducks down to avoid it.
Shimada throws a nice hook to the body that draws an oooh from the crowd.
Munson scores with a spinning back kick!
Munson staying out of range there.
Shimada has Munson up against the cage in a clinch.
A right hand to the body from Shimada.
Munson tries a body shot but Shimada blocks it.
Shimada's corner calls for him to break the clinch, which he does.
Shimada tries to clinch but Munson moves away
and Munson counters with a lovely shot to the body.
Munson lands a front kick.
That's three minutes gone in the round.
Munson with a jab.
Shimada tries to clinch but Munson is having none of it.
Munson swings away with a counter right hand but no contact made.
Shimada is looking to take this fight into the clinch.
Munson uses good footwork to get in and out and land a nice right hand before Shimada has time to react.
Shimada missing with a left hand there. Munson was out of range so wasted energy throwing that one.
Decent striking displayed by Munson there.
Shimada fails in his attempt to clinch.
Munson fakes and then throws a beautiful body shot. Shimada looks a bit winded and takes a step backwards to take a breath.
Munson connects with a lovely right hand, straight down the pipe.
Shimada gets to the clinch - let's see what his plan is here.
Shimada misses with a hook from the clinch.
Shimada doesn't land with the attempted body shot.
That's four minutes gone in the round.
Shimada fails to land with a short punch on the inside.
Shimada misses with a hook to the ribs.
Shimada misses with some punches.
Shimada misses with some punches.
Shimada tries a body shot but Munson blocks it.
Shimada stalling in the clinch but Munson improves position.
Our sources have told us that Shimada has been working on his elbows in the gym.
Munson comes over the top with an elbow. That landed flush.
We've seen a great period of action over the last minute or so - credit to both fighters for going all out!
Munson lands a right hand that snaps the head of Shimada backwards.
Munson working on landing some head shots here - that one got through nicely.
Munson's corner calls for him to break the clinch, which he does.
Munson lands with a thumping leg kick.
Munson with a hook.
Shimada darts in trying to clinch
and Munson counters with a nice uppercut.
Shimada closes the distance and presses his opponent up against the cage.
And that is the end of the round. The fighters go back to their corners.
Robert Munson dominated that round.
The cut man is working on Kambei Shimada's cut.
The fighters' corners scream their final instructions, as the referee calls time. Here we go, back to the action!
Munson swats away the attempt to clinch by Shimada.
Munson was about to counter that last move with a leg kick but changes his mind.
Shimada misses with an uppercut
and Munson counters with an outside leg kick.
Robert Munson seems to be getting the better of the standup.
Shimada tries to clinch but Munson is having none of it.
Munson gets tackled into the cage by Shimada. Shimada maintains the clinch.
Munson lands with a short shot to the head.
Munson works on Shimada's body with a couple of short punches.
Munson jumps guard but Shimada turns him against the cage and keeps the fight standing.
Shimada has a couple of punches blocked by Munson.
Munson pushes Shimada back against the cage and lands a hook to the side of the head.
Munson lands a nice looking hook to the body, against the cage.
We've had a slow start to the round here - hopefully the action picks up.
Munson throws an elbow that misses.

Munson pulls guard effortlessly.

Munson looking to try and escape his hips here, looking for a submission. It looks like he's going for a triangle but Shimada is defending well. Munson quickly switches to an armbar and extends the arm! Shimada has no choice but to tap, to a very quick submission! Wow, that was lightning fast! Munson celebrates on the cage, with the crowd.
Ladies and gentlemen, after 1:56 of round 2, we have a winner by way of Submission (Armbar). Robert Munson!
Kambei Shimada was interviewed post fight and said 'I commit seppuku tomorrow'.
|
|
|
|
|
|
|
|
|
|
|
|
|
|
|
|
|
|
|
|
|
|
|
| S |
C
A |
G |
S |
C
B |
G |
|
S |
C |
G |
|
energy
A | B |
|
hype
A | B |
|
pop
A | B |
|
mgr
A | B |
|
FIGHT
RATING
61% |
|
|
|
|
|
|
|
Undercard bout
|
Coming up we have a heavyweight MMA rules bout between James Fury (ranked 1719 p4p, 2532 weight class) and Steven Shewmaker (ranked 228 p4p, 309 weight class). Fury comes to the cage accompanied by Astronaut in the ocean. Both fighters look fresh as a daisy as they make their way towards the cage.
 |
|
 |
| 200 cm
21
265
6 - 3 - 0 |
|
200 cm
28
270
4 - 2 - 0 |
BJJ Brown Belt
Excellent boxer
Good chin |
|
BJJ Brown Belt
Brawler
Solid chin |
|
| |
|
Ladies and gentlemen. This fight is 3 rounds, in the heavyweight division.
Introducing the fighter to my left, fighting out of the red corner.
With a record of 6 - 3 - 0, fighting out of Amsterdam, James Fury!
And introducing the fighter to my right, fighting out of the blue corner.
With a record of 4 - 2 - 0, fighting out of Las Vegas, Steven Shewmaker!
The judges for this bout are Topper Green, Francis DeMontford and Summer Carpenter.
The bell rings for round one and we are underway!
Fury sizes up Shewmaker with a pawing jab and scores with a straight right down the middle.
Fury showing good head movement there, avoiding the strikes from Shewmaker.
Shewmaker throws a looping left and ducks down for a takedown. He's got his arms around Fury's waist but Fury gets an underhook and avoids the takedown by throwing Shewmaker off to one side.
Fury is trying hard to land a takedown here. Shewmaker sprawls well and keeps this one on the feet.
Shewmaker drops down looking to force a counter takedown but Fury defends it well.
Fury shoots in and scores a nice double leg takedown into half guard.
Fury trying to control from half guard but Shewmaker is working away.
Fury is taking a breather. Shewmaker says something to him but it's hard to make out. Perhaps he's telling him to get on with it and actually do something.
Fury is trying to work for a kimura. This could be trouble! No, Shewmaker has managed to free his arm - good work.
We've had a slow start to the round here - hopefully the action picks up.
Shewmaker is controlling Fury's trapped leg to prevent Fury from advancing to side control.
Fury is working for a kimura but Shewmaker is defending it quite comfortably.
That's one minute gone in the round.
Shewmaker is looking to sinch up a guillotine here but Fury pulls his head out easily.
Shewmaker is looking for a sweep. Fury is wise to his cunning plan and keeps the top position.
Fury is trying for a guillotine from the top but the pressure isn't in the right place so Shewmaker is just riding it out for now. Fury eventually gives up the hold.
Fury is working for a submission of some sort.
Shewmaker works his way to full guard. Good work.
That's two minutes gone in the round.
There's not a lot going on here and the crowd are letting the fighters know they're not willing to tolerate a lack of action.
Fury pressing down on his opponent's thigh, looking to pass guard. Shewmaker is keeping the position for now.
Shewmaker working a defensive guard here.
The fighters are pressed up against the cage, both looking to find a bit of space to work.
Fury pressing down on his opponent's thigh, looking to pass guard. Shewmaker is keeping the position for now.
Fury trying to control the position from guard on top but Shewmaker is wriggling around, looking for whatever he can.
Shewmaker pushes a forearm under Fury's chin to create some space. He's escaped his hips and pivoted quickly for an armbar! Can he extend the arm? Yes, Fury is tapping out! Damn, that was fast!
Ladies and gentlemen, after 3:58 of round 1, we have a winner by way of Submission (Armbar). Steven Shewmaker!
A victorious Steven Shewmaker thanked his army of followers in his post fight interview, telling people to make sure they follow him on Twitter.
|
|
|
|
|
|
|
|
|
|
|
|
|
|
|
|
|
|
|
|
|
|
|
| S |
C
A |
G |
S |
C
B |
G |
|
S |
C |
G |
|
energy
A | B |
|
hype
A | B |
|
pop
A | B |
|
mgr
A | B |
|
FIGHT
RATING
29% |
|
|
|
|
|
|
|
Co-main event
|
Coming up we have a light heavyweight MMA rules bout between Pedro Barbosa Ii (ranked 1660 p4p, 1697 weight class) and Muchy Cartwright (ranked 219 p4p, 225 weight class). Cartwright comes into a darkened arena with his song building. Mauled kicks in, the lights come on and the crowd goes wild! What a showman! Both fighters look fresh as a daisy as they make their way towards the cage.
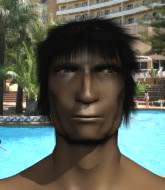 |
|
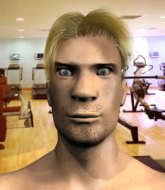 |
| 190 cm
26
205
5 - 0 - 0 |
|
192 cm
28
198
5 - 2 - 0 |
Good wrestling
Basic striking
Very quick |
|
BJJ Purple Belt
Excellent MT
Heavy handed |
|
| |
|
Ladies and gentlemen. This fight is 3 rounds, in the light heavyweight division.
Introducing the fighter to my left, fighting out of the red corner.
With a record of 5 - 0 - 0, fighting out of Hilo, Pedro Barbosa Ii!
And introducing the fighter to my right, fighting out of the blue corner.
With a record of 5 - 2 - 0, fighting out of Hilo, Muchy Cartwright!
The judges for this bout are Winston Howard, Ben Hemmingworth and Ron Honeybunn.
The bell rings for round one and we are underway!
Barbosa Ii circles away from the clinch attempt.
Barbosa Ii shoots in with a takedown attempt and he has Cartwright pinned against the cage. Cartwright gets the underhooks and manages to circle away.
Barbosa Ii ducks down and throws a hook to the body but Cartwright moves away.
Cartwright tries to clinch up.
Cartwright clinches.
Barbosa Ii has hold of one of Cartwright's legs. Cartwright is fighting the takedown attempt but Barbosa Ii gets the trip and lands the takedown into guard.
Cartwright working from the bottom, still in full guard. He's managed to get a loose triangle. Barbosa Ii doesn't seem to be doing much to defend here, obviously he feels comfortable in the position. Barbosa Ii manages to throw the legs off his shoulder and he's back into guard - no problem.
Cartwright is working from a closed guard but he's struggling to control his opponent.
We've had a slow start to the round here - hopefully the action picks up.
Barbosa Ii trying to control but Cartwright is working from the bottom.
Barbosa Ii drops back for a leg but he's not going to get it - he lets go and Cartwright dives on top into guard.

That's one minute gone in the round.
Barbosa Ii escapes his hips to the side and looks to be working for an armbar. Cartwright gives him a little smile and shakes his head. No chance.
Cartwright is taking a break and basically stalling. The referee will not allow him to do that for long.
Barbosa Ii working from the bottom, still in full guard. He's managed to get a loose triangle. Cartwright doesn't seem to be doing much to defend here, obviously he feels comfortable in the position. Cartwright manages to throw the legs off his shoulder and he's back into guard - no problem.
Barbosa Ii seems keen to control Cartwright's posture.

Cartwright decides he's had enough of playing guard and decides to stand. Come on Barbosa Ii, up you get!
Cartwright tries to clinch but is not successful on this occasion.
Muchy Cartwright is looking to keep the fight on the feet at all costs.
That's two minutes gone in the round.
The crowd are starting to boo a lack of action.
Barbosa Ii circles away from the clinch attempt.
Cartwright is looking to clinch but Barbosa Ii is avoiding it.
Cartwright gets caught on his heels momentarily as he allows Barbosa Ii to score an easy takedown into full guard.
The fighters are working up against the cage. Cartwright manages to wriggle his way back to his feet, so the fighters are now clinched against the cage.
Barbosa Ii blocks an elbow strike.
Barbosa Ii drops down for a takedown but doesn't get it.
Cartwright fails to land with a short punch on the inside.
Cartwright pushes off and fires off an elbow that misses, before clinching up again, against the cage.
Cartwright unloads a knee to the mid-section.
Cartwright lands a knee to the body.
That's three minutes gone in the round.
Cartwright misses with a body punch.
Cartwright scores with an uppercut up the middle.
Cartwright tries to land a knee to the head but Barbosa Ii blocks with his arms.
A short right hand to the side of the head by Cartwright.
Barbosa Ii is trying to work for a single leg takedown but Cartwright pulls him back up using the underhooks.
That's three failed takedown attempts in the round for Pedro Barbosa Ii. That's going to take a lot out of him.
Cartwright lands with a left to the head.
Barbosa Ii definitely looks more muscular than last time we saw him fight.
Cartwright tries to throw a body punch but Barbosa Ii avoids it by throwing Cartwright back against the cage.
Cartwright misses with a body punch.
Cartwright misses the knee to the body. Nice hip positioning from Barbosa Ii.
Cartwright connects with a nasty looking knee right to Barbosa Ii's face.
Barbosa Ii blocks a body shot from Cartwright.
A short left from Cartwright.
A nice left hand lands by Cartwright.
That's four minutes gone in the round.
Cartwright dictating the pace here, as the fighters clinch against the cage.
Cartwright throws a hook to the body. More of an arm punch but it's all scoring with the judges.
Barbosa Ii blocks a knee to the body. He'll have a nicely bruised forearm in the morning.
Cartwright misses with an elbow over the top.
Wooooo! Give it up for these two warriors! They are putting on a show!
Cartwright tries to land a knee to the head but misses.
Cartwright stalls.
Cartwright lands a nice looking hook to the body, against the cage.
Barbosa Ii avoids a wild elbow strike from Cartwright.
Cartwright tries a body shot but Barbosa Ii blocks it.
Cartwright lands a right uppercut that snaps the head of Barbosa Ii backwards.
Barbosa Ii blocking some punches.
And that is the end of the round. The fighters go back to their corners.
Muchy Cartwright dominated that round.
That's time! Back to the action!
Cartwright clinches up with Barbosa Ii and pushes him back against the cage.
The two fighters are working to gain dominance in the clinch.
Cartwright scores with a nice hook to the head.
Cartwright landing some nice looking knees to the body.
Cartwright scores with a shoulder strike.
Kneeeeees! The crowd are calling for knees to the body. Cartwright obliges.
Barbosa Ii blocks a body shot from Cartwright.
Cartwright tries a knee to the head but Barbosa Ii blocks it.
Cartwright working Barbosa Ii over with knees to the body.
We've had a slow start to the round here - hopefully the action picks up.
Barbosa Ii dodges an elbow strike from Cartwright.
Cartwright misses with a body punch.
Cartwright digs a right hand underneath Barbosa Ii's ribcage. Barbosa Ii let out a lung full of air as it connected.
Both fighters are absolutely exhausted here.
Cartwright landing knees to the head.
It looks like Pedro Barbosa Ii has been cut.
Cartwright lands with a short head shot on the inside.
That's one minute gone in the round.
Cartwright is looking to score with knees to the body. Maybe he'll change it up and go body then head. Barbosa Ii is defending well for now.
Cartwright tries to land a knee to the body but he is off balance and Barbosa Ii avoids it.
Barbosa Ii is working on a leg, looking for a takedown but Cartwright is defending well.
Cartwright lands a body punch.
Cartwright lands with a left to the head.
The pace really dropping off here, momentarily.
A right hand to the body from Cartwright.
Cartwright throws a vicious knee straight up the middle but Barbosa Ii blocks it with crossed arms.
Cartwright tries to work over Barbosa Ii's body with a swooping hook but it only glances the target.
Cartwright is looking to score with knees to the body. Maybe he'll change it up and go body then head. Barbosa Ii is defending well for now.
That's two minutes gone in the round.
Cartwright is clearly stalling here... Pick up the pace son.
Barbosa Ii has double underhooks and is working for a body lock takedown. He's got it. The fighters land in half guard but Cartwright regains guard immediately.
Cartwright is adopting a defensive guard.
Cartwright wants to sweep but no luck.
Cartwright throwing his legs up looking for a triangle.
Barbosa Ii wants to control from the top but Cartwright keeps moving.
That's three minutes gone in the round.
Barbosa Ii tries to free his leg and advance position but Cartwright is retaining full guard.
Cartwright looking for submissions off his back, moving his hips, looking for an opening.
Cartwright controlling the position.
Cartwright wants to stand but Barbosa Ii is controlling the position.
Cartwright keeping moving, preventing Barbosa Ii from controlling successfully.
Cartwright tries to land a sweep but no joy.
The ref warns both fighters not to hold the cage as they work up against the meshing.
Barbosa Ii trying to control the position from guard on top but Cartwright is wriggling around, looking for whatever he can.
The referee must be thinking about standing these guys back up.
Cartwright trying to keep a closed guard but Barbosa Ii is proving a slippery customer.

The referee has stepped in and called for a break in the action. We'll restart on the feet.
That's four minutes gone in the round.
Well. There's a bit of a lull in the action here and the crowd are starting to get restless.
Cartwright is looking to take this fight into the clinch.
Barbosa Ii shoots in for a takedown. He's persisting with it as Cartwright sprawls well. Cartwright wins this battle and keeps the fight standing. Barbosa Ii gets slowly back to his feet.
Barbosa Ii feints and then dives in with a takedown. That was a long way out but the feint bought him enough time to close the distance and complete the takedown. Now we'll play guard for a bit and see who can get the better of that position.

Cartwright manages to wriggle out and sneak his way back up to his feet, so the fighters are now clinched up against the cage.
Cartwright misses the knee to the body. Nice hip positioning from Barbosa Ii.
Cartwright stalling.
Barbosa Ii drops down looking for an ankle pick but Cartwright pulls his leg out and moves away.
That's three failed takedown attempts in the round for Pedro Barbosa Ii. That's going to take a lot out of him.
Barbosa Ii throws an uppercut from half a mile away. Cartwright sees it coming and avoids it easily.
And that is the end of the round. The fighters go back to their corners.
Muchy Cartwright showed his class in that round. I'd imagine he'll take it on all the scorecards.
The cut man is working on Pedro Barbosa Ii's cut.
The fighters get back to their feet, the hooter sounds and we're back to the action! The crowd applaud as we get ready to start the final round!
Barbosa Ii keeps the fight on the outside.
Cartwright tries to clinch up.
Cartwright tries to clinch there but Barbosa Ii circles away.
Cartwright has been the more effective fighter overall so far.
Cartwright doesn't manage to clinch there - Barbosa Ii circles away.
Cartwright instigates a clinch.
Barbosa Ii avoids a wild elbow strike from Cartwright.
Cartwright misses with a hook to the ribs.
Cartwright creates a bit of distance and throws an elbow that only just misses.
Barbosa Ii takes an elbow to the temple.
Barbosa Ii's head jolts backwards as he takes an uppercut right on the button!
We've had a slow start to the round here - hopefully the action picks up.
Still in the clinch, Cartwright scores with a nice short uppercut.
Barbosa Ii managing to block the knees to the body from Cartwright.
Cartwright landing knees to the head.
Barbosa Ii is rocked!
Barbosa Ii is trying to pull guard but Cartwright has him pressed against the cage.
That's one minute gone in the round.
Cartwright cracks Barbosa Ii with a nice body shot.
Muchy Cartwright seems to be working more effectively in the clinch in the fight so far.
Cartwright tries to work over Barbosa Ii's body with a swooping hook but it only glances the target.
Cartwright gets double underhooks to prevent a takedown attempt from Barbosa Ii.
Barbosa Ii has a body lock and is looking for a takedown. Cartwright is bouncing around trying to prevent the takedown and somehow he has indeed managed to stay on his feet.
That's three failed takedown attempts in the round for Pedro Barbosa Ii. That's going to take a lot out of him.
Both fighters are breathing heavily.
Cartwright lands with a left to the head.
Barbosa Ii works for the underhooks and manages to get a trip takedown into guard.
Cartwright kicks Barbosa Ii off and gets to his feet.
Cartwright moves in looking to clinch but Barbosa Ii pushes him off.
Cartwright gets in close and instigates a clinch.
Knees to the body from Cartwright.
Pedro Barbosa Ii has stepped it up - he knows he needs a finish here!
That's two minutes gone in the round.
Wooooo! Give it up for these two warriors! They are putting on a show!
A short left from Cartwright.
Cartwright stalling.
Cartwright content to slow the pace in the clinch.
Cartwright throws a knee to the head but misses.
Cartwright misses with an elbow strike.
Cartwright throws a nice elbow but it doesn't land.
Barbosa Ii blocks a knee to the body. He'll have a nicely bruised forearm in the morning.
A head punch on the inside from Cartwright fails to land.
Cartwright tries a knee to the head but Barbosa Ii blocks it.
Cartwright lands a right hand.
Cartwright has Barbosa Ii pushed against the cage.
Barbosa Ii drops down looking for an ankle pick but Cartwright pulls his leg out and moves away.
That's three minutes gone in the round.
Barbosa Ii throws the left hand but Cartwright avoids the punch easily.
Barbosa Ii misses with a looping left.
A countering left hand to the body from Cartwright misses.
Barbosa Ii closes the distance, clinches up and gets a nice trip takedown into side control. Very smooth.
Barbosa Ii tries for a kimura. Not really close to a finish though.
Cartwright tries to buck Barbosa Ii off but Barbosa Ii is having none of it.
Cartwright is working hard to escape and get back to his feet. After a battle for position, Barbosa Ii asserts his dominance and retains side control.
The fighters are pressed up against the cage, both looking to find a bit of space to work.
You can see the frustration on Cartwright's face, being in this tough position on the bottom.
Muchy Cartwright is fighting for a decision - hopefully he's judged it right and he's actually winning the fight.
That's four minutes gone in the round.
Cartwright is looking to regain half guard here but Barbosa Ii keeps moving and retains side control.
Barbosa Ii is chipping away with strikes.
Barbosa Ii throwing shots but missing, from side control.
Cartwright is pushing Barbosa Ii's head away, looking to escape. Barbosa Ii manages to hold on to the position though.
Cartwright is sneaking out the side here. He's bucked Barbosa Ii off and has taken his back!
Barbosa Ii tries to escape the position.
Cartwright has his opponent trapped and is landing shots. Not a good position for Barbosa Ii.
Fantastic stuff here - a very entertaining period of action, which has drawn cheers from the crowd.
Cartwright just keeping the dominant position. He can't wait too long though, otherwise the referee will stand them back up.
Barbosa Ii is in bad spot here.
And that's the end of the fight!
Muchy Cartwright comfortably won the final round on my scorecard.
I've got Cartwright winning every round here. Surely the decision will go his way and he'll pick up a well deserved decision victory. Over to the ring announcer for the scorecards.
Ladies and gentlemen, after 3 rounds of action, we go to the scorecards for a decision.
Judge Winston Howard scores the fight 27:30
Judge Ben Hemmingworth scores the fight 27:30
Judge Ron Honeybunn scores the fight 27:30
In favor of your winner, by unanimous decision... Muchy Cartwright!
Muchy Cartwright thanked the fans post fight for their support.
|
|
|
|
|
|
|
|
|
|
|
|
|
|
|
|
|
|
|
|
|
|
|
| S |
C
A |
G |
S |
C
B |
G |
|
S |
C |
G |
|
energy
A | B |
|
hype
A | B |
|
pop
A | B |
|
mgr
A | B |
|
FIGHT
RATING
47% |
|
|
|
|
|
|
|
Main event
|
Coming up we have a heavyweight MMA rules bout between Charles Luciano (ranked 418 p4p, 1096 weight class) and Zack Rize (ranked 61 p4p, 151 weight class). Rize comes into a darkened arena with his song building. Luke Combs - When It Rains It Pours kicks in, the lights come on and the crowd goes wild! What a showman! Buckle up people - heeeeeeeeeere we go!
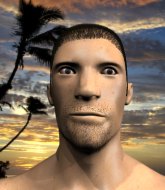 |
|
 |
| 190 cm
22
215
6 - 0 - 0 |
|
197 cm
20
260
8 - 1 - 0 |
Good wrestling
World class boxer
Cardio machine |
|
Good wrestler
Lethal high kicks
Good gas tank |
|
| |
|
Ladies and gentlemen. This fight is 5 rounds, for the heavyweight championship of the world!
Introducing the champion to my left, fighting out of the red corner.
With a record of 6 - 0 - 0, fighting out of New York, Charles Luciano!
And introducing the challenger to my right, fighting out of the blue corner.
With a record of 8 - 1 - 0, fighting out of Las Vegas, Zack Rize!
The judges for this bout are Winston Howard, Summer Carpenter and Darius Henderson.
The bell rings for round one and we are underway!
Rize throws a leg kick but he was too far away and it doesn't land.
Luciano is looking for a counter combo.
Luciano lands with a nice low kick. That'll leave a bruise.
Luciano swings wildly with a right hand that was never going to find it's target.
Rize scores with a crisp jab that stopped Luciano in his tracks.
Rize connects with a solid leg kick.
Rize scores with a jab to the jaw.
Rize throws a jab but it's blocked by Luciano.
Luciano fires out a quick counter leg kick but Rize just manages to avoid it.
A low kick from Luciano is predictable there
and Rize counters with a straight right hand.
Luciano thows a left - swing and a miss!
Rize tries to clinch
and Luciano counters with a series of strikes. Rize will be more careful next time no doubt.
Rize throws the left hand but Luciano avoids the punch easily.
Luciano appeared to be looking to counter that last move with a leg kick.
The crowd cheering loudly, showing their appreciation for the quality fight we're seeing here.
Luciano uses some good footwork to avoid the body shot by Rize.
Rize swings away with a leg kick that misses.
Luciano misses with a straight left.
Rize tries to counter by closing the distance.
That's one minute gone in the round.
Rize throws a jab but it's blocked by Luciano.
As Rize looks to move away, Luciano throws a big counter combo but Rize just gets out of the way.
Rize tries to land a leg kick but Luciano saw it coming and moves away.
Rize thows a leg kick but Luciano checks it
and Luciano counters with a left and a right that stings Rize.
Luciano keeping a good distance there, avoiding the body shot.
Rize pivots, looking for a leg kick but Luciano is out of range and Rize settles back down.
Rize connects with a leg kick. He turned his hip over nicely there.
Rize swings for the body but Luciano moves out of range.
Rize thuds his right hand into Luciano's forehead from close range. That could be painful for both fighters.
Luciano has been talking about how he's improved his wrestling in the run up to the fight so let's see if that's enough to sway the balance.
Rize misses with a lunging right hand
and Luciano counters with a lovely straight right hand!
Rize jabs Luciano right on the nose. Luciano blinks but takes it well.
Luciano staying out of range there.
Rize fakes high and swings low for a body shot but Luciano manages to avoid it.
Luciano lifts his leg as if looking to counter with a high kick.
Rize checks a low kick from Luciano.
That's two minutes gone in the round.
Rize misses with a low kick.
The crowd cheering loudly, showing their appreciation for the quality fight we're seeing here.
Rize misses with a jab to the body
and Luciano counters with a nice uppercut.
Luciano looks to score with a jab to the body but Rize is just out of range.
The fighters circling - Luciano throws out the jab but it was never going to land.
Luciano bobs and weaves well there to avoid the strikes.
It looked like Luciano was looking amped, ready to throw a big counter but didn't commit.
Rize fakes a jab and scores with a low kick.
Luciano defending well as Rize loads up on a big left hand.
Luciano appears to be looking for a counter punch to the body.
Rize looking to take his opponent's legs away with the low kicks.
Rize scoring well with a low kick there.
Rize throws a shot from downtown. Luciano moves away and avoids it.
Luciano feinted there with a counter leg kick.
Rize gets a clinch.
Rize misses with a punch to the body.
Luciano misses with some punches.
Rize scores with a shot to the side of Luciano's head.
That's three minutes gone in the round.
Luciano works on Rize's body with a couple of short punches.
Luciano throws a head punch that misses.
Rize lands with a quick shot inside that doesn't really do much damage.
An uppercut on the inside fails to land for Luciano.
Rize misses with a hook from the clinch.
Luciano struggles to land a body shot inside as Rize controls his hands.
Luciano fails to land with a short punch on the inside.
Luciano breaks from the clinch.
Rize throws a low kick but it's checked well by Luciano.
Luciano uses decent footwork to sidestep a right hand from Rize.
Luciano misses with a looping left.
Luciano throws a nice looking combination but Rize bobs and weaves to avoid any damage.
Luciano checks a low kick from Rize.
Rize fakes a jab and scores with a low kick.
Luciano throws a nice looking combination but Rize bobs and weaves to avoid any damage.
A low kick from Luciano misses
enabling Rize to counter with a crisp jab.
That's four minutes gone in the round.
Luciano connects with a leg kick. He turned his hip over nicely there.
Rize attempts a leg kick but it's missed by a good margin.
And Luciano counters with a quick kick to the body but Rize blocks it.

Oooooh!!! Rize has knocked Luciano down with a huge combo! Rize steps away and waves a wobbly Luciano back to his feet! This one might not go much longer!
Luciano is rocked!
The fans in attendance giving it up for the two fighters, who have really let it all hang out in the last minute or so!
Rize lands a head shot.
Oh Luciano is still all over the place! His legs are completely gone! Will he be able to recover?!!
Rize lands with a thumping leg kick.
Luciano seems to have got his legs back now.
Rize tries to land a leg kick but Luciano saw it coming and moves away.
Rize stuns Luciano with a nice body shot, before stepping back out of range.
A nice inside leg kick there by Rize. That's going to slow Luciano down.
Rize explodes with a nice body kick and back out of range. Nice work.
The crowd applaud the fighters' efforts here as the round comes to an end.
Rize moves out of range of the body kick from Luciano.
Luciano takes a swing at Rize's ribcage but misses.
Luciano slips a straight right by Rize.
And that is the end of the round. The fighters go back to their corners.
Zack Rize dominated that round.
The minute break is over - no more time for sponges and pep talks - back to the action!
Luciano misses with a telegraphed body shot
and Rize counters with a nice uppercut.
Luciano misses with a straight left.
Rize throws a hook to the body but it doesn't connect.
Luciano is hobbling a little on that front leg after taking quite a few leg kicks so far in this fight.
Luciano has his front leg slapped to the side - a nice low kick landing there from Rize.
Left hook, right uppercut from Rize.
Rize dips down and scores with a jab to the body.
Rize throws a hard body shot but it just misses.
Luciano misses with the combination.
We've had a slow start to the round here - hopefully the action picks up.
Rize throws a leg kick that is checked

and Luciano counters with a head kick that drops Rize to the mat! Rize scrambles across the canvas and gets back to his feet, still wobbly!
The crowd cheering loudly, showing their appreciation for the quality fight we're seeing here.
Rize swings and misses with a hook to the body.
A little feinted left hand from Luciano on the counter but he doesn't commit to it.
Good work by Rize as he checks the leg kick.
Rize throws a jab when Luciano was well out of range.
We are yet to see a takedown attempt from Rize in the fight. On paper you would think he is the more dominant ground fighter so let's see if these unusual tactics pay off.
That's one minute gone in the round.
Luciano tries to score with an inside leg kick but telegraphs it and Rize is able to avoid easily.
Luciano tries to land with a swinging hook to the body but Rize was well out of range. Poor timing from Luciano.
Rize scores with a big left there. The judges will like that one.
Rize fakes with the hands and throws a leg kick but Luciano is out of range.
Rize uses decent footwork to sidestep a right hand from Luciano.
A bone on bone clash there as Luciano blocks the leg kick.
Rize takes a swing at Luciano's ribcage but misses.
An attempted straight right counter from Luciano misses the target.
Luciano lands a beauty of a right hand that gets the crowd cheering.
Luciano checks the leg kick.
Luciano tries a switch kick but it misses it's target.
Rize wants to land a leg kick but Luciano is out of range.
Rize throws a hook to the body but it doesn't connect.
Luciano jinks towards his opponent looking like he wants to counter with a mid kick but doesn't commit.
Zack Rize seems to be the more aggressive standup fighter in this bout.
Rize throws a leg kick
and Luciano counters with a series of strikes. Rize will be more careful next time no doubt.
That's two minutes gone in the round.
Rize misses with a left hand
and Luciano counters with a crisp one two that drops Rize! Luciano thinks about following him to the mat for a moment but instead steps back and waves Rize to his feet! Rize is in big trouble!
Rize is rocked!
The crowd are loving this. Great action here.
Rize misses with a telegraphed body shot
and Luciano counters with a powerful cross that connects right on the chin and the lights go out! A massive one punch knock out!
Ladies and gentlemen, after 2:14 of round 2, we have a winner by way of KO (Punch). Charles Luciano!
Charles Luciano retains his heavyweight title!
Our winner, Charles Luciano, made sure he spent some time buttering up the crowd during his post fight interview, which will no doubt bring him a few more fans.
|
|
|
|
|
|
|
|
|
|
|
|
|
|
|
|
|
|
|
|
|
|
|
| S |
C
A |
G |
S |
C
B |
G |
|
S |
C |
G |
|
energy
A | B |
|
hype
A | B |
|
pop
A | B |
|
mgr
A | B |
|
FIGHT
RATING
56% |
|
|
|
|
|
|
|
|
|
|
