|
TWGC 35 (185lbs, D1): Sydney Qualifier - Round 2 PBP Commentary |
Co-main event
|
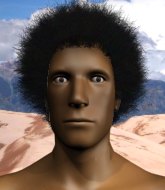
This TWGC bout is 1 fifteen minute round in the middleweight division. Introducing today's competitors. In the red corner, competing out of New York, with a TWGC record of 7 wins and 1 losses; Giuseppe Turturro! And in the blue corner, fighting out of New York, with a TWGC record of 10 wins and 7 losses; Koryu Miyagi!
The judges for this bout are Francis DeMontford, Damien Edna and Topper Green.
The fighters connect hands in the middle of the mat and we are under way.#CL2#
Miyagi gets in close and instigates a clinch.
Miyagi jumps guard but his hands slip and he falls flat on his back. Well, he's made himself look a right mug there, as Turturro walks away with a smile on his face. Miyagi gets slowly back to his feet and shakes his head. #CL#
Turturro drives through and clinches with Miyagi against the cage.
#TD2#
Miyagi pulls guard effortlessly.
Miyagi controlling Turturro's posture.
Miyagi trying to keep a closed guard but Turturro is proving a slippery customer.
Turturro seems content to control from guard here. He's going to have to remain active though if he doesn't want to get stood back up.
We've had a slow start to the round here - hopefully the action picks up.
Turturro postures up.
Miyagi wants to control here, rather than go for any submissions from the bottom. At least for now. #T1#
Turturro trying to pass the guard but can't manage it just yet.
The ref warns both fighters not to hold the cage as they work up against the meshing.
Turturro controls the pace of the fight for a moment.
Turturro preventing the sweep.
Turturro engaging in some classic timewasting tactics.
Miyagi is trying to keep Turturro in close.
Miyagi managing to control the position. #T2#
Miyagi looking to sweep here. No luck so far.
We've been hearing good reports from Turturro's training camp. Apparently he has been rolling around with some good quality BJJ practitioners and has been sharpening his skills. Let's see if that has an impact on the fight today.#SUB2#
Miyagi had isolated an arm as going for a kimura. Turturro defends it easily.
Turturro tries to free his leg and advance position but Miyagi is retaining full guard.
Miyagi being controlled here, momentarily.
Miyagi is working an open guard here, looking to improve his position. No doubt that will leave him open to counters but at least he's being more offensive.#T3#
Miyagi seems keen to control Turturro's posture.
Turturro is stalling in the full guard.
The fighters are pressed up against the cage, both looking to find a bit of space to work.
Miyagi managing to control the position.
Turturro pushes down on Miyagi's leg and manages to get into half guard.#T4#
Turturro looking to pass the half guard. Not this time.
Turturro content to control rather than advance.
Turturro has controlled the position for a good 20 seconds, which will no doubt be starting to frustrate his opponent.
Miyagi is looking to improve his position.
#T5#
Turturro trying to pass the guard but Miyagi defending well.
Turturro keeping composed on the top, looking to control the action.
Miyagi is trying to maintain the position but Turturro is very close to passing his half guard.
Turturro will need to keep those long limbs tucked in whilst he's on the ground, to prevent any submissions.
Miyagi trying to keep hold of his opponent's head but Turturro manages to pass to mount!
Score +3 for passing guard: Turturro (3) vs (0) Miyagi
Turturro controlling the position easily from mount. #T6#
Miyagi holds on for dear life, controlling Turturro's posture momentarily.
Turturro controlling his opponent.
Miyagi is looking to get to half guard.
Turturro sitting in mount, just looking to control for the moment.
Turturro avoids the attempt from Miyagi to control.#T7#
Miyagi is trying to escape the mount.
Miyagi wants to hold on but Turturro pushes him away.
Miyagi reaches up to try and control the position but Turturro seems to have an arm triangle now! Uh oh! Miyagi rolls and tries to escape and now Turturro has his back!
Score +3 for taking back: Turturro (6) vs (0) Miyagi
A bit of a pause in the action here. Turturro controlling the positon.
Turturro keeps control of the position as Miyagi tries to break free.
#T8#
I would not like to be Miyagi right now.
Miyagi tries to break free.
Turturro keeps control of the position easily here as Miyagi tries to buck him off.
Miyagi felt the need to train up his defensive grappling in the buildup to the fight. Presumably he was expecting to be in a difficult position like this, so let's see if he can get out of it.
Miyagi looks to control his opponent's hands but he's not mananging it at the moment. #T9#
Miyagi wants to escape the position.
Turturro gets his hands free as Miyagi looks to control.
So, who will make the next big move? In this position it could be crucial.
Miyagi turns into Turturro and is now in his guard.
Score +2 for sweep to guard / half guard: Turturro (6) vs (2) Miyagi#T10#
Turturro pulls Miyagi in close to prevent any damage.
Turturro keeping moving, preventing Miyagi from controlling successfully.
Miyagi is taking a break and basically stalling. The referee will not allow him to do that for long.
Turturro is pulling down on Miyagi's head to control his posture.
Turturro looking to control.
#T11#
Miyagi stands up and looks to throw the legs aside to pass to side control. Turturro swivels though and keeps the full guard.
Turturro can't do much from the bottom at the moment, as Miyagi controls the pace.
Miyagi is looking to advance position but Turturro has hit a scissor sweep - now he's on top in mount! Score +4 for clean sweep to past guard: Turturro (10) vs (2) Miyagi
Miyagi tries to hold on but Turturro pushes him away.
Turturro sitting in mount, just looking to control for the moment.
Miyagi tries to get back to half guard but can't. #T12#
Turturro tucks in and makes sure he doesn't lose the dominant position.
Miyagi wants to improve position but instead he's given up his back. Score +3 for taking back: Turturro (13) vs (2) Miyagi
Turturro controls the action.
Turturro has the hooks in. Miyagi is trying to push off one leg but he has to do so cautiously to avoid being submitted.
Miyagi is still trying to improve position.#T13#
Turturro trying to secure his dominant position for a moment - making sure Miyagi doesn't escape.
Miyagi trying to control the hands but Turturro breaks the grip. #T14#
Miyagi tries to escape the position - he's now mounted. Is that better or worse? Hard to tell!
Turturro is dominating on the ground here - he's now on his opponent's back, looking to sink in the hooks. Miyagi is in real trouble.
Score +3 for taking back: Turturro (16) vs (2) Miyagi
Turturro slows the pace down here. Having a little breather whilst he's in a dominant position, looking to rest and regain some energy, ready to go for the finish.
Boooooooooooooooooooo!!! God, this has been a terrible round. Come on you two, sort yourselves out!
And that's the end of the fight!
Turturro takes the fight on points by 16 to 2.
A less than humble Giuseppe Turturro misjudged his post fight interview somewhat and came across a little too arrogant whilst trying to hype up his own abilities.
Koryu Miyagi was interviewed post fight and said 'Ill train smarter and harder next time, so i come back stronger than ever!'. |
|
|
|
Main event
|
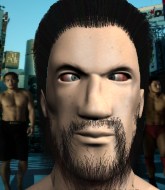
This TWGC bout is 1 fifteen minute round in the middleweight division. Introducing today's competitors. In the red corner, competing out of New York, with a TWGC record of 9 wins and 4 losses; Eduardo Vieira! And in the blue corner, fighting out of New York, with a TWGC record of 5 wins and 3 losses; Buddy Barnett!
The judges for this bout are Topper Green, Francis DeMontford and Damien Edna.
Let's get this grappling contest under way! Who will be victorious?
Vieira shoots in with a takedown attempt and he has Barnett pinned against the cage. Barnett gets the underhooks and manages to circle away.
Barnett steps in looking to clinch after the strikes miss from Vieira.#TD#
Barnett gets caught on his heels momentarily as he allows Vieira to score an easy takedown into full guard. Score +2 for takedown into guard / half guard: Vieira (2) vs (0) Barnett
Barnett being controlled here, momentarily.
Vieira wants to pass the guard but Barnett is keeping the position.
We've had a slow start to the round here - hopefully the action picks up.#T1#
Barnett can't do much from the bottom at the moment, as Vieira controls the pace.
Vieira being controlled here momentarily.
Barnett looking to control.
Barnett managing to control the position.
Vieira wants to control from the top but Barnett keeps moving. #T2#
Vieira trying to pass the guard but can't manage it just yet.
Our spies down at at AREA 51 inform us that Barnett has really been working on his submissions in the buildup to this fight. Will it pay off?
Barnett keeping moving, preventing Vieira from controlling successfully.
Vieira is going to have to think about doing something other than just controlling because Barnett is managing to avoid having the position dictated to him.
Vieira looking to control the position here, rather than advance.
Vieira trying to pass the guard but can't manage it just yet. #T3#
Vieira trying to pass the guard. He's being very persistent here but Barnett manages to land a sweep and now he's on top! Score +2 for sweep to guard / half guard: Vieira (2) vs (2) Barnett
Barnett preventing the sweep.
Barnett stays in close to Vieira's body and controls the position.
Vieira seems to have improved his submission grappling technique since last time we saw him. Let's see if he can pull off a submission.#SUB#
Vieira has an omoplata and is looking to use it perhaps as a submission or perhaps to transition. Barnett is in a bit of discomfort here, but he's managed to free himself and has dived into side control! That didn't work out too well for Vieira. Score +3 for passing guard: Vieira (2) vs (5) Barnett
Vieira tries to buck Barnett off but Barnett is having none of it.#T4#
The ref warns both fighters not to hold the cage as they work up against the meshing.
Vieira regains half guard.
Barnett stalling.
Vieira tries to roll over but Barnett keeps him under control.#T5#
Vieira trying to control from the bottom.
Vieira is looking for a sweep. Barnett is wise to his cunning plan and keeps the top position.
Vieira wants to get back to full guard but Barnett has mounted him! Score +3 for passing guard: Vieira (2) vs (8) Barnett
Vieira is wriggling around trying to escape.
Barnett controlling his opponent.
Vieira is looking to improve his position but Barnett isn't that keen on the idea.#T6#
Vieira is working hard here to advance position.
Vieira manages to regain half guard. Good work.
Barnett is just sitting in half guard, waiting for something to happen.#T7#
Vieira moves into full guard.
Vieira not looking particularly offensive just at the moment.
Barnett not doing a lot at the moment. He'll have to show some more aggression or the fight will get stood up.
Let's hope that Barnett has the urge to step up the pace any second now because for the last 15 or 20 seconds he's just been holding on tight.
Vieira is pulling down on Barnett's head to control his posture. #T8##SUB#
Vieira had isolated an arm as going for a kimura. Barnett defends it easily.#SUB#
Vieira working away from the bottom but not quite defensive enough there because Barnett has passed into half guard!
Barnett content to control rather than advance. #T9#
Vieira tries to roll over but Barnett keeps him under control.
Vieira trying to hold on to Barnett's head to control him but Barnett postures up.
Barnett passes the guard and advances to mount! Score +3 for passing guard: Vieira (2) vs (11) Barnett
Vieira wants to control but Barnett is having none of it.#T10#
Vieira is desperately trying to get back to half guard.
Vieira wants to control but Barnett is having none of it.
Barnett content just to control the position here.
Vieira is wriggling around trying to escape.
Barnett trying to control but he's not successful this time.
Vieira is just holding on here. Barnett manages to take his back.
Score +3 for taking back: Vieira (2) vs (14) Barnett#T11#
Vieira wants to escape the position.
I would not like to be Vieira right now.
The fighters are pressed up against the cage, both looking to find a bit of space to work.#T12##SUB2#
Barnett looking to break Vieira's wrist control so he can sink in the choke. Vieira remaining controlled and patient though - he really has to keep calm otherwise Barnett will wrap this one up with the rear naked choke!
Vieira tries to escape the position - he's now mounted. Is that better or worse? Hard to tell!
Barnett is trying to take his opponent's back.
Vieira is looking to get to half guard.
Vieira regains half guard.#T13#
Vieira is looking to improve his position.
Well, if Barnett is going to just lie there, perhaps we should talk about what we're having for dinner tonight
I'm having a ham and pineapple pizza
Yum. Can't wait.
Vieira is trying to get back to full guard.#T14##SUB#
Vieira looking for subs from the bottom but Barnett mounts him! Score +3 for passing guard: Vieira (2) vs (17) Barnett
Vieira is trying desperately to improve position.
Boooooooooooooooooooo!!! God, this has been a terrible round. Come on you two, sort yourselves out!
Barnett controlling the pace for now.
And that's the end of the fight!
Barnett wins on points by 17 to 2.
Buddy Barnett seemed lost for words in his post fight interview but he remembered to thank his fans and directed everyone to his website. |
|
|
|
|
|
|