 |
Highland 42 PBP Commentary |
Undercard bout
|
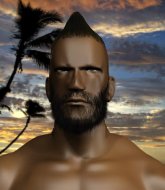
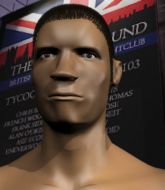
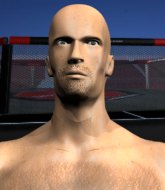
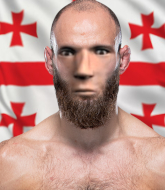
Coming up we have a lightweight MMA rules bout between Esmond Cobb (ranked 25015 p4p, 25192 weight class) and Zia Pologe (ranked 661 p4p, 697 weight class). Pologe has chosen Die Young as his entrance music, which hasn't gone down very well with the crowd. Over to our ring announcer for the fighter introductions!
 |
|
|
| 178 cm
25
162
0 - 3 - 0 |
|
182 cm
25
155
0 - 3 - 0 |
Decent wrestler
Solid boxing
Big right hand |
|
BJJ White Belt
Good kicks
Very confident |
|
| |
|
Ladies and gentlemen. This fight is 3 rounds, in the lightweight division.
Introducing the fighter to my left, fighting out of the red corner.
With a record of 0 - 3 - 0, fighting out of The Island, Esmond Cobb!
And introducing the fighter to my right, fighting out of the blue corner.
With a record of 0 - 3 - 0, fighting out of The Island, Zia Pologe!
The judges for this bout are David Hoff, Peter Branson and Santiago Holmes.

The bell rings for round one and we are underway!
A head kick misses from Pologe.
Pologe pulls out of a head kick attempt.
Cobb ducks down and throws a hook to the body.
Pologe has done a lot of speed work in the buildup to this fight.

Pologe clinches with his opponent.
Pologe tries to break free but Cobb pushes him back against the cage.

Cobb breaks the clinch and we return to the middle of the mat.
Cobb blocks a head kick by Pologe.
A head kick misses from Pologe.
Pologe lands a head kick. Cobb smiles back at him and beckons him forward.
Nice body punch from Cobb.
Pologe misses with a head kick.
Pologe throws a head kick that misses
and Cobb counters with a nice uppercut.
Pologe looks winded!
Cobb digs a good hook to Pologe's body.
We've seen a great period of action over the last minute or so - credit to both fighters for going all out!

Cobb gets in close and instigates a clinch.
Cobb definitely looks more muscular than last time we saw him fight.
Cobb misses the knee to the body. Nice hip positioning from Pologe.
Cobb lands with a short shot to the head.

That's one minute gone in the round.
A short right from Cobb.
Cobb lands a shoulder strike that jolts his opponent's head backwards.
Cobb lands a shoulder strike.
Cobb lands a right hand that snaps the head of Pologe backwards.
Cobb breaks the clinch.
Pologe gets clipped by a big right hand and goes down spinning to the canvas! Cobb gets the back mount and begins to drop bombs on his rocked foe! Pologe is too out of it to defend against the strikes and the referee jumps in to save him from the beatdown!
Ladies and gentlemen, after 1:41 of round 1, we have a winner by way of TKO (Strikes). Esmond Cobb!
|
|
|
|
|
|
|
|
|
|
|
|
|
|
|
|
|
|
|
|
|
|
|
| S |
C
A |
G |
S |
C
B |
G |
|
S |
C |
G |
|
energy
A | B |
|
hype
A | B |
|
pop
A | B |
|
mgr
A | B |
|
FIGHT
RATING
63% |
|
|
|
|
|
|
|
Undercard bout
|
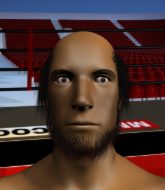
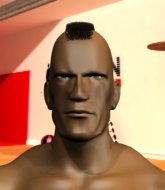
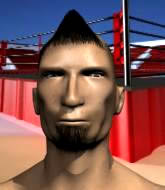
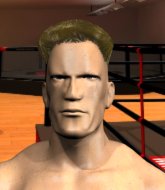
Coming up we have a featherweight MMA rules bout between Fiji Pampo (ranked 7098 p4p, 6923 weight class) and AJ Gardener (ranked 489 p4p, 481 weight class). Fiji Pampo could well score a knockout today. He has the power to get to AJ Gardener's chin.
 |
|
 |
| 167 cm
25
158
0 - 2 - 0 |
|
194 cm
20
147
1 - 2 - 0 |
BJJ Brown Belt
Counter fighter
KO power |
|
Decent wrestler
Counter fighter
Powerful |
|
| |
|
Ladies and gentlemen. This fight is 3 rounds, in the featherweight division.
Introducing the fighter to my left, fighting out of the red corner.
With a record of 0 - 2 - 0, fighting out of The Island, Fiji Pampo!
And introducing the fighter to my right, fighting out of the blue corner.
With a record of 1 - 2 - 0, fighting out of The Island, AJ Gardener!
The judges for this bout are Peter Branson, Santiago Holmes and Daniel Franklin.
The bell rings for round one and we are underway!
Pampo throws a left and a right that both miss

and Gardener decides to take the opportunity to score a takedown. He's landed in Pampo's guard.
Gardener trying to pass the guard but can't manage it just yet.
Pampo controls Gardener momentarily but Gardener frees himself.
Gardener trying to control the position from guard on top but Pampo is wriggling around, looking for whatever he can.
Pampo might be looking to lock onto one of his opponent's long limbs for a submission, whilst we're on the ground.
Gardener controlling from the guard. I say controlling but really, he's stalling.
The ref warns both fighters not to hold the cage as they work up against the meshing.
We've had a slow start to the round here - hopefully the action picks up.
Pampo keeping moving, preventing Gardener from controlling successfully.
Gardener lands a nice shot whilst sitting in his opponent's guard.
That's one minute gone in the round.

Pampo is working for submissions here. He's thrown up his legs looking for a triangle but Gardener frees his head nicely. Oh but Pampo has switched to an armbar! Gardener is tapping furiously! Lovely submission there!
Ladies and gentlemen, after 1:26 of round 1, we have a winner by way of Submission (Triangle Armbar). Fiji Pampo!
|
|
|
|
|
|
|
|
|
|
|
|
|
|
|
|
|
|
|
|
|
|
|
| S |
C
A |
G |
S |
C
B |
G |
|
S |
C |
G |
|
energy
A | B |
|
hype
A | B |
|
pop
A | B |
|
mgr
A | B |
|
FIGHT
RATING
44% |
|
|
|
|
|
|
|
Undercard bout
|
Coming up we have a featherweight MMA rules bout between Sahara Sam (ranked 5527 p4p, 7066 weight class) and Rudy Loens (ranked 427 p4p, 487 weight class). The crowd seem to be enjoying Loens's choice of entrance music: MMA Entrance Music / Justin Gaethje. Sahara Sam has the better chin. Will he look to stand and bang today?
 |
|
 |
| 170 cm
26
155
1 - 3 - 0 |
|
175 cm
21
145
1 - 3 - 0 |
BJJ White Belt
Solid boxing
KO power |
|
BJJ Blue Belt
Basic striking
Tends to cut |
|
| |
|
Ladies and gentlemen. This fight is 3 rounds, in the featherweight division.
Introducing the fighter to my left, fighting out of the red corner.
With a record of 1 - 3 - 0, fighting out of The Island, Sahara Sam!
And introducing the fighter to my right, fighting out of the blue corner.
With a record of 1 - 3 - 0, fighting out of The Island, Rudy Loens!
The judges for this bout are Sandra Marshall, Winston Alpacca and Peter Branson.
The bell rings for round one and we are underway!
Sam misses with a head kick.
A nice combination there by Sam.
Loens looks frustrated there after his takedown attempt is stuffed easily.
A good leg kick by Sam.
Loens checks a leg kick.
Loens fakes high and shoots in for a takedown but Sam avoids it really well and circles away.
Sam keeps the fight standing with a nice sprawl.
Sahara Sam has stuffed three takedown attempts in the round now. That's going to take a lot out of Rudy Loens.
We've had a slow start to the round here - hopefully the action picks up.
A nice inside leg kick there by Sam. That's going to slow Loens down.
Loens shoots for a takedown but Sam saw that one coming a mile off and avoided it easily.
Loens looking for a takedown here - he's got it.

Sam pushes Loens off and scrambles back to his feet.
That's one minute gone in the round.
Loens will have to do better than that with his takedown attempts.
Sam throws a head kick that misses and slips in the process. He scrambles back to his feet and the fighters circle.
Sam tries a head kick but it misses.
Sam throws a decent looking leg kick but it doesn't land clean.
Loens shoots in with a takedown attempt and he has Sam pinned against the cage. Sam gets the underhooks and manages to circle away.
Sam pulls out of a head kick attempt.
Loens takes a thudding leg kick, right into the meat of the thigh.
Sahara Sam is looking to keep the fight on the feet at all costs.
Sam with a nice calf kick.
Jab, cross, leg kick. Nice combination by Sam!
A good leg kick by Sam.
Loens on the wrong end of a nice hook.
Loens tries a switch kick but it misses it's target.
Fantastic stuff here - a very entertaining period of action, which has drawn cheers from the crowd.
Sam pulls out of a head kick attempt.
Sam looking to take his opponent's legs away with the low kicks.

That's two minutes gone in the round.
Some bone on bone action there as Loens checks a low kick. Luckily it wasn't a particularly hard one.
Sam misses with a leg kick
and Loens counters with a series of strikes. Sam will be more careful next time no doubt.
Sam stuffs the takedown.
A head kick misses from Sam.
Sam throws a low kick, looking for Loens's leg but Loens calmly moves out of range.
Loens with the counter takedown but Sam avoids it easily.
Loens checks a low kick from Sam.
Sam tries to score with an inside leg kick but telegraphs it and Loens is able to avoid easily.
Sam connects with a leg kick.
Sahara Sam seems to be the more aggressive standup fighter in this bout.
Sam tries to score with an inside leg kick but telegraphs it and Loens is able to avoid easily.
Sam throws a head kick but Loens moves out of range.
Sam throws a leg kick but Loens moved away.
Good work by Loens as he checks the leg kick.
Loens blocks a head kick by Sam.
Sam pivots, looking for a leg kick but Loens is out of range and Sam settles back down.
Sam swings away with a leg kick that misses.
Sam with a nice looking leg kick. You could hear that one land in a back row.

That's three minutes gone in the round.
Loens misses with a takedown attempt - Sam sprawls well and throws a nice strike on the way out which just misses.
Loens checks a leg kick.
Loens misses with a takedown attempt - Sam sprawls well and throws a nice strike on the way out which just misses.
Sam throws a sloppy head kick
and Loens counters with a one-two to the body.
Loens shoots in looking for a takedown but Sam manages to keep the fight standing, pushing Loens's face into the canvas for good measure before circling away.
Sam half commits to a counter takedown before pushing away, out of range.
Sam throws a low kick but Loens avoids it.
Sam dances in quickly and lands a nice inside leg kick on Loens. That did some damage!
Sam throws a chopping leg kick but Loens manages to avoid taking any serious damage.
Loens fails with a takedown attempt.
Loens fails with a takedown attempt from distance.
Sam changes levels looking for a counter takedown but doesn't commit.
Sam turns his hip over beautifully as he lands a nice leg kick.
A clash of legs there as Loens blocks the low kick.

That's four minutes gone in the round.
Sam slaps away a takedown attempt from Loens, before circling back to the center of the mat.
Sam pulls out of a head kick attempt.
As Sam backs off Loens throws a huge counter combo but Sam manages to avoid it all.
Sam connects with a jab.
Sam fakes a jab and throws a low kick but Loens checks it well.
Loens shoots in looking for a double leg takedown. Sam defends it nicely.
Loens's leg has a nasty welt from taking a succession of leg kicks. That must be slowing him down.
Wooooo! Give it up for these two warriors! They are putting on a show!
Sam throws a front kick aimed at Loens's knee but Loens avoids it well.
As Sam backs off Loens throws a huge counter combo but Sam manages to avoid it all.
Loens stumbles momentarily as he takes a strong leg kick from Sam.
A clash of legs there as Loens blocks the low kick.
Sam throws a low kick but Loens avoids it.
Sam wants to slow Loens down by chopping away at his legs.
Sam misses with a head kick.
Sam tries a head kick but it misses.
Sam misses with a low kick.
And that is the end of the round. The fighters go back to their corners.
Sahara Sam dominated that round.
Well, the break between rounds is over. Let's get back to the scrappin!

An inside leg kick from Sam misses.
Sam finds nothing but air with that leg kick attempt.
Sam stuffs the takedown.
Donk. Sam catches Loens right on the button with a cross.
Nice sprawl there from Sam as Loens shoots in.
Sam tries to score with a low kick but Loens moves his leg out of the way.
Loens fails miserably with a takedown attempt.
Sahara Sam has stuffed three takedown attempts in the round now. That's going to take a lot out of Rudy Loens.
Sam throws a leg kick but Loens checks it.
Sahara Sam is winning the standup battle so far.
A really sloppy takedown attempt there from Loens.
We've had a slow start to the round here - hopefully the action picks up.
Sam fakes with a right hand and throws a good leg kick, right into the thigh. That had to hurt Loens.
A bone on bone clash there as Loens blocks the leg kick.
Sam throws a head kick that misses and slips in the process. He scrambles back to his feet and the fighters circle.
Loens takes one to the chin there.
That's one minute gone in the round.
Sam rushes forward with a series of wild hooks but Loens moves out of range and avoids them all easily.
Sahara Sam is looking to throw some combinations by the looks of things.
Loens on the wrong end of a nice low kick. He's acting like it's no big deal but he doesn't want to take many more of those.
Sam tries to land a leg kick but Loens saw it coming and moves away.
Loens is clearly looking to counter with head kicks.
Loens throws a looping left and ducks down for a takedown. He's got his arms around Sam's waist but Sam gets an underhook and avoids the takedown by throwing Loens off to one side.
Sam tries a switch kick but it misses it's target.
Sam misses with a low kick.
Loens fails with a takedown attempt.
Sam scores with a sloppy right hand. Loens should have avoided that one.
Sam lands with a shot to the body.
Nice uppercut there from Sam.
 Loens is rocked! Loens is rocked!
Loens loses concentration momentarily and Sam pounces with a three punch combo! Right, left, right! Loens crashes face first to the mat, out cold! Sam finishes this one with a fantastically precise combo! Great stuff.
Ladies and gentlemen, after 1:53 of round 2, we have a winner by way of KO (Punches). Sahara Sam!
Sahara Sam took some time post fight to say the following; 'For the Pyramids!'.
Rudy Loens was interviewed post fight and said 'Despite my loss against an opponent who was tonight better as me a big thanks to the Highland organisation for having the chance fighting here tonight.Also a big thanks on the great fans and public supporting me.Thanks again and i'll be back !'.
|
|
|
|
|
|
|
|
|
|
|
|
|
|
|
|
|
|
|
|
|
|
|
| S |
C
A |
G |
S |
C
B |
G |
|
S |
C |
G |
|
energy
A | B |
|
hype
A | B |
|
pop
A | B |
|
mgr
A | B |
|
FIGHT
RATING
52% |
|
|
|
|
|
|
|
Undercard bout
|
Coming up we have a featherweight MMA rules bout between Thierry Bailly (ranked 5869 p4p, 6819 weight class) and Jack Palmer (ranked 436 p4p, 477 weight class). Bailly comes to the cage accompanied by MMA Entrance Music / Dustin Poirier. I don't know about you partner, but I'm pumped for this one!
 |
|
 |
| 175 cm
21
145
1 - 3 - 0 |
|
177 cm
19
148
0 - 1 - 0 |
BJJ Blue Belt
Brawler
Good in bed |
|
BJJ White Belt
Excellent boxer
Granite chin |
|
| |
|
Ladies and gentlemen. This fight is 3 rounds, in the featherweight division.
Introducing the fighter to my left, fighting out of the red corner.
With a record of 1 - 3 - 0, fighting out of The Island, Thierry Bailly!
And introducing the fighter to my right, fighting out of the blue corner.
With a record of 0 - 1 - 0, fighting out of The Island, Jack Palmer!
The judges for this bout are Daniel Franklin, Winston Alpacca and Michael Johnstone.
The bell rings for round one and we are underway!
Palmer throws the left hand but Bailly avoids the punch easily.

Bailly closes the distance and looks for a trip takedown... aaaand he's got it - Bailly lands in his opponent's guard.
Palmer has been taking part in the yoga sessions down at Cozad The Island. Presumably he's going to look for a slick submission... Or maybe he's looking to avoid one.
Bailly sitting in guard, not really doing much.
Bailly working some ground and pound from guard but it's not doing any damage.
We've had a slow start to the round here - hopefully the action picks up.
Bailly drops back looking for a leg! Palmer is in trouble here! The fighters roll with the hold and Palmer manages to kick Bailly off! Bailly jumps back into Palmer's guard.
Palmer tries to strike from the bottom.
That's one minute gone in the round.
Palmer utilising some decent striking defenses from the guard, preventing the ground and pound.
Bailly's corner is telling him to maintain position.

The referee has stepped in and called for a break in the action. We'll restart on the feet.
Palmer clinches up against the cage.
Palmer has hold of one of Bailly's legs. Bailly is fighting the takedown attempt but Palmer gets the trip and lands the takedown into guard.
Bailly is working the butterfly guard. He manages to land a nice scissor sweep and is now in half guard on the top. Nice move.

Palmer tries to get to full guard but Bailly has control of the leg.
The referee calls for the fighters to work.
That's two minutes gone in the round.
Palmer trying to control from the bottom.
Bailly is looking for a kimura here.
Bailly is looking for a kimura but Palmer is holding onto that half guard position, so it's hard for Bailly to get the leverage.
The fighters are pressed up against the cage, both looking to find a bit of space to work.
Bailly is taking a breather. Palmer says something to him but it's hard to make out. Perhaps he's telling him to get on with it and actually do something.
Palmer is trying to control but can't.
Bailly moves nicely into side control.
Palmer really doesn't want to stay on the ground with Bailly. If he can't get it back to his feet, it's only a matter of time before he'll be tapping out.
That's three minutes gone in the round.
Bailly advances nicely into full mount.
Bailly has control of Palmer's right arm, working for a kimura. It's a bit of a token attempt though and Palmer regains control of the situation pretty easily.
The fighters are starting to perspire pretty heavily.
Bailly looking to control but Palmer is working nicely, looking to advance position himself.
Bailly looks like he's working for a submission but he's not found anything just yet.
Bailly content just to control the position here.
That's four minutes gone in the round.
Palmer tries to reverse the position but Bailly maintains control.
Bailly postures up and cracks his opponent a couple of times before moving back into close ground control. Palmer looks a forlorn figure.
Bailly is working on an americana here. Ooh, that looks pretty nasty! Nope, Palmer has managed to escape the submission attempt.
Bailly unloads with some shots from mount but Palmer bucks and avoids them well.
Bailly breaks from Palmer's wrist control and lands an elbow.
The crowd thankful this round is nearly over.
Bailly tries to control but Palmer wriggling away.
Palmer is bucking up trying to escape but Bailly cracks him with another couple of good strikes.
And that is the end of the round. The fighters go back to their corners.
Thierry Bailly dominated that round.
That's time! Bailly's corner gives him a slap on the ass as he gets ready to fight.
Palmer pushes Bailly up against the cage in a clinch.
Palmer jumps guard.
Palmer wants to stand up but Bailly is controlling him.
Bailly not doing a lot at the moment. He'll have to show some more aggression or the fight will get stood up.
Palmer has momentary wrist control but Bailly slips an elbow through the middle.
Palmer tries to land a sweep but no joy.
Bailly is frustrating his opponent with some stalling tactics from top position.
We've had a slow start to the round here - hopefully the action picks up.
Bailly stopping the sweep attempt from Palmer.
That's one minute gone in the round.
Palmer working the defensive guard well to avoid strikes from Bailly.
Bailly is taking a break and basically stalling. The referee will not allow him to do that for long.
The referee decides to stand the fighters back up.
Palmer drives through and clinches with Bailly against the cage.
Palmer drags the fight down to the ground.
Palmer keeping moving, preventing Bailly from controlling successfully.
Bailly engaging in some classic timewasting tactics.
That's two minutes gone in the round.
Palmer utilising some decent striking defenses from the guard, preventing the ground and pound.
Bailly controls from within his opponent's guard.
Bailly is looking to work some ground and pound but Palmer has wrist control.
Bailly has been looking to land a fair amount of strikes on the ground. He might be looking to soften his opponent up in order to work for a submission.
Bailly seems content to control from guard here. He's going to have to remain active though if he doesn't want to get stood back up.
The referee is pacing around the two fighters, thinking about a standup.
Bailly is trying to work a guillotine from the top, or something like that? Don't know how he thinks he's going to get a finish from there.
The referee decides to stand the fighters back up.
That's three minutes gone in the round.
Bailly shoots in for a takedown! He's got it and he's managed to land in side control! That's better than Bailly was expecting from the takedown attempt, I'm sure!

Bailly stands up and beckons Palmer to his feet.
Thierry Bailly is looking to throw some combinations by the looks of things.
Palmer closes the distance and clinches.
Bailly is working on a single leg takedown against the cage. Palmer can't fight it off and eventually Bailly manages to take the fight to the floor. Palmer looks annoyed but at least he's managed to land in guard.
Bailly is trying to work a guillotine from the top, or something like that? Don't know how he thinks he's going to get a finish from there.

Palmer is throwing his legs up, looking for submissions. Bailly is aware though and is defending well.
That's four minutes gone in the round.
Bailly gets to his feet - Palmer follows without any prompting.
Palmer misses with a jab, cross combination.
Palmer tries a head kick but it misses.
Palmer closes the distance and clinches.
This has been an exciting period of action!
Bailly is trying to trip Palmer. He has hold of a leg but Palmer is hopping around, keeping his balance for the moment. Bailly persists though and gets the takedown into guard.
Bailly slows down the pace of the fight for a moment. He'll need to remain active if he doesn't want to see the fight stood back up.
The ref warns both fighters not to hold the cage as they work up against the meshing.
Bailly gets to his feet - Palmer follows without any prompting.
The crowd thankful this round is nearly over.
Bailly looking to score a takedown here. Palmer is defending well but Bailly drives through and ends up in Palmer's guard.
Bailly trying to control but Palmer is working from the bottom.
And that is the end of the round. The fighters go back to their corners.
That was a close second round but I would say that Thierry Bailly will probably get the nod.
The minute break is over - no more time for sponges and pep talks - back to the action! Let's get this one finished - here comes the final round!

Bailly bobs and weaves into range and then changes levels and scores with a nice takedown into side control.
Palmer tries to improve position but can't.
You can see the frustration on Palmer's face as Bailly controls the position.
Bailly tries for a kimura but Palmer is defending well.
Bailly taking a breather here.
We've had a slow start to the round here - hopefully the action picks up.
Bailly advances to full mount.
Palmer tries to hold on but Bailly pushes him away.
That's one minute gone in the round.
Bailly throwing shots from mount but they're not landing.
Palmer keeping his composure momentarily, calmly looking to get back to half guard.
Palmer tries to lock up and control but Bailly gives him a forearm to the face and pushes him away.
Bailly sitting in mount, just looking to control for the moment.
Palmer takes a big shot to the head but keeps on trying to improve his position.
Bailly takes his opponent's back. Perhaps a chance to lock up a rear naked choke here.
Bailly is really dominating this fight. Is there anything that Palmer can do to turn this around?
Bailly trying to secure his dominant position for a moment - making sure Palmer doesn't escape.
That's two minutes gone in the round.
Bailly has the hooks in. Palmer is trying to push off one leg but he has to do so cautiously to avoid being submitted.
Palmer is displaying good submission defense - not really looking in danger of submitting to the rear naked choke at the moment. That could change in an instant of course if Bailly gets his way!
Palmer wants to escape the position.
Bailly has good solid back control here.
Bailly has his hand under the chin of his opponent looking for the choke. He's nearly got it! This one could be all over! But no, Palmer has freed his hand and lives to survive another� well, another couple of seconds at least!
That's three minutes gone in the round.
Bailly punishes Palmer with strikes from the back mount.
You can see the frustration on Palmer's face� He knows he is in trouble unless he improves his position sooner rather than later.
Bailly softening up his opponent with strikes here.
A lull in the action here.
Bailly looking for the RNC.
Palmer prevents Bailly from getting a body triangle.
Palmer is trying to defend against the choke here but Bailly has an arm under his chin. This one might not last much longer. Bailly Tightens the hold and Palmer taps out furiously! Bailly displays superior BJJ to win the fight.
Ladies and gentlemen, after 4:55 of round 3, we have a winner by way of Submission (RNC). Thierry Bailly!
Post fight, Thierry Bailly stared into the camera and said 'A big thanks to my sponsor Savage Fightwear Island and the Highland organisation for having the chance fighting here tonight. Also a big thanks on the great fans and public supporting me, without you all I could not win. Thanks again and i'll be back, you'r the best.'.
|
|
|
|
|
|
|
|
|
|
|
|
|
|
|
|
|
|
|
|
|
|
|
| S |
C
A |
G |
S |
C
B |
G |
|
S |
C |
G |
|
energy
A | B |
|
hype
A | B |
|
pop
A | B |
|
mgr
A | B |
|
FIGHT
RATING
42% |
|
|
|
|
|
|
|
Undercard bout
|
Coming up we have a lightweight MMA rules bout between Frank Dux (ranked 4222 p4p, 4360 weight class) and Clint Bishop (ranked 483 p4p, 496 weight class). Both fighters look fresh as a daisy as they make their way towards the cage.
 |
|
 |
| 177 cm
25
155
1 - 1 - 0 |
|
178 cm
26
160
1 - 3 - 0 |
BJJ Purple Belt
Basic striking
KO power |
|
Good wrestler
Basic striking
Granite chin |
|
| |
|
Ladies and gentlemen. This fight is 3 rounds, in the lightweight division.
Introducing the fighter to my left, fighting out of the red corner.
With a record of 1 - 1 - 0, fighting out of The Island, Frank Dux!
And introducing the fighter to my right, fighting out of the blue corner.
With a record of 1 - 3 - 0, fighting out of The Island, Clint Bishop!
The judges for this bout are David Hoff, Dirk Anderson and Michael Johnstone.
The bell rings for round one and we are underway!
Bishop manages to get an easy takedown there - catching Dux on his heels. He'll look to pass Dux's guard now, I'm sure.
Bishop is looking to work some ground and pound but Dux has wrist control.
Bishop looking to sit in guard and control but Dux gets the butterfly guard and sweeps. He's now in the guard on the top.
Bishop really doesn't want to stay on the ground with Dux. If he can't get it back to his feet, it's only a matter of time before he'll be tapping out.
Dux won't allow Bishop to sweep him here.
Dux has been talking about how he's improved his wrestling in the run up to the fight so let's see if that's enough to sway the balance.
The fighters are pressed up against the cage, both looking to find a bit of space to work.
Dux tries to free his leg and advance position but Bishop is retaining full guard.
Dux showing good wrestling skills to control the position.
Dux wants to pass the guard but Bishop is keeping the position.
We've had a slow start to the round here - hopefully the action picks up.
Bishop keeping moving, preventing Dux from controlling successfully.
Dux looking to pass the guard.
That's one minute gone in the round.
Bishop is avoiding any damage by keeping wrist control.
Dux stays in close to Bishop's body and controls the position.
Dux trying to control the position from guard on top but Bishop is wriggling around, looking for whatever he can.
Dux advances to half guard.
Dux is working for a submission here. He's got hold of the far side arm and he's looking for a kimura. He's cranking on the arm and he's got it! Bishop is tapping out! Ouch, that looked like it hurt!
Ladies and gentlemen, after 2:58 of round 1, we have a winner by way of Submission (Kimura). Frank Dux!
Frank Dux spent the whole post fight interview bigging himself up. It didn't go down that well with the fans after a while as they thought it was a bit arrogant.
|
|
|
|
|
|
|
|
|
|
|
|
|
|
|
|
|
|
|
|
|
|
|
| S |
C
A |
G |
S |
C
B |
G |
|
S |
C |
G |
|
energy
A | B |
|
hype
A | B |
|
pop
A | B |
|
mgr
A | B |
|
FIGHT
RATING
36% |
|
|
|
|
|
|
|
Undercard bout
|
Coming up we have a light heavyweight MMA rules bout between Buddy Barnett (ranked 3995 p4p, 4192 weight class) and Eaton Rockwell (ranked 538 p4p, 559 weight class). Barnett's ring entrance music is that housewives' favourite, Born Ready. Both fighters look fresh as a daisy as they make their way towards the cage.
 |
|
 |
| 180 cm
18
210
2 - 1 - 0 |
|
180 cm
25
208
2 - 1 - 0 |
BJJ Purple Belt
Basic striking
Prefers standup |
|
Good wrestler
Brawler
Intelligent |
|
| |
|
Ladies and gentlemen. This fight is 3 rounds, in the light heavyweight division.
Introducing the fighter to my left, fighting out of the red corner.
With a record of 2 - 1 - 0, fighting out of The Island, Buddy Barnett!
And introducing the fighter to my right, fighting out of the blue corner.
With a record of 2 - 1 - 0, fighting out of The Island, Eaton Rockwell!
The judges for this bout are Bart Greer, Peter Branson and David Hoff.
The bell rings for round one and we are underway!
Barnett thows a left - swing and a miss!
Wow, both these guys are really going for it!
Rockwell looks for a takedown here. Will he get it? Barnett is fending him off so far but Rockwell persists. Nope, Barnett circles away and we're back to standing.
Barnett throws a nice hook to the body that draws an oooh from the crowd.
Rockwell closes the distance and takes a jab right on the nose as he does so.
Rockwell shoots in but doesn't get the takedown
enabling Barnett to counter with a crisp jab.
Rockwell goes for a double leg but Barnett avoids the attempt and the two fighters end up clinched against the cage as Barnett continues to drive forward.
Buddy Barnett has stuffed three takedown attempts in the round now. That's going to take a lot out of Eaton Rockwell.
Rockwell ducks under a wild hook from Barnett.
Barnett throws a hook to the side of Rockwell's head but Rockwell sees it coming and ducks under it beautifully.
Rockwell scores with a nice takedown into half guard. Let's see what he's got on the ground.
Barnett avoiding damage under a succession of punches from Rockwell.
Rockwell wants to lay and pray for a moment but Barnett keeps working.
Rockwell throws a strike but Barnett avoids it easily and moves to full guard.
Rockwell throwing elbows and punches but not connecting, as Barnett works some decent striking defense from the bottom.
The fans in attendance giving it up for the two fighters, who have really let it all hang out in the last minute or so!
Rockwell in full guard, throwing the ground and pound. No damage this time.
Rockwell is in close to Barnett's body, working some short punches and elbows.
That's one minute gone in the round.
Barnett trying to keep a closed guard but Rockwell is proving a slippery customer.

Barnett is working an open guard so Rockwell takes the opportunity to get back to his feet.
Rockwell ducks under an overhand right and circles away with a smile on his face.
Barnett scores with a body shot.
Rockwell slips a straight right by Barnett.
Rockwell tries for a takedown but Barnett sees it coming a mile off and avoids it easily.
Barnett seemed to be looking to counter by closing the distance.
Barnett scores with a sloppy right hand. Rockwell should have avoided that one.
Rockwell closes this distance looking for a takedown but Barnett circles away.
Rockwell fakes a strike and closes the distance, dragging Barnett to the ground. Rockwell is now in Barnett's guard.
Hammerfist, elbow! yells Rockwell's corner. There ya go! There ya go!
Barnett is looking to get back to his feet but can't, whilst Rockwell is controlling him.
Rockwell postures up to throw the ground and pound strikes but they don't connect.
Rockwell scores with a decent looking elbow strike.
That's two minutes gone in the round.
Rockwell looking to pass the guard.
Hammerfist, elbow! yells Rockwell's corner. There ya go! There ya go!
Rockwell throws a big elbow that misses.
Rockwell lands a couple of decent looking shots.
Rockwell has gone for a leg lock! Barnett slips out almost immediately though and dives into Rockwell's guard.
This is a great period of action - very entertaining stuff!
Rockwell is looking to stand back up... there's a bit of a scramble and Barnett dives into side control.
Rockwell is looking for a sweep.
Rockwell looking for a sweep but Barnett has passed into full mount! Oh no!
We get told so often about how wrestlers don't like to be on their backs. Let's see if Rockwell can do anything to dispel that myth.
That's three minutes gone in the round.
Rockwell tries to reverse the position but Barnett maintains control.
Rockwell tries to hold on but Barnett postures up.
Rockwell is trying to reverse the position but instead Barnett has taken his back - oops!
The ref warns both fighters not to hold the cage as they work up against the meshing.
Barnett seems like he's trying to stand.
Rockwell looks to control his opponent's hands but he's not mananging it at the moment.
That's four minutes gone in the round.
Rockwell tries to escape the position.
Barnett struggling to keep hold of the position.
Barnett controlling well, preventing Rockwell from escaping the position.
Rockwell keeps trying to improve his position.
And that is the end of the round. The fighters go back to their corners.
Buddy Barnett dominated that round.
That's time! Barnett's corner gives him a slap on the ass as he gets ready to fight.
Rockwell clinches with his opponent.
Rockwell gets a trip takedown into half guard.
Rockwell not throwing his punches with enough precision this time.
Barnett has no desire to be mounted, so is trying to control. Rockwell is working away from the top position though.
Eaton Rockwell has got the better of the ground game so far.
Rockwell looking to pass the half guard. Not this time.
Nice strikes from Rockwell there.
Barnett regains full guard, whilst avoiding punches from Rockwell.
Rockwell trying to control but Barnett is working from the bottom.
We've had a slow start to the round here - hopefully the action picks up.
Rockwell throwing shots from guard but he's hitting more mat than opponent.
Rockwell is holding a leg here, probably looking for an ankle lock - he drops back and goes for it! Barnett is in trouble! Is it all over??? No! Barnett has escaped and now he's on top!
That's one minute gone in the round.
Barnett is fighting to break Rockwell's control of his arms but Rockwell is doing a good job of controlling the position at the moment.
Rockwell tries to land a sweep but no joy.
Rockwell trying to keep a closed guard but Barnett is proving a slippery customer.
Rockwell is pulling down on Barnett's head to control his posture.
Rockwell looking to sweep using the butterfly guard but Barnett puts pay to that idea as he passes nicely into half guard.
Rockwell tries to roll over but Barnett keeps him under control.
That's two minutes gone in the round.
The crowd are starting to boo a lack of action.
Rockwell moves into full guard.
Rockwell seems keen to control Barnett's posture.
Rockwell wants to sweep here but Barnett controlling him for the moment.
Rockwell has a butterfly guard looking to sweep but Barnett has passed into side control.
Rockwell tries to slip a leg under to move to half guard but Barnett presses down on the leg and jumps into full mount!
Rockwell is desperately trying to improve his position but Barnett has a good base and remains in mount.
That's three minutes gone in the round.
Barnett manages to capitalize on a mistake by Rockwell to take his back!
Barnett is really dominating this fight. Is there anything that Rockwell can do to turn this around?
Barnett avoiding Rockwell 's attempts to control his hands.
Rockwell is trying to break free.
Rockwell is persisting with the attempt to improve his position.
Barnett tries to keep control of the position but Rockwell is staying busy.
Rockwell is trying to stand back up.
Rockwell tries to escape but Barnett has the hooks in and won't let him break free.
That's four minutes gone in the round.
Rockwell is trying to stand back up.
Rockwell trying to control the hands but Barnett won't let him.
Barnett nearly escaped from the position there.
Boooooooooooooooooooo!!! God, this has been a terrible round. Come on you two, sort yourselves out!
Rockwell tries to escape the position.
The crowd hopeful of a finish here - Barnett's supporters are on their feet, screaming for him to go for the rear naked choke.
And that is the end of the round. The fighters go back to their corners.
Buddy Barnett dominated that second round.
That's the end of the interval. I'm sure that seemed a lot quicker than a minute for our two fighters! Back to the action. And we move into the final round!
Rockwell walks straight into an uppercut. Luckily it didn't land flush.
Rockwell forces Barnett back against the cage and clinches.
Rockwell keeps control of Barnett as he tries to wriggle out of the double underhooks.
Barnett looks like he'd prefer to be striking at range right now.
Barnett is trying to break the clinch but Rockwell has him pressed against the cage.
Barnett is looking to break free of the clinch but Rockwell has double underhooks.
Rockwell gets a trip takedown into half guard.
Rockwell with the ground and pound but Barnett uses the opportunity to regain guard.
Rockwell must be cautious of submissions here, given that his opponent has the superior Jiu Jitsu.
Rockwell throws an elbow that misses. Barnett uses the momentum to reverse the position. He's now in Rockwell's guard. Nice move by Barnett!
Rockwell looking to hit a scissor sweep but Barnett is one step ahead there.
We've had a slow start to the round here - hopefully the action picks up.
Rockwell wants to improve his position but instead Barnett has moved into half guard.
Rockwell trying to get back to full guard but Barnett takes advantage of the position and moves to full mount!
That's one minute gone in the round.
Rockwell really trying hard to get back to half guard here.
Barnett gets to his feet and calls his opponent to stand. Here come the fireworks!
Barnett lands a jab.
Rockwell changes levels and drives through with a really nice takedown into side control. Barnett looks really pissed at himself for not defending that better.
Barnett can't do much from the bottom here.
Rockwell looks up at the clock and then as Barnett takes his cue and looks up at the clock too, Rockwell smacks him right in the chops with a big elbow! How rude!
Rockwell misses with an attempted head punch from side control.
Rockwell throwing ground and pound but whilst doing so, he forgets to control position and Barnett works his way back to half guard. Good composure under pressure.
That's two minutes gone in the round.
Rockwell throwing punches and elbows but they're not doing any damage.
Rockwell looks towards his corner to check for any instructions. The corner give him nothing to work with, so he cracks Barnett with a short hammerfist. I guess that's as good as any advice he could get in this position.
Rockwell looks to land a strike but Barnett avoids it nicely and regains full guard.
Rockwell stops Barnett from standing up.
Rockwell looking to sit in guard and control but Barnett gets the butterfly guard and sweeps. He's now in the guard on the top.
Rockwell has a closed guard, preventing anything of note from happening. Perhaps he's looking to stall.
Rockwell working a defensive guard here.
That's three minutes gone in the round.
Barnett wanted to stand there but Rockwell had control of the position.
Barnett prevents Rockwell from getting back to his feet.
Barnett is looking to stand up but Rockwell won't let him.
Rockwell has a butterfly guard looking to sweep but Barnett has passed into side control.
Rockwell is looking for a sweep.
That's four minutes gone in the round.
A few boos can be heard. I'm sure they will multiply if the fighters don't pick up the pace.
Rockwell looking for a sweep but Barnett has passed into full mount! Oh no!
Rockwell tries to lock up and control but Barnett gives him a forearm to the face and pushes him away.
Rockwell can't escape the position.
Rockwell tries to control the position but Barnett now has his back.
Rockwell rolls, trying to escape but Barnett keeps control of the position.
Rockwell is trying to stand back up.
Will Barnett go for the finish here or will he try and keep control of the position?
Buddy Barnett is fighting for a decision here - he's started to take the cautious approach.
The crowd thankful this round is nearly over.
Barnett avoiding Rockwell 's attempts to control his hands.
And that's the end of the fight!
Buddy Barnett showed his dominance in that final round.
Well I reckon that's a shut out for Barnett, winning every round. Will the judges agree? They are the ones who matter, even if they are often depressingly incompetent. Over to the ring announcer for the scorecards.
Ladies and gentlemen, after 3 rounds of action, we go to the scorecards for a decision.
Judge Bart Greer scores the fight 30:27
Judge Peter Branson scores the fight 30:27
Judge David Hoff scores the fight 30:27
In favor of your winner, by unanimous decision... Buddy Barnett!
During a confident post fight interview, Buddy Barnett thanked all his fans. He seemed very genuine when describing how motivated his fans keep him.
|
|
|
|
|
|
|
|
|
|
|
|
|
|
|
|
|
|
|
|
|
|
|
| S |
C
A |
G |
S |
C
B |
G |
|
S |
C |
G |
|
energy
A | B |
|
hype
A | B |
|
pop
A | B |
|
mgr
A | B |
|
FIGHT
RATING
36% |
|
|
|
|
|
|
|
Undercard bout
|
Coming up we have a heavyweight MMA rules bout between Darnell Big Daddy (ranked 3040 p4p, 3288 weight class) and Wilson Franklyn (ranked 347 p4p, 377 weight class). Over to our ring announcer for the fighter introductions!
 |
|
 |
| 192 cm
26
265
3 - 1 - 0 |
|
199 cm
26
243
2 - 2 - 0 |
BJJ White Belt
Excellent boxer
Cuts easily |
|
Good wrestler
Brawler
Powerful |
|
| |
|
Ladies and gentlemen. This fight is 3 rounds, in the heavyweight division.
Introducing the fighter to my left, fighting out of the red corner.
With a record of 3 - 1 - 0, fighting out of The Island, Darnell Big Daddy!
And introducing the fighter to my right, fighting out of the blue corner.
With a record of 2 - 2 - 0, fighting out of The Island, Wilson Franklyn !
The judges for this bout are Dirk Anderson, Sandra Marshall and Peter Branson.
The bell rings for round one and we are underway!
Nice defenses there by Big Daddy.
Big Daddy misses with a jab and misses with a cross straight after too.
And an attempted straight right on the counter from Franklyn ! But no joy.
Franklyn misses with a hook
and Big Daddy counters with a three punch combination, finished off with a leg kick. Nice work.
Big Daddy misses with a jab and misses with a cross straight after too.
Big Daddy avoids the body shot from Franklyn .
Franklyn scores with a nice strike.
 It looks like Darnell Big Daddy has been cut. It looks like Darnell Big Daddy has been cut.
Franklyn dips down and scores with a jab to the body.
Big Daddy just misses with a punch to the body.
Big Daddy misses the body punch
and Franklyn counters with a stiff right hand.
Some wild striking there from Big Daddy.
Franklyn looks like he wants to counter punch here.
This is a great period of action - very entertaining stuff!
Big Daddy steps to the side to avoid the strikes from Franklyn .
Big Daddy is the aggressor but that punch slipped nicely by Franklyn .
Big Daddy looks to score with a jab to the body but Franklyn is just out of range.
Big Daddy misses with a double jab.
Franklyn misses with a looping left.

Franklyn cracks Big Daddy with a big right hand that sends him to the floor! Big Daddy looks wobbly but he's sprung back up to his feet straight away� can Franklyn finish him?
 Big Daddy is rocked! Big Daddy is rocked!
Franklyn knocks out Big Daddy with a massive right hand! The ref tackles Franklyn before he can follow up with any more strikes and that's it everyone. Franklyn picks up the big W with a huge KO!
Ladies and gentlemen, after 1:58 of round 1, we have a winner by way of KO (Punch). Wilson Franklyn !
An out of breath Wilson Franklyn thanked his loyal fans in his post fight interview, giving them credit for his success over the course of his career.
|
|
|
|
|
|
|
|
|
|
|
|
|
|
|
|
|
|
|
|
|
|
|
| S |
C
A |
G |
S |
C
B |
G |
|
S |
C |
G |
|
energy
A | B |
|
hype
A | B |
|
pop
A | B |
|
mgr
A | B |
|
FIGHT
RATING
100% |
|
|
|
|
|
|
|
Undercard bout
|
Coming up we have a heavyweight MMA rules bout between Jordan Hero Manlet Killer (ranked 2242 p4p, 2201 weight class) and Sean Martin (ranked 254 p4p, 243 weight class). There are an array of beautiful celebrities at ringside tonight! I wonder if any of them paid for their tickets.
 |
|
 |
| 195 cm
25
265
4 - 0 - 0 |
|
202 cm
25
242
3 - 1 - 0 |
Good wrestling
Counter fighter
Very strong |
|
BJJ Purple Belt
Excellent MT
Very confident |
|
| |
|
Ladies and gentlemen. This fight is 3 rounds, in the heavyweight division.
Introducing the fighter to my left, fighting out of the red corner.
With a record of 4 - 0 - 0, fighting out of The Island, Jordan Hero Manlet Killer!
And introducing the fighter to my right, fighting out of the blue corner.
With a record of 3 - 1 - 0, fighting out of The Island, Sean Martin!
The judges for this bout are Winston Alpacca, Daniel Franklin and Sandra Marshall.
The bell rings for round one and we are underway!
Manlet Killer gets a clinch.
A short right from Manlet Killer.
A nice left hand lands by Manlet Killer.
Manlet Killer throws a punch but it's blocked by Martin.
Manlet Killer cracks Martin with a nice body shot.
Martin tries to break free but Manlet Killer pushes him back against the cage.
Manlet Killer tries a shoulder strike but it doesn't do any damage.
Manlet Killer lands with a good tight uppercut to the head.
Manlet Killer lands with a short punch from the clinch.
Manlet Killer is struggling to control the position.
Manlet Killer definitely looks more muscular than last time we saw him fight.
We've had a slow start to the round here - hopefully the action picks up.
Martin is looking to break free of the clinch but Manlet Killer has double underhooks.
Manlet Killer digs a right hand underneath Martin's ribcage. Martin let out a lung full of air as it connected.
Manlet Killer goes for a body shot but it's blocked.
A nice right hand lands inside from Manlet Killer.
That's one minute gone in the round.
Manlet Killer lands a hook that snaps the head of Martin backwards.
Martin blocking some punches.
Manlet Killer lands with a light punch inside.
Manlet Killer has a couple of punches blocked by Martin.
Manlet Killer tries to land a shot to the body but it's blocked.
Manlet Killer keeps control of Martin as he tries to wriggle out of the double underhooks.
Martin jumps guard but Manlet Killer stands there with Martin around his waist. Martin gives up and drops back to his feet. We remain in the clinch.
Martin is trying to break free.
Manlet Killer lands with a quick shot inside that doesn't really do much damage.
Manlet Killer lands a short shot on the inside that snaps the head of Martin backwards.
An uppercut on the inside fails to land for Manlet Killer.
Martin tries to pull guard but Manlet Killer won't allow it.
That's two minutes gone in the round.
Manlet Killer lands on the inside with an uppercut.
Manlet Killer tries to throw a body punch but Martin avoids it by throwing Manlet Killer back against the cage.
Martin takes a shot to the head.
Martin is rocked!
Good body shot from Manlet Killer.
Martin is still on wobbly legs! Can Manlet Killer finish him?
Martin looks winded!
Manlet Killer lands a right hand that snaps the head of Martin backwards.
This has been an exciting period of action!
Manlet Killer creates some distance for himself and unleashes a massive uppercut that sends Martin's eyes rolling into the back of his head! Martin drops to his knees and Manlet Killer pours it on with more strikes until the referee steps in to end the bout!
Ladies and gentlemen, after 2:34 of round 1, we have a winner by way of TKO (Strikes). Jordan Hero Manlet Killer!
|
|
|
|
|
|
|
|
|
|
|
|
|
|
|
|
|
|
|
|
|
|
|
| S |
C
A |
G |
S |
C
B |
G |
|
S |
C |
G |
|
energy
A | B |
|
hype
A | B |
|
pop
A | B |
|
mgr
A | B |
|
FIGHT
RATING
44% |
|
|
|
|
|
|
|
Co-main event
|
Coming up we have a light heavyweight MMA rules bout between Murtaz Vatsadze (ranked 2159 p4p, 2510 weight class) and Philip Driver (ranked 320 p4p, 352 weight class). Philip Driver will no doubt be trying to keep this one on the feet, where he has a distinct advantage.
 |
|
 |
| 186 cm
26
205
4 - 1 - 0 |
|
188 cm
25
211
3 - 1 - 0 |
Decent wrestler
Solid Muay Thai
Cardio machine |
|
BJJ Blue Belt
Decent boxing
Powerful |
|
| |
|
Ladies and gentlemen. This fight is 3 rounds, in the light heavyweight division.
Introducing the fighter to my left, fighting out of the red corner.
With a record of 4 - 1 - 0, fighting out of The Island, Murtaz Vatsadze!
And introducing the fighter to my right, fighting out of the blue corner.
With a record of 3 - 1 - 0, fighting out of The Island, Philip Driver!
The judges for this bout are Daniel Franklin, Bart Greer and Dirk Anderson.
The bell rings for round one and we are underway!
A swing and a miss from Driver.
Vatsadze is looking to counter punch.
Driver pushing out the jab but it's not landing.
A jab from Driver misses.
Driver throws a hook to the side of Vatsadze's head but Vatsadze sees it coming and ducks under it beautifully.
Driver gets a clinch.
Vatsadze lands a hook to the side of the head.
Vatsadze swings away with an uppercut that misses.
Vatsadze has Driver pressed against the cage, preventing Driver from circling away and getting back to striking at range.
Vatsadze swings away with an uppercut that misses.
Driver tries to throw a body punch but Vatsadze avoids it by throwing Driver back against the cage.
An uppercut on the inside fails to land for Vatsadze.
We've had a slow start to the round here - hopefully the action picks up.
Vatsadze lands a hook to the side of the head.
Vatsadze lands a shoulder strike.
Vatsadze definitely looks more muscular than last time we saw him fight.
Vatsadze lands a left hand that snaps the head of Driver backwards.
Vatsadze gets through Driver's defenses to land a nice punch to the side of the head.
Vatsadze fails to land with a short punch on the inside.
We've seen a great period of action over the last minute or so - credit to both fighters for going all out!
Driver misses with a hook to the ribs.
Vatsadze swings wildly with an uppercut but Driver uses good head movement to avoid it.
Driver throws a punch but it's blocked by Vatsadze.
That's one minute gone in the round.
A short right hand to the side of the head by Vatsadze.
Vatsadze prevents Driver from breaking the clinch.
Vatsadze lands a body shot.
Driver blocks a punch to the side of the head.
Driver misses with a punch to the body.
Driver struggles to land a body shot inside as Vatsadze controls his hands.
Vatsadze lands a shot to the body.
An uppercut to the body lands inside from Vatsadze.
Driver looks winded!
Vatsadze can't find room to land a body shot as Driver controls the action.
Driver wants to break the clinch but can't.
Vatsadze misses with a shot to the kidneys.
Vatsadze lands with a light punch inside.
Vatsadze stays in close to his opponent and throws a right hand to the body.
Vatsadze lands a nice uppercut.
Vatsadze lands with a quick shot inside that doesn't really do much damage.
Driver scores with an uppercut up the middle.
Vatsadze lands with a quick shot inside that doesn't really do much damage.
Vatsadze lands a body shot.
Fantastic stuff here - a very entertaining period of action, which has drawn cheers from the crowd.
Vatsadze cracks Driver with a nice body shot.
A quick uppercut on the inside from Vatsadze.
Vatsadze lands with a quick shot inside that doesn't really do much damage.
Vatsadze lands on the inside with an uppercut.
That's two minutes gone in the round.
Vatsadze lands a shoulder strike.
Driver has had enough of the clinch but Vatsadze keeps him there for the moment.
Vatsadze can't find room to land a body shot as Driver controls the action.
Driver looks like he'd prefer to be striking at range right now.
Vatsadze lands a hook that snaps the head of Driver backwards.
Vatsadze working some nice short punches in the clinch.
Vatsadze working on landing some head shots here - that one got through nicely.
Vatsadze tries to land a shot to the body but it's blocked.
Vatsadze lands a hook to the side of the head.
A right handed body shot lands from Vatsadze.
Vatsadze lands with a quick shot inside that doesn't really do much damage.
Vatsadze gets through Driver's defenses to land a nice punch to the side of the head.
Driver is rocked!
Vatsadze lands with a light punch inside.
Driver is still on wobbly legs! Can Vatsadze finish him?
Vatsadze lands a short shot on the inside that snaps the head of Driver backwards.
Vatsadze working aggressively here.
An uppercut on the inside fails to land for Vatsadze.
Vatsadze dips a shoulder and cracks Driver with a mighty uppercut! Driver falls back against the cage and Vatsadze unloads with a barrage of strikes! Driver is completely out with his eyes open, only supported by the cage! Save him ref! Eventually the ref decides to do his job and jumps in - Vatsadze screams abuse at the incompetent official before going over to celebrate with his corner. Brutal stuff!
Ladies and gentlemen, after 2:47 of round 1, we have a winner by way of TKO (Strikes). Murtaz Vatsadze!
After winning the bout, Murtaz Vatsadze thanked all his fans and promised he'd do even better in his next fight. The crowd seemed to love his humility.
|
|
|
|
|
|
|
|
|
|
|
|
|
|
|
|
|
|
|
|
|
|
|
| S |
C
A |
G |
S |
C
B |
G |
|
S |
C |
G |
|
energy
A | B |
|
hype
A | B |
|
pop
A | B |
|
mgr
A | B |
|
FIGHT
RATING
67% |
|
|
|
|
|
|
|
Main event
|
Coming up we have a light heavyweight MMA rules bout between Archie Laird (ranked 1213 p4p, 1894 weight class) and Amaharo Xan (ranked 187 p4p, 282 weight class). Xan comes into a darkened arena with his song building. ARIGA TCHAN kicks in, the lights come on and the crowd goes wild! What a showman! Archie Laird has the better chin. Will he look to stand and bang today?
 |
|
 |
| 180 cm
25
211
4 - 0 - 0 |
|
180 cm
25
205
3 - 1 - 0 |
Good wrestling
Basic striking
Granite chin |
|
Decent wrestler
Solid Muay Thai
Powerful |
|
| |
|
Ladies and gentlemen. This fight is 3 rounds, in the light heavyweight division.
Introducing the fighter to my left, fighting out of the red corner.
With a record of 4 - 0 - 0, fighting out of The Island, Archie Laird!
And introducing the fighter to my right, fighting out of the blue corner.
With a record of 3 - 1 - 0, fighting out of The Island, Amaharo Xan!
The judges for this bout are Peter Branson, Sandra Marshall and David Hoff.
The bell rings for round one and we are underway!
Xan looks to land a left hand but Laird moved out of range nicely.
Good exchange - Xan coming out on top.
Laird seems to be moving with more speed, compared to his last bout. He must have been working on that in the gym.
Laird bobs and weaves well there to avoid the strikes.
Laird throws a wild body kick that Xan sees coming a mile off.
Laird forces Xan back against the cage and clinches.
Laird blocks a punch to the side of the head.
Xan misses with some punches.
Xan tries a shoulder strike but it doesn't do any damage.
Xan has a couple of punches blocked by Laird.
Xan throws a punch but it's blocked by Laird.
Xan fails to land with a short punch on the inside.
A short right from Xan.
Xan misses with some punches.
Xan lands a right hand.
Xan goes for a body shot but it's blocked.
Xan working aggressively here.
Xan misses with a hook from the clinch.
Xan swings away with an uppercut that misses.
This is a great period of action - very entertaining stuff!
Laird tries to score a body lock takedown but Xan shows good agility there to stay on his feet.
Xan can't find room to land a body shot as Laird controls the action.
That's one minute gone in the round.
A head punch on the inside from Xan fails to land.
Xan scores with a hook to the body.
Laird blocking some punches.
A head punch on the inside from Xan fails to land.
Xan tries to land a shot to the body but it's blocked.
Xan fails to land with a short punch on the inside.
Nice body punch from Xan.
Xan struggles to land a body shot inside as Laird controls his hands.
Xan throws a head punch that misses.
Laird tightens his grip and picks Xan up, before dumping him to the ground. Xan manages to land in guard.
Xan looking to sweep here. No luck so far.
Laird throwing shots from guard but he's hitting more mat than opponent.
Xan wants to hit a sweep here but Laird passes into full mount! Oh no, disaster for Xan there!
Xan is in all sorts of trouble here.
Xan takes a big shot to the head but keeps on trying to improve his position.
That's two minutes gone in the round.
Xan is looking to get to half guard.
Fantastic stuff here - a very entertaining period of action, which has drawn cheers from the crowd.
Laird raining down hammerfists from mount.
Xan is in all sorts of trouble here.
We get told so often about how wrestlers don't like to be on their backs. Let's see if Xan can do anything to dispel that myth.
Laird lands a big shot there that rocks Xan but he's holding on and managing to survive for now.
Xan is trying to escape the mount.
Laird is in the full mount, landing strikes.
Laird prevents Xan from getting the reversal.
Laird connects with a couple of good shots from mount.
Laird lands a big elbow.
Xan is in all sorts of trouble here.
BOOM! Laird connects with a massive shot to the dome!
Xan working to try and regain half guard.
That's three minutes gone in the round.
Laird landing punches.
Laird scores with a couple of good head shots there.
Xan manages to regain half guard. Good work.
Laird missing with the ground and pound from half guard.
Laird scores with a couple of good hammerfists.
Laird not throwing his punches with enough precision this time.
Laird prevents Xan from improving his position.
Xan on the receiving end of some nice ground and pound.
Laird is trying to work for a kimura. This could be trouble! No, Xan has managed to free his arm - good work.
Laird controlling the pace.
That's four minutes gone in the round.
Xan tries to get to full guard but Laird has control of the leg.
Xan is refusing to be controlled, as Laird sits in half guard.
Laird working over Xan with some ground and pound. Xan looks like he wants out of this position, which is understandable.
Laird is trying to control. Xan wants to improve his position but can't escape this time.
Xan really doesn't want to stay on the ground with Laird. If he can't get it back to his feet, it's only a matter of time before he'll be tapping out.
Xan is looking to regain full guard. Not this time though.
Xan wants to get back to full guard but Laird has mounted him!
Xan is in all sorts of trouble here.
Laird has been looking to land a fair amount of strikes on the ground. He might be looking to soften his opponent up in order to work for a submission.
Laird tucks in and makes sure he doesn't lose the dominant position.
Laird looking to finish Xan with some ground and pound. This is bad for Xan!
And that is the end of the round. The fighters go back to their corners.
Archie Laird dominated that round.
That's the end of the round. The referee orders the cornermen out of the cage so we can get back down to business.
Xan throws a jab, cross combination which is slipped
and Laird counters with a shoot takedown into half guard.
Laird with a momentary lay and pray from half guard.
Laird landing with strikes to the body and head, softening up his opponent.
Laird is really dominating this fight. Is there anything that Xan can do to turn this around?
Laird tries to pass the half guard into mount. Xan knows what he's doing though and prevents the attempt.
Laird prevents Xan from improving his position.
Xan is persisting with the attempt to improve his position.
Laird passes to full mount!
We've had a slow start to the round here - hopefully the action picks up.
Laird with good strikes from the mount here!
Xan bucks up and manages to get a nice reversal! He's in guard on the top - nicely done!
Laird is looking for a triangle but Xan pushes his legs off easily.
That's one minute gone in the round.
Laird working the defensive guard well to avoid strikes from Xan.
Archie Laird overall seems to be getting the better of the ground position in the fight so far.
There's a bit of a scramble here and now Laird is on top in guard.
Xan tries to land a sweep but no joy.
Laird stays in close to Xan's body and controls the position.
Laird trying to control the position from guard on top but Xan is wriggling around, looking for whatever he can.
Xan avoiding any damage from the ground and pound.
Laird postures up.
Laird preventing the sweep.
The ref warns both fighters not to hold the cage as they work up against the meshing.
That's two minutes gone in the round.
Laird works over Xan with some ground and pound from guard.
Laird advances to half guard.
Laird lands with an elbow from half guard - that looked like it hurt.
Xan taking some punishment here, with Laird in his half guard.
Laird controlling the action here.
Xan is looking to regain full guard. Not this time though.
That's three minutes gone in the round.
Laird wants to pass the guard but Xan is defending well.
The two fighters exchange a few words. I couldn't hear what they were saying but maybe it's more fun if you make it up yourself. Laird connects with a nice short shot to Xan's temple.
Xan wants to improve his position but Laird is controlling well.
Laird is scoring with some nice ground and pound from the dominant position.
Laird is keen to just control but Xan is a slippery customer.
Laird looks towards his corner to check for any instructions. The corner give him nothing to work with, so he cracks Xan with a short hammerfist. I guess that's as good as any advice he could get in this position.
The referee walks around the fighters to get a better view of the action. Laird lands a nice short elbow.
Laird not throwing his punches with enough precision this time.
That's four minutes gone in the round.
Xan manages to get to full guard.
Laird passes Xan's left leg - he's now in half guard.
Nice strikes from Laird there.
Xan throws a strike from the bottom that misses.
Xan is looking to control Laird's leg but it's slowly edging free. Can Xan avoid being mounted?
Laird sitting in half guard, looking to land shots. Xan defending well though.
Laird looks to score some points with some ground and pound.
The crowd thankful this round is nearly over.
Laird controlling the pace.
Laird seems very keen to just sit and control from half guard but Xan does not like that idea so much and is remaining active off his back.
And that is the end of the round. The fighters go back to their corners.
Archie Laird dominated that second round.
That's time! Back to the action! This is the final round!
Laird slips a straight right by Xan.
Laird throws a low kick but Xan avoids it.
Xan throws a lazy right hand but Laird sees it coming a mile off and sidesteps it easily.
The fighters circle momentarily. Laird darts into range and connects with a nice straight punch.
Laird ducks down and throws a hook to the body but Xan moves away.
Laird jabs Xan to the body, keeping him at a distance.
Laird drives through with a takedown into guard.
Laird slips effortlessly into side control - very nice.
Laird tries to advance to mount but can't.
Xan tries to bench press Laird off him but Laird keeps the position.
Xan is trying to work for a sweep but Laird has mounted him!
Xan is looking to get to half guard.
Laird with the ground and pound from mount.
We've been informed that Xan has been working hard on his conditioning in the buildup to the fight.
That's one minute gone in the round.
Laird prevents Xan from getting the reversal.
Laird lands a nice shot to the head.
The fighters are pressed up against the cage, both looking to find a bit of space to work.
Xan gets back to half guard.
Laird trying to control the action but Xan is working from the bottom.
Xan is looking to improve his position.
Xan is staying active underneath Laird, who seems content to just control the action from this position.
The two fighters exchange a few words. I couldn't hear what they were saying but maybe it's more fun if you make it up yourself. Laird connects with a nice short shot to Xan's temple.
Xan is looking to improve his position.
Xan on the receiving end of some nice ground and pound.
Laird is scoring with some nice ground and pound from the dominant position.
Amaharo Xan has stepped it up - he knows he needs a finish here!
That's two minutes gone in the round.
Laird perhaps working for something from half guard, or maybe not. It looks like he's just sitting there.
Laird working the head and body with strikes.
Laird is thwarting Xan's attempts to control the position.
Laird works his way into side control.
Laird advances nicely into full mount.
Laird lands a heavy elbow.
Xan is looking to get to half guard.
Laird lands an elbow that was bordering on illegal but the referee lets it go with a warning.
Xan is rocked!
The fans in attendance giving it up for the two fighters, who have really let it all hang out in the last minute or so!
Xan taking shots to the head.
Xan is still in real trouble! Can Laird finish him?
Laird scoring with some good ground and pound from mount here. Will he manage to finish Xan?
That's three minutes gone in the round.
Laird postures up and lands a whopping elbow - oh that's hurt Xan bigstyle! Two more strikes land for Laird and the fight is over!
Ladies and gentlemen, after 3:20 of round 3, we have a winner by way of TKO (Strikes). Archie Laird!
An out of breath Archie Laird thanked his loyal fans in his post fight interview, giving them credit for his success over the course of his career.
|
|
|
|
|
|
|
|
|
|
|
|
|
|
|
|
|
|
|
|
|
|
|
| S |
C
A |
G |
S |
C
B |
G |
|
S |
C |
G |
|
energy
A | B |
|
hype
A | B |
|
pop
A | B |
|
mgr
A | B |
|
FIGHT
RATING
61% |
|
|
|
|
|
|
|
|
|
|
