 |
IXF XXI PBP Commentary |
Undercard bout
|
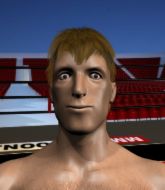
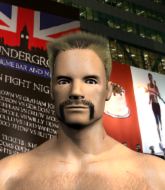
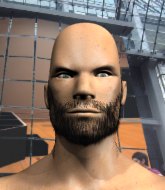
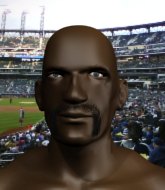
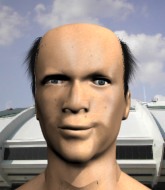
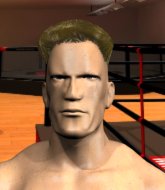
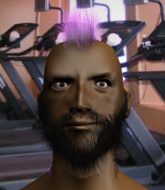
Coming up we have a welterweight MMA rules bout between Isai Anderson (ranked 6527 p4p, 6451 weight class) and Sorrenco Cistiffufs (ranked 645 p4p, 639 weight class). Both these guys have really solid chins. Will we see a standup war or will they both decide that a knockout is unlikely and try to win the fight elsewhere?
 |
|
 |
| 163 cm
25
170
0 - 1 - 0 |
|
180 cm
25
180
2 - 4 - 0 |
Good takedowns
Basic striking
Granite chin |
|
Good takedowns
Brawler
Solid chin |
|
| |
|
Ladies and gentlemen. This fight is 3 rounds, in the welterweight division.
Introducing the fighter to my left, fighting out of the red corner.
With a record of 0 - 1 - 0, fighting out of The Island, Isai Anderson!
And introducing the fighter to my right, fighting out of the blue corner.
With a record of 2 - 4 - 0, fighting out of The Island, Sorrenco Cistiffufs!
The judges for this bout are Michael Johnstone, Bart Greer and Winston Alpacca.

The bell rings for round one and we are underway!
Cistiffufs shoots in looking for a takedown but Anderson manages to keep the fight standing, pushing Cistiffufs's face into the canvas for good measure before circling away.

Excellent takedown into side control there by Anderson.
Cistiffufs is looking to reverse the position.
Anderson wants to control but Cistiffufs is keeping him busy.
Cistiffufs controls the position for a moment.
Cistiffufs wants to control but Anderson postures up.
Cistiffufs is looking to regain half guard here but Anderson keeps moving and retains side control.

Anderson wants to work for a kimura but he's foiled early by Cistiffufs, who protects the arm well.
Cistiffufs tries to get back to half guard but can't.
We've had a slow start to the round here - hopefully the action picks up.
Anderson trying to control the position but Cistiffufs is working away.
Anderson tries for a kimura. Not really close to a finish though.
Cistiffufs is looking for a sweep.

That's one minute gone in the round.
Anderson advances to mount.
Cistiffufs is working to get back to half guard.
Anderson trying to control but Cistiffufs is having none of it.
Cistiffufs is looking to get to half guard.
Cistiffufs keeps trying to improve his position.

That's two minutes gone in the round.
Anderson trying to control but he's not successful this time.
Anderson with some aggressive grappling here. He's looking for submissions here, rather than waiting for the opportunity to counter.
Cistiffufs working to try and regain half guard.
Anderson looking for an armbar but decides to keep the dominant position instead.
Anderson looking for an armbar but decides to keep the dominant position instead.
Cistiffufs wants to hold on but Anderson pushes him away.
Cistiffufs tries to get back to half guard but can't.
Cistiffufs bucks up and manages to get a nice reversal! He's in guard on the top - nicely done!
Cistiffufs tries to free his leg and advance position but Anderson is retaining full guard.
Anderson escapes his hips to the side and looks to be working for an armbar. Cistiffufs gives him a little smile and shakes his head. No chance.

Cistiffufs drops back looking for a leg! Anderson is in trouble here! The fighters roll with the hold and Anderson manages to kick Cistiffufs off! Cistiffufs jumps back into Anderson's guard.

That's three minutes gone in the round.
Cistiffufs thinks about going for a leg but decides against it, in order to maintain the position.
Cistiffufs trying to control the position from guard on top but Anderson is wriggling around, looking for whatever he can.
Cistiffufs wants to pass the guard but Anderson is keeping the position.
Cistiffufs thinks about going for a leg but decides against it, in order to maintain the position.
Anderson has a loose triangle. He'll be looking to tighten that up but Cistiffufs can see exactly what he's planning and manages to posture up and free himself.
Cistiffufs wants to control from the top but Anderson keeps moving.
Cistiffufs stays in close to Anderson's body and controls the position.

That's four minutes gone in the round.
My god... these two guys really need to pick up the pace or everyone will leave to go get a beer.
Cistiffufs looking to sit in guard and control but Anderson gets the butterfly guard and sweeps. He's now in the guard on the top.

Anderson avoids a guillotine attempt easily.
Anderson could do with losing a few pounds - he looks very soft around the mid section, to put it politely.
Cistiffufs is throwing his legs up, looking for submissions. Anderson is aware though and is defending well.
Anderson drops back looking for a leg! Cistiffufs is in trouble here! The fighters roll with the hold and Cistiffufs manages to kick Anderson off! Anderson jumps back into Cistiffufs's guard.
The ref warns both fighters not to hold the cage as they work up against the meshing.
Anderson got a little sloppy there for a moment and Cistiffufs has worked his way into a loose triangle - can he finish it?! No, Anderson has managed to get both his arms back between Cistiffufs's legs - danger averted.
Cistiffufs has a loose triangle. He'll be looking to tighten that up but Anderson can see exactly what he's planning and manages to posture up and free himself.
The crowd thankful this round is nearly over.
Anderson drops back looking for a leg! Cistiffufs is in trouble here! The fighters roll with the hold and Cistiffufs manages to kick Anderson off! Anderson jumps back into Cistiffufs's guard.
Anderson passes Cistiffufs's right leg, so he's now in half guard.
And that is the end of the round. The fighters go back to their corners.
Isai Anderson dominated that round.
The fighters' corners scream their final instructions, as the referee calls time. Here we go, back to the action!

Anderson shoots in looking for a single leg takedown. Cistiffufs is trying to defend but Anderson finishes it well and ends up in half guard. Let's see if he can advance position further.
Cistiffufs is defending against the submission attempts here by Anderson.
The fighters are pressed up against the cage, both looking to find a bit of space to work.
Anderson seems very keen to just sit and control from half guard but Cistiffufs does not like that idea so much and is remaining active off his back.
Cistiffufs actively working from the bottom here.
Cistiffufs is looking to sinch up a guillotine here but Anderson pulls his head out easily.
Anderson is trying for a guillotine from the top but the pressure isn't in the right place so Cistiffufs is just riding it out for now. Anderson eventually gives up the hold.
We've had a slow start to the round here - hopefully the action picks up.
Anderson prevents Cistiffufs from improving his position.
Anderson is trying for a guillotine from the top but the pressure isn't in the right place so Cistiffufs is just riding it out for now. Anderson eventually gives up the hold.
That's one minute gone in the round.
Anderson seems to be looking for submissions.
Cistiffufs actively working from the bottom here.
Cistiffufs is looking to sinch up a guillotine here but Anderson pulls his head out easily.
Anderson is looking for a kimura but he's never going to get it from there.
Anderson wants to take a breather but Cistiffufs is having none of it.
Cistiffufs trying to control here.
That's two minutes gone in the round.
Well. There's a bit of a lull in the action here and the crowd are starting to get restless.
Cistiffufs actively working from the bottom here.
Anderson tries to pass the half guard into mount. Cistiffufs knows what he's doing though and prevents the attempt.
Cistiffufs trying to get back to full guard but Anderson takes advantage of the position and moves to full mount!
Cistiffufs is desperately trying to improve his position but Anderson has a good base and remains in mount.
Cistiffufs tries to improve his position but Anderson has taken his back! Anderson has a choke - it's sunk in pretty tight... Will Cistiffufs tap? No... maybe... yes! He's tapped! Anderson pushes Cistiffufs away and gets up to celebrate with his corner!
Ladies and gentlemen, after 2:49 of round 2, we have a winner by way of Submission (RNC). Isai Anderson!
|
|
|
|
|
|
|
|
|
|
|
|
|
|
|
|
|
|
|
|
|
|
|
| S |
C
A |
G |
S |
C
B |
G |
|
S |
C |
G |
|
energy
A | B |
|
hype
A | B |
|
pop
A | B |
|
mgr
A | B |
|
FIGHT
RATING
32% |
|
|
|
|
|
|
|
Undercard bout
|
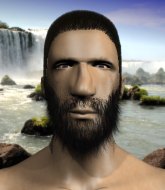
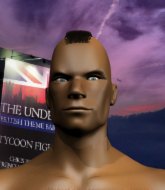
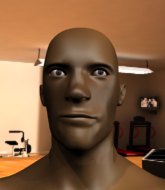
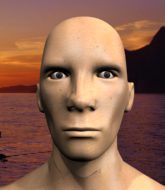
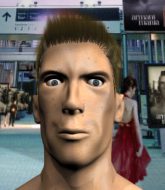
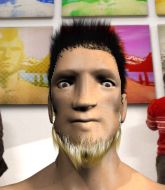
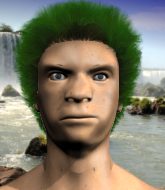
Coming up we have a featherweight MMA rules bout between Dzhambul Myagmarsuren (ranked 5230 p4p, 5901 weight class) and Mauricio Ascaciba (ranked 416 p4p, 442 weight class). Dzhambul Myagmarsuren has the better chin. Will he look to stand and bang today?
 |
|
 |
| 169 cm
25
154
1 - 1 - 0 |
|
177 cm
25
145
0 - 1 - 0 |
Decent wrestler
Brawler
Cuts easily |
|
BJJ White Belt
Excellent MT
Enjoys gardening |
|
| |
|
Ladies and gentlemen. This fight is 3 rounds, in the featherweight division.
Introducing the fighter to my left, fighting out of the red corner.
With a record of 1 - 1 - 0, fighting out of The Island, Dzhambul Myagmarsuren!
And introducing the fighter to my right, fighting out of the blue corner.
With a record of 0 - 1 - 0, fighting out of The Island, Mauricio Ascaciba!
The judges for this bout are Winston Alpacca, Peter Branson and Santiago Holmes.
The bell rings for round one and we are underway!
Myagmarsuren ducks down and throws a hook to the body but Ascaciba moves away.
Myagmarsuren checks a leg kick.
Myagmarsuren feinted with a counter takedown.
Myagmarsuren dodges the punch combination from Ascaciba.
Myagmarsuren looks to have improved his striking defense since last time we saw him fight.
Ascaciba bobs and weaves and throws out a fast jab that snaps Myagmarsuren's head backwards.
Ascaciba misses with a wild body shot.
Myagmarsuren shoots in for a takedown - he's clinched up with Ascaciba but Ascaciba pushes him off and we're back to square one.
Myagmarsuren displays some good footwork, moving neatly out of range as Ascaciba throws out the jab.
Myagmarsuren closes the distance and gets a trip takedown into side control. Ascaciba quickly recovers to half guard.
Myagmarsuren drops an elbow to the side of Ascaciba's head.
Ascaciba tries to roll over but Myagmarsuren keeps him under control.
Myagmarsuren seems to be taking a bit of a break to think of his next move. He lands a short punch in the meantime.
That's one minute gone in the round.
Myagmarsuren thumps the canvas. Not on purpose obviously - he just missed Ascaciba's head.
Ascaciba is concentrating on defense, preventing Myagmarsuren from advancing position.
Myagmarsuren missing with the ground and pound from half guard.
Myagmarsuren scoring with strikes to the body and head.
Ascaciba really doesn't want to stay on the ground with Myagmarsuren. If he can't get it back to his feet, it's only a matter of time before he'll be tapping out.
Myagmarsuren throwing shots but they're hitting the canvas more than the man.
Myagmarsuren looks towards his corner to check for any instructions. The corner give him nothing to work with, so he cracks Ascaciba with a short hammerfist. I guess that's as good as any advice he could get in this position.
We get told so often about how wrestlers don't like to be on their backs. Let's see if Ascaciba can do anything to dispel that myth.
Myagmarsuren throwing shots but Ascaciba is blocking nicely.
Myagmarsuren landing with strikes to the body and head, softening up his opponent.
Myagmarsuren throwing punches and elbows but they're not doing any damage.
The ref warns both fighters not to hold the cage as they work up against the meshing.
Ascaciba has no desire to be mounted, so is trying to control. Myagmarsuren is working away from the top position though.
Ascaciba is trying to defend against the ground and pound but Myagmarsuren scores with a couple of nice shots.
That's two minutes gone in the round.
Myagmarsuren with a momentary lay and pray from half guard.
Myagmarsuren is nestled in close to Ascaciba, controlling him well. He's worked in a nice elbow to the side of the head as well, for good measure.
Ascaciba keeping his head moving to avoid the ground and pound.
Myagmarsuren working over Ascaciba with some ground and pound. Ascaciba looks like he wants out of this position, which is understandable.
Ascaciba felt the need to train up his defensive grappling in the buildup to the fight. Presumably he was expecting to be in a difficult position like this, so let's see if he can get out of it.
Ascaciba keeping his head moving to avoid the ground and pound.
Myagmarsuren scoring with strikes to the body and head.
Myagmarsuren lands a big shot. The thud that echoes around the arena is like music to the fans' ears.
Myagmarsuren slips a nice elbow through Ascaciba's hands, connecting with Ascaciba's forehead.
Myagmarsuren working the head and body with strikes.
 Ascaciba is rocked! Ascaciba is rocked!
Myagmarsuren winds up and cracks Ascaciba with a swinging punch to the side of the head.
Ascaciba is still in real trouble! Can Myagmarsuren finish him?
We've seen a great period of action over the last minute or so - credit to both fighters for going all out!
Myagmarsuren landing with strikes to the body and head, softening up his opponent.
Myagmarsuren lands a massive shot from half guard that has rocked Ascaciba! More strikes land and this one is all over! Myagmarsuren jumps to his feet and is applauded loudly by the crowd!
Ladies and gentlemen, after 3:18 of round 1, we have a winner by way of TKO (Strikes). Dzhambul Myagmarsuren!
|
|
|
|
|
|
|
|
|
|
|
|
|
|
|
|
|
|
|
|
|
|
|
| S |
C
A |
G |
S |
C
B |
G |
|
S |
C |
G |
|
energy
A | B |
|
hype
A | B |
|
pop
A | B |
|
mgr
A | B |
|
FIGHT
RATING
42% |
|
|
|
|
|
|
|
Undercard bout
|
Coming up we have a heavyweight MMA rules bout between Kari Polli (ranked 4431 p4p, 7120 weight class) and Jon Walker (ranked 483 p4p, 614 weight class). Kari Polli is staring across the cage at his opponent, tweaking his nipples... Tweaking his own nipples that is.
 |
|
 |
| 212 cm
23
244
1 - 2 - 0 |
|
201 cm
20
257
1 - 3 - 0 |
Good wrestling
Brawler
Granite chin |
|
BJJ Blue Belt
Counter fighter
Determined |
|
| |
|
Ladies and gentlemen. This fight is 3 rounds, in the heavyweight division.
Introducing the fighter to my left, fighting out of the red corner.
With a record of 1 - 2 - 0, fighting out of The Island, Kari Polli!
And introducing the fighter to my right, fighting out of the blue corner.
With a record of 1 - 3 - 0, fighting out of The Island, Jon Walker!
The judges for this bout are Michael Johnstone, Winston Alpacca and Sandra Marshall.
The bell rings for round one and we are underway!
Polli scores with a hook to the body. Walker takes a step back and tries to catch his breath.
Polli lands with a hook. Walker tried to avoid it but it clipped the top of his head.
 It looks like Jon Walker has been cut. It looks like Jon Walker has been cut.

Polli lands a big uppercut and Walker crumbles to the floor! The ref thinks about stopping the fight but Walker looks OK. Polli waves Walker back to his feet!
Walker is rocked!
Walker switches off momentarily and Polli cracks him with a monster right hand! Walker topples backwards and makes a semi conscious attempt to cover up, as Polli dives in to land one more shot, before the referee has time to call the fight. What a finish by Polli!
Ladies and gentlemen, after 0:14 of round 1, we have a winner by way of KO (Punch). Kari Polli!
|
|
|
|
|
|
|
|
|
|
|
|
|
|
|
|
|
|
|
|
|
|
|
| S |
C
A |
G |
S |
C
B |
G |
|
S |
C |
G |
|
energy
A | B |
|
hype
A | B |
|
pop
A | B |
|
mgr
A | B |
|
FIGHT
RATING
100% |
|
|
|
|
|
|
|
Undercard bout
|
Coming up we have a heavyweight MMA rules bout between Floki Big Mouth (ranked 2981 p4p, 3869 weight class) and Loba Capitolina (ranked 337 p4p, 433 weight class). Over to our ring announcer for the fighter introductions!
 |
|
 |
| 190 cm
25
275
1 - 2 - 0 |
|
189 cm
25
226
2 - 1 - 0 |
BJJ White Belt
Excellent boxer
Very strong |
|
BJJ White Belt
Excellent boxer
Granite chin |
|
| |
|
Ladies and gentlemen. This fight is 3 rounds, in the heavyweight division.
Introducing the fighter to my left, fighting out of the red corner.
With a record of 1 - 2 - 0, fighting out of The Island, Floki Big Mouth !
And introducing the fighter to my right, fighting out of the blue corner.
With a record of 2 - 1 - 0, fighting out of The Island, Loba Capitolina!
The judges for this bout are Winston Alpacca, Bart Greer and Santiago Holmes.
The bell rings for round one and we are underway!
Big Mouth swings wildly with a right hand that was never going to find it's target.
Big Mouth lands a jab to the nose.
Big Mouth swings wildly with a right hand that was never going to find it's target.
Capitolina feints a jab promting Big Mouth to slip. Capitolina then demonstrates his capabilities by jabbing again. Big Mouth slips again and ducks right into an uppercut.
Capitolina's coach down at Cozad The Island was telling us pre-fight that they have been working on Capitolina's balance. Obviously they view that as a key factor in the outcome of this fight.
Capitolina is pinned up against the cage taking some big shots here. The referee is looking closely deciding whether he should stop the fight.
Capitolina pushing out the jab but it's not landing.
Capitolina blocks a jab.
Capitolina will need to tighten up his combinations if he doesn't want to gas himself out, swinging at thin air.
Capitolina jabs Big Mouth right on the nose. Big Mouth blinks but takes it well.
Capitolina misses with a straight left.
Big Mouth misses with a jab to the body
and Capitolina counters with a three punch combination, finished off with a leg kick. Nice work.
This has been an exciting period of action!
Big Mouth looks to land a right hand but Capitolina moved out of range.
Capitolina slips a jab from Big Mouth .
Capitolina throws the left hand but Big Mouth avoids the punch easily.
Big Mouth swung with a counter right hand that didn't connect.
Capitolina throws a right hand that Big Mouth ducks under and follows up with a left that Big Mouth also avoids with ease.
This fight brought to you by 5M nutrition - it's mmmmm tasty. Nice jab by Big Mouth .
That's one minute gone in the round.
Big Mouth lands an overhand right.
Big Mouth slips under a jab.
Big Mouth lands a nice hook to Capitolina's body. Capitolina takes it in his stride and looks to land his own strikes.
Capitolina slips under a jab from Big Mouth .
Big Mouth throws a body punch but Capitolina moves out of range.
Capitolina walks into a straight right hand from Big Mouth .
Capitolina looks to land a right hand but Big Mouth moved out of range.
Big Mouth keeps his opponent at a distance with a nice jab.
Big Mouth cracks Capitolina with a hook to the jaw. Both fighters smile at eachother and high-five before getting back down to business.
Capitolina slips under a jab from Big Mouth .
Floki Big Mouth seems to be the more aggressive standup fighter in this bout.
Capitolina looks to land a left hand but Big Mouth moved out of range nicely.
Big Mouth uses some good footwork to avoid the body shot by Capitolina.
Big Mouth throws a hook to the body but it doesn't connect.
Big Mouth ducks under an overhand right and circles away with a smile on his face.
Capitolina lands with a nice body punch.
This has been an exciting period of action!
Capitolina misses with a double jab
and Big Mouth counters with a good right hand that lands right on the jaw.
Nice straight punches there by Big Mouth . You know Roy Jones Jr respects the hands of Big Mouth .
That's two minutes gone in the round.
Capitolina misses with a straight left.
Capitolina misses with a series of wild punches.
Capitolina takes a shot right to the bread basket.
Capitolina swinging wildly here.
Capitolina waving his hands out in front of him, looking to distract Big Mouth .
Capitolina throws the left hand but Big Mouth avoids the punch easily.
Big Mouth was looking to counter that move with a punch but didn't quite pull the trigger.
Capitolina circles away from the clinch attempt.
Big Mouth definitely looks more muscular than last time we saw him fight.
Big Mouth scores with a punch to the head.
Capitolina throws a sloppy body shot
and Big Mouth connects with a straight left hand counter down the middle.
Capitolina tries to land with a swinging hook to the body but Big Mouth was well out of range. Poor timing from Capitolina.
Big Mouth misses with an uppercut. Capitolina saw that one coming.
Jab from Capitolina.
Capitolina throws a hard body shot but it just misses.
Big Mouth is the aggressor but that punch slipped nicely by Capitolina.
That's three minutes gone in the round.
Big Mouth thuds his right hand into Capitolina's forehead from close range. That could be painful for both fighters.
Big Mouth throws a jab when Capitolina was well out of range.
Big Mouth wings a very wild body shot but it does the job and lands to the midsection.
Big Mouth misses with a hook.
Capitolina looked like he wanted to counter with a punch but didn't throw it.
Capitolina slips a jab from Big Mouth .
Big Mouth steps to the side to avoid the strikes from Capitolina.
Big Mouth tries to close the distance and clinch up against the cage but Capitolina paws at him with a jab and circles away.
Big Mouth fakes a head shot and lands one to the body.
Big Mouth throws a lazy right hand but Capitolina sees it coming a mile off and sidesteps it easily.
Big Mouth jabs Capitolina to the body, keeping him at a distance.
Big Mouth showing good head movement there, avoiding the strikes from Capitolina.
Capitolina walks into a jab.
Capitolina tests Big Mouth 's chin there with a solid looking shot.
Big Mouth sizes up Capitolina with a pawing jab and scores with a straight right down the middle.
That's four minutes gone in the round.
This has been an exciting period of action!
Capitolina takes a body punch but keeps moving.
Good exchange - Big Mouth coming out on top.
Big Mouth scores with a nice strike.
Big Mouth throws a hook but Capitolina blocks it.
Big Mouth lands a nice hook to Capitolina's body. Capitolina takes it in his stride and looks to land his own strikes.
Big Mouth scores with a straight right hand, right through his opponent's guard.
Big Mouth connects with a right hand. Capitolina shakes it off.
Big Mouth bobbing and weaving, closes the distance and lands a hook to the side of Capitolina's head.
Capitolina moves into range and throws a lovely three punch combination.
Big Mouth keeps his opponent at a distance with a nice jab.
Capitolina missing with a left hand there. Big Mouth was out of range so wasted energy throwing that one.
It looked like Big Mouth was trying to counter with a body shot coming off that last attack from Capitolina.
Big Mouth lands with a straight right. Capitolina didn't see that one coming.
The crowd applaud the fighters' efforts here as the round comes to an end.
Capitolina looks to score with a combo but nothing lands.
Capitolina throws a big shot that misses.
Big Mouth misses with a looping right.
Big Mouth misses with a body shot. Nice footwork from Capitolina.
And that is the end of the round. The fighters go back to their corners.
Floki Big Mouth dominated that round.
The minute break is over - no more time for sponges and pep talks - back to the action!
Big Mouth stooping low to avoid any incoming strikes and then lunges in with an uppercut come cross that lands flush.
A big right from Capitolina misses.
Big Mouth takes a swing at Capitolina's ribcage but misses.
Capitolina keeping his hands up high there, blocking the jab from Big Mouth .
Capitolina misses with a hook
and Big Mouth counters with a lovely straight right hand!
Big Mouth throws a hook but Capitolina blocks it.
A shot to the liver by Big Mouth . Beautiful body shot.
Big Mouth is really dominating this fight. Is there anything that Capitolina can do to turn this around?
Capitolina misses with a left hand
and Big Mouth counters with a crisp hook to the side of the head.
Big Mouth throws a lazy right hand but Capitolina sees it coming a mile off and sidesteps it easily.
Capitolina swings away with a counter right hand but no contact made.
Capitolina fails to land with the punch combination there - jab, cross, hook, miss, miss, miss.
Big Mouth swings for the body but Capitolina moves out of range.
Loba Capitolina is looking to throw some combinations by the looks of things.
Big Mouth waving his hands out in front of him, looking to distract Capitolina.
Capitolina throws a shot from downtown. Big Mouth moves away and avoids it.
Capitolina uses good footwork to avoid the strikes from Big Mouth .
Big Mouth misses with a body shot. Nice footwork from Capitolina.
Capitolina takes an uppercut right on the jaw but it doesn't phase him.
The crowd cheering loudly, showing their appreciation for the quality fight we're seeing here.
Big Mouth tests Capitolina's chin there with a solid looking shot.
Floki Big Mouth is winning the standup battle so far.
Capitolina works his jab well there, keeping his opponent at a distance.
That's one minute gone in the round.
Capitolina throws a hook but Big Mouth avoids it easily.
A left lands for Big Mouth .
Capitolina slips a jab from Big Mouth .
Big Mouth throws a good cross that connects.
Big Mouth ducks down and throws a hook to the body but Capitolina moves away.
Capitolina is the aggressor but that punch slipped nicely by Big Mouth .
Capitolina throws a right hand that misses
and Big Mouth connects with a straight left hand counter down the middle.
Big Mouth cracks Capitolina with a right hand to the side of the head.
Both these guys seem content to just stand up and trade with each other but Capitolina might want to think about changing up his gameplan a bit because over the course of the fight, Big Mouth has got the better of the exchanges.
Capitolina throws a big shot that misses.
Capitolina displaying good standup as he scores with a three punch combination.
Capitolina shuffles to his left behind two crisp jabs. Big Mouth eats them both and turns towards Capitolina to reposition himself and eats a stinging right hand-left hook combo.
The crowd cheering loudly, showing their appreciation for the quality fight we're seeing here.
Capitolina takes a punch right to his stomach. That took the wind out of him momentarily.
Capitolina works over Big Mouth 's head and body with a nice combination.
Capitolina misses with a jab, cross combination.
Capitolina is breathing heavily.
Capitolina takes one on the chin but keeps coming.
That's two minutes gone in the round.
Big Mouth scores with a jab to the head.
Capitolina lands three nice shots there - that looked like it hurt!
Capitolina staying out of range there.
Big Mouth takes a swing at Capitolina's ribcage but misses.
Big Mouth lands a body shot.
Big Mouth cracks Capitolina with a right hand to the side of the head.
Big Mouth tries to close the distance and clinch up against the cage but Capitolina paws at him with a jab and circles away.
Capitolina now looks to counter with a shot at the body.
Capitolina throws an overhand right that lands on Big Mouth 's shoulder, as Big Mouth tries to avoid the shot.
Big Mouth tries to clinch but is not successful on this occasion.
Big Mouth misses the shot to the body.
Capitolina slips under a jab.
Big Mouth throws a hard body shot but it just misses.
Big Mouth scores with a sloppy right hand. Capitolina should have avoided that one.
Capitolina keeping a good distance there, avoiding the body shot.
Capitolina slips a straight right by Big Mouth .
Capitolina ducks down and throws a hook to the body but Big Mouth moves away.
Capitolina on the wrong end of a nice hook.
That's three minutes gone in the round.
Capitolina throws a monster uppercut resembling something out of street fighter but it doesn't land.
Big Mouth swung with a counter right hand that didn't connect.
Big Mouth jabbing away but nothing is landing.
Capitolina has a pretty nasty looking mouse under his right eye.
Capitolina's hands are dropping dangerously low here and Big Mouth connects clean with a right hook that sends him down to one knee! Capitolina scrambles back to his feet.
Capitolina throws a right and a left that both miss.
Capitolina has his head snapped back a nice jab. A little nod from Capitolina there as he acknowledges the shot.
Big Mouth throws a shot to the body.
Capitolina gets cracked with a nice right hand there by Big Mouth .
Capitolina gets cracked with a nice right hand there by Big Mouth .
Capitolina defending well as Big Mouth loads up on a big left hand.
Big Mouth catches Capitolina with a nice straight right. He seems pissed - ooooh, it's on now! On like donkey kong!
Capitolina has his hands up protecting his head but a hook from Big Mouth finds it's way round the side to connect with Capitolina's head.
Big Mouth misses with a hook
and Capitolina counters with a straight punch to the midsection.
The fans in attendance giving it up for the two fighters, who have really let it all hang out in the last minute or so!
Big Mouth lands with an uppercut that bounces Capitolina off the cage and back into range.
Capitolina is rocked!
A slow jab from Big Mouth misses its intended target.
Capitolina doesn't fully commit to the body shot counter.
Capitolina misses with the combination.
That's four minutes gone in the round.
Big Mouth jabs at Capitolina's body.
Big Mouth scores with a jab.
Big Mouth tests Capitolina's chin there with a solid looking shot.
Capitolina is still on wobbly legs! Can Big Mouth finish him?
Big Mouth lands with a nice body punch.
Big Mouth misses with a body shot. Nice footwork from Capitolina.
Capitolina seems to have recovered his senses.
Big Mouth lands with a right hand.
Big Mouth lands the left hand.
Big Mouth ducks under an overhand right and circles away with a smile on his face.
Capitolina pushing out the jab but it's not landing.
Capitolina missing with a left hand there. Big Mouth was out of range so wasted energy throwing that one.
The crowd applaud the fighters' efforts here as the round comes to an end.
Big Mouth stooping low to avoid any incoming strikes and then lunges in with an uppercut come cross that lands flush.
Capitolina fails to land with the punch combination there - jab, cross, hook, miss, miss, miss.
Capitolina on the wrong end of a nice hook.
Big Mouth scores with a sloppy right hand. Capitolina should have avoided that one.
And that is the end of the round. The fighters go back to their corners.
Floki Big Mouth dominated that second round.
The fighters get back to their feet, the hooter sounds and we're back to the action! Ladies and gentlemen, this is the final round!

Big Mouth drops a shoulder and throws an uppercut that cracks Capitolina right on the button. Capitolina goes down! Big Mouth follows him to the mat and finishes the job with more strikes! Big Mouth gets the win via TKO!
Ladies and gentlemen, after 0:05 of round 3, we have a winner by way of TKO (Strikes). Floki Big Mouth !
A victorious Floki Big Mouth thanked his army of followers in his post fight interview, telling people to make sure they follow him on Twitter.
|
|
|
|
|
|
|
|
|
|
|
|
|
|
|
|
|
|
|
|
|
|
|
| S |
C
A |
G |
S |
C
B |
G |
|
S |
C |
G |
|
energy
A | B |
|
hype
A | B |
|
pop
A | B |
|
mgr
A | B |
|
FIGHT
RATING
92% |
|
|
|
|
|
|
|
Undercard bout
|
Coming up we have a light heavyweight MMA rules bout between Carlton Yonge (ranked 3955 p4p, 4031 weight class) and Jordan Montana (ranked 511 p4p, 520 weight class). The crowd seem to be enjoying Montana's choice of entrance music: The Coming. The fight MMA fans around the world have waited their entire lives for!
 |
|
 |
| 181 cm
25
215
2 - 2 - 0 |
|
197 cm
24
210
2 - 1 - 0 |
BJJ Blue Belt
Basic striking
Big heart |
|
BJJ Blue Belt
Excellent boxer
Granite chin |
|
| |
|
Ladies and gentlemen. This fight is 3 rounds, in the light heavyweight division.
Introducing the fighter to my left, fighting out of the red corner.
With a record of 2 - 2 - 0, fighting out of The Island, Carlton Yonge!
And introducing the fighter to my right, fighting out of the blue corner.
With a record of 2 - 1 - 0, fighting out of The Island, Jordan Montana!
The judges for this bout are Daniel Franklin, Winston Alpacca and Michael Johnstone.
The bell rings for round one and we are underway!
Yonge misses with an uppercut.
Yonge checks a leg kick nicely.

Yonge closes the distance and presses his opponent up against the cage.
Yonge tries to land a shot to the body but it's blocked.
Yonge gets a trip takedown into half guard.
Montana trying to control from the bottom.
Yonge is trying a forearm choke
I don't think that's going to do much at this level of the game.
Yonge keeping composed on the top, looking to control the action.
We've had a slow start to the round here - hopefully the action picks up.
Montana is trying to get back to full guard.
Yonge seems to be working for a kimura but Montana defends the submission attempt.
Yonge wants to pass the guard but Montana is defending well.
That's one minute gone in the round.
Yonge wants to work for an arm triangle but Montana is really keeping half guard well and defending the submission attempt.
Yonge wants to pass the guard but Montana is defending well.
Yonge is working for submissions here but there's nothing on.
Yonge is pressing down on Montana's thigh, looking to free his foot. Montana is holding on for now.
Yonge is working for submissions here but there's nothing on.
Yonge is sneakily working for an arm triangle but Montana sees it coming and defends easily.
Yonge prevents Montana from improving his position.
That's two minutes gone in the round.
A lull in the action here being met with boos from the crowd.
Yonge is working for submissions here but there's nothing on.
Yonge is trying to control. Montana wants to improve his position but can't escape this time.
Yonge seems to be working for a kimura but Montana defends the submission attempt.
Yonge is figuring out what he wants to do next.
The referee is asking the fighters to pick up the pace.
Yonge is pressing down on Montana's thigh, looking to free his foot. Montana is holding on for now.
Montana is pressing down on Yonge's left leg trying to get back to full guard. He's managed it.
Yonge might be looking to lock onto one of his opponent's long limbs for a submission, whilst we're on the ground.
Yonge tries to free his leg and advance position but Montana is retaining full guard.
Montana working a defensive guard here.
Yonge stays in close to Montana's body and controls the position.

The referee has decided to stand the fighters back up, so we'll restart on the feet.
That's three minutes gone in the round.
Montana fails to land with the punch combination there - jab, cross, hook, miss, miss, miss.
Yonge looks to have improved his striking defense since last time we saw him fight.
Yonge closes the distance and pushes Montana back into the cage.
A short right hand to the side of the head by Yonge.

Montana is trying to trip Yonge. He has hold of a leg but Yonge is hopping around, keeping his balance for the moment. Montana persists though and gets the takedown into guard.
Montana trying to stand up but can't free himself from Yonge's guard.
Yonge escapes his hips to the side and looks to be working for an armbar. Montana gives him a little smile and shakes his head. No chance.
Yonge looking to sweep here. No luck so far.
Yonge on his back here. We all know that wrestlers don't like being on their back so let's see if Yonge tries to get out of the position.
Montana wants to control from the top but Yonge keeps moving.
Yonge had isolated an arm as going for a kimura. Montana defends it easily.
That's four minutes gone in the round.
Montana trying to control but Yonge is working from the bottom.
Yonge working from the bottom, still in full guard. He's managed to get a loose triangle. Montana doesn't seem to be doing much to defend here, obviously he feels comfortable in the position. Montana manages to throw the legs off his shoulder and he's back into guard - no problem.

Montana stands up and waves to Yonge to follow him.
Montana takes a swing at Yonge's ribcage but misses.
Montana looks to land a right hand but Yonge moved out of range.
Yonge misses with a hook to the body
and Montana counters with a series of strikes. Yonge will be more careful next time no doubt.
Montana's coach down at Cozad The Island was telling us pre-fight that they have been working on Montana's balance. Obviously they view that as a key factor in the outcome of this fight.
Wooooo! Give it up for these two warriors! They are putting on a show!
Montana shoots in and gets a takedown into Yonge's guard.
The crowd thankful this round is nearly over.
Yonge looking for a sweep. Not yet Yonge, not yet.
Yonge pulls Montana in close to his closed guard and prevents Montana from doing any damage or advancing position.
Yonge is working from a closed guard but he's struggling to control his opponent.
And that is the end of the round. The fighters go back to their corners.
A close round but Jordan Montana will probably get the nod.
OK. That's time! The bell goes and we're back to the action.
Yonge avoids the head kick by Montana.
Montana throws a head kick that misses and slips in the process. He scrambles back to his feet and the fighters circle.
Yonge lands a nice shot that snaps Montana's head back.
Yonge pushes Montana up against the cage in a clinch.
Yonge lands with a short punch from the clinch.
A frustrated look appears on Montana's face as he tries to break the clinch.
Yonge tries to land a knee to the body but he is off balance and Montana avoids it.
Montana wants to break the clinch but can't.
Montana wants to strike at distance but he can't break free of the clinch.
Montana is fighting off a takedown attempt but Yonge is just too persistent for him and manages to trip Montana to the mat. Montana regains guard as soon as the fighters hit the mat.
We've had a slow start to the round here - hopefully the action picks up.
Yonge is taking a break and basically stalling. The referee will not allow him to do that for long.
Yonge looking to pass the guard.
Yonge wants to control from the top but Montana keeps moving.
That's one minute gone in the round.
Yonge showing good wrestling skills to control the position.
Yonge is looking to pass into half guard but Montana pushes him away with his feet and jumps on top - now Montana is in guard.

Yonge is working actively off his back, looking to secure an arm or perhaps work for a triangle.
Yonge has his foot on Montana's thigh. He's trying to push off and get in position for a triangle, I think. Montana works his way back into a safe position though.
Yonge looking for submissions off his back, moving his hips, looking for an opening.
Yonge looking for a sweep. Not yet Yonge, not yet.
Montana loading up with the ground and pound but he's missing more than he's landing in this flurry.
Montana trying to control the position from guard on top but Yonge is wriggling around, looking for whatever he can.
That's two minutes gone in the round.
Yonge wants to sweep but no luck.
Yonge escapes his hips to the side and looks to be working for an armbar. Montana gives him a little smile and shakes his head. No chance.
Yonge keeping moving, preventing Montana from controlling successfully.
Yonge has a loose triangle. He'll be looking to tighten that up but Montana can see exactly what he's planning and manages to posture up and free himself.
Yonge throwing his legs up looking for a triangle.
Yonge looking to sweep here. No luck so far.
That's three minutes gone in the round.
Montana missing there with some ground and pound from the guard.
The referee has motioned to the fighters to stand back up.
Montana scores with a body shot.
Jordan Montana is looking to throw some combinations by the looks of things.
Montana just misses with a punch to the body.
Yonge feinted with a counter takedown.
Yonge lands with a head kick! That's gotta hurt.
Yonge takes a swing at Montana's ribcage but misses.
Yonge closes the distance and clinches.
Yonge keeps the fight in the clinch, despite Montana's efforts to push away.
Yonge has a couple of punches blocked by Montana.
Montana tries to break free but Yonge pushes him back against the cage.
Yonge lands with a quick shot inside that doesn't really do much damage.
Montana has had enough of the clinch but Yonge keeps him there for the moment.
Yonge misses with a body punch.
That's four minutes gone in the round.
Yonge digs a right hand underneath Montana's ribcage. Montana let out a lung full of air as it connected.
Yonge fails to land with a short punch on the inside.
Yonge working some nice short punches in the clinch.
Yonge lands a hook to the body. It's hard to tell if that hurt Montana or not.
Yonge lands with a left to the head.
Yonge lands a shoulder strike that jolts his opponent's head backwards.
This is a great period of action - very entertaining stuff!
Nice body punch from Yonge - that landed with a thud.
Montana tries to break free but Yonge pushes him back against the cage.
Yonge scores with a hook to the body.
Montana is breathing heavily.
A short uppercut from Yonge.
The crowd thankful this round is nearly over.
Montana's head jolts backwards as he takes an uppercut right on the button!
Yonge lands with a good tight uppercut to the head.
Yonge lands on the inside with an uppercut.
And that is the end of the round. The fighters go back to their corners.
Carlton Yonge dominated that second round.
OK. That's time! The bell goes and we're back to the action. This is the final round!
Yonge throws a body shot but no joy.
Montana takes a solid shot to the body. That one hurt him but he's trying not to show it.
Yonge moves into range and connects with a jab.
Jordan Montana seems to be getting the better of the standup.
Montana misses with a wild body shot.
Montana moves out of range of the body kick from Yonge.
Montana misses with a double jab.
Montana with a body punch. A glancing blow.
Yonge takes the fight into the clinch.
Yonge lands with a good tight uppercut to the head.
We've had a slow start to the round here - hopefully the action picks up.
Yonge cracks Montana with a nice body shot.
Montana gets double underhooks and manages to take the fight to the ground.
This is a great period of action - very entertaining stuff!
Yonge has a loose triangle. He'll be looking to tighten that up but Montana can see exactly what he's planning and manages to posture up and free himself.
Yonge is really dominating this fight. Is there anything that Montana can do to turn this around?
Montana trying to control but Yonge is working from the bottom.
That's one minute gone in the round.
Yonge escapes his hips to the side and looks to be working for an armbar. Montana gives him a little smile and shakes his head. No chance.
Yonge looking for submissions from the bottom here. Moving his hips around, possibly looking for an armbar.
Montana decides to stand up and beckons his opponent to follow.
Montana tries to land with a swinging hook to the body but Yonge was well out of range. Poor timing from Montana.
Yonge throws a wild body kick that Montana sees coming a mile off.
Montana was about to counter that last move with a leg kick but changes his mind.
A slow jab from Montana misses its intended target.
Montana tries a head kick but it misses.
Yonge misses with a straight left.
The fight moves into the clinch position.
That's two minutes gone in the round.
Yonge misses the knee to the body. Nice hip positioning from Montana.
Yonge lands a hook to the side of the head.
Carlton Yonge has scored more points in the clinch so far.
A hook to the body from Yonge.
Montana takes a big intake of breath there - he's definitely tired.
Montana gets double underhooks and manages to take the fight to the ground.
The ref warns both fighters not to hold the cage as they work up against the meshing.
Yonge has managed to work for a loose triangle. I think Montana should be able to defend this one pretty easily though. Oh, Yonge has tightened it up now! Montana should have reacted faster there - he's in big trouble and yes, he's tapped out! This one is all over!
Ladies and gentlemen, after 2:44 of round 3, we have a winner by way of Submission (Triangle). Carlton Yonge!
During a confident post fight interview, Carlton Yonge thanked all his fans. He seemed very genuine when describing how motivated his fans keep him.
|
|
|
|
|
|
|
|
|
|
|
|
|
|
|
|
|
|
|
|
|
|
|
| S |
C
A |
G |
S |
C
B |
G |
|
S |
C |
G |
|
energy
A | B |
|
hype
A | B |
|
pop
A | B |
|
mgr
A | B |
|
FIGHT
RATING
50% |
|
|
|
|
|
|
|
Undercard bout
|
Coming up we have a light heavyweight MMA rules bout between Crone Moans (ranked 3312 p4p, 3725 weight class) and Jhonny Boy (ranked 430 p4p, 487 weight class). I'm sure you'll be fascinated to know that I was talking to some pointless Z list celebrity before the fight and he thought that Jhonny Boy was going to win. Let's see if he was right.
 |
|
 |
| 193 cm
25
215
3 - 1 - 1 |
|
195 cm
25
212
2 - 3 - 0 |
Decent wrestler
Basic striking
Granite chin |
|
Good takedowns
Counter fighter
Knockout power |
|
| |
|
Ladies and gentlemen. This fight is 3 rounds, in the light heavyweight division.
Introducing the fighter to my left, fighting out of the red corner.
With a record of 3 - 1 - 1, fighting out of The Island, Crone Moans!
And introducing the fighter to my right, fighting out of the blue corner.
With a record of 2 - 3 - 0, fighting out of The Island, Jhonny Boy!
The judges for this bout are David Hoff, Dirk Anderson and Winston Alpacca.
The bell rings for round one and we are underway!
Moans swings away but doesn't land with a series of punches.
Moans thows a leg kick but Boy checks it
and Boy counters with a takedown into side control.
Boy tries for a kimura but Moans is defending well.
Boy has hold of Moans's arm here. He's working for an Americana. It looks like he might have it! Moans tries to escape but he's just digging himself in deeper - Boy cranks the arm and Moans screams in pain! The ref makes a decision and ends the fight before the tap - no complains from Moans, who is just happy to have his arm attached to his body.
Ladies and gentlemen, after 0:31 of round 1, we have a winner by way of Submission (Americana). Jhonny Boy!
|
|
|
|
|
|
|
|
|
|
|
|
|
|
|
|
|
|
|
|
|
|
|
| S |
C
A |
G |
S |
C
B |
G |
|
S |
C |
G |
|
energy
A | B |
|
hype
A | B |
|
pop
A | B |
|
mgr
A | B |
|
FIGHT
RATING
100% |
|
|
|
|
|
|
|
Undercard bout
|
Coming up we have a light heavyweight MMA rules bout between Doraku Niten (ranked 2396 p4p, 2361 weight class) and Sergey Vinogradov (ranked 330 p4p, 326 weight class). Sergey Vinogradov will no doubt be trying to keep this one on the feet, where he has a distinct advantage.
 |
|
 |
| 190 cm
25
205
1 - 0 - 0 |
|
195 cm
25
220
2 - 0 - 0 |
Good wrestling
Basic striking
Very quick |
|
Powerful takedowns
Counter fighter
Powerful |
|
| |
|
Ladies and gentlemen. This fight is 3 rounds, in the light heavyweight division.
Introducing the fighter to my left, fighting out of the red corner.
With a record of 1 - 0 - 0, fighting out of The Island, Doraku Niten!
And introducing the fighter to my right, fighting out of the blue corner.
With a record of 2 - 0 - 0, fighting out of The Island, Sergey Vinogradov!
The judges for this bout are Michael Johnstone, David Hoff and Bart Greer.
The bell rings for round one and we are underway!
Vinogradov gets caught on his heels momentarily as he allows Niten to score an easy takedown into full guard.
Niten keeps in close for a moment and lands a decent shot to the side of Vinogradov's head.
Vinogradov is throwing his legs up, looking for submissions. Niten is aware though and is defending well.
Niten wants to control from the top but Vinogradov keeps moving.
Niten wants to pass the guard but Vinogradov is keeping the position.
Vinogradov working from the bottom, still in full guard. He's managed to get a loose triangle. Niten doesn't seem to be doing much to defend here, obviously he feels comfortable in the position. Niten manages to throw the legs off his shoulder and he's back into guard - no problem.
Niten passes easily into side control. Nice work.
Vinogradov gets one leg under and gets the fight to half guard.
Niten knows he needs to get back to his feet asap. He's simply no match for Vinogradov on the ground.
Vinogradov looking to work for a kimura from the bottom.
Niten trying to control from half guard but Vinogradov is working away.
That's one minute gone in the round.
Vinogradov looking for submissions off his back.
Niten working over Vinogradov with some ground and pound. Vinogradov looks like he wants out of this position, which is understandable.
Vinogradov looking for submissions from an awkward position here.
Niten landing with strikes to the body and head, softening up his opponent.
Niten is nestled in close to Vinogradov, controlling him well. He's worked in a nice elbow to the side of the head as well, for good measure.
Vinogradov is trying to control but can't.
Ground and pound from Niten.
Vinogradov moves into full guard.
Niten trying to pass the guard but can't manage it just yet.
The fighters are starting to perspire pretty heavily.
Niten with a couple of shots to the head there. Not particularly brutal.
Niten pressing down on his opponent's thigh, looking to pass guard. Vinogradov is keeping the position for now.
Vinogradov has his foot on Niten's thigh. He's trying to push off and get in position for a triangle, I think. Niten works his way back into a safe position though.
That's two minutes gone in the round.
Vinogradov looking for a sweep. Not yet Vinogradov, not yet.
Niten tries to free his leg and advance position but Vinogradov is retaining full guard.
Vinogradov looking to control.
Vinogradov is working actively off his back, looking to secure an arm or perhaps work for a triangle.
Vinogradov looking for submissions from the bottom here. Moving his hips around, possibly looking for an armbar.
Niten trying to control the position from guard on top but Vinogradov is wriggling around, looking for whatever he can.
Niten postures up.
Niten tries to free his leg and advance position but Vinogradov is retaining full guard.
Vinogradov is throwing his legs up, looking for submissions. Niten is aware though and is defending well.
The crowd are loving this. Great action here.
Niten seems content to control from guard here. He's going to have to remain active though if he doesn't want to get stood back up.
That's three minutes gone in the round.
Niten landing with the ground and pound.
Vinogradov looking for a guillotine here but Niten defends easily.
Niten has to be careful here, sitting in the guard of a superior BJJ player.
Vinogradov working from the bottom, still in full guard. He's managed to get a loose triangle. Niten doesn't seem to be doing much to defend here, obviously he feels comfortable in the position. Niten manages to throw the legs off his shoulder and he's back into guard - no problem.
Niten passes into half guard.
Vinogradov looking to work for a kimura from the bottom.
Niten content to control rather than advance.
Nice strikes from Niten there.
That's four minutes gone in the round.
Niten wants to lay and pray for a moment but Vinogradov keeps working.
Niten is looking to advance position but Vinogradov won't allow it.
Vinogradov is working on a guillotine. He's managed to get to full guard and he's really squeezing tight! Niten is tapping! Great win for Vinogradov!
Ladies and gentlemen, after 4:26 of round 1, we have a winner by way of Submission (Guillotine). Sergey Vinogradov!
A less than humble Sergey Vinogradov misjudged his post fight interview somewhat and came across a little too arrogant whilst trying to hype up his own abilities.
|
|
|
|
|
|
|
|
|
|
|
|
|
|
|
|
|
|
|
|
|
|
|
| S |
C
A |
G |
S |
C
B |
G |
|
S |
C |
G |
|
energy
A | B |
|
hype
A | B |
|
pop
A | B |
|
mgr
A | B |
|
FIGHT
RATING
36% |
|
|
|
|
|
|
|
Undercard bout
|
Coming up we have a featherweight MMA rules bout between Leon Smalls (ranked 2046 p4p, 2860 weight class) and Cael Sanderson (ranked 214 p4p, 286 weight class). The key to victory for Leon Smalls has got to be keeping the fight on the feet.
 |
|
 |
| 172 cm
25
145
3 - 1 - 0 |
|
170 cm
25
152
1 - 0 - 0 |
Decent wrestler
Brawler
KO power |
|
Good wrestler
Brawler
Tends to cut |
|
| |
|
Ladies and gentlemen. This fight is 3 rounds, in the featherweight division.
Introducing the fighter to my left, fighting out of the red corner.
With a record of 3 - 1 - 0, fighting out of The Island, Leon Smalls!
And introducing the fighter to my right, fighting out of the blue corner.
With a record of 1 - 0 - 0, fighting out of The Island, Cael Sanderson!
The judges for this bout are David Hoff, Daniel Franklin and Sandra Marshall.
The bell rings for round one and we are underway!
Smalls scores with a body shot.
Smalls scores with a nice strike.
Sanderson shoots in with a takedown attempt and he has Smalls pinned against the cage. Smalls gets the underhooks and manages to circle away.
Sanderson fakes an overhand right and shoots for a takedown. Smalls sprawls well initially but Sanderson persists and gets the takedown into half guard.
Sanderson is looking to advance position but Smalls won't allow it.
Smalls is in a tricky position but he's been working on his transitions down at Walter J Abramowitz Center for Bigness, so we'll see if he gets out of it.
Smalls is defending against the submission attempts here by Sanderson.
Smalls knows he needs to get back to his feet asap. He's simply no match for Sanderson on the ground.
Sanderson sitting in half guard, looking to land shots. Smalls defending well though.
We've had a slow start to the round here - hopefully the action picks up.
Smalls has a hand on Sanderson's thigh, trying to get back to full guard. Sanderson takes advantage of the position though and mounts him!
Smalls really trying hard to get back to half guard here.
Smalls in a bad spot here, taking shots to the head.
That's one minute gone in the round.
Sanderson has hold of an arm here, looking to extend it. He's committed to the armbar attempt here! Will he get it?! Yes! Smalls is forced to tap!
Ladies and gentlemen, after 1:21 of round 1, we have a winner by way of Submission (Armbar). Cael Sanderson!
|
|
|
|
|
|
|
|
|
|
|
|
|
|
|
|
|
|
|
|
|
|
|
| S |
C
A |
G |
S |
C
B |
G |
|
S |
C |
G |
|
energy
A | B |
|
hype
A | B |
|
pop
A | B |
|
mgr
A | B |
|
FIGHT
RATING
68% |
|
|
|
|
|
|
|
Co-main event
|
Coming up we have a super heavyweight MMA rules bout between Torraso Fisticuffs (ranked 2074 p4p, 3216 weight class) and Adam Wright (ranked 79 p4p, 119 weight class). Wright has chosen Fabolous - B.O.M.B.S. as his entrance music. The fight MMA fans around the world have waited their entire lives for!
 |
|
 |
| 207 cm
25
290
3 - 1 - 0 |
|
225 cm
25
300
1 - 1 - 0 |
BJJ White Belt
Excellent MT
Big right hand |
|
BJJ White Belt
Excellent boxer
Powerful |
|
| |
|
Ladies and gentlemen. This fight is 3 rounds, in the super heavyweight division.
Introducing the fighter to my left, fighting out of the red corner.
With a record of 3 - 1 - 0, fighting out of The Island, Torraso Fisticuffs!
And introducing the fighter to my right, fighting out of the blue corner.
With a record of 1 - 1 - 0, fighting out of The Island, Adam Wright!
The judges for this bout are Daniel Franklin, David Hoff and Peter Branson.
The bell rings for round one and we are underway!
Fisticuffs slips under a jab from Wright.
Fisticuffs darts in and out, connecting with a jab.
Fisticuffs is looking to clinch but Wright is avoiding it.
Fisticuffs on the wrong end of a vicious looking body shot.
Wright with poor footwork there. He got himself in a bit of a tangle, enabling Fisticuffs to score with a decent uppercut.
Fisticuffs closes the distance and presses his opponent up against the cage.
I was talking to Fisticuffs's coach per-fight and he was telling me that they'd been working on the clinch in the runup to this fight.
Fisticuffs misses with some punches.
Wright's head jolts backwards as he takes an uppercut right on the button!
Wright is trying to work out of this bad position, with his back against the cage.
Fisticuffs scores with a shot to the side of Wright's head.
Wright takes a shot to the head.
Fisticuffs pushes Wright back against the cage and lands a hook to the side of the head.
Wright is rocked!
Fisticuffs lands a left hand that snaps the head of Wright backwards.
Wright is still on wobbly legs! Can Fisticuffs finish him?
The crowd cheering loudly, showing their appreciation for the quality fight we're seeing here.
Fisticuffs lands a shot to the body.
Fisticuffs creates a bit of space for himself and rocks Wright with a big uppercut! Wright tries to clinch up but Fisticuffs pushes him back against the cage and lands another monster strike that crumples Wright to the mat! Wright covers up and Fisticuffs unloads with more strikes until the referee steps in to end the bout!
Ladies and gentlemen, after 0:51 of round 1, we have a winner by way of TKO (Punches). Torraso Fisticuffs!
|
|
|
|
|
|
|
|
|
|
|
|
|
|
|
|
|
|
|
|
|
|
|
| S |
C
A |
G |
S |
C
B |
G |
|
S |
C |
G |
|
energy
A | B |
|
hype
A | B |
|
pop
A | B |
|
mgr
A | B |
|
FIGHT
RATING
85% |
|
|
|
|
|
|
|
Main event
|
Coming up we have a light heavyweight MMA rules bout between Cannon Fodder (ranked 1377 p4p, 2668 weight class) and Diamond Hand (ranked 204 p4p, 361 weight class). Over to our ring announcer for the fighter introductions!
 |
|
 |
| 190 cm
25
210
4 - 1 - 0 |
|
190 cm
25
210
2 - 2 - 0 |
Good wrestling
Counter fighter
Very strong |
|
Good wrestler
Decent boxing
Very confident |
|
| |
|
Ladies and gentlemen. This fight is 3 rounds, in the light heavyweight division.
Introducing the fighter to my left, fighting out of the red corner.
With a record of 4 - 1 - 0, fighting out of The Island, Cannon Fodder!
And introducing the fighter to my right, fighting out of the blue corner.
With a record of 2 - 2 - 0, fighting out of The Island, Diamond Hand!
The judges for this bout are Michael Johnstone, Dirk Anderson and Winston Alpacca.
The bell rings for round one and we are underway!
Fodder misses with a body punch
enabling Hand to counter with a crisp jab.
Fodder tries to clinch up.
Fodder is looking to clinch but Hand is avoiding it.
Hand looked like he wanted to counter with a punch but didn't throw it.
Fodder throws a shot from downtown. Hand moves away and avoids it.
Fodder gets a clinch.
Fodder gets through Hand's defenses to land a nice punch to the side of the head.
Hand blocks a body shot from Fodder.
Fodder can't find room to land a body shot as Hand controls the action.
We've had a slow start to the round here - hopefully the action picks up.
A quick uppercut on the inside from Hand.
Hand blocking some punches.
Fodder blocks a couple of punches on the inside.
Fodder tries to work over Hand's body with a swooping hook but it only glances the target.
Fodder misses with a body punch.
Fodder blocking some punches.
Hand lands a hook to the side of the head.
Fodder swings away with an uppercut that misses.
That's one minute gone in the round.
Fodder tried to land a shot to the body but connects with Hand's elbow.
Hand lands punches inside but they're not really causing much damage.
Fodder misses with a body punch.
Fodder misses with some punches.
Hand stays in close to his opponent and throws a right hand to the body.
Hand struggles to land a body shot inside as Fodder controls his hands.
Hand blocking some punches.
Hand is working Fodder over against the cage.
A head punch blocked on the inside by Hand.
Fodder misses with a shot to the kidneys.
Fodder misses with a body punch.
An uppercut on the inside fails to land for Hand.
Fodder is working Hand over against the cage.
I was talking to Fodder's coach per-fight and he was telling me that they'd been working on the clinch in the runup to this fight.
Fodder lands a body punch - he's looking to wear down Hand.
Fodder misses with a body punch.
Both fighters working to control the clinch.

Fodder breaks the clinch and we return to the middle of the mat.
Fodder on the wrong end of a nice jab.
Cannon Fodder seems to be the more aggressive standup fighter in this bout.
Fodder closes the distance looking to clinch
enabling Hand to counter with a crisp jab.
That's two minutes gone in the round.
Jab by Fodder.
Fodder tries to clinch but is not successful on this occasion.
Wooooo! Give it up for these two warriors! They are putting on a show!
A shot to the body from Hand misses
and Fodder counters with a crisp hook to the side of the head.
Fodder darts in trying to clinch
and Hand counters with a good right hand that lands right on the jaw.
Hand lands a straight punch to the body, keeping Fodder at a distance.
That's three minutes gone in the round.
Fodder tries to clinch up against the cage, rushing in to close the distance. Hand manages to break the clinch and circles back to the middle of the mat.
Hand on the wrong end of a nice hook.
Fodder instigates a clinch.
Hand blocks a couple of punches on the inside.
Hand lands with a short shot to the head.
Fodder misses with a punch to the body.
Fodder misses with a short punch on the inside.
A head punch blocked on the inside by Fodder.
Hand has had enough of the clinch and is looking to separate.
Hand tries to throw a body punch but Fodder avoids it by throwing Hand back against the cage.
Fodder throws a punch but it's blocked by Hand.
Fodder swings wildly with an uppercut but Hand uses good head movement to avoid it.
Fodder tries a body shot but Hand blocks it.
Fodder tried to land a shot to the body but connects with Hand's elbow.
Fodder misses with a shot to the kidneys.
That's four minutes gone in the round.
Hand lands with a right to the head.
Fodder misses with some punches.
Fodder lands with a right to the head.
Fodder misses with some punches.
A nice left hand lands by Hand.
We've seen a great period of action over the last minute or so - credit to both fighters for going all out!
Hand scores with an uppercut up the middle.
Fodder tries a body shot but Hand blocks it.
Hand tries to throw a body punch but Fodder avoids it by throwing Hand back against the cage.
Fodder pushes Hand back against the cage and lands a hook to the side of the head.
Fodder misses with a shot to the kidneys.
Fodder prevents a body shot from Hand.
Hand swings wildly with an uppercut but Fodder uses good head movement to avoid it.
Fodder tried to land a shot to the body but connects with Hand's elbow.
Fodder lands a nice shot to the body.
Hand blocks a punch to the side of the head.
A head punch blocked on the inside by Hand.
Nice body punch from Hand.
Hand lands a short shot on the inside that snaps the head of Fodder backwards.
Hand lands a right uppercut that snaps the head of Fodder backwards.
A head punch on the inside from Hand fails to land.
Fodder jumps guard but Hand turns him against the cage and keeps the fight standing.
And that is the end of the round. The fighters go back to their corners.
A close round but Diamond Hand will probably get the nod.
That's the end of the round. The referee orders the cornermen out of the cage so we can get back down to business.
Fodder swings and misses with a shot to the body
and Hand counters with a lovely straight right hand!
Hand misses with a hook
and Fodder counters with a quick right hand to the jaw.
Fodder thuds a left hand into Hand's body.
Hand throws a right hand that misses
and Fodder connects with a straight left hand counter down the middle.
Fodder throws a body shot but no joy.
Fodder pushing out the jab but it's not landing.
We've had a slow start to the round here - hopefully the action picks up.
A jab from Fodder does it's job there.
Hand jabbing away but nothing is landing.
Fodder fakes high and swings low for a body shot but Hand manages to avoid it.
Hand throws out a counter right but Fodder avoids it with no problem.
That's one minute gone in the round.
Fodder moves out of range of the strikes.
Decent striking displayed by Fodder there.
Some wild striking there from Fodder.
Hand looked like he wanted to counter with a punch but didn't throw it.
Fodder tries to clinch up.
Fodder moves into the clinch.
A battle for position here, against the cage.
Hand tries to throw a body punch but Fodder avoids it by throwing Hand back against the cage.
Hand scores with a shot to the side of Fodder's head.
A short body shot lands from Fodder as the two fighters clinch.
Fodder blocks an uppercut.
That's two minutes gone in the round.
A head punch on the inside from Hand fails to land.
Hand lands a body punch.
Hand misses with a hook from the clinch.
Hand taking a breather.
A short right from Fodder on the inside.
Hand working some nice short punches in the clinch.
Fodder can't find room to land a body shot as Hand controls the action.
Cannon Fodder has scored more points in the clinch so far.
Hand misses with a hook from the clinch.
A right hook to the body lands for Hand.
Fodder manages to break the clinch.
This is a great period of action - very entertaining stuff!
Hand thuds his right hand into Fodder's forehead from close range. That could be painful for both fighters.
Hand goes to the watering hole and comes back with a big thumbs up from the judges as he scores a three punch combo.
Fodder lands a beauty of a right hand that gets the crowd cheering.
Fodder misses with a leg kick.
That's three minutes gone in the round.
Fodder misses with a shot to the body
and Hand counters with a quick right hand to the jaw.
 Fodder is rocked! Fodder is rocked!
Fodder throws a body shot but no joy.
Oh Fodder is still all over the place! His legs are completely gone! Will he be able to recover?!!
Fodder throws a right hand that misses
and Hand counters with a nice body shot.
Fodder seems to have got his legs back now.
A slow jab from Hand misses its intended target.
Hand gets his head snapped back by a nice shot there.
Fodder throws a nice looking combination but Hand bobs and weaves to avoid any damage.
Fodder fakes a head shot and lands one to the body.
Fodder wants to clinch up but Hand keeps it at a distance.
Hand might want to mix his strikes up a bit more. He's just going for head shots at the moment and that can become a bit predictable.
Hand throws a hook but Fodder blocks it.
Fodder is looking to counter punch.
That's four minutes gone in the round.
Hand throws a body shot but no joy.
Nice cross by Fodder.
Fodder wants to clinch
and Hand connects with a straight left hand counter down the middle.
Fodder tries to clinch but Hand moves away
and Hand scores with a counter punch that sends Fodder to the canvas! Hand smells blood - he's punishing Fodder with more strikes and the ref has stopped it! Fodder has no idea where he is - he's tackled the ref... oh dear, poor guy, the crowd is in hysterics!
Ladies and gentlemen, after 4:36 of round 2, we have a winner by way of TKO (Strikes). Diamond Hand!
After the fight, Diamond Hand was humble in paying tribute to his opponent but made it clear he wants to go on to bigger and better things. It seemed to go down well with the crowd who cheered him loudly.
|
|
|
|
|
|
|
|
|
|
|
|
|
|
|
|
|
|
|
|
|
|
|
| S |
C
A |
G |
S |
C
B |
G |
|
S |
C |
G |
|
energy
A | B |
|
hype
A | B |
|
pop
A | B |
|
mgr
A | B |
|
FIGHT
RATING
56% |
|
|
|
|
|
|
|
|
|
|
