 |
Highland 30 PBP Commentary |
Undercard bout
|
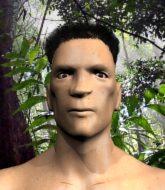
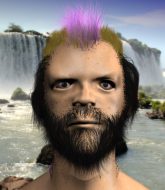
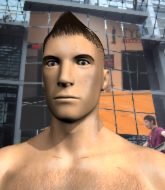
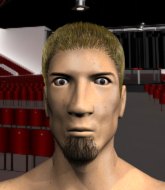
Coming up we have a bantamweight MMA rules bout between Kai Kara France (ranked 6826 p4p, 4367 weight class) and Amangkurat Mauliwarmadewa (ranked 287 p4p, 215 weight class). Mauliwarmadewa has chosen Follow Through as his entrance music. Amangkurat Mauliwarmadewa has the eye of the tiger tonight.
 |
|
 |
| 163 cm
25
130
0 - 1 - 0 |
|
151 cm
25
130
1 - 2 - 0 |
BJJ White Belt
Excellent MT
Granite chin |
|
BJJ White Belt
Excellent boxer
Good gas tank |
|
| |
|
Ladies and gentlemen. This fight is 3 rounds, in the bantamweight division.
Introducing the fighter to my left, fighting out of the red corner.
With a record of 0 - 1 - 0, fighting out of The Island, Kai Kara France!
And introducing the fighter to my right, fighting out of the blue corner.
With a record of 1 - 2 - 0, fighting out of The Island, Amangkurat Mauliwarmadewa!
The judges for this bout are David Hoff, Peter Branson and Sandra Marshall.

The bell rings for round one and we are underway!

Kara France clinches.
Kara France tries a shoulder strike but it doesn't do any damage.

Kara France breaks the clinch and we return to the middle of the mat.
Mauliwarmadewa lands a vicious shot with the stealth of a sniper and the strength of a viper. Are vipers that strong? I can think of lots of things that are stronger than a viper - not many rhyme with sniper though.
Mauliwarmadewa looks more muscular than last time we saw him. He must have been on the weights.

The fight moves into the clinch position.
Kara France misses with the head strike.
Kara France has a couple of punches blocked by Mauliwarmadewa.

Mauliwarmadewa breaks from the clinch.
Kara France will need to tighten up his combinations if he doesn't want to gas himself out, swinging at thin air.
Mauliwarmadewa misses with a half-hearted attempt at a head kick.
Kara France throws a right and a left that Mauliwarmadewa avoids nicely.
Kara France uses some good footwork to avoid the body shot by Mauliwarmadewa.
Mauliwarmadewa walks forward and throws out a flicking leg kick. Kara France checks it nicely though, as he moves to the side.
A combination from Mauliwarmadewa does no damage.
Kara France ducks under an overhand right and circles away with a smile on his face.
This has been an exciting period of action!
Kara France throws a nice looking combination but Mauliwarmadewa bobs and weaves to avoid any damage.
Mauliwarmadewa tries a head kick but it misses.
Kara France on the wrong end of a decent looking cross there.
Kara France throws a right and a left that both miss.
Mauliwarmadewa looked like he wanted to counter with a punch but didn't throw it.
Amangkurat Mauliwarmadewa seems to be the more aggressive standup fighter in this bout.
Mauliwarmadewa dances in quickly and lands a nice inside leg kick on Kara France. That did some damage!
Kara France is looking to clinch.

That's one minute gone in the round.
Mauliwarmadewa moves into range and clinches up with Kara France.
Mauliwarmadewa escapes the clinch and we're back to striking.
Kara France keeping his hands up high there, blocking the jab from Mauliwarmadewa.
Sloppy strikes from Mauliwarmadewa. Those never looked like landing.
Kara France rushes Mauliwarmadewa and starts throwing punches like they are going out of style! Mauliwarmadewa is up against the cage and has nowhere to go. Kara France piles on the pressure and Mauliwarmadewa crumples to the floor! This one is all over!
Ladies and gentlemen, after 1:19 of round 1, we have a winner by way of TKO (Strikes). Kai Kara France!
|
|
|
|
|
|
|
|
|
|
|
|
|
|
|
|
|
|
|
|
|
|
|
| S |
C
A |
G |
S |
C
B |
G |
|
S |
C |
G |
|
energy
A | B |
|
hype
A | B |
|
pop
A | B |
|
mgr
A | B |
|
FIGHT
RATING
79% |
|
|
|
|
|
|
|
Undercard bout
|
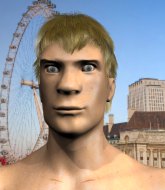
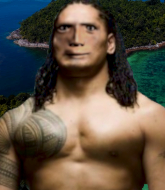
Coming up we have a middleweight MMA rules bout between Roundabout Tom (ranked 5723 p4p, 3757 weight class) and Siale Veainu (ranked 677 p4p, 530 weight class). Both fighters look pumped up here. Let's hope this is a good fight!
 |
|
 |
| 175 cm
18
190
2 - 1 - 0 |
|
172 cm
25
195
1 - 1 - 0 |
Good takedowns
Counter fighter
KO power |
|
BJJ White Belt
Excellent boxer
Granite chin |
|
| |
|
Ladies and gentlemen. This fight is 3 rounds, in the middleweight division.
Introducing the fighter to my left, fighting out of the red corner.
With a record of 2 - 1 - 0, fighting out of The Island, Roundabout Tom!
And introducing the fighter to my right, fighting out of the blue corner.
With a record of 1 - 1 - 0, fighting out of The Island, Siale Veainu!
The judges for this bout are Santiago Holmes, Peter Branson and David Hoff.
The bell rings for round one and we are underway!
Veainu defending well as Tom loads up on a big left hand.
Veainu scores with a jab to the body.
Siale Veainu seems to be the more aggressive standup fighter in this bout.
Veainu throws a looping overhand right but Tom ducks down to avoid it.
Tom definitely looks more muscular than last time we saw him fight.
Veainu fakes a head punch and goes low to the body. Nicely done.
Veainu misses with a looping left.
Nice body punch from Veainu.
Tom showing good head movement there, avoiding the strikes from Veainu.
Veainu scores with a nice strike.
 It looks like Roundabout Tom has been cut. It looks like Roundabout Tom has been cut.
Veainu throws a hook to the side of Tom's head but Tom sees it coming and ducks under it beautifully.
Tom tries to counter by moving into the clinch but Veainu manages to circle out of the way.
Tom fakes high and swings low for a body shot but Veainu manages to avoid it.

Veainu cracks Tom with a big right hand that sends him crashing to the floor. Veainu has the opportunity to follow him to the ground but instead he's beckoning Tom to stand back up!
 Tom is rocked! Tom is rocked!
The crowd cheering loudly, showing their appreciation for the quality fight we're seeing here.
Tom ducks into an uppercut from Veainu and that's knocked him out cold! This one is all over!
Ladies and gentlemen, after 0:58 of round 1, we have a winner by way of KO (Punch). Siale Veainu!
|
|
|
|
|
|
|
|
|
|
|
|
|
|
|
|
|
|
|
|
|
|
|
| S |
C
A |
G |
S |
C
B |
G |
|
S |
C |
G |
|
energy
A | B |
|
hype
A | B |
|
pop
A | B |
|
mgr
A | B |
|
FIGHT
RATING
98% |
|
|
|
|
|
|
|
Undercard bout
|
Coming up we have a featherweight MMA rules bout between Sahara Sam (ranked 4260 p4p, 3399 weight class) and BH Turner (ranked 385 p4p, 329 weight class). BH Turner is the more experienced fighter, so let's see if that makes a difference tonight.
 |
|
 |
| 170 cm
25
155
1 - 2 - 0 |
|
175 cm
25
150
2 - 1 - 0 |
BJJ White Belt
Solid boxing
KO power |
|
BJJ Blue Belt
Brawler
Tends to cut |
|
| |
|
Ladies and gentlemen. This fight is 3 rounds, in the featherweight division.
Introducing the fighter to my left, fighting out of the red corner.
With a record of 1 - 2 - 0, fighting out of The Island, Sahara Sam!
And introducing the fighter to my right, fighting out of the blue corner.
With a record of 2 - 1 - 0, fighting out of The Island, BH Turner!
The judges for this bout are Winston Alpacca, Dirk Anderson and Santiago Holmes.
The bell rings for round one and we are underway!
Turner tries to check a leg kick but that clearly hurt him.
Sam scores with a nice looking left hook and follows it up with an uppercut!
Turner with the inside leg kick.
Turner slips under a jab from Sam.
Sam fails to land with a series of punches.
We've been told by Sam's head coaches at Cozad The Island that he's been working on his takedown defense in preparation for this fight.
Sam throws a wild combination but nothing lands.
Turner is definitely looking for the counter takedowns here.
Turner tries to close the distance and clinch but Sam swats him to one side with an open hand palm strike and circles away.
Sam tries to work over Turner's front leg with a kick but Turner checks it.
Sam takes a swing at Turner's ribcage but misses.
Turner looks to score with a combo but nothing lands.
Sam misses with a series of wild punches.
Sam fails to land with a series of punches.
Sahara Sam seems to be the more aggressive standup fighter in this bout.
Turner has Sam up against the cage in a clinch.
The crowd are loving this. Great action here.

Turner jumps into guard, dragging Sam to the mat.

Sam decides to stand up and beckons his opponent to follow.
Turner walks straight into an uppercut. Luckily it didn't land flush.
That's one minute gone in the round.
Turner misses with a takedown attempt. He shot from a bit too far out.
Sam throws a head kick but Turner moves out of range.
Turner scoring well with a low kick there.
Turner blocks a low kick nicely.
Sam with a nice looking leg kick. You could hear that one land in a back row.
Turner looks frustrated there after his takedown attempt is stuffed easily.
Turner changes levels and looks for a double leg takedown. Sam tries to avoid it but Turner manages to keep hold of a leg and drag Sam to the ground. Sam escapes though and pops straight back up to his feet.
Sahara Sam has stuffed three takedown attempts in the round now. That's going to take a lot out of BH Turner.
Sam pivots, looking for a leg kick but Turner is out of range and Sam settles back down.
A clash of legs there as Sam blocks the low kick.
Sam misses with a double jab
and Turner counters with a shoot takedown into half guard.
The ref warns both fighters not to hold the cage as they work up against the meshing.
Sam is trying to stand back up but Turner is controlling him
In the pre-fight buildup videos we saw Turner working his ground and pound in the gym. He isn't landing a great percentage of his ground strikes so far though.

That's two minutes gone in the round.
Sam wants to stand back up but Turner manages to pass into side control.
Sam on his back here. We all know that wrestlers don't like being on their back so let's see if Sam tries to get out of the position.
Turner prevents Sam from escaping the position.
Turner working the body and head with strikes.
Sam is trying to buck Turner off.
This is a great period of action - very entertaining stuff!
Sam bucks up and tries to throw Turner off but instead Turner has got his back!
Sam is trying to stand back up.
Turner has the superior BJJ but he's also working some ground strikes into his gameplan.
Sam is trapped and Turner is scoring with shots to the head and body.
Sam knows he needs to get back to his feet asap. He's simply no match for Turner on the ground.
Sam is trying to stand back up.

That's three minutes gone in the round.

Turner is working on the RNC. He looks like he's got it but Sam won't tap... Oh, he's out! The ref rips Turner off his unconscious opponent!
Ladies and gentlemen, after 3:21 of round 1, we have a winner by way of Submission (RNC). BH Turner!
During a confident post fight interview, BH Turner thanked all his fans. He seemed very genuine when describing how motivated his fans keep him.
|
|
|
|
|
|
|
|
|
|
|
|
|
|
|
|
|
|
|
|
|
|
|
| S |
C
A |
G |
S |
C
B |
G |
|
S |
C |
G |
|
energy
A | B |
|
hype
A | B |
|
pop
A | B |
|
mgr
A | B |
|
FIGHT
RATING
49% |
|
|
|
|
|
|
|
Undercard bout
|
Coming up we have a light heavyweight MMA rules bout between Aisland Bounser (ranked 2719 p4p, 3898 weight class) and Robert White (ranked 353 p4p, 489 weight class). Both fighters look fresh as a daisy as they make their way towards the cage.
 |
|
 |
| 188 cm
25
205
2 - 1 - 0 |
|
190 cm
25
215
1 - 0 - 0 |
Good wrestling
Counter fighter
Granite chin |
|
BJJ White Belt
Excellent MT
Powerful |
|
| |
|
Ladies and gentlemen. This fight is 3 rounds, in the light heavyweight division.
Introducing the fighter to my left, fighting out of the red corner.
With a record of 2 - 1 - 0, fighting out of The Island, Aisland Bounser!
And introducing the fighter to my right, fighting out of the blue corner.
With a record of 1 - 0 - 0, fighting out of The Island, Robert White!
The judges for this bout are David Hoff, Santiago Holmes and Sandra Marshall.
The bell rings for round one and we are underway!
Bounser throws an off balance right hand
letting White counter with a right hand.
It looks like Aisland Bounser has been cut.
White thows a left - swing and a miss!
White throws a hook but Bounser avoids it easily.
White lands with a straight right. Bounser didn't see that one coming.
White pulls out of a head kick attempt.
Bounser looked to counter with a high kick but didn't commit.
Robert White seems to be the more aggressive standup fighter in this bout.
White misses with an uppercut.
Bounser throws a quick counter kick to the body but White avoids it.
White misses with a hook.
White with a nice cross.
White throws a head kick but Bounser moves out of range.
Bounser is looking to counter with a shot to the body.
White lands a pitter patter jab to the forehead of his opponent.
We've had a slow start to the round here - hopefully the action picks up.
Bounser has his hands up protecting his head but a hook from White finds it's way round the side to connect with Bounser's head.
White connects with the punch.
Bounser takes an uppercut right on the jaw but it doesn't phase him.
Wooooo! Give it up for these two warriors! They are putting on a show!
Bounser takes one on the button.
Bounser definitely looks more muscular than last time we saw him fight.
That's one minute gone in the round.
White slaps away a takedown attempt from Bounser, before circling back to the center of the mat.
White scores with a nice right hand.
Bounser throws a shot from downtown. White moves away and avoids it.
A low kick from Bounser misses
and White counters with a straight right hand.
White is landing a lot of head punches in this opening round! Bounser had better start moving his head a bit unless he wants his face to turn into mush.
White misses with a jab and misses with a cross straight after too.
Bounser circles away from the clinch attempt.
White sizes up Bounser with a pawing jab and scores with a straight right down the middle.
White lands a nice looking body shot.
White tries to clinch but Bounser moves out of range.

Bounser scores with a takedown into White's guard.
White looks more muscular than last time we saw him. He must have been on the weights.
Bounser working from the guard for now, landing some ground and pound.
That's two minutes gone in the round.
The crowd cheering loudly, showing their appreciation for the quality fight we're seeing here.
Bounser is looking to work some ground and pound but White has wrist control.
Bounser postures up in White's guard and throws a big left but White blocks it.
The ref warns both fighters not to hold the cage as they work up against the meshing.
White is looking to stand back up but Bounser counters by passing into half guard. Oops... bit sloppy there by White.
Bounser is keen to just control but White is a slippery customer.
Bounser scoring with strikes to the body and head.
Bounser trying to control from half guard but White is working away.
Bounser has been looking to land a fair amount of strikes on the ground. He might be looking to soften his opponent up in order to work for a submission.
Bounser throwing shots but they're hitting the canvas more than the man.
The fighters are pressed up against the cage, both looking to find a bit of space to work.
That's three minutes gone in the round.
Nice strikes from Bounser there.
Bounser thumps the canvas. Not on purpose obviously - he just missed White's head.
Bounser takes advantage of the dominant position to land a couple of big hammer fists.
Bounser is pressing down on White's thigh, looking to free his foot. White is holding on for now.
Bounser thumps the canvas. Not on purpose obviously - he just missed White's head.
White won't allow Bounser to pass to mount.
White is trying to stand.
Bounser winds up and cracks White with a swinging punch to the side of the head.
Bounser working over White with some ground and pound. White looks like he wants out of this position, which is understandable.
Bounser thows a wild elbow that connects with the canvas.
Bounser working some ground and pound from close in. He's looking to maintain this position and strike for a while by the looks of things... although he'll probably advance to full mount in a minute now I've said that.

That's four minutes gone in the round.
White is trying to defend against the ground and pound but Bounser scores with a couple of nice shots.
Bounser looks to score some points with some ground and pound.
White blocking the ground and pound attempt from Bounser.
White keeping his head moving to avoid the ground and pound.
Bounser thumps the canvas. Not on purpose obviously - he just missed White's head.
Bounser thumps the canvas. Not on purpose obviously - he just missed White's head.
Bounser looks to score some points with some ground and pound.
Bounser working over White with some ground and pound. White looks like he wants out of this position, which is understandable.
This has been an exciting period of action!
Bounser is figuring out what he wants to do next.
Bounser looks towards his corner to check for any instructions. The corner give him nothing to work with, so he cracks White with a short hammerfist. I guess that's as good as any advice he could get in this position.
Bounser lands with an elbow from half guard - that looked like it hurt.
And that is the end of the round. The fighters go back to their corners.
That was a close round but I would say that Aisland Bounser will probably get the nod.
The cut man is working on Aisland Bounser's cut.
That's time! Bounser's corner gives him a slap on the ass as he gets ready to fight.

Bounser looks for a takedown here. Will he get it? White is fending him off so far but Bounser persists. Nope, White circles away and we're back to standing.
A little jabbing left from White on the counter but it doesn't find it's target.
White scores with a decent looking hook.
White throws out a powerful jab.
Bounser misses with a kick to the body
and White counters with a quick right hand to the jaw.
White tries to clinch there but Bounser circles away.
White bobs and weaves and throws out a fast jab that snaps Bounser's head backwards.
White jabs. That one connects to the head of his opponent.
Bounser throws a leg kick
and White connects with a straight left hand counter down the middle.
Bounser swings widly with a right hand
enabling White to counter with a crisp jab.
White lands a jab to Bounser's midsection.
Robert White seems to be getting the better of the standup.
Bounser staying out of range there.
The fans in attendance giving it up for the two fighters, who have really let it all hang out in the last minute or so!
Bounser pulls out of a head kick attempt.
White throws a big shot that misses.
That's one minute gone in the round.
White throws an overhand right that lands on Bounser's shoulder, as Bounser tries to avoid the shot.
Bounser misses with a hook to the body
and White connects with a straight left hand counter down the middle.
White tries a head kick but it misses.
White lands a jab, followed by a cross and another cross, as Bounser backs up against the cage.
White uses good footwork to get in and out, landing a nice hook.
White tries to clinch but Bounser is having none of it.
The fight moves into the clinch position.
White lands a nice uppercut.
Bounser tries a shoulder strike but it doesn't do any damage.
Bounser swings wildly with an uppercut but White uses good head movement to avoid it.
White escapes the clinch and we're back to striking.
White throws the left hand but Bounser avoids the punch easily.
A counter left hand to the body from Bounser misses its target.
White lands the left hand.
That's two minutes gone in the round.
This has been an exciting period of action!
Nice straight punches there by White. You know Roy Jones Jr respects the hands of White.
A jab from Bounser misses.
Bounser ducks under a wild hook from White.
White lunges at Bounser with a hook that half lands and is half blocked by Bounser's hand.
White throws out a loose jab but Bounser uses good head movement to avoid it.
It looked like Bounser wanted to counter with a hook but didn't fully commit.
Bounser tries to land with a swinging hook to the body but White was well out of range. Poor timing from Bounser.
White might want to mix his strikes up a bit more. He's just going for head shots at the moment and that can become a bit predictable.
Bounser takes a really solid shot there but just smiles back and shrugs his shoulders.
White lands with an overhand left.
Bounser throws a low kick but White moves out of range easily.
White is moving around nicely and scores here with a single head shot.
Bounser checks a low kick. Bone on bone - not my idea of a good time.
Bounser keeping his hands up high there, blocking the jab from White.
Bounser seem to be loading up, looking for a big counter.
That's three minutes gone in the round.
A head kick misses from Bounser.
White is clearly trying to counter these attacks from Bounser with a body shot.
Bounser throws a leg kick
and White counters with a nice uppercut.
Bounser throws a leg kick
and White counters with a good right hand that lands right on the jaw.
Good shot there by White.
White fakes a head shot and lands one to the body.
Bounser throws a lazy right hand but White sees it coming a mile off and sidesteps it easily.
A jab from White finds it's way through Bounser's defenses.
Bounser drops his hands and takes a jab to the jaw for his troubles.
White lunges in with an uppercut that skims his opponent's chin.
White misses the jab.
Bounser takes a jab on the nose. He smiles like he loves it and keeps coming.
The crowd cheering loudly, showing their appreciation for the quality fight we're seeing here.
Bounser swings for the body but White moves out of range.
That's four minutes gone in the round.
White lands a vicious shot with the stealth of a sniper and the strength of a viper. Are vipers that strong? I can think of lots of things that are stronger than a viper - not many rhyme with sniper though.
Left hook, right uppercut from White.
Bounser has his head slapped from side to side by a 3 punch combination. That must have hurt him.
White closes the distance and clinches.
White tried to land a shot to the body but connects with Bounser's elbow.
White lands a left hand that snaps the head of Bounser backwards.
White doesn't land with the attempted body shot.
Bounser tried to land a shot to the body but connects with White's elbow.
White lands a left hand that snaps the head of Bounser backwards.
Bounser swings wildly with an uppercut but White uses good head movement to avoid it.
Bounser tries to work over White's body with a swooping hook but it only glances the target.
White goes for a body shot but it's blocked.
White blocks a body shot from Bounser.
White misses with a punch to the body.
Bounser working aggressively here.
White blocks a punch to the side of the head.
The crowd applaud the fighters' efforts here as the round comes to an end.
A short right from Bounser on the inside.
And that is the end of the round. The fighters go back to their corners.
Robert White showed his class in that round. I'd imagine he'll take it on all the scorecards.
The cut man is working on Aisland Bounser's cut.
The fighters get back to their feet, the hooter sounds and we're back to the action! This is the final round!

White tries to clinch up against the cage, rushing in to close the distance. Bounser manages to break the clinch and circles back to the middle of the mat.
Bounser feinted there with a counter leg kick.
Bounser is the aggressor but that punch slipped nicely by White.
Bounser misses with a lunging right hand
and White counters with a quick right hand to the jaw.
White throws out a powerful jab.
Bounser throws an ugly left hook that misses
and White counters with a good right hand that lands right on the jaw.
White misses the jab.
A little feinted left hand from Bounser on the counter but he doesn't commit to it.
White connects with the punch.
Bounser throws a body kick that misses
and White counters with a crisp hook to the side of the head.
Bounser misses with a leg kick
and Bounser takes a counter punch right on the button for his troubles.
We've had a slow start to the round here - hopefully the action picks up.
White throws a big shot that misses.
White lands an overhand left. A wild punch that just about connected.
White has been the more effective fighter overall so far.
Donk. White catches Bounser right on the button with a cross.
Wooooo! Give it up for these two warriors! They are putting on a show!
White tries to clinch but Bounser moves out of range.
That's one minute gone in the round.
White catches Bounser with a nice straight right. He seems pissed - ooooh, it's on now! On like donkey kong!
White misses with an uppercut. Bounser saw that one coming.
A combination from White does no damage.
White's corner calls for a 1, 2 combination and White duly obliges.
A cross from White lands.
Bounser looks for a takedown. He's got it. We're now in half guard.
White won't allow Bounser to pass to mount.
Bounser throwing shots but White is blocking nicely.
Bounser wants to control but White is keeping him busy.
The referee walks around the fighters to get a better view of the action. Bounser lands a nice short elbow.
That's two minutes gone in the round.
The crowd cheering loudly, showing their appreciation for the quality fight we're seeing here.
Bounser moves into full mount! White won't be happy about that!
We get told so often about how wrestlers don't like to be on their backs. Let's see if White can do anything to dispel that myth.
Bounser lands a big shot there that rocks White but he's holding on and managing to survive for now.
Bounser looking to ground and pound his opponent to a finish here.
 It looks like Robert White has been cut. It looks like Robert White has been cut.
Bounser landing shots from mount.
That has opened up Robert White's cut even more.
White takes a big intake of breath there - he's definitely tired.
Bounser scores with a couple of good head shots there.
Bounser with shots to the head and body - White looks very uncomfortable down there.
The cut above Robert White's eye is starting to cause him problems now.
A nice elbow there by Bounser.
Bounser trying to control but he's not successful this time.
Bounser scoring with strikes but White is staying in there.
Robert White's cut is absolute horrible now. This looks like something out of a horror film with blood covering both fighters.
The referee calls the doctor in to look at Robert White's cut. Oh no, the doctor has called an end to the bout!
Ladies and gentlemen, after 3:18 of round 3, we have a winner by way of TKO (Cut). Aisland Bounser!
|
|
|
|
|
|
|
|
|
|
|
|
|
|
|
|
|
|
|
|
|
|
|
| S |
C
A |
G |
S |
C
B |
G |
|
S |
C |
G |
|
energy
A | B |
|
hype
A | B |
|
pop
A | B |
|
mgr
A | B |
|
FIGHT
RATING
63% |
|
|
|
|
|
|
|
Undercard bout
|
Coming up we have a lightweight MMA rules bout between Jorge Assvidal (ranked 2705 p4p, 3703 weight class) and Bosque Trabuco (ranked 328 p4p, 415 weight class). Both fighter's entrance songs getting the crowd jumping here.
 |
|
 |
| 171 cm
25
166
2 - 0 - 0 |
|
174 cm
25
160
1 - 0 - 0 |
Good wrestling
Solid boxing
Very strong |
|
BJJ Blue Belt
Good elbows
Powerful |
|
| |
|
Ladies and gentlemen. This fight is 3 rounds, in the lightweight division.
Introducing the fighter to my left, fighting out of the red corner.
With a record of 2 - 0 - 0, fighting out of The Island, Jorge Assvidal!
And introducing the fighter to my right, fighting out of the blue corner.
With a record of 1 - 0 - 0, fighting out of The Island, Bosque Trabuco!
The judges for this bout are Dirk Anderson, David Hoff and Winston Alpacca.
The bell rings for round one and we are underway!
Good standup being displayed there by Assvidal as he connects with a hook.
Jorge Assvidal seems to be the more aggressive standup fighter in this bout.
Trabuco with a lazy takedown attempt
and Assvidal counters into the clinch. Nicely done.
A shot in the inside from Assvidal.
With the fighters up against the cage, Trabuco throws an elbow but misses.
Trabuco creates a bit of space for himself and sneaks an elbow through Assvidal's defenses.
Assvidal fails to land with a short punch on the inside.
A short left from Assvidal.
An uppercut on the inside fails to land for Assvidal.
Trabuco wants to take the fight to the mat but Assvidal manages to get underhooks and keep the fight in the clinch.
Assvidal scores with an uppercut up the middle.
Assvidal tried to land a shot to the body but connects with Trabuco's elbow.
Trabuco blocks a body shot from Assvidal.
Still in the clinch, Assvidal scores with a nice short uppercut.
A nice right hand lands inside from Assvidal.
Fantastic stuff here - a very entertaining period of action, which has drawn cheers from the crowd.
Assvidal lands a nice looking hook to the body, against the cage.
Still in the clinch, Assvidal scores with a nice short uppercut.
Trabuco misses with an elbow strike.
Assvidal lands with a good tight uppercut to the head.
Trabuco fails to land with a short punch on the inside.
Assvidal tries a shoulder strike but it doesn't do any damage.
Assvidal lands on the inside with an uppercut.
With the fighters up against the cage, Trabuco throws an elbow but misses.
That's one minute gone in the round.
Trabuco tries a body shot but Assvidal blocks it.
A nice left hand lands by Assvidal.
Assvidal misses with a body punch.
Trabuco has hold of a leg and is looking for a trip takedown. Assvidal avoids it nicely though and we remain in the clinch.
Jorge Assvidal has stuffed three takedown attempts in the round now. That's going to take a lot out of Bosque Trabuco.
Trabuco misses with an elbow over the top.
Trabuco lands an elbow just above Assvidal 's eye.
Assvidal scores with a shoulder strike.
Assvidal blocks the elbow strike.
Assvidal scores with a hook to the body.
A hook to the body from Assvidal.
Assvidal stops a takedown attempt from Trabuco.
Assvidal lands a left hand that snaps the head of Trabuco backwards.
Assvidal throws a hook to the body. More of an arm punch but it's all scoring with the judges.
Trabuco looks winded!
Assvidal scores with a nice hook to the head.
Assvidal lands a hook to the side of the head.
Assvidal throws a blind hook that connects with the side of Trabucos head.
We've seen a great period of action over the last minute or so - credit to both fighters for going all out!
Assvidal lands a hook that snaps the head of Trabuco backwards.
 Trabuco is rocked! Trabuco is rocked!
Assvidal stays in close to his opponent and throws a right hand to the body.
Assvidal lands with a light punch inside.
A right hand to the body from Assvidal.
That's two minutes gone in the round.
A right hand to the body from Assvidal.
Assvidal is leaning against Trabuco and scores with a nice uppercut to the body.
Assvidal lands a left hand that snaps the head of Trabuco backwards.
Assvidal lands a nice uppercut.
A short right from Assvidal.
Trabuco is still on wobbly legs! Can Assvidal finish him?
Assvidal cracks Trabuco with a nice body shot.
Trabuco seems to have recovered his senses.
Assvidal lands a hook to the side of the head.
Assvidal is leaning against Trabuco and scores with a nice uppercut to the body.
A shot in the inside from Assvidal.
Assvidal working some nice short punches in the clinch.
A short right hand to the side of the head by Assvidal.
Nice body punch from Assvidal.
Assvidal cracks Trabuco with a nice body shot.
Assvidal makes some space for himself and lands an uppercut.
A short right from Assvidal.
A left hand lands to the body for Assvidal.
Assvidal lands a hook to the side of the head.
Assvidal throws a hook to the body. More of an arm punch but it's all scoring with the judges.
A body shot lands from Assvidal.
Assvidal lands a left hand.
That's three minutes gone in the round.
Assvidal softening up his opponent with strikes, against the cage.
Assvidal definitely looks more muscular than last time we saw him fight.
Trabuco takes a shot to the head.
Assvidal lands with a quick shot inside that doesn't really do much damage.
Trabuco has been looking to improve his clinch game in recent weeks. Assvidal seems to have the measure of him in the clinch so far, so let's see if Trabuco can turn it around.
Assvidal lands a short shot on the inside that snaps the head of Trabuco backwards.
Assvidal creates some distance for himself and unleashes a massive uppercut that sends Trabuco's eyes rolling into the back of his head! Trabuco drops to his knees and Assvidal pours it on with more strikes until the referee steps in to end the bout!
Ladies and gentlemen, after 3:24 of round 1, we have a winner by way of TKO (Strikes). Jorge Assvidal!
After the fight, Jorge Assvidal was humble in paying tribute to his opponent but made it clear he wants to go on to bigger and better things. It seemed to go down well with the crowd who cheered him loudly.
|
|
|
|
|
|
|
|
|
|
|
|
|
|
|
|
|
|
|
|
|
|
|
| S |
C
A |
G |
S |
C
B |
G |
|
S |
C |
G |
|
energy
A | B |
|
hype
A | B |
|
pop
A | B |
|
mgr
A | B |
|
FIGHT
RATING
76% |
|
|
|
|
|
|
|
Undercard bout
|
Coming up we have a light heavyweight MMA rules bout between Archie Laird (ranked 2281 p4p, 3394 weight class) and Franko Getaldic (ranked 304 p4p, 432 weight class). Archie Laird could well score a knockout today. He has the power to get to Franko Getaldic's chin.
 |
|
 |
| 180 cm
25
211
2 - 0 - 0 |
|
190 cm
25
204
1 - 0 - 0 |
Good wrestling
Basic striking
Granite chin |
|
BJJ White Belt
Excellent boxer
Heavy handed |
|
| |
|
Ladies and gentlemen. This fight is 3 rounds, in the light heavyweight division.
Introducing the fighter to my left, fighting out of the red corner.
With a record of 2 - 0 - 0, fighting out of The Island, Archie Laird!
And introducing the fighter to my right, fighting out of the blue corner.
With a record of 1 - 0 - 0, fighting out of The Island, Franko Getaldic!
The judges for this bout are David Hoff, Dirk Anderson and Bart Greer.
The bell rings for round one and we are underway!
Getaldic throws a good cross that connects.
Getaldic throws a lazy right hand but Laird sees it coming a mile off and sidesteps it easily.
Laird changes levels looking for a counter takedown but doesn't commit.
Laird uses some good footwork to avoid the body shot by Getaldic.
Getaldic scores with a straight right hand, right through his opponent's guard.
Getaldic misses with a body shot.
Laird tries to clinch there but Getaldic circles away.
Getaldic lands a really nice looking cross but Laird seems unphased.
Laird tries for a takedown but Getaldic sees it coming a mile off and avoids it easily.
As Laird backs off Getaldic throws a huge counter combo but Laird manages to avoid it all.
Getaldic throws a hard body shot but it just misses.
Getaldic throws out a powerful jab.
Laird swings widly with a right hand
and Getaldic counters with a crisp hook to the side of the head.
No luck for Laird with that takedown attempt.
Laird decides to change it up a bit and drives through with a nice takedown into half guard.
This has been an exciting period of action!
Getaldic is trying to defend against the ground and pound but Laird scores with a couple of nice shots.
Getaldic is trying to control but can't.
Getaldic really doesn't want to stay on the ground with Laird. If he can't get it back to his feet, it's only a matter of time before he'll be tapping out.
Laird performing his best blanket impression for a moment.
That's one minute gone in the round.
Laird lands with an elbow from half guard - that looked like it hurt.
Laird looks over to his corner - he wants some instructions but his corner are not responding.
Laird lands strikes from half guard.
The ref warns both fighters not to hold the cage as they work up against the meshing.
Getaldic avoiding damage under a succession of punches from Laird.
Laird looks over to his corner - he wants some instructions but his corner are not responding.
Laird thows a wild elbow that connects with the canvas.
That's two minutes gone in the round.
Neither fighter has done anything of merit for a good minute or two here and the crowd are not happy about it.
The referee walks around the fighters to get a better view of the action. Laird lands a nice short elbow.
Laird missing with the ground and pound from half guard.
Well, if Laird is going to just lie there, perhaps we should talk about what we're having for dinner tonight
I'm having a ham and pineapple pizza
Yum. Can't wait.
Laird working over Getaldic with some ground and pound. Getaldic looks like he wants out of this position, which is understandable.
Laird is scoring with some nice ground and pound from the dominant position.
Laird sitting and controlling from the half guard.
Getaldic trying to control from the bottom.
We get told so often about how wrestlers don't like to be on their backs. Let's see if Getaldic can do anything to dispel that myth.
That's three minutes gone in the round.
Laird seems content to maintain position for now, rather than mounting any offense.
Laird moves nicely into side control.
You can see the frustration on Getaldic's face, being in this tough position on the bottom.
Getaldic takes a couple of big shots there - the referee warns him that he has to defend himself better.
Getaldic is being controlled here.
Getaldic can't do much from the bottom here.
That's four minutes gone in the round.
Laird scoring with punches and elbows.
Laird in side control lands a decent elbow.
Laird fails to land a wild elbow strike.
Getaldic is trying to escape the position but Laird is controlling the position.
Laird is working Getaldic over with some ground and pound from side control.
The fighters are pressed up against the cage, both looking to find a bit of space to work.
Getaldic is not in a great position here, taking some shots.
You can see the frustration on Getaldic's face, being in this tough position on the bottom.
Laird working the head and body with strikes.
Getaldic is rocked!
Laird scores with a big shot from side control... and another... and another! Oh Getaldic is done here - save him referee! More strikes land and eventually the ref does step in and Laird can finally stop beating on his defenseless opponent!
Ladies and gentlemen, after 4:55 of round 1, we have a winner by way of TKO (Strikes). Archie Laird!
A very excited looking Archie Laird made sure he remembered to thank all the fans both in the arena and on the internet. He said all the coolest people spend all day on MMA websites, which got a big reaction.
|
|
|
|
|
|
|
|
|
|
|
|
|
|
|
|
|
|
|
|
|
|
|
| S |
C
A |
G |
S |
C
B |
G |
|
S |
C |
G |
|
energy
A | B |
|
hype
A | B |
|
pop
A | B |
|
mgr
A | B |
|
FIGHT
RATING
37% |
|
|
|
|
|
|
|
Undercard bout
|
Coming up we have a bantamweight MMA rules bout between Harry Henderson (ranked 2306 p4p, 3409 weight class) and Jens Neustadt (ranked 125 p4p, 171 weight class). Over to our ring announcer for the fighter introductions!
 |
|
 |
| 159 cm
25
135
2 - 1 - 0 |
|
165 cm
25
140
3 - 0 - 0 |
Good wrestling
Basic striking
Very quick |
|
Good wrestler
Dangerous knees
Tends to cut |
|
| |
|
Ladies and gentlemen. This fight is 3 rounds, in the bantamweight division.
Introducing the fighter to my left, fighting out of the red corner.
With a record of 2 - 1 - 0, fighting out of The Island, Harry Henderson!
And introducing the fighter to my right, fighting out of the blue corner.
With a record of 3 - 0 - 0, fighting out of The Island, Jens Neustadt!
The judges for this bout are Peter Branson, David Hoff and Daniel Franklin.
The bell rings for round one and we are underway!
Nice takedown defense from Neustadt. No joy for Henderson on that attempt.
Harry Henderson seems to be the more aggressive standup fighter in this bout.
Henderson shoots in but Neustadt avoids the takedown attempt easily.
Neustadt steps in looking to clinch after the strikes miss from Henderson.
Henderson shoots in but doesn't get the takedown
and Neustadt counters by clinching up.
That's three failed takedown attempts in the round for Harry Henderson. That's going to take a lot out of him.
Neustadt trying to land knees to the body.
Neustadt tries to land a knee to the head but Henderson blocks with his arms.
Neustadt scores a nice knee to the body.
Neustadt using the Thai clinch to land knees to the body.
Neustadt with the Thai clinch, lands a knee to the head.
Neustadt landing knees to the body. They look like they could hurt.
Henderson wants to break the clinch but can't.
Neustadt lands a knee to the head there! That was nasty!
Neustadt controlling the action here for a moment.
Neustadt's coach down at SMASH Training was telling us pre-fight that they have been working on Neustadt's balance. Obviously they view that as a key factor in the outcome of this fight.
Henderson drops to a knee looking for a takedown but Neustadt gets the underhooks and prevents it.
That's one minute gone in the round.
Neustadt trying to land knees to the body.
Neustadt scores a nice knee to the body.
Neustadt lands a knee to the body.
Henderson trying to control the position but instead, Neustadt has worked for underhooks and has pushed Henderson into the cage.
Neustadt dodges an elbow strike from Henderson.
Knees in the clinch landing for Neustadt.
Henderson takes a knee right on the jaw!
Neustadt lands a nice knee to the body.
Neustadt slows down the pace here.
Neustadt prevents the takedown attempt.
That's two minutes gone in the round.
Neustadt landing some nice looking knees to the body.
Kneeeeees! The crowd are calling for knees to the body. Neustadt obliges.
Neustadt blocks an uppercut.
Neustadt landing knees to the body. They look like they could hurt.
Henderson is breathing heavily.
The crowd are loving this. Great action here.
Knees to the body from Neustadt.
Neustadt lands a knee to the body.
Neustadt working Henderson over with knees to the body.
Neustadt utilising his Muay Thai to score with a knee to the body.
Neustadt lands a knee to the head there! That was nasty!
Neustadt landing knees to the body.
Neustadt scores a nice knee to the body.
Neustadt unloads a knee to the mid-section.
Neustadt using the Thai clinch to land knees to the body.
Neustadt landing some nice looking knees to the body.
Neustadt with a knee to the head.
That's three minutes gone in the round.
A knee to the head by Neustadt.
Neustadt unloads a knee to the mid-section.
Neustadt connects with a nasty looking knee right to Henderson's face.
Neustadt lands a nice knee to the body.
Neustadt lands a nice knee to the body.
Neustadt landing knees to the body. They look like they could hurt.
Kneeeeees! The crowd are calling for knees to the body. Neustadt obliges.
Neustadt stalls.
Knees in the clinch landing for Neustadt.
Neustadt landing knees to the head.
The crowd cheering loudly, showing their appreciation for the quality fight we're seeing here.
Neustadt connects with a nasty looking knee right to Henderson's face.
Neustadt lands a knee to the body.
Henderson jumps guard but Neustadt turns him against the cage and keeps the fight standing.
Neustadt landing some nice looking knees to the body.
That's four minutes gone in the round.
Neustadt lands a nice knee to the body.
Neustadt connects with a knee to the head.
Neustadt using the Thai clinch to land knees to the body.
Neustadt landing knees to the body. They look like they could hurt.
Henderson tries to break free but Neustadt pushes him back against the cage.
Henderson wants a takedown but no success here.
Neustadt scores with a knee to the head.
Neustadt lands a knee to the head.
Neustadt lands a knee to the head.
Neustadt scores a nice knee to the body.
Neustadt lands a knee to the head there! That was nasty!
Henderson is rocked!
The crowd applaud the fighters' efforts here as the round comes to an end.
Neustadt with the Thai clinch, lands a knee to the head.
Oh Henderson is still all over the place! His legs are completely gone! Will he be able to recover?!!
Knees in the clinch landing for Neustadt.
Neustadt utilising his Muay Thai to score with a knee to the body.
Neustadt crunches a lovely knee into Henderson's ribcage.
Neustadt landing knees to the head.
Neustadt landing knees to the body.
Neustadt putting his Muay Thai to good use. He has Henderson in a tight clinch and is doing some damage with knees to the body.
Neustadt crunches a lovely knee into Henderson's ribcage.
Henderson takes a knee to the side of the body.
Neustadt landing some nice looking knees to the body.
A knee to the head by Neustadt.
Neustadt landing knees to the head.
And that is the end of the round. The fighters go back to their corners.
Jens Neustadt dominated that round.
The fighters get back to their feet, the hooter sounds and we're back to the action!
Henderson fails miserably with a takedown attempt.
Neustadt tries to counter by closing the distance.
Henderson closes the distance and clinches up with Neustadt, looking for a takedown. Henderson pushes Neustadt against the cage but Neustadt circles to the side and manages to break the clinch.
Neustadt tries to counter with a clinch but Henderson shakes him off and moves away.
No luck for Henderson with that takedown attempt.
Neustadt steps in looking to clinch after the strikes miss from Henderson.
That's three failed takedown attempts in the round for Harry Henderson. That's going to take a lot out of him.
Neustadt has taken the fight to the clinch.
Neustadt lands a knee to the head.
Neustadt has Henderson pressed up against the cage in a tight Thai clinch. Henderson is arching his back, trying to avoid the knees but a big one sneaks through from Neustadt - that's hurt Henderson badly! Oh, another knee lands and Henderson is covering up! The referee steps in to save him - possibly a bit early but Henderson doesn't seem to be complaining.
Ladies and gentlemen, after 0:20 of round 2, we have a winner by way of TKO (Knees). Jens Neustadt!
|
|
|
|
|
|
|
|
|
|
|
|
|
|
|
|
|
|
|
|
|
|
|
| S |
C
A |
G |
S |
C
B |
G |
|
S |
C |
G |
|
energy
A | B |
|
hype
A | B |
|
pop
A | B |
|
mgr
A | B |
|
FIGHT
RATING
77% |
|
|
|
|
|
|
|
Undercard bout
|
Coming up we have a middleweight MMA rules bout between Vai Crackudo (ranked 1975 p4p, 2955 weight class) and Grover Montoya (ranked 293 p4p, 418 weight class). Crackudo comes to the cage accompanied by VAI CRACUDO. Fingers crossed for an exciting fight - I'm sure both fighters are looking for a nice under the table bonus!
 |
|
 |
| 187 cm
25
185
2 - 0 - 0 |
|
185 cm
18
188
2 - 0 - 0 |
BJJ White Belt
Excellent MT
Granite chin |
|
BJJ Blue Belt
Counter fighter
Determined |
|
| |
|
Ladies and gentlemen. This fight is 3 rounds, in the middleweight division.
Introducing the fighter to my left, fighting out of the red corner.
With a record of 2 - 0 - 0, fighting out of The Island, Vai Crackudo!
And introducing the fighter to my right, fighting out of the blue corner.
With a record of 2 - 0 - 0, fighting out of The Island, Grover Montoya!
The judges for this bout are Sandra Marshall, Santiago Holmes and David Hoff.
The bell rings for round one and we are underway!
Crackudo missing with a left hand there. Montoya was out of range so wasted energy throwing that one.
Montoya tries to counter with a clinch but Crackudo shakes him off and moves away.
Montoya ducks under a wild hook from Crackudo.
Montoya tries to counter by closing the distance.
Crackudo looks to land a right hand but Montoya moved out of range.
Montoya swings wildly with a right hand that was never going to find it's target.
Crackudo throws a jab when Montoya was well out of range.
Montoya lands a right hook to the body.
Crackudo definitely looks more muscular than last time we saw him fight.
Crackudo misses with a hook.
Montoya tries a quick counter leg kick but Crackudo is wise to it.
A slow jab from Crackudo misses its intended target.
Montoya steps in looking to clinch after the strikes miss from Crackudo.
Montoya lands with an uppercut that bounces Crackudo off the cage and back into range.
Crackudo lands with a cross to side of his opponent's head.
A telegraphed right hand from Crackudo misses the target.
Crackudo throws a right and a left that Montoya avoids nicely.
It seemed like Montoya was going to counter with the hook but didn't fully commit to it.
Crackudo thows a left - swing and a miss!
Montoya is trying to avoid his opponent's strikes and get into the clinch.
Montoya connects with the punch.
We've seen a great period of action over the last minute or so - credit to both fighters for going all out!
A big left from Crackudo misses.
Montoya steps in looking to clinch after the strikes miss from Crackudo.
A jab from Crackudo misses.
No joy there for Montoya, who threw a few shots but didn't land.
A jab from Montoya misses.
That's one minute gone in the round.
Montoya slips a straight right by Crackudo.
Montoya blocks a jab.
Crackudo misses with a looping left.
Montoya moves out of range of the strikes.
A big right from Crackudo misses.
Vai Crackudo seems to be the more aggressive standup fighter in this bout.
Montoya scores with a reasonable looking shot to the body. Crackudo doesn't seem bothered though.
Good shot there by Crackudo.
Montoya waving his hands out in front of him, looking to distract Crackudo.
Crackudo throwing a counter right hand but Montoya manages to avoid it.
Montoya tried to score with a low kick but Crackudo checks it.
Crackudo uses good head movement to avoid the hook from Montoya.
The fighters circling - Crackudo throws out the jab but it was never going to land.
Montoya steps in looking to clinch after the strikes miss from Crackudo.
Crackudo fails to land with the punch combination there - jab, cross, hook, miss, miss, miss.
Crackudo throws a shot from downtown. Montoya moves away and avoids it.
Montoya pushing out the jab but it's not landing.
Crackudo throwing a counter right hand but Montoya manages to avoid it.
Crackudo throws a lazy right hand but Montoya sees it coming a mile off and sidesteps it easily.
Montoya ducks under a wild hook from Crackudo.
Montoya is on the wrong end of a nice combination from Crackudo.
That's two minutes gone in the round.
This has been an exciting period of action!
Crackudo fakes a jab and then connects with a hook.

Crackudo lands a big uppercut and Montoya crumbles to the floor! The ref thinks about stopping the fight but Montoya looks OK. Crackudo waves Montoya back to his feet!
Montoya is rocked!
Crackudo is really head hunting here, hardly looking to strike to the body at all.
Nice defenses there by Crackudo.
Montoya is still on wobbly legs! Can Crackudo finish him?
The fighters circling - Crackudo throws out the jab but it was never going to land.
Crackudo thows a left - swing and a miss!
Montoya seems to have recovered his senses.
Montoya ducks under an overhand right and circles away with a smile on his face.
Montoya is trying to avoid his opponent's strikes and get into the clinch.
Montoya avoids a lazy jab quite easily.
Jab from Montoya.
A big right from Crackudo misses.
It seemed like Montoya was going to counter with the hook but didn't fully commit to it.
Crackudo thows a left - swing and a miss!
Crackudo misses with a hook.
Montoya slips a jab from Crackudo.
Montoya tries to counter with a clinch but Crackudo shakes him off and moves away.
Crackudo is the aggressor but that punch slipped nicely by Montoya.
Nice defenses there by Montoya.
Crackudo works his jab well there, keeping his opponent at a distance.
Montoya dodges the punch combination from Crackudo.
That's three minutes gone in the round.
Montoya uses decent footwork to sidestep a right hand from Crackudo.
Crackudo sets himself, and Montoya steps forward looking for the clinch! Crackudo avoids it this time.
Montoya is pinned up against the cage taking some big shots here. The referee is looking closely deciding whether he should stop the fight.
Crackudo misses with a hook.
Montoya steps in looking to clinch after the strikes miss from Crackudo.
Crackudo misses with a hook. Montoya ducked under it nicely.
Montoya takes a shot to the eye socket. That's gotta hurt.
Crackudo throws a lazy right hand but Montoya sees it coming a mile off and sidesteps it easily.
Crackudo throws out a loose jab but Montoya uses good head movement to avoid it.
Crackudo throws a looping overhand right but Montoya ducks down to avoid it.
Crackudo throws a right hand that misses
and Montoya counters with a nice uppercut.
It looks like Vai Crackudo has been cut.
Crackudo blocks a low kick nicely.
Crackudo gets his head snapped back by a nice shot there.
Montoya throws a front kick aimed at Crackudo's knee but Crackudo avoids it well.
Montoya fakes high and swings low for a body shot but Crackudo manages to avoid it.
Crackudo throws a hook but Montoya avoids it easily.
A solid leg kick lands there for Montoya.
That's four minutes gone in the round.
Montoya thuds a left hand into Crackudo's body.
Wooooo! Give it up for these two warriors! They are putting on a show!
Montoya slips under a jab.
Crackudo lands the left hand.
Crackudo lands a nice shot that snaps Montoya's head back.
Crackudo throws a looping overhand right but Montoya ducks down to avoid it.
Montoya throws a body shot but no joy.
Montoya moves out of range as Crackudo strikes.
Montoya steps in looking to clinch after the strikes miss from Crackudo.
Montoya throws a good cross that connects.
Montoya has tried to improve his agility in the runup to this fight.
Crackudo throws a monster uppercut resembling something out of street fighter but it doesn't land.
Montoya defending well as Crackudo loads up on a big left hand.
Crackudo throws a right and a left that Montoya avoids nicely.
Crackudo misses with an uppercut
and Montoya counters with a lovely straight right hand!
The crowd applaud the fighters' efforts here as the round comes to an end.
Crackudo misses with a jab and misses with a cross straight after too.
Montoya dips down and scores with a jab to the body.
Montoya avoids a lazy jab quite easily.
Montoya throws a right and a left that both miss.
And that is the end of the round. The fighters go back to their corners.
Vai Crackudo dominated that round.
The cut man is working on Vai Crackudo's cut.
OK. That's time! The bell goes and we're back to the action.
Crackudo misses with a looping left.
Crackudo throws a jab when Montoya was well out of range.
A looping hook to the body misses from Montoya. Crackudo does a little dance to reset his feet.
Crackudo throws a monster uppercut resembling something out of street fighter but it doesn't land.
Montoya tries to counter by closing the distance.
Vai Crackudo is winning the standup battle so far.
Crackudo swings widly with a right hand
and Montoya counters with a good right hand that lands right on the jaw.
Crackudo throws a series of punches but Montoya moves out of range.
And an attempted straight right on the counter from Montoya! But no joy.
Crackudo uses some good footwork to avoid the body shot by Montoya.
Crackudo throws an uppercut from half a mile away. Montoya sees it coming and avoids it easily.
Both these guys seem content to just stand up and trade with each other but Montoya might want to think about changing up his gameplan a bit because over the course of the fight, Crackudo has got the better of the exchanges.
Montoya lands with a good body shot.
Montoya tries a low kick but Crackudo avoids it.
Montoya with a nice cross.
We've had a slow start to the round here - hopefully the action picks up.
Crackudo takes a body punch that cleary hurt but he's trying not to show any weakness.
Crackudo looks to land a right hand but Montoya moved out of range.
Montoya bobs and weaves well there to avoid the strikes.
Crackudo throws a hook but Montoya avoids it easily.
Montoya displays some good footwork, moving neatly out of range as Crackudo throws out the jab.
The fighters circling - Crackudo throws out the jab but it was never going to land.
Montoya tries to counter with a clinch but Crackudo shakes him off and moves away.
That's one minute gone in the round.
Montoya throws a hook but Crackudo avoids it easily.
A little feinted left hand from Crackudo on the counter but he doesn't commit to it.
Montoya changes levels and scores with a jab to the body.
Crackudo misses with a hook. Montoya ducked under it nicely.
The fighters circling - Crackudo throws out the jab but it was never going to land.
Nice defenses there by Montoya.
Montoya takes one to the side of the head.
Montoya staying out of range there.
Montoya lands a slapping body shot.
Montoya uses good head movement to avoid the hook from Crackudo.
Crackudo throws an overhand right that lands on Montoya's shoulder, as Montoya tries to avoid the shot.
A big right from Crackudo misses.
The fighters circling - Montoya throws out the jab but it was never going to land.
Montoya misses with an uppercut. Crackudo saw that one coming.
Montoya connects with a leg kick. He turned his hip over nicely there.
Montoya lands the left hand.
That's two minutes gone in the round.
Crackudo throws the left hand but Montoya avoids the punch easily.
A telegraphed right hand from Crackudo misses the target.
Wooooo! Give it up for these two warriors! They are putting on a show!
Crackudo swings wildly with a right hand that was never going to find it's target.
Montoya slips a jab and a cross from Crackudo.
Crackudo pushing out the jab but it's not landing.
Montoya tries to counter by closing the distance.
Montoya lands a nice hook to Crackudo's body. Crackudo takes it in his stride and looks to land his own strikes.
A telegraphed right hand from Crackudo misses the target.
Montoya tries to counter by closing the distance.
Crackudo throws out a loose jab but Montoya uses good head movement to avoid it.
Crackudo looks to throw the jab but Montoya is out of range.
Montoya lunges in with an uppercut that skims his opponent's chin.
Crackudo misses with a looping left.
A telegraphed right hand from Crackudo misses the target.
Crackudo takes one on the chin but seems OK.
Crackudo misses with a hook.
Crackudo swings widly with a right hand
and Montoya counters with a nice jab to the body that keeps Crackudo thinking.
Both fighters are absolutely exhausted here.
Crackudo throws out a loose jab but Montoya uses good head movement to avoid it.
That's three minutes gone in the round.
Crackudo throws a right and a left that Montoya avoids nicely.
Montoya lands a nice shot that snaps Crackudo's head back.
A big left from Crackudo misses.
Montoya punishes Crackudo's body with a nice straight punch.
Montoya throws a right hand that Crackudo ducks under and follows up with a left that Crackudo also avoids with ease.
It looked like Crackudo wanted to counter with a hook but didn't fully commit.
Montoya cracks Crackudo with a hook to the jaw. Both fighters smile at eachother and high-five before getting back down to business.
Montoya fakes a jab and throws a low kick but Crackudo checks it well.
Crackudo looks to land a combination. Montoya sees it coming but can only parry a couple of the shots.
Crackudo misses with a straight left.
Montoya takes a step towards his opponent and connects with a left hand, before circling away.
Crackudo tries to bum rush Montoya with a series of wild strikes but Montoya uses good footwork to avoid the assault.
The fighters are going at a pretty good pace and they're both starting to sweat now.
We've seen a great period of action over the last minute or so - credit to both fighters for going all out!
Crackudo throws the left hand but Montoya avoids the punch easily.
Montoya now looks to counter with a shot at the body.
Nice defenses there by Montoya.
A telegraphed right hand from Crackudo misses the target.
Montoya wants to counter with a clinch but Crackudo pushes him away.
Montoya cracks Crackudo with a right hand to the side of the head.
Crackudo on the wrong end of a nice low kick. He's acting like it's no big deal but he doesn't want to take many more of those.
That's four minutes gone in the round.
The fighters circling - Crackudo throws out the jab but it was never going to land.
Crackudo moves into range and throws a combination. A nice jab followed by a hook to the body.
Montoya throws a monster uppercut resembling something out of street fighter but it doesn't land.
Montoya avoids a lazy jab quite easily.
Crackudo misses the jab.
Crackudo misses with a hook
and Montoya cracks him with a counter punch right on the button.
Crackudo slips a jab from Montoya.
Montoya finds nothing but air with that leg kick attempt.
Montoya keeping his hands up high there, blocking the jab from Crackudo.
Crackudo sets himself, and Montoya steps forward looking for the clinch! Crackudo avoids it this time.
Montoya slips under a jab from Crackudo.
Montoya bobs and weaves well there to avoid the strikes.
Montoya wants to counter the offense by Crackudo and move into the clinch position.
Montoya displays some good footwork, moving neatly out of range as Crackudo throws out the jab.
A slapping leg kick lands for Montoya.
The crowd applaud the fighters' efforts here as the round comes to an end.
Crackudo slips a jab from Montoya.
Crackudo was looking to counter that move with a punch but didn't quite pull the trigger.
Crackudo throws a looping overhand right but Montoya ducks down to avoid it.
And that is the end of the round. The fighters go back to their corners.
A close second round but Grover Montoya will probably get the nod - 10:9.
The cut man is working on Vai Crackudo's cut.
Well, the break between rounds is over. Let's get back to the scrappin! This is the final round!
Montoya moves away from the strike by Crackudo.
Crackudo sets himself, and Montoya steps forward looking for the clinch! Crackudo avoids it this time.
A telegraphed right hand from Crackudo misses the target.
Montoya is trying to avoid his opponent's strikes and get into the clinch.
Montoya defending well as Crackudo loads up on a big left hand.
Montoya only half commits to the counter leg kick.
Crackudo scores with a one two! Montoya had his feet all tangled up there and couldn't avoid the strikes.
Montoya throws a hard body shot but it just misses.
Montoya looks to land a left hand but Crackudo moved out of range nicely.
Montoya uses good footwork to avoid the strikes from Crackudo.
Crackudo misses with a jab and misses with a cross straight after too.
Crackudo throws a looping overhand right but Montoya ducks down to avoid it.
Montoya throws out a counter right but Crackudo avoids it with no problem.
Crackudo throws out a loose jab but Montoya uses good head movement to avoid it.
Crackudo blocks a jab.
We've had a slow start to the round here - hopefully the action picks up.
Crackudo swings widly with a right hand
letting Montoya counter with a right hand.
Crackudo misses with a straight right.
Crackudo sets himself, and Montoya steps forward looking for the clinch! Crackudo avoids it this time.
Montoya fails to land with the punch combination there - jab, cross, hook, miss, miss, miss.
Both fighters are breathing heavily.
Crackudo steps to the side to avoid the strikes from Montoya.
Montoya throws a leg kick but he was too far away and it doesn't land.
That's one minute gone in the round.
Crackudo throws an uppercut from half a mile away. Montoya sees it coming and avoids it easily.
Crackudo is really dominating this fight. Is there anything that Montoya can do to turn this around?
Montoya uses decent footwork to sidestep a right hand from Crackudo.
Montoya lets it all go there with a big combo counter but none of the punches connected.
A swing and a miss from Crackudo.
Crackudo misses with a left hand
and Montoya counters with a quick right hand to the jaw.
Crackudo jabbing away but nothing is landing.
Crackudo looks to throw the jab but Montoya is out of range.
Montoya swings away with a counter right hand but no contact made.
Montoya displays some good footwork, moving neatly out of range as Crackudo throws out the jab.
Montoya avoids a lazy jab quite easily.
Montoya throws out a leg kick but Crackudo moves out of range and Montoya only half commits.
Some wild striking there from Crackudo.
Montoya tries to counter with a clinch but Crackudo shakes him off and moves away.
A decent looking cross lands there for Montoya.
Crackudo misses with a series of wild punches.
That's two minutes gone in the round.
Montoya moves out of range as Crackudo strikes.
Montoya is the aggressor but that punch slipped nicely by Crackudo.
A little feinted left hand from Crackudo on the counter but he doesn't commit to it.
Crackudo throws a lazy right hand but Montoya sees it coming a mile off and sidesteps it easily.
Montoya let fly with a counter punch to the body but it didn't land.
Montoya connects with a hook to the side of his opponent's head.
Crackudo takes a hook to the side of the head. I wonder if that's got his ears ringing.
The crowd cheering loudly, showing their appreciation for the quality fight we're seeing here.
Montoya fakes a couple of low kicks, before throwing one on the third attempt. It connects and Crackudo has to reset his feet before getting ready to engage.
Montoya ducks under a wild hook from Crackudo.
Crackudo thows a left - swing and a miss!
Crackudo looks to land a left hand but Montoya moved out of range nicely.
The fighters circling - Montoya throws out the jab but it was never going to land.
Crackudo throws the left hand but Montoya avoids the punch easily.
Montoya takes an uppercut right on the jaw but it doesn't phase him.
Crackudo misses with an uppercut
and Montoya connects with a straight left hand counter down the middle.
Crackudo throws an off balance right hand
and Montoya counters with a straight right hand.
Crackudo throws an overhand right that lands on Montoya's shoulder, as Montoya tries to avoid the shot.
Montoya jabs at Crackudo's body.
That's three minutes gone in the round.
Montoya steps to the side to avoid the strikes from Crackudo.
Crackudo takes one on the button.
Montoya dodges the punch combination from Crackudo.
A countering left hand to the body from Montoya misses.
Crackudo misses with an uppercut. Montoya saw that one coming.
Nice defenses there by Montoya.
Montoya displays some good footwork, moving neatly out of range as Crackudo throws out the jab.
Montoya misses with a looping right.
Montoya throws a hook but Crackudo avoids it easily.
It looked like Crackudo wanted to counter with a hook but didn't fully commit.
Montoya throws out a powerful jab.
Montoya misses with a body shot. Nice footwork from Crackudo.
Montoya tries a low kick but Crackudo avoids it.
Montoya slips a jab from Crackudo.
Crackudo throws a hook to the side of Montoya's head but Montoya sees it coming and ducks under it beautifully.
Crackudo lands with a straight right. Montoya didn't see that one coming.
That's four minutes gone in the round.
Crackudo checks a leg kick.
Montoya cracks Crackudo with a right hand to the side of the head.
Montoya misses with a straight left.
Montoya uses good footwork to avoid the strikes from Crackudo.
This is a great period of action - very entertaining stuff!
A slow jab from Crackudo misses its intended target.
Crackudo throws a hook but Montoya blocks it.
Montoya moves out of range as Crackudo strikes.
Montoya steps in looking to clinch after the strikes miss from Crackudo.
Crackudo missing with a left hand there. Montoya was out of range so wasted energy throwing that one.
Montoya tries to score with an inside leg kick but telegraphs it and Crackudo is able to avoid easily.
Crackudo throws an uppercut from half a mile away. Montoya sees it coming and avoids it easily.
Good work by Crackudo as he checks the leg kick.
Crackudo throws a right and a left that Montoya avoids nicely.
Montoya steps in looking to clinch after the strikes miss from Crackudo.
Decent striking displayed by Crackudo there.
Montoya displays some good footwork, moving neatly out of range as Crackudo throws out the jab.
And that's the end of the fight!
That was a close round. You could make an argument for either fighter but I would give it to Vai Crackudo.
Well Crackudo has outscored his opponent in every aspect of the fight today. Only a scarily incompetent judge or two will keep him from a well deserved win... Over to the ring announcer for the scorecards.
Ladies and gentlemen, after 3 rounds of action, we go to the scorecards for a decision.
Judge Sandra Marshall scores the fight 29:28
Judge Santiago Holmes scores the fight 30:28
Judge David Hoff scores the fight 30:27
In favor of your winner, by unanimous decision... Vai Crackudo!
After the fight, Vai Crackudo was humble in paying tribute to his opponent but made it clear he wants to go on to bigger and better things. It seemed to go down well with the crowd who cheered him loudly.
|
|
|
|
|
|
|
|
|
|
|
|
|
|
|
|
|
|
|
|
|
|
|
| S |
C
A |
G |
S |
C
B |
G |
|
S |
C |
G |
|
energy
A | B |
|
hype
A | B |
|
pop
A | B |
|
mgr
A | B |
|
FIGHT
RATING
77% |
|
|
|
|
|
|
|
Co-main event
|
Coming up we have a middleweight MMA rules bout between Enzo Williams (ranked 1629 p4p, 2215 weight class) and Hank Pecker (ranked 239 p4p, 321 weight class). Over to our ring announcer for the fighter introductions!
 |
|
 |
| 180 cm
25
186
6 - 1 - 0 |
|
185 cm
25
189
2 - 1 - 0 |
Good wrestling
Brawler
Experienced |
|
Good takedowns
Counter fighter
Determined |
|
| |
|
Ladies and gentlemen. This fight is 3 rounds, in the middleweight division.
Introducing the fighter to my left, fighting out of the red corner.
With a record of 6 - 1 - 0, fighting out of The Island, Enzo Williams!
And introducing the fighter to my right, fighting out of the blue corner.
With a record of 2 - 1 - 0, fighting out of The Island, Hank Pecker!
The judges for this bout are Daniel Franklin, Peter Branson and Santiago Holmes.
The bell rings for round one and we are underway!
Pecker closes the distance and scores a nice trip takedown into half guard. Williams did well to prevent Pecker getting side control.
Pecker is looking to take a break and control but Williams is keeping him honest, looking to work from the bottom.
Williams wants to control but Pecker is keeping busy.
Pecker sitting and controlling from the half guard.
Williams wants to get back to full guard.
Williams is trying to maintain the position but Pecker is very close to passing his half guard.
Williams makes his way to full guard. A much better position for Williams.
Williams controlling the position.
We've had a slow start to the round here - hopefully the action picks up.

Williams isolates an arm and boxes in a triangle. Pecker stacks Williams on his neck as he steps over and passes to the side. He's now in a much more dominant position where he can look to do some serious damage. Nice move by Pecker!
Pecker looking for an arm triangle but it's way too loose to do anything.
Williams is positioning himself to get back to half guard.
The ref warns both fighters not to hold the cage as they work up against the meshing.
That's one minute gone in the round.
Pecker wants to lay and pray for a moment but Williams keeps working.
Williams struggling a bit here.
Williams is going to have to think about doing something other than just controlling because Pecker is managing to avoid having the position dictated to him.
Williams is looking for a sweep.
Williams on his back here. We all know that wrestlers don't like being on their back so let's see if Williams tries to get out of the position.
Pecker connects with a decent looking elbow from side control that caused Williams some visible discomfort.
Pecker trying to control the position but Williams is working away.
The fighters are pressed up against the cage, both looking to find a bit of space to work.
Williams manages to get back to half guard.
Williams definitely looks more muscular than last time we saw him fight.
Williams wants to get back to full guard.
Williams is pressing down on Pecker's left leg trying to get back to full guard. He's managed it.
Pecker trying to control the position from guard on top but Williams is wriggling around, looking for whatever he can.
That's two minutes gone in the round.
Pecker avoids a guillotine attempt easily.
Pecker works a leg free and moves into half guard.
Williams is looking to sinch up a guillotine here but Pecker pulls his head out easily.
Williams wants to get back to full guard.
Pecker landing with strikes to the body and head, softening up his opponent.
Williams is trying to get back to full guard.
Williams is looking to sinch up a guillotine here but Pecker pulls his head out easily.
Williams works his way to full guard. Good work.
Pecker wants to control from the top but Williams keeps moving.
That's three minutes gone in the round.
Williams is looking for a triangle but Pecker pushes his legs off easily.
Pecker preventing the sweep.
Williams keeping moving, preventing Pecker from controlling successfully.
Williams is looking for a triangle but Pecker pushes his legs off easily.
Williams has his feet on Pecker's thighs here. He's pushed Pecker off and worked for a very quick armbar from the bottom! He's flipped onto his stomach and he's cranking hard on the arm! Pecker screams in pain and taps out! This one is all over!
Ladies and gentlemen, after 3:45 of round 1, we have a winner by way of Submission (Armbar). Enzo Williams!
Enzo Williams decided to thank the fans in attendance for making a great atmosphere. It seemed to go down pretty well.
|
|
|
|
|
|
|
|
|
|
|
|
|
|
|
|
|
|
|
|
|
|
|
| S |
C
A |
G |
S |
C
B |
G |
|
S |
C |
G |
|
energy
A | B |
|
hype
A | B |
|
pop
A | B |
|
mgr
A | B |
|
FIGHT
RATING
32% |
|
|
|
|
|
|
|
Main event
|
Coming up we have a welterweight MMA rules bout between Odd Job (ranked 849 p4p, 1953 weight class) and Dick Winters (ranked 136 p4p, 284 weight class). Winters has chosen Say It Ain't So as his entrance music. Over to our ring announcer for the fighter introductions!
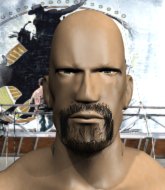 |
|
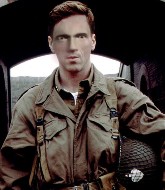 |
| 179 cm
25
172
4 - 0 - 0 |
|
183 cm
25
170
4 - 0 - 0 |
Good wrestling
Basic striking
Very quick |
|
Good wrestler
Basic striking
Granite chin |
|
| |
|
Ladies and gentlemen. This fight is 5 rounds, for the welterweight championship of the world!
Introducing the champion to my left, fighting out of the red corner.
With a record of 4 - 0 - 0, fighting out of The Island, Odd Job!
And introducing the challenger to my right, fighting out of the blue corner.
With a record of 4 - 0 - 0, fighting out of The Island, Dick Winters!
The judges for this bout are Sandra Marshall, Michael Johnstone and Bart Greer.
The bell rings for round one and we are underway!
Winters misses with a takedown attempt - Job sprawls well and throws a nice strike on the way out which just misses.
Job misses with an uppercut. Winters saw that one coming.
Job misses with a takedown attempt - Winters sprawls well and throws a nice strike on the way out which just misses.
Winters avoids a lazy jab quite easily.
Job works his jab well there, keeping his opponent at a distance.
Winters bobs and weaves into range and then changes levels and scores with a nice takedown into side control.
Job is looking to get back to his feet here but Winters is keeping cool and he's managed to take Job's back.
Winters is working for the rear naked choke. He has one arm under the chin but Job has hold of the other arm. A bit of a stalemate here.
Job looking very determined here, making life difficult for Winters.
That's one minute gone in the round.
Job trying to get back to his feet but Winters is in full control for now.
Winters trying desperately to keep hold of the dominant position.
Job surviving as best he can, preventing damage.
Winters looks more muscular than last time we saw him. He must have been on the weights.
I really don't envy Job right now.
That's two minutes gone in the round.
My god... these two guys really need to pick up the pace or everyone will leave to go get a beer.
Job trying to control the hands but Winters breaks the grip.
Job tries to escape the position - he's now mounted. Is that better or worse? Hard to tell!
Winters fails to move to back control.
Job is really trying hard to get back to his feet.
Job is looking to get to half guard.
Job is working hard here to advance position.
That's three minutes gone in the round.
Winters moves into side control, trying to work for a kimura. That looks painful! Will he finish!!?? No, Job has worked his arm free - good work by Job!
Winters thinks about going for a far side armbar but bails out and retains the dominant position instead.
Job is trying to get back to half guard.
Job is not content to let Winters control the position.

The referee has stepped in and called for a break in the action. We'll restart on the feet.
That's four minutes gone in the round.
My god... these two guys really need to pick up the pace or everyone will leave to go get a beer.
Winters fails with a rather predictable takedown attempt.
Job displays good takedown defense there as he swats away a double leg from Winters.
Odd Job has stuffed three takedown attempts in the round now. That's going to take a lot out of Dick Winters.
Winters shoots for a double leg takedown but Job sprawls well. He's pushed Winters's face into the mat and manages to get back to his feet relatively easily.
Winters shoots for a takedown but Job saw that one coming a mile off and avoided it easily.
Winters gets a takedown into half guard.
Job is staying active underneath Winters, who seems content to just control the action from this position.
Job definitely looks more muscular than last time we saw him fight.
The crowd thankful this round is nearly over.
Job is looking to regain full guard. Not this time though.
And that is the end of the round. The fighters go back to their corners.
A close round but Dick Winters will probably get the nod.
The fighters' corners scream their final instructions, as the referee calls time. Here we go, back to the action!
Winters shoots in for a takedown - he's clinched up with Job but Job pushes him off and we're back to square one.
Winters fails miserably with a takedown attempt.
Job scores with a jab. Winters acknowledges it with a nod of the head.
Winters shoots in for a takedown but Job shows good takedown defense.
Odd Job has stuffed three takedown attempts in the round now. That's going to take a lot out of Dick Winters.
Job drops down and drives through with a powerful takedown into guard.
Job is really dominating this fight. Is there anything that Winters can do to turn this around?
Job lands a couple of elbows.
Job is looking to work some ground and pound but Winters has wrist control.
Job wants to control from the top but Winters keeps moving.
Job is looking to advance position but Winters has hit a scissor sweep - now he's on top in mount!

Job is trying to escape the mount.
The fighters are pressed up against the cage, both looking to find a bit of space to work.
That's one minute gone in the round.
Job tries to control Winters's body but Winters pushes him off. Job squirms to his side and now Winters has his back!
Winters trying desperately to keep hold of the dominant position.
Job is trying to stand back up.
Winters avoiding Job 's attempts to control his hands.
That's two minutes gone in the round.
A lull in the action here being met with boos from the crowd.
What can Job do to escape this position? He's going to have to figure it out pretty quick if he wants to stay in the fight!
You can see the frustration on Job's face
He knows he is in trouble unless he improves his position sooner rather than later.
Job is trying to get back to his feet but Winters has full control of the position and if anything, Job has just worked his way into a worse spot.
Job breaks Winters's hooks off and manages to turn into his guard.
Dick Winters has got the better of the ground game so far.
Winters is working actively off his back, looking to secure an arm or perhaps work for a triangle.
The ref warns both fighters not to hold the cage as they work up against the meshing.
Winters is working the butterfly guard. He manages to land a nice scissor sweep and is now in half guard on the top. Nice move.
That's three minutes gone in the round.
Job wants to sweep but Winters has passed to side control!
Job sneaks a leg under to get back to half guard.
Job looking to work for a kimura from the bottom.
Job is looking to regain full guard. He's left an arm up in the air though and Winters has latched onto it... Big trouble! Winters pivots for an armbar - it's in tight and it Job is tapping in no time flat! Great counter grappling there from Winters!
Ladies and gentlemen, after 4:57 of round 2, we have a winner by way of Submission (Armbar). Dick Winters!
Dick Winters is the new welterweight champion!
An out of breath Dick Winters thanked his loyal fans in his post fight interview, giving them credit for his success over the course of his career.
|
|
|
|
|
|
|
|
|
|
|
|
|
|
|
|
|
|
|
|
|
|
|
| S |
C
A |
G |
S |
C
B |
G |
|
S |
C |
G |
|
energy
A | B |
|
hype
A | B |
|
pop
A | B |
|
mgr
A | B |
|
FIGHT
RATING
28% |
|
|
|
|
|
|
|
|
|
|
