 |
GDL 84: McKenzie VS Hayles PBP Commentary |
Undercard bout
|
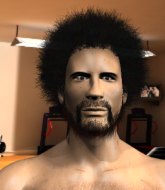
Coming up we have a welterweight MMA rules bout between Jake Ramer (ranked 6731 p4p, 6289 weight class) and Caelan Hall (ranked 703 p4p, 669 weight class). Both fighters really staring each other down here, as Caelan Hall enters the cage!
 |
|
 |
| 187 cm
23
179
1 - 1 - 0 |
|
180 cm
18
170
0 - 1 - 0 |
BJJ Blue Belt
Counter fighter
Good chin |
|
BJJ Blue Belt
Counter fighter
Intelligent |
|
| |
|
Ladies and gentlemen. This fight is 3 rounds, in the welterweight division.
Introducing the fighter to my left, fighting out of the red corner.
With a record of 1 - 1 - 0, fighting out of Las Vegas, Jake Ramer!
And introducing the fighter to my right, fighting out of the blue corner.
With a record of 0 - 1 - 0, fighting out of London, Caelan Hall!
The judges for this bout are Daniel Franklin, Stewart Dunkirk and Chris Downing.

The bell rings for round one and we are underway!
Ramer tries to clinch but is not successful on this occasion.
Hall is definitely looking for the counter takedowns here.
Hall throws a combination that misses
and Ramer counters with a two punch combo.

Ramer tries to keep at a distance but Hall has taken the fight into the clinch.
Hall blocks an uppercut.
A short right from Hall.
Ramer goes for a takedown in the clinch but Hall prevents it.
Hall effectively controlling the action here.
Hall misses with the head strike.
We've had a slow start to the round here - hopefully the action picks up.
Hall is clearly stalling here... Pick up the pace son.
Hall lands a short shot on the inside that snaps the head of Ramer backwards.

That's one minute gone in the round.
Hall misses with some punches.
Ramer scores with an uppercut up the middle.
Ramer looking to stall.
Hall lands an uppercut.

Hall breaks the clinch.
Ramer tries to close the distance and clinch up but Hall swats him away and circles back towards the center.
Hall pushing out the jab but it's not landing.
Ramer fails with an attempt to clinch.
Hall displays good takedown defense there as he swats away a double leg from Ramer.
Hall swats away the attempt to clinch by Ramer.
Ramer fails with a takedown attempt.
That's three failed takedown attempts in the round for Jake Ramer. That's going to take a lot out of him.

That's two minutes gone in the round.
Hall circles away from the clinch attempt.
Ramer looks to be in better condition than last time we saw him fight. Obviously he's been working hard on his cardio.
Hall dips down and scores with a jab to the body.
Ramer wants to clinch but Hall slips to the side

and Hall counters with a nice double leg into half guard.
This has been an exciting period of action!
Hall working over Ramer with some ground and pound. Ramer looks like he wants out of this position, which is understandable.
Hall performing his best blanket impression for a moment.
Hall working the head and body with strikes.
Hall drops an elbow to the side of Ramer's head.
Hall is figuring out what he wants to do next.

That's three minutes gone in the round.
Ramer taking some punishment here, with Hall in his half guard.
Hall winds up and cracks Ramer with a swinging punch to the side of the head.
Still in half guard, Hall seems content to control.
Ramer trying to hold on to Hall's head to control him but Hall postures up.
Hall content to control rather than advance.
Hall lands with a punch from half guard.
Hall is figuring out what he wants to do next.
The referee walks around the fighters to get a better view of the action. Hall lands a nice short elbow.

That's four minutes gone in the round.
Nice strikes from Hall there.
Hall working some ground and pound from close in. He's looking to maintain this position and strike for a while by the looks of things... although he'll probably advance to full mount in a minute now I've said that.
Hall lands strikes from half guard.
Hall lands strikes from half guard.
Neither fighter is being very active at the moment, with Hall in particular looking to stall.
Ramer has a hand on Hall's thigh, trying to get back to full guard. Hall takes advantage of the position though and mounts him!
Hall landing strikes from the mount.
Hall pausing momentarily but resumes with a couple of decent strikes that do a bit of damage.
This is a great period of action - very entertaining stuff!
Hall dominating with strikes here.
The crowd growing excited in anticipation of a finish here! Right on cue, Hall cracks his opponent with a massive right hand that draws loud cheers!
And that is the end of the round. The fighters go back to their corners.
Caelan Hall dominated that round.
The fighters get back to their feet, the hooter sounds and we're back to the action!

Ramer walks straight into an uppercut. Luckily it didn't land flush.
 Ramer is rocked! Ramer is rocked!
 It looks like Jake Ramer has been cut. It looks like Jake Ramer has been cut.
Hall drops a shoulder and throws a monster hook that connects perfectly to the side of Ramer's head, knocking him out cold! Hall is extatic as he celebrates with his cornermen.
Ladies and gentlemen, after 0:11 of round 2, we have a winner by way of KO (Punch). Caelan Hall!
|
|
|
|
|
|
|
|
|
|
|
|
|
|
|
|
|
|
|
|
|
|
|
| S |
C
A |
G |
S |
C
B |
G |
|
S |
C |
G |
|
energy
A | B |
|
hype
A | B |
|
pop
A | B |
|
mgr
A | B |
|
FIGHT
RATING
41% |
|
|
|
|
|
|
|
Undercard bout
|
Coming up we have a super heavyweight MMA rules bout between Stat Stat (ranked 6008 p4p, 6143 weight class) and Scott Dolton (ranked 151 p4p, 152 weight class). There are an array of beautiful celebrities at ringside tonight! I wonder if any of them paid for their tickets.
 |
|
 |
| 225 cm
18
230
1 - 1 - 0 |
|
185 cm
18
255
1 - 1 - 0 |
BJJ Blue Belt
Counter fighter
Hates pizza |
|
Good wrestler
Counter fighter
Likes musicals |
|
| |
|
Ladies and gentlemen. This fight is 3 rounds, in the super heavyweight division.
Introducing the fighter to my left, fighting out of the red corner.
With a record of 1 - 1 - 0, fighting out of Tokyo, Stat Stat!
And introducing the fighter to my right, fighting out of the blue corner.
With a record of 1 - 1 - 0, fighting out of Las Vegas, Scott Dolton!
The judges for this bout are George Francis, Gwen Towbar and Alan Glass.
The bell rings for round one and we are underway!
Stat closes the distance looking to clinch
and Dolton counters with a single leg into guard. Stat didn't expect that.

Stat has managed to wall walk up one of the corner posts to get back to his feet. Dolton is pushing him up against the cage, looking to control the position.
Dolton gets a nice trip takedown into half guard.
Stat has one foot on Dolton's thigh - he pushes off and manages to get back to his feet.
This has been an exciting period of action!
Stat gets his takedown attempt stuffed easily
and Dolton counters with a nice double leg into side control. Stat won't be happy with that.
Stat tries to get back to half guard but can't.
Dolton cracks Stat with a big elbow. Oh, he's hurt! Dolton immediately mounts and start dropping bombs! Stat is done! The referee jumps in and saves him from any more punishment - a quick and decisive finish by Dolton!
Ladies and gentlemen, after 1:57 of round 1, we have a winner by way of TKO (Strikes). Scott Dolton!
|
|
|
|
|
|
|
|
|
|
|
|
|
|
|
|
|
|
|
|
|
|
|
| S |
C
A |
G |
S |
C
B |
G |
|
S |
C |
G |
|
energy
A | B |
|
hype
A | B |
|
pop
A | B |
|
mgr
A | B |
|
FIGHT
RATING
100% |
|
|
|
|
|
|
|
Undercard bout
|
Coming up we have a featherweight MMA rules bout between Kojima Hisashi (ranked 6947 p4p, 5655 weight class) and Jack Money (ranked 497 p4p, 436 weight class). Well, the cameraman is lingering on a pretty young lady for a bit too long there. Keep your eyes on the prize buddy or you'll miss the fighter intros!
 |
|
 |
| 176 cm
20
145
1 - 1 - 0 |
|
179 cm
19
151
0 - 0 - 0 |
BJJ White Belt
Excellent boxer
Big heart |
|
BJJ White Belt
Solid Muay Thai
Good gas tank |
|
| |
|
Ladies and gentlemen. This fight is 3 rounds, in the featherweight division.
Introducing the fighter to my left, fighting out of the red corner.
With a record of 1 - 1 - 0, fighting out of Tokyo, Kojima Hisashi!
And introducing the fighter to my right, fighting out of the blue corner.
With a record of 0 - 0 - 0, fighting out of St Petersburg, Jack Money!
The judges for this bout are Daniel Franklin, Stewart Dunkirk and Chris Downing.
The bell rings for round one and we are underway!
Hisashi will need to close the distance a bit before he attacks - that leg kick was thrown from too far away.
Hisashi throws a series of punches but Money moves out of range.
Hisashi misses with a takedown
and Money counters by clinching up.
Money taking a break, stalling in the clinch.
Money drops down for a takedown but doesn't get it.
Money's corner calls for him to break the clinch, which he does.
We've had a slow start to the round here - hopefully the action picks up.
Money drives through and clinches with Hisashi against the cage.
Hisashi working hard to break the clinch.
Money manages to pull guard.
That's one minute gone in the round.
Hisashi tries to stand but Money is controlling from the bottom.
Money wants to sweep but no luck.
Money has a closed guard, preventing Hisashi from standing up.
Money is trying to stand up but he's not managed so far.
Hisashi wants to stand but Money has a closed guard, so he can't escape.
Money looking to sweep here. No luck so far.
That's two minutes gone in the round.
A few boos can be heard. I'm sure they will multiply if the fighters don't pick up the pace.
Money manages to sweep nicely, so he's now on top. Hisashi manages to get himself to full guard.

Hisashi wants to get back to his feet but Money passes into half guard.
Money is thwarting Hisashi's attempts to control the position.
Money thows a wild elbow that connects with the canvas.
Money tries to pass the half guard into mount. Hisashi knows what he's doing though and prevents the attempt.
Money passes to side control.
That's three minutes gone in the round.
Hisashi is trying to improve his position.
Money trying to control the position but Hisashi is working away.
Money cracks Hisashi with an elbow. That is naaassty.
Hisashi is not content to let Money control the position.
The fighters are starting to get a bit slippery now, which will make submissions a bit more difficult.
Hisashi is trying to escape and get back to his feet.
That's four minutes gone in the round.
The crowd are hurling abuse towards the fighters... You can hardly blame them though because there isn't a lot going on in the fight.
Money tries to cartwheel into mount but he doesn't manage it.
Hisashi is not content to let Money control the position.
Hisashi is trying to stand back up. He's worked his way up against the cage but Money has just dragged him back down to the mat.

The ref stands the fighters back up due to a lack of activity.
And that is the end of the round. The fighters go back to their corners.
Jack Money dominated that round.
OK. That's time! The bell goes and we're back to the action.
Money fakes with an overhand right and moves in to clinch with Hisashi, pushing him back against the cage.
Money is trying to pull guard but being pressed up against the cage enables Hisashi to keep the fight standing.
Money jumps guard but Hisashi stands there with Money around his waist. Money gives up and drops back to his feet. We remain in the clinch.
Money tries to pull guard but Hisashi won't allow it.
Kojima Hisashi has stuffed three takedown attempts in the round now. That's going to take a lot out of Jack Money.
Money pushes off and circles away, back to the middle of the mat.
Hisashi throws a body kick but he was well out of range there.
Hisashi attempts a low kick but it misses it's target.
We've had a slow start to the round here - hopefully the action picks up.
Hisashi throws a half hearted mid kick.
Hisashi avoids the head kick by Money.
Hisashi throws a big counter combination but Money scrambles out of danger and avoids any damage.
Kojima Hisashi is looking to throw some combinations by the looks of things.
Money closes the distance and clinches up with Hisashi, looking for a takedown. Money pushes Hisashi against the cage but Hisashi circles to the side and manages to break the clinch.
That's one minute gone in the round.
Money takes a body punch that cleary hurt but he's trying not to show any weakness.
Money drives through and clinches with Hisashi against the cage.
Hisashi wants to get back to striking at distance but Money won't allow it.
Money fails to pull guard.
Hisashi looking to stall.
Hisashi prevents a takedown attempt there.
Money fails to pull guard.
Money escapes the clinch and we're back to striking.
Money tries to clinch there but Hisashi circles away.
That's two minutes gone in the round.
Nice straight punches there by Hisashi. You know Roy Jones Jr respects the hands of Hisashi.
Money looks for a takedown but Hisashi sprawls well.
Money doesn't succeed with the takedown

and Hisashi counters by moving into the clinch.

Hisashi pulls guard successfully.
Hisashi is looking to get back to his feet but can't, whilst Money is controlling him.
Hisashi wants to get back to his feet but he's too absorbed in his own little project and Money manages to pass to side control.
That's three minutes gone in the round.

Hisashi is looking to sinch up a guillotine here but Money pulls his head out easily.
Money takes a deep breath and rests his weight momentarily on top of his opponent, to control the position.
Hisashi won't allow Money to pass to mount.
Hisashi is trying to control but can't.

Money is working for submissions here but there's nothing on.
Money has freed up his trapped foot and advances to mount.
Hisashi is squirming around, avoiding Money's attempts to control the action.
That's four minutes gone in the round.
Money is in a good position here but he's just trying to control... And he's not even managing to do that successfully.
Hisashi is trying to get to the cage to help him get back to his feet.
Boooooooooooooooooooo!!! God, this has been a terrible round. Come on you two, sort yourselves out!
Hisashi wriggling around on the bottom manages to avoid the strikes thrown by Money.
Money has been the more effective fighter overall so far.
Money looking to secure an arm triangle but Hisashi defends it well.
And that is the end of the round. The fighters go back to their corners.
That was a close second round but I would say that Kojima Hisashi will probably get the nod.
Well, the break between rounds is over. Let's get back to the scrappin! Ladies and gentlemen, this is the final round!

Hisashi misses with a wild combination.
Hisashi throws a body kick but he was well out of range there.
Hisashi scores with a crisp jab that stopped Money in his tracks.
Money shoots in looking for a takedown but Hisashi manages to keep the fight standing, pushing Money's face into the canvas for good measure before circling away.
Hisashi appears to be looking for a counter takedown.
Money fails with the takedown
and Hisashi counters with a series of strikes. Money will be more careful next time no doubt.
We've had a slow start to the round here - hopefully the action picks up.
Hisashi pushes forward with a 1-2 combination that forces Money back to the cage. Hisashi follows up with a solid lead hook to the liver.
Money wants to clinch up but Hisashi keeps it at a distance.
Hisashi stuffs a takedown. It's all about dictating where the fight takes place and Hisashi wants it to stay on the feet.
Kojima Hisashi has stuffed three takedown attempts in the round now. That's going to take a lot out of Jack Money.
A clash of legs there as Money blocks the low kick.
Jack Money seems to be the more aggressive standup fighter in this bout.
That's one minute gone in the round.
Money lands a jab to the nose.
Kojima Hisashi is winning the standup battle so far.
Hisashi throws a leg kick but Money sees it coming and moves out of range.
Hisashi keeps the fight on the outside.
Hisashi stuffs the takedown attempt from Money. Money gets slowly back to his feet.
Money throws an overhand right that lands on Hisashi's shoulder, as Hisashi tries to avoid the shot.
Money wants to clinch but Hisashi slips to the side
and Hisashi counters with a nice uppercut.
Money shoots in for a takedown. "Ole!" shouts Hisashi as he jumps to the side.
Money tries to score a power double leg takedown but Hisashi sees that one coming and sprawls well. That will dishearten Money somewhat.
That's two minutes gone in the round.
Money shoots in but doesn't get the takedown
and Hisashi counters with a stiff right hand.
Hisashi throws a head kick that misses and slips in the process. He scrambles back to his feet and the fighters circle.
Hisashi stuffs the takedown.
As Money looks to move away, Hisashi throws a big counter combo but Money just gets out of the way.
The fight stays on the outside here - Hisashi looks like he's thinking about clinching though.
Money takes the fight into the clinch.
That's three minutes gone in the round.
Hisashi has had enough of the clinch but Money keeps him there for the moment.
Money breaks the clinch and we return to the middle of the mat.
Money changes levels and looks for a double leg takedown. Hisashi tries to avoid it but Money manages to keep hold of a leg and drag Hisashi to the ground. Hisashi escapes though and pops straight back up to his feet.
Money rushes Hisashi and presses him up against the cage.
Money lands a knee to the head.
Money changes levels and goes for a takedown here. Hisashi fights it off and pushes away nicely.
Money throws a half hearted mid kick.
Hisashi slaps away a takedown attempt from Money, before circling back to the center of the mat.
That's four minutes gone in the round.
Hisashi throws a sloppy head kick and Money moves out of range easily.
Hisashi throws a combination but comes up with nothing but fresh air.
Hisashi takes one on the chin but keeps coming.
Money shoots in for a takedown. "Ole!" shouts Hisashi as he jumps to the side.
A nice combination there by Hisashi.
Both fighters are breathing heavily.
Money looks for a takedown but Hisashi sprawls well.
And that's the end of the fight!
Kojima Hisashi showed his dominance in that final round.
I think Hisashi has won this one but let's see what the judges have to say. Over to the ring announcer for the scorecards.
Ladies and gentlemen, after 3 rounds of action, we go to the scorecards for a decision.
Judge Daniel Franklin scores the fight 29:29
Judge Stewart Dunkirk scores the fight 28:29
Judge Chris Downing scores the fight 29:29
The fight is ruled a majority draw!
|
|
|
|
|
|
|
|
|
|
|
|
|
|
|
|
|
|
|
|
|
|
|
| S |
C
A |
G |
S |
C
B |
G |
|
S |
C |
G |
|
energy
A | B |
|
hype
A | B |
|
pop
A | B |
|
mgr
A | B |
|
FIGHT
RATING
28% |
|
|
|
|
|
|
|
Undercard bout
|
Coming up we have a super heavyweight MMA rules bout between You Gon Die Boy (ranked 4756 p4p, 5652 weight class) and Tyron Scott (ranked 164 p4p, 143 weight class). The key to victory for You Gon Die Boy has got to be keeping the fight on the feet.
 |
|
 |
| 225 cm
20
275
1 - 0 - 0 |
|
186 cm
20
255
1 - 1 - 0 |
BJJ White Belt
Solid boxing
Granite chin |
|
Good wrestler
Counter fighter
Solid chin |
|
| |
|
Ladies and gentlemen. This fight is 3 rounds, in the super heavyweight division.
Introducing the fighter to my left, fighting out of the red corner.
With a record of 1 - 0 - 0, fighting out of Las Vegas, You Gon Die Boy!
And introducing the fighter to my right, fighting out of the blue corner.
With a record of 1 - 1 - 0, fighting out of Las Vegas, Tyron Scott!
The judges for this bout are Chris Downing, Alan Glass and George Francis.
The bell rings for round one and we are underway!
Scott circles away from the clinch attempt.
Gon Die Boy scores with a leg kick.
Scott has done a lot of speed work in the buildup to this fight.
Scott shoots in looking for a single leg takedown. Gon Die Boy is trying to defend but Scott finishes it well and ends up in half guard. Let's see if he can advance position further.
Scott missing with some ground and pound from the half guard.
The fighters are pressed up against the cage, both looking to find a bit of space to work.
Scott looks to score some points with some ground and pound.
Gon Die Boy is in a tricky position. We've heard reports from his gym mates at Rabid Dog that he's been drilling escapes, so let's see if he can get back to his feet.
Gon Die Boy blocking the ground and pound attempt from Scott.
Scott looks to score some points with some ground and pound.
Scott throwing shots but Gon Die Boy is blocking nicely.
The ref warns both fighters not to hold the cage as they work up against the meshing.
Gon Die Boy is breathing heavily.
We've had a slow start to the round here - hopefully the action picks up.
Scott trying to control the action but Gon Die Boy is working from the bottom.
Nice strikes from Scott there.
The two fighters exchange a few words. I couldn't hear what they were saying but maybe it's more fun if you make it up yourself. Scott connects with a nice short shot to Gon Die Boy's temple.
Scott throwing shots but Gon Die Boy is blocking nicely.
That's one minute gone in the round.
Scott controlling the pace.
Scott not throwing his punches with enough precision this time.
Scott missing with some ground and pound from the half guard.
Scott sitting and controlling from the half guard.
Scott slips a nice elbow through Gon Die Boy's hands, connecting with Gon Die Boy's forehead.
Scott throwing punches and elbows but they're not doing any damage.
Gon Die Boy taking some punishment here, with Scott in his half guard.
Scott controlling the pace.
Scott thumps the canvas. Not on purpose obviously - he just missed Gon Die Boy's head.
Scott trying to control the pace.
That's two minutes gone in the round.
The referee must be thinking about standing these guys back up.
Scott looks to score some points with some ground and pound.
Scott drops an elbow to the side of Gon Die Boy's head.
Scott throwing punches and elbows but they're not doing any damage.
Gon Die Boy tries to kick Scott off but Scott keeps his base steady and stays in half guard.
Scott sitting in half guard, looking to land shots. Gon Die Boy defending well though.
Scott scoring with strikes to the body and head.
Gon Die Boy is rocked!
Scott scores with a big shot! Gon Die Boy's head bounced off the canvas with a huge thud! More strikes land and the referee has jumped in to save Gon Die Boy! He was hurt real bad - good stoppage!
Ladies and gentlemen, after 3:59 of round 1, we have a winner by way of TKO (Strikes). Tyron Scott!
|
|
|
|
|
|
|
|
|
|
|
|
|
|
|
|
|
|
|
|
|
|
|
| S |
C
A |
G |
S |
C
B |
G |
|
S |
C |
G |
|
energy
A | B |
|
hype
A | B |
|
pop
A | B |
|
mgr
A | B |
|
FIGHT
RATING
32% |
|
|
|
|
|
|
|
Undercard bout
|
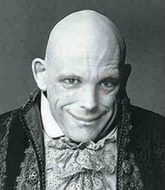
Coming up we have a super heavyweight MMA rules bout between Fester Addams (ranked 25099 p4p, 25010 weight class) and Jesperro Knudsen (ranked 218 p4p, 216 weight class). Jesperro Knudsen has the better chin. Will he look to stand and bang today?
 |
|
 |
| 225 cm
18
300
0 - 2 - 0 |
|
200 cm
23
270
1 - 2 - 0 |
BJJ White Belt
Excellent MT
KO power |
|
BJJ Blue Belt
Solid Muay Thai
Solid chin |
|
| |
|
Ladies and gentlemen. This fight is 3 rounds, in the super heavyweight division.
Introducing the fighter to my left, fighting out of the red corner.
With a record of 0 - 2 - 0, fighting out of London, Fester Addams!
And introducing the fighter to my right, fighting out of the blue corner.
With a record of 1 - 2 - 0, fighting out of Rio de Janeiro, Jesperro Knudsen!
The judges for this bout are Chris Downing, Robert Twigg and Wesley Smith.
The bell rings for round one and we are underway!
A big right from Addams misses.
Jesperro Knudsen seems to be the more aggressive standup fighter in this bout.
Knudsen throws a series of punches but Addams moves out of range.
Knudsen fails with a takedown attempt.
Knudsen connects with a high kick.
We've had a slow start to the round here - hopefully the action picks up.
Knudsen fails with a takedown attempt.
Addams defending well as Knudsen loads up on a big left hand.
Addams tries to clinch there but Knudsen circles away.
That's one minute gone in the round.
Knudsen takes a hook to the side of the head. I wonder if that's got his ears ringing.
 It looks like Jesperro Knudsen has been cut. It looks like Jesperro Knudsen has been cut.
Knudsen throws a jab, cross combination which is slipped
and Addams counters with a nice uppercut.
Knudsen walks into a picture perfect straight right hand from Addams! He's gone down face first to the canvas, unconscious before he even hit the floor! Ohhhh. My. Goodness! That boys and girls was a beautiful knockout! Give that man a biscuit!
Ladies and gentlemen, after 1:19 of round 1, we have a winner by way of KO (Punch). Fester Addams!
Fester Addams spent the whole post fight interview bigging himself up. It didn't go down that well with the fans after a while as they thought it was a bit arrogant.
|
|
|
|
|
|
|
|
|
|
|
|
|
|
|
|
|
|
|
|
|
|
|
| S |
C
A |
G |
S |
C
B |
G |
|
S |
C |
G |
|
energy
A | B |
|
hype
A | B |
|
pop
A | B |
|
mgr
A | B |
|
FIGHT
RATING
47% |
|
|
|
|
|
|
|
Undercard bout
|
Coming up we have a super heavyweight MMA rules bout between Rock Mars (ranked 4440 p4p, 5008 weight class) and Gustaw Babiakski (ranked 157 p4p, 168 weight class). Over to our ring announcer for the fighter introductions!
 |
|
 |
| 200 cm
24
275
4 - 0 - 0 |
|
207 cm
25
300
0 - 0 - 0 |
BJJ White Belt
Solid boxing
KO power |
|
BJJ White Belt
Excellent boxer
Heavy handed |
|
| |
|
Ladies and gentlemen. This fight is 3 rounds, in the super heavyweight division.
Introducing the fighter to my left, fighting out of the red corner.
With a record of 4 - 0 - 0, fighting out of Las Vegas, Rock Mars!
And introducing the fighter to my right, fighting out of the blue corner.
With a record of 0 - 0 - 0, fighting out of St Petersburg, Gustaw Babiakski!
The judges for this bout are Frank Dennis, Chris Downing and George Francis.
The bell rings for round one and we are underway!
Mars fails to land with the punch combination there - jab, cross, hook, miss, miss, miss.
Mars lands with a cross.
It looks like Gustaw Babiakski has been cut.
Babiakski moves out of range as Mars strikes.
Mars has his head slapped from side to side by a 3 punch combination. That must have hurt him.
It looks like Rock Mars has been cut.
Babiakski slips under a jab.
Wow, both these guys are really going for it!
Babiakski defending well as Mars loads up on a big left hand.
Babiakski lands a right hook to the body.
Mars looks to have improved his striking defense since last time we saw him fight.

Babiakski sends Mars crashing to the mat with a devastating uppercut! Babiakski is motioning to the referee to let Mars up. He wants to try and finish this one on the feet!
Fantastic stuff here - a very entertaining period of action, which has drawn cheers from the crowd.
Babiakski feints and then winds up with a huge right hand that connects perfectly and sends Mars sprawling to the canvas! Mars rolls over backwards and springs off the cage and manages to regain his footing - how acrobatic! Oh, he's still wobbly - can Babiakski finish him?!
Mars is rocked!
Mars circles to his right, straight into a beautiful hook by Babiakski. Mars falls face first into the canvas - great knockout victory for Babiakski!
Ladies and gentlemen, after 0:34 of round 1, we have a winner by way of KO (Punch). Gustaw Babiakski!
|
|
|
|
|
|
|
|
|
|
|
|
|
|
|
|
|
|
|
|
|
|
|
| S |
C
A |
G |
S |
C
B |
G |
|
S |
C |
G |
|
energy
A | B |
|
hype
A | B |
|
pop
A | B |
|
mgr
A | B |
|
FIGHT
RATING
100% |
|
|
|
|
|
|
|
Undercard bout
|
Coming up we have a welterweight MMA rules bout between Thiago Dos Santos (ranked 6722 p4p, 3065 weight class) and Kyle Man (ranked 702 p4p, 405 weight class). Man, I cannot wait for this one!
 |
|
 |
| 190 cm
18
180
0 - 1 - 0 |
|
200 cm
18
170
1 - 0 - 0 |
BJJ Purple Belt
Brawler
Granite chin |
|
Good takedowns
Brawler
Determined |
|
| |
|
Ladies and gentlemen. This fight is 3 rounds, in the welterweight division.
Introducing the fighter to my left, fighting out of the red corner.
With a record of 0 - 1 - 0, fighting out of Rio de Janeiro, Thiago Dos Santos!
And introducing the fighter to my right, fighting out of the blue corner.
With a record of 1 - 0 - 0, fighting out of Los Angeles, Kyle Man!
The judges for this bout are Cecil Peabody, Frank Dennis and George Francis.
The bell rings for round one and we are underway!
Dos Santos clinches up against the cage.
Man looks really tired already! That doesn't bode well for a good, competitive fight!
Dos Santos jumps into guard, dragging Man to the mat.
Dos Santos working from the bottom, still in full guard. He's managed to get a loose triangle. Man doesn't seem to be doing much to defend here, obviously he feels comfortable in the position. Man manages to throw the legs off his shoulder and he's back into guard - no problem.
Dos Santos looking to hit a scissor sweep but Man is one step ahead there.
Man is a painfully thin specimen of a man. You do wonder whether a good body kick would snap him clean in two.
Dos Santos wants to stand up but Man is controlling him.
Dos Santos had isolated an arm as going for a kimura. Man defends it easily.
Dos Santos is looking to get back to his feet but can't, whilst Man is controlling him.
We've had a slow start to the round here - hopefully the action picks up.
Dos Santos managing to control the position.
Dos Santos continues to stall.
That's one minute gone in the round.
Dos Santos manages to sweep nicely, so he's now on top. Man manages to get himself to full guard.

Dos Santos is frustrating his opponent with some stalling tactics from top position.
Dos Santos scoring with punches to the head and body.
Dos Santos passes Man's right leg, so he's now in half guard.
That's two minutes gone in the round.
Dos Santos is looking for a kimura. It's going to be difficult to finish that from half guard though and Man defends it well.
The fighters are pressed up against the cage, both looking to find a bit of space to work.
Dos Santos is trying to work for a kimura. This could be trouble! No, Man has managed to free his arm - good work.
Ground and pound from Dos Santos.
Dos Santos looks to score some points with some ground and pound.
Dos Santos not doing much here.
That's three minutes gone in the round.
The referee walks around the fighters to get a better view of the action. Dos Santos lands a nice short elbow.
Dos Santos wants to stand up but Man is controlling the position.
Dos Santos working over Man with some ground and pound. Man looks like he wants out of this position, which is understandable.
Dos Santos looking for a kimura but he'll have to free his other leg if he wants to finish that. Perhaps he's just using it as a distraction technique.
The ref warns both fighters not to hold the cage as they work up against the meshing.
That's four minutes gone in the round.
A few boos can be heard. I'm sure they will multiply if the fighters don't pick up the pace.
Dos Santos looks over to his corner - he wants some instructions but his corner are not responding.
Dos Santos is looking for a kimura but Man is holding onto that half guard position, so it's hard for Dos Santos to get the leverage.
Boooooooooooooooooooo!!! God, this has been a terrible round. Come on you two, sort yourselves out!
Dos Santos is trying a forearm choke
I don't think that's going to do much at this level of the game.
Dos Santos is sneakily working for an arm triangle but Man sees it coming and defends easily.
And that is the end of the round. The fighters go back to their corners.
Thiago Dos Santos dominated that round.
The minute break is over - no more time for sponges and pep talks - back to the action!
Dos Santos fails to land with the punch combination there - jab, cross, hook, miss, miss, miss.
Dos Santos tries a head kick but it misses.
Dos Santos darts in and clinches Man up against the cage.
Dos Santos has double underhooks and is working for a body lock takedown. He's got it. The fighters land in half guard but Man regains guard immediately.
Man is looking to stand back up but Dos Santos counters by passing into half guard. Oops... bit sloppy there by Man.
Still in half guard, Dos Santos seems content to control.
We've had a slow start to the round here - hopefully the action picks up.
Man is breathing heavily.
That's one minute gone in the round.
Dos Santos tries to stand but his arm is trapped.
Dos Santos content to sit in half guard and control for a moment.
Dos Santos tries to stand but his arm is trapped.
Thiago Dos Santos overall seems to be getting the better of the ground position in the fight so far.
Man won't allow Dos Santos to pass to mount.
That's two minutes gone in the round.
The crowd are showing their displeasure at the lack of action as loud boos ring out around the arena.
Dos Santos takes a deep breath and rests his weight momentarily on top of his opponent, to control the position.
Man pushes Dos Santos off looking to stand but Dos Santos dives back in and keeps control.
The referee is asking the fighters to pick up the pace.
Dos Santos seems content to maintain position for now, rather than mounting any offense.
The ref stands the fighters back up due to a lack of activity.
Man tries to check a leg kick but that clearly hurt him.
Dos Santos shoots in for a takedown and gets it.
Dos Santos not doing much here.
That's three minutes gone in the round.
Dos Santos is sneakily working for an arm triangle but Man sees it coming and defends easily.
The referee calls for the fighters to work.
Dos Santos wants to stand but Man has hold of a leg and an arm, so he's trapped for now.
Dos Santos slows the pace down in half guard.
That's four minutes gone in the round.
Neither fighter has done anything of merit for a good minute or two here and the crowd are not happy about it.
It looks like Dos Santos is going to stand back up.
The referee decides to stand the fighters back up.
Dos Santos drives through with a takedown into guard.
Man is looking to stand back up... there's a bit of a scramble and Dos Santos dives into side control.
Boooooooooooooooooooo!!! God, this has been a terrible round. Come on you two, sort yourselves out!
Man on the wrong end of some ground and pound.
And that is the end of the round. The fighters go back to their corners.
Thiago Dos Santos dominated that second round.
That's the end of the interval. I'm sure that seemed a lot quicker than a minute for our two fighters! Back to the action. This is the final round!
Man with a lazy takedown attempt
and Dos Santos counters with a three punch combination, finished off with a leg kick. Nice work.
Man walks into a stiff left hand from Dos Santos.
Dos Santos dives in and scores a takedown into Man's guard.
Dos Santos advances position into side control!
A lull in the action here as Dos Santos stalls from top position.
Dos Santos is working Man over with some ground and pound from side control.
Both fighters are breathing heavily.
We've had a slow start to the round here - hopefully the action picks up.
Dos Santos wants to work for a kimura but he's foiled early by Man, who protects the arm well.
Dos Santos is moving around in side control but his primary objective seems to be to maintain the position.
That's one minute gone in the round.
Dos Santos moves into full mount!
Dos Santos moves to the back.
Dos Santos biding his time, looking for the opening.
That's two minutes gone in the round.
The crowd are hurling abuse towards the fighters... You can hardly blame them though because there isn't a lot going on in the fight.
Dos Santos is working for the choke. He's slipped one arm under the chin. Man has to defend the other arm for all he's worth... but Dos Santos has managed to get that arm free too and he's tightening the choke! Man taps out and looks absolutely disgusted with himself. Dos Santos doesn't care though - he's delighted!
Ladies and gentlemen, after 2:23 of round 3, we have a winner by way of Submission (RNC). Thiago Dos Santos!
An out of breath Thiago Dos Santos thanked his loyal fans in his post fight interview, giving them credit for his success over the course of his career.
|
|
|
|
|
|
|
|
|
|
|
|
|
|
|
|
|
|
|
|
|
|
|
| S |
C
A |
G |
S |
C
B |
G |
|
S |
C |
G |
|
energy
A | B |
|
hype
A | B |
|
pop
A | B |
|
mgr
A | B |
|
FIGHT
RATING
34% |
|
|
|
|
|
|
|
Undercard bout
|
Coming up we have a lightweight MMA rules bout between Samurai Shadow (ranked 6538 p4p, 3775 weight class) and Jack Stevens (ranked 602 p4p, 411 weight class). Over to our ring announcer for the fighter introductions!
 |
|
 |
| 225 cm
25
155
0 - 1 - 0 |
|
180 cm
25
155
0 - 1 - 0 |
BJJ White Belt
Excellent MT
Granite chin |
|
BJJ Blue Belt
Brawler
Granite chin |
|
| |
|
Ladies and gentlemen. This fight is 3 rounds, in the lightweight division.
Introducing the fighter to my left, fighting out of the red corner.
With a record of 0 - 1 - 0, fighting out of Las Vegas, Samurai Shadow!
And introducing the fighter to my right, fighting out of the blue corner.
With a record of 0 - 1 - 0, fighting out of New York, Jack Stevens!
The judges for this bout are Stewart Dunkirk, Chris Downing and Gwen Towbar.
The bell rings for round one and we are underway!
Shadow throws a shot to the body.
Shadow sizes up Stevens with a pawing jab and scores with a straight right down the middle.
Stevens shoots in and scores a nice double leg takedown into half guard.
Stevens is just sitting in half guard, waiting for something to happen.
Stevens slips a nice elbow through Shadow's hands, connecting with Shadow's forehead.
Stevens has the superior BJJ but he's also working some ground strikes into his gameplan.
Neither fighter is being very active at the moment, with Stevens in particular looking to stall.
We've had a slow start to the round here - hopefully the action picks up.

Stevens postures up and decides to stand up, from the half guard. The ref calls for Shadow to stand up.
Stevens scores with a takedown into Shadow's guard.
Shadow wants to get back to his feet but he's too absorbed in his own little project and Stevens manages to pass to side control.
That's one minute gone in the round.
Stevens working Shadow over with strikes.
Stevens content to sit in half guard and control for a moment.
Shadow really does look like a pencil wearing a pair of gloves. Let's hope he has a gameplan to suit that ridiculous body shape.
Shadow wants to get back to his feet.
Shadow knows he needs to get back to his feet asap. He's simply no match for Stevens on the ground.
Stevens is keeping good posture, landing some ground and pound.
Stevens seems like he's working for an arm triangle here. He's freed his trapped foot and he's rotating nicely. Shadow is in big trouble! He's tapping out! This one is aaaaaaaaaaaall over!
Ladies and gentlemen, after 2:58 of round 1, we have a winner by way of Submission (Arm Triangle). Jack Stevens!
Jack Stevens really struggled to get his t-shirt on before his hand was raised. Making sure that Voodoo Nutrition logo gets some air time is pretty tricky when you're all sweaty.
|
|
|
|
|
|
|
|
|
|
|
|
|
|
|
|
|
|
|
|
|
|
|
| S |
C
A |
G |
S |
C
B |
G |
|
S |
C |
G |
|
energy
A | B |
|
hype
A | B |
|
pop
A | B |
|
mgr
A | B |
|
FIGHT
RATING
50% |
|
|
|
|
|
|
|
Co-main event
|
Coming up we have a light heavyweight MMA rules bout between Duncan Spade (ranked 5576 p4p, 3492 weight class) and Luke Kitchener (ranked 584 p4p, 427 weight class). We have two fighters making their debuts here, so let's see who comes out of this one with their first professional victory.
 |
|
 |
| 200 cm
25
215
0 - 0 - 0 |
|
190 cm
25
217
0 - 0 - 0 |
BJJ White Belt
Excellent MT
Cuts easily |
|
BJJ White Belt
Excellent boxer
Solid chin |
|
| |
|
Ladies and gentlemen. This fight is 3 rounds, in the light heavyweight division.
Introducing the fighter to my left, fighting out of the red corner.
With a record of 0 - 0 - 0, fighting out of Hilo, Duncan Spade!
And introducing the fighter to my right, fighting out of the blue corner.
With a record of 0 - 0 - 0, fighting out of London, Luke Kitchener!
The judges for this bout are Chris Downing, George Francis and Daniel Franklin.
The bell rings for round one and we are underway!
Kitchener fails with the takedown
and Spade counters with a three punch combo that has Kitchener backing up. Kitchener nods at Spade to acknowledge the strikes.
Spade misses with a head kick.
Kitchener is looking to clinch but Spade is avoiding it.
Kitchener wants to clinch but Spade slips to the side
letting Spade counter with a right hand.
It looks like Luke Kitchener has been cut.
Kitchener displays good takedown defense there as he swats away a double leg from Spade.
Spade avoids a lazy jab quite easily.
Spade wings a very wild body shot but it does the job and lands to the midsection.
Kitchener shoots in looking for a takedown but Spade manages to keep the fight standing, pushing Kitchener's face into the canvas for good measure before circling away.
We've had a slow start to the round here - hopefully the action picks up.
Spade throws a head kick that misses and slips in the process. He scrambles back to his feet and the fighters circle.
Spade dives in for a single leg takedown but Kitchener sprawls and the fighters end up clinched against the cage.
Kitchener tries a knee to the head but he's missed.
Spade lands with a short shot to the head.
That's one minute gone in the round.

Spade breaks the clinch and we return to the middle of the mat.
Spade throws a head kick that misses.
Spade takes the fight into the clinch.
Kitchener is trying to pull guard but Spade has him pressed against the cage.
Duncan Spade has stuffed three takedown attempts in the round now. That's going to take a lot out of Luke Kitchener.
Kitchener is trying to stall.
Spade's corner calls for him to break the clinch, which he does.
Kitchener is looking to take this fight into the clinch.
Spade darts in looking for a takedown but Kitchener gets double underhooks and turns Spade into the cage.
Spade stalling against the cage.
Spade manages to break the clinch.
That's two minutes gone in the round.
Kitchener looking to throw a kick but he's pulled out of it.
Spade pushes Kitchener up against the cage in a clinch.
Spade is looking to score with knees to the body. Maybe he'll change it up and go body then head. Kitchener is defending well for now.
Spade is trying to pull guard but Kitchener has him pressed against the cage.
Kitchener doesn't land with the attempted body shot.
Spade breaks the clinch and we're back to striking at distance.
No luck with that takedown attempt from Kitchener.
Spade displays good takedown defense there as he swats away a double leg from Kitchener.
Nice takedown defense from Kitchener. No joy for Spade on that attempt.
Kitchener changes levels for a counter takedown but doesn't follow through with his attempt.
Spade moves into range and clinches up with Kitchener.
Spade drags the fight down to the ground.
That's three minutes gone in the round.
Spade throws his legs up looking for a submission but Kitchener uses it to pass to side control.
Kitchener wants to control but Spade is keeping him busy.
Spade defending against the ground and pound.
Kitchener gets to mount! Spade was on the offensive and wasn't defending properly.
Spade holding onto his opponent's waist for dear life, as Kitchener tries to land some strikes to get him to release his grip.
Spade can't escape the position.
Kitchener is working for a guillotine from mount but Spade frees his head quite easily.
That's four minutes gone in the round.
Kitchener prevents Spade from getting the reversal.
Kitchener content just to control the position here.
Kitchener thowing shots but they're missing.
Kitchener looking to ground and pound but Spade is blocking nicely.
Kitchener controlling his opponent.
Spade on his back here. We all know that wrestlers don't like being on their back so let's see if Spade tries to get out of the position.
Spade tries to lock up and control but Kitchener gives him a forearm to the face and pushes him away.
And that is the end of the round. The fighters go back to their corners.
Duncan Spade dominated that round.
The cut man is working on Luke Kitchener's cut.
That's the end of the round. The referee orders the cornermen out of the cage so we can get back down to business.
Spade closes the distance and clinches.
Spade tries to pull guard but Kitchener forces him back to his feet, against the cage.
A bit of stalling here from Spade.
Spade breaks from the clinch.
Spade stuffs the takedown.
Kitchener fails to land the takedown.
Spade stuffs the takedown.
Duncan Spade has stuffed three takedown attempts in the round now. That's going to take a lot out of Luke Kitchener.
Kitchener shoots for a takedown but Spade saw that one coming a mile off and avoided it easily.
We've had a slow start to the round here - hopefully the action picks up.
Spade shoots in looking for a double leg takedown. Kitchener defends it nicely.
Duncan Spade is winning the standup battle so far.
Kitchener tries to close the distance and clinch up against the cage but Spade paws at him with a jab and circles away.
Spade shoots for a double leg takedown but Kitchener sprawls well. He's pushed Spade's face into the mat and manages to get back to his feet relatively easily.
That's one minute gone in the round.
Kitchener looks frustrated there after his takedown attempt is stuffed easily.
Duncan Spade is looking to throw some combinations by the looks of things.
Kitchener tries to close the distance and clinch up against the cage but Spade paws at him with a jab and circles away.
Kitchener fails with a takedown attempt from distance.
Kitchener throws a looping left and ducks down for a takedown. He's got his arms around Spade's waist but Spade gets an underhook and avoids the takedown by throwing Kitchener off to one side.
Spade shoots in for a takedown. "Ole!" shouts Kitchener as he jumps to the side.
Spade shoots for a double leg takedown but Kitchener sprawls well. He's pushed Spade's face into the mat and manages to get back to his feet relatively easily.
Kitchener tries to clinch there but Spade circles away.
Kitchener shoots in for a double leg but Spade sprawls well. That's going to sap some energy.
Spade attempts a counter takedown but Kitchener avoids it well and moves away.
Kitchener changes levels and looks for a double leg takedown. Spade tries to avoid it but Kitchener manages to keep hold of a leg and drag Spade to the ground. Spade escapes though and pops straight back up to his feet.
Spade shoots for a takedown but Kitchener saw that one coming a mile off and avoided it easily.
That's two minutes gone in the round.
Spade has managed to clinch.
Kitchener tries to pull guard but Spade forces him back to his feet, against the cage.
Kitchener fails to pull guard.
Spade stalling against the cage.
Kitchener fails to pull the fight into his guard.
Kitchener tries to pull guard but Spade won't allow it.
Kitchener is trying to break the clinch but Spade is controlling him.
Spade breaks the clinch and we return to the middle of the mat.
Spade moves into the clinch.
Spade tries for a takedown. No joy.
Kitchener with the Thai clinch. He's looking to land a big knee but he's not managed it this time.
That's three minutes gone in the round.
Spade gets control of Kitchener's arms and successfully pulls guard. Spade will no doubt be looking for submissions off his back.
Spade working a defensive guard here.
Spade pulls Kitchener in to control the position.
Spade is working actively off his back, looking to secure an arm or perhaps work for a triangle.
Kitchener in full guard, throwing the ground and pound. No damage this time.
Kitchener looking to sit in guard and control but Spade gets the butterfly guard and sweeps. He's now in the guard on the top.
Kitchener seems keen to control Spade's posture.
That's four minutes gone in the round.
Kitchener is trying to keep Spade in close.
Kitchener manages to sweep nicely, so he's now on top. Spade manages to get himself to full guard.
Kitchener drops back for a leg! It's a sloppy attempt though and Kitchener jumps back into guard quickly, to retain the dominant position.
The crowd thankful this round is nearly over.
Spade throwing his legs up looking for a triangle.
Spade wants to stand and escape but Kitchener is having none of it.
And that is the end of the round. The fighters go back to their corners.
Duncan Spade dominated that second round.
The cut man is working on Luke Kitchener's cut.
The fighters get back to their feet, the hooter sounds and we're back to the action! This is the final round!
Spade misses with a takedown attempt. He shot from a bit too far out.
And Kitchener tries to counter it with a takedown but Spade pushes his down on his head and steps out.
No luck for Spade with that takedown attempt.
Spade tries to clinch up.
Spade fails with the takedown.
Kitchener appears to be waiting to throw a counter punch to the body.
That's three failed takedown attempts in the round for Duncan Spade. That's going to take a lot out of him.
Spade stuffs the takedown.
Spade half committed to a counter leg kick.
Kitchener shoots in but Spade avoids the takedown attempt easily.
Spade half committed to a counter leg kick.
We've had a slow start to the round here - hopefully the action picks up.
Kitchener fails miserably with a takedown attempt.
Spade defends well against a solid takedown attempt from Kitchener.
That's one minute gone in the round.
Spade clinches.
Good anti-grappling being displayed by Spade as Kitchener tries to tie him up.
Kitchener tries to take the fight to the ground by pulling guard but can't manage it.
Kitchener wants to push off and get back to the center of the mat but Spade has him pressed against the cage.
Kitchener tries for a takedown but Spade manages to get underhooks.
Spade has managed to pull guard. Let's see whether he can work an aggressive guard. It will also be interesting to see what tactics Kitchener uses from the top position.
Spade scores with a nice shot.
Kitchener postures up as if he's going to throw some strikes but drops back for an ankle! Spade is in big trouble! He looks ready to tap! But no, he's escaped and dives on top of Kitchener, into his guard.
Spade stays in close to Kitchener's body and controls the position.
That's two minutes gone in the round.
Kitchener working for a triangle but Spade defends it easily.
Spade trying to land body shots but he keeps hitting the mat.
Spade trying to stand up but can't free himself from Kitchener's guard.
Kitchener avoiding any damage from the ground and pound.
That's three minutes gone in the round.
Spade wants to control from the top but Kitchener keeps moving.
Luke Kitchener has got the better of the ground game so far.
Kitchener has his foot on Spade's thigh. He's trying to push off and get in position for a triangle, I think. Spade works his way back into a safe position though.
Kitchener working a defensive guard but Spade passes into half guard.
Spade throws a big elbow that misses, also allowing Kitchener to regain full guard.
Kitchener is trying to control the position but Spade postures up.
Spade stands up and looks to throw the legs aside to pass to side control. Kitchener swivels though and keeps the full guard.
Spade is pushing down on Kitchener's leg trying to pass to half guard. Kitchener is fighting to maintain full guard but Spade has managed to sneak the leg through.
The ref warns both fighters not to hold the cage as they work up against the meshing.
The referee calls for the fighters to work.
That's four minutes gone in the round.
Kitchener is trying to get back to full guard.
Spade wants to lay and pray for a moment but Kitchener keeps working.
The referee has decided to stand the fighters back up, so we'll restart on the feet.
The fighters circle momentarily. Spade darts into range and connects with a nice straight punch.
Nice takedown defense from Spade. No joy for Kitchener on that attempt.
Boooooooooooooooooooo!!! God, this has been a terrible round. Come on you two, sort yourselves out!
Kitchener tries for a takedown but Spade circles away easily
and Spade counters with a lovely straight right hand!
Luke Kitchener has stepped it up - he knows he needs a finish here!
Duncan Spade is fighting for a decision here - he's started to take the cautious approach.
Spade rushes Kitchener and presses him up against the cage.
And that's the end of the fight!
Duncan Spade showed his dominance in that final round.
Well Spade has outscored his opponent in every aspect of the fight today. Only a scarily incompetent judge or two will keep him from a well deserved win... Over to the ring announcer for the scorecards.
Ladies and gentlemen, after 3 rounds of action, we go to the scorecards for a decision.
Judge Chris Downing scores the fight 30:27
Judge George Francis scores the fight 30:27
Judge Daniel Franklin scores the fight 30:27
In favor of your winner, by unanimous decision... Duncan Spade!
|
|
|
|
|
|
|
|
|
|
|
|
|
|
|
|
|
|
|
|
|
|
|
| S |
C
A |
G |
S |
C
B |
G |
|
S |
C |
G |
|
energy
A | B |
|
hype
A | B |
|
pop
A | B |
|
mgr
A | B |
|
FIGHT
RATING
31% |
|
|
|
|
|
|
|
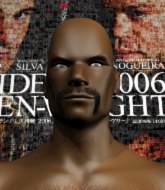
Main event
|
Coming up we have a welterweight MMA rules bout between Jordan McKenzie (ranked 4245 p4p, 3211 weight class) and Jay Hayles (ranked 528 p4p, 423 weight class). The key to victory for Jordan McKenzie has got to be keeping the fight on the feet.
 |
|
 |
| 180 cm
25
175
0 - 1 - 0 |
|
185 cm
25
176
2 - 0 - 0 |
BJJ Blue Belt
Brawler
Good chin |
|
Good takedowns
Brawler
Tends to cut |
|
| |
|
Ladies and gentlemen. This fight is 3 rounds, in the welterweight division.
Introducing the fighter to my left, fighting out of the red corner.
With a record of 0 - 1 - 0, fighting out of Sydney, Jordan McKenzie!
And introducing the fighter to my right, fighting out of the blue corner.
With a record of 2 - 0 - 0, fighting out of London, Jay Hayles!
The judges for this bout are Chris Downing, George Francis and Gwen Towbar.
The bell rings for round one and we are underway!
Hayles has McKenzie up against the cage in a clinch.
McKenzie tries for a takedown but Hayles manages to get underhooks.
McKenzie drops to a knee looking for a takedown but Hayles gets the underhooks and prevents it.
Hayles has dropped down and is working for a takedown. McKenzie is trying to keep an underhook but Hayles manages to get the takedown into half guard.
McKenzie tries to kick Hayles off in order to stand up. Hayles Avoids the leg push though and dives into side control.
We could do with one of the fighters taking the initiative a bit more on the ground - they're both waiting to capitalize on a mistake.
The referee tells the fighters to keep busy.
McKenzie can't do much from the bottom here.
McKenzie is going to have to think about doing something other than just controlling because Hayles is managing to avoid having the position dictated to him.
We've had a slow start to the round here - hopefully the action picks up.
Hayles wants to stand but McKenzie is controlling his arm.
McKenzie is trying to control Hayles's posture but Hayles avoids it.
The ref warns both fighters not to hold the cage as they work up against the meshing.
That's one minute gone in the round.
McKenzie tries to buck Hayles off but Hayles is having none of it.

McKenzie throws Hayles to one side and escapes!
Hayles stuffs the takedown attempt from McKenzie. McKenzie gets slowly back to his feet.
That's three failed takedown attempts in the round for Jordan McKenzie. That's going to take a lot out of him.
Hayles looks to land a combination but McKenzie avoids it well.
Hayles moves into range and clinches up with McKenzie.
Hayles gets a nice trip takedown into half guard.
Hayles is looking for an arm triangle, whilst trying to pass to side control. McKenzie doesn't seem that keen to cooperate though. No luck this time Hayles.
Hayles controlling the action here.
That's two minutes gone in the round.
That's three minutes gone in the round.
McKenzie wants to get back to his feet.
McKenzie wants to control the action here but instead Hayles manages to pass to full mount!
McKenzie tries to improve his position but instead Hayles has taken his back!
Hayles is controlling his opponent, waiting for an opportunity to finish.
Hayles gets his hands free as McKenzie looks to control.
Hayles keeps control of the position easily here as McKenzie tries to buck him off.
McKenzie tries to escape the position.
The fighters are pressed up against the cage, both looking to find a bit of space to work.
That's four minutes gone in the round.
McKenzie turns into Hayles and is now in his guard.
Hayles controlling McKenzie's posture.
McKenzie loading up with the ground and pound but he's missing more than he's landing in this flurry.
McKenzie drops back looking for a heel hook - he quickly realises he's not going to get it but Hayles manages to dive on top of him before he can escape and now McKenzie has Hayles in his guard.
McKenzie pulls Hayles in close to prevent any damage.
And that is the end of the round. The fighters go back to their corners.
Jay Hayles dominated that round.
Well, the break between rounds is over. Let's get back to the scrappin!
Hayles gets a clinch.
Hayles has dropped down and is working for a takedown. McKenzie is trying to keep an underhook but Hayles manages to get the takedown into half guard.
McKenzie scrambles, trying to get to his feet, but Hayles manages to mount him!
Hayles controlling from the full mount.
We've had a slow start to the round here - hopefully the action picks up.
Hayles is trying to stand up but he's being controlled by his opponent.
That's one minute gone in the round.
McKenzie working to try and regain half guard.
Hayles controlling his opponent.
McKenzie working to try and regain half guard.
That's two minutes gone in the round.
The crowd are showing their displeasure at the lack of action as loud boos ring out around the arena.
Hayles controlling from mount.
McKenzie tries to lock up and control but Hayles gives him a forearm to the face and pushes him away.
Hayles controlling the position easily from mount.
McKenzie is looking to improve his position but Hayles isn't that keen on the idea.
Hayles tucks in and makes sure he doesn't lose the dominant position.
That's three minutes gone in the round.
McKenzie regains half guard.
Jay Hayles has got the better of the ground game so far.
Hayles controlling the action here.
The referee decides to stand the fighters back up.
Jay Hayles is looking to keep the fight on the feet at all costs.
That's four minutes gone in the round.
There's not a lot going on here and the crowd are letting the fighters know they're not willing to tolerate a lack of action.
Hayles looks for a takedown. He's got it. We're now in half guard.
McKenzie is looking to improve his position.
McKenzie looking to work for a kimura from the bottom.
Still in half guard, Hayles seems content to control.
Boooooooooooooooooooo!!! God, this has been a terrible round. Come on you two, sort yourselves out!
And that is the end of the round. The fighters go back to their corners.
Jay Hayles showed his class in that round. I'd imagine he'll take it on all the scorecards.
Well, the break between rounds is over. Let's get back to the scrappin! Let's hear some noise people - this is the final round!
McKenzie shoots for a double leg takedown but Hayles sprawls well. He's pushed McKenzie's face into the mat and manages to get back to his feet relatively easily.
McKenzie shoots in and drives through. Hayles sprawls well.
Hayles misses with a double jab.
McKenzie shoots in for a double leg but Hayles sprawls well. That's going to sap some energy.
That's three failed takedown attempts in the round for Jordan McKenzie. That's going to take a lot out of him.
McKenzie fails with a takedown attempt from distance.
McKenzie tries to close the distance and clinch but Hayles swats him to one side with an open hand palm strike and circles away.
Hayles has managed to clinch.
McKenzie throws a head punch that misses.
Hayles turns his back and goes for a hip toss. It's a bit messy but it gets the job done and Hayles manages to end up in side control.
You can see the frustration on McKenzie's face, being in this tough position on the bottom.
Hayles controlling the position.
Both fighters are breathing heavily.
That's one minute gone in the round.
You can see the frustration on McKenzie's face, being in this tough position on the bottom.
Hayles wants to stand but McKenzie is controlling his arm.
McKenzie trying to remain calm as Hayles controls from the top position.
The referee has motioned to the fighters to stand back up.
McKenzie is looking to clinch.
Hayles defends well against a solid takedown attempt from McKenzie.
Hayles with the counter takedown but McKenzie avoids it easily.
Hayles darts in and clinches McKenzie up against the cage.
That's two minutes gone in the round.
Neither fighter has done anything of merit for a good minute or two here and the crowd are not happy about it.
Hayles lands a nice trip takedown into half guard.
Hayles controlling the action here.
McKenzie looks like he's trying to stand up.
Hayles seems content to maintain position for now, rather than mounting any offense.
That's three minutes gone in the round.
McKenzie gets back to full guard.
Hayles looking to control the position here, rather than advance.
Jay Hayles is fighting for a decision - hopefully he's judged it right and he's actually winning the fight.
The referee has decided to stand the fighters back up, so we'll restart on the feet.
That's four minutes gone in the round.
The crowd are getting on the fighters' backs, as the pace has dropped off in the last minute or so.
McKenzie fails with the takedown.
Jordan McKenzie is looking to throw some combinations by the looks of things.
Hayles misses with a series of wild punches.
Hayles has been the more effective fighter overall so far.
Hayles clinches up with McKenzie and pushes him back against the cage.
McKenzie has a body lock and is looking for a takedown. Hayles is bouncing around trying to prevent the takedown and somehow he has indeed managed to stay on his feet.
Hayles has picked McKenzie up - he's going for a ride! Hayles dumps his opponent to the mat with a thud and settles into half guard.
The referee calls for the fighters to work.
The crowd thankful this round is nearly over.
McKenzie is looking to improve his position.
And that's the end of the fight!
Jay Hayles comfortably won the final round on my scorecard.
Well Hayles has outworked and out performed his opponent in all aspects of the game today. He was simply too good and the decision should be no more than a formality. Over to the ring announcer for the scorecards.
Ladies and gentlemen, after 3 rounds of action, we go to the scorecards for a decision.
Judge Chris Downing scores the fight 27:30
Judge George Francis scores the fight 27:30
Judge Gwen Towbar scores the fight 27:30
In favor of your winner, by unanimous decision... Jay Hayles!
|
|
|
|
|
|
|
|
|
|
|
|
|
|
|
|
|
|
|
|
|
|
|
| S |
C
A |
G |
S |
C
B |
G |
|
S |
C |
G |
|
energy
A | B |
|
hype
A | B |
|
pop
A | B |
|
mgr
A | B |
|
FIGHT
RATING
31% |
|
|
|
|
|
|
|
|
|
|
