|
TWGC 31 (145lbs, D2): London Qualifier - Round 1 PBP Commentary |
Co-main event
|
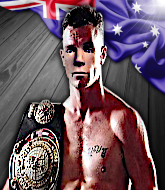
This TWGC bout is 1 fifteen minute round in the featherweight division. Introducing today's competitors. In the red corner, competing out of Los Angeles, with a TWGC record of 3 wins and 1 losses; Lemony Snicket! And in the blue corner, fighting out of St Petersburg, with a TWGC record of 0 wins and 2 losses; Oenomaus Doctore!
The judges for this bout are Sam Margolis, James Ackerman and William Gold.
The fighters bow as they face eachother in the middle of the mat and we are under way.
Snicket is looking to take this fight into the clinch.#CL#
Snicket moves into range and clinches up with Doctore.#TD2#
Doctore is working on a single leg takedown against the cage. Snicket can't fight it off and eventually Doctore manages to take the fight to the floor. Snicket looks annoyed but at least he's managed to land in guard. Score +2 for takedown into guard / half guard: Snicket (0) vs (2) Doctore
Doctore slips effortlessly into side control - very nice. Score +3 for passing guard: Snicket (0) vs (5) Doctore
We've had a slow start to the round here - hopefully the action picks up.
Doctore wants to control but Snicket is keeping him busy.
Doctore tries to advance to mount but Snicket denies him. #T1#
Snicket tries to buck Doctore off but Doctore is having none of it.
Snicket is working hard here to advance position.#SUB2#
Doctore is looking to finish here, going for an Americana. Snicket knows the correct defense though, so he's OK.
Doctore is moving around in side control but his primary objective seems to be to maintain the position. #T2#
Snicket is looking to reverse the position.
Snicket's coaches at Navy Street MMA have been working on his defensive grappling in preparation for this fight so let's see if he can get out of this tricky position.#SUB2#
Doctore thinks about going for a far side armbar but bails out and retains the dominant position instead. #SUB2#
Doctore working hard here to secure a kimura but he's not really in the right position for it.
Doctore passes to full mount! That's big trouble for Snicket! Score +2 for reaching mount: Snicket (0) vs (7) Doctore#T3#
Doctore content just to control the position here.
Doctore's corner are shouting for him to control the position and he seems happy to oblige.
Let's hope that Doctore has the urge to step up the pace any second now because for the last 15 or 20 seconds he's just been holding on tight.#SUB2#
Doctore moves into side control, trying to work for a kimura. That looks painful! Will he finish!!?? No, Snicket has worked his arm free - good work by Snicket!
#T4#
Snicket gives up the full mount - oops, sloppy defensive grappling there! Score +2 for reaching mount: Snicket (0) vs (9) Doctore
Doctore content just to control the position here. #SUB2#
Doctore is working for a guillotine from mount but Snicket frees his head quite easily.
My spies in The Factory inform me that Doctore has been getting involved in the gym's BJJ sparring sessions. Let's see whether that pays dividends!
Doctore with some aggressive grappling here, looking for the finish.
#T5#
Snicket regains half guard.#SUB2#
Doctore is sneakily working for an arm triangle but Snicket sees it coming and defends easily.
Doctore is trying to control the action in half guard but Snicket is working away on the bottom, looking perhaps to get back to full guard. #SUB2#
Doctore is looking for a kimura. It's going to be difficult to finish that from half guard though and Snicket defends it well.
Doctore has freed up his trapped foot and advances to mount. Score +3 for passing guard: Snicket (0) vs (12) Doctore#T6#
Doctore controlling from the full mount.
Snicket is desperately trying to get back to half guard.
Doctore wants to control the pace but Snicket is squirming around nicely. #SUB2#
Doctore jumps to side control looking for an arm triangle but Snicket manages to avoid the submission attempt.
Doctore trying to control the position but Snicket is working away. #T7##SUB2#
Doctore tries for a kimura. Not really close to a finish though.
Snicket tries to buck Doctore off but Doctore is having none of it.
The fighters are pressed up against the cage, both looking to find a bit of space to work.#SUB2#
Doctore is looking to finish here, going for an Americana. Snicket knows the correct defense though, so he's OK. #T8#
Doctore works to advance to full mount. Snicket defends for a few seconds but eventually he succumbs. Score +2 for reaching mount: Snicket (0) vs (14) Doctore
Doctore trying to control but he's not successful this time.
Doctore controlling from the full mount.
Snicket tries to get back to half guard but can't. #T9#
Doctore controlling from mount. #SUB2#
Doctore goes for an armbar but he's not got it
Snicket turns into him and now he's in Doctore's guard.
Score +2 for sweep to guard / half guard: Snicket (2) vs (14) Doctore#T10#
Doctore is pulling down on Snicket's head to control his posture.
Doctore is working the butterfly guard. He manages to land a nice scissor sweep and is now in half guard on the top. Nice move. Score +2 for sweep to guard / half guard: Snicket (2) vs (16) Doctore#SUB2#
Doctore is trying for a guillotine from the top but the pressure isn't in the right place so Snicket is just riding it out for now. Doctore eventually gives up the hold.
Doctore content to control rather than advance. #T11#
Doctore wants to pass to mount but Snicket is defending the position. #SUB2#
Doctore is sneakily working for an arm triangle but Snicket sees it coming and defends easily.
Doctore with a momentary lay and pray from half guard. #T12##SUB#
Snicket actively working from the bottom here.#SUB#
Snicket looking for submissions off his back.
Doctore is working hard to pass the guard. He's done it - he's now in full mount! Trouble for Snicket! Score +3 for passing guard: Snicket (2) vs (19) Doctore
Doctore controlling the pace for now. #T13#
Snicket can't escape the position.
#SUB2#
Doctore quickly switches position and commits to an armbar! It's a big risk for Doctore but it's paid off an Snicket is forced to tap! Nice work by Doctore.
Ladies and gentlemen, after 13:34 of round 1, we have a winner by way of Submission (Armbar). Oenomaus Doctore!
Oenomaus Doctore took to the microphone after his victory and thanked his sponsors, BuriedAlive// Fight Gear for their support in the buildup to the fight. |
|
|
|
Main event
|
This TWGC bout is 1 fifteen minute round in the featherweight division. Introducing today's competitors. In the red corner, competing out of Montreal, with a TWGC record of 0 wins and 1 losses; Gustave Mignard! And in the blue corner, fighting out of Amsterdam, with a TWGC record of 2 wins and 2 losses; Kreepee Krawlee!
The judges for this bout are Chris Edwards, Phil Schofield and Andrew Berry.
The fighters bow as they face eachother in the middle of the mat and we are under way.#CL#
Mignard forces Krawlee back against the cage and clinches.#TD#
Mignard has hold of one of Krawlee's legs. Krawlee is fighting the takedown attempt but Mignard gets the trip and lands the takedown into guard. Score +2 for takedown into guard / half guard: Mignard (2) vs (0) Krawlee
Krawlee not looking particularly offensive just at the moment.
Mignard has to be careful here, sitting in the guard of a superior BJJ player.
Mignard wants to control from the top but Krawlee keeps moving.
Krawlee seems keen to control Mignard's posture.
Krawlee is trying to keep Mignard in close.
Krawlee looking for a sweep. Not yet Krawlee, not yet.
We've had a slow start to the round here - hopefully the action picks up.
Mignard trying to control but Krawlee is working from the bottom.
Krawlee has his hands on Mignard's head, controlling the position. #T1#
Mignard looking to pass the guard.
Krawlee working a defensive guard here.
Mignard stopping the sweep attempt from Krawlee.
Krawlee keeping full guard, as Mignard tries to pass.
Mignard is working hard here to advance position.#T2#
Krawlee is working from a closed guard but he's struggling to control his opponent.#SUB2#
Krawlee looking for submissions off his back, moving his hips, looking for an opening.
Krawlee trying to control the position.
#T3#
Krawlee pulls Mignard in to control the position.
Krawlee keeping full guard, as Mignard tries to pass.
Krawlee tries to land a sweep but no joy.
Mignard wants to pass the guard but Krawlee is keeping the position.
Krawlee looking to hit a scissor sweep but Mignard is one step ahead there.
Krawlee controlling the position.#T4#
Mignard stands up and looks to throw the legs aside to pass to side control. Krawlee swivels though and keeps the full guard.
Mignard trying to control but Krawlee is working from the bottom. #SUB2#
Mignard got a little sloppy there for a moment and Krawlee has worked his way into a loose triangle - can he finish it?! No, Mignard has managed to get both his arms back between Krawlee's legs - danger averted.
Krawlee has a closed guard, preventing anything of note from happening. Perhaps he's looking to stall.
Mignard stands up and looks to throw the legs aside to pass to side control. Krawlee swivels though and keeps the full guard. #T5#
Krawlee is trying to control the position but Mignard postures up.
Krawlee is pulling down on Mignard's head. It's preventing any offense from Mignard, at least for the moment.
Krawlee trying to keep a closed guard but Mignard is proving a slippery customer.
Mignard trying to pass the guard but can't manage it just yet.
Krawlee seems keen to control Mignard's posture.
Mignard trying to control but Krawlee is working from the bottom. #T6#
Mignard pressing down on his opponent's thigh, looking to pass guard. Krawlee is keeping the position for now.
Krawlee looking to control.
Krawlee keeping full guard, as Mignard tries to pass.
Krawlee is working the butterfly guard. He manages to land a nice scissor sweep and is now in half guard on the top. Nice move. Score +2 for sweep to guard / half guard: Mignard (2) vs (2) Krawlee#SUB2#
Krawlee is working for a kimura but Mignard is defending it quite comfortably.
#SUB2#
Krawlee is looking for a kimura but he's never going to get it from there. #T7##SUB#
Mignard is looking to sinch up a guillotine here but Krawlee pulls his head out easily. #SUB2#
Krawlee seems to be working for a kimura but Mignard defends the submission attempt.
Krawlee seems content to maintain position for now, rather than mounting any offense. #T8#
Mignard works his way to full guard. Good work.
Mignard wants to sweep here but Krawlee controlling him for the moment.
Mignard working a defensive guard but Krawlee manages to pass into side control anyway.
Score +3 for passing guard: Mignard (2) vs (5) Krawlee
Krawlee wants to lay and pray for a moment but Mignard keeps working.
Krawlee controls the position.#T9#
Krawlee trying to control the position but Mignard is working away. #SUB2#
Krawlee tries for a kimura. Not really close to a finish though.
Mignard is positioning himself to get back to half guard. #SUB2#
Krawlee tries for a kimura but Mignard is defending well.
Mignard gets back to half guard.#T10#
Krawlee looking to pass the half guard. Not this time. #SUB2#
Krawlee is looking for a kimura. It's going to be difficult to finish that from half guard though and Mignard defends it well.
Mignard wants to get back to full guard.#SUB2#
Krawlee is trying to work for a kimura but Mignard is defending well.
#T11#
Krawlee wants to take a breather but Mignard is having none of it.
Mignard trying to get back to full guard but Krawlee takes advantage of the position and moves to full mount! Score +3 for passing guard: Mignard (2) vs (8) Krawlee
Mignard is in a tricky position but he's been working on his transitions down at The Foundry, so we'll see if he gets out of it.
Mignard keeping his composure momentarily, calmly looking to get back to half guard.
Krawlee tries to control but Mignard wriggling away.
Krawlee tucks in and makes sure he doesn't lose the dominant position. #T12#
Krawlee wants to control the pace but Mignard is squirming around nicely.
Mignard can't escape the position.
Krawlee trying to control but he's not successful this time.
Krawlee controlling his opponent. #T13#
Krawlee trying to control but he's not successful this time. #SUB2#
Krawlee is working on an americana here. Ooh, that looks pretty nasty! Nope, Mignard has managed to escape the submission attempt.
Krawlee sitting in mount, just looking to control for the moment.
Mignard is looking to improve his position but Krawlee isn't that keen on the idea.
Krawlee trying to control but he's not successful this time. #T14#
Mignard slips a leg in and gets back to half guard.
Mignard wants to control but Krawlee is keeping busy.
Krawlee wants to take a breather but Mignard is having none of it.
Krawlee trying to pass the guard but Mignard defending well.
My spies in Shut Up & Train! {$1000} inform me that Krawlee has been getting involved in the gym's BJJ sparring sessions. Let's see whether that pays dividends!
Boooooooooooooooooooo!!! God, this has been a terrible round. Come on you two, sort yourselves out!
Mignard is trying to control but Krawlee passes into side control!
Score +3 for passing guard: Mignard (2) vs (11) Krawlee
Mignard manages to work his way to half guard, despite Krawlee's best efforts.
And that's the end of the fight!
Krawlee wins on points by 11 to 2.
Kreepee Krawlee decided to thank the fans in attendance for making a great atmosphere. It seemed to go down pretty well. |
|
|
|
|
|
|