 |
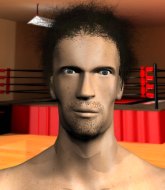
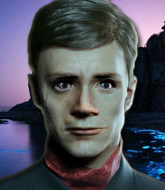
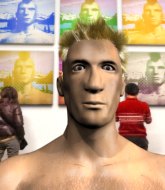
SMASH: Hasselhoff vs Gomes PBP Commentary |
Undercard bout
|
Coming up we have a light heavyweight MMA rules bout between Osama Akharraz (ranked 3369 p4p, 411 weight class) and Chase Morgan (ranked 3376 p4p, 412 weight class). Akharraz has a slight injury, which hopefully won't affect the fight too much. Man, I cannot wait for this one!
 |
|
 |
| 225 cm
35
215 lbs
22 - 26 - 0 |
|
185 cm
32
214 lbs
13 - 14 - 0 |
Good wrestling
World class boxer
Insanely flexible |
|
Good wrestler
Dangerous knees
Granite chin |
|
| |
|
Ladies and gentlemen. This fight is 3 rounds, in the light heavyweight division.
Introducing the fighter to my left, fighting out of the red corner.
With a record of
22 - 26 - 0, fighting out of Amsterdam, Osama Akharraz!
And introducing the fighter to my right, fighting out of the blue corner.
With a record of
13 - 14 - 0, fighting out of Las Vegas, Chase Morgan!
The judges for this bout are James Glass, Richard Clark and Phil Schofield.

The bell rings for round one and we are underway!
Morgan looks to land a right hand but Akharraz moved out of range.
Morgan has been spending a lot of time sparring his boxing in the run up to the fight, trying to sharpen up those hands and look for a knockout.
Akharraz keeping his hands up high there, blocking the jab from Morgan.
Morgan throws the left hand but Akharraz avoids the punch easily.

Akharraz instigates a clinch.
Morgan blocks an uppercut.
Akharraz lands with a right to the head.

Morgan has Akharraz pressed up against the cage. He's trying to work for a single leg takedown. Morgan pulls back from the cage and twists to the side, sending Akharraz tumbling to the mat - Morgan dives into Akharraz's guard.
Morgan's corner is telling him to maintain position.
The ref warns both fighters not to hold the cage as they work up against the meshing.
Morgan passes easily into side control. Nice work.
Akharraz seems a little lost for a moment, as Morgan dominates the positioning.

Morgan looking for an arm triangle but it's way too loose to do anything.
Morgan remains in side control and seems content to stay there. It's a versatile position from which he can work both strikes and submissions, whilst maintaining that control, so maybe he'll sit here for a while.

That's one minute gone in the round.
Akharraz wants to get back to his feet.
Akharraz is trying to escape the position but Morgan is controlling the position.
Akharraz wants to escape from the position here - easier said than done!
Morgan staying calm.
Akharraz pushes Morgan away and creates a bit of space to escape. He's almost out here... but no, Morgan gets a good hold of his legs and remains firmly in side control.
Morgan working the ground and pound.
Morgan is pausing for a moment. What's he doing? It looks like he's clearing his nose. Oh dude! He's shot a load of snot all down Akharraz's shoulder. That is not cool.
We've been hearing good reports from Akharraz's training camp. Apparently he has been rolling around with some good quality BJJ practitioners and has been sharpening his skills. Let's see if that has an impact on the fight today.
Akharraz wants to get back to his feet but Morgan drags him back down.

That's two minutes gone in the round.
Neither fighter has done anything of merit for a good minute or two here and the crowd are not happy about it.
Morgan wants to work for a kimura but he's foiled early by Akharraz, who protects the arm well.
Morgan tries to advance to mount but can't.
Morgan is maintaining the dominant position - no doubt Akharraz will start to get frustrated soon if he's not already.
Akharraz wants to escape from the position here - easier said than done!
Morgan is maintaining the dominant position - no doubt Akharraz will start to get frustrated soon if he's not already.
Akharraz bucks up and tries to throw Morgan off but instead Morgan has got his back!

That's three minutes gone in the round.
What can Akharraz do to escape this position? He's going to have to figure it out pretty quick if he wants to stay in the fight!
Morgan is working for the choke. It looks like he might have got it... has he...? Yes! Akharraz is tapping out! This one is all over!
Ladies and gentlemen, after 3:58 of round 1, we have a winner by way of Submission (RNC). Chase Morgan!
Chase Morgan seemed lost for words in his post fight interview but he remembered to thank his fans and directed everyone to his website.
|
|
|
|
|
|
|
|
|
|
|
|
|
|
|
|
|
|
|
|
|
|
|
| S |
C
A |
G |
S |
C
B |
G |
|
S |
C |
G |
|
energy
A | B |
|
hype
A | B |
|
pop
A | B |
|
mgr
A | B |
|
FIGHT
RATING
31% |
|
|
|
|
|
|
|
Undercard bout
|
Coming up we have a welterweight MMA rules bout between Yamakinme Crazy (ranked 3171 p4p, 401 weight class) and Michael Demon (ranked 2872 p4p, 366 weight class). Yamakinme Crazy has the edge in experience - let's see if he can make that count tonight.
 |
|
 |
| 188 cm
25
179 lbs
3 - 3 - 0 |
|
170 cm
25
175 lbs
2 - 0 - 0 |
BJJ White Belt
Excellent boxer
Experienced |
|
BJJ Purple Belt
Counter fighter
Solid chin |
|
| |
|
Ladies and gentlemen. This fight is 3 rounds, in the welterweight division.
Introducing the fighter to my left, fighting out of the red corner.
With a record of
3 - 3 - 0, fighting out of Las Vegas, Yamakinme Crazy!
And introducing the fighter to my right, fighting out of the blue corner.
With a record of
2 - 0 - 0, fighting out of Los Angeles, Michael Demon!
The judges for this bout are Sam Margolis, Phil Schofield and Colin Fotheringham.
The bell rings for round one and we are underway!
Demon avoids the body shot from Crazy.
Demon takes a shot right to the liver - Bas would have been proud of that punch.
Demon misses with a wild body shot.
Crazy looks to score with a jab to the body but Demon is just out of range.
Demon steps in looking to clinch after the strikes miss from Crazy.
Crazy throws a head kick but Demon moves out of range.
Demon tries to counter by closing the distance.
Crazy lands with a cross.
Crazy lands a jab to the nose.
We can't be sure of the tactics at this early stage but we have heard that Demon has been working on his takedowns a lot in the buildup to the fight and we can only assume he's going to look to take this to the mat.
We've had a slow start to the round here - hopefully the action picks up.
Demon on the wrong end of an overhand right that came out of nowhere.
Crazy is using his reach advantage well here, landing the more effective single shots from range.
Some wild striking there from Crazy.
That's one minute gone in the round.
Demon avoids the head kick by Crazy.
Good standup being displayed there by Crazy as he connects with a hook.
Demon checks a low kick from Crazy.
A shot to the liver by Crazy. Beautiful body shot.
Demon swings wildly with a couple of big hooks
and Crazy makes him pay by landing a nice hook to the body before moving out of range.
Crazy lands a right hook to the body.
Demon looks winded!
Crazy tried to score with a low kick but Demon checks it.
Demon steps in looking to clinch after the strikes miss from Crazy.
Crazy lands a slapping body shot.
That's two minutes gone in the round.
Crazy lunges in with an uppercut that skims his opponent's chin.
Demon throws a poor cross that misses
and Crazy counters with a crisp hook to the side of the head.
Crazy is looking to land body kicks.
Crazy is looking to wear down Demon with body shots, infact he's throwing more body shots than head shots at the moment.
Demon takes a punch right to his stomach. That took the wind out of him momentarily.
The crowd cheering loudly, showing their appreciation for the quality fight we're seeing here.
Crazy uses good footwork to get in and out, landing a nice hook.
Demon should think about turning a few of those tyres round his middle into muscle if he wants people to take him seriously as an athlete.
Crazy throws a hook to the body but it doesn't connect.
Demon steps in looking to clinch after the strikes miss from Crazy.
Crazy stuns Demon with a nice body shot, before stepping back out of range.
Crazy listening to his corner there, landing a nice uppercut.
That's three minutes gone in the round.
Demon misses with a body shot
and Crazy counters with a quick right hand to the jaw.
Crazy throws a jab to the body, straight down the pipe. Boom. That sent Demon stumbling backwards but he manages to regain his composure quickly.
Crazy misses with a body shot. Nice footwork from Demon.
Demon is trying to avoid his opponent's strikes and get into the clinch.
Some bone on bone action there as Demon checks a low kick. Luckily it wasn't a particularly hard one.
Demon rushes in with a sloppy looking punch
and Crazy counters with a one-two to the body.
Demon on the wrong end of a vicious looking body shot.
Demon is pinned up against the cage taking some big shots here. The referee is looking closely deciding whether he should stop the fight.
Crazy lands a slapping body shot.

That's four minutes gone in the round.
Crazy throws a shot to the body.
Crazy is using his height advantage well here, landing a good percentage of his punches.
Crazy throws a low kick but it's checked well by Demon.
Crazy sets himself, and Demon steps forward looking for the clinch! Crazy avoids it this time.
Demon is pinned up against the cage taking some big shots here. The referee is looking closely deciding whether he should stop the fight.
Fantastic stuff here - a very entertaining period of action, which has drawn cheers from the crowd.
Demon swings and misses with a shot to the body
letting Crazy counter with a right hand.
Crazy with a body punch. A glancing blow.
Crazy throws a low kick but Demon moves out of range easily.
Demon takes a punch right to his stomach. That took the wind out of him momentarily.
Crazy scores with a punch to the gut of his opponent.
And thats the end of the round the fighters go back to their corners.
Yamakinme Crazy dominated that round.
That's time! Back to the action!

Good work by Demon as he checks the leg kick.
Crazy tries to land a leg kick but Demon saw it coming and moves away.
Crazy throws a low kick but Demon moves out of range easily.
Crazy scores with a nice one two combo and darts back out of range to avoid anything coming in the opposite direction.
Crazy misses with a wild body shot.
Demon misses with an uppercut.
Crazy swung with a counter punch to the body but it didn't connect.
We've had a slow start to the round here - hopefully the action picks up.
Demon avoids a low kick by using good footwork.
Demon wants to counter the offense by Crazy and move into the clinch position.
Crazy lands a nice looking body shot.
Demon is breathing heavily.
Demon misses with a body shot
and Crazy counters with a shot to the ribs. That looked like it hurt.
That's one minute gone in the round.
Crazy misses with a wild combination.
Demon tries to counter with a clinch but Crazy shakes him off and moves away.
Demon misses with a hook to the body
and Crazy counters with a shot to the ribs. That looked like it hurt.
Decent striking displayed by Crazy there.
Demon avoids a kick to the body.
Crazy just misses with a punch to the body.
Crazy scores to the head and body with a nice combination!
Demon throws a hook to the body but it doesn't connect.
That's two minutes gone in the round.
Good standup being displayed there by Crazy as he connects with a hook.
Crazy connects with a hook to the side of his opponent's head.
Demon walks into a jab.
Crazy will need to tighten up his combinations if he doesn't want to gas himself out, swinging at thin air.
Demon steps in looking to clinch after the strikes miss from Crazy.
Yamakinme Crazy is winning the standup battle so far.
Fantastic stuff here - a very entertaining period of action, which has drawn cheers from the crowd.
Nice shot lands for Crazy.
That's three minutes gone in the round.
Crazy lets the fists fly and connects with a left straight followed by a right hook.
Crazy lands a nice hook to Demon's body. Demon takes it in his stride and looks to land his own strikes.
Crazy ducks down and throws a hook to the body.
The fighters circle momentarily. Crazy darts into range and connects with a nice straight punch.
Jab by Crazy.
Crazy tries to score with an inside leg kick but telegraphs it and Demon is able to avoid easily.
Jab, cross, leg kick. Nice combination by Crazy!
Crazy scores with a reasonable looking shot to the body. Demon doesn't seem bothered though.
That's four minutes gone in the round.
We've seen a great period of action over the last minute or so - credit to both fighters for going all out!
Demon takes a solid shot to the body. That one hurt him but he's trying not to show it.
Crazy looks to land a body kick but Demon moved away.
Demon steps in looking to clinch after the strikes miss from Crazy.
Crazy scores with a hook to the body. Demon takes a step back and tries to catch his breath.
Crazy will need to close the distance a bit before he attacks - that leg kick was thrown from too far away.
Crazy sets himself, and Demon steps forward looking for the clinch! Crazy avoids it this time.
Crazy scores with a nice head shot.
Demon checks a low kick from Crazy.
Crazy lands a nice hook to Demon's body. Demon takes it in his stride and looks to land his own strikes.
And thats the end of the round the fighters go back to their corners.
Yamakinme Crazy dominated that second round.
That's the end of the round. The referee orders the cornermen out of the cage so we can get back down to business. This is the final round!

Crazy darts in and out, connecting with a jab.
Crazy tries to score with an inside leg kick but telegraphs it and Demon is able to avoid easily.
Crazy throws a lazy body kick

and Demon counters by clinching up.
Both fighters working to control the clinch.
Crazy blocks a couple of punches on the inside.
Crazy taking a breather.
A head punch on the inside from Demon fails to land.
Crazy stays in close to his opponent and throws a right hand to the body.
We've had a slow start to the round here - hopefully the action picks up.
Crazy tries to land knees in the clinch but Demon avoids the damage to the body.
Demon takes a big intake of breath there - he's definitely tired.
Crazy scores with an uppercut up the middle.
Demon misses with a short punch on the inside.
Crazy lands a shoulder strike that jolts his opponent's head backwards.
Crazy avoiding damage.
Crazy lands a body punch.
That's one minute gone in the round.
Crazy lands a left hand.
Crazy is really dominating this fight. Is there anything that Demon can do to turn this around?
Crazy stalling against the cage.
Crazy lands an uppercut.
Crazy creates a bit of distance and throws an elbow that only just misses.
Demon lands a shoulder strike.
Demon blocks a knee to the body. He'll have a nicely bruised forearm in the morning.
Demon throws a head punch that misses.
The pace slowing considerably in the clinch, as Crazy takes a break from that fighting nonsense to think about the finer things in life.
Demon swings wildly with an uppercut but Crazy uses good head movement to avoid it.
Crazy slowing the pace effectively.
Crazy wants to break free but Demon has control.
Crazy tries to land a shot to the body but it's blocked.
Crazy misses with an elbow over the top.
Crazy pushes Demon back against the cage and unloads with a body punch.
That's two minutes gone in the round.
Demon fails to land with a short punch on the inside.
Good anti-grappling being displayed by Demon as Crazy tries to tie him up.
Crazy scores with an uppercut up the middle.
A right hand to the body from Crazy.
Crazy is working Demon over against the cage.
Crazy has had enough of the clinch and is looking to separate.
Demon managing to block the knees to the body from Crazy.
Crazy scores with a nice hook to the head.
Demon tries to land a knee to the body but he is off balance and Crazy avoids it.
A bit of stalling here from Crazy.
This has been an exciting period of action!
A shot in the inside from Crazy.
Crazy stalling.
A hook to the body from Crazy.
Demon has a pretty nasty looking mouse under his right eye.
Crazy working on landing some head shots here - that one got through nicely.
Crazy lands on the inside with an uppercut.
Crazy blocks an uppercut.
Demon throws a head punch that misses.
That's three minutes gone in the round.
Crazy taking a breather.
Crazy lands with a left to the head.
Crazy works for underhooks and lands a body shot in the process.
Demon on the defensive, avoiding the knees to the body.
Crazy avoiding damage.
Crazy misses with a body punch.
The fighters are starting to perspire pretty heavily.
Demon working aggressively here.
Demon is trying to maintain a safe position but Crazy gets an underhook and turns Demon into the cage.
Nice body punch from Crazy - that landed with a thud.
The fighters are pressed against the cage, as the pace of the fight slows.
Crazy dictating the pace here, as the fighters clinch against the cage.
Demon throws a head punch that misses.
That's four minutes gone in the round.
Demon fails to land with a short punch on the inside.
Crazy misses with an elbow strike.
Crazy stalling.
Crazy leaning against his opponent.
Crazy lands a glancing elbow in the clinch.
Crazy lands a short shot on the inside that snaps the head of Demon backwards.
Good anti-grappling being displayed by Crazy as Demon tries to tie him up.
Crazy throws an elbow but it's blocked.
Crazy digs a right hand into Demon's ribs. Those have got to be taking their toll on Demon's gas tank.
Demon is trying to slow down the pace in the clinch, to catch his breath.
Crazy effectively controlling the action here.
Crazy lands an uppercut.
Crazy lands with a quick shot inside that doesn't really do much damage.
Michael Demon has stepped it up - he knows he needs a finish here!
Demon blocks an elbow strike from Crazy.
And that's the end of the fight!
Yamakinme Crazy showed his dominance in that final round.
Well Crazy has outscored his opponent in every aspect of the fight today. Only a scarily incompetent judge or two will keep him from a well deserved win... Over to the ring announcer for the scorecards.
Ladies and gentlemen, after 3 rounds of action, we go to the scorecards for a decision.
Judge Sam Margolis scores the fight 30:25
Judge Phil Schofield scores the fight 30:25
Judge Colin Fotheringham scores the fight 30:25
In favor of your winner, by unanimous decision... Yamakinme Crazy!
|
|
|
|
|
|
|
|
|
|
|
|
|
|
|
|
|
|
|
|
|
|
|
| S |
C
A |
G |
S |
C
B |
G |
|
S |
C |
G |
|
energy
A | B |
|
hype
A | B |
|
pop
A | B |
|
mgr
A | B |
|
FIGHT
RATING
51% |
|
|
|
|
|
|
|
Undercard bout
|
Coming up we have a middleweight MMA rules bout between Hola Aloha (ranked 3757 p4p, 432 weight class) and Ilpo Pallero (ranked 2771 p4p, 338 weight class). The fight MMA fans around the world have waited their entire lives for!
 |
|
 |
| 194 cm
24
190 lbs
3 - 3 - 0 |
|
175 cm
24
190 lbs
7 - 7 - 0 |
BJJ White Belt
Solid Muay Thai
Granite chin |
|
BJJ Purple Belt
Counter fighter
Knockout power |
|
| |
|
Ladies and gentlemen. This fight is 3 rounds, in the middleweight division.
Introducing the fighter to my left, fighting out of the red corner.
With a record of
3 - 3 - 0, fighting out of Montreal, Hola Aloha!
And introducing the fighter to my right, fighting out of the blue corner.
With a record of
7 - 7 - 0, fighting out of Montreal, Ilpo Pallero!
The judges for this bout are James Glass, Phil Schofield and James Atkins.
The bell rings for round one and we are underway!
Aloha misses with an uppercut
and Pallero counters with a shoot takedown. Aloha fights it but they end up in guard.
Aloha trying to control the position here.
Pallero passes Aloha's right leg, so he's now in half guard.
Pallero is taking a breather. Aloha says something to him but it's hard to make out. Perhaps he's telling him to get on with it and actually do something.
Pallero is thinking about going for an arm triangle but he can't free his leg.
Pallero prevents Aloha from improving his position.
We've had a slow start to the round here - hopefully the action picks up.
Aloha keeps control of the position for the meantime.
Pallero is trying a forearm choke
I don't think that's going to do much at this level of the game.
Aloha wants to get back to full guard.
That's one minute gone in the round.
Aloha trying to control here.
The referee calls for the fighters to work.
It looks like Pallero might be adopting somewhat of a lay and pray gameplan here, which I'm sure won't go down too well with the paying fans in attendance... Or the ring announcers come to think of it.
Aloha is trying to control but can't.
Pallero is trying to work for a kimura but Aloha is defending well.
Pallero content to sit in half guard and control for a moment.
Aloha wants to get back to his feet.
That's two minutes gone in the round.
The crowd are starting to boo a lack of action.
Neither fighter is being very active at the moment, with Pallero in particular looking to stall.
Aloha is trying to control but can't.
Aloha looks to be in better condition than last time we saw him fight. Obviously he's been working hard on his cardio.
Pallero is looking for a kimura but he's never going to get it from there.
Aloha knows he needs to get back to his feet asap. He's simply no match for Pallero on the ground.
Pallero is sneakily working for an arm triangle but Aloha sees it coming and defends easily.
Aloha is concentrating on defense, preventing Pallero from advancing position.
Aloha trying to control from the bottom.
Aloha wants to get back to full guard.
Aloha is defending against the submission attempts here by Pallero.
The ref warns both fighters not to hold the cage as they work up against the meshing.
Pallero is keeping good posture, landing some ground and pound.
That's three minutes gone in the round.
Pallero controlling the action here.
Aloha is in trouble now - Pallero has advanced to mount!
Pallero sitting in mount, just looking to control for the moment.
Aloha can't escape the position.
Pallero in mount throwing good strikes here, bouncing his opponent's head off the canvas.
Pallero looking to control and managing it successfully.
Aloha wants to hold on but Pallero pushes him away.
Pallero cracks Aloha with a nasty head shot there - the crowd let out an audible gasp there, as the noise reverberated around the arena.
That's four minutes gone in the round.
Pallero looking to control and managing it successfully.
BOOM! Pallero connects with a massive shot to the dome!
Aloha tries to lock up and control but Pallero gives him a forearm to the face and pushes him away.
Pallero controlling his opponent.
Wooooo! Give it up for these two warriors! They are putting on a show!
The crowd thankful this round is nearly over.
And thats the end of the round the fighters go back to their corners.
Ilpo Pallero dominated that round.
That's time! Back to the action!
Aloha wants to clinch but Pallero slips to the side
and Pallero counters with a shoot takedown. Aloha fights it but they end up in guard.
Pallero being controlled here momentarily.
Pallero is frustrating his opponent with some stalling tactics from top position.
We've had a slow start to the round here - hopefully the action picks up.
Pallero trying to control the position from guard on top but Aloha is wriggling around, looking for whatever he can.
Pallero slows down the pace of the fight, as he sits in guard.
That's one minute gone in the round.
Pallero advances to half guard.
Pallero trying to pass the guard but Aloha defending well.
Pallero seems content to maintain position for now, rather than mounting any offense.
Pallero not throwing his punches with enough precision this time.
Aloha wants to get back to full guard.
Pallero is working for a submission of some sort.
Pallero winds up and cracks Aloha with a swinging punch to the side of the head.
Pallero is scoring with some nice ground and pound from the dominant position.
That's two minutes gone in the round.
Pallero passes the half guard and he's now in mount! Big trouble for Aloha!
Aloha tries to hold on but Pallero pushes him away.
Aloha is trying to stand up.
Aloha is in all sorts of trouble here.
Pallero controlling his opponent.
Pallero connects with a couple of good shots from mount.
The fighters are pressed up against the cage, both looking to find a bit of space to work.
Pallero postures up and cracks his opponent a couple of times before moving back into close ground control. Aloha looks a forlorn figure.
Fantastic stuff here - a very entertaining period of action, which has drawn cheers from the crowd.
Pallero content just to control the position here.
Pallero landing strikes, looking to finish!
Pallero controlling the position easily from mount.
That's three minutes gone in the round.
Pallero lands a couple of good shots and Aloha has given up his back, trying to escape the position!
Aloha preventing the rear naked choke attempt from Pallero.
Aloha trying to control the hands but Pallero breaks the grip.
Oooh a big shot gets through from Pallero. Many more shots like that and the referee will have to think about stepping in!
Pallero has been the more effective fighter overall so far.
Can Aloha hold on?! Pallero is landing more strikes to his hapless foe.
Pallero lands a punch to the side of the head from the back.
I would not like to be Aloha right now.
Pallero is working on the RNC. He looks like he's got it but Aloha won't tap... Oh, he's out! The ref rips Pallero off his unconscious opponent!
Ladies and gentlemen, after 4:59 of round 2, we have a winner by way of Submission (RNC). Ilpo Pallero!
|
|
|
|
|
|
|
|
|
|
|
|
|
|
|
|
|
|
|
|
|
|
|
| S |
C
A |
G |
S |
C
B |
G |
|
S |
C |
G |
|
energy
A | B |
|
hype
A | B |
|
pop
A | B |
|
mgr
A | B |
|
FIGHT
RATING
44% |
|
|
|
|
|
|
|
Undercard bout
|
Coming up we have a welterweight MMA rules bout between Kalu Koli (ranked 1881 p4p, 262 weight class) and Mateusz Biernat (ranked 1960 p4p, 275 weight class). Koli comes to the cage accompanied by Two Steps From Hell - Unbreakable. The crowd seem to be enjoying Biernat's choice of entrance music: Ballroom Blitz. These two fighters really are very evenly matched on the feet - it will be fascinating to see who can assert themselves in that aspect of the fight.
 |
|
 |
| 183 cm
23
180 lbs
4 - 1 - 0 |
|
178 cm
28
164 lbs
13 - 14 - 0 |
Abu Dhabi Champ
World class MT
Cardio machine |
|
Powerful takedowns
Great elbows
Good gas tank |
|
| |
|
Ladies and gentlemen. This fight is 3 rounds, in the welterweight division.
Introducing the fighter to my left, fighting out of the red corner.
With a record of
4 - 1 - 0, fighting out of Helsinki, Kalu Koli!
And introducing the fighter to my right, fighting out of the blue corner.
With a record of
13 - 14 - 0, fighting out of London, Mateusz Biernat!
The judges for this bout are Paul Tew, Richard Clark and James Atkins.
The bell rings for round one and we are underway!
Biernat moves his head to the side to avoid a jab but walks straight into a cross.

It looks like Mateusz Biernat has been cut.
Biernat has taken the fight to the clinch.
Koli blocks a couple of punches on the inside.
Koli unloads a knee to the mid-section. Biernat lets out a prehistoric sounding urrrrgh.
Koli lands on the inside with an uppercut.
Biernat creates a bit of distance and throws an elbow that only just misses.
Koli working some nice short punches in the clinch.
The two fighters are working to gain dominance in the clinch.
A short right from Koli.
Koli lands with a quick shot inside that doesn't really do much damage.
Koli definitely looks more muscular than last time we saw him fight.
Koli stalling.
Biernat lands a shoulder strike that jolts his opponent's head backwards.
The crowd are loving this. Great action here.
Koli misses the knee to the body. Nice hip positioning from Biernat.
Koli blocks an elbow strike.
Koli lands with a light punch inside.
Nice elbow from Biernat.
Koli dodges an elbow strike from Biernat.
Biernat pushes off and fires off an elbow that misses, before clinching up again, against the cage.
Biernat creates a bit of distance and throws an elbow that only just misses.
Koli misses the knee to the body. Nice hip positioning from Biernat.
Biernat being controlled against the cage.
Biernat misses with an elbow strike.
That's one minute gone in the round.
Biernat creates a bit of space for himself and sneaks an elbow through Koli's defenses.
Koli gets through Biernat's defenses to land a nice punch to the side of the head.
Koli connects with a nasty looking knee right to Biernat's face.
Koli effectively controlling the action here.
Koli throws a vicious knee straight up the middle but Biernat blocks it with crossed arms.
Koli avoids the elbow strike from Biernat, against the cage.
Biernat throws an elbow but it misses.
Biernat lands an elbow inside.
Koli working on landing some head shots here - that one got through nicely.
Biernat has hold of a leg and is looking for a trip takedown. Koli avoids it nicely though and we remain in the clinch.
Koli leaning against his opponent.
Biernat is trying to work out of this bad position, with his back against the cage.
Biernat looks to throw an elbow but misses.
Koli lands on the inside with an uppercut.
Koli avoids the elbow strike from Biernat, against the cage.
Koli lands a right hand that snaps the head of Biernat backwards.
This has been an exciting period of action!
With the fighters clinched against the cage, Koli creates a bit of distance for himself and scores with a nice uppercut.
That's two minutes gone in the round.
Koli avoids a wild elbow strike from Biernat.
Koli controlling the action here for a moment.
Biernat pushes off and fires off an elbow that misses, before clinching up again, against the cage.
Koli swings away with an uppercut that misses.
Koli blocks an elbow strike from Biernat.
Biernat blocking some punches.
With the two fighters working up against the cage, Biernat just misses with a elbow thrown towards Koli's brow.
Koli with an attempt at a knee that misses.
Koli scores with a shot to the side of Biernat's head.
Biernat has a couple of punches blocked by Koli.
Biernat looks like he'd prefer to be striking at range right now.
Biernat tries a knee to the head but Koli blocks it.
Biernat throws an elbow but it misses.
Kneeeeees! The crowd are calling for knees to the body. Koli obliges.

Koli drops Biernat with a big knee straight up the middle! Biernat is covering up against the cage but manages to escape and gets back to his feet!

Biernat is rocked!
Koli cracks Biernat with a left hook right on the temple and Biernat goes down! He's out! Referee! Stop the fight! Koli lands a few more punches before the dopey ref steps in - hopefully Biernat is OK!
Ladies and gentlemen, after 2:59 of round 1, we have a winner by way of KO (Punch). Kalu Koli!
A victorious Kalu Koli thanked his army of followers in his post fight interview, telling people to make sure they follow him on Twitter.
|
|
|
|
|
|
|
|
|
|
|
|
|
|
|
|
|
|
|
|
|
|
|
| S |
C
A |
G |
S |
C
B |
G |
|
S |
C |
G |
|
energy
A | B |
|
hype
A | B |
|
pop
A | B |
|
mgr
A | B |
|
FIGHT
RATING
66% |
|
|
|
|
|
|
|
Undercard bout
|
Coming up we have a light heavyweight MMA rules bout between Jyrki The Cash (ranked 1977 p4p, 256 weight class) and Daniel Hazlehurst (ranked 1547 p4p, 208 weight class). Hazlehurst has chosen Queen - One Vision as his entrance music. Daniel Hazlehurst has the better chin. Will he look to stand and bang today?
 |
|
 |
| 188 cm
28
210 lbs
7 - 3 - 0 |
|
183 cm
28
202 lbs
12 - 6 - 0 |
Good wrestling
Excellent boxer
Insanely flexible |
|
Good wrestler
Brawler
Good gas tank |
|
| |
|
Ladies and gentlemen. This fight is 3 rounds, in the light heavyweight division.
Introducing the fighter to my left, fighting out of the red corner.
With a record of
7 - 3 - 0, fighting out of Amsterdam, Jyrki The Cash!
And introducing the fighter to my right, fighting out of the blue corner.
With a record of
12 - 6 - 0, fighting out of London, Daniel Hazlehurst!
The judges for this bout are Andrew Berry, James Glass and Donald Grub.
The bell rings for round one and we are underway!
Hazlehurst misses with a hook. The Cash ducked under it nicely.
The Cash takes a body punch that cleary hurt but he's trying not to show any weakness.
The fighters circling - Hazlehurst throws out the jab but it was never going to land.
Hazlehurst misses with a looping left.
Hazlehurst tries to bum rush The Cash with a series of wild strikes but The Cash uses good footwork to avoid the assault.
Daniel Hazlehurst seems to be the more aggressive standup fighter in this bout.
The Cash ducks under a wild hook from Hazlehurst.
Hazlehurst throws an uppercut from half a mile away. The Cash sees it coming and avoids it easily.
Hazlehurst swings and misses with a shot to the body
and The Cash cracks him with a counter punch right on the button.
The Cash misses with a half-hearted attempt at a head kick.
The Cash scores with a nice head shot.
The Cash misses with a looping right.
Hazlehurst ducks right into an uppercut from The Cash.
Hazlehurst misses with a hook.
A slow jab from The Cash misses its intended target.
That's one minute gone in the round.
The Cash fakes with a right hand and throws a good leg kick, right into the thigh. That had to hurt Hazlehurst.
The Cash lands a vicious shot with the stealth of a sniper and the strength of a viper. Are vipers that strong? I can think of lots of things that are stronger than a viper - not many rhyme with sniper though.
The Cash lands with a kick to the temple. Hazlehurst shrugs as if to say "is that all you've got?"
A bone on bone clash there as Hazlehurst blocks the leg kick.
Hazlehurst throws a counter combo.
Hazlehurst steps to the side to avoid the strikes from The Cash.
The Cash swings for the body but Hazlehurst moves out of range.
A punch combination from The Cash misses.
Hazlehurst unleashes a big counter combination but The Cash bobs and weaves and avoids any damage.
Hazlehurst misses with a left hand
and The Cash connects with a straight left hand counter down the middle.
Hazlehurst looks to land a combination but The Cash avoids it well.
The Cash throws a hook but Hazlehurst avoids it easily.
The Cash lands with a nice low kick. That'll leave a bruise.
Hazlehurst misses with an uppercut
and The Cash cracks him with a counter punch right on the button.
We've seen a great period of action over the last minute or so - credit to both fighters for going all out!
Hazlehurst throws a poor cross that misses
and The Cash counters with a lovely shot to the body.
That's two minutes gone in the round.
Hazlehurst misses with an uppercut
and The Cash counters with a crisp hook to the side of the head.
Hazlehurst drops his hands momentarily and The Cash takes advantage with a crisp shot to the head.
The Cash throws a series of strikes that have Hazlehurst backpedaling.
Hazlehurst tries to bum rush The Cash with a series of wild strikes but The Cash uses good footwork to avoid the assault.
Hazlehurst pushing out the jab but it's not landing.
The Cash connects with a crisp jab.
The Cash misses with a jab, cross combination.
Hazlehurst moves forwards but The Cash connects with a nice, crisp jab.
Hazlehurst is holding his hands too far apart here. The Cash throws a hard, straight punch right down the pipe and BOOM! Hazlehurst is out! That punch landed square on the jaw - what a shot!
Ladies and gentlemen, after 2:46 of round 1, we have a winner by way of KO (Punch). Jyrki The Cash!
In his post fight interview, Jyrki The Cash started talking himself up. Luckily his charisma kept the crowd on side and gave him a good reception.
|
|
|
|
|
|
|
|
|
|
|
|
|
|
|
|
|
|
|
|
|
|
|
| S |
C
A |
G |
S |
C
B |
G |
|
S |
C |
G |
|
energy
A | B |
|
hype
A | B |
|
pop
A | B |
|
mgr
A | B |
|
FIGHT
RATING
60% |
|
|
|
|
|
|
|
Undercard bout
|
Coming up we have a lightweight MMA rules bout between Justin Midget (ranked 1884 p4p, 219 weight class) and Kyle Seehaver (ranked 2335 p4p, 266 weight class). Kyle Seehaver will no doubt be looking to use his reach advantage to good effect.
 |
|
 |
| 160 cm
43
160 lbs
35 - 21 - 0 |
|
183 cm
35
155 lbs
9 - 3 - 0 |
Powerful takedowns
Counter fighter
Cardio machine |
|
Excellent grappler
Basic striking
Good gas tank |
|
| |
|
Ladies and gentlemen. This fight is 3 rounds, in the lightweight division.
Introducing the fighter to my left, fighting out of the red corner.
With a record of
35 - 21 - 0, fighting out of New York, Justin Midget!
And introducing the fighter to my right, fighting out of the blue corner.
With a record of
9 - 3 - 0, fighting out of London, Kyle Seehaver!
The judges for this bout are Donald Grub, Richard Clark and William Gold.
The bell rings for round one and we are underway!
Seehaver dives in and scores a takedown into Midget's guard.
Seehaver wants to control from the top but Midget keeps moving.

Midget escapes his hips to the side and looks to be working for an armbar. Seehaver gives him a little smile and shakes his head. No chance.
Midget looking for a guillotine here but Seehaver defends easily.
Seehaver avoids a guillotine attempt easily.
Seehaver not doing a lot at the moment. He'll have to show some more aggression or the fight will get stood up.
Seehaver trying to control the position from guard on top but Midget is wriggling around, looking for whatever he can.
We've had a slow start to the round here - hopefully the action picks up.
Midget looking for submissions off his back, moving his hips, looking for an opening.
Seehaver trying to control the position from guard on top but Midget is wriggling around, looking for whatever he can.
That's one minute gone in the round.
Midget escapes his hips to the side and looks to be working for an armbar. Seehaver gives him a little smile and shakes his head. No chance.
Midget keeping moving, preventing Seehaver from controlling successfully.
Seehaver is stalling in the full guard.
Seehaver trying to control but Midget is working from the bottom.
Seehaver drops back looking for a leg! Midget is in trouble here! The fighters roll with the hold and Midget manages to kick Seehaver off! Seehaver jumps back into Midget's guard.
Seehaver trying to control but Midget is working from the bottom.
Midget looking for submissions from the bottom here. Moving his hips around, possibly looking for an armbar.
That's two minutes gone in the round.
Well. There's a bit of a lull in the action here and the crowd are starting to get restless.
Midget is looking for a guillotine. You can't force these things though and Seehaver defends well.
Seehaver slows down the pace of the fight, as he sits in guard.
Seehaver got a little sloppy there for a moment and Midget has worked his way into a loose triangle - can he finish it?! No, Seehaver has managed to get both his arms back between Midget's legs - danger averted.
Seehaver engaging in some classic timewasting tactics.
Midget throwing his legs up looking for a triangle.
The fighters are pressed up against the cage, both looking to find a bit of space to work.
Seehaver trying to control but Midget is working from the bottom.
The ref warns both fighters not to hold the cage as they work up against the meshing.
Seehaver is in a good position here but he's just trying to control... And he's not even managing to do that successfully.
That's three minutes gone in the round.
Midget throwing his legs up looking for a triangle.
Seehaver trying to control but Midget is working from the bottom.
Seehaver slows down the pace of the fight, as he sits in guard.
Seehaver is trying to work a guillotine from the top, or something like that? Don't know how he thinks he's going to get a finish from there.
Midget has a loose triangle. He'll be looking to tighten that up but Seehaver can see exactly what he's planning and manages to posture up and free himself.
Midget had isolated an arm as going for a kimura. Seehaver defends it easily.
Seehaver trying to control the position from guard on top but Midget is wriggling around, looking for whatever he can.
That's four minutes gone in the round.
A few boos can be heard. I'm sure they will multiply if the fighters don't pick up the pace.
Midget has a loose triangle. He'll be looking to tighten that up but Seehaver can see exactly what he's planning and manages to posture up and free himself.
Seehaver drops back looking for a leg! Midget is in trouble here! The fighters roll with the hold and Midget manages to kick Seehaver off! Seehaver jumps back into Midget's guard.
Midget has a loose triangle. He'll be looking to tighten that up but Seehaver can see exactly what he's planning and manages to posture up and free himself.
Seehaver trying to control the position from guard on top but Midget is wriggling around, looking for whatever he can.
Midget looking for submissions from the bottom here. Moving his hips around, possibly looking for an armbar.
Boooooooooooooooooooo!!! God, this has been a terrible round. Come on you two, sort yourselves out!
Midget is throwing his legs up, looking for submissions. Seehaver is aware though and is defending well.
Midget had isolated an arm as going for a kimura. Seehaver defends it easily.
Midget working from the bottom, still in full guard. He's managed to get a loose triangle. Seehaver doesn't seem to be doing much to defend here, obviously he feels comfortable in the position. Seehaver manages to throw the legs off his shoulder and he's back into guard - no problem.
And thats the end of the round the fighters go back to their corners.
A close round but Kyle Seehaver will probably get the nod.
The referee calls time. The cornermen exit stage left and we're back to business.
Midget gets caught on his heels momentarily as he allows Seehaver to score an easy takedown into full guard.
Seehaver wants to control from the top but Midget keeps moving.
Midget escapes his hips to the side and looks to be working for an armbar. Seehaver gives him a little smile and shakes his head. No chance.
Seehaver trying to control the position from guard on top but Midget is wriggling around, looking for whatever he can.
We've had a slow start to the round here - hopefully the action picks up.
Seehaver is intent on slowing down the pace of the fight, simply looking to control.
That's one minute gone in the round.
Midget keeping moving, preventing Seehaver from controlling successfully.
Seehaver is trying to work a guillotine from the top, or something like that? Don't know how he thinks he's going to get a finish from there.
Midget keeping moving, preventing Seehaver from controlling successfully.
Seehaver drops back looking for a leg! Midget is in trouble here! The fighters roll with the hold and Midget manages to kick Seehaver off! Seehaver jumps back into Midget's guard.
Midget is working actively off his back, looking to secure an arm or perhaps work for a triangle.
Midget has his foot on Seehaver's thigh. He's trying to push off and get in position for a triangle, I think. Seehaver works his way back into a safe position though.
Midget is throwing his legs up, looking for submissions. Seehaver is aware though and is defending well.
Seehaver trying to control the position from guard on top but Midget is wriggling around, looking for whatever he can.
That's two minutes gone in the round.
A lull in the action here being met with boos from the crowd.
Seehaver has a momentary lapse of concentration, allowing Midget to throw up a leg and lock on what appears to be a pretty tight triangle! Seehaver is fighting it off but it's all too little too late - Midget pulls down on the head and he's put Seehaver to sleep! This one is all over!
Ladies and gentlemen, after 2:22 of round 2, we have a winner by way of Submission (Triangle). Justin Midget!
|
|
|
|
|
|
|
|
|
|
|
|
|
|
|
|
|
|
|
|
|
|
|
| S |
C
A |
G |
S |
C
B |
G |
|
S |
C |
G |
|
energy
A | B |
|
hype
A | B |
|
pop
A | B |
|
mgr
A | B |
|
FIGHT
RATING
23% |
|
|
|
|
|
|
|
Co-main event
|
Coming up we have a lightweight MMA rules bout between Yusuke Urameshi (ranked 346 p4p, 40 weight class) and John Rbn (ranked 1544 p4p, 188 weight class). Urameshi's ring entrance music is that housewives' favourite, Smile Bomb. John Rbn has the better chin. Will he look to stand and bang today?
 |
|
 |
| 172 cm
28
160 lbs
20 - 7 - 0 |
|
175 cm
26
157 lbs
5 - 2 - 0 |
Good wrestling
Excellent boxer
Insanely flexible |
|
Good wrestler
Dangerous knees
Good gas tank |
|
| |
|
Ladies and gentlemen. This fight is 5 rounds, for the lightweight championship of the world!
Introducing the champion to my left, fighting out of the red corner.
With a record of
20 - 7 - 0, fighting out of Las Vegas, Yusuke Urameshi!
And introducing the challenger to my right, fighting out of the blue corner.
With a record of
5 - 2 - 0, fighting out of Las Vegas, John Rbn!
The judges for this bout are James Glass, Andrew Berry and Daniel Bishop.
The bell rings for round one and we are underway!
Rbn has closed the distance and engaged Urameshi in a clinch.
Urameshi lands a hook to the side of the head.
Rbn throws an elbow but it misses.
Urameshi avoids the elbow strike from Rbn, against the cage.
Rbn throws an elbow that misses.
Urameshi blocks an elbow strike.
Rbn throws an elbow but it's blocked.
Rbn misses with an elbow over the top.
A short body shot lands from Urameshi as the two fighters clinch.
Rbn misses with an elbow strike.
With the two fighters working up against the cage, Rbn just misses with a elbow thrown towards Urameshi's brow.
Rbn prevents a body shot from Urameshi.
Urameshi swings wildly with an uppercut but Rbn uses good head movement to avoid it.
Rbn creates a bit of distance and throws an elbow that only just misses.
Urameshi lands a nice uppercut.
Urameshi misses with a shot to the kidneys.
Urameshi lands a right uppercut that snaps the head of Rbn backwards.
Rbn blocks a body shot from Urameshi.
Rbn comes over the top with an elbow. That landed flush.

It looks like Yusuke Urameshi has been cut.
Wooooo! Give it up for these two warriors! They are putting on a show!
A quick uppercut on the inside from Urameshi.

Urameshi manages to break the clinch.
Urameshi scores with a jab to the body.
Urameshi lands with a straight right. Rbn didn't see that one coming.
Urameshi throws a shot to the body.
That's one minute gone in the round.
Rbn moves into the clinch.
Urameshi scores with a shot to the side of Rbn's head.
Urameshi lands a right hand.
Urameshi dodges an elbow strike from Rbn.
Rbn misses with an elbow over the top.
Urameshi blocks the elbow strike.
Urameshi misses with a shot to the kidneys.
Urameshi swings away with an uppercut that misses.
Rbn creates a bit of distance and throws an elbow that only just misses.
Urameshi working some nice short punches in the clinch.
Urameshi misses with a body punch.
Urameshi lands a body shot in the clinch.
With the two fighters working up against the cage, Rbn just misses with a elbow thrown towards Urameshi's brow.
Urameshi breaks from the clinch.
A cross from Urameshi lands.
Rbn pivots, looking for a leg kick but Urameshi is out of range and Rbn settles back down.
Urameshi stooping low to avoid any incoming strikes and then lunges in with an uppercut come cross that lands flush.
We've seen a great period of action over the last minute or so - credit to both fighters for going all out!
Urameshi moving in and out of range nicely, whilst landing the scoring shot.
Rbn tries to close the distance and clinch but Urameshi swats him to one side with an open hand palm strike and circles away.
Urameshi scores with a jab to the head.
That's two minutes gone in the round.
Rbn gets cracked with a nice right hand there by Urameshi.
The fight moves into the clinch position.
Urameshi blocks an elbow strike.
Urameshi presses Rbn against the cage and delivers a mid-strength body shot.
Urameshi lands a nice uppercut.
Urameshi lands a body shot in the clinch.
Rbn throws an elbow but it misses.
Urameshi tries to throw a body punch but Rbn avoids it by throwing Urameshi back against the cage.
Urameshi goes for a body shot but it's blocked.
Urameshi breaks the clinch and we return to the middle of the mat.
It looks like Urameshi has been trying to sharpen up his punching technique, as it looks crisper than last time we saw him.
Rbn wants to clinch up but Urameshi keeps it at a distance.
Rbn misses with a lunging right hand
and Urameshi counters nicely by changing levels and landing a hook to the body.
Rbn moves into the clinch.
Rbn creates a bit of distance and throws an elbow that only just misses.
Rbn misses with an elbow strike.
Urameshi misses with a punch to the body.
Urameshi misses with a body punch.
Urameshi misses with a short punch on the inside.
Urameshi working aggressively here.
Urameshi lands a right hand.
Rbn throws a nice elbow but it doesn't land.
That's three minutes gone in the round.
Rbn blocks a punch to the side of the head.
Rbn blocks a body shot from Urameshi.
Urameshi avoids a wild elbow strike from Rbn.
Rbn lands an elbow that stopped Urameshi in his tracks for a moment.
Urameshi digs a right hand into Rbn's ribs. Those have got to be taking their toll on Rbn's gas tank.
Rbn misses with an elbow strike.
Rbn gets an overhook and lands an elbow to the side of the head.
Urameshi throws a punch but it's blocked by Rbn.
Urameshi blocks an elbow strike.
Urameshi blocks an elbow strike from Rbn.
Urameshi tries to work over Rbn's body with a swooping hook but it only glances the target.
Rbn misses with an elbow over the top.
Urameshi tried to land a shot to the body but connects with Rbn's elbow.
Urameshi misses with some punches.
Urameshi misses with a short punch on the inside.
Rbn throws an elbow but it's blocked.
Urameshi avoids the elbow strike from Rbn, against the cage.
Rbn creates a bit of distance and throws an elbow that only just misses.
Urameshi presses Rbn against the cage and delivers a mid-strength body shot.
Urameshi breaks the clinch and we return to the middle of the mat.
Rbn moves into the clinch.
Urameshi stays in close to his opponent and throws a right hand to the body.
That's four minutes gone in the round.
The crowd cheering loudly, showing their appreciation for the quality fight we're seeing here.
Rbn throws an elbow but it misses.
Urameshi misses with a shot to the kidneys.
Urameshi avoids a wild elbow strike from Rbn.
Rbn blocks a body shot from Urameshi.
Urameshi blocks an elbow strike from Rbn.
Rbn blocks a couple of punches on the inside.
Rbn throws an elbow that misses.
Rbn looks to throw an elbow but misses.
The fighters are starting to perspire pretty heavily.
Rbn creates a bit of distance and throws an elbow that only just misses.
Urameshi lands a left hand.
Rbn misses with an elbow over the top.
Urameshi lands a left hand that snaps the head of Rbn backwards.
Urameshi throws a head punch that misses.
Urameshi lands a left hand that snaps the head of Rbn backwards.
Still in the clinch, Urameshi scores with a nice short uppercut.
With the fighters up against the cage, Rbn throws an elbow but misses.
The crowd applaud the fighters' efforts here as the round comes to an end.
A nice right hand lands inside from Urameshi.
Urameshi can't find room to land a body shot as Rbn controls the action.
A head punch on the inside from Urameshi fails to land.
Rbn throws an elbow but it's blocked.
Rbn pushes off an throws an elbow but Urameshi leans to the side and avoids it. We're back to clinching against the cage.
Urameshi goes for a body shot but it's blocked.
And thats the end of the round the fighters go back to their corners.
Yusuke Urameshi dominated that round.
The cut man is working on Yusuke Urameshi's cut.
The corners get their ten second warning. Both fighters stand from their stools and stare eachother down, ready to get back to the action.
Urameshi lands a body shot.
John Rbn seems to be the more aggressive standup fighter in this bout.
Rbn takes a jab right on the nose. That must have hurt but he shrugs his shoulders and looks to return the favor.
Rbn tries to clinch but Urameshi moves away
and Urameshi counters with a straight right hand.
Rbn tries to close the distance and clinch but Urameshi swats him to one side with an open hand palm strike and circles away.
Urameshi avoids the clinch attempt nicely.
Urameshi throws a big counter combination but Rbn scrambles out of danger and avoids any damage.
Urameshi is really dominating this fight. Is there anything that Rbn can do to turn this around?
Rbn closes the distance and presses his opponent up against the cage.
Rbn throws an elbow that misses.
Urameshi throws a hook to the body. More of an arm punch but it's all scoring with the judges.
Urameshi breaks the clinch and we return to the middle of the mat.
Urameshi jabs at Rbn's body.
Urameshi scores with a jab. Rbn acknowledges it with a nod of the head.
Urameshi cracks Rbn with a right hand to the side of the head.
Urameshi getting the better of the striking in that exchange.
Wooooo! Give it up for these two warriors! They are putting on a show!
Rbn moves in looking to clinch but Urameshi pushes him off.
Rbn closes the distance looking to clinch
and Urameshi counters with a stiff right hand.
Rbn wants to clinch but Urameshi slips to the side
and Urameshi connects with a straight left hand counter down the middle.
Rbn drives through and clinches with Urameshi against the cage.
That's one minute gone in the round.
Urameshi blocks the elbow strike.
Urameshi breaks the clinch and we're back to striking at distance.
The fight stays on the outside here - Rbn looks like he's thinking about clinching though.
Urameshi dips down and scores with a jab to the body.
Rbn tries to clinch up but Urameshi circles away and keeps his distance.
A quick step to the side and Urameshi tries to counter with a shot to the body but it doesn't connect.
Rbn wants to clinch.
Urameshi lands a powerful looking uppercut that connected with his opponent's jaw.
A lazy left from Urameshi finds it's target.
Urameshi circles away from the clinch attempt
and Urameshi counters with a quick right hand to the jaw.
Rbn moves into the clinch.
That's two minutes gone in the round.
With the fighters clinched against the cage, Urameshi creates a bit of distance for himself and scores with a nice uppercut.
A head punch blocked on the inside by Rbn.
Yusuke Urameshi has scored more points in the clinch so far.
Rbn throws an elbow that misses.
Rbn prevents a body shot from Urameshi.
Urameshi scores with a hook to the body.
Urameshi scores with a shot to the side of Rbn's head.
Fantastic stuff here - a very entertaining period of action, which has drawn cheers from the crowd.
Rbn creates a bit of space for himself and sneaks an elbow through Urameshi's defenses.
Urameshi lands a left hand.
Urameshi breaks the clinch.
Rbn closes the distance and pushes Urameshi back into the cage.
Urameshi misses with a body punch.
Urameshi scores with an uppercut up the middle.
Urameshi swings away with an uppercut that misses.
Rbn throws an elbow that misses.
Rbn throws a nice elbow but it doesn't land.
A short uppercut from Urameshi.
A short right hand to the side of the head by Urameshi.
Urameshi lands with a quick shot inside that doesn't really do much damage.
Urameshi avoids the elbow strike from Rbn, against the cage.
Rbn throws an elbow but it misses.
Rbn pushes off and fires off an elbow that misses, before clinching up again, against the cage.
Rbn pushes off and fires off an elbow that misses, before clinching up again, against the cage.
That's three minutes gone in the round.
A short right from Urameshi.
With the fighters up against the cage, Rbn throws an elbow but misses.
With the two fighters working up against the cage, Rbn just misses with a elbow thrown towards Urameshi's brow.
Urameshi lands with a right to the head.
Urameshi misses with a shot to the kidneys.
Urameshi avoids the elbow strike from Rbn, against the cage.
Rbn throws an elbow that misses.
Rbn throws an elbow that misses.
Rbn throws an elbow but it misses.
Urameshi working aggressively here.
Urameshi misses with a short punch on the inside.
Urameshi lands punches inside but they're not really causing much damage.
Rbn throws an elbow but it's blocked.
Urameshi lands an uppercut.
Urameshi tries a shoulder strike but it doesn't do any damage.
Urameshi digs a right hand into Rbn's ribs. Those have got to be taking their toll on Rbn's gas tank.
Rbn throws an elbow that misses.
Rbn blocks a body shot from Urameshi.
Rbn pushes off and fires off an elbow that misses, before clinching up again, against the cage.
Urameshi lands a body punch - he's looking to wear down Rbn.
A body shot lands from Urameshi.
Rbn is breathing heavily.
The fans in attendance giving it up for the two fighters, who have really let it all hang out in the last minute or so!
Urameshi lands with a short head shot on the inside.
That's four minutes gone in the round.
Urameshi dodges an elbow strike from Rbn.
Urameshi lands a hook to the body. It's hard to tell if that hurt Rbn or not.
Rbn blocks a body shot from Urameshi.
With the two fighters working up against the cage, Rbn just misses with a elbow thrown towards Urameshi's brow.
A short uppercut from Urameshi.
Urameshi scores with a shoulder strike.
Urameshi lands a body shot.
Rbn looks to throw an elbow but misses.
Rbn throws an elbow but it misses.
Urameshi is leaning against Rbn and scores with a nice uppercut to the body.
Urameshi breaks the clinch.
Rbn walks into a stiff left hand from Urameshi.
Rbn tries to clinch but Urameshi moves away
and Rbn takes a counter punch right on the button for his troubles.
Urameshi scores with the left hand. Rbn knows he should have avoided that one.
Urameshi connects with a right hand. Rbn shakes it off.
The crowd applaud the fighters' efforts here as the round comes to an end.
Urameshi throws a good cross that connects.
Rbn takes one on the button.
Urameshi is moving around nicely and scores here with a single head shot.
Rbn wants to clinch up but Urameshi keeps it at a distance.
Urameshi swung with a counter right hand that didn't connect.
And thats the end of the round the fighters go back to their corners.
Yusuke Urameshi dominated that second round.
The cut man is working on Yusuke Urameshi's cut.
The minute break is over - no more time for sponges and pep talks - back to the action!
Rbn swings widly with a right hand
and Urameshi counters with a stiff right hand.
Rbn has his head snapped back a nice jab. A little nod from Rbn there as he acknowledges the shot.
Urameshi waving his hands out in front of him, looking to distract Rbn.
Rbn wants to clinch.
Rbn tries to clinch but Urameshi moves out of range.
Rbn pushes Urameshi up against the cage in a clinch.
Rbn blocks a couple of punches on the inside.
Urameshi tries to land a shot to the body but it's blocked.
Rbn throws an elbow that misses.
Urameshi breaks the clinch and we return to the middle of the mat.
Rbn wants to clinch but Urameshi slips to the side
and Urameshi counters with a lovely straight right hand!
Yusuke Urameshi is winning the standup battle so far.
We've had a slow start to the round here - hopefully the action picks up.
Rbn instigates a clinch.
With the fighters up against the cage, Rbn throws an elbow but misses.
Urameshi breaks from the clinch.
Rbn darts in and clinches Urameshi up against the cage.
Urameshi scores with a nice hook to the head.
We've seen a great period of action over the last minute or so - credit to both fighters for going all out!
Urameshi blocks an elbow strike from Rbn.
That's one minute gone in the round.
Rbn blocks a body shot from Urameshi.
A right hook to the body lands for Urameshi.
Rbn pushes off an throws an elbow but Urameshi leans to the side and avoids it. We're back to clinching against the cage.
Urameshi throws a blind hook that connects with the side of Rbns head.
Rbn blocks a punch to the side of the head.
Rbn blocks a couple of punches on the inside.
Urameshi can't find room to land a body shot as Rbn controls the action.
Rbn blocking some punches.
Urameshi blocks the elbow strike.
Urameshi lands with a short punch from the clinch.
Rbn throws an elbow but it's blocked.
Still in the clinch, Urameshi scores with a nice short uppercut.
An uppercut on the inside fails to land for Urameshi.
Urameshi breaks the clinch.
A decent looking cross lands there for Urameshi.
Urameshi ducks down and throws a hook to the body.
Rbn tries to close the distance and clinch up but Urameshi swats him away and circles back towards the center.
Rbn wants to clinch but Urameshi slips to the side
and Urameshi counters with a two punch combo.
The fans in attendance giving it up for the two fighters, who have really let it all hang out in the last minute or so!
Rbn moves to clinch but Urameshi breaks away
and Urameshi counters with a nice uppercut.
That's two minutes gone in the round.
Rbn keeping a good distance there, avoiding the body shot.
Rbn throws an ugly left hook that misses
letting Urameshi counter with a right hand.
The fight stays on the outside here - Rbn looks like he's thinking about clinching though.
Rbn tries to clinch but Urameshi moves away
and Urameshi counters with a right hand to the body.
Rbn gets a clinch.
Urameshi goes for a body shot but it's blocked.
With the fighters clinched against the cage, Urameshi creates a bit of distance for himself and scores with a nice uppercut.
Urameshi lands a nice uppercut.
Urameshi misses with a punch on the inside.
A nice left hand lands by Urameshi.
Urameshi's corner calls for him to break the clinch, which he does.
Rbn looks to clinch
and Urameshi counters nicely by changing levels and landing a hook to the body.
Nice shot by Urameshi.
Rbn wants to clinch but Urameshi slips to the side
and Urameshi counters with a straight right hand.
The fight moves into the clinch position.
A short right from Urameshi on the inside.
That's three minutes gone in the round.
A short body shot lands from Urameshi as the two fighters clinch.
Urameshi lands a hook to the side of the head.
Urameshi lands a nice shot to the body.
Rbn takes a big intake of breath there - he's definitely tired.
Urameshi lands a body punch in the clinch.
Urameshi blocks an elbow strike from Rbn.
Urameshi lands a shoulder strike that jolts his opponent's head backwards.
Urameshi has a couple of punches blocked by Rbn.
Nice body punch from Urameshi.
A nice left hand lands by Urameshi.
Urameshi pushes off and circles away, back to the middle of the mat.
Urameshi lands a slapping body shot.
Urameshi lands a two punch combo.
Rbn is rocked!
Rbn wants to clinch but Urameshi slips to the side
and Urameshi counters with a stiff right hand.
Rbn is still on wobbly legs! Can Urameshi finish him?
This is a great period of action - very entertaining stuff!
Urameshi tries to keep at a distance but Rbn has taken the fight into the clinch.
Urameshi lands an uppercut.
A short right from Urameshi.
Rbn throws an elbow but it misses.
A hook to the body from Urameshi.
Urameshi dodges an elbow strike from Rbn.
That's four minutes gone in the round.
Rbn misses with an elbow over the top.
Rbn pushes off an throws an elbow but Urameshi leans to the side and avoids it. We're back to clinching against the cage.
Urameshi lands an uppercut.
Urameshi lands a body punch - he's looking to wear down Rbn.
Urameshi breaks the clinch and we return to the middle of the mat.
Urameshi lands with a good body shot.
Rbn throws a poor cross that misses
and Urameshi counters with a quick right hand to the jaw.
Urameshi keeps the fight on the outside.
Urameshi with a body punch. A glancing blow.
Rbn takes one on the chin but seems OK.
Rbn fails with an attempt to clinch.
Rbn wants to clinch but Urameshi slips to the side
and Urameshi counters with a crisp hook to the side of the head.
Urameshi fakes and then throws a beautiful body shot. Rbn looks a bit winded and takes a step backwards to take a breath.
Urameshi connects with a single shot there.
The crowd applaud the fighters' efforts here as the round comes to an end.
Urameshi lands a nice looking body shot.
Rbn tries to grapple but his opponent circles
enabling Urameshi to counter with a crisp jab.
And thats the end of the round the fighters go back to their corners.
Yusuke Urameshi clearly takes that round.
The cut man is working on Yusuke Urameshi's cut.
That's time! Back to the action!

Rbn closes the distance but Urameshi moves to the side
and Urameshi counters with a deadly accurate combination that rocks Rbn badly! He tries to strike back but Urameshi puts an end to that with another precision combo that knocks Rbn out cold! Oh man, Rbn will never hear the end of this one!
Ladies and gentlemen, after 0:05 of round 4, we have a winner by way of KO (Punches). Yusuke Urameshi!
Yusuke Urameshi retains his lightweight title!
An out of breath Yusuke Urameshi thanked his loyal fans in his post fight interview, giving them credit for his success over the course of his career.
|
|
|
|
|
|
|
|
|
|
|
|
|
|
|
|
|
|
|
|
|
|
|
| S |
C
A |
G |
S |
C
B |
G |
|
S |
C |
G |
|
energy
A | B |
|
hype
A | B |
|
pop
A | B |
|
mgr
A | B |
|
FIGHT
RATING
85% |
|
|
|
|
|
|
|
Main event
|
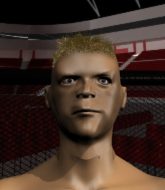
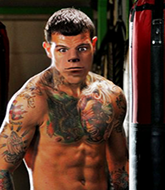
Coming up we have a welterweight MMA rules bout between Hershel Hasselhoff (ranked 2227 p4p, 313 weight class) and David Gomes (ranked 1083 p4p, 161 weight class). Gomes is bouncing up and down as he enters the arena, backed by AC/DC - Thunderstruck . Both fighters look fresh as a daisy as they make their way towards the cage.
 |
|
 |
| 180 cm
36
175 lbs
16 - 15 - 0 |
|
190 cm
29
176 lbs
12 - 3 - 0 |
BJJ Brown Belt
Counter fighter
Granite chin |
|
Excellent grappler
Counter fighter
Powerful |
|
| |
|
Ladies and gentlemen. This fight is 3 rounds, in the welterweight division.
Introducing the fighter to my left, fighting out of the red corner.
With a record of
16 - 15 - 0, fighting out of New York, Hershel Hasselhoff!
And introducing the fighter to my right, fighting out of the blue corner.
With a record of
12 - 3 - 0, fighting out of Las Vegas, David Gomes!
The judges for this bout are James Atkins, Steven Brown and Colin Fotheringham.
The bell rings for round one and we are underway!
We've got one fighter who appears to only be looking to counter and the other not looking particularly aggressive either, so we could be in for a dull fight.
Hasselhoff tries to score a power double leg takedown but Gomes sees that one coming and sprawls well. That will dishearten Hasselhoff somewhat.
Gomes feints the counter takedown.
Hasselhoff throws a looping left and ducks down for a takedown. He's got his arms around Gomes's waist but Gomes gets an underhook and avoids the takedown by throwing Hasselhoff off to one side.
Gomes feints the counter takedown.
Hasselhoff changes levels and looks for a double leg takedown. Gomes tries to avoid it but Hasselhoff manages to keep hold of a leg and drag Gomes to the ground. Gomes escapes though and pops straight back up to his feet.
That's three failed takedown attempts in the round for Hershel Hasselhoff. That's going to take a lot out of him.
We've had a slow start to the round here - hopefully the action picks up.

Hasselhoff shoots in with a lovely double leg takedown. Gomes manages to land in full guard to minimise the damage.
Hasselhoff trying to control but Gomes is working from the bottom.
The ref warns both fighters not to hold the cage as they work up against the meshing.
That's one minute gone in the round.
Gomes escapes his hips to the side and looks to be working for an armbar. Hasselhoff gives him a little smile and shakes his head. No chance.
Gomes is pulling down on Hasselhoff's head. It's preventing any offense from Hasselhoff, at least for the moment.
Gomes keeping moving, preventing Hasselhoff from controlling successfully.
Gomes is trying to control the position from the bottom.
Gomes keeping full guard, as Hasselhoff tries to pass.
The fighters are pressed up against the cage, both looking to find a bit of space to work.
Hasselhoff wants to control from the top but Gomes keeps moving.
Gomes is looking for a guillotine. You can't force these things though and Hasselhoff defends well.
Hasselhoff stands up and looks to throw the legs aside to pass to side control. Gomes swivels though and keeps the full guard.
That's two minutes gone in the round.
A real slowdown in the pace of the fight for a moment, as Gomes holds on and takes a little breather.
Our spies down at at AREA 51 GROUND inform us that Gomes has really been working on his submissions in the buildup to this fight. Will it pay off?
Gomes looking for submissions off his back, moving his hips, looking for an opening.
Gomes manages to sweep nicely, so he's now on top. Hasselhoff manages to get himself to full guard.

Gomes seems content to control from guard here. He's going to have to remain active though if he doesn't want to get stood back up.
Gomes looking to pass the guard.
Gomes looking to sit in guard and control but Hasselhoff gets the butterfly guard and sweeps. He's now in the guard on the top.

Gomes escapes his hips to the side and looks to be working for an armbar. Hasselhoff gives him a little smile and shakes his head. No chance.
Hasselhoff trying to pass the guard but can't manage it just yet.
Gomes has his foot on Hasselhoff's thigh. He's trying to push off and get in position for a triangle, I think. Hasselhoff works his way back into a safe position though.
That's three minutes gone in the round.
Gomes manages to sweep nicely, so he's now on top. Hasselhoff manages to get himself to full guard.
Hasselhoff keeping moving, preventing Gomes from controlling successfully.
Gomes pressing down on his opponent's thigh, looking to pass guard. Hasselhoff is keeping the position for now.
Hasselhoff looking for submissions off his back, moving his hips, looking for an opening.
Gomes pressing down on his opponent's thigh, looking to pass guard. Hasselhoff is keeping the position for now.
Gomes advances position into side control!
Gomes has hold of Hasselhoff's arm. He's looking for a kimura. Hasselhoff seems comfortable defending it but Gomes has shifted his position slighty and is cranking on the arm! Hasselhoff is real pain and he's forced to tap out! Hasselhoff is disgusted with himself for not defending it better but Gomes couldn't care less - he's delighted!
Ladies and gentlemen, after 3:42 of round 1, we have a winner by way of Submission (Kimura). David Gomes!
During a confident post fight interview, David Gomes thanked all his fans. He seemed very genuine when describing how motivated his fans keep him.
|
|
|
|
|
|
|
|
|
|
|
|
|
|
|
|
|
|
|
|
|
|
|
| S |
C
A |
G |
S |
C
B |
G |
|
S |
C |
G |
|
energy
A | B |
|
hype
A | B |
|
pop
A | B |
|
mgr
A | B |
|
FIGHT
RATING
34% |
|
|
|
|
|
|
|
|
|
|
