 |
QFC Tournament 941 Round 1 PBP Commentary |
Undercard bout
|
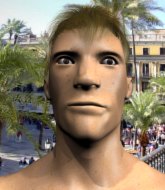
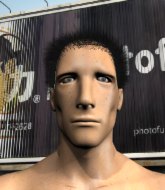
Coming up we have a light heavyweight MMA rules bout between Johnny James (ranked 5119 p4p, 0 weight class) and John Kuhn (ranked 5390 p4p, 514 weight class). We have two fighters making their debuts here, so let's see who comes out of this one with their first professional victory.
 |
|
 |
| 187 cm
20
214 lbs
0 - 0 - 0 |
|
185 cm
18
170 lbs
0 - 0 - 0 |
BJJ White Belt
Solid boxing
Granite chin |
|
BJJ White Belt
Brawler
Solid chin |
|
| |
|
Ladies and gentlemen. This fight is 3 rounds, in the light heavyweight division.
Introducing the fighter to my left, fighting out of the red corner.
With a record of
0 - 0 - 0, fighting out of London, Johnny James!
And introducing the fighter to my right, fighting out of the blue corner.
With a record of
0 - 0 - 0, fighting out of London, John Kuhn!
The judges for this bout are Paul Tew, James Ackerman and Chris Edwards.

The bell rings for round one and we are underway!
No luck for Kuhn with that takedown attempt.
Kuhn slips under a jab.
Kuhn fails miserably with a takedown attempt.
James misses with a two punch combination.
The fighters circle momentarily. James darts into range and connects with a nice straight punch.
Nice sprawl there from James as Kuhn shoots in.
Johnny James has stuffed three takedown attempts in the round now. That's going to take a lot out of John Kuhn.

Kuhn closes the distance and clinches.
James wants to break the clinch but can't.
Kuhn taking a break, stalling in the clinch.
We've had a slow start to the round here - hopefully the action picks up.
James tries to break free but Kuhn pushes him back against the cage.
Kuhn is working for takedown but James is calmly controlling the position for now.
Kuhn lands with a short punch from the clinch.
Kuhn tries to take the fight to the ground by pulling guard but can't manage it.

That's one minute gone in the round.
A frustrated look appears on James's face as he tries to break the clinch.

Kuhn breaks the clinch and we're back to striking at distance.
A combination from Kuhn does no damage.
Kuhn keeps the fight on the outside.
Good shot there by James.
James jabs Kuhn to the body, keeping him at a distance.
Kuhn misses with a takedown attempt. He shot from a bit too far out.
Kuhn looks winded!
James scores with a punch to the head.
James misses with a two punch combination.
Kuhn gets caught by a brutal right hook which buckles his knees! Kuhn tries to backpedal with his spaghettilegs but James is headhunting and goes for the kill. A jab and a right hook connect and Kuhn buckles badly as his eyes roll back. The referee steps in and saves Kuhn!! Kuhn is complaining but he was clearly out on his feet. James throws his mouthpiece into the crowd. Mmmm spit-tastic.
Ladies and gentlemen, after 1:53 of round 1, we have a winner by way of TKO (Strikes). Johnny James!
|
|
|
|
|
|
|
|
|
|
|
|
|
|
|
|
|
|
|
|
|
|
|
| S |
C
A |
G |
S |
C
B |
G |
|
S |
C |
G |
|
energy
A | B |
|
hype
A | B |
|
pop
A | B |
|
mgr
A | B |
|
FIGHT
RATING
46% |
|
|
|
|
|
|
|
Undercard bout
|
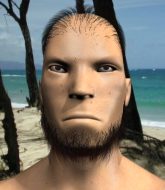
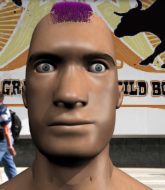
Coming up we have a light heavyweight MMA rules bout between Nash Anderson (ranked 4852 p4p, 0 weight class) and Ramon Dix (ranked 4727 p4p, 0 weight class). We have two fighters making their debuts here, so let's see who comes out of this one with their first professional victory.
 |
|
 |
| 200 cm
20
220 lbs
0 - 0 - 0 |
|
179 cm
20
205 lbs
0 - 0 - 0 |
BJJ Purple Belt
Brawler
Good chin |
|
BJJ Purple Belt
Basic striking
Granite chin |
|
| |
|
Ladies and gentlemen. This fight is 3 rounds, in the light heavyweight division.
Introducing the fighter to my left, fighting out of the red corner.
With a record of
0 - 0 - 0, fighting out of London, Nash Anderson!
And introducing the fighter to my right, fighting out of the blue corner.
With a record of
0 - 0 - 0, fighting out of London, Ramon Dix!
The judges for this bout are James Ackerman, Steven Brown and Chris Edwards.
The bell rings for round one and we are underway!
Dix fails with an attempt to clinch.
Anderson feinted with a counter takedown.
Anderson scores with a kick to the body.
Dix fails in his attempt to clinch.
Dix is looking to clinch.
Dix closes the distance and presses his opponent up against the cage.
Anderson is trying to push Dix away but Dix has him pressed against the cage, so he's going nowhere.
Dix is trying to maintain a safe position but Anderson gets an underhook and turns Dix into the cage.
Anderson wants to push off and get back to the center of the mat but Dix has him pressed against the cage.
Anderson is looking to break free of the clinch but Dix has double underhooks.
Anderson has Dix pressed against the cage.
We've had a slow start to the round here - hopefully the action picks up.
Good anti-grappling being displayed by Anderson as Dix tries to tie him up.
Anderson is looking to break free of the clinch but Dix has double underhooks.
That's one minute gone in the round.
Anderson is stalling here.
Anderson holding his opponent close, against the cage.
The crowd are getting pretty annoyed with Anderson for his constant stalling in the clinch and are voicing their displeasure.
Anderson slowing the pace effectively.
Dix avoids the elbow strike from Anderson, against the cage.
Both guys are working to get underhooks.
Dix keeps the fight in the clinch, despite Anderson's efforts to push away.
Dix has Anderson pressed against the cage, preventing Anderson from circling away and getting back to striking at range.

That's two minutes gone in the round.
A few boos can be heard. I'm sure they will multiply if the fighters don't pick up the pace.
Anderson tries to jump guard but he falls flat on his backside. Dix smiles and moves away.
Dix is looking to clinch but Anderson is avoiding it.
Dix wants to clinch.
Dix tries to clinch but is not successful on this occasion.
Dix is looking to take this fight into the clinch.
Dix tries to close the distance and clinch up but Anderson swats him away and circles back towards the center.

Anderson gets the takedown into side control.
Dix is trying to get back to half guard.

Anderson wants to work for a kimura but he's foiled early by Dix, who protects the arm well.

That's three minutes gone in the round.
Anderson passes to full mount! That's big trouble for Dix!
BOOM! Anderson connects with a massive shot to the dome!
Dix keeping his composure momentarily, calmly looking to get back to half guard.
Anderson with good strikes from the mount here!
Dix tries to get back to half guard but can't.
Anderson content just to control the position here.
The ref warns both fighters not to hold the cage as they work up against the meshing.
Dix is looking to improve his position but Anderson isn't that keen on the idea.

Anderson stands up from the dominant position. He obviously fancies his chances standing.

That's four minutes gone in the round.
Dix has Anderson up against the cage in a clinch.
The fighters are pressed against the cage, as the pace of the fight slows.
A frustrated look appears on Anderson's face as he tries to break the clinch.
The pace really dropping off here, momentarily.
Boooooooooooooooooooo!!! God, this has been a terrible round. Come on you two, sort yourselves out!
Anderson gets the body lock takedown. After a quick scramble, Dix regains guard.
And thats the end of the round the fighters go back to their corners.
Nash Anderson dominated that round.
That's the end of the round. The referee orders the cornermen out of the cage so we can get back down to business.

Anderson throws a body kick that misses.
Anderson keeps the fight on the outside.
Anderson throws a big counter combination but Dix scrambles out of danger and avoids any damage.
Anderson looks for a takedown. He's got it. We're now in half guard.
Anderson decides to return to a standing position.
Anderson looking to shoot here. He's gone for it and he's landed a takedown into side control! Oh, that's bad for Dix!
Dix tries to work a leg under to get back to half guard but Anderson wriggles his own leg back out and remains in side control.
Anderson content to control the pace. The referee will try and keep them active though.
Dix manages to get one leg in to regain half guard.
Anderson perhaps working for something from half guard, or maybe not. It looks like he's just sitting there.

Dix looking for submissions from an awkward position here.
Dix looking for submissions off his back.
Neither fighter is being very active at the moment, with Anderson in particular looking to stall.
That's one minute gone in the round.
Anderson is trying to work for a kimura. This could be trouble! No, Dix has managed to free his arm - good work.
Anderson is controlling the pace.
Dix moves his hips nicely and gets into full guard.
That's two minutes gone in the round.
There's not a lot going on here and the crowd are letting the fighters know they're not willing to tolerate a lack of action.
Dix escapes his hips to the side and looks to be working for an armbar. Anderson gives him a little smile and shakes his head. No chance.
Anderson is frustrating his opponent with some stalling tactics from top position.
Dix is working actively off his back, looking to secure an arm or perhaps work for a triangle.
Dix is breathing heavily.
Anderson stands up from Dix's guard - Anderson perhaps looking for a knockout.
Anderson scores with a takedown into Dix's guard.
That's three minutes gone in the round.
Anderson slows down the pace of the fight, as he sits in guard.
Dix throws his legs up looking for a submission but Anderson uses it to pass to side control.
Dix tries to buck Anderson off but Anderson is having none of it.
Dix should think about turning a few of those tyres round his middle into muscle if he wants people to take him seriously as an athlete.
Anderson controls the position.
Anderson advances to mount.
Anderson lands a shot to the body, followed up by a shot to the exposed head of his trapped opponent.
That's four minutes gone in the round.
Anderson looking to secure an arm triangle but Dix defends it well.
Dix looking to escape from mount but he's given up his back!
A bit of a pause in the action here. Anderson controlling the positon.
Dix tries to escape the position - he's now mounted. Is that better or worse? Hard to tell!
Anderson is really dominating this fight. Is there anything that Dix can do to turn this around?
Dix really trying hard to get back to half guard here.
Dix is persisting with the attempt to improve his position.
The crowd thankful this round is nearly over.
Anderson with good strikes from the mount here!
Dix is trying desperately to improve position.
Anderson looks like he's working for a submission but he's not found anything just yet.
And thats the end of the round the fighters go back to their corners.
Nash Anderson dominated that second round.
That's time! Anderson's corner gives him a slap on the ass as he gets ready to fight. This is the final round!

Anderson swats away the attempt to clinch by Dix.
Anderson feinted with a counter takedown.
Dix tries to clinch there but Anderson circles away.
Dix clinches.
Dix has Anderson pushed against the cage.
Anderson looking for a takedown.
Anderson is trying to pull guard but being pressed up against the cage enables Dix to keep the fight standing.
We've had a slow start to the round here - hopefully the action picks up.
Dix keeps control of Anderson as he tries to wriggle out of the double underhooks.
Anderson ties up his opponent against the cage and manages to drag the fight down to the ground. Anderson no doubt will be looking to work submissions from his guard.
Anderson is doing well to control the posture of his opponent and prevent any damage.
Dix looking to pass the guard.
That's one minute gone in the round.
Anderson has Dix pulled in close to control his posture.
Dix trying to pass the guard but can't manage it just yet.
Dix postures up as if he's going to throw some strikes but drops back for an ankle! Anderson is in big trouble! He looks ready to tap! But no, he's escaped and dives on top of Dix, into his guard.

Dix is looking for a triangle but Anderson pushes his legs off easily.
Dix takes a big intake of breath there - he's definitely tired.
Anderson passes Dix's left leg - he's now in half guard.
Anderson sitting and controlling from the half guard.
Dix is looking to sinch up a guillotine here but Anderson pulls his head out easily.
That's two minutes gone in the round.
Anderson controlling the action here.
Nash Anderson overall seems to be getting the better of the ground position in the fight so far.
Dix looking for submissions off his back.
The two fighters exchange a few words. I couldn't hear what they were saying but maybe it's more fun if you make it up yourself. Anderson connects with a nice short shot to Dix's temple.
Anderson works his way into side control.
Anderson controls the position.
That's three minutes gone in the round.
Anderson stands up and we're back to a striking position.
Dix takes the fight into the clinch.
Dix is trying to slow down the pace of the fight but Anderson is keeping busy.
Anderson missing with knees to the body.
Anderson is trying to work out of this bad position, with his back against the cage.
Dix prevents a takedown attempt there.
That's three failed takedown attempts in the round for Nash Anderson. That's going to take a lot out of him.
That's four minutes gone in the round.
The crowd are starting to boo a lack of action.
Dix stalling in the clinch but Anderson improves position.
Dix has Anderson pressed against the cage.
Anderson wants to strike at distance but he can't break free of the clinch.
Anderson tries to jump guard but he falls flat on his backside. Dix smiles and moves away.
The fight stays on the outside here - Dix looks like he's thinking about clinching though.
Boooooooooooooooooooo!!! God, this has been a terrible round. Come on you two, sort yourselves out!

Anderson clinches up against the cage.
Ramon Dix has stepped it up - he knows he needs a finish here!
Nash Anderson is fighting for a decision here - he's started to take the cautious approach.
Anderson gets control of Dix's arms and successfully pulls guard. Anderson will no doubt be looking for submissions off his back.
And that's the end of the fight!
Nash Anderson showed his dominance in that final round.
Well I reckon that's a shut out for Anderson, winning every round. Will the judges agree? They are the ones who matter, even if they are often depressingly incompetent. Over to the ring announcer for the scorecards.
Ladies and gentlemen, after 3 rounds of action, we go to the scorecards for a decision.
Judge James Ackerman scores the fight for Nash Anderson!
Judge Steven Brown scores the fight for Nash Anderson!
Judge Chris Edwards scores the fight for Nash Anderson!
Nash Anderson wins by unanimous decision!
|
|
|
|
|
|
|
|
|
|
|
|
|
|
|
|
|
|
|
|
|
|
|
| S |
C
A |
G |
S |
C
B |
G |
|
S |
C |
G |
|
energy
A | B |
|
hype
A | B |
|
pop
A | B |
|
mgr
A | B |
|
FIGHT
RATING
31% |
|
|
|
|
|
|
|
Undercard bout
|
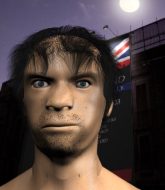
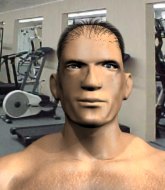
Coming up we have a light heavyweight MMA rules bout between Mitch Bisping (ranked 4843 p4p, 0 weight class) and Jack Dix (ranked 4726 p4p, 0 weight class). We have two fighters making their debuts here, so let's see who comes out of this one with their first professional victory.
 |
|
 |
| 180 cm
18
145 lbs
0 - 0 - 0 |
|
180 cm
20
215 lbs
0 - 0 - 0 |
BJJ Blue Belt
Brawler
KO power |
|
Decent wrestler
Counter fighter
Intelligent |
|
| |
|
Ladies and gentlemen. This fight is 3 rounds, in the light heavyweight division.
Introducing the fighter to my left, fighting out of the red corner.
With a record of
0 - 0 - 0, fighting out of London, Mitch Bisping!
And introducing the fighter to my right, fighting out of the blue corner.
With a record of
0 - 0 - 0, fighting out of London, Jack Dix!
The judges for this bout are Richard Clark, Paul Tew and Colin Fotheringham.
The bell rings for round one and we are underway!
Bisping throws a right and a left that both miss.
Dix swings away with a counter right hand but no contact made.
Bisping fails in his attempt to clinch.
Dix avoids the clinch attempt nicely.
Dix looked like he wanted to counter with a punch but didn't throw it.
Bisping is looking to clinch but Dix is avoiding it.
It seemed like Dix was going to counter with the hook but didn't fully commit to it.
Bisping fails with a rather predictable takedown attempt.
Dix throws out a counter right but Bisping avoids it with no problem.
Dix swats away the attempt to clinch by Bisping.
Dix throws out a counter right but Bisping avoids it with no problem.
We've had a slow start to the round here - hopefully the action picks up.
Bisping misses with a body shot
and Dix counters with a big right hand! Oh Bisping is in trouble here! Dix follows up with more strikes and that's it! The ref has stopped it!
Ladies and gentlemen, after 0:57 of round 1, we have a winner by way of TKO (Strikes). Jack Dix!
|
|
|
|
|
|
|
|
|
|
|
|
|
|
|
|
|
|
|
|
|
|
|
| S |
C
A |
G |
S |
C
B |
G |
|
S |
C |
G |
|
energy
A | B |
|
hype
A | B |
|
pop
A | B |
|
mgr
A | B |
|
FIGHT
RATING
50% |
|
|
|
|
|
|
|
Undercard bout
|
|
|
|
Undercard bout
|
Coming up we have a light heavyweight MMA rules bout between Minitauro Shogun (ranked 5265 p4p, 0 weight class) and Ned Tucker Iii (ranked 4746 p4p, 0 weight class). Tucker Iii has chosen APA as his entrance music. We have two fighters making their debuts here, so let's see who comes out of this one with their first professional victory.
 |
|
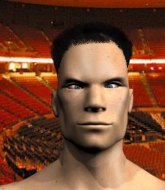 |
| 183 cm
19
217 lbs
0 - 0 - 0 |
|
169 cm
20
205 lbs
0 - 0 - 0 |
BJJ Purple Belt
Brawler
Granite chin |
|
BJJ Blue Belt
Brawler
Can Moonwalk |
|
| |
|
Ladies and gentlemen. This fight is 3 rounds, in the light heavyweight division.
Introducing the fighter to my left, fighting out of the red corner.
With a record of
0 - 0 - 0, fighting out of London, Minitauro Shogun!
And introducing the fighter to my right, fighting out of the blue corner.
With a record of
0 - 0 - 0, fighting out of London, Ned Tucker Iii!
The judges for this bout are Daniel Bishop, James Ackerman and Andrew Berry.
The bell rings for round one and we are underway!
Tucker Iii moves out of range of the body kick from Shogun.
Shogun has his takedown stuffed
and Tucker Iii counters into the clinch. Nicely done.
Shogun is defending well against a takedown attempt.
Tucker Iii escapes the clinch and we're back to striking.
Tucker Iii tries to sprawl but Shogun drives through with a takedown into half guard.
Tucker Iii is trying to escape back to his feet but Shogun uses the scramble to pass into side control.
Tucker Iii tries to bench press Shogun off him but Shogun keeps the position.
Shogun wants to lay and pray for a moment but Tucker Iii keeps working.
Shogun just content to control the position.
Shogun in side control, throwing shots but Tucker Iii defends.
That's one minute gone in the round.
Shogun is looking to finish here, going for an Americana. Tucker Iii knows the correct defense though, so he's OK.
The fighters are pressed up against the cage, both looking to find a bit of space to work.
Shogun moves into full mount!
Shogun sitting in mount, just looking to control for the moment.
Shogun unloading with bombs!
Shogun looks like he's working for a submission but he's not found anything just yet.
That's two minutes gone in the round.
Tucker Iii is trying desperately to improve position.
Shogun lands with some vicious ground and pound - can Tucker Iii hang on?
Shogun looking to control but Tucker Iii is working nicely, looking to advance position himself.
We're hearing some news coming in from back stage. It's official - Tucker Iii has eaten all the pies!
Shogun is dominating on the ground here - he's now on his opponent's back, looking to sink in the hooks. Tucker Iii is in real trouble.
Shogun is riding his opponent, not letting Tucker Iii buck him off.
That's three minutes gone in the round.
The fighters are starting to get a bit slippery now, which will make submissions a bit more difficult.
Shogun struggling to keep hold of the position.
Tucker Iii tries to break free.
Tucker Iii really doesn't want to stay on the ground with Shogun. If he can't get it back to his feet, it's only a matter of time before he'll be tapping out.
Shogun has his hand under the chin of his opponent looking for the choke. He's nearly got it! This one could be all over! But no, Tucker Iii has freed his hand and lives to survive another
well, another couple of seconds at least!
Shogun is landing with strikes from the back.
Shogun is controlling his opponent, waiting for an opportunity to finish.
Shogun is trying to stick to Tucker Iii's back but Tucker Iii is turning into Shogun. He's managed to reverse the position - now he's in Shogun's guard. Polite applause from the crowd in appreciation of some nice Jiu Jitsu by Tucker Iii.
That's four minutes gone in the round.
Shogun wants to sweep but no luck.
Shogun will need to keep those long limbs tucked in whilst he's on the ground, to prevent any submissions.
Shogun trying to control the position.
Tucker Iii controls from within his opponent's guard.
Tucker Iii trying to control but Shogun is working from the bottom.
The crowd thankful this round is nearly over.
Tucker Iii won't allow Shogun to get back to his feet.
Tucker Iii keeps in close for a moment and lands a decent shot to the side of Shogun's head.
And thats the end of the round the fighters go back to their corners.
Minitauro Shogun dominated that round.
That's time! Shogun's corner gives him a slap on the ass as he gets ready to fight.
Tucker Iii forces Shogun back against the cage and clinches.
Shogun decides to pull guard.
Tucker Iii looking to sit in guard and control but Shogun gets the butterfly guard and sweeps. He's now in the guard on the top.
We get told so often about how wrestlers don't like to be on their backs. Let's see if Tucker Iii can do anything to dispel that myth.
Shogun pressing down on his opponent's thigh, looking to pass guard. Tucker Iii is keeping the position for now.
Tucker Iii wants to hit a switch here but Shogun passes into full mount! Oh no, disaster for Tucker Iii there!
Tucker Iii is bucking up trying to escape but Shogun cracks him with another couple of good strikes.
We've had a slow start to the round here - hopefully the action picks up.
Shogun dominating with strikes here.
Tucker Iii is wriggling around trying to escape.
That's one minute gone in the round.
The ref warns both fighters not to hold the cage as they work up against the meshing.
Tucker Iii wants to control but Shogun is having none of it.
Shogun is really dominating this fight. Is there anything that Tucker Iii can do to turn this around?
Shogun landing strikes from the mount and Tucker Iii is in trouble!
Shogun content just to control the position here.
Shogun thowing strikes but they're hitting the gloves, not doing any damage.
Shogun trying to control but Tucker Iii is having none of it.
Tucker Iii has given up his back - I dont know if this is a deliberate ploy to try and escape or if he is just struggling down there.
That's two minutes gone in the round.
Shogun looking for the choke from the back.
Shogun keeps control of the position as Tucker Iii tries to break free.
Tucker Iii trying to control but not successfully.
Tucker Iii wants to get back to his feet.
Tucker Iii tries to escape the position.
That's three minutes gone in the round.
Shogun trying to control momentarily.
Tucker Iii is trying to defend against the choke here but Shogun has an arm under his chin. This one might not last much longer. Shogun Tightens the hold and Tucker Iii taps out furiously! Shogun displays superior BJJ to win the fight.
Ladies and gentlemen, after 3:36 of round 2, we have a winner by way of Submission (RNC). Minitauro Shogun!
|
|
|
|
|
|
|
|
|
|
|
|
|
|
|
|
|
|
|
|
|
|
|
| S |
C
A |
G |
S |
C
B |
G |
|
S |
C |
G |
|
energy
A | B |
|
hype
A | B |
|
pop
A | B |
|
mgr
A | B |
|
FIGHT
RATING
35% |
|
|
|
|
|
|
|
Undercard bout
|
Coming up we have a light heavyweight MMA rules bout between Hunter Hughes (ranked 5038 p4p, 519 weight class) and Nairy Huts (ranked 5212 p4p, 0 weight class). We have two fighters making their debuts here, so let's see who comes out of this one with their first professional victory.
 |
|
 |
| 169 cm
20
215 lbs
0 - 0 - 0 |
|
190 cm
20
213 lbs
0 - 0 - 0 |
BJJ White Belt
Excellent boxer
Inexperienced |
|
BJJ Brown Belt
Good kicks
Solid chin |
|
| |
|
Ladies and gentlemen. This fight is 3 rounds, in the light heavyweight division.
Introducing the fighter to my left, fighting out of the red corner.
With a record of
0 - 0 - 0, fighting out of London, Hunter Hughes!
And introducing the fighter to my right, fighting out of the blue corner.
With a record of
0 - 0 - 0, fighting out of London, Nairy Huts!
The judges for this bout are Richard Clark, Phil Schofield and Sam Margolis.
The bell rings for round one and we are underway!
Huts chopping away at his opponent's legs.
Huts leaves Hughes with his face pressed against the mat as he sprawls beautifully, defending against a solid takedown attempt.
Huts tries to close the distance and clinch up but Hughes swats him away and circles back towards the center.
Hughes lands a jab. Then a cross. Then finally a nice hook to the body. Good work there by Hughes.

It looks like Nairy Huts has been cut.
Hughes darts in and clinches Huts up against the cage.
Hughes keeps control of Huts as he tries to wriggle out of the double underhooks.
Hughes avoiding damage.

Huts manages to pull guard.
The ref warns both fighters not to hold the cage as they work up against the meshing.
Hughes throws a big elbow that misses.
We've had a slow start to the round here - hopefully the action picks up.
Huts not looking particularly offensive just at the moment.
Hughes won't allow Huts to sweep him here.
Huts not looking particularly offensive just at the moment.
That's one minute gone in the round.
Hughes is just sitting in guard, looking to avoid any submissions.
Huts trying to keep a closed guard but Hughes is proving a slippery customer.

The referee has motioned to the fighters to stand back up. He just wasn't happy with the level of activity.
Huts fails with the takedown
and Hughes counters by moving into the clinch.
Hughes stops a takedown attempt from Huts.
Huts is trying to break the clinch but Hughes has him pressed against the cage.
Huts is trying to break the clinch but Hughes is controlling him.
Hughes wants to break the clinch but can't.
Huts misses with a body punch.
That's two minutes gone in the round.
Well. There's a bit of a lull in the action here and the crowd are starting to get restless.
Huts jumps guard but Hughes turns him against the cage and keeps the fight standing.
Hunter Hughes has stuffed three takedown attempts in the round now. That's going to take a lot out of Nairy Huts.
Huts tries to circle away but Hughes has him pinned against the cage.
Huts wants a takedown.
Huts tries to pull guard but Hughes won't allow it.
Huts is trying to break the clinch but Hughes has him pressed against the cage.
Huts is looking for a takedown up against the cage. Hughes gets underhooks though and prevents the takedown attempt.
Hughes tries for a takedown. No joy.

Hughes breaks the clinch.
Huts shoots in looking for a takedown. Hughes tries to sprawl out of it but Huts keeps driving through. The fighters are pinned against the cage. Hughes manages to get underhooks and after a bit of a struggle, circles away and we're back to standing.
Hughes thinks about countering with a head kick.
Hughes closes the distance and scores a nice trip takedown into half guard. Huts did well to prevent Hughes getting side control.
That's three minutes gone in the round.
Hughes perhaps working for something from half guard, or maybe not. It looks like he's just sitting there.
Huts trying to control from the bottom.
Hughes tries to stand and escape but Huts is controlling the position.
Hughes knows he needs to get back to his feet asap. He's simply no match for Huts on the ground.
Huts gets back to full guard.
Hughes's corner is telling him to maintain position.
Huts is trying to control the position but Hughes postures up.
The referee has stepped in and called for a break in the action. We'll restart on the feet.
Hughes fails with a rather predictable takedown attempt.
That's four minutes gone in the round.
The crowd are starting to boo a lack of action.
Hughes defends well against a solid takedown attempt from Huts.
Huts lets loose with a powerful body kick. Hughes will feel that in the morning.
Hughes clinches.
Huts pulls guard effortlessly.
Hughes working from the guard for now, landing some ground and pound.
Hughes looking to control the position here, rather than advance.
Hughes throwing strikes from guard but Huts blocks nicely.
And thats the end of the round the fighters go back to their corners.
Hunter Hughes dominated that round.
The cut man is working on Nairy Huts's cut.
The minute break is over - no more time for sponges and pep talks - back to the action!
Huts throws a body kick that digs right into the meat.
Hughes dives in and grabs Huts's left leg, looking for a takedown. Huts pushes down on Hughes's head and hops out.
Hughes moves into the clinch.
Hughes is defending well against a takedown attempt.
Huts is working hard here but doesn't seem to be able to control effectively, up against the cage.
Hughes is trying to work out of this bad position, with his back against the cage.
Hughes breaks the clinch and we're back to striking at distance.
We've had a slow start to the round here - hopefully the action picks up.
Hughes scores with a hook to the body. Huts takes a step back and tries to catch his breath.
Huts pulls out of a head kick attempt.
Hughes changes levels looking for a counter takedown but doesn't commit.
Huts with a lazy takedown attempt
and Hughes counters with a one-two to the body.
Hughes is really dominating this fight. Is there anything that Huts can do to turn this around?
Huts checks a leg kick.
Hughes looks for a takedown but Huts sprawls well.
That's one minute gone in the round.
Hughes has a takedown stuffed.
Huts is loading up here, looking for a big counter of his own.
That's three failed takedown attempts in the round for Hunter Hughes. That's going to take a lot out of him.
Hughes misses with a half-hearted attempt at a head kick.
Huts shoots in but doesn't get the takedown
and Hughes counters with a lovely straight right hand!
Huts is looking to clinch.
Hughes tries for a takedown but Huts sees it coming a mile off and avoids it easily.
Huts darts in trying to clinch
and Hughes cracks him with a counter punch right on the button.
Nice sprawl there from Huts as Hughes shoots in.
That's two minutes gone in the round.
Huts blocks a head kick by Hughes.
Hunter Hughes is looking to throw some combinations by the looks of things.
Huts drives through with a takedown into guard.
Huts wants to control from the top but Hughes keeps moving.
Huts won't allow Hughes to sweep him here.
Huts trying to control the position from guard on top but Hughes is wriggling around, looking for whatever he can.
Hughes is working the butterfly guard. He manages to land a nice scissor sweep and is now in half guard on the top. Nice move.
The crowd cheering loudly, showing their appreciation for the quality fight we're seeing here.
Huts wants to control but Hughes is keeping busy and won't allow it.
That's three minutes gone in the round.
Huts is pressing down on Hughes's left leg trying to get back to full guard. He's managed it.
Huts bucks up whilst keeping hold of a body lock, managing to reverse the position. Now he's in top in Hughes's guard.

Huts in full guard, throwing the ground and pound. No damage this time.
Hughes throws his legs up looking for a submission but Huts uses it to pass to side control.

Huts has had enough of the ground for now and decides to stand.
Hughes defends well against a solid takedown attempt from Huts.
Huts avoids the head kick by Hughes.
Hughes throws a looping left and ducks down for a takedown. He's got his arms around Huts's waist but Huts gets an underhook and avoids the takedown by throwing Hughes off to one side.
That's four minutes gone in the round.
Huts gets his takedown attempt stuffed easily
and Hughes makes him pay by landing a nice hook to the body before moving out of range.
Hughes fails with a rather predictable takedown attempt.
Both fighters are absolutely exhausted here.
Huts takes a jab right on the kisser.
Hughes has Huts up against the cage in a clinch.
Hughes has Huts pressed against the cage, preventing Huts from circling away and getting back to striking at range.
Hughes has hold of a leg and is looking for a trip takedown. Huts avoids it nicely though and we remain in the clinch.
Hughes looking for a takedown.
Huts tries to break the clinch but Hughes is controlling the position.
And thats the end of the round the fighters go back to their corners.
Hunter Hughes dominated that second round.
The cut man is working on Nairy Huts's cut.
Well, the break between rounds is over. Let's get back to the scrappin! This is the final round!
Hughes shoots in but Huts avoids the takedown attempt easily.
A head kick misses from Hughes.
Huts shoots in for a takedown. "I don't think so" says Hughes as he avoids it easily.
Huts tries to keep at a distance but Hughes has taken the fight into the clinch.
Hughes blocks a punch to the side of the head.
Hughes has a body lock and is looking for a takedown. Huts is bouncing around trying to prevent the takedown and somehow he has indeed managed to stay on his feet.
Hughes wants to break free. God knows he wants to breaaaak freeee.
We've had a slow start to the round here - hopefully the action picks up.
Hughes wants to take the fight to the mat but Huts manages to get underhooks and keep the fight in the clinch.
That's three failed takedown attempts in the round for Hunter Hughes. That's going to take a lot out of him.
Hughes wants to break free but Huts has control.
Huts fails to land with a short punch on the inside.
Huts jumps guard.
That's one minute gone in the round.
Huts is trying to stand up but he's not managed so far.
Hughes trying to move into half guard but instead Huts has managed to sweep!
Huts tries to free his leg and advance position but Hughes is retaining full guard.
Hughes might be looking to lock onto one of his opponent's long limbs for a submission, whilst we're on the ground.
Huts trying to control the position from guard on top but Hughes is wriggling around, looking for whatever he can.
Huts has decided he wants to stand but the closed guard of Hughes is proving hard to escape from.
Huts is looking to work some ground and pound but Hughes has wrist control.
Hughes on his back here. We all know that wrestlers don't like being on their back so let's see if Hughes tries to get out of the position.
Huts trying to land body shots but he keeps hitting the mat.
That's two minutes gone in the round.
My god... these two guys really need to pick up the pace or everyone will leave to go get a beer.
Hughes keeping moving, preventing Huts from controlling successfully.
Huts missing there with some ground and pound from the guard.
Hughes utilising some decent striking defenses from the guard, preventing the ground and pound.
If this pace continues, the referee will definitely step in and force a standup.
Hughes is trying to keep Huts in close.
The ref stands the fighters back up due to a lack of activity.
Nice sprawl there from Hughes as Huts shoots in.
Hughes closes the distance and clinches.
Hughes gets double underhooks to prevent a takedown attempt from Huts.
Hughes is trying to break the clinch but Huts is controlling him.
That's three minutes gone in the round.
Huts has hold of a leg and is looking for a trip takedown. Hughes avoids it nicely though and we remain in the clinch.
Hughes jumps guard but Huts stands there with Hughes around his waist. Hughes gives up and drops back to his feet. We remain in the clinch.
Huts is looking for a takedown.
Huts stalling in the clinch but Hughes improves position.
Hughes has dropped down and is working for a takedown. Huts is trying to keep an underhook but Hughes manages to get the takedown into half guard.
Hughes is working for a kimura here but Huts manages to reverse the position and he's now in Hughes's guard.
Hughes tries to land a sweep but no joy.
Both fighters are breathing heavily.
Huts wants to control from the top but Hughes keeps moving.
Hughes looking to sweep using the butterfly guard but Huts puts pay to that idea as he passes nicely into half guard.
That's four minutes gone in the round.
Hughes blocking the ground and pound attempt from Huts.
Hughes is trying to control but Huts passes into side control!
Hughes gives up the full mount - oops, sloppy defensive grappling there!
Hughes can't escape the position.
Hughes is working hard here to advance position.
Boooooooooooooooooooo!!! God, this has been a terrible round. Come on you two, sort yourselves out!
Huts looking to isolate an arm here. Hughes doesn't see it coming and as Huts extends the arm, he's forced to tap out! Nice submission by Huts!
Ladies and gentlemen, after 4:56 of round 3, we have a winner by way of Submission (Armbar). Nairy Huts!
|
|
|
|
|
|
|
|
|
|
|
|
|
|
|
|
|
|
|
|
|
|
|
| S |
C
A |
G |
S |
C
B |
G |
|
S |
C |
G |
|
energy
A | B |
|
hype
A | B |
|
pop
A | B |
|
mgr
A | B |
|
FIGHT
RATING
47% |
|
|
|
|
|
|
|
Co-main event
|
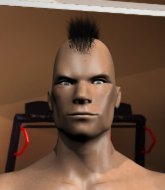
Coming up we have a light heavyweight MMA rules bout between Dylan White (ranked 4729 p4p, 0 weight class) and Ho Lee Fuuk (ranked 5201 p4p, 525 weight class). We have two fighters making their debuts here, so let's see who comes out of this one with their first professional victory.
 |
|
 |
| 185 cm
20
215 lbs
0 - 0 - 0 |
|
180 cm
20
213 lbs
0 - 0 - 0 |
BJJ White Belt
Excellent boxer
KO power |
|
BJJ White Belt
Basic striking
Granite chin |
|
| |
|
Ladies and gentlemen. This fight is 3 rounds, in the light heavyweight division.
Introducing the fighter to my left, fighting out of the red corner.
With a record of
0 - 0 - 0, fighting out of London, Dylan White!
And introducing the fighter to my right, fighting out of the blue corner.
With a record of
0 - 0 - 0, fighting out of London, Ho Lee Fuuk!
The judges for this bout are Paul Tew, Richard Clark and William Gold.
The bell rings for round one and we are underway!
Fuuk moves into the clinch.
Fuuk misses with the head strike.
Both fighters working to control the clinch.
White blocks a punch to the side of the head.
Fuuk misses with a shot to the kidneys.
White looking to slow down the pace here.
White trying to control the position but instead, Fuuk has worked for underhooks and has pushed White into the cage.
Fuuk throws a punch but it's blocked by White.
Good anti-grappling being displayed by Fuuk as White tries to tie him up.
Fuuk lands with a quick shot inside that doesn't really do much damage.
Fuuk swings away with an uppercut that misses.
Fuuk misses with a punch on the inside.
White is trying to slow down the pace in the clinch, to catch his breath.
Both fighters working to control the clinch.
Maybe White would be better served going for some more strikes rather than trying to control so much.
We've had a slow start to the round here - hopefully the action picks up.
White looking to stall.
The ref breaks the fighters up, due to lack of action by Dylan White.
Fuuk takes the fight into the clinch.
White trying to stall but Fuuk improves his position.
That's one minute gone in the round.
Fuuk swings away with an uppercut that misses.
Fuuk being controlled against the cage.
White trying to control the position but instead, Fuuk has worked for underhooks and has pushed White into the cage.
Fuuk cracks White with a nice body shot.
Fuuk misses with a hook from the clinch.
White blocks an uppercut.
Fuuk can't find room to land a body shot as White controls the action.
White looking to stall.
Fuuk misses with a punch to the body.
Fuuk swings away with an uppercut that misses.
White blocking some punches.
Fuuk lands a shoulder strike.
White wants to stall.
White blocks a punch to the side of the head.
White stalling in the clinch but Fuuk improves position.
Fuuk lands a shoulder strike.
White prevents a body shot from Fuuk.
Fuuk misses with the head strike.
That's two minutes gone in the round.
White is clearly stalling here... Pick up the pace son.
Fuuk tries a shoulder strike but it doesn't do any damage.
Fuuk misses with a short punch on the inside.
White's head jolts backwards as he takes an uppercut right on the button!
White blocks a couple of punches on the inside.
Fuuk lands a right hand that snaps the head of White backwards.
Fuuk scores with an uppercut up the middle.
A short right hand to the side of the head by Fuuk.
This has been an exciting period of action!
White blocks a body shot from Fuuk.
Fuuk should think about turning a few of those tyres round his middle into muscle if he wants people to take him seriously as an athlete.
Fuuk lands a hook to the side of the head.
White tries to stall but Fuuk uses the opportunity to gain a better position.
Fuuk throws a punch but it's blocked by White.
Fuuk fails to land with a short punch on the inside.
Fuuk lands with a short head shot on the inside.
Fuuk is working White over against the cage.
Fuuk misses with a short punch on the inside.
A shot in the inside from Fuuk.
White wants to stall.
Fuuk throws a head punch that misses.
That's three minutes gone in the round.
Fuuk fails to land with a short punch on the inside.
White blocking some punches.
White wants to stall.
White blocks an uppercut.
White taking a breather.
White is trying to stall.
White wants to stall.
White is breathing heavily.
Fuuk tries a shoulder strike but it doesn't do any damage.
White pressing his opponent against the cage.
The ref breaks the fighters up, due to lack of action by Dylan White.
Fuuk gets in close and instigates a clinch.
Fuuk misses with a punch on the inside.
White wants to stall.
Fuuk swings away with an uppercut that misses.
That's four minutes gone in the round.
White blocks a punch to the side of the head.
White looking to stall.
White looking to stall.
Fuuk lands with a right to the head.
Fuuk lands with a short shot to the head.
The pace really dropping off here, momentarily.
White controlling the action here for a moment.
Fuuk tries a shoulder strike but it doesn't do any damage.
A short uppercut from Fuuk.
Fuuk lands with a short punch from the clinch.
Fuuk scores with a nice hook to the head.
Fuuk misses with a punch to the body.
Fuuk gets through White's defenses to land a nice punch to the side of the head.
The crowd cheering loudly, showing their appreciation for the quality fight we're seeing here.
Fuuk throws a hook to the body. More of an arm punch but it's all scoring with the judges.
Fuuk misses with a punch on the inside.
And thats the end of the round the fighters go back to their corners.
Ho Lee Fuuk dominated that round.
The fighters get back to their feet, the hooter sounds and we're back to the action!
Fuuk rushes White and presses him up against the cage.
White controlling the action here for a moment.
White is trying to slow down the pace of the fight but Fuuk is keeping busy.
Fuuk fails to land with a short punch on the inside.
Ho Lee Fuuk seems to be working more effectively in the clinch in the fight so far.
Fuuk digs a right hand into White's ribs. Those have got to be taking their toll on White's gas tank.
White blocks a punch to the side of the head.
The fighters are starting to get sweaty, which will make takedowns a bit more tricky.
White is trying to slow down the pace of the fight but Fuuk is keeping busy.
Both fighters working to control the clinch.
Fuuk misses with a punch on the inside.
White is working hard here but doesn't seem to be able to control effectively, up against the cage.
The ref breaks the fighters up, due to lack of action by Dylan White.
Fuuk forces White back against the cage and clinches.
We've had a slow start to the round here - hopefully the action picks up.
Fuuk lands with a light punch inside.
Fuuk lands a body punch in the clinch.
Fuuk scores with a shot to the side of White's head.
Both fighters are absolutely exhausted here.
White is looking to control Fuuk's arms but Fuuk gets an underhook and turns him. Now White has his back to the cage.
That's one minute gone in the round.
White is trying to stall.
Fuuk tries a shoulder strike but it doesn't do any damage.
White is trying to slow down the pace in the clinch, to catch his breath.
White is looking to control Fuuk's arms but Fuuk gets an underhook and turns him. Now White has his back to the cage.
Fuuk scores with a shot to the side of White's head.
Fuuk pushes White back against the cage and lands a hook to the side of the head.
Fuuk misses with a punch on the inside.
Fuuk misses with some punches.
Fuuk lands a hook that snaps the head of White backwards.
White is trying to slow down the pace of the fight but Fuuk is keeping busy.
Fuuk misses with a hook to the ribs.
Fuuk works for underhooks and lands a body shot in the process.
White blocks a couple of punches on the inside.
White blocks an uppercut.
An uppercut to the body lands inside from Fuuk.
Fuuk lands with a left to the head.
Fuuk working aggressively here.
A quick uppercut on the inside from Fuuk.
An uppercut on the inside fails to land for Fuuk.
That's two minutes gone in the round.
Fuuk misses with some punches.
Both guys are working to get underhooks.
Fuuk lands with a short punch from the clinch.
White blocks a punch to the side of the head.
Fuuk pushes White back against the cage and lands a hook to the side of the head.
The fans in attendance giving it up for the two fighters, who have really let it all hang out in the last minute or so!
Fuuk misses with some punches.
Still in the clinch, Fuuk scores with a nice short uppercut.
Fuuk misses with a short punch on the inside.
A short left from Fuuk.
With the fighters clinched against the cage, Fuuk creates a bit of distance for himself and scores with a nice uppercut.
Fuuk lands a shoulder strike.
White blocks a punch to the side of the head.
Fuuk tries a shoulder strike but it doesn't do any damage.
A short right from Fuuk on the inside.
Fuuk has been the more effective fighter overall so far.
Fuuk lands with a right to the head.
A nice left hand lands by Fuuk.
Fuuk misses with a punch on the inside.
Fuuk scores with a shot to the side of White's head.
Fuuk misses with a short punch on the inside.
White blocking some punches.
That's three minutes gone in the round.
White blocks a punch to the side of the head.
A shot in the inside from Fuuk.
A short right from Fuuk.
White is trying to slow down the pace in the clinch, to catch his breath.
White blocks an uppercut.
Fuuk lands a shoulder strike that jolts his opponent's head backwards.
White is trying to maintain a safe position but Fuuk gets an underhook and turns White into the cage.
Fuuk throws a hook to the body. More of an arm punch but it's all scoring with the judges.
White prevents a body shot from Fuuk.
Fuuk swings wildly with an uppercut but White uses good head movement to avoid it.
White taking a breather.
A nice left hand lands by Fuuk.
Fuuk throws a head punch that misses.
Fuuk lands a right uppercut that snaps the head of White backwards.
An uppercut on the inside fails to land for Fuuk.
A short body shot lands from Fuuk as the two fighters clinch.
Fuuk swings wildly with an uppercut but White uses good head movement to avoid it.
Fuuk swings wildly with an uppercut but White uses good head movement to avoid it.
That's four minutes gone in the round.
Fuuk stays in close to his opponent and throws a right hand to the body.
Fuuk throws a punch but it's blocked by White.
Fuuk tries a shoulder strike but it doesn't do any damage.
Fuuk pushes White back against the cage and lands a hook to the side of the head.
Fuuk gets through White's defenses to land a nice punch to the side of the head.
The crowd are loving this. Great action here.
White prevents a body shot from Fuuk.
Fuuk lands a body punch in the clinch.
A head punch on the inside from Fuuk fails to land.
Fuuk misses with the head strike.
A head punch on the inside from Fuuk fails to land.
Fuuk throws a punch but it's blocked by White.
Fuuk working aggressively here.
A short left from Fuuk.
White prevents a body shot from Fuuk.
Fuuk throws a punch but it's blocked by White.
Fuuk working aggressively here.
Fuuk swings away with an uppercut that misses.
And thats the end of the round the fighters go back to their corners.
Ho Lee Fuuk showed his class in that round. I'd imagine he'll take it on all the scorecards.
The corners get their ten second warning. Both fighters stand from their stools and stare eachother down, ready to get back to the action. Let's get this one finished - here comes the final round!
Fuuk has White up against the cage in a clinch.
A shot in the inside from Fuuk.
White content to slow the pace in the clinch.
Fuuk lands on the inside with an uppercut.
White trying to stall but Fuuk improves his position.
White trying to control the position but instead, Fuuk has worked for underhooks and has pushed White into the cage.
White blocks an uppercut.
White is trying to slow down the pace in the clinch, to catch his breath.
A hook to the body from Fuuk.
We've had a slow start to the round here - hopefully the action picks up.
White blocks an uppercut.
White is trying to slow down the pace of the fight but Fuuk is keeping busy.
An uppercut on the inside fails to land for Fuuk.
White's head jolts backwards as he takes an uppercut right on the button!
Both fighters are breathing heavily.
White is trying to slow down the pace of the fight but Fuuk is keeping busy.
Good anti-grappling being displayed by Fuuk as White tries to tie him up.
White seems a little flustered. He's come in with the intention of controlling the clinch but Fuuk is preventing him from doing so, at least for the moment.
That's one minute gone in the round.
The ref breaks the fighters up, due to lack of action by Dylan White.
Fuuk has managed to clinch.
Fuuk lands a shot to the body.
Fuuk scores with an uppercut up the middle.
Fuuk scores with a shoulder strike.
Both guys are working to get underhooks.
Fuuk lands with a short punch from the clinch.
White taking a breather.
Fuuk lands a right hand.
Fuuk lands a nice uppercut.
Fuuk lands with a short head shot on the inside.
Fuuk swings wildly with an uppercut but White uses good head movement to avoid it.
A shot in the inside from Fuuk.
Fuuk has a couple of punches blocked by White.
A head punch blocked on the inside by White.
White wants to stall.
White blocks an uppercut.
That's two minutes gone in the round.
White blocking some punches.
White blocks an uppercut.
Fuuk tries a shoulder strike but it doesn't do any damage.
The crowd are loving this. Great action here.
A head punch on the inside from Fuuk fails to land.
A real battle for position is taking place between these two warriors.
Fuuk misses with some punches.
Fuuk working on landing some head shots here - that one got through nicely.
White wants to stall.
Fuuk lands a left hand.
Fuuk lands a hook to the side of the head.
A head punch on the inside from Fuuk fails to land.
White blocking some punches.
A head punch on the inside from Fuuk fails to land.
Fuuk lands a nice shot to the body.
White blocking some punches.
White is trying to slow down the pace of the fight but Fuuk is keeping busy.
Fuuk scores with a shoulder strike.
That's three minutes gone in the round.
White blocks a punch to the side of the head.
White blocks a couple of punches on the inside.
Fuuk scores with a shot to the side of White's head.
Fuuk has a couple of punches blocked by White.
A head punch on the inside from Fuuk fails to land.
Fuuk tries a shoulder strike but it doesn't do any damage.
Fuuk has a couple of punches blocked by White.
Fuuk lands a short shot on the inside that snaps the head of White backwards.
A shot in the inside from Fuuk.
Fuuk working aggressively here.
White tries to stall but Fuuk uses the opportunity to gain a better position.
Fuuk misses with a hook to the ribs.
White trying to stall but Fuuk improves his position.
Still in the clinch, Fuuk scores with a nice short uppercut.
Fuuk scores with a shot to the side of White's head.
Fuuk misses with a short punch on the inside.
Fuuk has a couple of punches blocked by White.
Fuuk lands a hook that snaps the head of White backwards.
White blocks an uppercut.
That's four minutes gone in the round.
Fuuk digs a right hand into White's ribs. Those have got to be taking their toll on White's gas tank.
Fuuk lands a right hand.
This is a great period of action - very entertaining stuff!
Fuuk tries a shoulder strike but it doesn't do any damage.
Fuuk is leaning against White and scores with a nice uppercut to the body.
Fuuk throws a punch but it's blocked by White.
Fuuk working aggressively here.
A body shot lands from Fuuk.
Fuuk lands a body punch in the clinch.
Fuuk swings wildly with an uppercut but White uses good head movement to avoid it.
Fuuk lands with a light punch inside.
Fuuk misses with a punch on the inside.
Fuuk throws a head punch that misses.
A nice right hand lands inside from Fuuk.
Fuuk working on landing some head shots here - that one got through nicely.
A head punch on the inside from Fuuk fails to land.
White looking to stall.
Dylan White has stepped it up - he knows he needs a finish here!
Ho Lee Fuuk is fighting for a decision here - he's started to take the cautious approach.
Fuuk has a couple of punches blocked by White.
And that's the end of the fight!
Ho Lee Fuuk comfortably won the final round on my scorecard.
Well Fuuk has outworked and out performed his opponent in all aspects of the game today. He was simply too good and the decision should be no more than a formality. Over to the ring announcer for the scorecards.
Ladies and gentlemen, after 3 rounds of action, we go to the scorecards for a decision.
Judge Paul Tew scores the fight for Ho Lee Fuuk!
Judge Richard Clark scores the fight for Ho Lee Fuuk!
Judge William Gold scores the fight for Ho Lee Fuuk!
Ho Lee Fuuk wins by unanimous decision!
|
|
|
|
|
|
|
|
|
|
|
|
|
|
|
|
|
|
|
|
|
|
|
| S |
C
A |
G |
S |
C
B |
G |
|
S |
C |
G |
|
energy
A | B |
|
hype
A | B |
|
pop
A | B |
|
mgr
A | B |
|
FIGHT
RATING
57% |
|
|
|
|
|
|
|
Main event
|
Coming up we have a light heavyweight MMA rules bout between Luca Kun (ranked 4728 p4p, 0 weight class) and Fat Slim (ranked 5314 p4p, 0 weight class). We have two fighters making their debuts here, so let's see who comes out of this one with their first professional victory.
 |
|
 |
| 170 cm
20
216 lbs
0 - 0 - 0 |
|
198 cm
20
217 lbs
0 - 0 - 0 |
BJJ Brown Belt
Basic striking
Cuts easily |
|
Good wrestler
Counter fighter
Tends to cut |
|
| |
|
Ladies and gentlemen. This fight is 3 rounds, in the light heavyweight division.
Introducing the fighter to my left, fighting out of the red corner.
With a record of
0 - 0 - 0, fighting out of London, Luca Kun!
And introducing the fighter to my right, fighting out of the blue corner.
With a record of
0 - 0 - 0, fighting out of London, Fat Slim!
The judges for this bout are James Ackerman, Phil Schofield and Paul Tew.
The bell rings for round one and we are underway!
The fight stays on the outside here - Kun looks like he's thinking about clinching though.
A big right from Slim misses.
Kun seemed to be looking to counter by closing the distance.
Kun tries to close the distance and clinch up but Slim swats him away and circles back towards the center.
Kun is looking to clinch.
Kun tries to clinch there but Slim circles away.
Kun tries to clinch up.
Kun tries to clinch up
and Slim counters with a nice jab to the body that keeps Kun thinking.
We've had a slow start to the round here - hopefully the action picks up.
Kun tries to clinch but Slim is having none of it.
Kun tries to clinch there but Slim circles away.
Kun fails with an attempt to clinch.
That's one minute gone in the round.
Kun tries to clinch but fails miserably
and Slim counters with a nice jab to the body that keeps Kun thinking.
Slim keeps the fight on the outside.
Kun tries to clinch but Slim is having none of it.
Slim tries to bum rush Kun with a series of wild strikes but Kun uses good footwork to avoid the assault.
Kun tries to close the distance and clinch but Slim swats him to one side with an open hand palm strike and circles away.
Slim fails to land with a series of punches.
Kun tries to clinch up.
Kun fails with an attempt to clinch.
Kun fails in his attempt to clinch.
Slim misses with the combination.
Kun tries to close the distance and clinch but Slim swats him to one side with an open hand palm strike and circles away.
Kun wants to clinch up but Slim keeps it at a distance.
That's two minutes gone in the round.
Kun tries to clinch but Slim moves out of range.
Kun tries to clinch but is not successful on this occasion.
Slim unleashes a big counter combination but Kun bobs and weaves and avoids any damage.
Kun moves in looking to clinch but Slim pushes him off.
Kun fails with an attempt to clinch.
Luca Kun seems to be the more aggressive standup fighter in this bout.
Slim avoids the clinch attempt nicely.
Slim throws a shot from downtown. Kun moves away and avoids it.
Kun is trying to close the distance and clinch up, after that failed offence from Slim.
Kun moves to clinch but Slim breaks away
and Slim counters with a nice jab to the body that keeps Kun thinking.
Kun slips a straight right by Slim.
Kun fails with an attempt to clinch.
A little jabbing left from Slim on the counter but it doesn't find it's target.
Kun tries to clinch there but Slim circles away.
Slim unleashes a big counter combination but Kun bobs and weaves and avoids any damage.
That's three minutes gone in the round.
Kun moves out of range of the strikes.
Slim swats away the attempt to clinch by Kun.
Slim keeps the fight on the outside.
Kun tries to clinch but Slim moves out of range.
Slim throws a right hand that Kun ducks under and follows up with a left that Kun also avoids with ease.
Kun wants to clinch up but Slim keeps it at a distance.
Kun fails with an attempt to clinch.
Slim avoids the clinch attempt nicely.
Slim is loading up here, looking for a big counter of his own.
Kun tries to clinch up.
Kun tries to clinch but is not successful on this occasion.
Slim misses with the combination.
That's four minutes gone in the round.
Slim clinches with his opponent.
Kun is trying to pull guard but Slim has him pressed against the cage.
Kun is trying to pull guard but Slim turns him against the cage and we stay in the clinch.
Kun tries to pull guard but Slim won't allow it.
That's three failed takedown attempts in the round for Luca Kun. That's going to take a lot out of him.
Slim drags the fight down to the ground.
Kun stands and throws Slim's legs to the side, diving into side control.
Kun working hard here to secure a kimura but he's not really in the right position for it.
Kun tries for a kimura but Slim is defending well.
We've seen a great period of action over the last minute or so - credit to both fighters for going all out!
The crowd thankful this round is nearly over.
Slim is trying to control Kun's posture but Kun avoids it.
And thats the end of the round the fighters go back to their corners.
Fat Slim dominated that round.
That's time! Back to the action!
Kun fails with an attempt to clinch.
Slim is loading up here, looking for a big counter of his own.
Kun tries to close the distance and clinch up against the cage but Slim paws at him with a jab and circles away.
Kun closes the distance but Slim moves to the side
and Slim counters with a series of strikes. Kun will be more careful next time no doubt.
Slim throws a combination but it was largely blocked by Kun.
Kun is trying to close the distance and clinch up, after that failed offence from Slim.
Kun is looking to clinch but Slim is avoiding it.
Slim circles away from the clinch attempt.
A nice side step and Slim releases a counter shot to the body, but it doesn't find it's home.
Slim misses with a wild combination.
We've had a slow start to the round here - hopefully the action picks up.
Kun tries to clinch but is not successful on this occasion.
Kun keeping a good distance there, avoiding the body shot.
As Slim tries to get set, Kun tries to push him back and clinch up but Slim manages to avoid the attempt.
Kun tries to clinch up.
That's one minute gone in the round.
Kun tries to clinch but Slim moves out of range.
Kun is looking to take this fight into the clinch.
Slim tries to counter by closing the distance.
Slim keeps the fight on the outside.
Kun fails in his attempt to clinch.
Slim fails to land with a series of punches.
Kun fails with an attempt to clinch.
Kun wants to clinch up but Slim keeps it at a distance.
Kun tries to close the distance and clinch up but Slim swats him away and circles back towards the center.
The fight stays on the outside here - Kun looks like he's thinking about clinching though.
That's two minutes gone in the round.
Slim swats away the attempt to clinch by Kun.
Despite the aggression on Slim's face he doesn't fully commit to the counter.
Slim throws a hard body shot but it just misses.
Kun avoids the head kick by Slim.
Slim circles away from the clinch attempt.
Kun wants to clinch.
Slim is clearly trying to counter these attacks from Kun with a body shot.
Kun doesn't manage to clinch there - Slim circles away.
Slim is throwing a lot of body shots here, looking to wear down Kun rather than just go for the knockout.
Slim rushes Kun and pushes him back against the cage in a clinch.
Kun is trying to pull guard but Slim has him pressed against the cage.
Kun tries to pull guard but Slim won't allow it.
That's three minutes gone in the round.
Kun is trying to pull guard but Slim has him pressed against the cage.
That's three failed takedown attempts in the round for Luca Kun. That's going to take a lot out of him.
Kun jumps guard but his hands slip and he falls flat on his back. Well, he's made himself look a right mug there, as Slim walks away with a smile on his face. Kun gets slowly back to his feet and shakes his head.
Kun is looking to clinch.
The fight stays on the outside here - Kun looks like he's thinking about clinching though.
Slim is loading up here, looking for a big counter of his own.
Kun tries to clinch but is not successful on this occasion.
Kun wants to clinch up but Slim keeps it at a distance.
Despite the aggression on Slim's face he doesn't fully commit to the counter.
Kun tries to clinch but Slim moves out of range.
Kun fails in his attempt to clinch.
Kun moves in looking to clinch but Slim pushes him off.
Slim lets it all go there with a big combo counter but none of the punches connected.
Luca Kun is looking to throw some combinations by the looks of things.
Slim misses with a jab, cross combination.
Kun tries to close the distance and clinch up but Slim swats him away and circles back towards the center.
Slim misses with a series of wild punches.
That's four minutes gone in the round.
Kun wants to clinch but Slim slips to the side
letting Slim counter with a right hand.
Slim misses with a jab, cross combination.
Kun wants to clinch.
Slim throws a hook to the body but it doesn't connect.
Kun tries to clinch up but Slim circles away and keeps his distance.
Boooooooooooooooooooo!!! God, this has been a terrible round. Come on you two, sort yourselves out!
The sound of bone on bone echoes around the arena as Kun checks a leg kick.
Kun tries to close the distance and clinch up but Slim swats him away and circles back towards the center.
Slim has been the more effective fighter overall so far.
Kun fails with an attempt to clinch.
And thats the end of the round the fighters go back to their corners.
Fat Slim showed his class in that round. I'd imagine he'll take it on all the scorecards.
Well, the break between rounds is over. Let's get back to the scrappin! And we move into the final round!
Slim has taken the fight to the clinch.
Kun pulls guard effortlessly.
Slim wants to control from the top but Kun keeps moving.
Slim is trying to tuck his arms in to keep them safe but Kun has managed to isolate one of them and has got a loose triangle. Slim is looking to defend but Kun has done well to lock his legs together - this could be big trouble for Slim! Kun pulls down on the head and a little smile comes across his face - he knows he's got it. Yep, Slim taps out and this one is all over!
Ladies and gentlemen, after 0:31 of round 3, we have a winner by way of Submission (Triangle). Luca Kun!
|
|
|
|
|
|
|
|
|
|
|
|
|
|
|
|
|
|
|
|
|
|
|
| S |
C
A |
G |
S |
C
B |
G |
|
S |
C |
G |
|
energy
A | B |
|
hype
A | B |
|
pop
A | B |
|
mgr
A | B |
|
FIGHT
RATING
37% |
|
|
|
|
|
|
|
|
|
|
