 |
ROTI-22 PBP Commentary |
Undercard bout
|
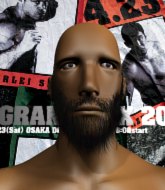
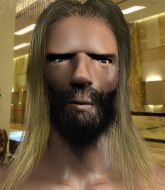
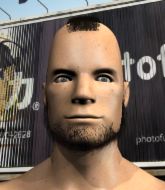
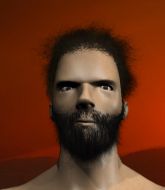
Coming up we have a light heavyweight MMA rules bout between Drax Tauro (ranked 4977 p4p, 544 weight class) and Splinter Yoshi (ranked 5868 p4p, 584 weight class). Over to our ring announcer for the fighter introductions!
 |
|
 |
| 185 cm
25
205 lbs
1 - 2 - 0 |
|
190 cm
25
220 lbs
0 - 0 - 0 |
BJJ White Belt
Excellent boxer
Very strong |
|
BJJ Blue Belt
Solid Muay Thai
Granite chin |
|
| |
|
Ladies and gentlemen. This fight is 3 rounds, in the light heavyweight division.
Introducing the fighter to my left, fighting out of the red corner.
With a record of
1 - 2 - 0, fighting out of The Island, Drax Tauro !
And introducing the fighter to my right, fighting out of the blue corner.
With a record of
0 - 0 - 0, fighting out of The Island, Splinter Yoshi!
The judges for this bout are Winston Alpacca, Peter Branson and Dirk Anderson.

The bell rings for round one and we are underway!
Yoshi slips a straight right by Tauro .
Tauro misses with a body shot.
Tauro throws a monster uppercut resembling something out of street fighter but it doesn't land.
Yoshi lands with a nice low kick. That'll leave a bruise.
Tauro lands a jab to Yoshi's midsection.
Tauro misses with a looping right.
Yoshi slips a jab from Tauro .
Drax Tauro seems to be the more aggressive standup fighter in this bout.
Tauro misses with a wild body shot.
Yoshi dodges the punch combination from Tauro .
We've had a slow start to the round here - hopefully the action picks up.
Tauro stumbles momentarily as he takes a strong leg kick from Yoshi.
Tauro tries to bum rush Yoshi with a series of wild strikes but Yoshi uses good footwork to avoid the assault.
Yoshi connects with an inside leg kick.
Yoshi slips a jab and a cross from Tauro .

That's one minute gone in the round.
Tauro throws a right hand that Yoshi ducks under and follows up with a left that Yoshi also avoids with ease.
Yoshi avoids a lazy jab quite easily.
Yoshi steps to the side to avoid the strikes from Tauro .
Tauro just misses with a punch to the body.
Yoshi swings and misses with a hook to the body.
Tauro looks to land a right hand but Yoshi moved out of range.
Yoshi connects with a leg kick. Tauro looked like he was expecting something else and didn't defend it.
Tauro throws a hook but Yoshi blocks it.
Tauro backing away here, and Yoshi unleashes a leg kick that just misses.
Yoshi throws a head kick that looked like it stung.
Tauro swings widly with a right hand
and Yoshi counters with an inside leg kick.
Like a baseball bat into the meat of his leg there - nice leg kick by Yoshi.
Tauro pushes forward with a 1-2 combination that forces Yoshi back to the cage. Tauro follows up with a solid lead hook to the liver.
Yoshi misses the jab.
Nice defenses there by Yoshi.
Yoshi appeared to try and counter that last move with a leg kick.
Yoshi connects with a leg kick. He turned his hip over nicely there.

That's two minutes gone in the round.
Fantastic stuff here - a very entertaining period of action, which has drawn cheers from the crowd.
Yoshi displays some good footwork, moving neatly out of range as Tauro throws out the jab.
Yoshi was about to counter that last move with a leg kick but changes his mind.
The fighters circling - Yoshi throws out the jab but it was never going to land.
That's a knee to de groin and it's over and out! Tauro crumples to the ground after an illegal strike from Yoshi - the referee stops the clock and Tauro gets 5 minutes to recover from that one. "I'm sorry" says Yoshi. Tauro manages to get back to his feet and the fight resumes.
Tauro has his front leg slapped to the side - a nice low kick landing there from Yoshi.
Yoshi buckles his opponent's knee momentarily with a nice leg kick.
Tauro fakes low and throws an overhand right that catches Yoshi on the side of the head.
A swing and a miss from Tauro .
Yoshi wants to counter the offense by Tauro and move into the clinch position.
Tauro takes a thudding leg kick, right into the meat of the thigh.
Yoshi feints with a shoulder and throws a nice leg kick to Tauro 's calf.
Nice shot lands for Tauro .
Tauro has his front leg slapped to the side - a nice low kick landing there from Yoshi.
Tauro rushes in with a sloppy looking punch
and Yoshi counters with a nice leg kick.
Yoshi fakes a jab and scores with a low kick.
Tauro moves out of range as Yoshi strikes.

That's three minutes gone in the round.
Tauro throws a jab but it's blocked by Yoshi.
A nice leg kick lands there from Yoshi.
Tauro rushes in with a sloppy looking punch
and Yoshi counters with a thumping low kick.
Yoshi lands a leg kick and bounces back out of range.
Yoshi avoids the body shot from Tauro .
Tauro throws a right hand that Yoshi ducks under and follows up with a left that Yoshi also avoids with ease.
Yoshi keeping his hands up high there, blocking the jab from Tauro .
Yoshi avoids the body shot from Tauro .
Yoshi appeared to try and counter that last move with a leg kick.
A nice inside leg kick there by Yoshi. That's going to slow Tauro down.
A solid body kick from Yoshi.
Yoshi keeping a good distance there, avoiding the body shot.
Yoshi scoring well with a low kick there.
Yoshi slips a jab and a cross from Tauro .

That's four minutes gone in the round.
Tauro throws a left and a right that both miss
and Yoshi counters with an outside leg kick.
Yoshi throws a nice inside leg kick.
Tauro misses with a series of wild punches.
This is a great period of action - very entertaining stuff!
Tauro misses with a left hand
and Yoshi counters with a slapping leg kick.
Tauro throws a right hand that misses
and Yoshi counters with a nice leg kick.
Tauro throws a body punch but Yoshi moves out of range.
Tauro on the receiving end of a decent leg kick there by Yoshi. Yoshi obviously looking to wear him down.
Yoshi throws a leg kick which misses Tauro 's front leg but catches the back leg as Tauro tries to avoid it.
Tauro ducks down and throws a hook to the body but Yoshi moves away.
Tauro throws a hook to the body but it doesn't connect.
Yoshi wants to counter with a clinch but Tauro pushes him away.
Tauro misses with a looping right.
Yoshi throws a body kick that sends a sickening thudding noise reverberating around the arena.
Tauro is hobbling a little on that front leg after taking quite a few leg kicks so far in this fight.
Tauro misses with a hook.
And thats the end of the round the fighters go back to their corners.
A close round but Splinter Yoshi will probably get the nod.
That's the end of the round. The referee orders the cornermen out of the cage so we can get back down to business.

Tauro looks to score with a combo but nothing lands.
Yoshi throws a hard body shot but it just misses.
Yoshi pulls out of a head kick attempt.
Tauro ducks down and throws a hook to the body but Yoshi moves away.
Tauro misses with a few strikes there.
Yoshi uses some good footwork to avoid the body shot by Tauro .
Yoshi appeared to try and counter that last move with a leg kick.
Yoshi slips under a jab.
Tauro throws a looping overhand right but Yoshi ducks down to avoid it.
Tauro has his front leg slapped to the side - a nice low kick landing there from Yoshi.
Sloppy strikes from Tauro . Those never looked like landing.
We've had a slow start to the round here - hopefully the action picks up.
Yoshi cracks the inside of Tauro 's front leg.
A big left from Tauro misses.
Yoshi flicks out a counter leg kick but Tauro steps away.
Tauro misses the jab.
Yoshi appeared to try and counter that last move with a leg kick.
A chopping leg kick lands by Yoshi.
Yoshi throws a mid kick that lands with a slap.
That's one minute gone in the round.
Yoshi tries to move into range but Tauro moves to the side and lands with a nice right hand.
Yoshi throws a quick inside leg kick.
Yoshi blocks a jab.
Splinter Yoshi seems to be getting the better of the standup.
Tauro lands with an overhand left.
Yoshi lands a nice leg kick that just misses Tauro 's sensitive parts.
A big right from Tauro misses.
Tauro takes a nice looking leg kick right on the meat of his thigh there.
Tauro misses with a straight left.
Tauro backing away here, and Yoshi unleashes a leg kick that just misses.
Tauro takes a nasty kick to the mid section... That should keep him thinking. Does he try and block and risk a head kick landing?
Tauro swings away with a body shot that misses
and Yoshi makes him pay by landing a thudding low kick.
Yoshi connects with an inside leg kick.
Yoshi scores with a slapping inside leg kick.
A slapping body kick lands there for Yoshi.
That's two minutes gone in the round.
Yoshi feints with a shoulder and throws a nice leg kick to Tauro 's calf.
This is a great period of action - very entertaining stuff!
A chopping leg kick lands by Yoshi.
Yoshi connects with an inside leg kick.
Yoshi ducks under a wild hook from Tauro .
Tauro fakes high and swings low for a body shot but Yoshi manages to avoid it.
Yoshi feints and then cracks Tauro 's leading leg with a nice low kick. He's obviously looking to slow Tauro down.
Yoshi lands a leg kick. The shin dug right into the meat of the thigh.
Tauro takes a thudding leg kick, right into the meat of the thigh.
Tauro misses with a hook.
Yoshi feints a counter leg kick.
Tauro takes a thudding leg kick, right into the meat of the thigh.
Tauro scores to the head and body with a nice combination!
Yoshi fakes a couple of low kicks, before throwing one on the third attempt. It connects and Tauro has to reset his feet before getting ready to engage.
Yoshi thumps Tauro with a low kick.
Yoshi thows a body kick. Tauro tries to catch it but that hurt him.
Tauro will be looking to protect his midsection after taking some solid kicks to the body.
That's three minutes gone in the round.
Tauro takes a thudding leg kick, right into the meat of the thigh.
Yoshi with a nice looking leg kick. You could hear that one land in a back row.
Yoshi slips a jab and a cross from Tauro .
Tauro throws an overhand right that lands on Yoshi's shoulder, as Yoshi tries to avoid the shot.
Tauro throws a body shot but no joy.
Yoshi is loading up here, looking for a big counter of his own.
Tauro throws a jab when Yoshi was well out of range.
Yoshi doesn't fully commit to the body shot counter.
Tauro tries to check a leg kick but that clearly hurt him.
Yoshi uses some good footwork to avoid the body shot by Tauro .
Tauro misses with a looping left.
Yoshi fakes a couple of low kicks, before throwing one on the third attempt. It connects and Tauro has to reset his feet before getting ready to engage.
Yoshi avoids a punch combination nicely.
Tauro throws out a loose jab but Yoshi uses good head movement to avoid it.
That's four minutes gone in the round.
Yoshi uses decent footwork to sidestep a right hand from Tauro .
Yoshi turns his hip over beautifully as he lands a nice leg kick.
Yoshi ducks under a wild hook from Tauro .
Tauro throws a shot from downtown. Yoshi moves away and avoids it.
Tauro will need to tighten up his combinations if he doesn't want to gas himself out, swinging at thin air.
Nice body kick from Yoshi.
Wooooo! Give it up for these two warriors! They are putting on a show!
Tauro throws an ugly left hook that misses
and Yoshi makes him pay by landing a thudding low kick.
Yoshi connects with a leg kick. He turned his hip over nicely there.
That kick from Yoshi tenderised Tauro 's leg. Tauro is trying to keep his angry face on.
A nice inside leg kick there by Yoshi. That's going to slow Tauro down.
Yoshi moves away from the strike by Tauro .
Yoshi appeared to try and counter that last move with a leg kick.
Yoshi lands with a nice low kick. That'll leave a bruise.
And thats the end of the round the fighters go back to their corners.
Splinter Yoshi showed his class in that round. I'd imagine he'll take it on all the scorecards.
Well, the break between rounds is over. Let's get back to the scrappin! Let's get this one finished - here comes the final round!

Yoshi turns his hip over beautifully as he lands a nice leg kick.
Yoshi looking to take his opponent's legs away with the low kicks.
Tauro throws an ugly left hook that misses
and Yoshi counters with a low kick, right behind Tauro 's knee.
Yoshi has been the more effective fighter overall so far.
Tauro looks to throw the jab but Yoshi is out of range.
Tauro has a nice red mark on his side after a thudding body kick by Yoshi.
Tauro misses with an uppercut.
A big left from Yoshi misses.
Yoshi throws a nice inside leg kick.
Tauro lands a nice looking body shot.
Tauro misses with an uppercut
and Yoshi counters with a thumping low kick.
We've had a slow start to the round here - hopefully the action picks up.
Tauro fails to land with a series of punches.
Yoshi lands with a thumping leg kick.
The fighters circling - Tauro throws out the jab but it was never going to land.
An inside leg kick lands from Yoshi.
That's one minute gone in the round.
Yoshi is looking to slow Tauro down with leg kicks.
Tauro throws an overhand right that lands on Yoshi's shoulder, as Yoshi tries to avoid the shot.
Yoshi replies with a solid counter kick to the body but Tauro blocks it well.
A nice leg kick lands there from Yoshi.
Tauro moves out of range as Yoshi strikes.
A punch combination from Tauro misses.
Tauro 's legs have taken a beating and he's really slowing down as a result.
Tauro throws an off balance right hand
and Yoshi counters with a nice leg kick.
Tauro has a nice red mark on his side after a thudding body kick by Yoshi.
Yoshi connects with an inside leg kick.
Tauro pushing out the jab but it's not landing.
A swing and a miss from Tauro .
Yoshi is loading up here, looking for a big counter of his own.
Tauro misses with an uppercut.
An inside leg kick lands from Yoshi.
Tauro thows a left - swing and a miss!
Yoshi feints a counter leg kick.
That's two minutes gone in the round.
Nice defenses there by Yoshi.
Tauro has his front leg slapped to the side - a nice low kick landing there from Yoshi.
Tauro jabbing away but nothing is landing.
Thud! ouch! good body kick from Yoshi - that will leave a mark!
The crowd are loving this. Great action here.
Yoshi dances in quickly and lands a nice inside leg kick on Tauro . That did some damage!
Tauro swings and misses with a hook to the body.
A lazy left from Tauro finds it's target.
Yoshi misses with a half-hearted attempt at a head kick.
Yoshi throws a leg kick which misses Tauro 's front leg but catches the back leg as Tauro tries to avoid it.
Tauro misses with a jab and misses with a cross straight after too.
Yoshi scores with a leg kick.
Tauro throws a right hand that misses
and Yoshi counters with a leg kick that reverborates around the arena.
Yoshi keeps Tauro at a distance using the push kick.
That's three minutes gone in the round.
Tauro misses with a hook
and Yoshi counters with a leg kick that reverborates around the arena.
Tauro on the wrong end of a nice low kick. He's acting like it's no big deal but he doesn't want to take many more of those.
Tauro takes a nice looking leg kick right on the meat of his thigh there.
Thud! ouch! good body kick from Yoshi - that will leave a mark!
Yoshi showing good head movement there, avoiding the strikes from Tauro .
Yoshi staying out of range there.
Tauro throws an ugly left hook that misses
and Yoshi counters with an inside leg kick.
Yoshi steps to the side to avoid the strikes from Tauro .
Nice body kick from Yoshi.
Both fighters are breathing heavily.
Yoshi scoring well with a low kick there.
Yoshi throws a quick head kick that skims the top of Tauro 's head.
Yoshi uses decent footwork to sidestep a right hand from Tauro .
Yoshi flicks out a counter leg kick but Tauro steps away.
That's four minutes gone in the round.
Yoshi uses good footwork to avoid the strikes from Tauro .
Yoshi moves into range and lands a nice leg kick.
Tauro works Yoshi's body with a nice hook.
We've seen a great period of action over the last minute or so - credit to both fighters for going all out!
Yoshi showing good head movement there, avoiding the strikes from Tauro .
Tauro misses with a hook.
Yoshi slips a straight right by Tauro .
Tauro will need to tighten up his combinations if he doesn't want to gas himself out, swinging at thin air.
Yoshi feints a counter leg kick.
Tauro misses with a double jab
and Yoshi counters with a low kick, right behind Tauro 's knee.
Yoshi throws a nice inside leg kick.
Drax Tauro has stepped it up - he knows he needs a finish here!
Yoshi uses good footwork to avoid the strikes from Tauro .
And that's the end of the fight!
Splinter Yoshi comfortably won the final round on my scorecard.
Well Yoshi has outworked and out performed his opponent in all aspects of the game today. He was simply too good and the decision should be no more than a formality. Over to the ring announcer for the scorecards.
Ladies and gentlemen, after 3 rounds of action, we go to the scorecards for a decision.
Judge Winston Alpacca scores the fight 27:30
Judge Peter Branson scores the fight 27:30
Judge Dirk Anderson scores the fight 27:30
In favor of your winner, by unanimous decision... Splinter Yoshi!
During a confident post fight interview, Splinter Yoshi thanked all his fans. He seemed very genuine when describing how motivated his fans keep him.
|
|
|
|
|
|
|
|
|
|
|
|
|
|
|
|
|
|
|
|
|
|
|
| S |
C
A |
G |
S |
C
B |
G |
|
S |
C |
G |
|
energy
A | B |
|
hype
A | B |
|
pop
A | B |
|
mgr
A | B |
|
FIGHT
RATING
64% |
|
|
|
|
|
|
|
Undercard bout
|
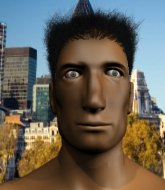
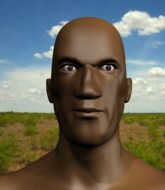
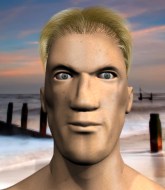
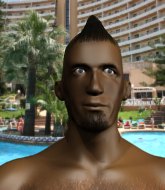
Coming up we have a heavyweight MMA rules bout between Green Bastard (ranked 6244 p4p, 492 weight class) and Black Caesar (ranked 5028 p4p, 458 weight class). I don't know about you partner, but I'm pumped for this one!
 |
|
 |
| 190 cm
20
275 lbs
1 - 1 - 0 |
|
186 cm
18
279 lbs
1 - 0 - 0 |
BJJ White Belt
Brawler
Big heart |
|
Good wrestler
Brawler
Powerful |
|
| |
|
Ladies and gentlemen. This fight is 3 rounds, in the heavyweight division.
Introducing the fighter to my left, fighting out of the red corner.
With a record of
1 - 1 - 0, fighting out of The Island, Green Bastard!
And introducing the fighter to my right, fighting out of the blue corner.
With a record of
1 - 0 - 0, fighting out of The Island, Black Caesar!
The judges for this bout are Dirk Anderson, Winston Alpacca and Sandra Marshall.
The bell rings for round one and we are underway!
Bastard misses with the combination.

Caesar instigates a clinch.
A bit of stalling here from Bastard.

Caesar has managed to pull guard. Let's see whether he can work an aggressive guard. It will also be interesting to see what tactics Bastard uses from the top position.
Caesar looking to control.

Caesar is looking for a guillotine. You can't force these things though and Bastard defends well.
Bastard controlling from the top position.
Caesar has been taking part in the yoga sessions down at My Yard 'Alcatraz'. Presumably he's going to look for a slick submission... Or maybe he's looking to avoid one.
Bastard wants to control from the top but Caesar keeps moving.
We've had a slow start to the round here - hopefully the action picks up.
Caesar has his foot on Bastard's thigh. He's trying to push off and get in position for a triangle, I think. Bastard works his way back into a safe position though.
Bastard has been talking about how he's improved his wrestling in the run up to the fight so let's see if that's enough to sway the balance.
Bastard has a momentary lapse of concentration, allowing Caesar to throw up a leg and lock on what appears to be a pretty tight triangle! Bastard is fighting it off but it's all too little too late - Caesar pulls down on the head and he's put Bastard to sleep! This one is all over!
Ladies and gentlemen, after 1:55 of round 1, we have a winner by way of Submission (Triangle). Black Caesar!
Black Caesar spent the whole post fight interview bigging himself up. It didn't go down that well with the fans after a while as they thought it was a bit arrogant.
|
|
|
|
|
|
|
|
|
|
|
|
|
|
|
|
|
|
|
|
|
|
|
| S |
C
A |
G |
S |
C
B |
G |
|
S |
C |
G |
|
energy
A | B |
|
hype
A | B |
|
pop
A | B |
|
mgr
A | B |
|
FIGHT
RATING
58% |
|
|
|
|
|
|
|
Undercard bout
|
Coming up we have a welterweight MMA rules bout between Xtreme Islander (ranked 5189 p4p, 485 weight class) and Aizah Burris (ranked 4857 p4p, 465 weight class). Chooooooooon! I think Islander might be my favorite fighter, now he's come out to You're Going Down. Aizah Burris told me before the fight that he's been watching a lot of DVDs so let's see if that helps him in this one! I can't wait to find out!
 |
|
 |
| 177 cm
25
173 lbs
1 - 2 - 0 |
|
183 cm
25
175 lbs
2 - 2 - 0 |
BJJ White Belt
Great elbows
Self confident |
|
Decent wrestler
Solid Muay Thai
Determined |
|
| |
|
Ladies and gentlemen. This fight is 3 rounds, in the welterweight division.
Introducing the fighter to my left, fighting out of the red corner.
With a record of
1 - 2 - 0, fighting out of The Island, Xtreme Islander!
And introducing the fighter to my right, fighting out of the blue corner.
With a record of
2 - 2 - 0, fighting out of The Island, Aizah Burris!
The judges for this bout are Peter Branson, Bart Greer and Dirk Anderson.
The bell rings for round one and we are underway!

Islander clinches up with Burris and pushes him back against the cage.
Islander comes over the top with an elbow. That landed flush.

It looks like Aizah Burris has been cut.
Islander lands a damaging elbow.
Burris slowing the pace effectively.
Burris misses with a short punch on the inside.
Nice body punch from Burris - that landed with a thud.
Burris lands a nice elbow.
Islander misses with a shot to the kidneys.
With the fighters clinched against the cage, Burris creates a bit of distance for himself and scores with a nice uppercut.
Islander can't find room to land a body shot as Burris controls the action.
Burris using the Thai plumb to throw knees but Islander has his back arched nicely, preventing the strike.
A short left from Islander.
Islander pressing his opponent against the cage.
Burris throws a head punch that misses.
Islander blocks a knee to the body. He'll have a nicely bruised forearm in the morning.
Islander lands a damaging elbow.
We've seen a great period of action over the last minute or so - credit to both fighters for going all out!
Islander trying to control the position but instead, Burris has worked for underhooks and has pushed Islander into the cage.
Islander lands an elbow just above Burris 's eye.
That has opened up Aizah Burris's cut even more.
Islander lands punches inside but they're not really causing much damage.
That's one minute gone in the round.
Burris lands on the inside with an uppercut.
Islander definitely looks more muscular than last time we saw him fight.
Islander avoiding damage as Burris throws knees to the body.
Nice elbow from Islander.
Islander blocks an uppercut.
Burris misses with a punch on the inside.
A short uppercut from Islander.
Islander utilising his Muay Thai to score with a knee to the body.
Islander trying to control the position but instead, Burris has worked for underhooks and has pushed Islander into the cage.
Burris is looking to score with knees to the body. Maybe he'll change it up and go body then head. Islander is defending well for now.
Burris will no doubt start fighting again in a minute but for now he's just having a little rest, leaning Islander up against the cage.
Burris misses with a punch to the body.
Burris pushes Islander back against the cage and lands a hook to the side of the head.
Burris avoiding damage.
Burris using the Thai plumb to throw knees but Islander has his back arched nicely, preventing the strike.
That's two minutes gone in the round.
Burris is looking to score with knees to the body. Maybe he'll change it up and go body then head. Islander is defending well for now.
Islander comes over the top with an elbow. That landed flush.
Islander displaying some good clinch control by pressing Burris up against the cage.
Burris is looking to score with knees to the body. Maybe he'll change it up and go body then head. Islander is defending well for now.
Fantastic stuff here - a very entertaining period of action, which has drawn cheers from the crowd.
Burris lands a glancing elbow in the clinch.
Burris scores with an uppercut up the middle.
Burris misses with a punch on the inside.
Islander prevents a body shot from Burris.
Burris tries to land a knee to the head but Islander blocks with his arms.
Burris is working hard here but doesn't seem to be able to control effectively, up against the cage.
Islander tries a knee to the head but Burris blocks it.
Islander lands an elbow inside that Burris shrugs off.
The cut above Aizah Burris's eye is starting to cause him problems now.
Islander blocks a couple of punches on the inside.
Islander lands an elbow inside.
Aizah Burris's cut is absolute horrible now. This looks like something out of a horror film with blood covering both fighters.
Islander putting his Muay Thai to good use. He has Burris in a tight clinch and is doing some damage with knees to the body.
Burris looks winded!
Burris being controlled against the cage.
Burris looking to throw knees to the head but Islander is blocking nicely.
That's three minutes gone in the round.
Islander blocking some punches.
Good anti-grappling being displayed by Burris as Islander tries to tie him up.
Islander is trying to slow down the pace in the clinch, to catch his breath.
Burris tries a knee to the head but he's missed.
Islander with a knee to the head.
The referee calls the doctor in to look at Aizah Burris's cut. Oh no, the doctor has called an end to the bout!
Ladies and gentlemen, after 3:33 of round 1, we have a winner by way of TKO (Cut). Xtreme Islander!
Our winner, Xtreme Islander, made sure he spent some time buttering up the crowd during his post fight interview, which will no doubt bring him a few more fans.
|
|
|
|
|
|
|
|
|
|
|
|
|
|
|
|
|
|
|
|
|
|
|
| S |
C
A |
G |
S |
C
B |
G |
|
S |
C |
G |
|
energy
A | B |
|
hype
A | B |
|
pop
A | B |
|
mgr
A | B |
|
FIGHT
RATING
35% |
|
|
|
|
|
|
|
Undercard bout
|
Coming up we have a light heavyweight MMA rules bout between Desmond Hume (ranked 3598 p4p, 440 weight class) and Rodney Halford (ranked 2011 p4p, 282 weight class). Rodney Halford has the better chin. Will he look to stand and bang today?
 |
|
 |
| 187 cm
18
220 lbs
2 - 0 - 0 |
|
181 cm
25
200 lbs
3 - 1 - 0 |
BJJ Blue Belt
Basic striking
KO power |
|
BJJ White Belt
Excellent MT
Determined |
|
| |
|
Ladies and gentlemen. This fight is 3 rounds, in the light heavyweight division.
Introducing the fighter to my left, fighting out of the red corner.
With a record of
2 - 0 - 0, fighting out of The Island, Desmond Hume!
And introducing the fighter to my right, fighting out of the blue corner.
With a record of
3 - 1 - 0, fighting out of The Island, Rodney Halford!
The judges for this bout are Bart Greer, Michael Johnstone and Daniel Franklin.
The bell rings for round one and we are underway!
Halford just misses with a punch to the body.
Hume wants to take advantage of his opponent's missed offense by moving into the clinch.
Halford looks more muscular than last time we saw him. He must have been on the weights.
Hume throws a looping left and ducks down for a takedown. He's got his arms around Halford's waist but Halford gets an underhook and avoids the takedown by throwing Hume off to one side.
Halford misses with a wild body shot.
Hume misses with a lunging right hand
and Halford counters with a nice kick to the body.
Halford lands with a nice body kick.
Hume throws an uppercut from half a mile away. Halford sees it coming and avoids it easily.
Hume fakes high and swings low for a body shot but Halford manages to avoid it.
A countering left hand to the body from Halford misses.
A decent looking body kick lands there for Halford.
Hume fails with a takedown attempt.
We've had a slow start to the round here - hopefully the action picks up.
Hume doesn't react quick enough there as he takes a shot to the body.
Hume avoids the body shot from Halford.
Halford fails in his attempt to clinch.
Hume has managed to clinch.
That's one minute gone in the round.
Hume throws a head punch that misses.
Hume throws a punch but it's blocked by Halford.
Hume swings wildly with an uppercut but Halford uses good head movement to avoid it.
Hume has a couple of punches blocked by Halford.
Hume tries a shoulder strike but it doesn't do any damage.
Hume misses with a punch to the body.
Hume misses with a punch to the body.
Halford can't break the clinch.
Hume lands a nice uppercut.
Halford stalling here - the referee won't stand for too much of that.
Both fighters working to control the clinch.
That's two minutes gone in the round.
A body shot lands from Hume.
Halford looking to stall.
Hume swings wildly with an uppercut but Halford uses good head movement to avoid it.

Halford breaks from the clinch.
Halford is looking to land body kicks.
Hume throws a hook to the body but it doesn't connect.

Hume looking for a takedown here - he's got it.
Hume is standing up over Halford. Halford looks to escape but Hume dives into side control.

This is a great period of action - very entertaining stuff!
Halford struggling a bit here.
That's three minutes gone in the round.
Halford wings away with a couple of strikes but they don't land.
Halford really doesn't want to stay on the ground with Hume. If he can't get it back to his feet, it's only a matter of time before he'll be tapping out.

Hume has an Americana. Halford didn't react quickly enough there and he's in big trouble now! He tries to squirm out but is forced to tap! Hume is delighted and gyrates in front of the ring girls. They seem to like the attention - it'll be interesting to see if Hume hooks up with any of them at the after show party.
Ladies and gentlemen, after 3:34 of round 1, we have a winner by way of Submission (Americana). Desmond Hume!
Our winner, Desmond Hume, made sure he spent some time buttering up the crowd during his post fight interview, which will no doubt bring him a few more fans.
|
|
|
|
|
|
|
|
|
|
|
|
|
|
|
|
|
|
|
|
|
|
|
| S |
C
A |
G |
S |
C
B |
G |
|
S |
C |
G |
|
energy
A | B |
|
hype
A | B |
|
pop
A | B |
|
mgr
A | B |
|
FIGHT
RATING
38% |
|
|
|
|
|
|
|
Undercard bout
|
Coming up we have a welterweight MMA rules bout between Iti Malia (ranked 2253 p4p, 248 weight class) and Nicholas Petrone (ranked 4519 p4p, 447 weight class). Iti Malia has the edge in experience - let's see if he can make that count tonight.
 |
|
 |
| 184 cm
25
175 lbs
3 - 1 - 0 |
|
179 cm
25
169 lbs
1 - 0 - 0 |
BJJ White Belt
Excellent boxer
KO power |
|
Good takedowns
Brawler
Experienced |
|
| |
|
Ladies and gentlemen. This fight is 3 rounds, in the welterweight division.
Introducing the fighter to my left, fighting out of the red corner.
With a record of
3 - 1 - 0, fighting out of The Island, Iti Malia!
And introducing the fighter to my right, fighting out of the blue corner.
With a record of
1 - 0 - 0, fighting out of The Island, Nicholas Petrone!
The judges for this bout are Peter Branson, Bart Greer and Michael Johnstone.
The bell rings for round one and we are underway!
Petrone shoots and misses
and Malia connects with a straight left hand counter down the middle.
Petrone shoots and misses
enabling Malia to counter with a crisp jab.
Petrone looks more muscular than last time we saw him. He must have been on the weights.
Malia is throwing a storm of strikes! Right hook, left hook and follows it up with a spinning back fist! Petrone hits the canvas like a rag doll! And just like that, this one is over!
Ladies and gentlemen, after 0:13 of round 1, we have a winner by way of KO (Strikes). Iti Malia!
|
|
|
|
|
|
|
|
|
|
|
|
|
|
|
|
|
|
|
|
|
|
|
| S |
C
A |
G |
S |
C
B |
G |
|
S |
C |
G |
|
energy
A | B |
|
hype
A | B |
|
pop
A | B |
|
mgr
A | B |
|
FIGHT
RATING
100% |
|
|
|
|
|
|
|
Undercard bout
|
Coming up we have a welterweight MMA rules bout between Virgil Van Dijk (ranked 2869 p4p, 304 weight class) and Whorely Alvarez (ranked 2598 p4p, 278 weight class). Whorely Alvarez struggled to make weight for this fight. He only made it down to 171.0lbs at the first attempt and had to take the additional two hours to make the official bout weight. Let's see how much it's taken out of him. Whorely Alvarez has the better chin. Will he look to stand and bang today?
 |
|
 |
| 184 cm
25
184 lbs
3 - 2 - 0 |
|
185 cm
25
185 lbs
3 - 3 - 0 |
Decent wrestler
Good kicks
KO power |
|
Good wrestler
Good kicks
Knockout power |
|
| |
|
Ladies and gentlemen. This fight is 3 rounds, in the welterweight division.
Introducing the fighter to my left, fighting out of the red corner.
With a record of
3 - 2 - 0, fighting out of The Island, Virgil Van Dijk!
And introducing the fighter to my right, fighting out of the blue corner.
With a record of
3 - 3 - 0, fighting out of The Island, Whorely Alvarez!
The judges for this bout are Daniel Franklin, Peter Branson and David Hoff.
The bell rings for round one and we are underway!
Alvarez lands a nice looking body kick.
Alvarez looks for the body kick but Van Dijk saw that one coming.
Alvarez looks to land a body kick but Van Dijk moved away.
Van Dijk moves out of range of the body kick from Alvarez.
Van Dijk lands a leg kick and bounces back out of range.
Alvarez throws a body kick but he was well out of range there.
Van Dijk misses with a half-hearted attempt at a head kick.
Alvarez ducks low and lands a nice hook to the body of his opponent.
Van Dijk swings and misses with a hook to the body.
Alvarez will have to do better than that with his takedown attempts.
Nice defenses there by Van Dijk.
Alvarez throws a jab but it's blocked by Van Dijk.
We've had a slow start to the round here - hopefully the action picks up.
Van Dijk thuds a mid kick into his opponent's body. That will wear on Alvarez if he has to take too many more of those.
Alvarez misses with a body kick.
Van Dijk does a little shimmy and throws a leg kick. The leg kick missed by a considerable margin though, making him look a little bit silly for doing the shimmy.
Alvarez takes an uppercut right on the jaw but it doesn't phase him.
Fantastic stuff here - a very entertaining period of action, which has drawn cheers from the crowd.
Horrible takedown attempt by Alvarez or perhaps it was just good defense by Van Dijk, which made it look bad.
That's one minute gone in the round.
Alvarez blocks a jab.
Alvarez looking to land some kicks to the body here.
Alvarez is trying hard to land a takedown here. Van Dijk sprawls well and keeps this one on the feet.
Virgil Van Dijk has stuffed three takedown attempts in the round now. That's going to take a lot out of Whorely Alvarez.
Van Dijk fakes high and swings low for a body shot but Alvarez manages to avoid it.
Van Dijk avoids a kick to the body.
Alvarez avoids a kick to the body.
Van Dijk attempts a leg kick but it's missed by a good margin.
Alvarez dips down and scores with a jab to the body.
Alvarez tries to land a front kick but Van Dijk steps back. That was a bit too telegraphed.
Van Dijk pulls out of a head kick attempt.
Van Dijk punishes Alvarez's body with a nice straight punch.
Ooooh, nice body kick lands from Alvarez. Van Dijk shrugs it off though.
Van Dijk tries a head kick but it misses.
Alvarez lands a front kick.
Van Dijk shoots in for a takedown but Alvarez shows good takedown defense.
That's two minutes gone in the round.
Van Dijk sees a low kick coming and goes to check it, but it's actually a body kick and it thuds into his unprotected ribs.
Van Dijk is breathing heavily.
The crowd are loving this. Great action here.
A slapping body kick lands there for Alvarez.
Alvarez throws a front kick that sends Van Dijk stumbling back into the cage.
Van Dijk steps to his left, right into the path of a big body kick from Alvarez. That one must have hurt.
Alvarez lands with a kick to the ribs.
Van Dijk sees a low kick coming and goes to check it, but it's actually a body kick and it thuds into his unprotected ribs.
Alvarez pushes Van Dijk away with a front kick.
Alvarez throws a quick head kick that skims the top of Van Dijk's head.
Van Dijk walks into a left hand.
Van Dijk throws a big shot that misses.
Van Dijk moves out of range of the body kick from Alvarez.
Alvarez works the jab nicely.
Van Dijk misses with an attempted mid kick.
A looping hook to the body misses from Van Dijk. Alvarez does a little dance to reset his feet.
That's three minutes gone in the round.
Alvarez pushes Van Dijk away with a front kick.
Van Dijk keeping a good distance there, avoiding the body shot.
Van Dijk tries to land a front kick but Alvarez steps back. That was a bit too telegraphed.
Alvarez is looking to land body kicks.
Van Dijk attempts a counter takedown but Alvarez avoids it well and moves away.
Van Dijk misses with a low kick as Alvarez jumps back.
Alvarez looked like he wanted to counter with a punch but didn't throw it.
Alvarez throws the kick towards the body but Van Dijk avoids it.
Alvarez fakes the leg kick and cracks Van Dijk in the body.
Alvarez misses with a straight left.
Van Dijk bobs and weaves and unloads with a good uppercut.
Van Dijk fakes and then throws a beautiful body shot. Alvarez looks a bit winded and takes a step backwards to take a breath.
Alvarez ducks under a wild hook from Van Dijk.
Both fighters circling a little - Alvarez finishes the exchange with a kick to the body.
Alvarez misses with an attempted mid kick.
Van Dijk tries to land a front kick but Alvarez steps back. That was a bit too telegraphed.
Alvarez thinks about the counter body kick.
Whorely Alvarez seems to be the more aggressive standup fighter in this bout.
That's four minutes gone in the round.
Van Dijk takes a head kick and keeps coming.
Wooooo! Give it up for these two warriors! They are putting on a show!
Van Dijk plants his feet and lands a nice head kick!
Alvarez gets his takedown attempt stuffed easily
and Van Dijk counters with a solid body kick.
Van Dijk explodes with a nice body kick and back out of range. Nice work.
A decent looking body kick lands there for Van Dijk.
Van Dijk shoots in but Alvarez avoids the takedown attempt easily.
A really sloppy takedown attempt there from Alvarez.
Alvarez scores with a decent looking hook.
Alvarez takes a body punch that cleary hurt but he's trying not to show any weakness.
The crowd applaud the fighters' efforts here as the round comes to an end.
Alvarez avoids a kick to the body.
And thats the end of the round the fighters go back to their corners.
Whorely Alvarez dominated that round.
The fighters' corners scream their final instructions, as the referee calls time. Here we go, back to the action!
Alvarez throws a shot from downtown. Van Dijk moves away and avoids it.
Van Dijk avoids the head kick by Alvarez.
Alvarez throws a quick inside leg kick.
Alvarez pivots as if he's going to throw a leg kick but stops half way.
Van Dijk misses with the combination.
Alvarez counters with a body kick.
Alvarez has been the more effective fighter overall so far.
Van Dijk on the wrong end of a kick to the body.
Van Dijk steps to his left, right into the path of a big body kick from Alvarez. That one must have hurt.
Van Dijk misses with a body shot. Nice footwork from Alvarez.
Van Dijk will be looking to protect his midsection after taking some solid kicks to the body.
We've had a slow start to the round here - hopefully the action picks up.
Alvarez fakes the leg kick and cracks Van Dijk in the body.
Van Dijk throws a leg kick
and Alvarez counters with a head kick that wobbles Van Dijk - left then right he sways and one more bomb from Alvarez sends him down. This one is all over!
Ladies and gentlemen, after 0:51 of round 2, we have a winner by way of TKO (Strikes). Whorely Alvarez!
Whorely Alvarez decided to hype himself up post fight. It was going well but he went on about it a bit too long and the crowd turned on him a little.
|
|
|
|
|
|
|
|
|
|
|
|
|
|
|
|
|
|
|
|
|
|
|
| S |
C
A |
G |
S |
C
B |
G |
|
S |
C |
G |
|
energy
A | B |
|
hype
A | B |
|
pop
A | B |
|
mgr
A | B |
|
FIGHT
RATING
56% |
|
|
|
|
|
|
|
Undercard bout
|
Coming up we have a lightweight MMA rules bout between Scar Ambe (ranked 1559 p4p, 179 weight class) and Tino Tropper (ranked 2808 p4p, 307 weight class). Ambe comes to the cage accompanied by Gonna - The World is Yours. Tino Tropper will no doubt be trying to keep this one on the feet, where he has a distinct advantage.
 |
|
 |
| 177 cm
25
160 lbs
7 - 2 - 0 |
|
177 cm
25
160 lbs
3 - 1 - 0 |
Good wrestling
Basic striking
Good chin |
|
Good takedowns
Counter fighter
Determined |
|
| |
|
Ladies and gentlemen. This fight is 3 rounds, in the lightweight division.
Introducing the fighter to my left, fighting out of the red corner.
With a record of
7 - 2 - 0, fighting out of The Island, Scar Ambe!
And introducing the fighter to my right, fighting out of the blue corner.
With a record of
3 - 1 - 0, fighting out of The Island, Tino Tropper!
The judges for this bout are Michael Johnstone, Santiago Holmes and Peter Branson.
The bell rings for round one and we are underway!
Ambe moves into the clinch.
Ambe tries to land knees in the clinch but Tropper avoids the damage to the body.
Ambe definitely looks more muscular than last time we saw him fight.
Tropper is trying to pull guard but Ambe turns him against the cage and we stay in the clinch.
Ambe misses with a hook from the clinch.
Ambe taking a breather.
Ambe throws a punch but it's blocked by Tropper.
Tropper looking to slow down the pace here.
Tropper blocks a punch to the side of the head.
Ambe misses with a punch on the inside.
Ambe misses with a punch on the inside.
We've had a slow start to the round here - hopefully the action picks up.
Tropper is trying to work out of this bad position, with his back against the cage.
Ambe fails to land with a short punch on the inside.
Tropper blocks a couple of punches on the inside.
Tropper is trying to maintain a safe position but Ambe gets an underhook and turns Tropper into the cage.
Ambe fails to land with a short punch on the inside.
That's one minute gone in the round.
A head punch blocked on the inside by Tropper.
Tropper looking to stall.
Ambe swings wildly with an uppercut but Tropper uses good head movement to avoid it.
An uppercut on the inside fails to land for Ambe.
Tropper being controlled against the cage.
Tropper has hold of a leg and is looking for a trip takedown. Ambe avoids it nicely though and we remain in the clinch.
Both guys are working to get underhooks.
Tropper blocks an uppercut.
Tropper trying to control the position but instead, Ambe has worked for underhooks and has pushed Tropper into the cage.
A head punch blocked on the inside by Tropper.
That's two minutes gone in the round.
Ambe has Tropper pushed against the cage.
Tropper is trying to slow down the pace in the clinch, to catch his breath.
Tropper stalling in the clinch but Ambe improves position.
Tropper taking a breather.
Tropper looking to stall.
The ref breaks the fighters up, due to lack of action by Tino Tropper.
Tropper leaves Ambe with his face pressed against the mat as he sprawls beautifully, defending against a solid takedown attempt.
Tropper is the aggressor but that punch slipped nicely by Ambe.
Ambe rushes Tropper and presses him up against the cage.
Tropper tries to stall but Ambe uses the opportunity to gain a better position.
Ambe taking a breather.
Ambe displaying some good clinch control by pressing Tropper up against the cage.
That's three minutes gone in the round.
Ambe slows down the pace here.
Ambe is struggling to control the position.
Ambe swings away with an uppercut that misses.
Tropper has had enough of the clinch and is looking to separate.
Tropper tries to stall but Ambe uses the opportunity to gain a better position.
Ambe working aggressively here.
Tropper is trying to slow down the pace in the clinch, to catch his breath.
Both guys are working to get underhooks.
That's four minutes gone in the round.
The crowd are starting to boo a lack of action.
Ambe misses with a hook from the clinch.
Tropper trying to control the position but instead, Ambe has worked for underhooks and has pushed Tropper into the cage.
Tropper blocks a couple of punches on the inside.
Tropper blocks an uppercut.
Ambe has a couple of punches blocked by Tropper.
We've been informed that Tropper has been working hard on his conditioning in the buildup to the fight.
Tropper stalling in the clinch but Ambe improves position.
Tropper is trying to pull guard but Ambe has him pressed against the cage.
Scar Ambe has stuffed three takedown attempts in the round now. That's going to take a lot out of Tino Tropper.
Come on Ambe - let's have some action - none of this stalling nonsense.
Ambe has dropped down and is working for a takedown. Tropper is trying to keep an underhook but Ambe manages to get the takedown into half guard.
We get told so often about how wrestlers don't like to be on their backs. Let's see if Tropper can do anything to dispel that myth.
Boooooooooooooooooooo!!! God, this has been a terrible round. Come on you two, sort yourselves out!
Ambe takes a deep breath and rests his weight momentarily on top of his opponent, to control the position.
Tropper tries to roll over but Ambe keeps him under control.
Tropper looking to work for a kimura from the bottom.
And thats the end of the round the fighters go back to their corners.
Scar Ambe dominated that round.
OK. That's time! The bell goes and we're back to the action.
Ambe moves into the clinch.
Ambe misses with some punches.
Tropper blocking some punches.
Tropper blocking some punches.
Ambe manages to get underhooks and slows down the pace for a moment.
Tropper is trying to maintain a safe position but Ambe gets an underhook and turns Tropper into the cage.
We've had a slow start to the round here - hopefully the action picks up.
Ambe misses with a hook from the clinch.
Ambe is clearly stalling here... Pick up the pace son.
Tropper blocks a punch to the side of the head.
That's one minute gone in the round.
Tropper avoiding damage as Ambe throws knees to the body.
Ambe has a couple of punches blocked by Tropper.
Ambe effectively controlling the action here.
Ambe misses with the head strike.
A shot in the inside from Ambe.
Tropper stalling in the clinch but Ambe improves position.
Tropper looking to slow down the pace here.
Tropper is trying to stall.
Ambe fails to land with a short punch on the inside.
Ambe is really dominating this fight. Is there anything that Tropper can do to turn this around?
A head punch on the inside from Ambe fails to land.
Ambe is stalling here.
Ambe misses with a punch on the inside.
That's two minutes gone in the round.
Tropper is working hard here but doesn't seem to be able to control effectively, up against the cage.
Tropper trying to stall but Ambe improves his position.
Ambe is struggling to control the position.
Ambe tries a shoulder strike but it doesn't do any damage.
Scar Ambe has scored more points in the clinch so far.
Tropper blocks an uppercut.
Ambe has a couple of punches blocked by Tropper.
Ambe misses with some punches.
The fighters are starting to get sweaty, which will make takedowns a bit more tricky.
Tropper is working hard here but doesn't seem to be able to control effectively, up against the cage.
Tropper is looking to take this one to the mat.
Tropper taking a breather.
A head punch blocked on the inside by Tropper.
That's three minutes gone in the round.
Tropper managing to block the knees to the body from Ambe.
Tropper is trying to slow down the pace of the fight but Ambe is keeping busy.
Ambe misses with a hook from the clinch.
Tropper wants to break the clinch but can't.
Ambe has dropped down and is working for a takedown. Tropper is trying to keep an underhook but Ambe manages to get the takedown into half guard.
Ambe prevents Tropper from improving his position.
Tropper avoiding damage under a succession of punches from Ambe.
Ambe scoring with strikes to the body and head.
Ambe is nestled in close to Tropper, controlling him well. He's worked in a nice elbow to the side of the head as well, for good measure.
Ambe missing with the ground and pound from half guard.
Tropper gets full guard.
Ambe wants to pass the guard but Tropper is keeping the position.
Ambe scoring with some ground and pound.
That's four minutes gone in the round.
Ambe avoids a guillotine attempt easily.
Tropper looking to control but Ambe passes into half guard.
Neither fighter is being very active at the moment, with Ambe in particular looking to stall.
Ambe lands strikes from half guard.
The fighters are pressed up against the cage, both looking to find a bit of space to work.
Tropper is trying to control but can't.
Ambe sitting in half guard, looking to land shots. Tropper defending well though.
Wooooo! Give it up for these two warriors! They are putting on a show!
Ground and pound from Ambe.
Ambe prevents Tropper from improving his position.
The crowd thankful this round is nearly over.
Ambe content to sit in half guard and control for a moment.
And thats the end of the round the fighters go back to their corners.
Scar Ambe dominated that second round.
The fighters' corners scream their final instructions, as the referee calls time. Here we go, back to the action! This is the final round!
Tropper misses with a looping left.
Ambe tries to land a front kick but Tropper steps back. That was a bit too telegraphed.
Ambe moves into the clinch.
Ambe has dropped down and is working for a takedown. Tropper is trying to keep an underhook but Ambe manages to get the takedown into half guard.
Tropper tries to strike from the bottom but it doesn't land.
Ambe looks to score some points with some ground and pound.
Ambe seems to be taking a bit of a break to think of his next move. He lands a short punch in the meantime.
Tropper gets full guard.
Tropper avoiding any damage from the ground and pound.
Ambe works a leg free and moves into half guard.
Tropper is refusing to be controlled, as Ambe sits in half guard.
Tropper trying to hold on to Ambe's head to control him but Ambe postures up.
Tropper slips a foot under and gets full guard. Nice work.
That's one minute gone in the round.
Ambe lands a couple of digs.
Tropper looking for submissions from the bottom here. Moving his hips around, possibly looking for an armbar.
Hammerfist, elbow! yells Ambe's corner. There ya go! There ya go!
Tropper trying to keep a closed guard but Ambe is proving a slippery customer.
Ambe throws a big elbow that misses.
Ambe sitting in guard here, content to control.
Ambe trying to control but Tropper is working from the bottom.
Tropper controls Ambe momentarily but Ambe frees himself.
Ambe is on the wrong end of a couple of strikes there.
That's two minutes gone in the round.
A lull in the action here being met with boos from the crowd.
Tropper trying to control the position.
Ambe working in close now, lands a nice elbow to the side of Tropper's head.
Scar Ambe overall seems to be getting the better of the ground position in the fight so far.
Ambe controls the pace of the fight for a moment.
Ambe has been looking to land a fair amount of strikes on the ground. He might be looking to soften his opponent up in order to work for a submission.
Ambe throwing shots from guard but he's hitting more mat than opponent.
Ambe pressing down on his opponent's thigh, looking to pass guard. Tropper is keeping the position for now.
Scar Ambe is fighting for a decision here - he's started to take the cautious approach.
Tropper has his foot on Ambe's thigh. He's trying to push off and get in position for a triangle, I think. Ambe works his way back into a safe position though.
Ambe looking to pass the guard.
Ambe controlling from the guard. I say controlling but really, he's stalling.
Ambe postures up.

The referee has motioned to the fighters to stand back up. He just wasn't happy with the level of activity.
Tropper moves out of range of the strikes.
Tropper feints the counter takedown.
Ambe tries to clinch but Tropper moves out of range.
That's three minutes gone in the round.
Ambe has Tropper up against the cage in a clinch.
An uppercut on the inside fails to land for Ambe.
Tropper wants to stall.
Ambe misses with the head strike.
Ambe misses with a short punch on the inside.
Tropper is trying to pull guard but Ambe turns him against the cage and we stay in the clinch.
A head punch blocked on the inside by Tropper.
That's four minutes gone in the round.
Both fighters working to control the clinch.
Ambe prevents Tropper from breaking the clinch.
Ambe stalling against the cage.
Tropper is trying to slow down the pace in the clinch, to catch his breath.
Ambe works for the underhooks and manages to get a trip takedown into guard.
The crowd thankful this round is nearly over.
Ambe advances position into side control!
Ambe wants to control but Tropper is keeping him busy.
Tino Tropper has stepped it up - he knows he needs a finish here!
Tropper tries to buck Ambe off but Ambe is having none of it.
And that's the end of the fight!
Scar Ambe showed his dominance in that final round.
Well I reckon that's a shut out for Ambe, winning every round. Will the judges agree? They are the ones who matter, even if they are often depressingly incompetent. Over to the ring announcer for the scorecards.
Ladies and gentlemen, after 3 rounds of action, we go to the scorecards for a decision.
Judge Michael Johnstone scores the fight 30:25
Judge Santiago Holmes scores the fight 30:25
Judge Peter Branson scores the fight 30:25
In favor of your winner, by unanimous decision... Scar Ambe!
After winning the bout, Scar Ambe thanked all his fans and promised he'd do even better in his next fight. The crowd seemed to love his humility.
|
|
|
|
|
|
|
|
|
|
|
|
|
|
|
|
|
|
|
|
|
|
|
| S |
C
A |
G |
S |
C
B |
G |
|
S |
C |
G |
|
energy
A | B |
|
hype
A | B |
|
pop
A | B |
|
mgr
A | B |
|
FIGHT
RATING
30% |
|
|
|
|
|
|
|
Co-main event
|
Coming up we have a lightweight MMA rules bout between Litill Bjornsson (ranked 833 p4p, 107 weight class) and Macho Man Savage (ranked 1861 p4p, 222 weight class). Man Savage has chosen Hey Freakshow! as his entrance music. Over to our ring announcer for the fighter introductions!
 |
|
 |
| 174 cm
25
165 lbs
5 - 0 - 0 |
|
185 cm
25
160 lbs
4 - 1 - 0 |
BJJ Brown Belt
Counter fighter
Very strong |
|
Decent wrestler
Decent boxing
Powerful |
|
| |
|
Ladies and gentlemen. This fight is 5 rounds, for the lightweight championship of the world!
Introducing the champion to my left, fighting out of the red corner.
With a record of
5 - 0 - 0, fighting out of The Island, Litill Bjornsson!
And introducing the challenger to my right, fighting out of the blue corner.
With a record of
4 - 1 - 0, fighting out of The Island, Macho Man Savage!
The judges for this bout are Michael Johnstone, Bart Greer and Winston Alpacca.
The bell rings for round one and we are underway!
Man Savage misses with a hook. Bjornsson ducked under it nicely.
Bjornsson gets cracked with a nice right hand there by Man Savage.
Jab from Man Savage.
Bjornsson has his head slapped from side to side by a 3 punch combination. That must have hurt him.
Man Savage looks to land a left hand but Bjornsson moved out of range nicely.
Bjornsson throwing a counter right hand but Man Savage manages to avoid it.
Man Savage is the aggressor but that punch slipped nicely by Bjornsson.
Bjornsson swung with a counter right hand that didn't connect.
Man Savage slips a straight right by Bjornsson.
Man Savage is clearly trying to counter these attacks from Bjornsson with a body shot.
Bjornsson defending well as Man Savage loads up on a big left hand.
Man Savage looks to land a combination but Bjornsson avoids it well.
Bjornsson slips under a jab.
Bjornsson gets cracked there but stands up to it.
Bjornsson throws a big shot that misses.
Bjornsson rushes Man Savage and presses him up against the cage.
Wooooo! Give it up for these two warriors! They are putting on a show!
A short left from Bjornsson.
The referee is keeping an eye on Man Savage - much more stalling and he will separate the fighters.
Bjornsson misses with a punch to the body.
That's one minute gone in the round.
Man Savage lands an uppercut.
Man Savage looks more muscular than last time we saw him. He must have been on the weights.
Man Savage throws a head punch that misses.
Bjornsson lands a nice looking hook to the body, against the cage.
Man Savage misses with a short punch on the inside.
Bjornsson trying to control the position but instead, Man Savage has worked for underhooks and has pushed Bjornsson into the cage.
Bjornsson scores with a shoulder strike.
Man Savage lands with a short punch from the clinch.
Bjornsson throws a head punch that misses.
Man Savage lands on the inside with an uppercut.
Bjornsson definitely looks more muscular than last time we saw him fight.
Bjornsson is trying to drag Man Savage to the mat but Man Savage just about manages to keep his footing. He used the cage to his advantage there.
Man Savage wants to stall.
Bjornsson tries to pull guard but can't drag his opponent to the mat. Man Savage just stands there and leans against the cage.
Bjornsson working aggressively here.
Man Savage lands a nice uppercut.
Bjornsson blocks an uppercut.
Bjornsson is trying to pull guard but being pressed up against the cage enables Man Savage to keep the fight standing.
That's three failed takedown attempts in the round for Litill Bjornsson. That's going to take a lot out of him.
That's two minutes gone in the round.
A short uppercut from Man Savage.
Bjornsson is trying to pull guard but Man Savage has him pressed against the cage.
Bjornsson blocks an uppercut.
The fans in attendance giving it up for the two fighters, who have really let it all hang out in the last minute or so!
Bjornsson jumps guard but Man Savage stands there with Bjornsson around his waist. Bjornsson gives up and drops back to his feet. We remain in the clinch.
Man Savage lands a nice uppercut.
A short right from Man Savage.
Bjornsson being controlled against the cage.
Bjornsson fails to pull guard.
Bjornsson tries to work over Man Savage's body with a swooping hook but it only glances the target.
Bjornsson misses with the head strike.
Man Savage just leaning against Bjornsson, taking a breather.
With the fighters clinched against the cage, Bjornsson creates a bit of distance for himself and scores with a nice uppercut.
A short right from Man Savage.
Bjornsson lands with a quick shot inside that doesn't really do much damage.
Bjornsson blocks an uppercut.
A head punch on the inside from Man Savage fails to land.
Bjornsson struggles to land a body shot inside as Man Savage controls his hands.
That's three minutes gone in the round.
Bjornsson is trying to pull guard but Man Savage turns him against the cage and we stay in the clinch.
Bjornsson swings away with an uppercut that misses.
Man Savage gets through Bjornsson's defenses to land a nice punch to the side of the head.
Man Savage throws a blind hook that connects with the side of Bjornssons head.
Bjornsson manages to pull guard.
Bjornsson looking for a triangle here. Man Savage is fighting it but it looks tight! Bjornsson pulls the arm across and this one won't last much longer! Nope, Man Savage is tapping out - this one is all over!
Ladies and gentlemen, after 3:34 of round 1, we have a winner by way of Submission (Triangle Choke). Litill Bjornsson!
Litill Bjornsson retains his lightweight title!
Litill Bjornsson thanked the fans post fight for their support.
Macho Man Savage was interviewed post fight and said 'Ohhh, yeaahhh!'.
|
|
|
|
|
|
|
|
|
|
|
|
|
|
|
|
|
|
|
|
|
|
|
| S |
C
A |
G |
S |
C
B |
G |
|
S |
C |
G |
|
energy
A | B |
|
hype
A | B |
|
pop
A | B |
|
mgr
A | B |
|
FIGHT
RATING
52% |
|
|
|
|
|
|
|
Main event
|
Coming up we have a middleweight MMA rules bout between Luther Jackson (ranked 949 p4p, 122 weight class) and Tottengill Bonariushausen (ranked 1895 p4p, 235 weight class). Bonariushausen has chosen Stink Foot as his entrance music, which hasn't gone down very well with the crowd. Over to our ring announcer for the fighter introductions!
 |
|
 |
| 185 cm
25
197 lbs
6 - 0 - 0 |
|
189 cm
25
182 lbs
4 - 1 - 0 |
Good wrestling
Basic striking
Good chin |
|
BJJ Purple Belt
Excellent boxer
Solid chin |
|
| |
|
Ladies and gentlemen. This fight is 5 rounds, for the middleweight championship of the world!
Introducing the champion to my left, fighting out of the red corner.
With a record of
6 - 0 - 0, fighting out of The Island, Luther Jackson!
And introducing the challenger to my right, fighting out of the blue corner.
With a record of
4 - 1 - 0, fighting out of The Island, Tottengill Bonariushausen!
The judges for this bout are Winston Alpacca, Peter Branson and Santiago Holmes.
The bell rings for round one and we are underway!
Jackson shoots in with a lovely double leg takedown. Bonariushausen manages to land in full guard to minimise the damage.
We could do with one of the fighters taking the initiative a bit more on the ground - they're both waiting to capitalize on a mistake.
Jackson forces his way into half guard.
The ref warns both fighters not to hold the cage as they work up against the meshing.
Jackson is looking to advance position but Bonariushausen won't allow it.
Jackson has freed up his trapped foot and advances to mount.
Bonariushausen is bucking up trying to escape but Jackson cracks him with another couple of good strikes.
Bonariushausen is looking to get to half guard.
Jackson lands a nice shot to the head.
Bonariushausen sneaks a leg back under and regains half guard and is working straight away to try and get back to guard. He hasn't managed just yet though.
We've seen a great period of action over the last minute or so - credit to both fighters for going all out!
Bonariushausen wants to improve his position but Jackson is controlling well.
Jackson definitely looks more muscular than last time we saw him fight.
Jackson seems to be looking for submissions.
Neither fighter is being very active at the moment, with Jackson in particular looking to stall.
Bonariushausen has hold of Jackson's hands but Jackson slips his arm to the side and lands an elbow.
That's one minute gone in the round.
Jackson wants to pass the guard but Bonariushausen is defending well.
Jackson looks to score some points with some ground and pound.
Jackson wants to pass to mount but Bonariushausen is defending the position.
Bonariushausen is trying to defend against the ground and pound but Jackson scores with a couple of nice shots.
Jackson is working hard to pass the guard. He's done it - he's now in full mount! Trouble for Bonariushausen!
Bonariushausen bucks up and manages to get a nice reversal! He's in guard on the top - nicely done!
Bonariushausen trying to pass the guard but can't manage it just yet.
Bonariushausen trying to control the position from guard on top but Jackson is wriggling around, looking for whatever he can.
Jackson is active off his back here, looking for submissions.
Bonariushausen wants to control from the top but Jackson keeps moving.
Jackson has managed to work for a loose triangle. I think Bonariushausen should be able to defend this one pretty easily though. Oh, Jackson has tightened it up now! Bonariushausen should have reacted faster there - he's in big trouble and yes, he's tapped out! This one is all over!
Ladies and gentlemen, after 2:59 of round 1, we have a winner by way of Submission (Triangle). Luther Jackson!
Luther Jackson retains his middleweight title!
Luther Jackson decided to thank the fans in attendance for making a great atmosphere. It seemed to go down pretty well.
|
|
|
|
|
|
|
|
|
|
|
|
|
|
|
|
|
|
|
|
|
|
|
| S |
C
A |
G |
S |
C
B |
G |
|
S |
C |
G |
|
energy
A | B |
|
hype
A | B |
|
pop
A | B |
|
mgr
A | B |
|
FIGHT
RATING
54% |
|
|
|
|
|
|
|
|
|
|

