 |
RapidFC 1 PBP Commentary |
Undercard bout
|
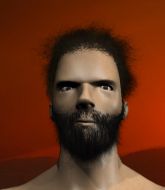
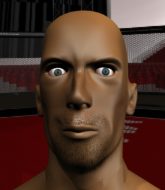
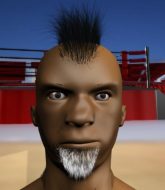
Coming up we have a featherweight MMA rules bout between El Torito (ranked 3355 p4p, 277 weight class) and Terry Josefi (ranked 8315 p4p, 446 weight class). Josefi has chosen I beat my dick as his entrance music. Both fighters look fresh as a daisy as they make their way towards the cage.
 |
|
 |
| 165 cm
37
147 lbs
9 - 3 - 0 |
|
175 cm
20
150 lbs
4 - 2 - 0 |
Abu Dhabi Champ
World class boxer
Very quick |
|
BJJ Blue Belt
Brawler
Determined |
|
| |
|
Ladies and gentlemen. This fight is 3 rounds, in the featherweight division.
Introducing the fighter to my left, fighting out of the red corner.
With a record of
9 - 3 - 0, fighting out of Sydney, El Torito!
And introducing the fighter to my right, fighting out of the blue corner.
With a record of
4 - 2 - 0, fighting out of Sydney, Terry Josefi!
The judges for this bout are Ben Hemmingworth, Winston Howard and Skip Squint.

The bell rings for round one and we are underway!
Josefi misses with a head kick.
Josefi walks into a left hand.

Torito gets a double leg takedown into Josefi's guard.
Torito engaging in some classic timewasting tactics.
Torito trying to pass the guard but can't manage it just yet.
We've had a slow start to the round here - hopefully the action picks up.
Torito postures up.
Torito stands up over Josefi, holding his feet. He dives back in and lands a decent shot to the head.
Torito definitely looks more muscular than last time we saw him fight.
Torito cracks Josefi with a solid left hand.

That's one minute gone in the round.
Torito controlling from the top position.
Torito won't allow Josefi to get back to his feet.
Josefi wants to control but Torito passes easily into half guard.
The fighters are pressed up against the cage, both looking to find a bit of space to work.
Josefi trying to hold on to Torito's head to control him but Torito postures up.
Josefi tries to roll over but Torito keeps him under control.
Josefi really doesn't want to stay on the ground with Torito. If he can't get it back to his feet, it's only a matter of time before he'll be tapping out.
Josefi moves into full guard.

That's two minutes gone in the round.
A lull in the action here being met with boos from the crowd.
Torito landing with the ground and pound.
Torito passes into half guard under a barage of strikes.
Torito scores with a couple of good hammerfists.
Josefi wants to get back to full guard but Torito has mounted him!
Torito sitting in mount, just looking to control for the moment.
Torito has been looking to land a fair amount of strikes on the ground. He might be looking to soften his opponent up in order to work for a submission.
Torito working Josefi over with strikes here.
Torito postures up and cracks his opponent a couple of times before moving back into close ground control. Josefi looks a forlorn figure.

Josefi is rocked!

That's three minutes gone in the round.
Josefi working to try and regain half guard.
Josefi is still in real trouble! Can Torito finish him?
Torito unloading with bombs!
Josefi seems to have recovered his senses.
Torito putting on the heat here with some good ground and pound!
Torito looking to finish Josefi with some ground and pound. This is bad for Josefi!
Torito with good strikes from the mount here!
Torito content just to control the position here.
Torito has his opponent pinned against the cage, landing some nasty ground and pound that is really making a bit of a mess out of Josefi's face.
A big strike lands for Torito! That's really hurt Josefi and he's turned his back - Torito keeps firing away and the ref dives in to stop the fight! Torito jumps to his feet to celebrate the victory!
Ladies and gentlemen, after 4:57 of round 1, we have a winner by way of TKO (Strikes). El Torito!
The defeated Terry Josefi had this to say: 'When will this pain and suffering end'.
|
|
|
|
|
|
|
|
|
|
|
|
|
|
|
|
|
|
|
|
|
|
|
| S |
C
A |
G |
S |
C
B |
G |
|
S |
C |
G |
|
energy
A | B |
|
hype
A | B |
|
pop
A | B |
|
mgr
A | B |
|
FIGHT
RATING
39% |
|
|
|
|
|
|
|
Undercard bout
|
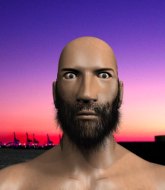
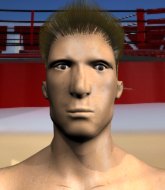
Coming up we have a middleweight MMA rules bout between Abraham Alcantara (ranked 3715 p4p, 436 weight class) and Kangaroo Jack (ranked 7324 p4p, 618 weight class). Kangaroo Jack has the eye of the tiger tonight.
 |
|
 |
| 180 cm
25
200 lbs
1 - 0 - 0 |
|
187 cm
25
200 lbs
0 - 1 - 0 |
BJJ White Belt
Great elbows
Granite chin |
|
Decent wrestler
Decent boxing
Heavy handed |
|
| |
|
Ladies and gentlemen. This fight is 3 rounds, in the middleweight division.
Introducing the fighter to my left, fighting out of the red corner.
With a record of
1 - 0 - 0, fighting out of Sydney, Abraham Alcantara!
And introducing the fighter to my right, fighting out of the blue corner.
With a record of
0 - 1 - 0, fighting out of Sydney, Kangaroo Jack!
The judges for this bout are Steve Erwin, Damien Edna and Donatello Bradman.
The bell rings for round one and we are underway!
Alcantara tries to clinch but Jack moves away
and Jack counters with a left to the body.
Alcantara tries a head kick but it misses.
Alcantara tries to clinch but Jack moves out of range.
Jack uses good head movement to avoid the hook from Alcantara.
Jack displaying good standup as he scores with a three punch combination.
Alcantara fails in his attempt to clinch.
Alcantara is looking to clinch but Jack is avoiding it.
Alcantara moves to clinch but Jack breaks away
and Jack counters with a crisp hook to the side of the head.
Jack lands a jab-cross combination.
Jack throws a wild combination but nothing lands.
Jack lands with a two punch combination before moving back out of range.
Wooooo! Give it up for these two warriors! They are putting on a show!
Alcantara is looking to take this fight into the clinch.
Jack misses the shot to the body.
Alcantara moves to clinch but Jack breaks away
and Jack counters with a left to the body.
Alcantara tries to clinch up
and Jack counters with a right hand to the body.
That's one minute gone in the round.
Alcantara is on the wrong end of a nice combination from Jack.
Alcantara misses with a body punch
and Jack counters with a lovely straight right hand!
Jack feints a jab promting Alcantara to slip. Jack then demonstrates his capabilities by jabbing again. Alcantara slips again and ducks right into an uppercut.
Abraham Alcantara seems to be the more aggressive standup fighter in this bout.
Jack scores with a punch to the head.
Alcantara ducks right into an uppercut from Jack.
Alcantara is looking to clinch but Jack is avoiding it.
Jack keeps the fight on the outside.
Jack stuns Alcantara with a nice body shot, before stepping back out of range.
Alcantara tries to close the distance and clinch up but Jack swats him away and circles back towards the center.
Jack connects with a right hand. Alcantara shakes it off.
This has been an exciting period of action!
Jack tries to bum rush Alcantara with a series of wild strikes but Alcantara uses good footwork to avoid the assault.
Alcantara is looking to take this fight into the clinch.

Alcantara closes the distance and clinches.
That's two minutes gone in the round.
Alcantara connects with a knee to the head.
Alcantara throws a vicious knee straight up the middle but Jack blocks it with crossed arms.
Alcantara fails to land with a short punch on the inside.
Jack tries to break free but Alcantara pushes him back against the cage.
A head punch blocked on the inside by Jack.
Alcantara scores with a knee to the head.
Alcantara landing knees to the body.
Jack is trying to break the clinch but Alcantara has him pressed against the cage.
A short right from Alcantara.
Alcantara lands a knee to the head there! That was nasty!
Alcantara misses with a punch on the inside.
Alcantara lands an elbow inside that Jack shrugs off.
Alcantara throws a knee to the head but misses.
A short right hand to the side of the head by Alcantara.
That's three minutes gone in the round.
Alcantara misses with a short punch on the inside.
Jack wants to break the clinch but can't.
Jack wants to push off and get back to the center of the mat but Alcantara has him pressed against the cage.
Alcantara misses with a short punch on the inside.
A quick uppercut on the inside from Alcantara.
Alcantara with an attempt at a knee that misses.
Alcantara tries to land a knee to the head but misses.
Alcantara lands with a light punch inside.
Jack is rocked!
Alcantara creates a bit of space for himself and sneaks an elbow through Jack's defenses.
Jack is still on wobbly legs! Can Alcantara finish him?
A head punch blocked on the inside by Jack.
Alcantara has Jack pressed up against the cage in a tight Thai clinch. Jack is arching his back, trying to avoid the knees but a big one sneaks through from Alcantara - that's hurt Jack badly! Oh, another knee lands and Jack is covering up! The referee steps in to save him - possibly a bit early but Jack doesn't seem to be complaining.
Ladies and gentlemen, after 3:49 of round 1, we have a winner by way of TKO (Knees). Abraham Alcantara!
|
|
|
|
|
|
|
|
|
|
|
|
|
|
|
|
|
|
|
|
|
|
|
| S |
C
A |
G |
S |
C
B |
G |
|
S |
C |
G |
|
energy
A | B |
|
hype
A | B |
|
pop
A | B |
|
mgr
A | B |
|
FIGHT
RATING
60% |
|
|
|
|
|
|
|
Undercard bout
|
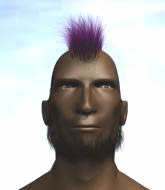
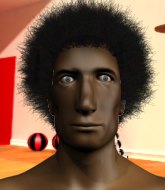
Coming up we have a heavyweight MMA rules bout between I Am Greatest (ranked 4072 p4p, 395 weight class) and Lygon Brunswick (ranked 4734 p4p, 441 weight class). Greatest's ring entrance music is that housewives' favourite, We are winners. Both fighters will be looking to make this an exciting fight for the fans, I'm sure!
 |
|
 |
| 203 cm
25
245 lbs
2 - 0 - 0 |
|
195 cm
25
220 lbs
1 - 0 - 0 |
BJJ White Belt
Excellent MT
Big right hand |
|
Decent wrestler
Counter fighter
Granite chin |
|
| |
|
Ladies and gentlemen. This fight is 3 rounds, in the heavyweight division.
Introducing the fighter to my left, fighting out of the red corner.
With a record of
2 - 0 - 0, fighting out of Sydney, I Am Greatest!
And introducing the fighter to my right, fighting out of the blue corner.
With a record of
1 - 0 - 0, fighting out of Sydney, Lygon Brunswick!
The judges for this bout are Summer Carpenter, Eliza Hachem and Topper Green.
The bell rings for round one and we are underway!

Brunswick throws the overhand right but ducks down into a quick takedown attempt. Greatest was covering up waiting for the punch and Brunswick finishes the takedown easily into guard.
Brunswick slips nicely into half guard.

Brunswick is looking for a kimura but he's never going to get it from there.
Brunswick tries to pass to full mount but Greatest defends it.
Brunswick frees up his trapped foot and advances to mount.
We've had a slow start to the round here - hopefully the action picks up.
Brunswick tries to control but Greatest wriggling away.
Brunswick looking for an armbar but decides to keep the dominant position instead.
That's one minute gone in the round.
Brunswick wants to finish this one by submission but Greatest is holding onto his waist, trying to prevent any attacks from Brunswick.
Greatest is looking to improve his position but Brunswick isn't that keen on the idea.
The fighters are pressed up against the cage, both looking to find a bit of space to work.
Brunswick with some aggressive grappling here, looking for the finish.
Greatest is squirming around, avoiding Brunswick's attempts to control the action.
Greatest working to try and regain half guard.
Brunswick is going oldschool here, as he tries to force Greatest to tap using a forearm choke. This isn't 1993 though, so Greatest shrugs it off.
That's two minutes gone in the round.
Brunswick is looking to work his way around to Greatest's back. He needs to be careful though, as he's in danger of losing this dominant position.
Greatest is writhing around trying to get back to his feet.
The ref warns both fighters not to hold the cage as they work up against the meshing.
Brunswick looking for an armbar but decides to keep the dominant position instead.
Greatest working to try and regain half guard.
Brunswick wants to take Greatest's back here but Greatest is holding on to an arm, himself looking to escape.
Brunswick controlling from the full mount.
Brunswick trying to control but Greatest is having none of it.
That's three minutes gone in the round.
Brunswick has hold of Greatest's left arm, perhaps looking for a submission. The two fighters tussle over control of the isolated limb and Greatest manages to get his arm back to his side and away from danger.
Greatest wants to control but Brunswick is having none of it.
Brunswick prevents Greatest from getting the reversal.
Greatest defends a decent attempt at a guillotine from Brunswick.
Brunswick looking for an armbar but decides to keep the dominant position instead.
Greatest is squirming around, avoiding Brunswick's attempts to control the action.

That's four minutes gone in the round.
Brunswick punching from mount but Greatest doing a good job of avoiding damage.
Greatest is desperately trying to get back to half guard.
Brunswick trying to control but Greatest is having none of it.
Brunswick is controlling this nicely and is looking to make no mistakes. Greatest is trying to wiggle out of this horrible position. Greatest flips to his side and attempts to get a leg in for half guard. Brunswick anticipates the leg and manages to get behind Greatest and secures both hooks! This could be bad! Brunswick slips an arm under Greatest chin and tries to position for a rear naked choke. Brunswick has worked the choke in now and it looks tight. Brunswick is squeezing on Greatest like an anaconda would it's prey. Greatest fails to tap and has fallen unconscious! We've got ourselves a winner by way of a rear naked choke!
Ladies and gentlemen, after 4:44 of round 1, we have a winner by way of Submission (RNC). Lygon Brunswick!
|
|
|
|
|
|
|
|
|
|
|
|
|
|
|
|
|
|
|
|
|
|
|
| S |
C
A |
G |
S |
C
B |
G |
|
S |
C |
G |
|
energy
A | B |
|
hype
A | B |
|
pop
A | B |
|
mgr
A | B |
|
FIGHT
RATING
32% |
|
|
|
|
|
|
|
Undercard bout
|
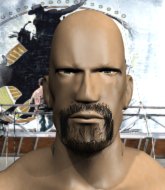
Coming up we have a heavyweight MMA rules bout between Grim Reaper (ranked 3740 p4p, 367 weight class) and Carlton Banks (ranked 7025 p4p, 530 weight class). Banks has a niggling injury. He would have liked to come in 100% fit but that's not always possible. Carlton Banks has the power to score a knockout today if he connects clean with Grim Reaper's chin.
 |
|
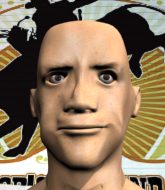 |
| 183 cm
25
252 lbs
2 - 2 - 0 |
|
200 cm
25
280 lbs
0 - 1 - 0 |
BJJ Purple Belt
Solid boxing
Cuts easily |
|
Decent wrestler
Decent boxing
Heavy handed |
|
| |
|
Ladies and gentlemen. This fight is 3 rounds, in the heavyweight division.
Introducing the fighter to my left, fighting out of the red corner.
With a record of
2 - 2 - 0, fighting out of Sydney, Grim Reaper!
And introducing the fighter to my right, fighting out of the blue corner.
With a record of
0 - 1 - 0, fighting out of Sydney, Carlton Banks!
The judges for this bout are Steve Erwin, Topper Green and Chris Dean.
The bell rings for round one and we are underway!
Reaper lunges in with swinging rights and lefts but Banks circles away quickly and effectively.
Reaper gets cracked with a nice right hand there by Banks.
Banks looks winded!
Reaper stalks Banks and leaps in with a furious combination of punches. Uppercuts and crosses smash into Banks's face. Banks staggers backwards, shaken.
Reaper tries to close the distance and clinch up but Banks swats him away and circles back towards the center.
Reaper tries to clinch but Banks moves out of range.
Reaper clinches up against the cage.
Reaper lands a hook to the body. It's hard to tell if that hurt Banks or not.
Banks wants to push off and get back to the center of the mat but Reaper has him pressed against the cage.
Reaper prevents Banks from breaking the clinch.
We've had a slow start to the round here - hopefully the action picks up.

Banks breaks from the clinch.
We've been told by Reaper's head coaches at Arvins Bootcamp that he's been working on his takedown defense in preparation for this fight.
A slow jab from Reaper misses its intended target.
Reaper explodes with a nice body kick and back out of range. Nice work.
That's one minute gone in the round.
Reaper throws a combination but comes up with nothing but fresh air.
Grim Reaper seems to be the more aggressive standup fighter in this bout.
Reaper moves into range and throws a combination. A nice jab followed by a hook to the body.
Banks lands a right hook to the body.
Reaper tries to clinch
and Banks makes him pay by landing a nice hook to the body before moving out of range.
Reaper tries to clinch there but Banks circles away.
Reaper lunges in with swinging rights and lefts but Banks circles away quickly and effectively.
Reaper swings away but doesn't land with a series of punches.
Reaper shoots in looking for a takedown. Banks tries to sprawl out of it but Reaper keeps driving through. The fighters are pinned against the cage. Banks manages to get underhooks and after a bit of a struggle, circles away and we're back to standing.
Banks fakes high and swings low for a body shot but Reaper manages to avoid it.
Reaper scores to the head and body with a nice combination!
Banks scores with a decent looking hook.
Wooooo! Give it up for these two warriors! They are putting on a show!
Reaper tries to close the distance and clinch up against the cage but Banks paws at him with a jab and circles away.
That's two minutes gone in the round.
Banks walks into a left hand.
Banks lands a beauty of a right hand that gets the crowd cheering.
Reaper looks to land a left hand but Banks moved out of range nicely.
Banks misses with a two punch combination.
Reaper throws a jab, cross combination which is slipped
and Banks counters with a shot to the ribs. That looked like it hurt.
Reaper wants to clinch up but Banks keeps it at a distance.
Reaper wants to clinch.
Nice defenses there by Banks.
Reaper takes one to the side of the head.
Reaper misses with a two punch combination.
Reaper shoots for a double leg takedown but Banks sprawls well. He's pushed Reaper's face into the mat and manages to get back to his feet relatively easily.
A little jabbing left from Banks on the counter but it doesn't find it's target.
That's three minutes gone in the round.
Reaper throws a combination but it was largely blocked by Banks.
Jab, cross, leg kick. Nice combination by Banks!
Banks connects with a body shot that sends Reaper's belly button to the back.
Banks misses with a body shot.
Banks is using his reach advantage to land shots from outside his opponent's range.
Reaper misses with a double jab
and Banks counters with a lovely straight right hand!
Reaper displaying good standup as he scores with a three punch combination.
Banks lands a jab-cross combination.
Reaper tries to move into range but Banks moves to the side and lands with a nice right hand.
Banks has been working his punching technique in the buildup to the fight and it appears to be paying off.
Reaper misses with a double jab
letting Banks counter with a right hand.
The crowd cheering loudly, showing their appreciation for the quality fight we're seeing here.
Reaper keeping a good distance there, avoiding the body shot.
Reaper tries to close the distance and clinch up but Banks swats him away and circles back towards the center.
Banks doesn't fully commit to the body shot counter.
That's four minutes gone in the round.
Banks with a jab.
Banks has used his reach advantage pretty well so far tonight.
Reaper throws a combination but it was largely blocked by Banks.
Danga de danga de dang - Banks scores with a four punch combination!
Reaper throws a jab to the body, straight down the pipe. Boom. That sent Banks stumbling backwards but he manages to regain his composure quickly.
Reaper tries to clinch but Banks is having none of it.
Banks avoids a punch combination nicely.
Banks avoids a punch combination nicely.
Banks fakes low and throws an overhand right that catches Reaper on the side of the head.
Reaper is looking to clinch.
Reaper closes the distance and pushes Banks back into the cage.
And thats the end of the round the fighters go back to their corners.
A close round but Carlton Banks will probably get the nod.
The fighters get back to their feet, the hooter sounds and we're back to the action!

A jab lands there for Banks.
Some wild striking there from Banks.
Reaper shoots in for a takedown. "Ole!" shouts Banks as he jumps to the side.
Reaper swings away but doesn't land with a series of punches.
A nice combination there by Reaper.
Banks connects with a body shot that sends Reaper's belly button to the back.
Reaper throws the kick towards the body but Banks avoids it.
We've had a slow start to the round here - hopefully the action picks up.
Reaper uses some good footwork to avoid the body shot by Banks.
Reaper pushes forward with a 1-2 combination that forces Banks back to the cage. Reaper follows up with a solid lead hook to the liver.
Reaper closes the distance and lands a one-two.
Grim Reaper is looking to throw some combinations by the looks of things.
Both fighters are absolutely exhausted here.
The crowd are loving this. Great action here.
Some wild striking there from Reaper.
That's one minute gone in the round.
Banks throws a right and a left that Reaper avoids nicely.
A combination from Banks does no damage.
Reaper fails to land with a series of punches.
Reaper wants to clinch.
Reaper waving his hands out in front of him, looking to distract Banks.
Banks throws a counter combo.
Banks moves away from the strike by Reaper.
It seemed like Banks was going to counter with the hook but didn't fully commit to it.
Reaper dodges the punch combination from Banks.
Nice defenses there by Reaper.
Some wild striking there from Reaper.
Banks appears to be waiting to throw a counter punch to the body.
That's two minutes gone in the round.
Reaper throws a combination but it was largely blocked by Banks.
Reaper throws a left and a right that both miss
and Banks counters nicely by changing levels and landing a hook to the body.
Reaper misses with a double jab
and Banks counters with a crisp hook to the side of the head.
Reaper lunges in with an uppercut that skims his opponent's chin.
Carlton Banks is looking to keep the fight on the feet at all costs.
Reaper avoids a punch combination nicely.
Banks misses the shot to the body.
Reaper throws a right and a left that Banks avoids nicely.
Reaper throws a combination but it was largely blocked by Banks.
Wooooo! Give it up for these two warriors! They are putting on a show!
Reaper misses with an uppercut. Banks saw that one coming.
Banks keeps the fight on the outside.
Banks lands with a two punch combination before moving back out of range.
Carlton Banks seems to be getting the better of the standup.
That's three minutes gone in the round.
Reaper tries to bum rush Banks with a series of wild strikes but Banks uses good footwork to avoid the assault.
Reaper takes an uppercut right on the jaw but it doesn't phase him.
Reaper misses with a jab and misses with a cross straight after too.
Reaper fails to land with the punch combination there - jab, cross, hook, miss, miss, miss.
Banks takes a swing at Reaper's ribcage but misses.
Banks lands a jab to the nose.
The fight stays on the outside here - Reaper looks like he's thinking about clinching though.
Banks looks to score with a combo but nothing lands.
Reaper looks to score with a combo but nothing lands.
Reaper fails with a takedown attempt.
Reaper throws a right hand that Banks ducks under and follows up with a left that Banks also avoids with ease.
Banks throws a counter combo.
That's four minutes gone in the round.
Banks throws a series of punches but Reaper avoids them all with ease.
Reaper takes a shot right to the bread basket.
Reaper tries to close the distance and clinch but Banks swats him to one side with an open hand palm strike and circles away.
Banks thuds a left hand into Reaper's body.
Banks scores with a one two! Reaper had his feet all tangled up there and couldn't avoid the strikes.
We've seen a great period of action over the last minute or so - credit to both fighters for going all out!
Reaper tries to close the distance and clinch up but Banks swats him away and circles back towards the center.
Reaper throws a right hand that Banks ducks under and follows up with a left that Banks also avoids with ease.
And an attempted straight right on the counter from Banks! But no joy.
Reaper throws a combination that misses
and Banks counters with a crisp hook to the side of the head.
Banks slips a jab and a cross from Reaper.
Banks doesn't fully commit to the body shot counter.
Reaper misses with a series of wild punches.
Reaper misses with a double jab.
Banks throws a wild combination but nothing lands.
It looked like Reaper was looking amped, ready to throw a big counter but didn't commit.
And thats the end of the round the fighters go back to their corners.
A close second round but Carlton Banks will probably get the nod - 10:9.
That's the end of the interval. I'm sure that seemed a lot quicker than a minute for our two fighters! Back to the action. Ladies and gentlemen, this is the final round!

Reaper throws a combination but it was largely blocked by Banks.
Reaper doesn't manage to clinch there - Banks circles away.
Banks tries to bum rush Reaper with a series of wild strikes but Reaper uses good footwork to avoid the assault.
Reaper fails to land with a series of punches.
Sloppy strikes from Banks. Those never looked like landing.
Banks dodges the punch combination from Reaper.
Banks showing good head movement there, avoiding the strikes from Reaper.
We've had a slow start to the round here - hopefully the action picks up.
Banks lands a really nice looking cross but Reaper seems unphased.
Reaper tries to close the distance and clinch but Banks swats him to one side with an open hand palm strike and circles away.
And an attempted straight right on the counter from Banks! But no joy.
Both fighters are breathing heavily.
Reaper throws a two punch combo that lands nicely.
Reaper rushes in with a sloppy looking punch
and Banks counters with a nice jab to the body that keeps Reaper thinking.
That's one minute gone in the round.
Banks keeps the fight on the outside.
Banks swats away the attempt to clinch by Reaper.
Reaper misses with a jab, cross combination.
Banks fails to land with the punch combination there - jab, cross, hook, miss, miss, miss.
Banks keeps the fight on the outside.
Reaper misses with a combination
and Reaper takes a counter punch right on the button for his troubles.
Reaper misses with a wild combination.
A little jabbing left from Banks on the counter but it doesn't find it's target.
Banks misses with a series of wild punches.
Banks swings and misses with a hook to the body.
That's two minutes gone in the round.
Reaper is looking to clinch but Banks is avoiding it.
Banks is looking for the big counter here.
Reaper closes the distance and clinches up with Banks, looking for a takedown. Reaper pushes Banks against the cage but Banks circles to the side and manages to break the clinch.
Banks circles away from the clinch attempt.
Reaper misses with the combination.
Banks throws a hook to the side of Reaper's head but Reaper sees it coming and ducks under it beautifully.
Reaper shoots in for a takedown but Banks shows good takedown defense there and keeps this one on the feet.
A punch combination from Reaper misses.
Banks fails to land with a series of punches.
Banks throws a one two combo.
The fans in attendance giving it up for the two fighters, who have really let it all hang out in the last minute or so!
Banks slips a jab and a cross from Reaper.
Banks scores with a nice strike.
Reaper lunges at Banks with a hook that half lands and is half blocked by Banks's hand.
That's three minutes gone in the round.
Reaper misses with a few strikes there.
Banks throws a series of punches but Reaper avoids them all with ease.
Banks tries to bum rush Reaper with a series of wild strikes but Reaper uses good footwork to avoid the assault.
Banks misses with a jab, cross combination.
A shot to the liver by Banks. Beautiful body shot.
Banks misses with a two punch combination.
Reaper works over Banks's head and body with a nice combination.
Reaper is looking to take this fight into the clinch.
Banks scores with a jab.
Reaper is looking to clinch but Banks is avoiding it.
Banks dips to his left and cracks Reaper with an uppercut!
That's four minutes gone in the round.
Reaper darts in and out, connecting with a jab.
Reaper looks like he's developed a pretty tasty lump over his left eye. He'll need to avoid taking much more damage to that.
Reaper tries to clinch but Banks is having none of it.
Banks throws a body shot but no joy.
The crowd are loving this. Great action here.
Reaper tries to clinch but Banks is having none of it.
Banks ducks right into an uppercut from Reaper.
Reaper pulls out of a head kick attempt.
Reaper tries to clinch but fails miserably
and Banks counters with a quick right hand to the jaw.
Reaper tries to clinch up.
Reaper throws a combination but comes up with nothing but fresh air.
Banks is loading up here, looking for a big counter of his own.
Banks takes a shot to the eye socket. That's gotta hurt.
Reaper misses with a double jab.
Grim Reaper has stepped it up - he knows he needs a finish here!
Reaper throws a right and a left that Banks avoids nicely.
Reaper throws a head kick that misses and slips in the process. He scrambles back to his feet and the fighters circle.
And that's the end of the fight!
I would just about give that final round to Carlton Banks.
I've got Banks winning every round here. Surely the decision will go his way and he'll pick up a well deserved decision victory. Over to the ring announcer for the scorecards.
Ladies and gentlemen, after 3 rounds of action, we go to the scorecards for a decision.
Judge Steve Erwin scores the fight 27:30
Judge Topper Green scores the fight 27:30
Judge Chris Dean scores the fight 27:30
In favor of your winner, by unanimous decision... Carlton Banks!
|
|
|
|
|
|
|
|
|
|
|
|
|
|
|
|
|
|
|
|
|
|
|
| S |
C
A |
G |
S |
C
B |
G |
|
S |
C |
G |
|
energy
A | B |
|
hype
A | B |
|
pop
A | B |
|
mgr
A | B |
|
FIGHT
RATING
60% |
|
|
|
|
|
|
|
Co-main event
|
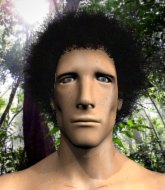
Coming up we have a featherweight MMA rules bout between Cyril Figis (ranked 5938 p4p, 395 weight class) and Goncalo Dias (ranked 5638 p4p, 379 weight class). We have two fighters making their debuts here, so let's see who comes out of this one with their first professional victory.
 |
|
 |
| 175 cm
25
155 lbs
0 - 0 - 0 |
|
178 cm
24
154 lbs
0 - 0 - 0 |
BJJ White Belt
Excellent boxer
Granite chin |
|
BJJ Brown Belt
Counter fighter
Determined |
|
| |
|
Ladies and gentlemen. This fight is 3 rounds, in the featherweight division.
Introducing the fighter to my left, fighting out of the red corner.
With a record of
0 - 0 - 0, fighting out of Sydney, Cyril Figis!
And introducing the fighter to my right, fighting out of the blue corner.
With a record of
0 - 0 - 0, fighting out of Sydney, Goncalo Dias!
The judges for this bout are Darius Henderson, Bruno Hogan and John Mangel.
The bell rings for round one and we are underway!
Figis misses with a two punch combination.
Dias tries a quick counter leg kick but Figis is wise to it.
Figis is looking to take this fight into the clinch.
Dias looked like he wanted to counter with a punch but didn't throw it.
Figis scores with a shot to the body.
Cyril Figis seems to be the more aggressive standup fighter in this bout.
Nice jab there from Figis.
Dias avoids the clinch attempt nicely.
Dias looks like he wants to counter punch here.
We've had a slow start to the round here - hopefully the action picks up.
Dias moves away from the strike by Figis.
Dias only half commits to the counter leg kick.
Figis throws a right and a left that Dias avoids nicely.
And an attempted straight right on the counter from Dias! But no joy.
Figis misses with a wild combination.
Cyril Figis is looking to keep the fight on the feet at all costs.
That's one minute gone in the round.
Figis will need to tighten up his combinations if he doesn't want to gas himself out, swinging at thin air.
And an attempted straight right on the counter from Dias! But no joy.
Figis scores with a jab to the head.
Figis lands a vicious shot with the stealth of a sniper and the strength of a viper. Are vipers that strong? I can think of lots of things that are stronger than a viper - not many rhyme with sniper though.
Figis tries to clinch but Dias moves away
and Dias counters with a nice uppercut.
Dias dodges the punch combination from Figis.
It seemed like Dias was going to counter with the hook but didn't fully commit to it.
That's two minutes gone in the round.
Figis throws a combination. Dias tries to block but a couple of punches get through.
Figis lands a nice shot to the body.
Dias is on the wrong end of a nice combination from Figis.
Fantastic stuff here - a very entertaining period of action, which has drawn cheers from the crowd.
Dias takes a punch to the jaw and another one to the bread basket.
Dias is rocked!
Figis lands an overhand left. A wild punch that just about connected.
Dias is still on wobbly legs! Can Figis finish him?
Dias blocks a jab.
Dias seems to have recovered his senses.
Figis throws a two punch combo that lands nicely.
That's three minutes gone in the round.

Figis drops Dias with a beautiful combination! Dias stares up at his opponent, who ushers him back to his feet - Figis is looking for the KO!
Figis throws a wild combination but nothing lands.
A little jabbing left from Dias on the counter but it doesn't find it's target.
Figis throws a wild combination but nothing lands.
Figis scores with a one two! Dias had his feet all tangled up there and couldn't avoid the strikes.
A combination from Figis does no damage.
Dias throws out a counter right but Figis avoids it with no problem.
Fantastic stuff here - a very entertaining period of action, which has drawn cheers from the crowd.
A right-left combo lands from Figis.
Dias ducks under a wild hook from Figis.
Dias throws out a counter right but Figis avoids it with no problem.
Figis tries to clinch up but Dias circles away and keeps his distance.
And an attempted straight right on the counter from Dias! But no joy.
Figis rushes forward with a series of wild hooks but Dias moves out of range and avoids them all easily.
That's four minutes gone in the round.
Figis tries to clinch but is not successful on this occasion.
Figis throws a combination but comes up with nothing but fresh air.
Figis tries to close the distance and clinch up but Dias swats him away and circles back towards the center.
Figis throws a hook to the body but it doesn't connect.
Dias appeared to try and counter that last move with a leg kick.
Figis throws a right and a left that both miss.
Dias throws out a counter right but Figis avoids it with no problem.
Dias has his hands up protecting his head but a hook from Figis finds it's way round the side to connect with Dias's head.
A telegraphed right hand from Figis misses the target.
Figis tries to close the distance and clinch up against the cage but Dias paws at him with a jab and circles away.
Dias throws out a counter right but Figis avoids it with no problem.
And thats the end of the round the fighters go back to their corners.
Cyril Figis dominated that round.
The fighters get back to their feet, the hooter sounds and we're back to the action!
Figis looks to score with a combo but nothing lands.
Figis swings and misses with a hook to the body.
The fight stays on the outside here - Figis looks like he's thinking about clinching though.
Dias looks like he wants to counter punch here.
Cyril Figis is looking to throw some combinations by the looks of things.
Figis throws a jab, cross combination which is slipped
letting Dias counter with a right hand.
Figis is looking to clinch but Dias is avoiding it.
We've had a slow start to the round here - hopefully the action picks up.
Figis cracks a nice hook into Dias's ribs.
Figis works his jab well there, keeping his opponent at a distance.
Figis works Dias's body with a nice hook.
That's one minute gone in the round.
Figis scores to the head and body with a nice combination!
Figis lands a jab.
Figis throws a combination that misses
letting Dias counter with a right hand.
Figis swings away but doesn't land with a series of punches.
Dias throws out a counter right but Figis avoids it with no problem.
Figis throws the left hand but Dias avoids the punch easily.
It seemed like Dias was going to counter with the hook but didn't fully commit to it.
Figis lands a left and a right that send Dias crashing to the mat, dazed. Figis thinks about following him to the mat but decides to wave him back up to his feet!
The crowd are loving this. Great action here.
Figis tries to clinch but Dias moves out of range.
Dias swings away with a counter right hand but no contact made.
Cyril Figis is winning the standup battle so far.
Figis throws a jab but it's blocked by Dias.
Dias on the wrong end of a nice hook.
That's two minutes gone in the round.
Figis fails to land with the punch combination there - jab, cross, hook, miss, miss, miss.
Dias swings away with a counter right hand but no contact made.
Figis lands a nice hook to Dias's body. Dias takes it in his stride and looks to land his own strikes.
Both these guys seem content to just stand up and trade with eachother but Dias might want to think about changing up his gameplan a bit because over the course of the fight, Figis has got the better of the exchanges.
The fighters circle momentarily. Figis darts into range and connects with a nice straight punch.
Figis throws a nice looking combination but Dias bobs and weaves to avoid any damage.
Dias looked like he wanted to counter with a punch but didn't throw it.
Figis loads up on a big right hand but Dias slips the punch.
Dias slips a jab and a cross from Figis.
Figis loads up on a big right hand but Dias slips the punch.
Figis misses with a few strikes there.
That's three minutes gone in the round.
Figis misses with a series of wild punches.
Dias flicks out a counter leg kick but Figis steps away.
Figis looks to land a right hand but Dias moved out of range.
A little jabbing left from Dias on the counter but it doesn't find it's target.
Figis misses with a few strikes there.
Figis misses with a wild body shot.
Dias throws out a counter right but Figis avoids it with no problem.
Figis misses with a straight left.
Sloppy strikes from Figis. Those never looked like landing.
A little jabbing left from Dias on the counter but it doesn't find it's target.
Dias avoids the clinch attempt nicely.
Dias avoids the body shot from Figis.
Dias appeared to try and counter that last move with a leg kick.
That's four minutes gone in the round.
Figis lands a really nice looking cross but Dias seems unphased.
Figis swings wildly with a couple of big hooks
and Dias counters with a stiff right hand.
Figis wants to clinch.
Figis is looking to take this fight into the clinch.
Dias looks like he wants to counter punch here.
Figis fakes high and swings low for a body shot but Dias manages to avoid it.
Figis is looking to clinch but Dias is avoiding it.
And thats the end of the round the fighters go back to their corners.
Cyril Figis dominated that second round.
The corners get their ten second warning. Both fighters stand from their stools and stare eachother down, ready to get back to the action. This is the final round!
Figis throws the left hand but Dias avoids the punch easily.
Dias only half commits to the counter leg kick.
Figis lands a lovely overhand right.
Figis rushes forward with a series of wild hooks but Dias moves out of range and avoids them all easily.
Figis misses with a series of wild punches.
Dias throws out a counter right but Figis avoids it with no problem.
Figis tries to clinch but Dias is having none of it.
We've had a slow start to the round here - hopefully the action picks up.
Figis scores with a big left there. The judges will like that one.
Figis throws a series of punches but Dias avoids them all with ease.
Dias only half commits to the counter leg kick.
Figis swings away but doesn't land with a series of punches.
That's one minute gone in the round.
Sloppy strikes from Figis. Those never looked like landing.
Dias takes a punch right to his stomach. That took the wind out of him momentarily.
Figis misses with a jab and misses with a cross straight after too.
A combination from Figis does no damage.
Dias showing good head movement there, avoiding the strikes from Figis.
A little jabbing left from Dias on the counter but it doesn't find it's target.
Figis misses with a two punch combination.
Figis tries to close the distance and clinch but Dias swats him to one side with an open hand palm strike and circles away.
Dias blocks a jab.
Dias throws out a counter right but Figis avoids it with no problem.
That's two minutes gone in the round.
Figis lands the left hand.
Figis tries to clinch but Dias is having none of it.
Dias showing good head movement there, avoiding the strikes from Figis.
Figis catches Dias with a nice straight right. He seems pissed - ooooh, it's on now! On like donkey kong!
A combination from Figis does no damage.
Dias looked like he wanted to counter with a punch but didn't throw it.
Figis throws a nice looking combination but Dias bobs and weaves to avoid any damage.
Figis backing away here, and Dias unleashes a leg kick that just misses.
That's three minutes gone in the round.
Figis throws a series of punches but Dias avoids them all with ease.
Figis looks to score with a combo but nothing lands.
Both fighters are breathing heavily.
Figis misses with a lunging right hand
and Dias counters with a stiff right hand.
Dias slips a jab and a cross from Figis.
And an attempted straight right on the counter from Dias! But no joy.
Figis moves in looking to clinch but Dias pushes him off.
It seemed like Dias was going to counter with the hook but didn't fully commit to it.
Dias closes the distance and takes a jab right on the nose as he does so.
Figis throws a hook to the body but it doesn't connect.
The fight stays on the outside here - Figis looks like he's thinking about clinching though.
That's four minutes gone in the round.
Figis fails to land with a series of punches.
Figis throws a looping overhand right but Dias ducks down to avoid it.
Figis misses with a straight right.
And an attempted straight right on the counter from Dias! But no joy.
Figis wants to clinch.
The crowd thankful this round is nearly over.
Dias ducks under a wild hook from Figis.
Figis throws a jab, cross combination which is slipped
and Figis takes a counter punch right on the button for his troubles.
And that's the end of the fight!
Cyril Figis showed his dominance in that final round.
Well Figis has outscored his opponent in every aspect of the fight today. Only a scarily incompetent judge or two will keep him from a well deserved win... Over to the ring announcer for the scorecards.
Ladies and gentlemen, after 3 rounds of action, we go to the scorecards for a decision.
Judge Darius Henderson scores the fight 30:26
Judge Bruno Hogan scores the fight 30:26
Judge John Mangel scores the fight 30:26
In favor of your winner, by unanimous decision... Cyril Figis!
|
|
|
|
|
|
|
|
|
|
|
|
|
|
|
|
|
|
|
|
|
|
|
| S |
C
A |
G |
S |
C
B |
G |
|
S |
C |
G |
|
energy
A | B |
|
hype
A | B |
|
pop
A | B |
|
mgr
A | B |
|
FIGHT
RATING
48% |
|
|
|
|
|
|
|
Main event
|
Coming up we have a lightweight MMA rules bout between Dave Yucca (ranked 4731 p4p, 456 weight class) and Jack Spriggins (ranked 3988 p4p, 403 weight class). Both fighters look pumped up here. Let's hope this is a good fight!
 |
|
 |
| 173 cm
25
160 lbs
1 - 0 - 0 |
|
180 cm
25
165 lbs
1 - 0 - 0 |
BJJ Blue Belt
Solid Muay Thai
KO power |
|
BJJ White Belt
Good kicks
Solid chin |
|
| |
|
Ladies and gentlemen. This fight is 3 rounds, in the lightweight division.
Introducing the fighter to my left, fighting out of the red corner.
With a record of
1 - 0 - 0, fighting out of Sydney, Dave Yucca!
And introducing the fighter to my right, fighting out of the blue corner.
With a record of
1 - 0 - 0, fighting out of Sydney, Jack Spriggins!
The judges for this bout are Summer Carpenter, Topper Green and Darius Henderson.
The bell rings for round one and we are underway!
Spriggins circles away from the clinch attempt
and Spriggins counters with a straight right hand.
Yucca shakes his hands off, looking to compose himself, but takes a jab to the jaw whilst he does it.
Yucca tries for a takedown but Spriggins sees it coming a mile off and avoids it easily.
Spriggins throws a counter combo.
Yucca tries to clinch but fails miserably
and Spriggins counters with a crisp hook to the side of the head.
Yucca forces Spriggins back against the cage and clinches.

Yucca breaks the clinch.
Yucca closes the distance and pushes Spriggins back into the cage.
Spriggins wants to push off and get back to the center of the mat but Yucca has him pressed against the cage.
Yucca trying to land knees to the body.
We've had a slow start to the round here - hopefully the action picks up.
Spriggins breaks from the clinch.
Spriggins throws a head kick that connects with a bit of head and a bit of hand.
Nice sprawl there from Spriggins as Yucca shoots in.
Yucca staying out of range there.

Spriggins gets in close and instigates a clinch.
That's one minute gone in the round.
Spriggins is trying to work out of this bad position, with his back against the cage.
Yucca breaks from the clinch.
Spriggins lunges in with swinging rights and lefts but Yucca circles away quickly and effectively.
Yucca half commits to a counter takedown before pushing away, out of range.
Yucca closes the distance and clinches.
Yucca goes for a body shot but it's blocked.
Spriggins's corner are urging him to control the action in the clinch for a moment, rather than mount any serious offense. I'm sure the crowd appreciate those instructions... not.
Spriggins gets double underhooks to prevent a takedown attempt from Yucca.
That's three failed takedown attempts in the round for Dave Yucca. That's going to take a lot out of him.
Yucca is trying to pull guard but Spriggins turns him against the cage and we stay in the clinch.
Spriggins told us before the fight that he's been working on his elbows. An under utilised technique these days - let's see if it can sway the outcome of the fight.
Spriggins pushes off and circles away, back to the middle of the mat.
That's two minutes gone in the round.
Yucca has his takedown stuffed
and Spriggins connects with a straight left hand counter down the middle.
Spriggins jabs at Yucca's body.
Jack Spriggins is looking to keep the fight on the feet at all costs.
Yucca tries to clinch but Spriggins is having none of it.
Dave Yucca seems to be the more aggressive standup fighter in this bout.
Yucca shoots in but doesn't get the takedown
and Spriggins counters with a crisp hook to the side of the head.
Yucca takes a punch to the jaw and another one to the bread basket.
Yucca instigates a clinch.
Wooooo! Give it up for these two warriors! They are putting on a show!
Yucca misses with an elbow over the top.
Yucca looking to stall.
Spriggins wants to break the clinch but can't.
Yucca jumps guard and drags Spriggins to the mat. He's obviously going to be looking for submissions off his back.
The fighters are pressed up against the cage, both looking to find a bit of space to work.

Spriggins decides he's had enough of playing guard and decides to stand. Come on Yucca, up you get!
That's three minutes gone in the round.
Yucca closes the distance and clinches.
Spriggins working hard to break the clinch.
Spriggins is trying to force a seperation but Yucca has the dominant position.
Yucca can't get the takedown.
Yucca breaks the clinch and we return to the middle of the mat.
Spriggins uses good footwork to get in and out, landing a nice hook.
Yucca tries to clinch up
and Spriggins counters with a straight right hand.
Yucca is looking to take this fight into the clinch.
Yucca gets in close and instigates a clinch.
That's four minutes gone in the round.
Spriggins breaks the clinch.
Yucca shoots in looking for a takedown. Spriggins tries to sprawl out of it but Yucca keeps driving through. The fighters are pinned against the cage. Spriggins manages to get underhooks and after a bit of a struggle, circles away and we're back to standing.
Yucca moves to clinch but Spriggins breaks away
and Spriggins counters with a nice uppercut.
Yucca gets to the clinch - let's see what his plan is here.
Spriggins pushes off and circles away, back to the middle of the mat.
Spriggins swats away the attempt to clinch by Yucca.
Spriggins avoids the clinch attempt nicely.
Spriggins throws a body punch but Yucca moves out of range.
Yucca wants to clinch.
And thats the end of the round the fighters go back to their corners.
Jack Spriggins dominated that round.
Well, the break between rounds is over. Let's get back to the scrappin!
Spriggins throws a combination. Yucca tries to block but a couple of punches get through.
Yucca is looking to clinch but Spriggins is avoiding it.
Yucca wants to clinch up but Spriggins keeps it at a distance.
Yucca fakes high and shoots in for a takedown but Spriggins avoids it really well and circles away.
As Yucca backs off Spriggins throws a huge counter combo but Yucca manages to avoid it all.
Yucca tries to clinch there but Spriggins circles away.
Spriggins was about to counter that last move with a leg kick but changes his mind.
Spriggins rushes Yucca and presses him up against the cage.
We've had a slow start to the round here - hopefully the action picks up.
Yucca breaks the clinch and we're back to striking at distance.
Yucca wants to clinch but Spriggins slips to the side
and Spriggins counters with a stiff right hand.
Yucca tries to close the distance and clinch but Spriggins swats him to one side with an open hand palm strike and circles away.
Spriggins tries to keep at a distance but Yucca has taken the fight into the clinch.
That's one minute gone in the round.
Yucca is trying to pull guard but being pressed up against the cage enables Spriggins to keep the fight standing.
Yucca breaks the clinch and we're back to striking at distance.
Yucca tries to clinch there but Spriggins circles away.
Yucca tries to clinch up but Spriggins circles away and keeps his distance.
Spriggins avoids the clinch attempt nicely.
Jack Spriggins seems to be getting the better of the standup.
Yucca tries to clinch up.
The fight moves into the clinch position.
Spriggins prevents a body shot from Yucca.
Yucca is trying to stall.
Yucca breaks the clinch.
Yucca tries to clinch but is not successful on this occasion.
That's two minutes gone in the round.
Yucca avoids the head kick by Spriggins.
Spriggins throws a quick inside leg kick.
Yucca is looking to clinch but Spriggins is avoiding it.
Spriggins is clearly trying to counter these attacks from Yucca with a body shot.
Yucca clinches up with Spriggins and pushes him back against the cage.
Yucca escapes the clinch and we're back to striking.
Yucca tries to clinch there but Spriggins circles away.
Spriggins is looking for the big counter here.
Spriggins keeps the fight on the outside.
Spriggins looks like he wanted to counter with a high kick but didn't throw it.
Spriggins rushes Yucca and pushes him back against the cage in a clinch.
Good anti-grappling being displayed by Spriggins as Yucca tries to tie him up.
Yucca prevents Spriggins from breaking the clinch.
Yucca escapes the clinch and we're back to striking.
Spriggins's corner calls for a 1, 2 combination and Spriggins duly obliges.
Spriggins has been the more effective fighter overall so far.
That's three minutes gone in the round.
Yucca tries to clinch but Spriggins moves away
and Spriggins counters with a one-two to the body.
Yucca wants to clinch but Spriggins slips to the side
and Spriggins connects with a straight left hand counter down the middle.
Spriggins stuffs a takedown. It's all about dictating where the fight takes place and Spriggins wants it to stay on the feet.
That's three failed takedown attempts in the round for Dave Yucca. That's going to take a lot out of him.
A decent looking cross lands there for Spriggins.
Spriggins cracks Yucca with a good jab.
Yucca throws an ugly left hook that misses
and Spriggins counters with a three punch combination, finished off with a leg kick. Nice work.
Yucca has his takedown stuffed
and Spriggins counters with a lovely straight right hand!
Both fighters are absolutely exhausted here.
Spriggins darts in and clinches Yucca up against the cage.
We've seen a great period of action over the last minute or so - credit to both fighters for going all out!
Spriggins holding his opponent close, against the cage.
Yucca pushes off and circles away, back to the middle of the mat.
Yucca tries to clinch but Spriggins is having none of it.
That's four minutes gone in the round.
Yucca darts in and clinches Spriggins up against the cage.
Yucca lands with a short punch from the clinch.
Spriggins breaks the clinch and we return to the middle of the mat.
Spriggins has used his reach advantage pretty well so far tonight.
Yucca avoids a punch combination nicely.
The fight stays on the outside here - Yucca looks like he's thinking about clinching though.
Yucca wants to clinch.
Spriggins avoids the clinch attempt nicely.
Yucca closes the distance but Spriggins moves to the side
and Spriggins counters with a straight right hand.
And thats the end of the round the fighters go back to their corners.
Jack Spriggins showed his class in that round. I'd imagine he'll take it on all the scorecards.
The corners get their ten second warning. Both fighters stand from their stools and stare eachother down, ready to get back to the action. The crowd applaud as we get ready to start the final round!
Yucca tries to clinch up against the cage, rushing in to close the distance. Spriggins manages to break the clinch and circles back to the middle of the mat.
Spriggins circles away from the clinch attempt.
Spriggins throws a head kick that misses and slips in the process. He scrambles back to his feet and the fighters circle.
Yucca feinted with a counter takedown.
Nice uppercut lands for Spriggins. That snapped Yucca's head back.
Yucca tries to close the distance and clinch up but Spriggins swats him away and circles back towards the center.
Spriggins slaps away a takedown attempt from Yucca, before circling back to the center of the mat.
As Yucca backs off Spriggins throws a huge counter combo but Yucca manages to avoid it all.
Spriggins rushes forward with a series of wild hooks but Yucca moves out of range and avoids them all easily.
Yucca attempts a counter takedown but Spriggins avoids it well and moves away.
Spriggins darts in and clinches Yucca up against the cage.
Yucca breaks the clinch.
We've had a slow start to the round here - hopefully the action picks up.
Yucca gets tackled into the cage by Spriggins. Spriggins maintains the clinch.
Yucca works on Spriggins's body with a couple of short punches.
Yucca pushes off and circles away, back to the middle of the mat.
Spriggins swings away but doesn't land with a series of punches.
Yucca attempts a counter takedown but Spriggins avoids it well and moves away.
That's one minute gone in the round.
Yucca tries to close the distance and clinch up against the cage but Spriggins paws at him with a jab and circles away.
Well, he's not going to score with shots like that. A lazy body kick attempt from Spriggins.
Spriggins takes a big intake of breath there - he's definitely tired.
Spriggins stuffs a takedown. It's all about dictating where the fight takes place and Spriggins wants it to stay on the feet.
Left hook, right uppercut from Spriggins.
Yucca tries a head kick but it misses.
A little jabbing left from Spriggins on the counter but it doesn't find it's target.
Spriggins throws a right hand that Yucca ducks under and follows up with a left that Yucca also avoids with ease.
Yucca is trying to close the distance and clinch up, after that failed offence from Spriggins.
Yucca fails with the takedown.
That's three failed takedown attempts in the round for Dave Yucca. That's going to take a lot out of him.
Yucca fails with an attempt to clinch.
Spriggins misses with a jab, cross combination.
A punch combination from Spriggins misses.
Yucca appears to be looking for a counter takedown.
Yucca tries to clinch up.
Yucca tries to clinch but is not successful on this occasion.
That's two minutes gone in the round.
Yucca shoots in for a takedown - he's clinched up with Spriggins but Spriggins pushes him off and we're back to square one.
Spriggins lets it all go there with a big combo counter but none of the punches connected.
Yucca tries to clinch but fails miserably
and Spriggins counters with a crisp hook to the side of the head.
Spriggins avoids the clinch attempt nicely.
Spriggins scores with a one two! Yucca had his feet all tangled up there and couldn't avoid the strikes.
The fans in attendance giving it up for the two fighters, who have really let it all hang out in the last minute or so!
Yucca connects with a high kick.
Yucca with a poor takedown
and Spriggins counters with a three punch combination, finished off with a leg kick. Nice work.
Spriggins might want to mix his strikes up a bit more. He's just going for head shots at the moment and that can become a bit predictable.
Yucca shoots in but doesn't get the takedown
and Spriggins counters with a left to the body.
Yucca darts in trying to clinch
and Spriggins counters with a nice uppercut.
That's three minutes gone in the round.
Spriggins takes the fight into the clinch.
Yucca tries to take the fight to the ground by pulling guard but can't manage it.
Spriggins breaks from the clinch.
Spriggins misses with the combination.
Spriggins keeps his opponent at a distance with a nice jab.
Dave Yucca is looking to throw some combinations by the looks of things.
Yucca tried to score with a low kick but Spriggins checks it.
Yucca tries to clinch up against the cage, rushing in to close the distance. Spriggins manages to break the clinch and circles back to the middle of the mat.
Yucca wants to clinch but Spriggins slips to the side
and Spriggins counters with a three punch combination, finished off with a leg kick. Nice work.
Yucca tries to clinch there but Spriggins circles away.
That's four minutes gone in the round.
Yucca tries a switch kick but it misses it's target.
A jab lands there for Spriggins.
Yucca tries to clinch there but Spriggins circles away.
Yucca looks like he's developed a pretty tasty lump over his left eye. He'll need to avoid taking much more damage to that.
Yucca tries to grapple but his opponent circles
and Spriggins counters with a two punch combo.
The fans in attendance giving it up for the two fighters, who have really let it all hang out in the last minute or so!
Yucca tries for a takedown but Spriggins circles away easily
and Spriggins counters with a straight right hand.
Yucca takes a punch to the jaw and another one to the bread basket.
Spriggins works over Yucca's head and body with a nice combination.
Yucca takes the fight into the clinch.
Dave Yucca has stepped it up - he knows he needs a finish here!
Jack Spriggins is fighting for a decision - hopefully he's judged it right and he's actually winning the fight.
A quick uppercut on the inside from Yucca.
And that's the end of the fight!
Jack Spriggins comfortably won the final round on my scorecard.
I've got Spriggins winning every round here. Surely the decision will go his way and he'll pick up a well deserved decision victory. Over to the ring announcer for the scorecards.
Ladies and gentlemen, after 3 rounds of action, we go to the scorecards for a decision.
Judge Summer Carpenter scores the fight 27:30
Judge Topper Green scores the fight 27:30
Judge Darius Henderson scores the fight 27:30
In favor of your winner, by unanimous decision... Jack Spriggins!
|
|
|
|
|
|
|
|
|
|
|
|
|
|
|
|
|
|
|
|
|
|
|
| S |
C
A |
G |
S |
C
B |
G |
|
S |
C |
G |
|
energy
A | B |
|
hype
A | B |
|
pop
A | B |
|
mgr
A | B |
|
FIGHT
RATING
53% |
|
|
|
|
|
|
|
|
|
|
