 |
Trials By Fire IV PBP Commentary |
Undercard bout
|
|
|
|
Undercard bout
|
|
|
|
Undercard bout
|
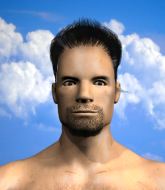
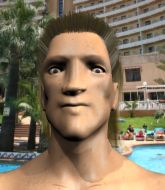
Coming up we have a bantamweight MMA rules bout between Jimmy Leiton (ranked 7687 p4p, 308 weight class) and Brayden Point (ranked 6225 p4p, 278 weight class). Brayden Point has the power to score a knockout today if he connects clean with Jimmy Leiton's chin.
 |
|
 |
| 171 cm
19
144 lbs
0 - 1 - 0 |
|
168 cm
18
135 lbs
0 - 0 - 0 |
BJJ Blue Belt
Brawler
Inexperienced |
|
Good wrestler
Basic striking
Solid chin |
|
| |
|
Ladies and gentlemen. This fight is 3 rounds, in the bantamweight division.
Introducing the fighter to my left, fighting out of the red corner.
With a record of
0 - 1 - 0, fighting out of London, Jimmy Leiton!
And introducing the fighter to my right, fighting out of the blue corner.
With a record of
0 - 0 - 0, fighting out of Los Angeles, Brayden Point!
The judges for this bout are William Gold, Daniel Bishop and Sam Margolis.

The bell rings for round one and we are underway!
Leiton tries to score a power double leg takedown but Point sees that one coming and sprawls well. That will dishearten Leiton somewhat.
Point lands with an overhand left.
Leiton tries to close the distance and clinch up but Point swats him away and circles back towards the center.
Point stuffs the takedown attempt from Leiton. Leiton gets slowly back to his feet.
Point thows a leg kick but Leiton checks it

so Leiton counters with a double leg into guard. Good agility.
Point tries to land a sweep but no joy.
Point keeping moving, preventing Leiton from controlling successfully.
We've had a slow start to the round here - hopefully the action picks up.
Point has a closed guard, preventing anything of note from happening. Perhaps he's looking to stall.

That's one minute gone in the round.
Point keeping moving, preventing Leiton from controlling successfully.
The fighters are pressed up against the cage, both looking to find a bit of space to work.
Point pulls Leiton in close to prevent any damage.

The referee has stepped in and called for a break in the action. We'll restart on the feet.
Point circles away from the clinch attempt.
Point throws a couple of head shots and lands with the final one - a decent hook, which struck Leiton on the side of the head.
Leiton fails with a takedown attempt.
That's three failed takedown attempts in the round for Jimmy Leiton. That's going to take a lot out of him.
Point waving his hands out in front of him, looking to distract Leiton.
Point ducks low and lands a nice hook to the body of his opponent.

That's two minutes gone in the round.
Leiton throws a leg kick but he was too far away and it doesn't land.
It seemed like Point was going to counter with the hook but didn't fully commit to it.
Leiton throws a right and a left that both miss.
Point tries a counter takedown but it's more of a dummy move, and he uses it to push himself away.
Leiton throws a quick inside leg kick.
Point misses with a hook. Leiton ducked under it nicely.
Leiton throwing a counter right hand but Point manages to avoid it.
Point throws the kick towards the body but Leiton avoids it.
Leiton takes an uppercut right on the jaw but it doesn't phase him.
Point connects with a body shot.
Leiton is breathing heavily.
Leiton keeping a good distance there, avoiding the body shot.
Leiton seem to be loading up, looking for a big counter.
Point scores with a straight right hand, right through his opponent's guard.
This has been an exciting period of action!
Leiton fakes high and shoots in for a takedown but Point avoids it really well and circles away.
Point fails to land the takedown.
Leiton throws a big counter combination but Point scrambles out of danger and avoids any damage.
Brayden Point seems to be the more aggressive standup fighter in this bout.
Leiton tries to clinch up.
Leiton is pinned up against the cage taking some big shots here. The referee is looking closely deciding whether he should stop the fight.
Point swings for the body but Leiton moves out of range.

That's three minutes gone in the round.
Point tries to score with a low kick but Leiton moves his leg out of the way.
Point walks forward and throws out a flicking leg kick. Leiton checks it nicely though, as he moves to the side.
Point with a body punch. A glancing blow.
Leiton drives through with a takedown into guard.

Point looking for a triangle here. Leiton is fighting it but it looks tight! Point pulls the arm across and this one won't last much longer! Nope, Leiton is tapping out - this one is all over!
Ladies and gentlemen, after 3:36 of round 1, we have a winner by way of Submission (Triangle Choke). Brayden Point!
|
|
|
|
|
|
|
|
|
|
|
|
|
|
|
|
|
|
|
|
|
|
|
| S |
C
A |
G |
S |
C
B |
G |
|
S |
C |
G |
|
energy
A | B |
|
hype
A | B |
|
pop
A | B |
|
mgr
A | B |
|
FIGHT
RATING
43% |
|
|
|
|
|
|
|
Undercard bout
|
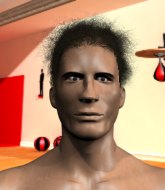
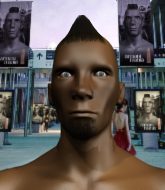
Coming up we have a featherweight MMA rules bout between Kent Mcallum (ranked 7636 p4p, 495 weight class) and Luke Trendall (ranked 7613 p4p, 494 weight class). Luke Trendall has the better chin. Will he look to stand and bang today?
 |
|
 |
| 170 cm
19
150 lbs
0 - 1 - 0 |
|
189 cm
23
150 lbs
0 - 1 - 0 |
BJJ White Belt
Good kicks
Intelligent |
|
BJJ White Belt
Decent boxing
Determined |
|
| |
|
Ladies and gentlemen. This fight is 3 rounds, in the featherweight division.
Introducing the fighter to my left, fighting out of the red corner.
With a record of
0 - 1 - 0, fighting out of London, Kent Mcallum!
And introducing the fighter to my right, fighting out of the blue corner.
With a record of
0 - 1 - 0, fighting out of London, Luke Trendall!
The judges for this bout are James Glass, James Atkins and William Gold.
The bell rings for round one and we are underway!
Trendall misses with a double jab.
An inside leg kick lands from Mcallum.
A combination from Trendall does no damage.
Mcallum misses with a jab, cross combination.
Mcallum has his head slapped from side to side by a 3 punch combination. That must have hurt him.
A head kick misses from Mcallum.
Mcallum leaves Trendall with his face pressed against the mat as he sprawls beautifully, defending against a solid takedown attempt.
We've had a slow start to the round here - hopefully the action picks up.

Mcallum clinches with his opponent.

Mcallum pushes off and circles away, back to the middle of the mat.
Trendall looks to score with a jab to the body but Mcallum is just out of range.
That's one minute gone in the round.
Trendall fails to land with the punch combination there - jab, cross, hook, miss, miss, miss.
Mcallum misses with a few strikes there.
Trendall shoots in for a takedown but Mcallum shows good takedown defense.
Trendall slips a jab and a cross from Mcallum.
Mcallum is looking to take this fight into the clinch.
Mcallum tries to clinch but is not successful on this occasion.
Trendall misses with a head kick.
Mcallum has taken the fight to the clinch.
Trendall's head jolts backwards as he takes an uppercut right on the button!
Mcallum breaks from the clinch.
That's two minutes gone in the round.
Mcallum tries to close the distance and clinch but Trendall swats him to one side with an open hand palm strike and circles away.
No luck for Trendall with that takedown attempt.
Mcallum is looking for a counter combo.
Kent Mcallum has stuffed three takedown attempts in the round now. That's going to take a lot out of Luke Trendall.
Mcallum thuds his shin into the meat of Trendall's side.
Mcallum is looking to clinch but Trendall is avoiding it.
Mcallum moves out of range of the leg kick from Trendall.
Mcallum lifts his leg as if looking to counter with a high kick.
Mcallum throws a push kick but Trendall slaps the foot to one side.
Mcallum misses with a jab, cross combination.
We've seen a great period of action over the last minute or so - credit to both fighters for going all out!
Mcallum tries to clinch
and Mcallum takes a counter punch right on the button for his troubles.
Mcallum throws a sloppy head kick

and Trendall holds on and brings the fighters into a clinch.
That's three minutes gone in the round.
An uppercut on the inside fails to land for Mcallum.
Trendall taking a breather.
Mcallum prevents Trendall from breaking the clinch.
Mcallum breaks the clinch and we return to the middle of the mat.
Mcallum throws a right and a left that both miss.
A head kick misses from Mcallum.
Trendall misses with a wild combination.
Mcallum wants to clinch.

That's four minutes gone in the round.
Nice sprawl there from Mcallum as Trendall shoots in.
Mcallum throws a head kick that misses and slips in the process. He scrambles back to his feet and the fighters circle.
Mcallum tries to close the distance and clinch up but Trendall swats him away and circles back towards the center.
Trendall shoots in but Mcallum avoids the takedown attempt easily.
No joy there for Trendall, who threw a few shots but didn't land.
Trendall pulls out of a head kick attempt.
Mcallum fakes a couple of low kicks, before throwing one on the third attempt. It connects and Trendall has to reset his feet before getting ready to engage.
Mcallum throws a sloppy head kick
and Mcallum takes a counter punch right on the button for his troubles.
And thats the end of the round the fighters go back to their corners.
Kent Mcallum dominated that round.
That's the end of the round. The referee orders the cornermen out of the cage so we can get back down to business.

Mcallum misses with a double jab.
Mcallum tries to close the distance and clinch but Trendall swats him to one side with an open hand palm strike and circles away.
Mcallum darts in and clinches Trendall up against the cage.
Trendall holding his opponent close, against the cage.
Trendall is trying to break the clinch but Mcallum has him pressed against the cage.
Mcallum escapes the clinch and we're back to striking.
We've had a slow start to the round here - hopefully the action picks up.
Mcallum throws a push kick but Trendall slaps the foot to one side.
Trendall throws a right hand that Mcallum ducks under and follows up with a left that Mcallum also avoids with ease.
Trendall scores with a three punch combo!
Trendall lands a powerful looking uppercut that connected with his opponent's jaw.
Kent Mcallum is looking to throw some combinations by the looks of things.
That's one minute gone in the round.
Trendall changes levels and looks for a double leg takedown. Mcallum tries to avoid it but Trendall manages to keep hold of a leg and drag Mcallum to the ground. Mcallum escapes though and pops straight back up to his feet.
Trendall shuffles to his left behind two crisp jabs. Mcallum eats them both and turns towards Trendall to reposition himself and eats a stinging right hand-left hook combo.
Mcallum tries to clinch there but Trendall circles away.
Mcallum tries to clinch but is not successful on this occasion.
A looping hook to the body misses from Mcallum. Trendall does a little dance to reset his feet.
Luke Trendall seems to be getting the better of the standup.
Mcallum connects with a leg kick. Trendall looked like he was expecting something else and didn't defend it.
Mcallum fails to land with the punch combination there - jab, cross, hook, miss, miss, miss.
Trendall tries to counter by closing the distance.
Trendall throws a head kick but Mcallum moves out of range.
Trendall throws a shot to the body.
Trendall is a painfully thin specimen of a man. You do wonder whether a good body kick would snap him clean in two.
Mcallum throws out a leg kick but Trendall moves out of range and Mcallum only half commits.
That's two minutes gone in the round.
Sloppy strikes from Mcallum. Those never looked like landing.
Trendall lets the fists fly and connects with a left straight followed by a right hook.
Jab from Trendall.
This has been an exciting period of action!
Mcallum gets a clinch.
Trendall wants to get back to striking at distance but Mcallum won't allow it.
Mcallum breaks the clinch and we're back to striking at distance.
Mcallum throws a sloppy head kick and Trendall moves out of range easily.
Mcallum tries a switch kick but it misses it's target.
Mcallum tries to clinch but is not successful on this occasion.
Mcallum throws a monster uppercut resembling something out of street fighter but it doesn't land.
Both fighters are absolutely exhausted here.
That's three minutes gone in the round.
Trendall looking to throw a kick but he's pulled out of it.
Mcallum doesn't manage to clinch there - Trendall circles away.
Mcallum lands a high kick!
Mcallum wants to clinch up but Trendall keeps it at a distance.
Mcallum blocks the body kick.
Trendall scores with a nice looking left hook and follows it up with an uppercut!
Mcallum throws a head kick that misses and slips in the process. He scrambles back to his feet and the fighters circle.
Mcallum sets himself, and Trendall steps forward looking for the clinch! Mcallum avoids it this time.
Mcallum tries to bum rush Trendall with a series of wild strikes but Trendall uses good footwork to avoid the assault.
Mcallum misses with a head kick.
A countering left hand to the body from Trendall misses.
Trendall is looking to land body kicks.
That's four minutes gone in the round.
Trendall misses with a takedown attempt. He shot from a bit too far out.
Trendall fakes high and shoots in for a takedown but Mcallum avoids it really well and circles away.
Kent Mcallum has stuffed three takedown attempts in the round now. That's going to take a lot out of Luke Trendall.

Trendall shoots in and gets a takedown into Mcallum's guard.
The fans in attendance giving it up for the two fighters, who have really let it all hang out in the last minute or so!
Mcallum working a defensive guard here.
And thats the end of the round the fighters go back to their corners.
A close second round but Luke Trendall will probably get the nod - 10:9.
That's the end of the round. The referee orders the cornermen out of the cage so we can get back down to business. So, we enter the final round. Let's see if either fighter can bring us a finish, or whether we're going to the judges scorecards.

Trendall shoots in with a takedown attempt and he has Mcallum pinned against the cage. Mcallum gets the underhooks and manages to circle away.
Mcallum tries to clinch up against the cage, rushing in to close the distance. Trendall manages to break the clinch and circles back to the middle of the mat.
Trendall shoots in from a long way out. He's driving through with the takedown attempt and he eventually gets it, landing in Mcallum's guard.

Mcallum is active off his back here, looking for submissions.
Mcallum escapes his hips to the side and looks to be working for an armbar. Trendall gives him a little smile and shakes his head. No chance.
We've had a slow start to the round here - hopefully the action picks up.

Trendall decides he's had enough of playing guard and decides to stand. Come on Mcallum, up you get!
Both fighters are breathing heavily.
That's one minute gone in the round.
Mcallum tries to clinch but fails miserably
and Trendall counters with a crisp hook to the side of the head.
Trendall throws a series of punches but Mcallum avoids them all with ease.
Mcallum tries to counter by clinching up but Trendall breaks away and moves out of range.
Mcallum tries to clinch but Trendall moves out of range.
Trendall lands three nice shots there - that looked like it hurt!
Trendall misses with a head kick.
Trendall lunges in with swinging rights and lefts but Mcallum circles away quickly and effectively.
A cross from Trendall lands.
Mcallum throws a head kick that misses and slips in the process. He scrambles back to his feet and the fighters circle.
Trendall fails with a rather predictable takedown attempt.
That's two minutes gone in the round.
Trendall lands with a cross.
Trendall throws a two punch combo that lands nicely.
This is a great period of action - very entertaining stuff!
Mcallum throws a head kick that misses and slips in the process. He scrambles back to his feet and the fighters circle.
Trendall is using his reach advantage to land shots from outside his opponent's range.
Mcallum tries to clinch but Trendall moves out of range.
Trendall tries to counter by closing the distance.
Mcallum moves out of range of the leg kick from Trendall.
Mcallum throws a head kick that misses and slips in the process. He scrambles back to his feet and the fighters circle.
Mcallum gets cracked there but stands up to it.
That's three minutes gone in the round.
Mcallum misses with a jab and misses with a cross straight after too.
Trendall will have to do better than that with his takedown attempts.
Kent Mcallum has stuffed three takedown attempts in the round now. That's going to take a lot out of Luke Trendall.
Trendall throws a head kick that misses.
Mcallum tries to counter with a takedown but Trendall is quick to defend against it.
A telegraphed takedown attempt from Trendall is defended easily by Mcallum.
Trendall gets tackled into the cage by Mcallum. Mcallum maintains the clinch.
That's four minutes gone in the round.
Mcallum stalling.
Trendall tries to break free but Mcallum pushes him back against the cage.
Trendall tries to break free but Mcallum pushes him back against the cage.
Trendall tries to break free but Mcallum pushes him back against the cage.
Mcallum lands an elbow just above Trendall 's eye.
Trendall misses with a hook from the clinch.
Mcallum breaks the clinch.
The crowd thankful this round is nearly over.
Trendall throws a head kick that misses.
Mcallum throws a head kick that misses and slips in the process. He scrambles back to his feet and the fighters circle.
And that's the end of the fight!
Luke Trendall comfortably won the final round on my scorecard.
I think Trendall has won this one but let's see whether the judges agree with me. Over to the ring announcer for the scorecards.
Ladies and gentlemen, after 3 rounds of action, we go to the scorecards for a decision.
Judge James Glass scores the fight 28:29
Judge James Atkins scores the fight 28:29
Judge William Gold scores the fight 28:29
In favor of your winner, by unanimous decision... Luke Trendall!
|
|
|
|
|
|
|
|
|
|
|
|
|
|
|
|
|
|
|
|
|
|
|
| S |
C
A |
G |
S |
C
B |
G |
|
S |
C |
G |
|
energy
A | B |
|
hype
A | B |
|
pop
A | B |
|
mgr
A | B |
|
FIGHT
RATING
41% |
|
|
|
|
|
|
|
Undercard bout
|
Coming up we have a lightweight MMA rules bout between Matteo Claessens (ranked 8032 p4p, 659 weight class) and Matt Buddy (ranked 8393 p4p, 670 weight class). Matteo Claessens has the better chin. Will he look to stand and bang today?
 |
|
 |
| 180 cm
25
162 lbs
0 - 1 - 0 |
|
180 cm
25
165 lbs
0 - 1 - 0 |
Good wrestling
Basic striking
Big heart |
|
BJJ Purple Belt
Solid Muay Thai
Determined |
|
| |
|
Ladies and gentlemen. This fight is 3 rounds, in the lightweight division.
Introducing the fighter to my left, fighting out of the red corner.
With a record of
0 - 1 - 0, fighting out of Helsinki, Matteo Claessens!
And introducing the fighter to my right, fighting out of the blue corner.
With a record of
0 - 1 - 0, fighting out of London, Matt Buddy!
The judges for this bout are Andrew Berry, Sam Margolis and Daniel Bishop.
The bell rings for round one and we are underway!
Buddy is looking to clinch.
A little feinted left hand from Claessens on the counter but he doesn't commit to it.
Claessens avoids the clinch attempt nicely.
A bone on bone clash there as Claessens blocks the leg kick.
As Buddy looks to move away, Claessens throws a big counter combo but Buddy just gets out of the way.
Buddy swings for the body but Claessens moves out of range.
Matteo Claessens seems to be the more aggressive standup fighter in this bout.
Buddy turns his hip over beautifully as he lands a nice leg kick.
Claessens scores a trip takedown into side control. Nice.
Claessens working the body and head with strikes.
Claessens knows he needs to get back to his feet asap. He's simply no match for Buddy on the ground.
Claessens is putting a hurting on Buddy here, landing some big shots from side control.
An elbow from Claessens crashes against the mat.
Claessens lands a knee to the body and follows it up with some ground and pound to the head. That will wear Buddy down.
Buddy is trying to stand back up. He's worked his way up against the cage but Claessens has just dragged him back down to the mat.
Buddy regains half guard.
Claessens tries to pass the half guard into mount. Buddy knows what he's doing though and prevents the attempt.
The fighters are pressed up against the cage, both looking to find a bit of space to work.
Buddy is trying to stand.
Claessens looks towards his corner to check for any instructions. The corner give him nothing to work with, so he cracks Buddy with a short hammerfist. I guess that's as good as any advice he could get in this position.
Wooooo! Give it up for these two warriors! They are putting on a show!
Claessens drops an elbow to the side of Buddy's head.
Buddy is pressing down on Claessens's left leg trying to get back to full guard. He's managed it.
Claessens missing there with some ground and pound from the guard.
That's one minute gone in the round.
Buddy has momentary wrist control but Claessens slips an elbow through the middle.
Claessens controls from within his opponent's guard.
Claessens seems to have a rather negative gameplan on the ground. He seems keen to just score the takedown and hold down Buddy for as long as he can get away with.
Claessens throwing elbows and punches but not connecting, as Buddy works some decent striking defense from the bottom.
Buddy looking for a sweep. Not yet Buddy, not yet.
Buddy manages to sweep nicely, so he's now on top. Claessens manages to get himself to full guard.

Claessens trying to control the position.
A real slowdown in the pace of the fight for a moment, as Claessens holds on and takes a little breather.
Claessens working a defensive guard here.
That's two minutes gone in the round.
Claessens avoiding any damage from the ground and pound.
Buddy stopping the sweep attempt from Claessens.
Claessens definitely looks more muscular than last time we saw him fight.
Buddy throws a big right hand that misses.
Claessens wants to sweep but no luck.
I've been told that Buddy has been drilling his wrestling of late, which has already helped him take this fight to the mat. Let's see how much of an impact it has on the outcome of the ground game.
Claessens throws a couple of weedy looking strikes off his back.
If this pace continues, the referee will definitely step in and force a standup.
Buddy has decided he wants to stand but the closed guard of Claessens is proving hard to escape from.
The ref stands the fighters back up due to a lack of activity.
No luck with that takedown attempt from Buddy.
Buddy looks winded!
Buddy gets tackled into the cage by Claessens. Claessens maintains the clinch.
That's three minutes gone in the round.
Buddy wants to break free but Claessens has control.
Claessens tries for a takedown but Buddy manages to get underhooks.
Claessens pushes off and circles away, back to the middle of the mat.
Claessens looking to score a takedown here. Buddy is defending well but Claessens drives through and ends up in Buddy's guard.
Buddy wants to get back to his feet but Claessens is in a dominant position and won't allow it.
Claessens throwing shots from guard but he's hitting more mat than opponent.
Claessens with a nice head shot there.
Buddy is trying to stand up but he's not managed so far.
Claessens trying to control but Buddy is working from the bottom.
Buddy utilising some decent striking defenses from the guard, preventing the ground and pound.
Claessens lands a nice shot whilst sitting in his opponent's guard.
Claessens controls from within his opponent's guard.
That's four minutes gone in the round.
Claessens chips away with some ground and pound.
Claessens connects with a couple of short punches.
Claessens postures up and lands some nice ground and pound.
Claessens trying to control the position from guard on top but Buddy is wriggling around, looking for whatever he can.
Claessens distracts Buddy with his right hand and drops a big elbow with his other arm.
The ref warns both fighters not to hold the cage as they work up against the meshing.
Claessens stands up over Buddy, holding his feet. He dives back in and lands a decent shot to the head.
Hammerfist, elbow! yells Claessens's corner. There ya go! There ya go!
Claessens lands a couple of decent looking shots.
Claessens content to strike from guard, landing some decent shots.
Hammerfist, elbow! yells Claessens's corner. There ya go! There ya go!
Claessens scores with a decent looking elbow strike.
Claessens is frustrating his opponent with some stalling tactics from top position.
Claessens postures up and lands some nice ground and pound.
And thats the end of the round the fighters go back to their corners.
Matteo Claessens dominated that round.
That's the end of the round. The referee orders the cornermen out of the cage so we can get back down to business.
Claessens throws a right and a left that both miss.
A looping hook to the body misses from Buddy. Claessens does a little dance to reset his feet.
Some wild striking there from Buddy.
Claessens went nuts there looking for a big combo counter but none of the flurry connected.
Claessens fakes an overhand right and shoots for a takedown. Buddy sprawls well initially but Claessens persists and gets the takedown into half guard.

Buddy pushes Claessens off and gets back to his feet.
Buddy throws an ugly left hook that misses
and Claessens counters with a one-two to the body.
This has been an exciting period of action!
A nice combination there by Claessens.
Matteo Claessens is looking to throw some combinations by the looks of things.
Buddy attempts a low kick but it misses it's target.
Claessens scores with a reasonable looking shot to the body. Buddy doesn't seem bothered though.
Claessens cracks a nice hook into Buddy's ribs.
Buddy tries to clinch up against the cage, rushing in to close the distance. Claessens manages to break the clinch and circles back to the middle of the mat.
Claessens throws a right hand that Buddy ducks under and follows up with a left that Buddy also avoids with ease.
Claessens misses with a telegraphed body shot
and Buddy makes him pay by landing a thudding low kick.
Buddy is breathing heavily.
Buddy tries to close the distance and clinch but Claessens swats him to one side with an open hand palm strike and circles away.
Claessens gets a takedown into half guard.
That's one minute gone in the round.
Buddy is trying to get back to full guard.
Claessens lands a big shot. The thud that echoes around the arena is like music to the fans' ears.
Claessens lands with a punch from half guard.
Claessens takes advantage of the dominant position to land a couple of big hammer fists.
Buddy is working for an escape here. He's hooked one of Claessens's legs and he's managed to sneak out and take Claessens's back!
Claessens looks to control his opponent's hands but he's not mananging it at the moment.
You can see the frustration on Claessens's face
He knows he is in trouble unless he improves his position sooner rather than later.
That's two minutes gone in the round.
Claessens's corner are yelling at him, telling him to just focus on controlling Buddy's hands.
Claessens trying to control but not successfully.
Claessens defends a rear naked choke attempt by controlling one of Buddy's arms.
Buddy controlling well, preventing Claessens from escaping the position.
That's three minutes gone in the round.
Claessens trying to control but not successfully.
Buddy connects with a big shot to the side of Claessens's head.
Buddy is not going to allow Claessens to sit and survive in this position.
I really don't envy Claessens right now.
Buddy is not going to allow Claessens to sit and survive in this position.
Buddy is hanging on to Claessens's back as he tries to escape.
Buddy wants to control but Claessens is keeping busy.
Claessens trying to control the hands but Buddy won't let him.
That's four minutes gone in the round.
Claessens prevents Buddy from getting a body triangle.
Claessens wants to escape the position.
Claessens is working hard here to advance position.
Claessens trying to control the hands but Buddy won't let him.
Claessens defending nicely against the rear naked choke attempt.
Claessens tries to escape the position.
And thats the end of the round the fighters go back to their corners.
A close second round but Matt Buddy will probably get the nod - 10:9.
That's time! Claessens's corner gives him a slap on the ass as he gets ready to fight. This is the final round!
Claessens lands a body shot.
Buddy fails with the takedown
and Claessens counters with a good right hand that lands right on the jaw.
Buddy misses the shot to the body.
Buddy stuffs a takedown. It's all about dictating where the fight takes place and Buddy wants it to stay on the feet.
Buddy moves into the clinch.
Buddy is trying to slow down the pace in the clinch, to catch his breath.
Claessens tries to take the fight to the ground by pulling guard but can't manage it.
We've had a slow start to the round here - hopefully the action picks up.
Claessens breaks the clinch and we're back to striking at distance.
Claessens scores with a reasonable looking shot to the body. Buddy doesn't seem bothered though.
Buddy throws a body kick but he wasn't in range.
Claessens throws a one two combo.
Claessens lands a jab, followed by a cross and another cross, as Buddy backs up against the cage.
Buddy takes a big intake of breath there - he's definitely tired.
That's one minute gone in the round.
Buddy tries to score with a leg kick but it misses it's target.
Buddy takes an uppercut right on the jaw but it doesn't phase him.
A punch combination from Claessens misses.
Buddy is trying to avoid his opponent's strikes and get into the clinch.
Claessens blocks a leg kick.
Buddy leaves Claessens with his face pressed against the mat as he sprawls beautifully, defending against a solid takedown attempt.
That's three failed takedown attempts in the round for Matteo Claessens. That's going to take a lot out of him.
Claessens scores with a nice takedown into half guard. Let's see what he's got on the ground.
Claessens slips a nice elbow through Buddy's hands, connecting with Buddy's forehead.
Claessens is scoring with some nice ground and pound from the dominant position.
Claessens looks towards his corner to check for any instructions. The corner give him nothing to work with, so he cracks Buddy with a short hammerfist. I guess that's as good as any advice he could get in this position.
Buddy is trying to get back to full guard.
Buddy is concentrating on defense, preventing Claessens from advancing position.
That's two minutes gone in the round.
Buddy is staying active underneath Claessens, who seems content to just control the action from this position.
Claessens scores with a couple of good hammerfists.
Claessens scores with a couple of good hammerfists.
Ground and pound from Claessens.
Claessens working the head and body with strikes.
Claessens is trying to control the action in half guard but Buddy is working away on the bottom, looking perhaps to get back to full guard.
Wooooo! Give it up for these two warriors! They are putting on a show!
Claessens drops an elbow to the side of Buddy's head.
Claessens is keeping good posture, landing some ground and pound.
Buddy is looking to improve his position.
Claessens slows the pace down in half guard.
Buddy is looking to regain full guard. Not this time though.
Claessens content to sit in half guard and control for a moment.
That's three minutes gone in the round.
Buddy is trying to stand up here but Claessens is controlling him well.
Claessens lands strikes from half guard.
Buddy is trying to stand back up but Claessens is controlling him
Claessens looks to score some points with some ground and pound.
Claessens lands a big shot. The thud that echoes around the arena is like music to the fans' ears.
Buddy has hold of Claessens's hands but Claessens slips his arm to the side and lands an elbow.
Claessens looks over to his corner - he wants some instructions but his corner are not responding.
Claessens seems very keen to just sit and control from half guard but Buddy does not like that idea so much and is remaining active off his back.
Buddy taking some punishment here, with Claessens in his half guard.
The referee walks around the fighters to get a better view of the action. Claessens lands a nice short elbow.
Claessens lands strikes from half guard.
That's four minutes gone in the round.
Neither fighter is being very active at the moment, with Claessens in particular looking to stall.
Buddy taking some punishment here, with Claessens in his half guard.
Claessens looks towards his corner to check for any instructions. The corner give him nothing to work with, so he cracks Buddy with a short hammerfist. I guess that's as good as any advice he could get in this position.
Buddy looking to work for a kimura from the bottom.
Buddy trying to control from the bottom.
Matteo Claessens overall seems to be getting the better of the ground position in the fight so far.
The referee calls for the fighters to work.
Claessens is really dominating this fight. Is there anything that Buddy can do to turn this around?
Buddy is trying to stand up here but Claessens is controlling him well.
Claessens lands strikes from half guard.
Buddy wants to control but Claessens is keeping busy and won't allow it.
And that's the end of the fight!
Matteo Claessens showed his dominance in that final round.
I think Claessens has won this one but let's see what the judges have to say. Over to the ring announcer for the scorecards.
Ladies and gentlemen, after 3 rounds of action, we go to the scorecards for a decision.
Judge Andrew Berry scores the fight 29:28
Judge Sam Margolis scores the fight 29:28
Judge Daniel Bishop scores the fight 29:28
In favor of your winner, by unanimous decision... Matteo Claessens!
After the big win, Matteo Claessens made sure to do all the important stuff like thanking his sponsors CAGED UP Clothings and telling the interviewer how much he loves him.
|
|
|
|
|
|
|
|
|
|
|
|
|
|
|
|
|
|
|
|
|
|
|
| S |
C
A |
G |
S |
C
B |
G |
|
S |
C |
G |
|
energy
A | B |
|
hype
A | B |
|
pop
A | B |
|
mgr
A | B |
|
FIGHT
RATING
45% |
|
|
|
|
|
|
|
Undercard bout
|
Coming up we have a heavyweight MMA rules bout between Jake Jones (ranked 6228 p4p, 533 weight class) and Shaidar Haram (ranked 6654 p4p, 549 weight class). We have two fighters making their debuts here, so let's see who comes out of this one with their first professional victory.
 |
|
|
| 200 cm
25
265 lbs
0 - 0 - 0 |
|
200 cm
25
270 lbs
0 - 0 - 0 |
BJJ White Belt
Excellent boxer
Good chin |
|
BJJ Blue Belt
Solid Muay Thai
Tends to cut |
|
| |
|
Ladies and gentlemen. This fight is 3 rounds, in the heavyweight division.
Introducing the fighter to my left, fighting out of the red corner.
With a record of
0 - 0 - 0, fighting out of Las Vegas, Jake Jones!
And introducing the fighter to my right, fighting out of the blue corner.
With a record of
0 - 0 - 0, fighting out of London, Shaidar Haram!
The judges for this bout are James Glass, Paul Tew and Colin Fotheringham.
The bell rings for round one and we are underway!
Jab, jab by Jones - just one landing.

It looks like Shaidar Haram has been cut.
Haram throws the kick towards the body but Jones avoids it.
Haram looks for a takedown but Jones sprawls well.
Haram changes levels and looks for a double leg takedown. Jones tries to avoid it but Haram manages to keep hold of a leg and drag Jones to the ground. Jones escapes though and pops straight back up to his feet.
A counter left hand to the body from Jones misses its target.
Jones circles away before darting back in with a big straight right hand. It connects beautifully and sends Haram tumbling to the canvas! He's out cold! Jones wins by KO!
Ladies and gentlemen, after 0:21 of round 1, we have a winner by way of KO (Punch). Jake Jones!
A loyal slave to those sponsorship dollars, Jake Jones made sure he mentioned Top Nutrition 160Q250$ 140Q150$ 100Q50$, along with how happy he was to win his fight.
|
|
|
|
|
|
|
|
|
|
|
|
|
|
|
|
|
|
|
|
|
|
|
| S |
C
A |
G |
S |
C
B |
G |
|
S |
C |
G |
|
energy
A | B |
|
hype
A | B |
|
pop
A | B |
|
mgr
A | B |
|
FIGHT
RATING
100% |
|
|
|
|
|
|
|
Co-main event
|
Coming up we have a light heavyweight MMA rules bout between Anthony King (ranked 6118 p4p, 658 weight class) and Michael Dark (ranked 5883 p4p, 646 weight class). King comes to the cage accompanied by Cruise - FGL. Dark has chosen Institutionalized as his entrance music. Anthony King has the better chin. Will he look to stand and bang today?
 |
|
 |
| 191 cm
21
205 lbs
1 - 0 - 0 |
|
205 cm
24
200 lbs
1 - 0 - 0 |
BJJ Blue Belt
Solid Muay Thai
Good chin |
|
BJJ Blue Belt
Decent boxing
Intelligent |
|
| |
|
Ladies and gentlemen. This fight is 3 rounds, in the light heavyweight division.
Introducing the fighter to my left, fighting out of the red corner.
With a record of
1 - 0 - 0, fighting out of New York, Anthony King!
And introducing the fighter to my right, fighting out of the blue corner.
With a record of
1 - 0 - 0, fighting out of London, Michael Dark!
The judges for this bout are William Gold, Sam Margolis and James Atkins.
The bell rings for round one and we are underway!
King tries to clinch up
and Dark counters with a left and a right that stings King.
Dark scores with a nice looking left hook and follows it up with an uppercut!
King takes a body punch that cleary hurt but he's trying not to show any weakness.
Dark is a painfully thin specimen of a man. You do wonder whether a good body kick would snap him clean in two.
King throws a body kick but he was well out of range there.
Dark throws a combination that misses
and King counters into the clinch. Nicely done.
King tries to pull guard but can't drag his opponent to the mat. Dark just stands there and leans against the cage.
Dark wants to break free. God knows he wants to breaaaak freeee.
King tries for a takedown. No joy.
King is trying to drag Dark to the mat but Dark just about manages to keep his footing. He used the cage to his advantage there.
That's three failed takedown attempts in the round for Anthony King. That's going to take a lot out of him.
Dark wants to strike at distance but he can't break free of the clinch.
Dark wants to break free but King has control.
That's one minute gone in the round.
A frustrated look appears on Dark's face as he tries to break the clinch.
Dark has had enough of the clinch and is looking to separate.
King goes for a takedown in the clinch but Dark prevents it.
Dark wants to break free. God knows he wants to breaaaak freeee.
Dark looks like he'd prefer to be striking at range right now.
King tries to pull guard but Dark holds him up against the cage and eventually King drops back down to his feet.
King crunches a lovely knee into Dark's ribcage.
King tries to throw a body punch but Dark avoids it by throwing King back against the cage.
King has Dark pushed against the cage.
King tried to land a shot to the body but connects with Dark's elbow.
That's two minutes gone in the round.
The crowd are hurling abuse towards the fighters... You can hardly blame them though because there isn't a lot going on in the fight.
King has managed to pull guard. Let's see whether he can work an aggressive guard. It will also be interesting to see what tactics Dark uses from the top position.
The ref warns both fighters not to hold the cage as they work up against the meshing.
King is working an open guard so Dark takes the opportunity to get back to his feet.
Dark's corner calls for a 1, 2 combination and Dark duly obliges.
King throws a head kick but Dark moves out of range.
Dark rushes forward with a series of wild hooks but King moves out of range and avoids them all easily.
King showing good head movement there, avoiding the strikes from Dark.
Dark pivots as if he's going to throw a leg kick but stops half way.
A combination from Dark does no damage.
Danga de danga de dang - Dark scores with a four punch combination!
Dark swats away the attempt to clinch by King.
King tries to clinch but Dark is having none of it.
That's three minutes gone in the round.
Dark scores to the head and body with a nice combination!
King shoots in but Dark avoids the takedown attempt easily.
Dark keeps the fight standing with a nice sprawl.
King showing good head movement there, avoiding the strikes from Dark.
Some wild striking there from Dark.
King tries to counter by moving into the clinch but Dark manages to circle out of the way.
Dark pushes forward with a 1-2 combination that forces King back to the cage. Dark follows up with a solid lead hook to the liver.
King shoots in for a takedown. He's persisting with it as Dark sprawls well. Dark wins this battle and keeps the fight standing. King gets slowly back to his feet.
That's four minutes gone in the round.
Dark scores to the head and body with a nice combination!
King fails with a takedown attempt.
This is a great period of action - very entertaining stuff!
Dark displays good takedown defense there as he swats away a double leg from King.
King is breathing heavily.
Dark lands a two punch combo.
King takes a punch to the jaw and another one to the bread basket.
Dark scores to the head and body with a nice combination!

King is rocked!
King tries to get into range but Dark steps to the side and lands a beautiful hook that drops King! He's faceplanted into the mat, ass in the air... he's out cold! That's an image he won't want to show his grandkids when he gets older! Dark scores the big KO victory!
Ladies and gentlemen, after 4:56 of round 1, we have a winner by way of KO (Punch). Michael Dark!
After the big win, Michael Dark made sure to do all the important stuff like thanking his sponsors CAGED UP Clothings and telling the interviewer how much he loves him.
In defeat, Anthony King stepped up to the mic, saying 'My bad, lucky win. I've gotta keep working. This ain't my last or first fight. Ya'll better be prepared for my next bout. Ima whoop a poor sucker.'.
|
|
|
|
|
|
|
|
|
|
|
|
|
|
|
|
|
|
|
|
|
|
|
| S |
C
A |
G |
S |
C
B |
G |
|
S |
C |
G |
|
energy
A | B |
|
hype
A | B |
|
pop
A | B |
|
mgr
A | B |
|
FIGHT
RATING
45% |
|
|
|
|
|
|
|
Main event
|
Coming up we have a middleweight MMA rules bout between John Miles (ranked 5652 p4p, 539 weight class) and Ruston Cohle (ranked 5449 p4p, 531 weight class). Cohle has chosen Raining Blood as his entrance music. Ruston Cohle acknowledges the crowd's support as he enters the cage.
 |
|
 |
| 190 cm
23
185 lbs
1 - 0 - 0 |
|
185 cm
25
185 lbs
1 - 0 - 0 |
BJJ Blue Belt
Excellent boxer
Very strong |
|
BJJ Blue Belt
Brawler
Determined |
|
| |
|
Ladies and gentlemen. This fight is 3 rounds, in the middleweight division.
Introducing the fighter to my left, fighting out of the red corner.
With a record of
1 - 0 - 0, fighting out of London, John Miles !
And introducing the fighter to my right, fighting out of the blue corner.
With a record of
1 - 0 - 0, fighting out of London, Ruston Cohle!
The judges for this bout are Andrew Berry, James Ackerman and Daniel Bishop.
The bell rings for round one and we are underway!
A combination from Miles does no damage.
Cohle fakes a strike and closes the distance, dragging Miles to the ground. Cohle is now in Miles 's guard.

Miles kicks Cohle off and gets to his feet.
Cohle drives through with a takedown into Miles 's guard. Let's see what he can do from the top position.
Cohle controls the pace of the fight for a moment.
The crowd are loving this. Great action here.
Cohle stands up and waves to Miles to follow him.
Cohle takes an uppercut right on the jaw but it doesn't phase him.
Cohle tries to score a power double leg takedown but Miles sees that one coming and sprawls well. That will dishearten Cohle somewhat.
Cohle darts in and clinches Miles up against the cage.
That's one minute gone in the round.
Miles wants to push off and get back to the center of the mat but Cohle has him pressed against the cage.
Cohle avoiding damage.
Cohle is working for a takedown up against the cage. He can't get it on this occasion though.
Miles has had enough of the clinch but Cohle keeps him there for the moment.
Cohle jumps guard but his hands slip and he falls flat on his back. Well, he's made himself look a right mug there, as Miles walks away with a smile on his face. Cohle gets slowly back to his feet and shakes his head.
John Miles has stuffed three takedown attempts in the round now. That's going to take a lot out of Ruston Cohle.
Miles works his jab well there, keeping his opponent at a distance.
Cohle on the wrong end of a nice jab.
A momentary lapse in concentration from Miles enables Cohle to shoot in and score with a neat double leg. Miles manages to secure a closed guard as the fighters hit the mat.
Cohle showing good wrestling skills to control the position.
Cohle's corner are shouting for him to control the position and he seems happy to oblige.
That's two minutes gone in the round.
Cohle throwing strikes from guard but Miles blocks nicely.
Cohle seems content to control from guard here. He's going to have to remain active though if he doesn't want to get stood back up.
Cohle slips nicely into half guard.
That's three minutes gone in the round.
Cohle controlling the action here.
Cohle looking for a kimura but he'll have to free his other leg if he wants to finish that. Perhaps he's just using it as a distraction technique.
Miles looks like he's trying to stand up.
That's four minutes gone in the round.
The crowd are showing their displeasure at the lack of action as loud boos ring out around the arena.
The referee has stepped in and called for a break in the action. We'll restart on the feet.
Miles pivots as if he's going to throw a leg kick but stops half way.
Miles digs a good hook to Cohle's body.
Cohle darts in looking for a takedown but Miles gets double underhooks and turns Cohle into the cage.
The crowd thankful this round is nearly over.
Miles throws a chopping leg kick but Cohle manages to avoid taking any serious damage.
Miles throws a series of punches but Cohle moves out of range.
The fighters are starting to get sweaty, which will make takedowns a bit more tricky.
Miles scores with a head kick.
Miles throws a right and a left that both miss.
And thats the end of the round the fighters go back to their corners.
John Miles dominated that round.
That's time! Miles 's corner gives him a slap on the ass as he gets ready to fight.
Cohle instigates a clinch.
Cohle controlling the action here for a moment.
Miles working hard to break the clinch.
Cohle wants the takedown. Miles is fighting it off but Cohle persists and manages to bring the fight to the ground, ending up in Miles 's guard against the cage.
Cohle looking to pass the guard.
Miles looks to be in better condition than last time we saw him fight. Obviously he's been working hard on his cardio.
We've had a slow start to the round here - hopefully the action picks up.
Cohle engaging in some classic timewasting tactics.
Cohle won't allow Miles to get back to his feet.
The fighters are pressed up against the cage, both looking to find a bit of space to work.
That's one minute gone in the round.
Cohle sitting in guard here, content to control.
Miles kicks Cohle off and gets to his feet.
Some wild striking there from Miles .
Miles goes to the watering hole and comes back with a big thumbs up from the judges as he scores a three punch combo.
That's two minutes gone in the round.
Cohle is on the wrong end of a nice combination from Miles .
Cohle changes levels and drives through with a really nice takedown into side control. Miles looks really pissed at himself for not defending that better.
We've seen a great period of action over the last minute or so - credit to both fighters for going all out!
You can see the frustration on Miles 's face as Cohle controls the position.
Cohle tries for an arm triangle. That looks pretty tight to me. Is this one over!?! Possibly, maybe, no Cohle has let go of the choke. Obviously it wasn't as tight as we thought!
Cohle moving around in side mount but really he's just happy to control for now.
Miles is pushing Cohle's head away, looking to escape. Cohle manages to hold on to the position though.
That's three minutes gone in the round.
The ref warns both fighters not to hold the cage as they work up against the meshing.
Cohle is moving around in side control but his primary objective seems to be to maintain the position.
Cohle swings around for an armbar but Miles sees it coming a mile off and turns beautifully into Cohle's guard.
Cohle seems keen to control rather than go for a submission, at least for now.
That's four minutes gone in the round.
Miles wants to stand but Cohle has a closed guard, so he can't escape.
Cohle has a closed guard, preventing anything of note from happening. Perhaps he's looking to stall.
Cohle lands a beautiful sweep and he's now moved into his opponent's guard.
And thats the end of the round the fighters go back to their corners.
John Miles dominated that second round.
That's time! Miles 's corner gives him a slap on the ass as he gets ready to fight. This is the final round!
Cohle closes the distance and looks for a trip takedown... aaaand he's got it - Cohle lands in his opponent's guard.
Cohle advances to half guard.
Cohle is looking to pass the guard... He's managed it - he's now in full mount!
Cohle is landing with some decent strikes but Miles is trying to advance his position so the referee is letting the fight continue.
In the pre-fight buildup videos we saw Cohle working his ground and pound in the gym.
We've had a slow start to the round here - hopefully the action picks up.
Cohle moves to the back.
Miles is trying to get back to his feet but he's not managed it yet.
That's one minute gone in the round.
Cohle looking for the RNC.
Cohle has his opponent's back and is working for the choke.
Ruston Cohle has got the better of the ground game so far.
Cohle is controlling his opponent, waiting for an opportunity to finish.
Miles is trying to stand back up.
Miles won't enjoy being in this position. Cohle looking for the choke. Oh... he's slipped the arm under the neck - Miles is tapping - it's over boys! Cohle picks up the submission victory!
Ladies and gentlemen, after 2:58 of round 3, we have a winner by way of Submission (RNC). Ruston Cohle!
An out of breath and clearly excited Ruston Cohle thanked CAGED UP Clothings for their help and support (and free stuff they sent him).
|
|
|
|
|
|
|
|
|
|
|
|
|
|
|
|
|
|
|
|
|
|
|
| S |
C
A |
G |
S |
C
B |
G |
|
S |
C |
G |
|
energy
A | B |
|
hype
A | B |
|
pop
A | B |
|
mgr
A | B |
|
FIGHT
RATING
44% |
|
|
|
|
|
|
|
|
|
|

