 |
Arlen Bales' Vegas Nights 1 PBP Commentary |
Undercard bout
|
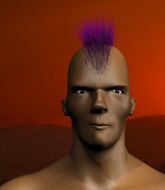
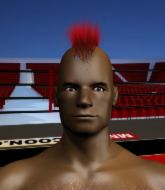
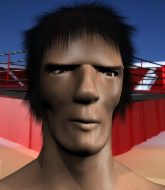
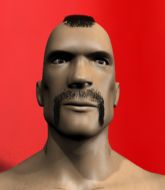
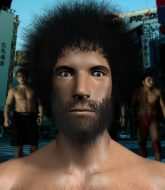
Coming up we have a welterweight MMA rules bout between John Starman (ranked 5642 p4p, 539 weight class) and Brian Calhoun (ranked 5789 p4p, 549 weight class). Brian Calhoun is staring across the cage at his opponent, tweaking his nipples.
 |
|
 |
| 178 cm
21
167 lbs
5 - 1 - 0 |
|
183 cm
21
175 lbs
1 - 0 - 0 |
Decent wrestler
Counter fighter
Good chin |
|
BJJ Purple Belt
Brawler
Very confident |
|
| |
|
Ladies and gentlemen. This fight is 3 rounds, in the welterweight division.
Introducing the fighter to my left, fighting out of the red corner.
With a record of
5 - 1 - 0, fighting out of London, John Starman!
And introducing the fighter to my right, fighting out of the blue corner.
With a record of
1 - 0 - 0, fighting out of New York, Brian Calhoun!
The judges for this bout are Daniel Franklin, Tiny Johnson and George Francis.

The bell rings for round one and we are underway!

Calhoun scores a trip takedown into side control. Nice.
Starman on his back here. We all know that wrestlers don't like being on their back so let's see if Starman tries to get out of the position.
Calhoun taking a break here but Starman is having none of it and regains half guard.
The ref warns both fighters not to hold the cage as they work up against the meshing.
Calhoun seems very keen to just sit and control from half guard but Starman does not like that idea so much and is remaining active off his back.
Starman keeping control of the leg, stopping his opponent passing to mount.
Calhoun sitting in half guard, looking to land shots. Starman defending well though.
We've had a slow start to the round here - hopefully the action picks up.
Calhoun stops Starman from getting back to his feet.
Starman is not content to let Calhoun control the position.
Calhoun might have to switch it up a bit here because his efforts to control Starman haven't been going to plan, at least at the current moment in time.

That's one minute gone in the round.
Starman tries to get to full guard but Calhoun has control of the leg.
Calhoun takes a deep breath and rests his weight momentarily on top of his opponent, to control the position.
If this pace continues, the referee will definitely step in and force a standup.
Starman desperately trying to maintain half guard.

The ref stands the fighters back up due to a lack of activity.
Calhoun throws a sloppy head kick

and Starman counters with a nice double leg into side control. Calhoun won't be happy with that.
Calhoun is working to avoid the ground and pound but Starman connects with a decent elbow.
Starman lands a decent elbow from side control.
Calhoun is looking for a sweep.
Starman definitely looks more muscular than last time we saw him fight.
Starman works a knee to the body and follows up with a nice elbow to the head.
Starman taking a break here but Calhoun is having none of it and regains half guard.

Calhoun kicks off Starman and gets to his feet.

That's two minutes gone in the round.
The crowd cheering loudly, showing their appreciation for the quality fight we're seeing here.
A jab lands there for Calhoun.
Brian Calhoun seems to be the more aggressive standup fighter in this bout.
Calhoun fakes a strike and closes the distance, dragging Starman to the ground. Calhoun is now in Starman's guard.
Calhoun loading up with the ground and pound but he's missing more than he's landing in this flurry.
Starman looking to hit a scissor sweep but Calhoun is one step ahead there.
Starman is pulling down on Calhoun's head. It's preventing any offense from Calhoun, at least for the moment.

That's three minutes gone in the round.
Starman wants to sweep but no luck.
Calhoun wants to control from the top but Starman keeps moving.
Starman trying to control the position here.
The referee has decided to stand the fighters back up, so we'll restart on the feet.

That's four minutes gone in the round.
The crowd are showing their displeasure at the lack of action as loud boos ring out around the arena.
Calhoun throws a head kick that misses and slips in the process. He scrambles back to his feet and the fighters circle.
Starman is looking to counter punch.
Calhoun drives through with a takedown into guard.
We've been informed that Calhoun has been working hard on his conditioning in the buildup to the fight.
Starman is working the butterfly guard. He manages to land a nice scissor sweep and is now in half guard on the top. Nice move.

Starman not throwing his punches with enough precision this time.
Starman lands with an elbow from half guard - that looked like it hurt.
The two fighters exchange a few words. I couldn't hear what they were saying but maybe it's more fun if you make it up yourself. Starman connects with a nice short shot to Calhoun's temple.
Starman passes into side control, despite Calhoun's attempt to control the position.
Starman misses with a strike but at least he's keeping busy, looking to cause some damage - that will still help him when it comes to the judges scorecards.
And that�s the end of the round � the fighters go back to their corners.
That was a close round but I would say that John Starman will probably get the nod.
The fighters' corners scream their final instructions, as the referee calls time. Here we go, back to the action!

Calhoun tries to clinch but Starman moves away
and Starman connects with a straight left hand counter down the middle.
Starman misses with a takedown attempt. He shot from a bit too far out.
Starman lands an overhand right.
Starman checks a low kick. Bone on bone - not my idea of a good time.
Starman throwing a counter right hand but Calhoun manages to avoid it.
Starman throws an uppercut from half a mile away. Calhoun sees it coming and avoids it easily.
Starman goes for a double leg but Calhoun avoids the attempt and the two fighters end up clinched against the cage as Calhoun continues to drive forward.
Calhoun is loading up here, looking for a big counter of his own.
We've had a slow start to the round here - hopefully the action picks up.
Starman throws a head kick that misses and slips in the process. He scrambles back to his feet and the fighters circle.
Starman looking to shoot here. He's gone for it and he's landed a takedown into side control! Oh, that's bad for Calhoun!
Calhoun sneaks out the side door and pushes Starman away - he's back to his feet. The crowd show their appreciation for the escape.
That's one minute gone in the round.
Starman looks for a takedown. He's got it. We're now in half guard.
Calhoun is pressing down on Starman's left leg trying to get back to full guard. He's managed it.
Calhoun working a defensive guard here.
Starman throws an elbow that misses. Calhoun uses the momentum to reverse the position. He's now in Starman's guard. Nice move by Calhoun!

Calhoun wants to control from the top but Starman keeps moving.
Starman knows he needs to get back to his feet asap. He's simply no match for Calhoun on the ground.
Starman has a closed guard, preventing anything of note from happening. Perhaps he's looking to stall.
That's two minutes gone in the round.
Starman wants to improve his position but instead Calhoun has moved into half guard.
Calhoun seems very keen to just sit and control from half guard but Starman does not like that idea so much and is remaining active off his back.
The fighters are pressed up against the cage, both looking to find a bit of space to work.
Starman manages to get to full guard.
Calhoun stands up and looks to throw the legs aside to pass to side control. Starman swivels though and keeps the full guard.
That's three minutes gone in the round.
Starman is controlling Calhoun's posture.
Calhoun postures up to throw the ground and pound strikes but they don't connect.

Calhoun stands up and waves to Starman to follow him.
Calhoun gets caught flat footed, as Starman shoots in with a quick takedown into guard.
Starman postures up in Calhoun's guard and throws a big left but Calhoun blocks it.
That's four minutes gone in the round.

Calhoun looking for submissions from the bottom here. Moving his hips around, possibly looking for an armbar.
Calhoun wants to sweep here but Starman controlling him for the moment.
Starman keeps in close for a moment and lands a decent shot to the side of Calhoun's head.
Starman wants to control from the top but Calhoun keeps moving.
Calhoun thows some rabbit punches from the bottom but they don't do any damage.
Starman has to be careful here, sitting in the guard of a superior BJJ player.
Starman with a nice head shot there.
The crowd thankful this round is nearly over.
Calhoun keeping moving, preventing Starman from controlling successfully.
Calhoun is trying to hold Starman in close to prevent damage but Starman has managed to pass into half guard.
And that�s the end of the round � the fighters go back to their corners.
That was a close second round but I would say that John Starman will probably get the nod.
The fighters get back to their feet, the hooter sounds and we're back to the action! Let's hear some noise people - this is the final round!

Starman closes the distance and gets a trip takedown into side control. Calhoun quickly recovers to half guard.
Ground and pound from Starman.
Calhoun is trying to control but can't.
Starman throwing shots but Calhoun is blocking nicely.
Starman missing with the ground and pound from half guard.
Starman keeping composed on the top, looking to control the action.
Starman thumps the canvas. Not on purpose obviously - he just missed Calhoun's head.
We've had a slow start to the round here - hopefully the action picks up.
Starman thumps the canvas. Not on purpose obviously - he just missed Calhoun's head.
Starman has freed up his trapped foot and advances to mount.
Starman trying to control but Calhoun is having none of it.
That's one minute gone in the round.
Starman postures up and cracks his opponent a couple of times before moving back into close ground control. Calhoun looks a forlorn figure.
The crowd growing excited in anticipation of a finish here! Right on cue, Starman cracks his opponent with a massive right hand that draws loud cheers!

Calhoun is rocked!
Starman unloads with some vicious shots from mount and Calhoun wants out - he looks towards the referee who steps in to save him! Starman celebrates on the cage and the crowd goes wild!
Ladies and gentlemen, after 1:53 of round 3, we have a winner by way of TKO (Strikes). John Starman!
John Starman gave a mention to WarHorse Fightwear in his post fight interview. That will please them (and hopefully generate some sales).
|
|
|
|
|
|
|
|
|
|
|
|
|
|
|
|
|
|
|
|
|
|
|
| S |
C
A |
G |
S |
C
B |
G |
|
S |
C |
G |
|
energy
A | B |
|
hype
A | B |
|
pop
A | B |
|
mgr
A | B |
|
FIGHT
RATING
47% |
|
|
|
|
|
|
|
Undercard bout
|
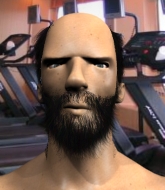
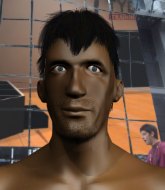
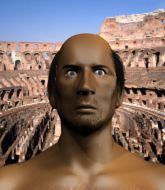
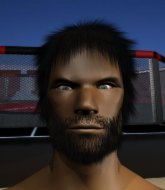
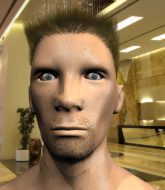
Coming up we have a welterweight MMA rules bout between Thomas Rowlands (ranked 5237 p4p, 525 weight class) and Erik Sykes (ranked 6387 p4p, 571 weight class). Over to our ring announcer for the fighter introductions!
 |
|
 |
| 190 cm
25
170 lbs
1 - 0 - 0 |
|
175 cm
18
170 lbs
1 - 0 - 0 |
BJJ Blue Belt
Brawler
Self confident |
|
BJJ Blue Belt
Counter fighter
Very confident |
|
| |
|
Ladies and gentlemen. This fight is 3 rounds, in the welterweight division.
Introducing the fighter to my left, fighting out of the red corner.
With a record of
1 - 0 - 0, fighting out of Las Vegas, Thomas Rowlands!
And introducing the fighter to my right, fighting out of the blue corner.
With a record of
1 - 0 - 0, fighting out of Las Vegas, Erik Sykes!
The judges for this bout are George Francis, Frank Dennis and Daniel Franklin.
The bell rings for round one and we are underway!
Sykes is looking to take this fight into the clinch.
Sykes scores with a takedown into Rowlands's guard.

Rowlands looking for submissions off his back, moving his hips, looking for an opening.
Sykes working some ground and pound from guard but it's not doing any damage.
Sykes working some ground and pound from guard but it's not doing any damage.
We've had a slow start to the round here - hopefully the action picks up.
Rowlands keeping moving, preventing Sykes from controlling successfully.
Rowlands is trying to keep Sykes in close.
That's one minute gone in the round.
Rowlands tries to land a sweep but no joy.
Sykes pressing down on his opponent's thigh, looking to pass guard. Rowlands is keeping the position for now.
Sykes throwing elbows and punches but not connecting, as Rowlands works some decent striking defense from the bottom.
Rowlands preventing the ground and pound from doing any damage.
Rowlands working a defensive guard here.
The referee has stepped in and called for a break in the action. We'll restart on the feet.
Sykes fails to land with a series of punches.

Rowlands gets to the clinch - let's see what his plan is here.
Rowlands manages to pull guard.
Sykes lands a couple of elbows.
Sykes wants to control from the top but Rowlands keeps moving.
That's two minutes gone in the round.
Rowlands throws a couple of shots from the bottom but they don't land.
Rowlands trying to control the position.
Sykes trying to control but Rowlands is working from the bottom.
Sykes won't allow Rowlands to sweep him here.
Rowlands looking for submissions off his back, moving his hips, looking for an opening.
Sykes won't allow Rowlands to sweep him here.
That's three minutes gone in the round.
Sykes postures up in Rowlands's guard and throws a big left but Rowlands blocks it.
Rowlands is trying to control the position from the bottom.
The ref stands the fighters back up due to a lack of activity.
Rowlands feints and then dives in with a takedown. That was a long way out but the feint bought him enough time to close the distance and complete the takedown. Now we'll play guard for a bit and see who can get the better of that position.
The fighters are starting to get a bit slippery now, which will make submissions a bit more difficult.
Rowlands avoids a guillotine attempt easily.
Rowlands in full guard, throwing the ground and pound. No damage this time.
Sykes working from the bottom, still in full guard. He's managed to get a loose triangle. Rowlands doesn't seem to be doing much to defend here, obviously he feels comfortable in the position. Rowlands manages to throw the legs off his shoulder and he's back into guard - no problem.
Sykes looking to control but Rowlands passes into half guard.
That's four minutes gone in the round.
Sykes is looking to regain full guard. Not this time though.
Rowlands really does look like a pencil wearing a pair of gloves. Let's hope he has a gameplan to suit that ridiculous body shape.
Sykes is not content to let Rowlands control the position.
The fighters are pressed up against the cage, both looking to find a bit of space to work.
Rowlands seems content to maintain position for now, rather than mounting any offense.
Sykes trying to control from the bottom.
Boooooooooooooooooooo!!! God, this has been a terrible round. Come on you two, sort yourselves out!
Rowlands seems very keen to just sit and control from half guard but Sykes does not like that idea so much and is remaining active off his back.
Sykes felt the need to train up his defensive grappling in the buildup to the fight. Presumably he was expecting to be in a difficult position like this, so let's see if he can get out of it.
Sykes punching from the bottom.
Sykes is looking to sinch up a guillotine here but Rowlands pulls his head out easily.
And that�s the end of the round � the fighters go back to their corners.
A close round but Erik Sykes will probably get the nod.
That's time! Back to the action!
Rowlands moves into the clinch successfully.
Rowlands tightens his grip and picks Sykes up, before dumping him to the ground. Sykes manages to land in guard.
Rowlands has to be careful here, sitting in the guard of a superior BJJ player.
Rowlands postures up.
Rowlands throwing strikes but missing.
Rowlands wants to control from the top but Sykes keeps moving.
We've had a slow start to the round here - hopefully the action picks up.
Rowlands has decided he wants to stand but the closed guard of Sykes is proving hard to escape from.
Sykes has a loose triangle. He'll be looking to tighten that up but Rowlands can see exactly what he's planning and manages to posture up and free himself.
That's one minute gone in the round.
Rowlands trying to control but Sykes is working from the bottom.
Sykes is pulling down on Rowlands's head. It's preventing any offense from Rowlands, at least for the moment.
Sykes is active off his back here, looking for submissions.
Rowlands wants to control from the top but Sykes keeps moving.
Rowlands is frustrating his opponent with some stalling tactics from top position.
Erik Sykes has got the better of the ground game so far.
That's two minutes gone in the round.
A few boos can be heard. I'm sure they will multiply if the fighters don't pick up the pace.
Rowlands postures up and lands some nice ground and pound.
Sykes escapes his hips to the side and looks to be working for an armbar. Rowlands gives him a little smile and shakes his head. No chance.
Rowlands content to sit in guard, stalling... Great. Oh but he could get punished here because Sykes has locked up a guillotine! Sykes's face is contorted as he sqeezes tight on the submission attempt - will he finish? Rowlands is holding on here and Sykes must be using up a lot of energy. Rowlands has gone limp! He's out! He's out cold! Sykes gets to his feet, tossing aside his stricken foe. Arms raised, he milks the applause from the crowd. Great submission!
Ladies and gentlemen, after 2:40 of round 2, we have a winner by way of Submission (Guillotine). Erik Sykes!
|
|
|
|
|
|
|
|
|
|
|
|
|
|
|
|
|
|
|
|
|
|
|
| S |
C
A |
G |
S |
C
B |
G |
|
S |
C |
G |
|
energy
A | B |
|
hype
A | B |
|
pop
A | B |
|
mgr
A | B |
|
FIGHT
RATING
27% |
|
|
|
|
|
|
|
Undercard bout
|
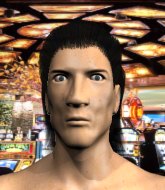
Coming up we have a welterweight MMA rules bout between John Lemon (ranked 5439 p4p, 554 weight class) and Heihachi Mishima (ranked 4922 p4p, 507 weight class). Heihachi Mishima struggled to make weight for this fight. He only made it down to 171.7lbs at the first attempt and had to take the additional two hours to make the official bout weight. Let's see how much it's taken out of him. Over to our ring announcer for the fighter introductions!
 |
|
 |
| 182 cm
23
176 lbs
3 - 1 - 0 |
|
180 cm
25
180 lbs
1 - 0 - 0 |
BJJ Blue Belt
Solid Muay Thai
Granite chin |
|
BJJ Blue Belt
Solid Muay Thai
Tends to cut |
|
| |
|
Ladies and gentlemen. This fight is 3 rounds, in the welterweight division.
Introducing the fighter to my left, fighting out of the red corner.
With a record of
3 - 1 - 0, fighting out of London, John Lemon!
And introducing the fighter to my right, fighting out of the blue corner.
With a record of
1 - 0 - 0, fighting out of London, Heihachi Mishima!
The judges for this bout are Cecil Peabody, Wesley Smith and Stewart Dunkirk.
The bell rings for round one and we are underway!
Mishima rushes forward with a series of wild hooks but Lemon moves out of range and avoids them all easily.
Lemon has been talking about how he's improved his wrestling in the run up to the fight so let's see if that's enough to sway the balance.
Mishima wants to land a leg kick but Lemon is out of range.
Mishima finds nothing but air with that leg kick attempt.
Lemon fails with an attempt to clinch.
Lemon tries to clinch but is not successful on this occasion.
Mishima looks to land a combination but Lemon avoids it well.
A chopping leg kick lands by Mishima.
A combination from Mishima does no damage.
Lemon throws a low kick, looking for Mishima's leg but Mishima calmly moves out of range.
Mishima lets it all go there with a big combo counter but none of the punches connected.
Mishima misses with a kick to the body.
Mishima tries to bum rush Lemon with a series of wild strikes but Lemon uses good footwork to avoid the assault.
We've had a slow start to the round here - hopefully the action picks up.
Mishima throws a combination but comes up with nothing but fresh air.
We've been informed that Mishima has been sparring a lot of Muay Thai in the buildup to this fight so let's see if that has an impact on the result.
Lemon fails in his attempt to clinch.
Mishima keeps the fight on the outside.
Lemon clinches up with Mishima and pushes him back against the cage.
Mishima looks like he'd prefer to be striking at range right now.
Lemon looking for a takedown.
That's one minute gone in the round.
Mishima wants to push off and get back to the center of the mat but Lemon has him pressed against the cage.

Mishima breaks the clinch and we're back to striking at distance.
Mishima blocks a head kick by Lemon.
Mishima throws a series of punches but Lemon moves out of range.
Mishima tries a switch kick but it misses it's target.
Mishima looks winded!
Lemon gets a clinch.

Lemon breaks from the clinch.
Lemon punishes Mishima's body with a nice straight punch.
Mishima tries to clinch there but Lemon circles away.
Lemon avoids the clinch attempt nicely.
Lemon avoids the head kick by Mishima.
Lemon dodges the punch combination from Mishima.
Lemon went nuts there looking for a big combo counter but none of the flurry connected.
Lemon rushes Mishima and pushes him back against the cage in a clinch.
That's two minutes gone in the round.
Lemon tries to land a knee to the head but misses.
Lemon breaks from the clinch.
Lemon tries to clinch but is not successful on this occasion.
Mishima misses with a body kick.
Mishima gets caught flat footed, as Lemon shoots in with a quick takedown into guard.
Mishima scrambles and gets back to his feet.
Heihachi Mishima seems to be the more aggressive standup fighter in this bout.
This is a great period of action - very entertaining stuff!
Heihachi Mishima is looking to keep the fight on the feet at all costs.
Lemon has taken the fight to the clinch.
Lemon stalling.
A knee to the head by Lemon.

It looks like Heihachi Mishima has been cut.
Lemon lands a short shot on the inside that snaps the head of Mishima backwards.
Lemon tries a knee to the head but he's missed.
Lemon misses with some punches.
A nice left hand lands by Lemon.
Mishima is trying to break the clinch but Lemon is controlling him.
That's three minutes gone in the round.
Lemon scores with a knee to the head.
Lemon's corner are urging him to control the action in the clinch for a moment, rather than mount any serious offense. I'm sure the crowd appreciate those instructions... not.
Lemon misses with a knee strike.
Mishima manages to break the clinch.
The fight stays on the outside here - Lemon looks like he's thinking about clinching though.
Lemon tries to clinch but Mishima is having none of it.
Mishima misses with a head kick.
Mishima misses with a body kick.
Lemon misses with a jab and misses with a cross straight after too.
Mishima swings wildly with a couple of big hooks
and Lemon counters with a quick right hand to the jaw.
Mishima is looking to land body kicks.
It looked like Lemon was looking amped, ready to throw a big counter but didn't commit.
That's four minutes gone in the round.
Lemon rushes Mishima and presses him up against the cage.
Mishima manages to break the clinch.
A slapping body kick lands there for Lemon.
A decent looking body kick lands there for Lemon.
Lemon moves into the clinch.
The crowd are loving this. Great action here.
Lemon lands with a short head shot on the inside.
Mishima avoids a wild elbow strike from Lemon.
Mishima working hard to break the clinch.
Lemon lands with a quick shot inside that doesn't really do much damage.
Lemon is pushing Mishima up against the cage, for a bit of lean and pray action. Action being used the in the loosest possible sense of the word.
Lemon looks to throw an elbow but misses.
Mishima looks like he'd prefer to be striking at range right now.
And that�s the end of the round � the fighters go back to their corners.
John Lemon dominated that round.
The cut man is working on Heihachi Mishima's cut.
The corners get their ten second warning. Both fighters stand from their stools and stare eachother down, ready to get back to the action.
Lemon throws a head kick that misses and slips in the process. He scrambles back to his feet and the fighters circle.
Lemon is looking to take this fight into the clinch.
Mishima throws a head kick that misses and slips in the process. He scrambles back to his feet and the fighters circle.
Lemon is looking to counter the offense by Mishima and move into the clinch.
Lemon is really dominating this fight. Is there anything that Mishima can do to turn this around?
Lemon blocks the body kick.
Mishima swats away the attempt to clinch by Lemon.
Heihachi Mishima is looking to throw some combinations by the looks of things.
Mishima throws a nice head kick!
Mishima throws a body kick that misses
and Lemon cracks him with a counter punch right on the button.
We've had a slow start to the round here - hopefully the action picks up.
Lemon throws a couple of head shots and lands with the final one - a decent hook, which struck Mishima on the side of the head.
Mishima is breathing heavily.
Lemon swinging wildly here.
Mishima changes levels for a counter takedown but doesn't follow through with his attempt.
Lemon tries to land a front kick but Mishima steps back. That was a bit too telegraphed.
Lemon rushes Mishima and pushes him back against the cage in a clinch.
That's one minute gone in the round.
Lemon misses with a knee to the head.
A short uppercut from Lemon.
Mishima breaks the clinch and we return to the middle of the mat.
Mishima misses with a few strikes there.
A punch combination from Mishima misses.
Mishima tries to bum rush Lemon with a series of wild strikes but Lemon uses good footwork to avoid the assault.
Lemon closes the distance and presses his opponent up against the cage.
Mishima tries to land knees in the clinch but Lemon avoids the damage to the body.
The referee calls for Lemon to work.
Mishima tries to land a shot to the body but it's blocked.
Lemon gets underhooks to prevent Mishima's takedown attempt.
With the fighters up against the cage, Lemon throws an elbow but misses.
Lemon throws a vicious knee straight up the middle but Mishima blocks it with crossed arms.
Mishima prevents the takedown attempt.
That's two minutes gone in the round.
Lemon tries a knee to the head but he's missed.
Mishima tries a knee to the head but he's missed.
Lemon scores with a shot to the side of Mishima's head.
The fighters are going at a pretty good pace and they're both starting to sweat now.
Lemon keeps control of Mishima as he tries to wriggle out of the double underhooks.
Lemon lands an uppercut.
This has been an exciting period of action!
Lemon softening up his opponent with strikes, against the cage.
Mishima avoids a wild elbow strike from Lemon.
Lemon has Mishima pushed against the cage.
Mishima wants to strike at distance but he can't break free of the clinch.
Lemon is looking to score with knees to the body. Maybe he'll change it up and go body then head. Mishima is defending well for now.
Lemon creates a bit of space for himself and sneaks an elbow through Mishima's defenses.
With the two fighters working up against the cage, Lemon just misses with a elbow thrown towards Mishima's brow.
Lemon tries to land a knee to the head but Mishima blocks with his arms.
Mishima is looking to break free of the clinch but Lemon has double underhooks.
That's three minutes gone in the round.
Mishima takes a knee right on the jaw!
Lemon lands a shoulder strike that jolts his opponent's head backwards.
John Lemon has scored more points in the clinch so far.
Lemon throws a nice elbow but it doesn't land.
A real battle for position is taking place between these two warriors.
Lemon with the Thai clinch. He's looking to land a big knee but he's not managed it this time.
Mishima stops a takedown attempt from Lemon.
Mishima tries to circle away but Lemon has him pinned against the cage.
Lemon creates a bit of space for himself and sneaks an elbow through Mishima's defenses.
A frustrated look appears on Mishima's face as he tries to break the clinch.
Mishima looks like he'd prefer to be striking at range right now.
Lemon scores with a knee to the head.
Mishima wants to break free but Lemon has control.
Lemon is clearly stalling here... Pick up the pace son.
Lemon misses with a knee strike.
That's four minutes gone in the round.
Lemon lands a knee to the head there! That was nasty!
Lemon manages to break the clinch.
Lemon fails in his attempt to clinch.
Mishima throws a series of punches but Lemon moves out of range.
Mishima moves out of range of the body kick from Lemon.
Thud! ouch! good body kick from Mishima - that will leave a mark!
The crowd are loving this. Great action here.
Mishima gets off balance looking for a body kick
and Lemon counters with a stiff right hand.
Heihachi Mishima seems to be getting the better of the standup.
Mishima keeps the fight on the outside.
Danga de danga de dang - Mishima scores with a four punch combination!
Lemon moves into the clinch successfully.
Lemon tries a knee to the head but Mishima blocks it.
And that�s the end of the round � the fighters go back to their corners.
John Lemon dominated that second round.
The cut man is working on Heihachi Mishima's cut.
OK. That's time! The bell goes and we're back to the action. This is the final round!
Lemon connects nicely with a jab. Noted by the judges no doubt.
Mishima takes one to the side of the head.
Mishima misses with a series of wild punches.
Mishima falls off balance throwing a combination
enabling Lemon to counter with a crisp jab.
Lemon takes a step back and watches a body kick go sailing past his mid section.
Mishima swats away the attempt to clinch by Lemon.
Mishima misses with a head kick.
We've had a slow start to the round here - hopefully the action picks up.
Mishima throws a series of punches but Lemon moves out of range.
Lemon goes for a high kick. It partially lands.
Lemon shoots in looking for a takedown. Mishima tries to sprawl out of it but Lemon keeps driving through. The fighters are pinned against the cage. Mishima manages to get underhooks and after a bit of a struggle, circles away and we're back to standing.
Mishima takes a big intake of breath there - he's definitely tired.
That's one minute gone in the round.
Mishima avoids the clinch attempt nicely.
Mishima throws a sloppy head kick and Lemon moves out of range easily.
Lemon tries to clinch but Mishima moves out of range.
Lemon tries to clinch but Mishima is having none of it.
Lemon tries to clinch up but Mishima circles away and keeps his distance.
Mishima pulls out of a head kick attempt.
Lemon has taken the fight to the clinch.
Lemon throws a vicious knee straight up the middle but Mishima blocks it with crossed arms.
Mishima can't break the clinch.
Lemon avoiding damage.
Lemon throws a blind hook that connects with the side of Mishimas head.
Lemon misses with a knee strike.
That's two minutes gone in the round.
Lemon with the Thai clinch. He's looking to land a big knee but he's not managed it this time.
A bit of stalling here from Lemon.
Lemon working Mishima over with knees to the body.
With the fighters up against the cage, Lemon throws an elbow but misses.
Mishima looks like he'd prefer to be striking at range right now.
Lemon's corner are urging him to control the action in the clinch for a moment, rather than mount any serious offense. I'm sure the crowd appreciate those instructions... not.
Mishima with a knee to the head.
Mishima drops to a knee looking for a takedown but Lemon gets the underhooks and prevents it.
Lemon jumps guard but Mishima stands there with Lemon around his waist. Lemon gives up and drops back to his feet. We remain in the clinch.
With the two fighters working up against the cage, Lemon just misses with a elbow thrown towards Mishima's brow.
That's three minutes gone in the round.
A nice right hand lands inside from Lemon.
Mishima is looking to break free of the clinch but Lemon has double underhooks.
Lemon is pushing Mishima up against the cage, for a bit of lean and pray action. Action being used the in the loosest possible sense of the word.
Mishima trying to land knees to the body.
Lemon scores with a shoulder strike.
Lemon throws a punch but it's blocked by Mishima.
Lemon throws a blind hook that connects with the side of Mishimas head.
A short right from Lemon.
Lemon tries a knee to the head but he's missed.
Mishima looks like he'd prefer to be striking at range right now.
Lemon misses with a knee to the head.
That's four minutes gone in the round.
Lemon tries to land a knee to the head but misses.
Mishima looks like he'd prefer to be striking at range right now.
Lemon manages to break the clinch.
Mishima tries a switch kick but it misses it's target.
Lemon throws a head kick but Mishima moves out of range.
John Lemon is fighting for a decision here - he's started to take the cautious approach.
Lemon drives through with a takedown into Mishima's guard. Let's see what he can do from the top position.
Mishima pushes Lemon off for just long enough to get back to his feet. Very athletic spring there.
This has been an exciting period of action!
Lemon throws a looping left and ducks down for a takedown. He's got his arms around Mishima's waist but Mishima gets an underhook and avoids the takedown by throwing Lemon off to one side.
Mishima lets it all go there with a big combo counter but none of the punches connected.
That's three failed takedown attempts in the round for John Lemon. That's going to take a lot out of him.
Lemon lands a nice shot to the body.
Lemon instigates a clinch.
Lemon breaks from the clinch.
Lemon fails in his attempt to clinch.
Mishima unleashes a big counter combination but Lemon bobs and weaves and avoids any damage.
Heihachi Mishima has stepped it up - he knows he needs a finish here!
Mishima swings away but doesn't land with a series of punches.
And that's the end of the fight!
John Lemon showed his dominance in that final round.
Well I reckon that's a shut out for Lemon, winning every round. Will the judges agree? They are the ones who matter, even if they are often depressingly incompetent. Over to the ring announcer for the scorecards.
Ladies and gentlemen, after 3 rounds of action, we go to the scorecards for a decision.
Judge Cecil Peabody scores the fight 30:27
Judge Wesley Smith scores the fight 30:27
Judge Stewart Dunkirk scores the fight 30:27
In favor of your winner, by unanimous decision... John Lemon!
John Lemon managed to slip a mention for his sponsors, Pit Bull Development, into his post fight interview.
|
|
|
|
|
|
|
|
|
|
|
|
|
|
|
|
|
|
|
|
|
|
|
| S |
C
A |
G |
S |
C
B |
G |
|
S |
C |
G |
|
energy
A | B |
|
hype
A | B |
|
pop
A | B |
|
mgr
A | B |
|
FIGHT
RATING
56% |
|
|
|
|
|
|
|
Undercard bout
|
Coming up we have a featherweight MMA rules bout between Ringo Starr (ranked 8818 p4p, 476 weight class) and Laxa Tiv (ranked 4680 p4p, 362 weight class). Ringo Starr has a significant reach advantage - let's see if he can make it count.
 |
|
 |
| 180 cm
18
145 lbs
0 - 1 - 0 |
|
168 cm
25
150 lbs
1 - 1 - 0 |
BJJ Blue Belt
Brawler
Cuts easily |
|
Dangerous GnP
Decent boxing
Heavy handed |
|
| |
|
Ladies and gentlemen. This fight is 3 rounds, in the featherweight division.
Introducing the fighter to my left, fighting out of the red corner.
With a record of
0 - 1 - 0, fighting out of Las Vegas, Ringo Starr!
And introducing the fighter to my right, fighting out of the blue corner.
With a record of
1 - 1 - 0, fighting out of Sydney, Laxa Tiv!
The judges for this bout are George Francis, Stewart Dunkirk and Wesley Smith.
The bell rings for round one and we are underway!
A combination from Tiv does no damage.
Starr tries to bum rush Tiv with a series of wild strikes but Tiv uses good footwork to avoid the assault.
Starr moves out of range of the strikes.
As Tiv looks to move away, Starr throws a big counter combo but Tiv just gets out of the way.
Starr shoots in for a takedown but doesn't get it.
Tiv's coach down at Arvins Bootcamp was telling us pre-fight that they have been working on Tiv's balance. Obviously they view that as a key factor in the outcome of this fight.
Tiv throws a hook but Starr blocks it.
Tiv misses with a looping left.
Tiv swings for the body but Starr moves out of range.
Tiv takes a swing at Starr's ribcage but misses.
Starr slips under a jab from Tiv.
Starr avoids the body shot from Tiv.
Tiv throws a hook but Starr blocks it.
Starr shoots in with a takedown attempt and he has Tiv pinned against the cage. Tiv gets the underhooks and manages to circle away.
We've had a slow start to the round here - hopefully the action picks up.
Tiv throws a wild combination but nothing lands.
Starr misses with a two punch combination.
Tiv throws an uppercut from half a mile away. Starr sees it coming and avoids it easily.
Starr dives in for a single leg takedown but Tiv sprawls and the fighters end up clinched against the cage.
That's three failed takedown attempts in the round for Ringo Starr. That's going to take a lot out of him.
Starr uses decent footwork to sidestep a right hand from Tiv.
That's one minute gone in the round.
Starr misses with a takedown attempt - Tiv sprawls well and throws a nice strike on the way out which just misses.
Starr shoots for a takedown but Tiv saw that one coming a mile off and avoided it easily.
Starr closes the distance and gets a double leg, slamming Tiv to the mat! Tiv manages to get full guard.
Starr slips effortlessly into side control - very nice.
Tiv wants to get back to his feet but Starr drags him back down.

Starr decides to take the fight back to the feet.
Starr is breathing heavily.

Tiv lands a left and a right that sends Starr crashing to the canvas! Tiv dives into mount looking to finish!

Starr is rocked!

It looks like Ringo Starr has been cut.
The crowd cheering loudly, showing their appreciation for the quality fight we're seeing here.
Oooh a big shot lands for Tiv! Starr is out! The ref dives in to save him from more punishment!
Ladies and gentlemen, after 1:56 of round 1, we have a winner by way of KO (Strikes). Laxa Tiv!
|
|
|
|
|
|
|
|
|
|
|
|
|
|
|
|
|
|
|
|
|
|
|
| S |
C
A |
G |
S |
C
B |
G |
|
S |
C |
G |
|
energy
A | B |
|
hype
A | B |
|
pop
A | B |
|
mgr
A | B |
|
FIGHT
RATING
77% |
|
|
|
|
|
|
|
Undercard bout
|
Coming up we have a welterweight MMA rules bout between Obadele Haynes (ranked 8362 p4p, 648 weight class) and Paul Phoenix (ranked 6133 p4p, 589 weight class). Paul Phoenix struggled to make weight for this fight. He only made it down to 172.8lbs at the first attempt and had to take the additional two hours to make the official bout weight. Let's see how much it's taken out of him. Paul Phoenix looks lathargic as he enters the arena. Wake up son, you're about to have a fight!
 |
|
 |
| 181 cm
19
175 lbs
2 - 1 - 0 |
|
187 cm
18
179 lbs
1 - 0 - 0 |
BJJ White Belt
Counter fighter
Good chin |
|
BJJ Blue Belt
Counter fighter
Very confident |
|
| |
|
Ladies and gentlemen. This fight is 3 rounds, in the welterweight division.
Introducing the fighter to my left, fighting out of the red corner.
With a record of
2 - 1 - 0, fighting out of Helsinki, Obadele Haynes!
And introducing the fighter to my right, fighting out of the blue corner.
With a record of
1 - 0 - 0, fighting out of London, Paul Phoenix!
The judges for this bout are Alan Glass, Frank Dennis and Cecil Peabody.
The bell rings for round one and we are underway!
Phoenix uses some good footwork to avoid the body shot by Haynes.
A looping hook to the body misses from Haynes. Phoenix does a little dance to reset his feet.
Phoenix is loading up here, looking for a big counter of his own.
Phoenix doesn't react quick enough there as he takes a shot to the body.
Haynes tries a head kick but it misses.
Phoenix throws a body shot but no joy.
Phoenix is the aggressor but that punch slipped nicely by Haynes.
We've had a slow start to the round here - hopefully the action picks up.
Phoenix misses with the combination.
A nice combination there by Haynes.
That's one minute gone in the round.
Haynes looks to throw a body kick
and Haynes takes a counter punch right on the button for his troubles.
Haynes throws a sloppy head kick and Phoenix moves out of range easily.
Phoenix takes a head kick and shrugs it off.
Haynes wants to clinch.
And Phoenix tries to counter it with a takedown but Haynes pushes his down on his head and steps out.
Haynes fails to land with the punch combination there - jab, cross, hook, miss, miss, miss.
Phoenix blocks a head kick by Haynes.
As Haynes backs off Phoenix throws a huge counter combo but Haynes manages to avoid it all.
That's two minutes gone in the round.
Haynes moves out of range of the strikes.
Haynes throws a hook to the body but it doesn't connect.
Phoenix keeping a good distance there, avoiding the body shot.
Haynes lands a jab. Then a cross. Then finally a nice hook to the body. Good work there by Haynes.
Haynes throws a lazy head kick
and Phoenix counters with a straight punch to the midsection.
Haynes throws a head kick that misses and slips in the process. He scrambles back to his feet and the fighters circle.
Haynes moves in looking to clinch but Phoenix pushes him off.
Phoenix scores with a hook.
That's three minutes gone in the round.
Haynes gets in close and instigates a clinch.
Phoenix is working for takedown but Haynes is calmly controlling the position for now.
Haynes pushes Phoenix back against the cage and unloads with a body punch.
Phoenix looks winded!
Phoenix takes an elbow to the temple.
Haynes doesn't land with the attempted body shot.
Haynes with an attempt at a knee that misses.
An uppercut on the inside fails to land for Haynes.
Phoenix wants to break free but Haynes has control.
Haynes lands punches inside but they're not really causing much damage.
Phoenix drops down for a takedown but doesn't get it.
Haynes lands with a short punch from the clinch.
That's four minutes gone in the round.
Haynes unloads a knee to the mid-section. Phoenix lets out a prehistoric sounding urrrrgh.
Phoenix is looking for a takedown up against the cage. Haynes gets underhooks though and prevents the takedown attempt.
Obadele Haynes has stuffed three takedown attempts in the round now. That's going to take a lot out of Paul Phoenix.
A short right from Haynes.
Haynes tries a knee to the head but he's missed.
Haynes looks to be in better condition than last time we saw him fight. Obviously he's been working hard on his cardio.
Haynes scores with a knee to the head.
Haynes lands a body shot.
We've seen a great period of action over the last minute or so - credit to both fighters for going all out!
With the two fighters working up against the cage, Haynes just misses with a elbow thrown towards Phoenix's brow.
Haynes with an attempt at a knee that misses.
Haynes has a couple of punches blocked by Phoenix.
Haynes working aggressively here.
Haynes throws a blind hook that connects with the side of Phoenixs head.
Haynes lands a good knee to the midsection. Phoenix won't want to take too many of those.
And that�s the end of the round � the fighters go back to their corners.
Obadele Haynes dominated that round.
That's the end of the interval. I'm sure that seemed a lot quicker than a minute for our two fighters! Back to the action.
Well, he's not going to score with shots like that. A lazy body kick attempt from Haynes.
Phoenix swings away with a counter right hand but no contact made.
Haynes tries to clinch but Phoenix is having none of it.
Haynes is looking to wear down Phoenix with body shots, infact he's throwing more body shots than head shots at the moment.
Haynes looks to land a combination but Phoenix avoids it well.
Phoenix showing good head movement there, avoiding the strikes from Haynes.
Sloppy strikes from Haynes. Those never looked like landing.
Phoenix now looks to counter with a shot at the body.
We've had a slow start to the round here - hopefully the action picks up.
Haynes misses with the combination.
A countering left hand to the body from Phoenix misses.
We've been informed that Phoenix has been working hard on his conditioning in the buildup to the fight.
That's one minute gone in the round.
Phoenix showing good head movement there, avoiding the strikes from Haynes.
Haynes misses with a looping right.
Haynes tries a head kick but it misses.
Haynes with a body punch. A glancing blow.
Haynes swinging wildly here.
A countering left hand to the body from Phoenix misses.
Haynes lands a nice leg kick that just misses Phoenix's sensitive parts.
That's two minutes gone in the round.
An inside leg kick from Haynes misses.
Phoenix is loading up here, looking for a big counter of his own.
Phoenix avoids a punch combination nicely.
Phoenix is clearly trying to counter these attacks from Haynes with a body shot.
A punch combination from Haynes misses.
The fight stays on the outside here - Haynes looks like he's thinking about clinching though.
Phoenix appears to be waiting to throw a counter punch to the body.
Haynes throws a leg kick but Phoenix sees it coming and checks it nicely.
Despite the aggression on Phoenix's face he doesn't fully commit to the counter.
Obadele Haynes is winning the standup battle so far.
That's three minutes gone in the round.
Phoenix uses some good footwork to avoid the body shot by Haynes.
Haynes lands with a shot to the body.
Haynes throws a right and a left that Phoenix avoids nicely.
Haynes fails with an attempt to clinch.
Obadele Haynes is looking to throw some combinations by the looks of things.
Haynes throws a head kick but Phoenix moves out of range.
Haynes throws a hard body shot but it just misses.
Haynes moves into the clinch.
That's four minutes gone in the round.
Haynes tries a knee to the head but he's missed.
Phoenix is trying to pull guard but Haynes turns him against the cage and we stay in the clinch.
Phoenix is breathing heavily.
Phoenix is trying to pull guard but Haynes turns him against the cage and we stay in the clinch.
Phoenix trying to stall but Haynes improves his position.
Haynes is really dominating this fight. Is there anything that Phoenix can do to turn this around?
Phoenix works for underhooks and lands a body shot in the process.
Haynes looking to throw knees to the head but Phoenix is blocking nicely.
Haynes working on landing some head shots here - that one got through nicely.
Phoenix takes a knee to the side of the body.
Haynes has a couple of punches blocked by Phoenix.
Boooooooooooooooooooo!!! God, this has been a terrible round. Come on you two, sort yourselves out!
Haynes connects with a knee to the head.
Phoenix is working on a leg, looking for a takedown but Haynes is defending well.
Obadele Haynes has stuffed three takedown attempts in the round now. That's going to take a lot out of Paul Phoenix.
Haynes misses with a short punch on the inside.
Phoenix is working for takedown but Haynes is calmly controlling the position for now.
And that�s the end of the round � the fighters go back to their corners.
Obadele Haynes dominated that second round.
The minute break is over - no more time for sponges and pep talks - back to the action! This is the final round!
Haynes misses with a half-hearted attempt at a head kick.
Obadele Haynes seems to be the more aggressive standup fighter in this bout.
Haynes fails with an attempt to clinch.
Haynes thumps Phoenix with a low kick.
Phoenix looks to land a right hand but Haynes moved out of range.
Haynes just misses with a punch to the body.
Haynes throws a head kick that misses.
We've had a slow start to the round here - hopefully the action picks up.
Phoenix ducks under a wild hook from Haynes.
Haynes fakes with a right hand and throws a good leg kick, right into the thigh. That had to hurt Phoenix.
Phoenix takes a big intake of breath there - he's definitely tired.
That's one minute gone in the round.
Haynes pulls out of a head kick attempt.
Haynes moves in looking to clinch but Phoenix pushes him off.
Haynes lands a slapping body shot.
Phoenix ducks right into an uppercut from Haynes.
Haynes lands a powerful looking uppercut that connected with his opponent's jaw.
Haynes tries to clinch but Phoenix moves out of range.
Phoenix is definitely looking for the counter takedowns here.
Haynes moves in looking to clinch but Phoenix pushes him off.
Haynes tries to clinch up but Phoenix circles away and keeps his distance.
Phoenix looks like he wants to counter punch here.
That's two minutes gone in the round.
Haynes listening to his corner there, landing a nice uppercut.
Haynes fails in his attempt to clinch.
Haynes misses with a head kick.
Haynes tries a head kick but it misses.
Haynes wants to clinch.
Phoenix throws a counter combo.
That's three minutes gone in the round.
Haynes looks for the body kick but Phoenix saw that one coming.
Phoenix lets it all go there with a big combo counter but none of the punches connected.
Haynes throws a body kick but he wasn't in range.
Haynes sets himself, and Phoenix steps forward looking for the clinch! Haynes avoids it this time.
Haynes fails with an attempt to clinch.
Haynes tries to clinch but is not successful on this occasion.
Haynes looks to land a combination but Phoenix avoids it well.
Haynes fakes a jab and scores with a low kick.
Phoenix takes a kick to the side of the head.
Haynes tries to close the distance and clinch but Phoenix swats him to one side with an open hand palm strike and circles away.
Phoenix is trying to avoid his opponent's strikes and get into the clinch.
That's four minutes gone in the round.
Haynes gets caught napping as Phoenix dives in and scores a takedown. Haynes manages to retain guard.
Phoenix controlling from the guard. I say controlling but really, he's stalling.
Haynes wants to get back to his feet but Phoenix is in a dominant position and won't allow it.
Phoenix slips effortlessly into side control - very nice.
Paul Phoenix has stepped it up - he knows he needs a finish here!
Boooooooooooooooooooo!!! God, this has been a terrible round. Come on you two, sort yourselves out!
Phoenix looking for an arm triangle but it's way too loose to do anything.
And that's the end of the fight!
Obadele Haynes showed his dominance in that final round.
Well I reckon that's a shut out for Haynes, winning every round. Will the judges agree? They are the ones who matter, even if they are often depressingly incompetent. Over to the ring announcer for the scorecards.
Ladies and gentlemen, after 3 rounds of action, we go to the scorecards for a decision.
Judge Alan Glass scores the fight 30:26
Judge Frank Dennis scores the fight 30:26
Judge Cecil Peabody scores the fight 30:26
In favor of your winner, by unanimous decision... Obadele Haynes!
A relieved looking Obadele Haynes thanked the fans for their support and gave the usual line about them being amazing. They seemed to believe that he actually meant it.
|
|
|
|
|
|
|
|
|
|
|
|
|
|
|
|
|
|
|
|
|
|
|
| S |
C
A |
G |
S |
C
B |
G |
|
S |
C |
G |
|
energy
A | B |
|
hype
A | B |
|
pop
A | B |
|
mgr
A | B |
|
FIGHT
RATING
33% |
|
|
|
|
|
|
|
Undercard bout
|
|
|
|
Undercard bout
|
|
|
|
Undercard bout
|
|
|
|
Co-main event
|
|
|
|
Main event
|
Coming up we have a lightweight MMA rules bout between Ramond Remon (ranked 7385 p4p, 603 weight class) and Ezequiel Senas (ranked 4378 p4p, 450 weight class). Senas has chosen Dojo sempat as his entrance music. Both fighters look fresh as a daisy as they make their way towards the cage.
 |
|
 |
| 175 cm
18
155 lbs
1 - 0 - 0 |
|
165 cm
25
165 lbs
1 - 1 - 0 |
BJJ Blue Belt
Brawler
Cuts easily |
|
BJJ White Belt
Brawler
Solid chin |
|
| |
|
Ladies and gentlemen. This fight is 3 rounds, in the lightweight division.
Introducing the fighter to my left, fighting out of the red corner.
With a record of
1 - 0 - 0, fighting out of Las Vegas, Ramond Remon!
And introducing the fighter to my right, fighting out of the blue corner.
With a record of
1 - 1 - 0, fighting out of Helsinki, Ezequiel Senas!
The judges for this bout are Alan Glass, Wesley Smith and Daniel Franklin.
The bell rings for round one and we are underway!

Senas pushes Remon up against the cage in a clinch.
Senas lands a right uppercut that snaps the head of Remon backwards.
Senas lands on the inside with an uppercut.
Senas swings away with an uppercut that misses.
Remon tries to land a knee to the head but Senas blocks with his arms.
Senas throws a punch but it's blocked by Remon.
A nice glancing elbow lands by Senas.
It looks like Ramond Remon has been cut.
A short uppercut from Senas.
Remon wants the takedown. Senas is fighting it off but Remon persists and manages to bring the fight to the ground, ending up in Senas's guard against the cage.
Senas throws some sloppy strikes off his back.
Senas doesn't do any damage with a couple of strikes from the bottom.
The fans in attendance giving it up for the two fighters, who have really let it all hang out in the last minute or so!
Senas throws some sloppy strikes off his back.
Remon works a leg free and moves into half guard.
Remon moves into side control, avoiding the strikes from Senas.
Senas is looking to regain half guard here but Remon keeps moving and retains side control.
Senas really doesn't want to stay on the ground with Remon. If he can't get it back to his feet, it's only a matter of time before he'll be tapping out.
Senas is working to avoid the ground and pound but Remon connects with a decent elbow.
Senas is trying to escape the position but Remon is controlling the position.
That's one minute gone in the round.
Remon slips into full mount, dodging the strikes by Senas.
Senas swinging wildly from the bottom but he's not landing.
Senas throwing hammer fists to the chest of Remon. What's that going to do exactly?
Remon connects with a couple of good shots from mount.
The fighters are pressed up against the cage, both looking to find a bit of space to work.
Remon wants to control the pace but Senas is squirming around nicely.
Senas is flailing around like a fish out of water, trying to land strikes.
Remon manages to capitalize on a mistake by Senas to take his back!
Remon working for a RNC but it's not happening just yet.
A bit of a pause in the action here. Remon controlling the positon.
You can see the frustration on Senas's face� He knows he is in trouble unless he improves his position sooner rather than later.
Remon is trying to stick to Senas's back but Senas is turning into Remon. He's managed to reverse the position - now he's in Remon's guard. Polite applause from the crowd in appreciation of some nice Jiu Jitsu by Senas.
The ref warns both fighters not to hold the cage as they work up against the meshing.
That's two minutes gone in the round.
Remon avoiding any damage from the ground and pound.
Senas is fighting to break Remon's control of his arms but Remon is doing a good job of controlling the position at the moment.
Senas lands a couple of elbows.
Senas with a couple of shots to the head there. Not particularly brutal.
Senas looks winded!
Remon looking for a sweep. Not yet Remon, not yet.
Senas with a nice head shot there.
Senas postures up and scores with a shot to the body and a follow up elbow to the head.
Remon on his back here. We all know that wrestlers don't like being on their back so let's see if Remon tries to get out of the position.
This has been an exciting period of action!
Remon looking to control the pace of the fight rather than finish it.
Senas throws an elbow that misses. Remon uses the momentum to reverse the position. He's now in Senas's guard. Nice move by Remon!
Senas wants to sweep here but Remon controlling him for the moment.
Remon scores with a decent looking elbow strike.
That's three minutes gone in the round.
Remon is frustrating his opponent with some stalling tactics from top position.
Senas trying to punch from his back but it's not doing any damage.
Remon drops back looking for a leg! Senas is in trouble here! The fighters roll with the hold and Senas manages to kick Remon off! Remon jumps back into Senas's guard.
Senas thows some rabbit punches from the bottom but they don't do any damage.
Senas thows some rabbit punches from the bottom but they don't do any damage.
Senas throws some sloppy strikes off his back.
Remon is trying to work a guillotine from the top, or something like that? Don't know how he thinks he's going to get a finish from there.
Senas is working an open guard so Remon takes the opportunity to get back to his feet.
That's four minutes gone in the round.
A few boos can be heard. I'm sure they will multiply if the fighters don't pick up the pace.
Senas clinches.
Remon's head jolts backwards as he takes an uppercut right on the button!
Remon works for the underhooks and manages to get a trip takedown into guard.
Senas with a couple of shots from the bottom there - nothing Remon can't handle though.
Remon trying to control the position from guard on top but Senas is wriggling around, looking for whatever he can.
Senas trying to punch from his back but it's not doing any damage.
Senas throwing some rather feeble looking strikes off his back.
Senas doesn't do any damage with a couple of strikes from the bottom.
Senas trying to punch from his back but it's not doing any damage.
Remon passes into half guard under a barage of strikes.
Remon is looking for a kimura but he's never going to get it from there.
Senas strikes from the bottom but Remon passes into mount!
And that�s the end of the round � the fighters go back to their corners.
Ramond Remon dominated that round.
The cut man is working on Ramond Remon's cut.
That's the end of the interval. I'm sure that seemed a lot quicker than a minute for our two fighters! Back to the action.
Senas keeping his hands up high there, blocking the jab from Remon.
Senas fails with an attempt to clinch.
Senas fails with an attempt to clinch.
Remon closes the distance and clinches up, looking for a takedown. He shifts his weight and gets a nice trip into half guard.
Remon blocks the strikes from Senas.
Remon is really dominating this fight. Is there anything that Senas can do to turn this around?
Senas moves his hips nicely and gets into full guard.
Senas throwing strikes off his back to little effect.
Remon slips nicely into half guard, despite the strikes coming from Senas.
Remon sitting and controlling from the half guard.
We've had a slow start to the round here - hopefully the action picks up.
Remon wants to control but Senas is keeping him busy.
Senas wants to get back to full guard but Remon has mounted him!
Senas is breathing heavily.
Remon is standing up, even though he is in mount.
That's one minute gone in the round.
Senas moves in looking to clinch but Remon pushes him off.
Senas moves into the clinch successfully.
Remon wants to push off and get back to the center of the mat but Senas has him pressed against the cage.
Senas is fighting off a takedown attempt but Remon is just too persistent for him and manages to trip Senas to the mat. Senas regains guard as soon as the fighters hit the mat.
Senas trying to strike from the bottom but really, it's not the best position to be doing that from!
Senas will have to put a bit more behind his punches if he's going to do any damage from this position.
Senas is striking from the bottom but Remon uses the opportunity to pass into half guard.
Senas misses with some strikes from the bottom.
Remon performing his best blanket impression for a moment.
Senas missing with punches from the bottom.
The referee calls for the fighters to work.
That's two minutes gone in the round.
Senas wants to sweep but Remon has passed to side control!
Remon landing with strikes to the head and body from side control.
Remon stands up and we're back to a striking position.
Senas rushes Remon and presses him up against the cage.
Senas working on landing some head shots here - that one got through nicely.
Remon blocks a punch to the side of the head.
Senas swings wildly with an uppercut but Remon uses good head movement to avoid it.
Senas misses with a hook from the clinch.
Senas misses with some punches.
Ezequiel Senas seems to be working more effectively in the clinch in the fight so far.
Fantastic stuff here - a very entertaining period of action, which has drawn cheers from the crowd.
Remon tightens his grip and picks Senas up, before dumping him to the ground. Senas manages to land in guard.
Remon trying to control the position from guard on top but Senas is wriggling around, looking for whatever he can.
That's three minutes gone in the round.
Senas striking from the bottom here.
Senas throws some sloppy strikes off his back.
Senas throws a couple of weedy looking strikes off his back.
Remon is in close to Senas's body, working some short punches and elbows.
Remon thinks about going for a leg but decides against it, in order to maintain the position.
Remon not doing a lot at the moment. He'll have to show some more aggression or the fight will get stood up.
Senas throwing strikes off his back to little effect.
Senas looking to sweep here. No luck so far.
Ramond Remon overall seems to be getting the better of the ground position in the fight so far.
Remon slips nicely into half guard, despite the strikes coming from Senas.
Remon keeping composed on the top, looking to control the action.
That's four minutes gone in the round.
Neither fighter has done anything of merit for a good minute or two here and the crowd are not happy about it.
Senas punching from the bottom.
Remon blocks the strikes from Senas.
Senas missing with punches from the bottom.
We've had a lack of effective grappling in the last minute or so, which could well see a referee standup.
Senas missing with punches from the bottom.
The referee has decided to stand the fighters back up, so we'll restart on the feet.
The fight stays on the outside here - Senas looks like he's thinking about clinching though.
Remon gets a takedown into half guard.
Remon is working for submissions here but there's nothing on.
The crowd thankful this round is nearly over.
Senas blocking the ground and pound attempt from Remon.
And that�s the end of the round � the fighters go back to their corners.
Ramond Remon dominated that second round.
The cut man is working on Ramond Remon's cut.
The minute break is over - no more time for sponges and pep talks - back to the action! So, we enter the final round. Let's see if either fighter can bring us a finish, or whether we're going to the judges scorecards.
Senas has managed to clinch.
We've been informed that Senas has been working hard on his conditioning in the buildup to the fight.
Senas misses with some punches.
Senas misses with a short punch on the inside.
Senas throws a head punch that misses.
Senas fails to land with a short punch on the inside.
Senas creates a bit of distance and throws an elbow that only just misses.
Remon slowing the pace effectively.
Remon lands with a right to the head.
Senas misses with a punch on the inside.
Remon blocks a punch to the side of the head.
Senas misses with the head strike.
We've had a slow start to the round here - hopefully the action picks up.
Senas misses with a punch on the inside.
Remon tries to break the clinch but Senas is controlling the position.
Remon works for the underhooks and manages to get a trip takedown into guard.
Remon stands and throws Senas's legs to the side, diving into side control.
Senas tries to get back to half guard but can't.
That's one minute gone in the round.
Senas takes a big intake of breath there - he's definitely tired.
Remon moves into full mount!
Remon working away from the top, dropping strikes.
Senas is looking to improve his position but Remon isn't that keen on the idea.
Remon controlling the pace for now.
Remon in mount throwing good strikes here, bouncing his opponent's head off the canvas.
Remon scoring with some good ground and pound from mount here. Will he manage to finish Senas?
Senas flailing away with punches but nothing is landing.
Remon tucks in and makes sure he doesn't lose the dominant position.
Ezequiel Senas has stepped it up - he knows he needs a finish here!
That's two minutes gone in the round.
Remon working for a submission here. He's tucked his head under his opponent's arm, looking for an arm triangle. He's hopped off into side control, looking to tighten the submission... is it going to work? He's given up a good position looking for it. Senas looks OK. Oh, I spoke too soon, he's out! That must have been tighter than I thought! Excellent work there by Remon! Submission of the night perhaps?
Ladies and gentlemen, after 2:20 of round 3, we have a winner by way of Submission (Arm Triangle). Ramond Remon!
|
|
|
|
|
|
|
|
|
|
|
|
|
|
|
|
|
|
|
|
|
|
|
| S |
C
A |
G |
S |
C
B |
G |
|
S |
C |
G |
|
energy
A | B |
|
hype
A | B |
|
pop
A | B |
|
mgr
A | B |
|
FIGHT
RATING
53% |
|
|
|
|
|
|
|
|
|
|
