 |
Chaos FC 11 PBP Commentary |
Undercard bout
|
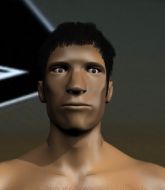
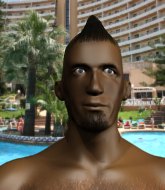
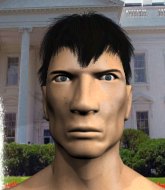
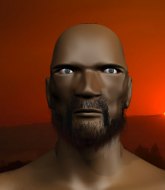
Coming up we have a bantamweight MMA rules bout between James Walter (ranked 8543 p4p, 361 weight class) and Noel Slager (ranked 8696 p4p, 366 weight class). The crowd seem to be enjoying Slager's choice of entrance music: Best UFC entrance of all time!!!. Noel Slager has the better chin. Will he look to stand and bang today?
 |
|
 |
| 150 cm
23
130 lbs
0 - 3 - 0 |
|
154 cm
18
130 lbs
1 - 3 - 0 |
BJJ White Belt
Great elbows
Very quick |
|
BJJ White Belt
Decent boxing
Determined |
|
| |
|
Ladies and gentlemen. This fight is 3 rounds, in the bantamweight division.
Introducing the fighter to my left, fighting out of the red corner.
With a record of
0 - 3 - 0, fighting out of The Island, James Walter!
And introducing the fighter to my right, fighting out of the blue corner.
With a record of
1 - 3 - 0, fighting out of The Island, Noel Slager!
The judges for this bout are Winston Alpacca, Bart Greer and Dirk Anderson.

The bell rings for round one and we are underway!

Walter clinches with his opponent.

Walter breaks the clinch and we're back to striking at distance.
Slager's coach down at Cozad The Island was telling us pre-fight that they have been working on Slager's balance. Obviously they view that as a key factor in the outcome of this fight.

Excellent takedown into side control there by Walter.

Slager sneaks out the side door and pushes Walter away - he's back to his feet. The crowd show their appreciation for the escape.
Slager throws a looping left and ducks down for a takedown. He's got his arms around Walter's waist but Walter gets an underhook and avoids the takedown by throwing Slager off to one side.
Slager looks frustrated there after his takedown attempt is stuffed easily.
Slager dives in and grabs Walter's left leg, looking for a takedown. Walter pushes down on Slager's head and hops out.
Walter wants to take advantage of his opponent's missed offense by moving into the clinch.
James Walter has stuffed three takedown attempts in the round now. That's going to take a lot out of Noel Slager.
We've seen a great period of action over the last minute or so - credit to both fighters for going all out!
Walter shoots in for a takedown from distance. He catches Slager napping and manages to drive through into side control!
Slager is looking to regain half guard here but Walter keeps moving and retains side control.
Walter knows he needs to get back to his feet asap. He's simply no match for Slager on the ground.

Walter decides to stand back up.
Slager takes a body punch but keeps moving.
No luck with that takedown attempt from Slager.
Walter throws a combination but comes up with nothing but fresh air.
Slager shoots in with a takedown attempt and he has Walter pinned against the ropes. Walter gets the underhooks and manages to circle away.

That's one minute gone in the round.
A telegraphed takedown attempt from Slager is defended easily by Walter.
Slager looks winded!
Walter scores with a reasonable looking shot to the body. Slager doesn't seem bothered though.
Slager closes this distance looking for a takedown but Walter circles away.
Walter rushes Slager and presses him up against the ropes.
Walter is working on a single leg takedown against the ropes. Slager can't fight it off and eventually Walter manages to take the fight to the floor. Slager looks annoyed but at least he's managed to land in guard.
The fighters are tangled up in the ropes here. We might need a restart if the fighters can't break free themselves.
Slager keeping full guard, as Walter tries to pass.
Walter's corner is telling him to maintain position.
Slager can't keep his opponent in guard - Walter advances to half guard, no doubt looking to mount.

That's two minutes gone in the round.
Slager is working for an escape here. He's hooked one of Walter's legs and he's managed to sneak out and take Walter's back!
Slager not allowing Walter to control his hands.
Walter tries to escape the position - he's now mounted. Is that better or worse? Hard to tell!
The fighters are trapped in the ropes so we're going to have a reposition here. The ref calls for a break and repositions the fighters in the center of the ring.
Walter bucks up and manages to get a nice reversal! He's in guard on the top - nicely done!
We've seen a great period of action over the last minute or so - credit to both fighters for going all out!
Slager has momentary wrist control but Walter slips an elbow through the middle.
Walter decides he's had enough of playing guard and decides to stand. Come on Slager, up you get!
Walter closes the distance, clinches up and gets a nice trip takedown into side control. Very smooth.
Slager is looking for a sweep.
Walter is maintaining the dominant position - no doubt Slager will start to get frustrated soon if he's not already.

Walter wants to work for a kimura but he's foiled early by Slager, who protects the arm well.

That's three minutes gone in the round.
Slager sneaks a leg under to get back to half guard.
Walter controlling the action here.
Slager should think about turning a few of those tyres round his middle into muscle if he wants people to take him seriously as an athlete.

Slager looking to work for a kimura from the bottom.
Slager wants to get back to full guard.
Walter working over Slager with some ground and pound. Slager looks like he wants out of this position, which is understandable.
Walter is trying to work for a kimura. This could be trouble! No, Slager has managed to free his arm - good work.
Slager is looking to control Walter's leg but it's slowly edging free. Can Slager avoid being mounted?

That's four minutes gone in the round.
There's not a lot going on here and the crowd are letting the fighters know they're not willing to tolerate a lack of action.
Walter takes a deep breath and rests his weight momentarily on top of his opponent, to control the position.
Slager tries to roll over but Walter keeps him under control.
Walter keeping composed on the top, looking to control the action.
Slager is looking for a sweep. Walter is wise to his cunning plan and keeps the top position.
Walter is sneakily working for an arm triangle but Slager sees it coming and defends easily.
Slager is looking to improve his position.
Slager is looking to get full guard. It looks like he might be successful but at the last minute Walter jumps into side control!
Slager is looking for a sweep.
Slager looks to move to half guard but instead Walter has passed into mount! Damn!
Walter trying to control but he's not successful this time.
And thats the end of the round the fighters go back to their corners.
James Walter dominated that round.
Well, the break between rounds is over. Let's get back to the scrappin!

Walter shoots in looking for a single leg takedown. Slager is trying to defend but Walter finishes it well and ends up in half guard. Let's see if he can advance position further.
Slager kicks Walter off and gets back to his feet.
Walter shoots in and bounces Slager off the ropes to secure the takedown into guard.
Slager is scooting his butt against the ropes and has managed to get back to his feet. Walter presses him back against the ropes, presumably looking to take the fight back to the mat.
The crowd are loving this. Great action here.
Walter tightens his grip and picks Slager up, before dumping him to the ground. Slager manages to land in guard.
Walter keeps in close for a moment and lands a decent shot to the side of Slager's head.
Slager scores with a couple of body punches from the bottom.
Walter stopping the sweep attempt from Slager.
Slager has a butterfly guard looking to sweep but Walter has passed into side control.
Slager is looking to reverse the position.
That's one minute gone in the round.
Walter lands an elbow.
Walter decides to stand back up. Walter steps back and let's Slager get back to his feet.
Walter gets to the clinch - let's see what his plan is here.
Slager is trying to drag Walter to the mat but Walter just about manages to keep his footing. He used the ropes to his advantage there.
Slager has had enough of the clinch and is looking to separate.
Slager fails to pull the fight into his guard.
Slager wants to break the clinch but can't.
Slager using the Thai plumb to throw knees but Walter has his back arched nicely, preventing the strike.
Slager is breathing heavily.
Walter manages to break the clinch.
Walter gets a double leg takedown into Slager's guard.
Walter wants to control from the top but Slager keeps moving.
Walter connects with a couple of short punches.
Walter stands and steps away. Slager gets to his feet too and we're back to the striking game.
That's two minutes gone in the round.

Slager fakes with an overhand right and moves in to clinch with Walter, pushing him back against the ropes.
Walter pushes off and circles away, back to the middle of the mat.
Slager clinches with his opponent.
Walter wants the takedown. Slager is fighting it off but Walter persists and manages to bring the fight to the ground, ending up in Slager's guard against the ropes.
The crowd cheering loudly, showing their appreciation for the quality fight we're seeing here.
Slager looking for submissions off his back, moving his hips, looking for an opening.
Walter scoring with punches to the head and body.
Slager escapes his hips to the side and looks to be working for an armbar. Walter gives him a little smile and shakes his head. No chance.
Walter cracks Slager with a solid left hand.
Walter decides to stand up and beckons his opponent to follow.
James Walter is looking to throw some combinations by the looks of things.
Walter drives through with a takedown into Slager's guard. Let's see what he can do from the top position.
Walter trying to control but Slager is working from the bottom.
That's three minutes gone in the round.
Walter is trying to work a guillotine from the top, or something like that? Don't know how he thinks he's going to get a finish from there.
Slager wants to sweep but no luck.
Walter gets to his feet - Slager follows without any prompting.
Slager shoots in with a takedown attempt and he has Walter pinned against the ropes. Walter gets the underhooks and manages to circle away.
James Walter has stuffed three takedown attempts in the round now. That's going to take a lot out of Noel Slager.
Slager fails miserably with a takedown attempt.
Slager looks to throw a body kick
so Walter counters with a double leg into guard. Good agility.
Walter trying to control but Slager is working from the bottom.
Walter is sitting in guard, working some ground and pound.
That's four minutes gone in the round.
Slager keeping moving, preventing Walter from controlling successfully.
Slager is working an open guard so Walter takes the opportunity to get back to his feet.
Slager shoots in for a takedown - he's clinched up with Walter but Walter pushes him off and we're back to square one.
Walter scores a trip takedown into side control. Nice.
Walter wants to control but Slager is keeping him busy.
Walter wants to work for a kimura but he's foiled early by Slager, who protects the arm well.
Walter cracks Slager with an elbow. That is naaassty.
And thats the end of the round the fighters go back to their corners.
James Walter dominated that second round.
The fighters get back to their feet, the hooter sounds and we're back to the action! This is the final round!

Slager changes levels and looks for a double leg takedown. Walter tries to avoid it but Slager manages to keep hold of a leg and drag Walter to the ground. Walter escapes though and pops straight back up to his feet.
Walter fakes a head shot and lands one to the body.
Walter shoots in for a takedown and gets it.
Slager is looking to regain full guard. Not this time though.
Walter scores with a couple of good hammerfists.
Walter is looking to take a break and control but Slager is keeping him honest, looking to work from the bottom.
Walter is really dominating this fight. Is there anything that Slager can do to turn this around?
Walter working Slager over with strikes.
We've had a slow start to the round here - hopefully the action picks up.
Slager is looking to improve his position.
Slager is refusing to be controlled, as Walter sits in half guard.
That's one minute gone in the round.
Walter tries to pass to full mount but Slager defends it.
Ground and pound from Walter.
Walter seems to be working for a kimura but Slager defends the submission attempt.
Both fighters are breathing heavily.
Walter trying to mount his opponent but Slager defends it.
Slager is trying to get back to full guard.
Walter wants to control but Slager is keeping him busy.
Slager is working for an escape here. He's hooked one of Walter's legs and he's managed to sneak out and take Walter's back!
Slager tightening his grip on Walter, looking for the choke.
That's two minutes gone in the round.
Walter is trying to stand back up.
Slager gets his hands free as Walter looks to control.
Slager is working really hard to secure the rear naked choke. Walter defends successfully for a significant amount of time. Both fighters are looking very determined.
Slager patiently working for the choke. Which fighter will keep their nerve here?
We've seen a great period of action over the last minute or so - credit to both fighters for going all out!
Walter trying to control but not successfully.
That's three minutes gone in the round.
Slager throwing sloppy strikes.
Walter trying to control the hands but Slager breaks the grip.
Walter trying to get back to his feet but Slager is in full control for now.
Walter avoids the strikes from Slager.
You can see the frustration on Walter's face
He knows he is in trouble unless he improves his position sooner rather than later.
Slager is staying calm and holding on to the back position, whilst working on a rear naked choke. Walter is defending well though. Slager let's go of the attempt for now.
Walter is trying to get back to his feet but Slager has full control of the position and if anything, Walter has just worked his way into a worse spot.
Slager looking to break Walter's wrist control so he can sink in the choke. Walter remaining controlled and patient though - he really has to keep calm otherwise Slager will wrap this one up with the rear naked choke!
Slager controlling well, preventing Walter from escaping the position.
Noel Slager has got the better of the ground game so far.
Slager punches the canvas rather than the man.
Watch the back of the head! Comes the shout from the referee towards Slager.
That's four minutes gone in the round.
I really don't envy Walter right now.
Walter won't enjoy being in this position. Slager looking for the choke. Oh... he's slipped the arm under the neck - Walter is tapping - it's over boys! Slager picks up the submission victory!
Ladies and gentlemen, after 4:26 of round 3, we have a winner by way of Submission (RNC). Noel Slager!
Noel Slager seemed lost for words in his post fight interview but he remembered to thank his fans and directed everyone to his website.
|
|
|
|
|
|
|
|
|
|
|
|
|
|
|
|
|
|
|
|
|
|
|
| S |
C
A |
G |
S |
C
B |
G |
|
S |
C |
G |
|
energy
A | B |
|
hype
A | B |
|
pop
A | B |
|
mgr
A | B |
|
FIGHT
RATING
71% |
|
|
|
|
|
|
|
Undercard bout
|
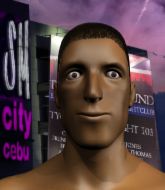
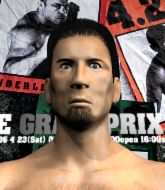
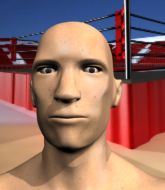
Coming up we have a welterweight MMA rules bout between Manuel Lora (ranked 2495 p4p, 372 weight class) and Ryan Rylie (ranked 9349 p4p, 844 weight class). Manuel Lora has the edge in experience - let's see if he can make that count tonight.
 |
|
 |
| 180 cm
26
180 lbs
5 - 3 - 0 |
|
190 cm
24
170 lbs
1 - 2 - 0 |
Good wrestling
Brawler
Cardio machine |
|
BJJ Blue Belt
Decent boxing
Intelligent |
|
| |
|
Ladies and gentlemen. This fight is 3 rounds, in the welterweight division.
Introducing the fighter to my left, fighting out of the red corner.
With a record of
5 - 3 - 0, fighting out of The Island, Manuel Lora!
And introducing the fighter to my right, fighting out of the blue corner.
With a record of
1 - 2 - 0, fighting out of The Island, Ryan Rylie!
The judges for this bout are Bart Greer, Sandra Marshall and Santiago Holmes.
The bell rings for round one and we are underway!
Rylie moves into range and clinches up with Lora.

Rylie manages to pull guard. Let's see whether he can land a sub off his back.
Rylie keeping full guard, as Lora tries to pass.
Rylie is trying to control the position from the bottom.
Lora tries to free his leg and advance position but Rylie is retaining full guard.
Rylie not looking particularly offensive just at the moment.
Lora passes Rylie's right leg, so he's now in half guard.
Lora wants to work for an arm triangle but Rylie is really keeping half guard well and defending the submission attempt.
Rylie is looking to regain full guard. Not this time though.
We've had a slow start to the round here - hopefully the action picks up.
Rylie keeps trying to improve his position.
Rylie is trying to control but can't.
Rylie won't allow Lora to pass to mount.
That's one minute gone in the round.
Lora trying to control from half guard but Rylie is working away.
Lora definitely looks more muscular than last time we saw him fight.
Rylie is trying to stand up here but Lora is controlling him well.
Lora is pressing down on Rylie's thigh, looking to free his foot. Rylie is holding on for now.
Rylie is staying active underneath Lora, who seems content to just control the action from this position.
Lora trying to mount his opponent but Rylie defends it.
Lora trying to control from half guard but Rylie is working away.
Rylie is looking for a sweep. Lora is wise to his cunning plan and keeps the top position.
Lora seems to be looking for submissions.
Lora uses his free foot to push down on Rylie's thigh. Eventually he works his other foot free and he's advanced to mount - this is trouble for Rylie.
Lora wants to finish this one by submission but Rylie is holding onto his waist, trying to prevent any attacks from Lora.
That's two minutes gone in the round.
Lora blocks Rylie's feeble attempts to strike from the bottom.
Rylie wants to control but Lora is having none of it.
The fighters are starting to get a bit slippery now, which will make submissions a bit more difficult.
Lora jumps to side control looking for an arm triangle but Rylie manages to avoid the submission attempt.
The fighters are trapped in the ropes so we're going to have a reposition here. The ref calls for a break and repositions the fighters in the center of the ring.
Lora trying to control the position but Rylie is working away.
Lora tries for a kimura but Rylie is defending well.
Rylie tries to improve position but can't.
Lora wants to work for a kimura but he's foiled early by Rylie, who protects the arm well.
Rylie is a painfully thin specimen of a man. You do wonder whether a good body kick would snap him clean in two.
That's three minutes gone in the round.
Lora trying to control the position but Rylie is working away.
Lora controls the position from side control.
Lora tries for a kimura. Not really close to a finish though.
Rylie is trying to improve his position.
Lora is looking for a kimura. He might have it! No, Rylie has escaped the position, nice work there.
Lora tries for a kimura but Rylie is defending well.
That's four minutes gone in the round.
Lora trying to control the position but Rylie is working away.
Rylie is trying to escape the position but Lora is controlling the position.
Lora thinks about going for a far side armbar but bails out and retains the dominant position instead.
Rylie trying to remain calm as Lora controls from the top position.
Boooooooooooooooooooo!!! God, this has been a terrible round. Come on you two, sort yourselves out!
Rylie tries to buck Lora off but Lora is having none of it.
Lora advances to full mount.
Lora has hold of Rylie's left arm, perhaps looking for a submission. The two fighters tussle over control of the isolated limb and Rylie manages to get his arm back to his side and away from danger.
And thats the end of the round the fighters go back to their corners.
Manuel Lora dominated that round.
That's the end of the round. The referee orders the cornermen out of the ring so we can get back down to business.
Rylie scores a trip takedown into side control. Nice.
Lora is trying to improve his position.
Rylie thinks about going for a far side armbar but bails out and retains the dominant position instead.
Lora wants to control but Rylie postures up.
Lora is moving his hips around well on the bottom and has managed to get back to half guard.
Rylie is looking to advance position but Lora won't allow it.
We've had a slow start to the round here - hopefully the action picks up.
Lora is working on a guillotine. He's managed to get to full guard and he's really squeezing tight! Rylie is tapping! Great win for Lora!
Ladies and gentlemen, after 0:47 of round 2, we have a winner by way of Submission (Guillotine). Manuel Lora!
|
|
|
|
|
|
|
|
|
|
|
|
|
|
|
|
|
|
|
|
|
|
|
| S |
C
A |
G |
S |
C
B |
G |
|
S |
C |
G |
|
energy
A | B |
|
hype
A | B |
|
pop
A | B |
|
mgr
A | B |
|
FIGHT
RATING
31% |
|
|
|
|
|
|
|
Undercard bout
|
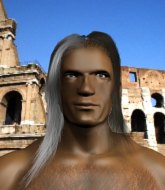
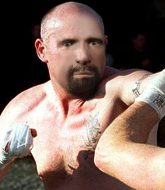
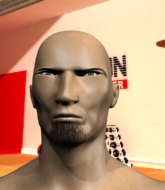
Coming up we have a super heavyweight MMA rules bout between Lawrence Tureaud (ranked 9087 p4p, 153 weight class) and Seth Poole (ranked 5814 p4p, 210 weight class). Seth Poole has the power to score a knockout today if he connects clean with Lawrence Tureaud's chin.
 |
|
 |
| 178 cm
19
255 lbs
5 - 3 - 0 |
|
195 cm
25
265 lbs
1 - 0 - 0 |
BJJ White Belt
Solid Muay Thai
Cardio machine |
|
BJJ Blue Belt
Decent boxing
Likes musicals |
|
| |
|
Ladies and gentlemen. This fight is 3 rounds, in the super heavyweight division.
Introducing the fighter to my left, fighting out of the red corner.
With a record of
5 - 3 - 0, fighting out of The Island, Lawrence Tureaud!
And introducing the fighter to my right, fighting out of the blue corner.
With a record of
1 - 0 - 0, fighting out of The Island, Seth Poole!
The judges for this bout are Dirk Anderson, Bart Greer and Sandra Marshall.
The bell rings for round one and we are underway!
Poole shoots for a takedown but Tureaud saw that one coming a mile off and avoided it easily.
Tureaud tries to counter by clinching up but Poole breaks away and moves out of range.
Poole looks for a takedown but Tureaud sprawls well.
Tureaud closes the distance and pushes Poole back into the ropes.
Poole should think about turning a few of those tyres round his middle into muscle if he wants people to take him seriously as an athlete.
Tureaud creates a bit of space for himself and sneaks an elbow through Poole's defenses.

It looks like Seth Poole has been cut.
Poole takes an elbow to the temple.
Tureaud using the Thai plumb to throw knees but Poole has his back arched nicely, preventing the strike.
Poole misses with a punch to the body.
Knees to the body from Tureaud.
Poole looks winded!
We've had a slow start to the round here - hopefully the action picks up.
A head punch on the inside from Tureaud fails to land.
Tureaud crunches a lovely knee into Poole's ribcage.
Tureaud comes over the top with an elbow. That landed flush.
Tureaud crunches a lovely knee into Poole's ribcage.
This has been an exciting period of action!
Tureaud lands an elbow that stopped Poole in his tracks for a moment.
That has opened up Seth Poole's cut even more.
Tureaud utilising his Muay Thai to score with a knee to the body.
That's one minute gone in the round.
A nice glancing elbow lands by Tureaud.
The cut above Seth Poole's eye is starting to cause him problems now.
Tureaud landing knees to the head.
Seth Poole's cut is absolute horrible now. This looks like something out of a horror film with blood covering both fighters.
Tureaud using the Thai clinch to land knees to the body.
Tureaud throws a vicious knee straight up the middle but Poole blocks it with crossed arms.
Tureaud lands an elbow that stopped Poole in his tracks for a moment.
The referee calls the doctor in to look at Seth Poole's cut. Oh no, the doctor has called an end to the bout!
Ladies and gentlemen, after 1:30 of round 1, we have a winner by way of TKO (Cut). Lawrence Tureaud!
In his post fight interview, Lawrence Tureaud started talking himself up. Luckily his charisma kept the crowd on side and gave him a good reception.
|
|
|
|
|
|
|
|
|
|
|
|
|
|
|
|
|
|
|
|
|
|
|
| S |
C
A |
G |
S |
C
B |
G |
|
S |
C |
G |
|
energy
A | B |
|
hype
A | B |
|
pop
A | B |
|
mgr
A | B |
|
FIGHT
RATING
42% |
|
|
|
|
|
|
|
Undercard bout
|
Coming up we have a super heavyweight MMA rules bout between Manny Warren (ranked 1670 p4p, 53 weight class) and Dej Shaw (ranked 8509 p4p, 272 weight class). Manny Warren has a significant reach advantage - let's see if he can make it count.
 |
|
 |
| 181 cm
26
280 lbs
6 - 2 - 0 |
|
170 cm
25
270 lbs
1 - 3 - 0 |
BJJ White Belt
Excellent boxer
KO power |
|
Decent wrestler
Basic striking
Determined |
|
| |
|
Ladies and gentlemen. This fight is 3 rounds, in the super heavyweight division.
Introducing the fighter to my left, fighting out of the red corner.
With a record of
6 - 2 - 0, fighting out of The Island, Manny Warren!
And introducing the fighter to my right, fighting out of the blue corner.
With a record of
1 - 3 - 0, fighting out of The Island, Dej Shaw!
The judges for this bout are Winston Alpacca, Daniel Franklin and Peter Branson.
The bell rings for round one and we are underway!

Warren drops Shaw with a beautiful combination! Shaw stares up at his opponent, who ushers him back to his feet - Warren is looking for the KO!
It looks like Dej Shaw has been cut.
Shaw looks really tired already! That doesn't bode well for a good, competitive fight!
Shaw wants to clinch but Warren slips to the side
and Warren counters with a massive hook, right on the button! He's out cold! Damn, that was naaaaaasty! Hopefully he'll be OK.
Ladies and gentlemen, after 0:05 of round 1, we have a winner by way of KO (Punch). Manny Warren!
|
|
|
|
|
|
|
|
|
|
|
|
|
|
|
|
|
|
|
|
|
|
|
| S |
C
A |
G |
S |
C
B |
G |
|
S |
C |
G |
|
energy
A | B |
|
hype
A | B |
|
pop
A | B |
|
mgr
A | B |
|
FIGHT
RATING
100% |
|
|
|
|
|
|
|
Undercard bout
|
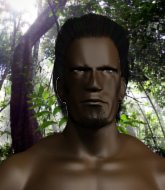
Coming up we have a bantamweight MMA rules bout between Jose Pacheco (ranked 4856 p4p, 234 weight class) and Monyakul Sathianthai (ranked 4644 p4p, 221 weight class). Both fighters look fresh as a daisy as they make their way towards the ring.
 |
|
 |
| 178 cm
26
140 lbs
3 - 4 - 0 |
|
170 cm
25
135 lbs
3 - 0 - 0 |
BJJ Brown Belt
Brawler
Experienced |
|
BJJ White Belt
Excellent boxer
Heavy handed |
|
| |
|
Ladies and gentlemen. This fight is 3 rounds, in the bantamweight division.
Introducing the fighter to my left, fighting out of the red corner.
With a record of
3 - 4 - 0, fighting out of The Island, Jose Pacheco!
And introducing the fighter to my right, fighting out of the blue corner.
With a record of
3 - 0 - 0, fighting out of The Island, Monyakul Sathianthai!
The judges for this bout are David Hoff, Daniel Franklin and Peter Branson.
The bell rings for round one and we are underway!
Pacheco shoots in for a takedown but Sathianthai shows good takedown defense there and keeps this one on the feet.
Pacheco shoots in with a takedown attempt and he has Sathianthai pinned against the ropes. Sathianthai gets the underhooks and manages to circle away.
Pacheco slips a jab from Sathianthai.
A telegraphed takedown attempt from Pacheco is defended easily by Sathianthai.
That's three failed takedown attempts in the round for Jose Pacheco. That's going to take a lot out of him.
Pacheco tries for a takedown but Sathianthai circles away easily
and Pacheco takes a counter punch right on the button for his troubles.
We've had a slow start to the round here - hopefully the action picks up.
Pacheco shoots in for a takedown but Sathianthai shows good takedown defense there and keeps this one on the feet.
Pacheco really does look like a pencil wearing a pair of gloves. Let's hope he has a gameplan to suit that ridiculous body shape.
Pacheco shoots in for a double leg but Sathianthai sprawls well. That's going to sap some energy.
Sathianthai cracks a nice hook into Pacheco's ribs.
Sathianthai connects with a good right hand that stumbles Pacheco. Pacheco circles away out of range and recomposes himself.
Decent striking displayed by Sathianthai there.

Pacheco is rocked!

It looks like Jose Pacheco has been cut.
That's one minute gone in the round.
Sathianthai connects with a right that clearly hurt Pacheco. He's backed up against the ropes with nowhere to go as Sathianthai proceeds to tee off with vicious combinations till Pacheco collapses and taps out under the pressure!
Ladies and gentlemen, after 1:09 of round 1, we have a winner by way of TKO (Strikes). Monyakul Sathianthai!
Monyakul Sathianthai was full of energy after the big win and talked about how he thinks he can do big things in this sport. The crowd were appreciative of his determination to succeed.
|
|
|
|
|
|
|
|
|
|
|
|
|
|
|
|
|
|
|
|
|
|
|
| S |
C
A |
G |
S |
C
B |
G |
|
S |
C |
G |
|
energy
A | B |
|
hype
A | B |
|
pop
A | B |
|
mgr
A | B |
|
FIGHT
RATING
54% |
|
|
|
|
|
|
|
Co-main event
|
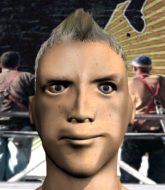
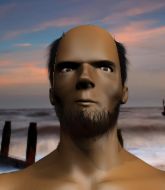
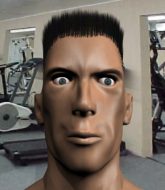
Coming up we have a middleweight MMA rules bout between John Fury (ranked 8317 p4p, 706 weight class) and Buffalo Marley (ranked 2344 p4p, 302 weight class). Buffalo Marley has the better chin. Will he look to stand and bang today?
 |
|
 |
| 182 cm
19
190 lbs
6 - 1 - 0 |
|
180 cm
19
195 lbs
3 - 2 - 0 |
BJJ White Belt
Excellent boxer
Very quick |
|
Good wrestler
Basic striking
Powerful |
|
| |
|
Ladies and gentlemen. This fight is 5 rounds, for the middleweight championship of the world!
Introducing the champion to my left, fighting out of the red corner.
With a record of
6 - 1 - 0, fighting out of The Island, John Fury!
And introducing the challenger to my right, fighting out of the blue corner.
With a record of
3 - 2 - 0, fighting out of The Island, Buffalo Marley!
The judges for this bout are Bart Greer, Santiago Holmes and Peter Branson.
The bell rings for round one and we are underway!
Fury sizes up Marley with a pawing jab and scores with a straight right down the middle.
Fury tries to clinch up.
Marley is loading up here, looking for a big counter of his own.
Fury tries to keep at a distance but Marley has taken the fight into the clinch.
Marley misses with the head strike.
Marley swings away with an uppercut that misses.
Marley swings away with an uppercut that misses.
Marley misses with a shot to the kidneys.
Fury misses with a hook to the ribs.
Marley goes for a body shot but it's blocked.
Marley scores with an uppercut up the middle.
Fury prevents a body shot from Marley.
A short uppercut from Fury.
Fury taking a breather.
We've had a slow start to the round here - hopefully the action picks up.
A shot in the inside from Fury.
Marley tries to land a shot to the body but it's blocked.
Marley lands with a good tight uppercut to the head.
Fury blocks a body shot from Marley.
Marley tries a shoulder strike but it doesn't do any damage.
Fury lands with a short shot to the head.
That's one minute gone in the round.
Marley lands punches inside but they're not really causing much damage.
Marley misses with a punch to the body.
Marley tried to land a shot to the body but connects with Fury's elbow.
Fury swings wildly with an uppercut but Marley uses good head movement to avoid it.
Fury prevents a body shot from Marley.
Marley scores with an uppercut up the middle.
Marley works for underhooks and lands a body shot in the process.
Fury blocks an uppercut.
Marley lands a right hand that snaps the head of Fury backwards.
Marley tries to throw a body punch but Fury avoids it by throwing Marley back against the ropes.
Marley misses with a punch on the inside.
Marley misses with a shot to the kidneys.
Marley misses with a body punch.
A head punch on the inside from Marley fails to land.
Fury has a couple of punches blocked by Marley.
Marley misses with a punch on the inside.
Marley lands a shoulder strike.
That's two minutes gone in the round.
A shot in the inside from Fury.
An uppercut to the body lands inside from Marley.
Fury lands a nice uppercut.
This is a great period of action - very entertaining stuff!
Fury avoids a wild elbow strike from Marley.
Good body shot from Marley.
A short left from Marley.
Marley lands an uppercut.
Fury misses with a body punch.
Fury blocks a couple of punches on the inside.
A nice right hand lands inside from Fury.
A right hand to the body from Marley.
Marley has a couple of punches blocked by Fury.
Fury blocks a couple of punches on the inside.
Marley tries to throw a body punch but Fury avoids it by throwing Marley back against the ropes.
Marley lands with a right to the head.
A short uppercut from Fury.
A head punch blocked on the inside by Fury.
Fury misses with some punches.
That's three minutes gone in the round.
Fury lands a body shot.
Marley can't find room to land a body shot as Fury controls the action.
Marley pushes Fury back against the ropes and unloads with a body punch.
Marley prevents a body shot from Fury.
Marley scores with a shot to the side of Fury's head.
Marley misses with a short punch on the inside.
Marley tries to land a shot to the body but it's blocked.
A short left from Fury.
We've been informed that Marley has been working hard on his conditioning in the buildup to the fight.
Marley lands a hook to the side of the head.
A head punch on the inside from Marley fails to land.
Marley goes for a body shot but it's blocked.
Marley misses with a hook from the clinch.
Marley struggles to land a body shot inside as Fury controls his hands.
Fury pushes Marley back against the ropes and lands a hook to the side of the head.
Marley tried to land a shot to the body but connects with Fury's elbow.
Marley digs a right hand underneath Fury's ribcage. Fury let out a lung full of air as it connected.
Marley swings wildly with an uppercut but Fury uses good head movement to avoid it.
That's four minutes gone in the round.
A short uppercut from Fury.
A head punch on the inside from Marley fails to land.
Marley tries a shoulder strike but it doesn't do any damage.
Wooooo! Give it up for these two warriors! They are putting on a show!
Fury blocks an uppercut.
A short left from Fury.
Fury tries to work over Marley's body with a swooping hook but it only glances the target.
Marley makes some space for himself and lands an uppercut.
Fury blocking some punches.
Marley working aggressively here.
Marley misses with a short punch on the inside.
Marley has a couple of punches blocked by Fury.
Marley blocks a body shot from Fury.
Fury digs a right hand underneath Marley's ribcage. Marley let out a lung full of air as it connected.
Fury goes for a body shot but it's blocked.
Marley tries a body shot but Fury blocks it.
A head punch on the inside from Fury fails to land.
And thats the end of the round the fighters go back to their corners.
Buffalo Marley dominated that round.
OK. That's time! The bell goes and we're back to the action.
Marley closes the distance and presses his opponent up against the ropes.
A head punch blocked on the inside by Fury.
Marley has been the more effective fighter overall so far.
Marley blocks a couple of punches on the inside.
Fury looks to be in better condition than last time we saw him fight. Obviously he's been working hard on his cardio.
Marley lands with a short head shot on the inside.
Marley misses with a punch on the inside.
A short right from Fury on the inside.
Fury tries to work over Marley's body with a swooping hook but it only glances the target.
Fury goes for a body shot but it's blocked.
Marley struggles to land a body shot inside as Fury controls his hands.
Fury lands a nice looking hook to the body, against the ropes.
We are yet to see a takedown attempt from Marley in the fight. On paper you would think he is the more dominant ground fighter so let's see if these unusual tactics pay off.
Marley misses with some punches.
Marley fails to land with a short punch on the inside.
We've had a slow start to the round here - hopefully the action picks up.
Marley misses with a shot to the kidneys.
Marley cracks Fury with a nice body shot.
Fury blocks a punch to the side of the head.
Fury pushes Marley back against the ropes and unloads with a body punch.
Fury blocking some punches.
A head punch on the inside from Marley fails to land.
That's one minute gone in the round.
A short right hand to the side of the head by Fury.
Marley fails to land with a short punch on the inside.
Marley lands a short shot on the inside that snaps the head of Fury backwards.
Fury tries a shoulder strike but it doesn't do any damage.
Marley tries a body shot but Fury blocks it.
Marley throws a blind hook that connects with the side of Furys head.
Marley lands with a left to the head.
Marley lands a nice uppercut.
Fury blocks an uppercut.
Marley throws a punch but it's blocked by Fury.
Marley lands a shoulder strike that jolts his opponent's head backwards.
Marley misses with some punches.
Fury takes a shot to the head.
Marley throws a punch but it's blocked by Fury.
Marley lands a body punch.
We've seen a great period of action over the last minute or so - credit to both fighters for going all out!
Fury misses with a shot to the kidneys.
Marley misses with a hook from the clinch.
That's two minutes gone in the round.
Marley blocks a punch to the side of the head.
Marley tries to land a shot to the body but it's blocked.
Marley misses with a knee strike.
Fury throws a head punch that misses.
Fury misses with a shot to the kidneys.
A hook to the body from Fury.
Marley misses with a punch on the inside.
Marley can't find room to land a body shot as Fury controls the action.
Fury tried to land a shot to the body but connects with Marley's elbow.
Fury blocks a punch to the side of the head.
Fury lands a right hand.
Marley has a couple of punches blocked by Fury.
Marley throws a vicious knee straight up the middle but Fury blocks it with crossed arms.
Fury lands with a short head shot on the inside.
Marley blocks a body shot from Fury.
Marley blocking some punches.
Marley fails to land with a short punch on the inside.
That's three minutes gone in the round.
Marley misses with some punches.
A head punch blocked on the inside by Fury.
Marley doesn't land with the attempted body shot.
Fury stalling here - the referee won't stand for too much of that.
Marley lands a shoulder strike.
Fury tried to land a shot to the body but connects with Marley's elbow.
Marley has a couple of punches blocked by Fury.
Fury digs a right hand underneath Marley's ribcage. Marley let out a lung full of air as it connected.
Marley lands a body punch - he's looking to wear down Fury.
Marley blocks a couple of punches on the inside.
Fury misses with a short punch on the inside.
Marley working aggressively here.
Marley scores with a nice hook to the head.
Fury lands with a right to the head.
Fury misses with a shot to the kidneys.
Marley blocks a couple of punches on the inside.
That's four minutes gone in the round.
Marley has a couple of punches blocked by Fury.
Fury lands a nice uppercut.
Fury misses with a hook from the clinch.
Fury lands a right hand that snaps the head of Marley backwards.
The crowd are loving this. Great action here.
Fury throws a head punch that misses.
Fury gets through Marley's defenses to land a nice punch to the side of the head.
Marley struggles to land a body shot inside as Fury controls his hands.
Marley can't find room to land a body shot as Fury controls the action.
A head punch on the inside from Marley fails to land.
Fury lands a right hand that snaps the head of Marley backwards.
Fury lands a short shot on the inside that snaps the head of Marley backwards.
An uppercut on the inside fails to land for Fury.
Marley lands with a short shot to the head.
A quick uppercut on the inside from Fury.
Marley pushes off and fires off an elbow that misses, before clinching up again, against the ropes.
Fury presses Marley against the ropes and delivers a mid-strength body shot.
And thats the end of the round the fighters go back to their corners.
A close second round but Buffalo Marley will probably get the nod - 10:9.
The fighters get back to their feet, the hooter sounds and we're back to the action!
Marley throws a jab but it's blocked by Fury.
Fury connects with a jab.
Fury with a body punch. A glancing blow.
Marley gets a clinch.
A head punch blocked on the inside by Marley.
Fury blocking some punches.
Marley misses with some punches.
A head punch blocked on the inside by Fury.
Fury blocks a couple of punches on the inside.
Buffalo Marley seems to be working more effectively in the clinch in the fight so far.
With the fighters clinched against the ropes, Marley creates a bit of distance for himself and scores with a nice uppercut.
Marley tries to throw a body punch but Fury avoids it by throwing Marley back against the ropes.
Fury lands a shot to the body.
We've had a slow start to the round here - hopefully the action picks up.
Marley goes for a body shot but it's blocked.
A head punch on the inside from Fury fails to land.
Marley misses with a punch on the inside.
A head punch on the inside from Fury fails to land.
Fury misses with a shot to the kidneys.
That's one minute gone in the round.
Marley has a couple of punches blocked by Fury.
A nice right hand lands inside from Fury.
Marley misses with a body punch.
Fury misses with a shot to the kidneys.
Fury misses with a body punch.
Marley tries to throw a body punch but Fury avoids it by throwing Marley back against the ropes.
A head punch blocked on the inside by Marley.
Fury misses with a punch on the inside.
Fury lands an uppercut.
Fury wants to break free but Marley has control.
Fury tries to land a shot to the body but it's blocked.
Fury tries a body shot but Marley blocks it.
Fury tries a body shot but Marley blocks it.
Marley misses with a hook from the clinch.
An uppercut on the inside fails to land for Marley.
Fury lands a body punch - he's looking to wear down Marley.
Fury misses with a punch on the inside.
That's two minutes gone in the round.
Fury lands a hook that snaps the head of Marley backwards.
A head punch blocked on the inside by Fury.
Fury lands a hook that snaps the head of Marley backwards.
Marley throws a punch but it's blocked by Fury.
Fury tries to throw a body punch but Marley avoids it by throwing Fury back against the ropes.
Marley makes some space for himself and lands an uppercut.
Marley tries a shoulder strike but it doesn't do any damage.
This is a great period of action - very entertaining stuff!
Fury misses with a shot to the kidneys.
Marley misses with the head strike.
Marley lands a left hand.
Marley tried to land a shot to the body but connects with Fury's elbow.
Marley tried to land a shot to the body but connects with Fury's elbow.
Marley misses with a knee strike.
Fury misses with a shot to the kidneys.
A head punch on the inside from Fury fails to land.
Fury misses with a punch to the body.
Marley lands with a left to the head.
That's three minutes gone in the round.
A shot in the inside from Marley.
With the fighters clinched against the ropes, Fury creates a bit of distance for himself and scores with a nice uppercut.
Marley misses with a hook to the ribs.
A quick uppercut on the inside from Marley.
Marley tries a knee to the head but Fury blocks it.
Fury tries to throw a body punch but Marley avoids it by throwing Fury back against the ropes.
Fury blocks a punch to the side of the head.
Marley misses with a punch on the inside.
Marley swings wildly with an uppercut but Fury uses good head movement to avoid it.
Fury tried to land a shot to the body but connects with Marley's elbow.
Fury misses with a body punch.
Marley tries a body shot but Fury blocks it.
Marley stays in close to his opponent and throws a right hand to the body.
Fury struggles to land a body shot inside as Marley controls his hands.
Marley misses with a punch to the body.
That's four minutes gone in the round.
Marley goes for a body shot but it's blocked.
Marley tries to land a shot to the body but it's blocked.
Fury tries to land a shot to the body but it's blocked.
Marley lands a short shot on the inside that snaps the head of Fury backwards.
A shot in the inside from Marley.
Fury takes a shot to the head.
Fury is rocked!
Fantastic stuff here - a very entertaining period of action, which has drawn cheers from the crowd.
Marley lands a right uppercut that snaps the head of Fury backwards.
Oh Fury is still all over the place! His legs are completely gone! Will he be able to recover?!!
Marley working aggressively here.
Marley throws a hook to the body. More of an arm punch but it's all scoring with the judges.
Fury blocks a punch to the side of the head.
A head punch blocked on the inside by Fury.
Marley tries to land a shot to the body but it's blocked.
Marley blocks a couple of punches on the inside.
Fury blocks a couple of punches on the inside.
Fury seems to have got his legs back now.
With the two fighters working up against the ropes, Marley just misses with a elbow thrown towards Fury's brow.
A short left from Marley.
Fury can't find room to land a body shot as Marley controls the action.
Marley tries to land a shot to the body but it's blocked.
And thats the end of the round the fighters go back to their corners.
Buffalo Marley really dominated that round.
That's the end of the round. The referee orders the cornermen out of the ring so we can get back down to business.

Fury uses good footwork to avoid the strikes from Marley.
Marley jabs. That one connects to the head of his opponent.
Fury lands with a hook. Marley tried to avoid it but it clipped the top of his head.
Fury just misses with a punch to the body.
Marley closes the distance and pushes Fury back into the ropes.
Fury scores with an uppercut up the middle.
Fury goes for a body shot but it's blocked.
Fury misses with some punches.
Fury blocks an uppercut.
Marley's head jolts backwards as he takes an uppercut right on the button!
Marley throws a hook to the body. More of an arm punch but it's all scoring with the judges.
We've had a slow start to the round here - hopefully the action picks up.
Marley scores with a shoulder strike.
Marley misses with a hook from the clinch.
Marley working aggressively here.
Marley misses with a hook from the clinch.
Fury blocking some punches.
That's one minute gone in the round.
Marley tried to land a shot to the body but connects with Fury's elbow.
Marley swings wildly with an uppercut but Fury uses good head movement to avoid it.
Marley throws a punch but it's blocked by Fury.
Marley tries to work over Fury's body with a swooping hook but it only glances the target.
Marley swings away with an uppercut that misses.
Fury swings wildly with an uppercut but Marley uses good head movement to avoid it.
Marley goes for a body shot but it's blocked.
Marley tries to throw a body punch but Fury avoids it by throwing Marley back against the ropes.
Marley goes for a body shot but it's blocked.
Marley works for underhooks and lands a body shot in the process.
Marley misses the knee to the body. Nice hip positioning from Fury.
Marley tries a shoulder strike but it doesn't do any damage.
Fury blocks a couple of punches on the inside.
Marley misses with the head strike.
Fury tries to throw a body punch but Marley avoids it by throwing Fury back against the ropes.
That's two minutes gone in the round.
Marley is leaning against Fury and scores with a nice uppercut to the body.
Both guys are working to get underhooks.
Fury swings wildly with an uppercut but Marley uses good head movement to avoid it.
Marley tries a shoulder strike but it doesn't do any damage.
Marley lands a body punch.
Marley lands a left hand that snaps the head of Fury backwards.
Marley lands a left hand that snaps the head of Fury backwards.
Fury lands with a short shot to the head.
Marley scores with a shot to the side of Fury's head.
The fans in attendance giving it up for the two fighters, who have really let it all hang out in the last minute or so!
A head punch on the inside from Fury fails to land.
A right handed body shot lands from Marley.
A head punch blocked on the inside by Fury.
Marley swings away with an uppercut that misses.
Marley blocks an uppercut.
That's three minutes gone in the round.
Marley misses with a knee to the head.
Fury makes some space for himself and lands an uppercut.
Fury misses with a hook to the ribs.
Fury blocking some punches.
A quick uppercut on the inside from Fury.
Marley swings wildly with an uppercut but Fury uses good head movement to avoid it.
A shot in the inside from Marley.
Marley working on landing some head shots here - that one got through nicely.
Marley lands a right hand that snaps the head of Fury backwards.
Marley misses with a hook from the clinch.
Marley prevents a body shot from Fury.
Marley misses with the head strike.
Marley working aggressively here.
Marley swings wildly with an uppercut but Fury uses good head movement to avoid it.
Marley looks to throw an elbow but misses.
That's four minutes gone in the round.
Marley swings away with an uppercut that misses.
Marley tries to land a knee to the head but Fury blocks with his arms.
A short uppercut from Marley.
We've seen a great period of action over the last minute or so - credit to both fighters for going all out!
Fury misses with some punches.
Marley fails to land with a short punch on the inside.
Fury struggles to land a body shot inside as Marley controls his hands.
Marley lands with a light punch inside.
Marley tries to throw a body punch but Fury avoids it by throwing Marley back against the ropes.
Marley swings away with an uppercut that misses.
Fury misses with a shot to the kidneys.
Marley tried to land a shot to the body but connects with Fury's elbow.
Marley has a couple of punches blocked by Fury.
Fury lands with a good tight uppercut to the head.
Still in the clinch, Fury scores with a nice short uppercut.
Fury lands with a good tight uppercut to the head.
And thats the end of the round the fighters go back to their corners.
Buffalo Marley dominated that fourth round.
That's the end of the interval. I'm sure that seemed a lot quicker than a minute for our two fighters! Back to the action. And we move into the final round!

Fury tries to clinch there but Marley circles away.
Marley gets in close and instigates a clinch.
Marley tries to throw a body punch but Fury avoids it by throwing Marley back against the ropes.
Marley lands a right hand.
Fury misses with a hook to the ribs.
Marley throws a head punch that misses.
Marley looks to throw an elbow but misses.
Fury digs a right hand underneath Marley's ribcage. Marley let out a lung full of air as it connected.
Marley tries to throw a body punch but Fury avoids it by throwing Marley back against the ropes.
Fury blocks a punch to the side of the head.
Fury tried to land a shot to the body but connects with Marley's elbow.
We've had a slow start to the round here - hopefully the action picks up.
Marley blocks a body shot from Fury.
Marley blocks a punch to the side of the head.
Marley has a couple of punches blocked by Fury.
Fury stays in close to his opponent and throws a right hand to the body.
Fury blocks an uppercut.
Marley misses with a knee strike.
That's one minute gone in the round.
Marley blocks a body shot from Fury.
Good body shot from Fury.
A shot in the inside from Fury.
Marley is wobbling all over the place through exhaustion. Will he make it to the final bell?
Marley swings away with an uppercut that misses.
Fury lands a hook to the body. It's hard to tell if that hurt Marley or not.
Fury working some nice short punches in the clinch.
Marley pushes off an throws an elbow but Fury leans to the side and avoids it. We're back to clinching against the ropes.
A head punch on the inside from Marley fails to land.
Fury working some nice short punches in the clinch.
Marley blocks a body shot from Fury.
Fury is trying to break the clinch but Marley is controlling him.
A body shot lands from Fury.
Marley doesn't land with the attempted body shot.
Fury blocks a knee to the body. He'll have a nicely bruised forearm in the morning.
Marley lands with a short shot to the head.
Marley fails to land with a short punch on the inside.
John Fury has stepped it up - he knows he needs a finish here!
That's two minutes gone in the round.
Marley tries a shoulder strike but it doesn't do any damage.
Fury struggles to land a body shot inside as Marley controls his hands.
Fury fails to land with a short punch on the inside.
Fury doesn't land with the attempted body shot.
Marley working aggressively here.
Fury fails to land with a short punch on the inside.
Marley lands with a light punch inside.
The fans in attendance giving it up for the two fighters, who have really let it all hang out in the last minute or so!
Fury lands an uppercut.
Marley blocks a punch to the side of the head.
Marley misses with some punches.
Marley lands a short shot on the inside that snaps the head of Fury backwards.
Marley doesn't land with the attempted body shot.
Fury blocks an uppercut.
Marley doesn't land with the attempted body shot.
Fury misses with a body punch.
Fury scores with an uppercut up the middle.
That's three minutes gone in the round.
Fury lands a shoulder strike.
A head punch on the inside from Marley fails to land.
Marley swings away with an uppercut that misses.
Fury tries a body shot but Marley blocks it.
Fury misses with the head strike.
Buffalo Marley is fighting for a decision - hopefully he's judged it right and he's actually winning the fight.
Marley misses with a punch on the inside.
Fury misses with a body punch.
Fury pushes Marley back against the ropes and lands a hook to the side of the head.
Fury has a couple of punches blocked by Marley.
Fury swings away with an uppercut that misses.
Still in the clinch, Fury scores with a nice short uppercut.
Fury tries to work over Marley's body with a swooping hook but it only glances the target.
An uppercut on the inside fails to land for Marley.
Marley lands with a short shot to the head.
That's four minutes gone in the round.
Marley tries a body shot but Fury blocks it.
Fury swings away with an uppercut that misses.
A head punch blocked on the inside by Marley.
Fury scores with a shot to the side of Marley's head.
Fury misses with a short punch on the inside.
Fury tried to land a shot to the body but connects with Marley's elbow.
Fury working aggressively here.
A short right from Fury.
The crowd are loving this. Great action here.
Marley doesn't land with the attempted body shot.
Fury misses with a punch to the body.
Fury misses with a shot to the kidneys.
Marley tries to land a shot to the body but it's blocked.
Fury blocks an uppercut.
And that's the end of the fight!
That was a close round. You could make an argument for either fighter but I would give it to John Fury.
I think Marley has won this one but let's see whether the judges agree with me. Over to the ring announcer for the scorecards.
Ladies and gentlemen, after 5 rounds of action, we go to the scorecards for a decision.
Judge Bart Greer scores the fight 46:49
Judge Santiago Holmes scores the fight 46:49
Judge Peter Branson scores the fight 46:49
In favor of your winner, by unanimous decision... Buffalo Marley!
Buffalo Marley is the new middleweight champion!
|
|
|
|
|
|
|
|
|
|
|
|
|
|
|
|
|
|
|
|
|
|
|
| S |
C
A |
G |
S |
C
B |
G |
|
S |
C |
G |
|
energy
A | B |
|
hype
A | B |
|
pop
A | B |
|
mgr
A | B |
|
FIGHT
RATING
64% |
|
|
|
|
|
|
|
Main event
|
Coming up we have a lightweight MMA rules bout between Milton Hilton (ranked 3705 p4p, 345 weight class) and Mike Van Rijn (ranked 3784 p4p, 352 weight class). Both fighters look fresh as a daisy as they make their way towards the ring.
 |
|
 |
| 176 cm
25
147 lbs
2 - 1 - 0 |
|
180 cm
19
163 lbs
4 - 1 - 0 |
BJJ Blue Belt
Basic striking
Good chin |
|
BJJ White Belt
Excellent MT
Granite chin |
|
| |
|
Ladies and gentlemen. This fight is 5 rounds, for the lightweight championship of the world!
Introducing the champion to my left, fighting out of the red corner.
With a record of
2 - 1 - 0, fighting out of The Island, Milton Hilton!
And introducing the challenger to my right, fighting out of the blue corner.
With a record of
4 - 1 - 0, fighting out of The Island, Mike Van Rijn!
The judges for this bout are Daniel Franklin, Sandra Marshall and Santiago Holmes.
The bell rings for round one and we are underway!
Van Rijn looks to score with a combo but nothing lands.
Van Rijn pulls out of a head kick attempt.
Van Rijn blocks a jab.
Hilton connects with a body shot.
Van Rijn gets caught flat footed, as Hilton shoots in with a quick takedown into guard.
We could do with one of the fighters taking the initiative a bit more on the ground - they're both waiting to capitalize on a mistake.
Hilton sitting in guard here, content to control.
Hilton pushes down on Van Rijn's leg and manages to get into half guard.
Van Rijn really doesn't want to stay on the ground with Hilton. If he can't get it back to his feet, it's only a matter of time before he'll be tapping out.
Hilton is controlling the pace.
Van Rijn trying to control but Hilton postures up.
We've had a slow start to the round here - hopefully the action picks up.
Hilton looks towards his corner to check for any instructions. The corner give him nothing to work with, so he cracks Van Rijn with a short hammerfist. I guess that's as good as any advice he could get in this position.
The fighters are trapped in the ropes so we're going to have a reposition here. The ref calls for a break and repositions the fighters in the center of the ring.
Hilton lands a big shot. The thud that echoes around the arena is like music to the fans' ears.
Hilton working the head and body with strikes.
Hilton is thwarting Van Rijn's attempts to control the position.
That's one minute gone in the round.
Hilton is scoring with some nice ground and pound from the dominant position.
Van Rijn is in trouble now - Hilton has advanced to mount!
Van Rijn wants to control but Hilton is having none of it.
We get told so often about how wrestlers don't like to be on their backs. Let's see if Van Rijn can do anything to dispel that myth.
Van Rijn is trying to avoid being dragged into an even worse position than he's already in but Hilton is staying active.
Hilton controlling from the full mount.
Van Rijn tries to hold on but Hilton postures up.
Hilton unloading with bombs!
Van Rijn wants to hold on but Hilton pushes him away.
Hilton has been looking to land a fair amount of strikes on the ground. He might be looking to soften his opponent up in order to work for a submission.
Van Rijn is in a horrible position here. Hilton smacks him with another shot as he tries to escape the position.
Van Rijn is bucking up trying to escape but Hilton cracks him with another couple of good strikes.
Hilton breaks from Van Rijn's wrist control and lands an elbow.
Hilton is still in mount, landing shots to his trapped opponent. Van Rijn can't stay in a position like this for much longer.
That's two minutes gone in the round.
Fantastic stuff here - a very entertaining period of action, which has drawn cheers from the crowd.
Hilton looks like he's working for a submission but he's not found anything just yet.
Van Rijn tries to hold on but Hilton pushes him away.
Hilton wants to control the pace but Van Rijn is squirming around nicely.
Van Rijn is trying to stand.
Hilton working away from the top, dropping strikes.
Van Rijn in a bad spot here, taking shots to the head.
Hilton cracks Van Rijn with a nasty head shot there - the crowd let out an audible gasp there, as the noise reverberated around the arena.
Van Rijn wants to control but Hilton is having none of it.
Hilton with good strikes from the mount here!
Van Rijn is looking to improve his position but Hilton isn't that keen on the idea.
Hilton looks to be in better condition than last time we saw him fight. Obviously he's been working hard on his cardio.
The fighters are tangled up in the ropes here. We might need a restart if the fighters can't break free themselves.
Van Rijn is squirming around, avoiding Hilton's attempts to control the action.
Hilton controlling from the full mount.
That's three minutes gone in the round.
Van Rijn wants to hold on but Hilton pushes him away.
Hilton scoring with some good ground and pound from mount here. Will he manage to finish Van Rijn?
Hilton is still in mount, landing shots to his trapped opponent. Van Rijn can't stay in a position like this for much longer.
Van Rijn takes a big shot to the head but keeps on trying to improve his position.
Van Rijn wants to control but Hilton is having none of it.
Hilton punishing his opponent with strikes.
Hilton avoids the attempt from Van Rijn to control.
We've been informed that Van Rijn has been working hard on his conditioning in the buildup to the fight.
Hilton looking to control and managing it successfully.
Van Rijn in a bad spot here, taking shots to the head.
Van Rijn taking shots to the head.
Hilton landing strikes, looking to finish!
Fantastic stuff here - a very entertaining period of action, which has drawn cheers from the crowd.
Hilton content just to control the position here.
Hilton is in the full mount, landing strikes.
Van Rijn is in a horrible position here. Hilton smacks him with another shot as he tries to escape the position.
That's four minutes gone in the round.
Hilton working the ground and pound effectively.
Hilton controlling his opponent.
Van Rijn tries to lock up and control but Hilton gives him a forearm to the face and pushes him away.
Van Rijn in a bad spot here, taking shots to the head.
Hilton looking to ground and pound his opponent to a finish here.
Hilton working for a submission here. He's tucked his head under his opponent's arm, looking for an arm triangle. He's hopped off into side control, looking to tighten the submission... is it going to work? He's given up a good position looking for it. Van Rijn looks OK. Oh, I spoke too soon, he's out! That must have been tighter than I thought! Excellent work there by Hilton! Submission of the night perhaps?
Ladies and gentlemen, after 4:45 of round 1, we have a winner by way of Submission (Arm Triangle). Milton Hilton!
Milton Hilton is the new lightweight champion!
Milton Hilton was full of energy after the big win and talked about how he thinks he can do big things in this sport. The crowd were appreciative of his determination to succeed.
|
|
|
|
|
|
|
|
|
|
|
|
|
|
|
|
|
|
|
|
|
|
|
| S |
C
A |
G |
S |
C
B |
G |
|
S |
C |
G |
|
energy
A | B |
|
hype
A | B |
|
pop
A | B |
|
mgr
A | B |
|
FIGHT
RATING
54% |
|
|
|
|
|
|
|
|
|
|
