 |
QFC Tournament 769 Round 2 PBP Commentary |
Undercard bout
|
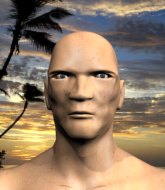
Coming up we have a bantamweight MMA rules bout between Ben Jensen (ranked 0 p4p, 0 weight class) and Mike Kovalev (ranked 0 p4p, 0 weight class). Mike Kovalev will no doubt be trying to keep this one on the feet, where he has a distinct advantage.
 |
|
 |
| 168 cm
23
140 lbs
1 - 0 - 0 |
|
150 cm
23
135 lbs
1 - 0 - 0 |
Good wrestling
Brawler
Cuts easily |
|
BJJ Blue Belt
Solid Muay Thai
Very confident |
|
| |
|
Ladies and gentlemen. This fight is 3 rounds, in the bantamweight division.
Introducing the fighter to my left, fighting out of the red corner.
With a record of
1 - 0 - 0, fighting out of Amsterdam, Ben Jensen!
And introducing the fighter to my right, fighting out of the blue corner.
With a record of
1 - 0 - 0, fighting out of Amsterdam, Mike Kovalev!
The judges for this bout are Patrick Alders, Daniel Blasius and Radbod Blank.

The bell rings for round one and we are underway!
Kovalev feints with a shoulder and throws a nice leg kick to Jensen's calf.
Kovalev throws a two punch combo that lands nicely.

It looks like Ben Jensen has been cut.
Jensen slaps away a takedown attempt from Kovalev, before circling back to the center of the mat.
Jensen appears to be looking for a counter takedown.

Jensen gets a takedown into half guard.
Jensen lands strikes from half guard.
Jensen working the head and body with strikes.
Jensen looks to score some points with some ground and pound.
We've seen a great period of action over the last minute or so - credit to both fighters for going all out!
The two fighters exchange a few words. I couldn't hear what they were saying but maybe it's more fun if you make it up yourself. Jensen connects with a nice short shot to Kovalev's temple.

Kovalev is rocked!
Kovalev is trying to defend against the ground and pound but Jensen scores with a couple of nice shots.
Kovalev is still in real trouble! Can Jensen finish him?
Jensen is sitting in half guard. He's postured up and lands a nice elbow. Oh, Kovalev is hurt! He's hurt bad - Jensen fires away with more strikes and the referee jumps in to save Kovalev from any more punishment! Congratulations to Jensen! Great finish!
Ladies and gentlemen, after 0:57 of round 1, we have a winner by way of TKO (Strikes). Ben Jensen!
|
|
|
|
|
|
|
|
|
|
|
|
|
|
|
|
|
|
|
|
|
|
|
| S |
C
A |
G |
S |
C
B |
G |
|
S |
C |
G |
|
energy
A | B |
|
hype
A | B |
|
pop
A | B |
|
mgr
A | B |
|
FIGHT
RATING
100% |
|
|
|
|
|
|
|
Undercard bout
|
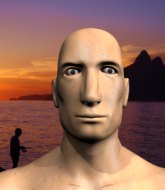
Coming up we have a bantamweight MMA rules bout between Luuk De Witte (ranked 0 p4p, 0 weight class) and Lai Tu (ranked 0 p4p, 0 weight class). Both these guys have really solid chins. Will we see a standup war or will they both decide that a knockout is unlikely and try to win the fight elsewhere?
 |
|
 |
| 166 cm
23
141 lbs
1 - 0 - 0 |
|
173 cm
23
142 lbs
1 - 0 - 0 |
Decent wrestler
Brawler
Big right hand |
|
Good takedowns
Basic striking
Solid chin |
|
| |
|
Ladies and gentlemen. This fight is 3 rounds, in the bantamweight division.
Introducing the fighter to my left, fighting out of the red corner.
With a record of
1 - 0 - 0, fighting out of Amsterdam, Luuk De Witte!
And introducing the fighter to my right, fighting out of the blue corner.
With a record of
1 - 0 - 0, fighting out of Amsterdam, Lai Tu!
The judges for this bout are Wagner Zegers, Paulsen Ambrosius and Nard Betker.
The bell rings for round one and we are underway!
Tu steps to the side to avoid the strikes from De Witte.
De Witte pushing out the jab but it's not landing.
De Witte keeping a good distance there, avoiding the body shot.
De Witte throwing a counter right hand but Tu manages to avoid it.
Tu just misses with a punch to the body.
Tu closes the distance and clinches up with De Witte, looking for a takedown. Tu pushes De Witte against the cage but De Witte circles to the side and manages to break the clinch.
No luck for Tu with that takedown attempt.
Tu slips under a jab from De Witte.
De Witte uses some good footwork to avoid the body shot by Tu.
Nice cross by De Witte.
Tu misses with a hook to the body
and De Witte counters with a straight right hand.
We've had a slow start to the round here - hopefully the action picks up.
De Witte throws a big shot that misses.
Tu drops down looking to force a counter takedown but De Witte defends it well.
Tu fails with a rather predictable takedown attempt.
Luuk De Witte has stuffed three takedown attempts in the round now. That's going to take a lot out of Lai Tu.
Tu shoots for a takedown but De Witte saw that one coming a mile off and avoided it easily.
Tu goes for a spinning back kick but it misses.
Tu uses good footwork to avoid the strikes from De Witte.

That's one minute gone in the round.
Tu on the wrong end of an overhand right that came out of nowhere.
De Witte swings wildly with a right hand that was never going to find it's target.
De Witte scores with a jab to the jaw of his opponent.

It looks like Lai Tu has been cut.
Tu misses the shot to the body.
De Witte was looking to counter that move with a punch but didn't quite pull the trigger.
De Witte moving in and out of range nicely, whilst landing the scoring shot.
Decent striking displayed by De Witte there.
De Witte connects with a single shot there.
Tu is rocked!
Tu tries to score with a leg kick but it misses it's target.
De Witte pushing out the jab but it's not landing.
Tu moves away from the strike by De Witte.
And Tu responds with a good body kick, but De Witte manages to step out the way in time.
Tu will have to do better than that with his takedown attempts.
De Witte scores with a big left there. The judges will like that one.
The crowd are loving this. Great action here.
Tu staying out of range there.
De Witte scores with a jab.
Tu is still on wobbly legs! Can De Witte finish him?
De Witte is the aggressor but that punch slipped nicely by Tu.
Tu seems to have recovered his senses.

That's two minutes gone in the round.
De Witte throws a hook but Tu blocks it.
De Witte throws a big shot that misses.
De Witte is moving around nicely and scores here with a single head shot.
Tu fakes high and shoots in for a takedown but De Witte avoids it really well and circles away.
A little feinted left hand from De Witte on the counter but he doesn't commit to it.
Tu looks winded!
De Witte drops Tu with a straight right hand, right on the button! De Witte follows him down to the mat and pounds him out with hammerfists until the referee jumps in to end the fight!
Ladies and gentlemen, after 2:31 of round 1, we have a winner by way of TKO (Strikes). Luuk De Witte!
|
|
|
|
|
|
|
|
|
|
|
|
|
|
|
|
|
|
|
|
|
|
|
| S |
C
A |
G |
S |
C
B |
G |
|
S |
C |
G |
|
energy
A | B |
|
hype
A | B |
|
pop
A | B |
|
mgr
A | B |
|
FIGHT
RATING
52% |
|
|
|
|
|
|
|
Co-main event
|
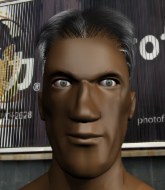
Coming up we have a bantamweight MMA rules bout between Frank Hills (ranked 0 p4p, 0 weight class) and Jonny Kick Ass (ranked 0 p4p, 0 weight class). Jonny Kick Ass has the better chin. Will he look to stand and bang today?
 |
|
 |
| 189 cm
18
145 lbs
1 - 0 - 0 |
|
170 cm
23
140 lbs
1 - 0 - 0 |
BJJ White Belt
Solid boxing
Big heart |
|
BJJ White Belt
Decent boxing
Granite chin |
|
| |
|
Ladies and gentlemen. This fight is 3 rounds, in the bantamweight division.
Introducing the fighter to my left, fighting out of the red corner.
With a record of
1 - 0 - 0, fighting out of Amsterdam, Frank Hills!
And introducing the fighter to my right, fighting out of the blue corner.
With a record of
1 - 0 - 0, fighting out of Amsterdam, Jonny Kick Ass!
The judges for this bout are Nard Betker, Daniel Blasius and Paul Aken.
The bell rings for round one and we are underway!
Hills tries to land with a swinging hook to the body but Kick Ass was well out of range. Poor timing from Hills.
Hills throws a leg kick that is checked
and Kick Ass counters with a three punch combo that has Hills backing up. Hills nods at Kick Ass to acknowledge the strikes.
Hills takes a swing at Kick Ass's ribcage but misses.
Hills misses with a head kick.
Hills throws a chopping leg kick but Kick Ass manages to avoid taking any serious damage.
Hills swings away but doesn't land with a series of punches.
No joy there for Hills, who threw a few shots but didn't land.
Hills tries to bum rush Kick Ass with a series of wild strikes but Kick Ass uses good footwork to avoid the assault.
As Hills backs off Kick Ass throws a huge counter combo but Hills manages to avoid it all.
Hills swings and misses with a hook to the body.
Kick Ass lands a two punch combo.
Frank Hills seems to be the more aggressive standup fighter in this bout.
Kick Ass moves out of range of the leg kick from Hills.
Kick Ass unleashes a big counter combination but Hills bobs and weaves and avoids any damage.
Kick Ass lands a beauty of a right hand that gets the crowd cheering.
Fantastic stuff here - a very entertaining period of action, which has drawn cheers from the crowd.
Hills misses with a jab and misses with a cross straight after too.
Kick Ass throws a series of punches but Hills avoids them all with ease.

Hills closes the distance and clinches.
Kick Ass has Hills pushed against the cage.
That's one minute gone in the round.
Hills tries to throw a body punch but Kick Ass avoids it by throwing Hills back against the cage.
Hills is trying to slow down the pace in the clinch, to catch his breath.
Kick Ass pressing his opponent against the cage.

Kick Ass pushes off and circles away, back to the middle of the mat.
Hills misses with a double jab.
Kick Ass unleashes a big counter combination but Hills bobs and weaves and avoids any damage.
Hills misses the jab.
Hills throws a sloppy head kick and Kick Ass moves out of range easily.
Hills tries to clinch but Kick Ass moves out of range.
Hills misses with a left hand
and Hills takes a counter punch right on the button for his troubles.
That's two minutes gone in the round.
Hills misses with a telegraphed body shot
and Kick Ass connects with a straight left hand counter down the middle.
Hills is looking to clinch but Kick Ass is avoiding it.
Hills throws a jab, cross combination which is slipped
and Kick Ass counters with a left and a right that stings Hills.
Some wild striking there from Kick Ass.
Hills throws a body shot but no joy.
Hills moves in looking to clinch but Kick Ass pushes him off.
Hills tries to land with a swinging hook to the body but Kick Ass was well out of range. Poor timing from Hills.
Kick Ass throws a counter combo.
Kick Ass avoids a punch combination nicely.
The crowd cheering loudly, showing their appreciation for the quality fight we're seeing here.
Hills misses with a wild combination.
Kick Ass looked like he wanted to counter with a punch but didn't throw it.
Hills ducks down and throws a hook to the body but Kick Ass moves away.
Kick Ass dodges the punch combination from Hills.

That's three minutes gone in the round.
Hills misses with a hook to the body
and Kick Ass counters with a two punch combo.
Hills throws a poor cross that misses
and Kick Ass counters with a lovely straight right hand!
Hills misses with a wild body shot.
Hills throws a hook to the body but it doesn't connect.
A leg kick checked by Kick Ass.
Hills scores with a jab to the head.
Kick Ass throws a series of strikes that have Hills backpedaling.
A combination from Kick Ass does no damage.
Hills fakes high and swings low for a body shot but Kick Ass manages to avoid it.
Kick Ass checks a low kick from Hills.
Nice defenses there by Kick Ass.
As Hills backs off Kick Ass throws a huge counter combo but Hills manages to avoid it all.
Hills really does look like a pencil wearing a pair of gloves. Let's hope he has a gameplan to suit that ridiculous body shape.
Hills tries to land with a swinging hook to the body but Kick Ass was well out of range. Poor timing from Hills.
The crowd cheering loudly, showing their appreciation for the quality fight we're seeing here.
Hills throws a hard body shot but it just misses.
Kick Ass unleashes a big counter combination but Hills bobs and weaves and avoids any damage.
Hills throws a front kick aimed at Kick Ass's knee but Kick Ass avoids it well.
Kick Ass looked like he wanted to counter with a punch but didn't throw it.

That's four minutes gone in the round.
Hills swings and misses with a hook to the body.
Hills throws a predictable looking body shot
and Kick Ass counters with a straight punch to the midsection.
A looping hook to the body misses from Hills. Kick Ass does a little dance to reset his feet.
It seemed like Kick Ass was going to counter with the hook but didn't fully commit to it.
Hills tries to clinch up
and Hills takes a counter punch right on the button for his troubles.
Hills throws a left and a right that both miss
and Kick Ass connects with a straight left hand counter down the middle.
Hills throws a right and a left that both miss.
Kick Ass swings away with a counter right hand but no contact made.
Hills fails to land with a series of punches.
Kick Ass is clearly trying to counter these attacks from Hills with a body shot.
This fight brought to you by 5M nutrition - it's mmmmm tasty. Nice jab by Hills.
Kick Ass's corner calls for a 1, 2 combination and Kick Ass duly obliges.
Hills throws a series of punches but Kick Ass moves out of range.
Hills throws a predictable looking body shot
and Kick Ass counters with a left and a right that stings Hills.
And thats the end of the round the fighters go back to their corners.
Jonny Kick Ass dominated that round.
That's time! Back to the action!

Hills just misses with a punch to the body.
Hills swings and misses with a hook to the body.
Jonny Kick Ass seems to be getting the better of the standup.
Hills looks to score with a jab to the body but Kick Ass is just out of range.
Hills misses with a jab and misses with a cross straight after too.
Kick Ass lets it all go there with a big combo counter but none of the punches connected.
Hills throws a solid leg kick but Kick Ass takes the impact on his shin and smiles at Hills.
Despite the aggression on Kick Ass's face he doesn't fully commit to the counter.
Kick Ass stalks Hills and leaps in with a furious combination of punches. Uppercuts and crosses smash into Hills's face. Hills staggers backwards, shaken.
We are yet to see a takedown attempt from Kick Ass in the fight. On paper you would think he is the more dominant ground fighter so let's see if these unusual tactics pay off.
Hills throws a hard body shot but it just misses.
Kick Ass misses with a wild combination.
Hills swings away but doesn't land with a series of punches.
We've had a slow start to the round here - hopefully the action picks up.
Kick Ass looks to score with a combo but nothing lands.
Hills keeping at a good range here, avoiding a leg kick.
Kick Ass fails to land with the punch combination there - jab, cross, hook, miss, miss, miss.
Kick Ass connects with a lovely right hand, straight down the pipe.
Hills is looking to wear down Kick Ass with body shots, infact he's throwing more body shots than head shots at the moment.
Hills jabbing away but nothing is landing.
That's one minute gone in the round.
Hills misses with a body shot.
Kick Ass uses some good footwork to avoid the body shot by Hills.
Kick Ass misses with a series of wild punches.
Hills is looking to counter with a shot to the body.
Hills takes a swing at Kick Ass's ribcage but misses.
Hills just misses with a punch to the body.
Kick Ass slips a jab and a cross from Hills.
Hills looks to score with a jab to the body but Kick Ass is just out of range.
A looping hook to the body misses from Hills. Kick Ass does a little dance to reset his feet.
A little jabbing left from Kick Ass on the counter but it doesn't find it's target.
Hills misses with a wild body shot.
It seemed like Kick Ass was going to counter with the hook but didn't fully commit to it.
Hills is looking to score with low kicks.
As Hills backs off Kick Ass throws a huge counter combo but Hills manages to avoid it all.
Hills misses with a low kick.
Hills fakes with the hands and throws a leg kick but Kick Ass is out of range.
That's two minutes gone in the round.
Hills finds nothing but air with that leg kick attempt.
Hills throws a body punch but Kick Ass moves out of range.
A leg kick checked by Kick Ass.
Kick Ass avoids the body shot from Hills.
Some bone on bone action there as Kick Ass checks a low kick. Luckily it wasn't a particularly hard one.
A looping hook to the body misses from Hills. Kick Ass does a little dance to reset his feet.
Hills throws out a loose jab but Kick Ass uses good head movement to avoid it.
Kick Ass displaying good standup as he scores with a three punch combination.
Hills misses with a wild body shot.
Kick Ass unleashes a big counter combination but Hills bobs and weaves and avoids any damage.
Kick Ass lands a body shot.
Fantastic stuff here - a very entertaining period of action, which has drawn cheers from the crowd.
Some wild striking there from Hills.
A countering left hand to the body from Kick Ass misses.
Hills waving his hands out in front of him, looking to distract Kick Ass.
Kick Ass checks a leg kick.
That's three minutes gone in the round.
Hills misses the shot to the body.
Kick Ass is looking for the big counter here.
Kick Ass keeping at a good range here, avoiding a leg kick.
Kick Ass lets it all go there with a big combo counter but none of the punches connected.
Hills thows a leg kick but Kick Ass checks it
and Kick Ass counters with a one-two to the body.
Kick Ass avoids the head kick by Hills.
Hills is looking to take this fight into the clinch.
Kick Ass misses with a two punch combination.
Hills swinging wildly here.
Kick Ass smiles there as he lands a nice right hand right on the button.
Hills throws a low kick but his opponent is out of range.
Hills moves into the clinch successfully.
That's four minutes gone in the round.

Hills's corner calls for him to break the clinch, which he does.
Hills lands a jab to Kick Ass's midsection.
Hills throws a left and a right that both miss
and Kick Ass counters with a straight right hand.
This is a great period of action - very entertaining stuff!
Hills throws a hard body shot but it just misses.
Hills misses with a body shot. Nice footwork from Kick Ass.
Kick Ass is looking for the big counter here.
Hills showing good head movement there, avoiding the strikes from Kick Ass.
Hills misses with a hook to the body
enabling Kick Ass to counter with a crisp jab.
Kick Ass takes a body punch but keeps moving.
Kick Ass swinging wildly here.
Kick Ass rushes forward with a series of wild hooks but Hills moves out of range and avoids them all easily.
Kick Ass avoids the body shot from Hills.
Kick Ass is working the combinations to good effect here.
Hills dips to his left and cracks Kick Ass with an uppercut!
And thats the end of the round the fighters go back to their corners.
A close second round but Jonny Kick Ass will probably get the nod - 10:9.
The fighters get back to their feet, the hooter sounds and we're back to the action! So, we enter the final round. Let's see if either fighter can bring us a finish, or whether we're going to the judges scorecards.

Kick Ass tries to bum rush Hills with a series of wild strikes but Hills uses good footwork to avoid the assault.
As Kick Ass backs away, Hills returns fire with a leg kick that just misses.
Hills looks to score with a jab to the body but Kick Ass is just out of range.
Frank Hills is looking to throw some combinations by the looks of things.
Hills throws a left and a right that both miss
and Kick Ass counters with a shot to the ribs. That looked like it hurt.
Nice defenses there by Kick Ass.
The fighters are starting to get sweaty, which will make takedowns a bit more tricky.
Kick Ass lands with a good body shot.
No joy there for Hills, who threw a few shots but didn't land.
Hills looks to score with a combo but nothing lands.
Hills misses with a body punch
enabling Kick Ass to counter with a crisp jab.
Good shot there by Kick Ass.
We've had a slow start to the round here - hopefully the action picks up.
A low kick from Hills is predictable there
and Kick Ass counters with a left and a right that stings Hills.
Hills moves to clinch but Kick Ass breaks away
and Kick Ass counters with a lovely straight right hand!
This has been an exciting period of action!
Hills swings widly with a right hand
and Kick Ass counters with a two punch combo.
Hills misses with a wild combination.
That's one minute gone in the round.
Kick Ass uses some good footwork to avoid the body shot by Hills.
Kick Ass throws a counter combo.
A looping hook to the body misses from Hills. Kick Ass does a little dance to reset his feet.
It seemed like Kick Ass was going to counter with the hook but didn't fully commit to it.
Hills tries to clinch but Kick Ass is having none of it.
Hills throws a hard body shot but it just misses.
Kick Ass throws a two punch combo that lands nicely.
Hills tries to close the distance and clinch up but Kick Ass swats him away and circles back towards the center.
Kick Ass slips a jab and a cross from Hills.
Kick Ass uses some good footwork to avoid the body shot by Hills.
Sloppy strikes from Kick Ass. Those never looked like landing.
Hills misses the body punch
enabling Kick Ass to counter with a crisp jab.
Hills looks like he's developed a pretty tasty lump over his left eye. He'll need to avoid taking much more damage to that.
Hills throws a combination but it was largely blocked by Kick Ass.
Both fighters are breathing heavily.
Hills ducks down and throws a hook to the body but Kick Ass moves away.
That's two minutes gone in the round.
Hills takes a big uppercut there. He seems a bit wobbly but no, he's OK.

Hills is rocked!
A combination from Hills does no damage.
Kick Ass cracks a nice hook into Hills's ribs.
The fans in attendance giving it up for the two fighters, who have really let it all hang out in the last minute or so!
Hills misses with a jab to the body
and Kick Ass counters with a good right hand that lands right on the jaw.
Oh Hills is still all over the place! His legs are completely gone! Will he be able to recover?!!
Hills swings for the body but Kick Ass moves out of range.
Hills seems to have got his legs back now.
Hills will need to tighten up his combinations if he doesn't want to gas himself out, swinging at thin air.
Kick Ass lets it all go there with a big combo counter but none of the punches connected.
Hills fails to land with a series of punches.
Kick Ass swinging wildly here.
Hills just misses with a punch to the body.
Kick Ass looks like he wants to counter punch here.
Hills misses the body punch
and Kick Ass counters with a lovely shot to the body.
Hills throws a body shot but no joy.
That's three minutes gone in the round.
Hills throws a leg kick
and Kick Ass counters with a two punch combo.
Hills thows a leg kick but Kick Ass checks it
and Kick Ass cracks him with a counter punch right on the button.
Hills looks to score with a jab to the body but Kick Ass is just out of range.
A looping hook to the body misses from Hills. Kick Ass does a little dance to reset his feet.
Kick Ass lands a head shot.
Hills is looking to take this fight into the clinch.
Hills gets off balance looking for a body kick
and Kick Ass counters with a one-two to the body.
Hills misses with a hook to the body
and Kick Ass counters with a three punch combination, finished off with a leg kick. Nice work.
Kick Ass misses with a wild combination.
Wooooo! Give it up for these two warriors! They are putting on a show!
Hills ducks down and throws a hook to the body but Kick Ass moves away.
A combination from Hills does no damage.
That's four minutes gone in the round.
Hills misses with a jab and misses with a cross straight after too.
It seemed like Kick Ass was going to counter with the hook but didn't fully commit to it.
Kick Ass lands a pitter patter jab to the forehead of his opponent.
Hills misses with a jab and misses with a cross straight after too.
Jonny Kick Ass is fighting for a decision here - he's started to take the cautious approach.
Hills takes one to the side of the head.
Hills tries to clinch but Kick Ass moves away
and Kick Ass counters with a lovely straight right hand!
Kick Ass fails to land with a series of punches.
Hills throws a jab, cross combination which is slipped
and Kick Ass counters with a crisp hook to the side of the head.
Hills throws a hook to the body but it doesn't connect.
Frank Hills has stepped it up - he knows he needs a finish here!
Kick Ass avoids the body shot from Hills.
Kick Ass lets it all go there with a big combo counter but none of the punches connected.
Hills's corner calls for a 1, 2 combination and Hills duly obliges.
Kick Ass lands a nice looking body shot.
The crowd applaud the fighters' efforts here as the round comes to an end.
Kick Ass uses some good footwork to avoid the body shot by Hills.
As Hills backs off Kick Ass throws a huge counter combo but Hills manages to avoid it all.
And that's the end of the fight!
Jonny Kick Ass comfortably won the final round on my scorecard.
I've got Kick Ass winning every round here. Surely the decision will go his way and he'll pick up a well deserved decision victory. Over to the ring announcer for the scorecards.
Ladies and gentlemen, after 3 rounds of action, we go to the scorecards for a decision.
Judge Nard Betker scores the fight for Jonny Kick Ass!
Judge Daniel Blasius scores the fight for Jonny Kick Ass!
Judge Paul Aken scores the fight for Jonny Kick Ass!
Jonny Kick Ass wins by unanimous decision!
|
|
|
|
|
|
|
|
|
|
|
|
|
|
|
|
|
|
|
|
|
|
|
| S |
C
A |
G |
S |
C
B |
G |
|
S |
C |
G |
|
energy
A | B |
|
hype
A | B |
|
pop
A | B |
|
mgr
A | B |
|
FIGHT
RATING
70% |
|
|
|
|
|
|
|
Main event
|
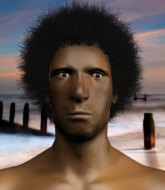
Coming up we have a bantamweight MMA rules bout between Sigmund Hamre (ranked 0 p4p, 0 weight class) and Bruno Archibald (ranked 0 p4p, 0 weight class). I don't know about you partner, but I'm pumped for this one!
 |
|
 |
| 170 cm
23
142 lbs
1 - 0 - 0 |
|
177 cm
22
138 lbs
1 - 0 - 0 |
Decent wrestler
Brawler
Good chin |
|
BJJ Blue Belt
Brawler
Granite chin |
|
| |
|
Ladies and gentlemen. This fight is 3 rounds, in the bantamweight division.
Introducing the fighter to my left, fighting out of the red corner.
With a record of
1 - 0 - 0, fighting out of Amsterdam, Sigmund Hamre!
And introducing the fighter to my right, fighting out of the blue corner.
With a record of
1 - 0 - 0, fighting out of Amsterdam, Bruno Archibald!
The judges for this bout are Albert Achterberg, Paul Aken and Paulsen Ambrosius.
The bell rings for round one and we are underway!
Hamre throws a monster uppercut resembling something out of street fighter but it doesn't land.
Archibald ducks under a wild hook from Hamre.
Archibald is a painfully thin specimen of a man. You do wonder whether a good body kick would snap him clean in two.
Hamre misses with a hook. Archibald ducked under it nicely.
Archibald misses with a wild combination.
Archibald throws a series of punches but Hamre moves out of range.
Good shot there by Hamre.
Archibald slips under a jab.
Archibald lands a jab to the head.
Hamre lands a jab to Archibald's midsection.
Bruno Archibald seems to be the more aggressive standup fighter in this bout.
A big right from Hamre misses.
Hamre looks to land a right hand but Archibald moved out of range.
Archibald throws a combination but it was largely blocked by Hamre.
The fighters circling - Hamre throws out the jab but it was never going to land.
Hamre is really struggling to find his range with his punches. Archibald's reach advantage is clearly causing him problems.
Hamre swings and misses with a hook to the body.
This is a great period of action - very entertaining stuff!
Archibald misses with a jab and misses with a cross straight after too.
Archibald falls off balance throwing a combination
and Hamre cracks him with a counter punch right on the button.
That's one minute gone in the round.
Hamre takes a swing at Archibald's ribcage but misses.
Archibald throws a combination. Hamre tries to block but a couple of punches get through.
Archibald slips a straight right by Hamre.
A left and a right from Archibald both land. Nice combination.
Archibald throws a combination but it was largely blocked by Hamre.
Hamre swings widly with a right hand
and Archibald counters with a crisp hook to the side of the head.
Archibald throws a series of punches but Hamre moves out of range.
Archibald throws a left and a right that both miss
letting Hamre counter with a right hand.
Hamre misses with an uppercut. Archibald saw that one coming.
Fantastic stuff here - a very entertaining period of action, which has drawn cheers from the crowd.
Hamre swings wildly with a right hand that was never going to find it's target.
Despite the aggression on Archibald's face he doesn't fully commit to the counter.
Hamre misses with a body shot. Nice footwork from Archibald.
Jab, jab by Hamre - just one landing.
Archibald displays some good footwork, moving neatly out of range as Hamre throws out the jab.
Hamre walks into a straight right hand from Archibald.
Nice defenses there by Hamre.
Archibald throws a combination but comes up with nothing but fresh air.
Archibald throws a right and a left that Hamre avoids nicely.
Archibald looks winded!
That's two minutes gone in the round.
Hamre ducks down and throws a hook to the body.
Archibald throws a hook but Hamre blocks it.
Hamre was looking to counter that last move with a shot to the body but he didn't commit.
Hamre misses with a wild body shot.
Archibald walks straight into a jab right on the nose. That one stung - he's blinking and trying to clear his head.
A decent looking cross lands there for Hamre.
Archibald's hands are dropping dangerously low here and Hamre connects clean with a right hook that sends him down to one knee! Archibald scrambles back to his feet.
Archibald shakes his hands off, looking to compose himself, but takes a jab to the jaw whilst he does it.
Hamre throws a hook to the body but it doesn't connect.
Hamre misses with a straight right.
Archibald is looking for the big counter here.
Hamre closes the distance and pushes Archibald back into the cage.
Hamre digs a right hand into Archibald's ribs. Those have got to be taking their toll on Archibald's gas tank.
Hamre breaks the clinch.
Hamre showing good head movement there, avoiding the strikes from Archibald.
A looping hook to the body misses from Hamre. Archibald does a little dance to reset his feet.
That's three minutes gone in the round.
Hamre connects with a body shot that sends Archibald's belly button to the back.
A jab from Hamre does it's job there.
Archibald misses with a combination
and Hamre counters with a good right hand that lands right on the jaw.
Hamre uses good footwork to get in and out and land a nice right hand before Archibald has time to react.
Hamre darts in and out, connecting with a jab.
Hamre throws an uppercut from half a mile away. Archibald sees it coming and avoids it easily.
Hamre slips a jab from Archibald.
Hamre ducks down and throws a hook to the body but Archibald moves away.
Archibald misses with a double jab.
Archibald swings wildly with a right hand that was never going to find it's target.
Hamre throws a hard body shot but it just misses.
Archibald lunges in with swinging rights and lefts but Hamre circles away quickly and effectively.
Hamre cracks a nice hook into Archibald's ribs.
The crowd cheering loudly, showing their appreciation for the quality fight we're seeing here.
Hamre takes a swing at Archibald's ribcage but misses.
Left hook, right uppercut from Hamre.
It looks like Bruno Archibald has been cut.
That's four minutes gone in the round.
Hamre jabbing away but nothing is landing.
Archibald throws a nice looking combination but Hamre bobs and weaves to avoid any damage.
Archibald falls off balance throwing a combination
enabling Hamre to counter with a crisp jab.
Hamre connects with a hook to the side of his opponent's head.
Archibald displays some good footwork, moving neatly out of range as Hamre throws out the jab.
Hamre is moving around nicely and scores here with a single head shot.
Hamre listening to his corner there, landing a nice uppercut.
Archibald swings widly with a right hand
and Hamre counters with a straight right hand.
Hamre lands a jab to the head.
Hamre takes a swing at Archibald's ribcage but misses.
The crowd applaud the fighters' efforts here as the round comes to an end.
Hamre throws a hard body shot but it just misses.
Archibald is the aggressor but that punch slipped nicely by Hamre.
Hamre swung with a counter right hand that didn't connect.
Hamre connects with a looping left hand that seems like it dazed Archibald momentarily.
Archibald takes one to the chin there.
And thats the end of the round the fighters go back to their corners.
Sigmund Hamre dominated that round.
The cut man is working on Bruno Archibald's cut.
The corners get their ten second warning. Both fighters stand from their stools and stare eachother down, ready to get back to the action.
Hamre swings wildly with a hook that is half blocked by Archibald.
Hamre avoids a punch combination nicely.
Hamre showing good head movement there, avoiding the strikes from Archibald.
Archibald misses with a double jab
and Hamre counters with a stiff right hand.
Hamre is really dominating this fight. Is there anything that Archibald can do to turn this around?
Archibald fails to land with a series of punches.
Hamre stalks Archibald and leaps in with a furious combination of punches. Uppercuts and crosses smash into Archibald's face. Archibald staggers backwards, shaken.
Archibald throws a right and a left that both miss.
Archibald has his hands up protecting his head but a hook from Hamre finds it's way round the side to connect with Archibald's head.
Hamre thows a left - swing and a miss!
Archibald on the wrong end of a nice hook.
Archibald has a pretty nasty looking mouse under his right eye.
Fantastic stuff here - a very entertaining period of action, which has drawn cheers from the crowd.
Nice defenses there by Archibald.
Archibald throws a series of punches but Hamre avoids them all with ease.
A little feinted left hand from Hamre on the counter but he doesn't commit to it.
Archibald is breathing heavily.
Hamre scores with a jab to the jaw.
That's one minute gone in the round.
Archibald throws an off balance right hand
and Hamre counters with a straight right hand.
Archibald swings wildly with a couple of big hooks
and Hamre counters with a nice uppercut.
Archibald is rocked!
Archibald avoids the body shot from Hamre.
Archibald misses with a jab, cross combination.
Hamre lands the left hand.
Archibald is still on wobbly legs! Can Hamre finish him?
Archibald bobbing and weaving, closes the distance and lands a hook to the side of Hamre's head.
Archibald seems to have recovered his senses.
Sigmund Hamre is winning the standup battle so far.
Hamre throws a hard body shot but it just misses.
Hamre clinches up against the cage.
The referee calls for Hamre to work.
Hamre lands a shoulder strike.
Archibald is looking to break free of the clinch but Hamre has double underhooks.
The pace slowing considerably in the clinch, as Hamre takes a break from that fighting nonsense to think about the finer things in life.
Hamre breaks from the clinch.
That's two minutes gone in the round.
Hamre swings and misses with a hook to the body.
Hamre's jab looks to have found its range, popping Archibald under the eye.
This has been an exciting period of action!
Archibald swings wildly with a couple of big hooks
and Hamre connects with a straight left hand counter down the middle.
Archibald misses with a wild combination.
Archibald uses good head movement to avoid the hook from Hamre.
Archibald might want to mix his strikes up a bit more. He's just going for head shots at the moment and that can become a bit predictable.
Hamre slips in close and lands a nice hook before moving back out of range.
Hamre clinches.
Hamre slows down the pace here.
The fighters are starting to perspire pretty heavily.
Hamre has Archibald pressed against the cage, preventing Archibald from circling away and getting back to striking at range.
A hook to the body from Hamre.
A short uppercut from Hamre.
That's three minutes gone in the round.
Archibald tries to break the clinch but Hamre is controlling the position.
A body shot lands from Hamre.
Hamre taking a breather.
Hamre stalling here - the referee won't stand for too much of that.
Archibald breaks the clinch and we're back to striking at distance.
Hamre looks to score with a jab to the body but Archibald is just out of range.
Archibald throws a series of punches but Hamre moves out of range.
Archibald misses with a double jab
and Hamre counters with a straight right hand.
Archibald on the wrong end of an overhand right that came out of nowhere.
Hamre with a nice cross.
Archibald misses with a straight left.
That's four minutes gone in the round.
Hamre works the jab nicely.
Hamre jabs. That one connects to the head of his opponent.
Hamre fails to land with a series of punches.
Hamre looks to land a right hand but Archibald moved out of range.
Fantastic stuff here - a very entertaining period of action, which has drawn cheers from the crowd.
Hamre throws out a token jab with nothing on it.
Bruno Archibald is looking to throw some combinations by the looks of things.
Hamre lunges in with swinging rights and lefts but Archibald circles away quickly and effectively.
Archibald fails to land with the punch combination there - jab, cross, hook, miss, miss, miss.
Archibald moves away from the strike by Hamre.
Archibald keeping a good distance there, avoiding the body shot.
Hamre lands the left hand.
Hamre fakes high and swings low for a body shot but Archibald manages to avoid it.
Archibald throws a counter combo.
Archibald throws a right and a left that both miss.
Hamre throws a hook to the side of Archibald's head but Archibald sees it coming and ducks under it beautifully.
Archibald moves into range and throws a combination. A nice jab followed by a hook to the body.
Archibald misses with an uppercut
and Hamre counters with a nice body shot.
And thats the end of the round the fighters go back to their corners.
Sigmund Hamre dominated that second round.
The cut man is working on Bruno Archibald's cut.
Well, the break between rounds is over. Let's get back to the scrappin! This is the final round!
Hamre swings for the body but Archibald moves out of range.
Archibald throws a series of punches but Hamre moves out of range.
Nice body punch from Hamre.
This fight brought to you by 5M nutrition - it's mmmmm tasty. Nice jab by Hamre.
Archibald swings wildly with a couple of big hooks
and Hamre counters with a quick right hand to the jaw.
Hamre lands a nice hook to Archibald's body. Archibald takes it in his stride and looks to land his own strikes.
Archibald smiles there as he lands a nice right hand right on the button.
Hamre slips in close and lands a nice hook before moving back out of range.
Nice jab there from Archibald.
A big right from Archibald misses.
Hamre connects with a slap. Keep your fist closed son.
The fans in attendance giving it up for the two fighters, who have really let it all hang out in the last minute or so!
Hamre slips a jab and a cross from Archibald.
Archibald takes a big intake of breath there - he's definitely tired.
Hamre avoids a punch combination nicely.
Archibald falls off balance throwing a combination
and Hamre counters with a quick right hand to the jaw.
That's one minute gone in the round.
Archibald throws a combination but comes up with nothing but fresh air.
A telegraphed right hand from Hamre misses the target.
Hamre scores with a sloppy right hand. Archibald should have avoided that one.
Hamre lands with a cross.
Hamre listening to his corner there, landing a nice uppercut.
Archibald rushes in with a sloppy looking punch
and Archibald takes a counter punch right on the button for his troubles.
Nice cross by Hamre.
Hamre misses with a looping left.
Archibald uses good head movement to avoid the hook from Hamre.
Hamre misses with a hook. Archibald ducked under it nicely.
Hamre connects with a nice looking jab.
Archibald throws a lazy right hand but Hamre sees it coming a mile off and sidesteps it easily.
Archibald throws a series of punches but Hamre avoids them all with ease.
The crowd are loving this. Great action here.
A slow jab from Hamre misses its intended target.
Hamre throws a good cross that connects.
That's two minutes gone in the round.
Archibald throws a big shot that misses.
Archibald throws a poor cross that misses
letting Hamre counter with a right hand.
Hamre throws a shot to the body.
Hamre throws a hard body shot but it just misses.
As Hamre backs off Archibald throws a huge counter combo but Hamre manages to avoid it all.
The fighters circling - Hamre throws out the jab but it was never going to land.
Hamre moving in and out of range nicely, whilst landing the scoring shot.
Hamre missing with a left hand there. Archibald was out of range so wasted energy throwing that one.
Hamre works Archibald's body with a nice hook.
Archibald takes one to the side of the head.
Archibald throws a poor cross that misses
and Hamre counters with a lovely straight right hand!
Hamre lands a nice shot to the body.
A combination from Archibald does no damage.
Hamre throwing a counter right hand but Archibald manages to avoid it.
Hamre throws a combination but it was largely blocked by Archibald.
Archibald uses decent footwork to sidestep a right hand from Hamre.
That's three minutes gone in the round.
Archibald throws a nice looking combination but Hamre bobs and weaves to avoid any damage.
Hamre lands a lovely overhand right.
Archibald takes one to the side of the head.
Hamre throws an uppercut from half a mile away. Archibald sees it coming and avoids it easily.
Archibald swings away with a counter right hand but no contact made.
Hamre moves away from the strike by Archibald.
Nice defenses there by Hamre.
It looked like Hamre was trying to counter with a body shot coming off that last attack from Archibald.
Hamre fakes and then throws a beautiful body shot. Archibald looks a bit winded and takes a step backwards to take a breath.
Archibald ducks under a wild hook from Hamre.
A swing and a miss from Hamre.
Archibald is looking for the big counter here.
A slow jab from Archibald misses its intended target.
Hamre throws a hook to the side of Archibald's head but Archibald sees it coming and ducks under it beautifully.
Archibald ducks under a wild hook from Hamre.
Archibald defending well as Hamre loads up on a big left hand.
Hamre lands a nice looking body shot.
That's four minutes gone in the round.
Archibald looks to score with a combo but nothing lands.
Hamre jabs. That one connects to the head of his opponent.
Nice uppercut lands for Hamre. That snapped Archibald's head back.
This is a great period of action - very entertaining stuff!
Hamre lands an overhand right.
Archibald swings wildly with a couple of big hooks
and Hamre counters with a nice body shot.
Hamre connects with a lovely jab that went straight through the gap between Archibald's hands.
Hamre ducks low and lands a nice hook to the body of his opponent.
Hamre showing good head movement there, avoiding the strikes from Archibald.
Archibald ducks under a wild hook from Hamre.
The crowd applaud the fighters' efforts here as the round comes to an end.
A punch lands to the side of Archibald 's head but he takes it in his stride.
Hamre tests Archibald's chin there with a solid looking shot.
Archibald keeping a good distance there, avoiding the body shot.
Bruno Archibald has stepped it up - he knows he needs a finish here!
Hamre's jab looks to have found its range, popping Archibald under the eye.
And that's the end of the fight!
Sigmund Hamre showed his dominance in that final round.
Well Hamre has outscored his opponent in every aspect of the fight today. Only a scarily incompetent judge or two will keep him from a well deserved win... Over to the ring announcer for the scorecards.
Ladies and gentlemen, after 3 rounds of action, we go to the scorecards for a decision.
Judge Albert Achterberg scores the fight for Sigmund Hamre!
Judge Paul Aken scores the fight for Sigmund Hamre!
Judge Paulsen Ambrosius scores the fight for Sigmund Hamre!
Sigmund Hamre wins by unanimous decision!
During a confident post fight interview, Sigmund Hamre thanked all his fans. He seemed very genuine when describing how motivated his fans keep him.
|
|
|
|
|
|
|
|
|
|
|
|
|
|
|
|
|
|
|
|
|
|
|
| S |
C
A |
G |
S |
C
B |
G |
|
S |
C |
G |
|
energy
A | B |
|
hype
A | B |
|
pop
A | B |
|
mgr
A | B |
|
FIGHT
RATING
85% |
|
|
|
|
|
|
|
|
|
|
