|
TWGC 15 (155lbs, D1): Helsinki Qualifier - Round 1 PBP Commentary |
Undercard bout
|
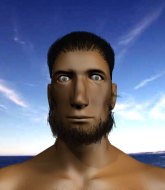
Coming up we have a lightweight Tycoon World Grappling Championship rules bout between Afa Sila and Timothy Robinson. Over to our ring announcer for the fighter introductions!
This TWGC bout is 1 fifteen minute round in the lightweight division. Introducing today's competitors. In the red corner, competing out of London, with a TWGC record of 0 wins and 0 losses; Afa Sila! And in the blue corner, fighting out of London, with a TWGC record of 5 wins and 4 losses; Timothy Robinson!
The judges for this bout are Ben Zyskovitsi, Johanna Lukiainen and Anni Minnemäki.
Let's get this grappling contest under way! Who will be victorious?

Sila clinches up with Robinson and pushes him back against the cage.
Sila is working for a takedown up against the cage. He can't get it on this occasion though.

Sila lands a takedown into guard.
Score +2 for takedown into guard / half guard: Sila (2) vs (0) Robinson
Sila wants to pass the guard but Robinson is keeping the position.
Sila trying to control but Robinson is working from the bottom.
Robinson is working an open guard here, looking to improve his position. No doubt that will leave him open to counters but at least he's being more offensive.
The fighters are pressed up against the cage, both looking to find a bit of space to work.
Robinson has control of Sila's left arm, preventing Sila from doing any damage.
We've had a slow start to the round here - hopefully the action picks up.
Robinson looking to control but Sila passes into half guard.
Sila stalling away here and it's allowed Robinson to slip out his trapped foot and regain full guard.

That's one minute gone in the round.

Robinson working from the bottom, still in full guard. He's managed to get a loose triangle. Sila doesn't seem to be doing much to defend here, obviously he feels comfortable in the position. Sila manages to throw the legs off his shoulder and he's back into guard - no problem.
Sila avoids a guillotine attempt easily.
Sila slows down the pace of the fight, as he sits in guard.
Robinson working a defensive guard but Sila passes into half guard.

That's two minutes gone in the round.
Robinson is positioning himself well to prevent Sila advancing to mount.
The fighters are battling for position here. Robinson manages to regain full guard. Nice work.
Robinson keeping moving, preventing Sila from controlling successfully.
Robinson is controlling Sila's posture.
Sila is frustrating his opponent with some stalling tactics from top position.
Sila's ground tactics aren't going to win him many fans. Let's hope he's got fireworks for us if he gets back to his feet because he's not doing much on the ground.

That's three minutes gone in the round.
Robinson trying to control the position.
Robinson is pulling down on Sila's head. It's preventing any offense from Sila, at least for the moment.
Sila preventing the sweep.
Sila tries to free his leg and advance position but Robinson is retaining full guard.

That's four minutes gone in the round.
Robinson is trying to control the position from the bottom.
Robinson keeping moving, preventing Sila from controlling successfully.
Robinson bucks up whilst keeping hold of a body lock, managing to reverse the position. Now he's in top in Sila's guard. Score +2 for sweep to guard / half guard: Sila (2) vs (2) Robinson
In the pre-fight buildup videos we saw Robinson working his ground and pound in the gym. He isn't landing a great percentage of his ground strikes so far though.
Robinson stands up and looks to throw the legs aside to pass to side control. Sila swivels though and keeps the full guard.
Robinson drops back for a leg! It's a sloppy attempt though and Robinson jumps back into guard quickly, to retain the dominant position.
Robinson advances position into side control! Score +3 for passing guard: Sila (2) vs (5) Robinson
Sila tries to bench press Robinson off him but Robinson keeps the position.

That's five minutes gone in the round.
Sila wants to control but Robinson postures up.
Sila is looking to regain half guard here but Robinson keeps moving and retains side control.
Robinson looking for an arm triangle but it's way too loose to do anything.
Robinson trying to control the action but Sila is working from the bottom.
Robinson is looking for a kimura. He might have it! No, Sila has escaped the position, nice work there.
Sila is looking for a sweep.
Robinson looking for an arm triangle but it's way too loose to do anything.
Sila is not content to let Robinson control the position.

That's six minutes gone in the round.
Sila sneaks a leg under to get back to half guard.
Robinson seems to be looking for submissions.
Robinson trying to control the action but Sila is working from the bottom.
Robinson seems to be looking for submissions.
Sila won't allow Robinson to pass to mount.
Sila wants to control but Robinson is keeping busy and won't allow it.
Robinson is looking for a kimura. It's going to be difficult to finish that from half guard though and Sila defends it well.

That's seven minutes gone in the round.
Robinson is trying to work for a kimura but Sila is defending well.
Robinson looking for a kimura but he'll have to free his other leg if he wants to finish that. Perhaps he's just using it as a distraction technique.
Sila has no desire to be mounted, so is trying to control. Robinson is working away from the top position though.

Sila looking to work for a kimura from the bottom.
Sila keeping hold of Robinson's head, controlling as best he can.

That's eight minutes gone in the round.
Robinson is trying a forearm choke
I don't think that's going to do much at this level of the game.
Sila is trying to get back to full guard.
Robinson is thinking about going for an arm triangle but he can't free his leg.

That's nine minutes gone in the round.
Robinson is looking to advance position but Sila won't allow it.
Robinson looking for a kimura but he'll have to free his other leg if he wants to finish that. Perhaps he's just using it as a distraction technique.
Robinson passes to full mount! Score +3 for passing guard: Sila (2) vs (8) Robinson
Robinson jumps to the side looking to secure the arm triangle
. Ooooh, that looks tight
Sila is gargling but he's managed to escape! Nice work there by Sila and Robinson has given up the dominant position trying to land that submission.
Robinson goes for an armbar! This could be all over! Wait, no, Sila rolls with the submission and now he's on top in Robinson's guard! Nice work there by Sila! Score +2 for sweep to guard / half guard: Sila (4) vs (8) Robinson

That's ten minutes gone in the round.
Robinson is working the butterfly guard. He manages to land a nice scissor sweep and is now in half guard on the top. Nice move. Score +2 for sweep to guard / half guard: Sila (4) vs (10) Robinson
Robinson works his way into side control. Score +3 for passing guard: Sila (4) vs (13) Robinson
Robinson tries for an arm triangle. That looks pretty tight to me. Is this one over!?! Possibly, maybe, no Robinson has let go of the choke. Obviously it wasn't as tight as we thought!
Sila is looking for a sweep.
Sila is trying to control Robinson's posture but Robinson avoids it.
Sila tries to work a leg under to get back to half guard but Robinson wriggles his own leg back out and remains in side control.

That's eleven minutes gone in the round.
Sila is not content to let Robinson control the position.
Sila is positioning himself to get back to half guard.
Sila is working hard here to advance position.
Robinson wants to control but Sila is keeping him busy.
Sila can't do much from the bottom here.
Sila regains half guard.

That's twelve minutes gone in the round.
Robinson works his way into side control. Score +3 for passing guard: Sila (4) vs (16) Robinson
Robinson swings around for an armbar but Sila sees it coming a mile off and turns beautifully into Robinson's guard. Score +2 for sweep to guard / half guard: Sila (6) vs (16) Robinson
Robinson is working the butterfly guard. He manages to land a nice scissor sweep and is now in half guard on the top. Nice move. Score +2 for sweep to guard / half guard: Sila (6) vs (18) Robinson
Sila trying to control here.
Sila is staying active underneath Robinson, who seems content to just control the action from this position.
Robinson is trying for a guillotine from the top but the pressure isn't in the right place so Sila is just riding it out for now. Robinson eventually gives up the hold.
Sila is working for an escape here. He's hooked one of Robinson's legs and he's managed to sneak out and take Robinson's back! Score +4 for clean sweep to past guard: Sila (10) vs (18) Robinson

That's thirteen minutes gone in the round.
Sila is working hard for the rear naked choke here.
Robinson is trying to break free.
Robinson is being controlled on the ground here - he must escape this position otherwise surely the end is near.
Sila looking for the RNC.
Robinson rolls, trying to escape but Sila keeps control of the position.
Robinson fending off the submission attempt from Sila.

That's fourteen minutes gone in the round.
Sila trying to secure his dominant position for a moment - making sure Robinson doesn't escape.
Robinson is defending well here and trying to improve his position.
Will Sila go for the finish here or will he try and keep control of the position?
I really don't envy Robinson right now.
Boooooooooooooooooooo!!! God, this has been a terrible round. Come on you two, sort yourselves out!
Robinson just trying to survive but Sila is wriggling into a better position, looking to finish.
And that's the end of the fight!
Robinson wins on points by 18 to 10.
Timothy Robinson managed to slip a mention for his sponsors, Sully's Bar & Grill, into his post fight interview. |
|
|
|
Undercard bout
|
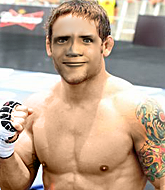
Coming up we have a lightweight Tycoon World Grappling Championship rules bout between Ozzy McKane and Masakazu Aoki. McKane comes to the cage accompanied by SAIL - AWOLNATION. Both fighters look fresh as a daisy as they make their way towards the cage.
This TWGC bout is 1 fifteen minute round in the lightweight division. Introducing today's competitors. In the red corner, competing out of Los Angeles, with a TWGC record of 2 wins and 2 losses; Ozzy McKane! And in the blue corner, fighting out of London, with a TWGC record of 2 wins and 1 losses; Masakazu Aoki!
The judges for this bout are Marco Blurström, Arvi Lind and Johanna Lukiainen.
Let's get this grappling contest under way! Who will be victorious?
McKane shoots in looking for a takedown. Aoki tries to sprawl out of it but McKane keeps driving through. The fighters are pinned against the cage. Aoki manages to get underhooks and after a bit of a struggle, circles away and we're back to standing.
McKane shoots in for a takedown and gets it. Let's see what he's got on the mat. Score +2 for takedown into guard / half guard: McKane (2) vs (0) Aoki
Aoki controls McKane momentarily but McKane frees himself.
Aoki might have to switch it up a bit here because his efforts to control McKane haven't been going to plan, at least at the current moment in time.
McKane controlling from the top position.
We've had a slow start to the round here - hopefully the action picks up.
Aoki pulls McKane in to control the position.
That's one minute gone in the round.
Aoki looking to sweep here. No luck so far.
McKane controlling from the top position.
McKane looking to pass the guard.
Aoki looking to hit a scissor sweep but McKane is one step ahead there.
Aoki is pulling down on McKane's head to control his posture.
That's two minutes gone in the round.
Aoki is trying to keep McKane in close.
McKane is taking a break and basically stalling. The referee will not allow him to do that for long.
Aoki wants to control the position but McKane says "no thanks buddy" and passes to half guard.
Aoki tries to roll over but McKane keeps him under control.
McKane looking to pass the half guard. Not this time.
That's three minutes gone in the round.
McKane stalling.
Aoki tries to get to full guard but McKane has control of the leg.
McKane trying to control the pace.
Aoki manages to get to full guard.
That's four minutes gone in the round.
Aoki controls McKane momentarily but McKane frees himself.
McKane passes Aoki's left leg - he's now in half guard.
Aoki regains full guard. Nicely done.
That's five minutes gone in the round.
Aoki controlling McKane's posture.
McKane is just sitting in guard, looking to avoid any submissions.
Aoki is doing well to control the posture of his opponent and prevent any damage.
McKane's corner is telling him to maintain position.
McKane passes Aoki's left leg - he's now in half guard.
The fighters are pressed up against the cage, both looking to find a bit of space to work.
Aoki is trying to maintain the position but McKane is very close to passing his half guard.
That's six minutes gone in the round.
McKane stalling.
McKane is just content to waste time from the top position. Aoki takes advantage of the situation and regains full guard.
Aoki looking for submissions off his back, moving his hips, looking for an opening.
Aoki wants to control but instead he gets his guard passed and McKane is now in half guard.
That's seven minutes gone in the round.
Aoki tries to regain full guard. Instead though, McKane has advanced to mount. Uh oh. Score +3 for passing guard: McKane (5) vs (0) Aoki
Aoki is desperately trying to get back to half guard.
McKane controlling from the full mount.
That's eight minutes gone in the round.
Aoki is wriggling around trying to escape.
McKane controlling his opponent.
McKane tries to control but Aoki wriggling away.
McKane content just to control the position here.
That's nine minutes gone in the round.
Aoki sneaks a leg back under and regains half guard and is working straight away to try and get back to guard. He hasn't managed just yet though.
Aoki moves into full guard.
Aoki is adopting a defensive guard.
That's ten minutes gone in the round.
Let's hope that Aoki has the urge to step up the pace any second now because for the last 15 or 20 seconds he's just been holding on tight.
McKane passes Aoki's left leg - he's now in half guard.
McKane wants to free his trapped foot but Aoki is holding on for dear life with his legs.
Aoki wants to control the action here but instead McKane manages to pass to full mount! Score +3 for passing guard: McKane (8) vs (0) Aoki
McKane can't quite control the action as he would like just now, as Aoki is looking to escape.
McKane controlling his opponent.
That's eleven minutes gone in the round.
Aoki tries to hold on but McKane postures up.
McKane sitting in mount, just looking to control for the moment.
That's twelve minutes gone in the round.
Aoki keeping his composure momentarily, calmly looking to get back to half guard.
McKane content just to control the position here.
McKane seems to have a rather negative gameplan on the ground. He seems keen to just score the takedown and hold down Aoki for as long as he can get away with.
Aoki is in all sorts of trouble here.
That's thirteen minutes gone in the round.
McKane trying to control but he's not successful this time.
McKane tucks in and makes sure he doesn't lose the dominant position.
McKane looking to control but Aoki is working nicely, looking to advance position himself.
Aoki is wriggling around trying to escape.
McKane avoids the attempt from Aoki to control.
That's fourteen minutes gone in the round.
McKane controlling his opponent.
Aoki can't escape the position.
McKane controlling the position easily from mount.
And that's the end of the fight!
McKane takes the fight on points by 8 to 0.
Ozzy McKane tried to hype himself up post fight but didn't word it too well and it ended up with him sounding like a bit of a tool. |
|
|
|
Co-main event
|
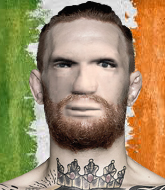
Coming up we have a lightweight Tycoon World Grappling Championship rules bout between Malaki Lima and Predator Burns. Lima's entrance music is Hawaii '78 - IZ. A fine choice. Burns has chosen Jiu-Jitsu as his entrance music. This should be fireworks!
This TWGC bout is 1 fifteen minute round in the lightweight division. Introducing today's competitors. In the red corner, competing out of London, with a TWGC record of 0 wins and 1 losses; Malaki Lima! And in the blue corner, fighting out of Rio de Janeiro, with a TWGC record of 3 wins and 6 losses; Predator Burns!
The judges for this bout are Arvi Lind, Anni Minnemäki and Johanna Lukiainen.
The official calls the fighters to the middle and the contest is under way.
Lima shoots in for a takedown. He's persisting with it as Burns sprawls well. Burns wins this battle and keeps the fight standing. Lima gets slowly back to his feet.
Lima shoots in looking for a double leg takedown. Burns defends it nicely.
Lima tries to shoot in for a takedown. He's got hold of a leg but Burns swivels and escapes.
Burns changes levels for a counter takedown but doesn't follow through with his attempt.
That's three failed takedown attempts in the round for Malaki Lima. That's going to take a lot out of him.
Lima fails with a takedown attempt from distance.
We've had a slow start to the round here - hopefully the action picks up.

Burns has closed the distance and engaged Lima in a clinch.

Burns drags the fight down to the ground.
Burns pushes a forearm under Lima's chin to create some space. He's escaped his hips and pivoted quickly for an armbar! Can he extend the arm? Yes, Lima is tapping out! Damn, that was fast!
Ladies and gentlemen, after 1:56 of round 1, we have a winner by way of Submission (Armbar). Predator Burns!
In his post fight interview, Predator Burns gave a big smile as he said 'Lets do the Trilogy fight. Good fight Man.'.
Malaki Lima spoke after the fight, saying 'Honestly don't know why I was put into Division 1 and not 2, but shit, congrats to my opponent'. |
|
|
|
Main event
|
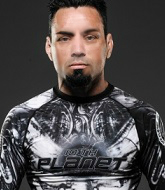
Coming up we have a lightweight Tycoon World Grappling Championship rules bout between Brett Hartlock and Chan Sung Aoki. Hartlock comes to the cage accompanied by Shoot To Thrill by AC/DC. Both fighters will be looking to make this an exciting fight for the fans, I'm sure!
This TWGC bout is 1 fifteen minute round in the lightweight division. Introducing today's competitors. In the red corner, competing out of Amsterdam, with a TWGC record of 0 wins and 1 losses; Brett Hartlock! And in the blue corner, fighting out of London, with a TWGC record of 0 wins and 0 losses; Chan Sung Aoki!
The judges for this bout are Johanna Lukiainen, Anni Minnemäki and Marco Blurström.
Let's get this grappling contest under way! Who will be victorious?
The fight moves into the clinch position.
Aoki drags the fight down to the ground.
Aoki working for a triangle but Hartlock defends it easily.
Hartlock looking to pass the guard.
Hartlock is working hard here to advance position.
Hartlock wants to control from the top but Aoki keeps moving.
Aoki looking to hit a scissor sweep but Hartlock is one step ahead there.
The ref warns both fighters not to hold the cage as they work up against the meshing.
We've had a slow start to the round here - hopefully the action picks up.
Aoki looking for submissions off his back, moving his hips, looking for an opening.
Aoki is trying to control the position but Hartlock postures up.
That's one minute gone in the round.
Hartlock wants to control from the top but Aoki keeps moving.
Hartlock controlling from the top position.
Aoki looking for a sweep. Not yet Aoki, not yet.
The fighters are pressed up against the cage, both looking to find a bit of space to work.
Aoki not looking particularly offensive just at the moment.
Aoki throwing his legs up looking for a triangle.
Aoki is working actively off his back, looking to secure an arm or perhaps work for a triangle.
Aoki is trying to control the position from the bottom.
Aoki looking for subs off his back but Hartlock has passed one foot through into half guard.
That's two minutes gone in the round.
Hartlock is figuring out what he wants to do next.
Hartlock wants to pass to mount but Aoki is defending the position.
Aoki is looking to regain full guard. Not this time though.
Hartlock uses his free foot to push down on Aoki's thigh. Eventually he works his other foot free and he's advanced to mount - this is trouble for Aoki. Score +3 for passing guard: Hartlock (3) vs (0) Aoki
Aoki is working to get back to half guard.
Hartlock trying to control but Aoki is having none of it.
That's three minutes gone in the round.
Hartlock controlling from the full mount.
Hartlock tries to control but Aoki wriggling away.
Aoki sneaks a leg back under and regains half guard and is working straight away to try and get back to guard. He hasn't managed just yet though.
Hartlock trying to control the pace.
Hartlock is working for a kimura but Aoki is defending it quite comfortably.
Aoki looking to work for a kimura from the bottom.
That's four minutes gone in the round.
Hartlock trying to control from half guard but Aoki is working away.
Hartlock is trying to work for a kimura but Aoki is defending well.
Hartlock prevents Aoki from improving his position.
Aoki is looking to control Hartlock's leg but it's slowly edging free. Can Aoki avoid being mounted?
Aoki makes his way to full guard. A much better position for Aoki.
Hartlock stays in close to Aoki's body and controls the position.
That's five minutes gone in the round.
Aoki escapes his hips to the side and looks to be working for an armbar. Hartlock gives him a little smile and shakes his head. No chance.
Aoki working for a triangle but Hartlock defends it easily.
Aoki looking to control but Hartlock passes into half guard.
Hartlock is looking for an arm triangle, whilst trying to pass to side control. Aoki doesn't seem that keen to cooperate though. No luck this time Hartlock.
Aoki moves his hips nicely and gets into full guard.
That's six minutes gone in the round.
Aoki has his hands on Hartlock's head, controlling the position.
Hartlock won't allow Aoki to sweep him here.
Aoki keeping moving, preventing Hartlock from controlling successfully.
Aoki is looking for a guillotine. You can't force these things though and Hartlock defends well.
Aoki wants to sweep here but Hartlock controlling him for the moment.
Hartlock showing good wrestling skills to control the position.
Aoki keeping moving, preventing Hartlock from controlling successfully.
That's seven minutes gone in the round.
Aoki looking to control.
Hartlock got a little sloppy there for a moment and Aoki has worked his way into a loose triangle - can he finish it?! No, Hartlock has managed to get both his arms back between Aoki's legs - danger averted.
Hartlock is frustrating his opponent with some stalling tactics from top position.
Aoki is active off his back here, looking for submissions.
Aoki not looking particularly offensive just at the moment.
Hartlock trying to control the position from guard on top but Aoki is wriggling around, looking for whatever he can.
Aoki trying to control the position.
That's eight minutes gone in the round.
Hartlock trying to control the position from guard on top but Aoki is wriggling around, looking for whatever he can.
Aoki working from the bottom, still in full guard. He's managed to get a loose triangle. Hartlock doesn't seem to be doing much to defend here, obviously he feels comfortable in the position. Hartlock manages to throw the legs off his shoulder and he's back into guard - no problem.
Aoki throwing his legs up looking for a triangle.
Aoki keeping moving, preventing Hartlock from controlling successfully.
Hartlock is looking to pass into half guard but Aoki pushes him away with his feet and jumps on top - now Aoki is in guard. Score +2 for sweep to guard / half guard: Hartlock (3) vs (2) Aoki
Hartlock can't keep his opponent in guard - Aoki advances to half guard, no doubt looking to mount.
Aoki is sneakily working for an arm triangle but Hartlock sees it coming and defends easily.
That's nine minutes gone in the round.
Aoki looking for a kimura but he'll have to free his other leg if he wants to finish that. Perhaps he's just using it as a distraction technique.
Hartlock moves his hips nicely and gets into full guard.
Aoki trying to pass the guard but can't manage it just yet.
Hartlock tries to land a sweep but no joy.
Aoki got a little sloppy there for a moment and Hartlock has worked his way into a loose triangle - can he finish it?! No, Aoki has managed to get both his arms back between Hartlock's legs - danger averted.
Hartlock looking for a sweep. Not yet Hartlock, not yet.
That's ten minutes gone in the round.
Aoki wants to control from the top but Hartlock keeps moving.
Hartlock looking to sweep here. No luck so far.
Hartlock looking for submissions from the bottom here. Moving his hips around, possibly looking for an armbar.
Hartlock is trying to keep Aoki in close.
Aoki drops back looking for a leg! Hartlock is in trouble here! The fighters roll with the hold and Hartlock manages to kick Aoki off! Aoki jumps back into Hartlock's guard.
Hartlock looking for submissions from the bottom here. Moving his hips around, possibly looking for an armbar.
Hartlock had isolated an arm as going for a kimura. Aoki defends it easily.
That's eleven minutes gone in the round.
Aoki trying to control the position from guard on top but Hartlock is wriggling around, looking for whatever he can.
Aoki is pushing down on Hartlock's leg trying to pass to half guard. Hartlock is fighting to maintain full guard but Aoki has managed to sneak the leg through.
Aoki is working for submissions here but there's nothing on.
Hartlock moves into full guard.
Hartlock trying to control the position.
That's twelve minutes gone in the round.
Aoki got a little sloppy there for a moment and Hartlock has worked his way into a loose triangle - can he finish it?! No, Aoki has managed to get both his arms back between Hartlock's legs - danger averted.
Aoki trying to control the position from guard on top but Hartlock is wriggling around, looking for whatever he can.
Aoki trying to pass the guard but can't manage it just yet.
Hartlock is looking for a triangle but Aoki pushes his legs off easily.
Aoki got a little sloppy there for a moment and Hartlock has worked his way into a loose triangle - can he finish it?! No, Aoki has managed to get both his arms back between Hartlock's legs - danger averted.
Hartlock looking to control.
Aoki trying to control but Hartlock is working from the bottom.
Aoki is intent on slowing down the pace of the fight, simply looking to control.
That's thirteen minutes gone in the round.
Hartlock working from the bottom, still in full guard. He's managed to get a loose triangle. Aoki doesn't seem to be doing much to defend here, obviously he feels comfortable in the position. Aoki manages to throw the legs off his shoulder and he's back into guard - no problem.
Aoki is pushing down on Hartlock's leg trying to pass to half guard. Hartlock is fighting to maintain full guard but Aoki has managed to sneak the leg through.
Aoki is looking for a kimura here.
Aoki wants to take a breather but Hartlock is having none of it.
That's fourteen minutes gone in the round.
Hartlock is defending against the submission attempts here by Aoki.
Hartlock manages to get to full guard.
Aoki trying to control the position from guard on top but Hartlock is wriggling around, looking for whatever he can.
Hartlock can't keep his opponent in guard - Aoki advances to half guard, no doubt looking to mount.
Boooooooooooooooooooo!!! God, this has been a terrible round. Come on you two, sort yourselves out!
Hartlock has no desire to be mounted, so is trying to control. Aoki is working away from the top position though.
Hartlock tries to get to full guard but Aoki has control of the leg.
And that's the end of the fight!
Hartlock takes the fight on points by 3 to 2.
Brett Hartlock was full of energy after the big win and talked about how he thinks he can do big things in this sport. The crowd were appreciative of his determination to succeed. |
|
|
|
|
|
|