 |
MMANIAK 24 Lotus vs Maul PBP Commentary |
Undercard bout
|
Coming up we have a welterweight MMA rules bout between Nick Hay (ranked 0 p4p, 0 weight class) and Carlos Strikes (ranked 0 p4p, 0 weight class). The fight MMA fans around the world have waited their entire lives for!
 |
|
 |
| 178 cm
29
166 lbs
13 - 4 - 1 |
|
186 cm
48
180 lbs
41 - 37 - 2 |
Good wrestling
Lethal high kicks
Granite chin |
|
BJJ Brown Belt
Excellent MT
Granite chin |
|
| |
|
Ladies and gentlemen. This fight is 3 rounds, in the welterweight division.
Introducing the fighter to my left, fighting out of the red corner.
With a record of
13 - 4 - 1, fighting out of Helsinki, Nick Hay!
And introducing the fighter to my right, fighting out of the blue corner.
With a record of
41 - 37 - 2, fighting out of London, Carlos Strikes!
The judges for this bout are Donald Grub, Sam Margolis and James Ackerman.

The bell rings for round one and we are underway!

Hay drives through and clinches with Strikes against the cage.

Hay pushes off and circles away, back to the middle of the mat.
Hay drives through and clinches with Strikes against the cage.
Hay's corner calls for him to break the clinch, which he does.
Hay has managed to clinch.
Strikes with a knee to the head.

Strikes breaks the clinch and we return to the middle of the mat.
A punch combination from Hay misses.
Hay throws a right hand that Strikes ducks under and follows up with a left that Strikes also avoids with ease.
Strikes has a takedown stuffed.
Strikes misses with a takedown attempt - Hay sprawls well and throws a nice strike on the way out which just misses.
Hay moves into the clinch.
Hay manages to break the clinch.
Wooooo! Give it up for these two warriors! They are putting on a show!

Strikes has closed the distance and engaged Hay in a clinch.
Strikes misses with a shot to the kidneys.
Hay with an attempt at a knee that misses.
Strikes breaks the clinch and we return to the middle of the mat.
A big right from Strikes misses.

That's one minute gone in the round.
Hay scores with a nice one two combo and darts back out of range to avoid anything coming in the opposite direction.

It looks like Carlos Strikes has been cut.
Strikes rushes Hay and pushes him back against the cage in a clinch.
Hay misses with an elbow strike.
Hay avoiding damage as Strikes throws knees to the body.
Hay breaks the clinch.
Strikes tries to drive through with a takedown attempt but Hay defends well and Strikes ends up having to push Hay into the cage where they will battle it out in the clinch.
Nick Hay has stuffed three takedown attempts in the round now. That's going to take a lot out of Carlos Strikes.
Strikes fails with a takedown attempt.
Strikes scoring well with a low kick there.
Hay has Strikes up against the cage in a clinch.
Strikes working hard to break the clinch.
Hay working some nice short punches in the clinch.
A short left from Hay.
The crowd cheering loudly, showing their appreciation for the quality fight we're seeing here.
Hay scores with an uppercut up the middle.
Hay throws an elbow but it misses.
Strikes tries to break the clinch but Hay is controlling the position.

That's two minutes gone in the round.
Hay pushes off and circles away, back to the middle of the mat.
Hay takes the fight into the clinch.
A head punch blocked on the inside by Hay.
Hay manages to break the clinch.
Strikes moves into the clinch successfully.
A nice right hand lands inside from Hay.
Hay dictating the pace here, as the fighters clinch against the cage.
Hay pushes off and circles away, back to the middle of the mat.
Hay throws a series of strikes that have Strikes backpedaling.
Hay rushes Strikes and pushes him back against the cage in a clinch.
Hay presses Strikes against the cage and delivers a mid-strength body shot.
Strikes wants to get back to striking at distance but Hay won't allow it.
Hay's corner calls for him to break the clinch, which he does.
Hay moves into the clinch.
Strikes misses with a shot to the kidneys.
Hay breaks the clinch.
Strikes shoots in for a takedown - he's clinched up with Hay but Hay pushes him off and we're back to square one.

That's three minutes gone in the round.
Hay gets a clinch.
Strikes manages to break the clinch.
Strikes closes the distance and presses his opponent up against the cage.
Strikes throws an elbow that misses.
Strikes creates a bit of distance and throws an elbow that only just misses.
Hay's corner calls for him to break the clinch, which he does.
Hay clinches up with Strikes and pushes him back against the cage.
Hay keeps control of Strikes as he tries to wriggle out of the double underhooks.
The referee is keeping an eye on Hay - much more stalling and he will separate the fighters.
Hay prevents Strikes from breaking the clinch.
Hay tries a knee to the head but he's missed.
Hay breaks the clinch.
Strikes is trying hard to land a takedown here. Hay sprawls well and keeps this one on the feet.
Strikes gets a clinch.
Strikes managing to block the knees to the body from Hay.
A right hand to the body from Hay.

That's four minutes gone in the round.
The pace really dropping off here, momentarily.
Hay working on landing some head shots here - that one got through nicely.
A right handed body shot lands from Hay.
The crowd cheering loudly, showing their appreciation for the quality fight we're seeing here.
Strikes pushes off and circles away, back to the middle of the mat.
Strikes clinches.
Strikes managing to block the knees to the body from Hay.
Hay breaks the clinch and we're back to striking at distance.
Hay clinches.
Hay misses with an elbow strike.
Hay's corner calls for him to break the clinch, which he does.
Nick Hay seems to be the more aggressive standup fighter in this bout.
Strikes looks for a takedown but Hay sprawls well.
The crowd applaud the fighters' efforts here as the round comes to an end.
Hay gets in close and instigates a clinch.
Hay's corner calls for him to break the clinch, which he does.
Strikes throws a combination but it was largely blocked by Hay.
And thats the end of the round the fighters go back to their corners.
Nick Hay dominated that round.
The cut man is working on Carlos Strikes's cut.
The fighters' corners scream their final instructions, as the referee calls time. Here we go, back to the action!

Strikes tries to keep at a distance but Hay has taken the fight into the clinch.
Strikes wants to push off and get back to the center of the mat but Hay has him pressed against the cage.
Hay missing with knees to the body.
Hay's corner calls for him to break the clinch, which he does.
A kick lands to the mid section there for Hay.
Nick Hay is winning the standup battle so far.
Hay instigates a clinch.
Strikes avoids the elbow strike from Hay, against the cage.
Hay's corner calls for him to break the clinch, which he does.
Hay closes the distance and clinches.
Hay escapes the clinch and we're back to striking.
Strikes takes a nasty kick to the mid section... That should keep him thinking. Does he try and block and risk a head kick landing?
Hay displaying good standup as he scores with a three punch combination.
The crowd are loving this. Great action here.
Hay darts in and out, connecting with a jab.
That has opened up Carlos Strikes's cut even more.
Strikes moves into the clinch.
Strikes lands a right hand.
Nick Hay has scored more points in the clinch so far.
Hay's corner calls for him to break the clinch, which he does.
Hay clinches up against the cage.
Hay manages to break the clinch.
That's one minute gone in the round.
Hay clinches.
Hay breaks the clinch and we're back to striking at distance.
Hay rushes Strikes and presses him up against the cage.
Strikes pushes off and fires off an elbow that misses, before clinching up again, against the cage.
Hay gets through Strikes's defenses to land a nice punch to the side of the head.
Hay breaks from the clinch.
Hay throws a left and a right that both miss
and Strikes counters nicely by changing levels and landing a hook to the body.
Hay will need to tighten up his combinations if he doesn't want to gas himself out, swinging at thin air.
Hay moves into the clinch.
Hay blocks a knee to the body. He'll have a nicely bruised forearm in the morning.
Hay manages to break the clinch.
Hay moves into the clinch.
Hay breaks the clinch and we're back to striking at distance.
Hay closes the distance and pushes Strikes back into the cage.
This has been an exciting period of action!
Hay breaks from the clinch.
That's two minutes gone in the round.
Strikes tries to keep at a distance but Hay has taken the fight into the clinch.
Hay working on landing some head shots here - that one got through nicely.
Hay misses the knee to the body. Nice hip positioning from Strikes.

Hay has Strikes pressed up against the cage. He's trying to work for a single leg takedown. Hay pulls back from the cage and twists to the side, sending Strikes tumbling to the mat - Hay dives into Strikes's guard.

The fighters are working up against the cage. Strikes manages to wriggle his way back to his feet, so the fighters are now clinched against the cage.
Hay breaks from the clinch.
Hay takes the fight into the clinch.
Hay scores with a shoulder strike.
The cut above Carlos Strikes's eye is starting to cause him problems now.
Hay breaks from the clinch.
Strikes closes the distance and clinches.
Hay escapes the clinch and we're back to striking.
That's three minutes gone in the round.
Hay fakes with an overhand right and moves in to clinch with Strikes, pushing him back against the cage.
Hay is really dominating this fight. Is there anything that Strikes can do to turn this around?
Hay breaks the clinch and we're back to striking at distance.
The fight moves into the clinch position.
Hay taking a breather.
Hay breaks the clinch and we're back to striking at distance.
Strikes fakes with an overhand right and moves in to clinch with Hay, pushing him back against the cage.
Hay breaks the clinch and we're back to striking at distance.
Hay misses with a jab, cross combination.
Hay looks to have improved his striking defense since last time we saw him fight.
Hay will need to tighten up his combinations if he doesn't want to gas himself out, swinging at thin air.
Strikes feints the counter takedown.
Hay clinches up against the cage.
Strikes looking to throw knees to the head but Hay is blocking nicely.
Hay manages to break the clinch.
Strikes tries a head kick but it misses.
That's four minutes gone in the round.
Hay has managed to clinch.
Hay breaks from the clinch.
The fans in attendance giving it up for the two fighters, who have really let it all hang out in the last minute or so!
Hay clinches with his opponent.
Strikes tries to land a knee to the head but Hay blocks with his arms.
Hay presses Strikes against the cage and delivers a mid-strength body shot.
Hay pushes off and circles away, back to the middle of the mat.
Strikes moves out of range as Hay throws a body kick.
Hay fails to land with a series of punches.
Nick Hay is looking to throw some combinations by the looks of things.
Strikes gets to the clinch - let's see what his plan is here.
Hay manages to break the clinch.
Strikes tries to drive through with a takedown attempt but Hay defends well and Strikes ends up having to push Hay into the cage where they will battle it out in the clinch.
Hay misses with a few strikes there.
Hay throws a jab, cross combination which is slipped
and Strikes counters with a series of strikes. Hay will be more careful next time no doubt.
The crowd applaud the fighters' efforts here as the round comes to an end.
Hay closes the distance and pushes Strikes back into the cage.
Hay breaks the clinch.
Sloppy strikes from Strikes. Those never looked like landing.
Hay went nuts there looking for a big combo counter but none of the flurry connected.
Hay drives through and clinches with Strikes against the cage.
And thats the end of the round the fighters go back to their corners.
Nick Hay dominated that second round.
The cut man is working on Carlos Strikes's cut.
That's time! Back to the action! This is the final round!

Hay lands with a nice combination. Strikes backs away looking to recover.
Hay pushes Strikes up against the cage in a clinch.
Hay's corner calls for him to break the clinch, which he does.
Hay misses with a jab and misses with a cross straight after too.
Strikes misses with a double jab.
Strikes clinches with his opponent.
Hay breaks from the clinch.
Hay throws a series of strikes that have Strikes backpedaling.
Hay darts in and clinches Strikes up against the cage.
The fans in attendance giving it up for the two fighters, who have really let it all hang out in the last minute or so!
Hay breaks the clinch.
Strikes gets tackled into the cage by Hay. Hay maintains the clinch.
Hay manages to break the clinch.
Strikes lands with a kick to the ribs.
Hay displays good takedown defense there as he swats away a double leg from Strikes.
Hay closes the distance and pushes Strikes back into the cage.
That's one minute gone in the round.
Strikes is trying to force a seperation but Hay has the dominant position.
Hay escapes the clinch and we're back to striking.
Hay drives through and clinches with Strikes against the cage.
Hay's corner calls for him to break the clinch, which he does.
Hay avoids the head kick by Strikes.
Hay went nuts there looking for a big combo counter but none of the flurry connected.
Hay clinches up with Strikes and pushes him back against the cage.
Hay just leaning against Strikes, taking a breather.
Hay lands with a short shot to the head.
Hay has Strikes pressed up against the cage and is working for takedown. Strikes manages to improve position though and keeps the fight standing.
Strikes misses with an elbow strike.
Hay can't get the takedown.
Hay working on landing some head shots here - that one got through nicely.
Hay pushes off and circles away, back to the middle of the mat.
Hay looks to land a combination but Strikes avoids it well.
Strikes rushes Hay and presses him up against the cage.
Strikes escapes the clinch and we're back to striking.
Strikes tries a head kick but it misses.
That's two minutes gone in the round.
Hay pushes Strikes up against the cage in a clinch.
The fans in attendance giving it up for the two fighters, who have really let it all hang out in the last minute or so!
Strikes breaks from the clinch.
Strikes gets tackled into the cage by Hay. Hay maintains the clinch.
Hay stalling against the cage.
Hay misses the knee to the body. Nice hip positioning from Strikes.
Hay lands a right hand.
Hay escapes the clinch and we're back to striking.
Hay misses with a double jab.
Hay tries to keep at a distance but Strikes has taken the fight into the clinch.
The two fighters are working to gain dominance in the clinch.
Strikes struggles to land a body shot inside as Hay controls his hands.
Hay throws a nice elbow but it doesn't land.
Hay has hold of a leg and is looking for a trip takedown. Strikes avoids it nicely though and we remain in the clinch.
That's three failed takedown attempts in the round for Nick Hay. That's going to take a lot out of him.
Strikes throws an elbow but it misses.
That's three minutes gone in the round.
Hay breaks from the clinch.
Hay darts in and clinches Strikes up against the cage.
Strikes misses with a knee strike.
Strikes blocks a knee to the body. He'll have a nicely bruised forearm in the morning.
A nice right hand lands inside from Hay.
Hay escapes the clinch and we're back to striking.
Hay moves into the clinch.
Hay escapes the clinch and we're back to striking.
A combination from Strikes does no damage.
Carlos Strikes has stepped it up - he knows he needs a finish here!
Hay throws a nice looking combination but Strikes bobs and weaves to avoid any damage.
Hay moves into the clinch successfully.
Hay lands a right uppercut that snaps the head of Strikes backwards.
Strikes working hard to break the clinch.
Hay breaks from the clinch.
The fight moves into the clinch position.
The crowd are loving this. Great action here.
Hay breaks from the clinch.
That's four minutes gone in the round.
Hay fakes with an overhand right and moves in to clinch with Strikes, pushing him back against the cage.
Strikes throws a vicious knee straight up the middle but Hay blocks it with crossed arms.
Strikes is trying to maintain a safe position but Hay gets an underhook and turns Strikes into the cage.
Both fighters working to control the clinch.
Nice body punch from Hay - that landed with a thud.
Strikes takes a big intake of breath there - he's definitely tired.
A short right from Hay.
Hay's corner calls for him to break the clinch, which he does.
Hay closes the distance and pushes Strikes back into the cage.
A short left from Hay.
Hay's corner calls for him to break the clinch, which he does.
Strikes moves into the clinch.
Hay pushes off and circles away, back to the middle of the mat.
Horrible takedown attempt by Strikes or perhaps it was just good defense by Hay, which made it look bad.
The crowd applaud the fighters' efforts here as the round comes to an end.
Hay moves forwards but Strikes connects with a nice, crisp jab.
Nick Hay is fighting for a decision here - he's started to take the cautious approach.
A telegraphed takedown attempt from Hay is defended easily by Strikes.
And that's the end of the fight!
Nick Hay showed his dominance in that final round.
Well I reckon that's a shut out for Hay, winning every round. Will the judges agree? They are the ones who matter, even if they are often depressingly incompetent. Over to the ring announcer for the scorecards.
Ladies and gentlemen, after 3 rounds of action, we go to the scorecards for a decision.
Judge Donald Grub scores the fight 30:27
Judge Sam Margolis scores the fight 30:27
Judge James Ackerman scores the fight 30:27
In favor of your winner, by unanimous decision... Nick Hay!
|
|
|
|
|
|
|
|
|
|
|
|
|
|
|
|
|
|
|
|
|
|
|
| S |
C
A |
G |
S |
C
B |
G |
|
S |
C |
G |
|
energy
A | B |
|
hype
A | B |
|
pop
A | B |
|
mgr
A | B |
|
FIGHT
RATING
83% |
|
|
|
|
|
|
|
Undercard bout
|
Coming up we have a heavyweight MMA rules bout between Stephen Otumba (ranked 0 p4p, 0 weight class) and Ling Manchu (ranked 0 p4p, 0 weight class). Manchu is bouncing up and down as he enters the arena, backed by Bodies. Stephen Otumba could well score a knockout today. He has the power to get to Ling Manchu's chin.
 |
|
 |
| 204 cm
21
220 lbs
4 - 12 - 0 |
|
208 cm
27
245 lbs
9 - 29 - 0 |
BJJ Blue Belt
Counter fighter
Good chin |
|
BJJ Blue Belt
Basic striking
Knockout power |
|
| |
|
Ladies and gentlemen. This fight is 3 rounds, in the heavyweight division.
Introducing the fighter to my left, fighting out of the red corner.
With a record of
4 - 12 - 0, fighting out of Amsterdam, Stephen Otumba!
And introducing the fighter to my right, fighting out of the blue corner.
With a record of
9 - 29 - 0, fighting out of London, Ling Manchu!
The judges for this bout are Daniel Bishop, William Gold and James Ackerman.
The bell rings for round one and we are underway!
Manchu has his takedown stuffed
and Otumba counters with a nice double leg into half guard.
Neither fighter is being very active at the moment, with Otumba in particular looking to stall.
Otumba with the ground and pound but Manchu uses the opportunity to regain guard.
Otumba missing there with some ground and pound from the guard.
Otumba slips nicely into half guard.
Otumba wants to pass the guard but Manchu is defending well.
We've been hearing good reports from Otumba's training camp. Apparently he has been rolling around with some good quality BJJ practitioners and has been sharpening his skills. Let's see if that has an impact on the fight today.
We've had a slow start to the round here - hopefully the action picks up.
Manchu is refusing to be controlled, as Otumba sits in half guard.
The referee calls for the fighters to work.
Manchu avoiding damage under a succession of punches from Otumba.
The ref warns both fighters not to hold the cage as they work up against the meshing.
That's one minute gone in the round.
Manchu is refusing to be controlled, as Otumba sits in half guard.
Otumba throwing punches and elbows but they're not doing any damage.
Otumba missing with some ground and pound from the half guard.
Otumba is keen to just control but Manchu is a slippery customer.
Otumba stalling away here and it's allowed Manchu to slip out his trapped foot and regain full guard.
Otumba is breathing heavily.
Manchu preventing the ground and pound from doing any damage.
Manchu is working the butterfly guard. He manages to land a nice scissor sweep and is now in half guard on the top. Nice move.

In the pre-fight buildup videos we saw Manchu working his ground and pound in the gym. He isn't landing a great percentage of his ground strikes so far though.
Manchu stalling.
Manchu working some ground and pound from close in. He's looking to maintain this position and strike for a while by the looks of things... although he'll probably advance to full mount in a minute now I've said that.
That's two minutes gone in the round.
Otumba is trying to maintain the position but Manchu is very close to passing his half guard.
Otumba is trying to defend against the ground and pound but Manchu scores with a couple of nice shots.
Otumba has been looking to land a fair amount of strikes on the ground. He might be looking to soften his opponent up in order to work for a submission.
Manchu looks towards his corner to check for any instructions. The corner give him nothing to work with, so he cracks Otumba with a short hammerfist. I guess that's as good as any advice he could get in this position.
Otumba is looking to regain full guard. Not this time though.
Manchu winds up and cracks Otumba with a swinging punch to the side of the head.
Otumba on the receiving end of some nice ground and pound.
Otumba trying to control here.
Manchu takes a deep breath and rests his weight momentarily on top of his opponent, to control the position.
Otumba has hold of Manchu's hands but Manchu slips his arm to the side and lands an elbow.
Otumba tries to get to full guard but Manchu has control of the leg.
Otumba has hold of Manchu's hands but Manchu slips his arm to the side and lands an elbow.
That's three minutes gone in the round.
Otumba is looking to improve his position.
Otumba wants to control but Manchu is keeping busy and won't allow it.

Otumba is defending against the submission attempts here by Manchu.
The two fighters exchange a few words. I couldn't hear what they were saying but maybe it's more fun if you make it up yourself. Manchu connects with a nice short shot to Otumba's temple.
Manchu trying to control the pace.
The referee walks around the fighters to get a better view of the action. Manchu lands a nice short elbow.
Manchu working Otumba over with strikes.
Otumba is trying to get back to full guard.
Otumba has hold of Manchu's hands but Manchu slips his arm to the side and lands an elbow.
Manchu working Otumba over with strikes.
Manchu takes a deep breath and rests his weight momentarily on top of his opponent, to control the position.
That's four minutes gone in the round.
Manchu working over Otumba with some ground and pound. Otumba looks like he wants out of this position, which is understandable.
The fighters are pressed up against the cage, both looking to find a bit of space to work.
Manchu missing with some ground and pound from the half guard.
Manchu lands strikes from half guard.
Manchu scores with a couple of good hammerfists.
Manchu is thwarting Otumba's attempts to control the position.
Manchu lands with a punch from half guard.
Otumba is trying to defend against the ground and pound but Manchu scores with a couple of nice shots.
Otumba wants to control but Manchu is keeping busy.
Manchu not doing much here.
The crowd thankful this round is nearly over.
Manchu landing with strikes to the body and head, softening up his opponent.
Manchu is thwarting Otumba's attempts to control the position.
And thats the end of the round the fighters go back to their corners.
Ling Manchu dominated that round.
OK. That's time! The bell goes and we're back to the action.
Manchu misses with a takedown
and Otumba counters with a nice double leg into side control. Manchu won't be happy with that.
Otumba trying to control the position but Manchu is working away.
Otumba tries to move into full mount but can't pass Manchu's legs.
We get told so often about how wrestlers don't like to be on their backs. Let's see if Manchu can do anything to dispel that myth.
Manchu gets back to half guard.
We've had a slow start to the round here - hopefully the action picks up.
Manchu trying to control here.
Otumba is stalling here. Manchu is in no mood to hang around though. He's locked up a kimura from the bottom! Otumba seems to be keeping calm but he's forced to roll out of the hold and Manchu has ended up in side control on the top. Nice work.
Both fighters are absolutely exhausted here.
That's one minute gone in the round.
Manchu controlling the position.
Otumba is not in a great position here, taking some shots.
Manchu connects with a decent looking elbow from side control that caused Otumba some visible discomfort.
Otumba is trying to escape the position but Manchu is controlling the position.
Manchu wants to lay and pray for a moment but Otumba keeps working.
Manchu working the head and body with strikes.
Ling Manchu has got the better of the ground game so far.
Otumba takes a couple of big shots there - the referee warns him that he has to defend himself better.
Manchu scores with a couple of short elbows.
Otumba is looking to regain half guard here but Manchu keeps moving and retains side control.
Manchu connects with a decent looking elbow from side control that caused Otumba some visible discomfort.
Otumba tries to work a leg under to get back to half guard but Manchu wriggles his own leg back out and remains in side control.
Otumba is sneaking out the side here. He's bucked Manchu off and has taken his back!
Otumba struggling to land strikes to the head as Manchu covers up.
That's two minutes gone in the round.
Otumba has the hooks in. Manchu is trying to push off one leg but he has to do so cautiously to avoid being submitted.
Otumba trying to control momentarily.
Otumba looking to hold on to the position here but Manchu rolls and ends up regaining guard.
The fans in attendance giving it up for the two fighters, who have really let it all hang out in the last minute or so!
Otumba wants to pass the guard but Manchu is keeping the position.
Otumba throws a strike but Manchu rolls with it and manages to sweep. Now he's in guard on top.
Manchu controlling from the guard. I say controlling but really, he's stalling.
Manchu's corner are shouting for him to control the position and he seems happy to oblige.
That's three minutes gone in the round.
Manchu stands up over Otumba, holding his feet. He dives back in and lands a decent shot to the head.
Manchu stopping the sweep attempt from Otumba.
Manchu must be cautious of submissions here, given that his opponent has the superior Jiu Jitsu.
Otumba being controlled here, momentarily.
Otumba is working an open guard here, looking to improve his position. No doubt that will leave him open to counters but at least he's being more offensive.
Otumba has momentary wrist control but Manchu slips an elbow through the middle.
Otumba is trying to control the position but Manchu postures up.
Manchu landing with the ground and pound.
Manchu not doing a lot at the moment. He'll have to show some more aggression or the fight will get stood up.
Manchu chips away with some ground and pound.
That's four minutes gone in the round.
Manchu is fighting to break Otumba's control of his arms but Otumba is doing a good job of controlling the position at the moment.
Manchu chips away with some ground and pound.
Manchu stands up over Otumba, holding his feet. He dives back in and lands a decent shot to the head.
Otumba is trying to control the position from the bottom.
Manchu is taking a break and basically stalling. The referee will not allow him to do that for long.
Otumba working a defensive guard here.
Manchu has been the more effective fighter overall so far.
Manchu engaging in some classic timewasting tactics.
Otumba is trying to control the position from the bottom.
The crowd thankful this round is nearly over.
Manchu sitting in guard, not really doing much.
Manchu with a couple of shots to the head there. Not particularly brutal.
And thats the end of the round the fighters go back to their corners.
Ling Manchu showed his class in that round. I'd imagine he'll take it on all the scorecards.
That's the end of the round. The referee orders the cornermen out of the cage so we can get back down to business. This is the final round!
Manchu shoots in but Otumba avoids the takedown attempt easily.
A really sloppy takedown attempt there from Manchu.
Otumba tries to counter with a takedown but Manchu is quick to defend against it.
Ling Manchu is looking to throw some combinations by the looks of things.
Manchu shoots in but no luck this time.
Otumba tries to counter with a takedown but Manchu is quick to defend against it.
Stephen Otumba has stuffed three takedown attempts in the round now. That's going to take a lot out of Ling Manchu.
Nice defenses there by Otumba.
Otumba tries to counter with a takedown but Manchu is quick to defend against it.
Manchu fails with a takedown attempt.
Otumba drops down looking for a counter takedown but Manchu sprawls and moves away.
Manchu takes a big intake of breath there - he's definitely tired.
We've had a slow start to the round here - hopefully the action picks up.
Nice takedown defense from Otumba. No joy for Manchu on that attempt.
That's one minute gone in the round.
Manchu gets his takedown attempt stuffed easily
and Otumba counters with a nice double leg into side control. Manchu won't be happy with that.
Otumba wants to control but Manchu is keeping him busy.
Otumba is going to have to think about doing something other than just controlling because Manchu is managing to avoid having the position dictated to him.
Manchu parries the strikes from Otumba easily there. Otumba is wary of posturing up too much because it might enable Manchu to escape.
Otumba is looking to take a break and control but Manchu is keeping him honest, looking to work from the bottom.
Sloppy strikes there by Otumba.
Otumba trying to control the action but Manchu is working from the bottom.
That's two minutes gone in the round.
Manchu defending against the ground and pound.
Otumba creates some space and throws a big elbow, but Manchu sees it coming and moves his head just enough to avoid the strike.
Manchu is not content to let Otumba control the position.
Otumba working the strikes but Manchu uses the opportunity to regain half guard.
Otumba is trying to control. Manchu wants to improve his position but can't escape this time.
That's three minutes gone in the round.
Otumba not throwing his punches with enough precision this time.
Otumba wants to control but Manchu is keeping him busy.
Manchu wants to improve his position but Otumba is controlling well.

The referee decides to stand the fighters back up.
Manchu fails with a takedown attempt.
Otumba feinted with a counter takedown.
Manchu fakes high and shoots in for a takedown but Otumba avoids it really well and circles away.
That's four minutes gone in the round.
The crowd are showing their displeasure at the lack of action as loud boos ring out around the arena.
A really sloppy takedown attempt there from Manchu.

Manchu gets a double leg takedown into Otumba's guard.
Otumba is trying to control the position from the bottom.
Otumba is really struggling to control Manchu but he's trying to hold on to the position.
Manchu sitting in guard, not really doing much.
Otumba trying to keep a closed guard but Manchu is proving a slippery customer.
Boooooooooooooooooooo!!! God, this has been a terrible round. Come on you two, sort yourselves out!
Manchu controlling from the guard. I say controlling but really, he's stalling.
And that's the end of the fight!
Stephen Otumba showed his dominance in that final round.
I think Manchu has won this one but let's see whether the judges agree with me. Over to the ring announcer for the scorecards.
Ladies and gentlemen, after 3 rounds of action, we go to the scorecards for a decision.
Judge Daniel Bishop scores the fight 28:29
Judge William Gold scores the fight 28:29
Judge James Ackerman scores the fight 28:29
In favor of your winner, by unanimous decision... Ling Manchu!
A relieved looking Ling Manchu thanked the fans for their support and gave the usual line about them being amazing. They seemed to believe that he actually meant it.
|
|
|
|
|
|
|
|
|
|
|
|
|
|
|
|
|
|
|
|
|
|
|
| S |
C
A |
G |
S |
C
B |
G |
|
S |
C |
G |
|
energy
A | B |
|
hype
A | B |
|
pop
A | B |
|
mgr
A | B |
|
FIGHT
RATING
31% |
|
|
|
|
|
|
|
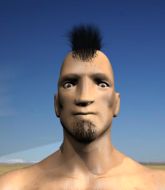
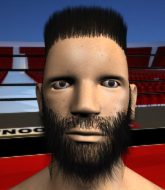
Co-main event
|
Coming up we have a heavyweight MMA rules bout between Thomas Johnson (ranked 0 p4p, 0 weight class) and Carl Williamson (ranked 0 p4p, 0 weight class). Johnson comes to the cage accompanied by Voodoo People. Over to our ring announcer for the fighter introductions!
 |
|
 |
| 202 cm
52
250 lbs
44 - 44 - 1 |
|
190 cm
20
240 lbs
6 - 4 - 0 |
BJJ Purple Belt
Excellent boxer
KO power |
|
Good wrestler
Brawler
Knockout power |
|
| |
|
Ladies and gentlemen. This fight is 3 rounds, in the heavyweight division.
Introducing the fighter to my left, fighting out of the red corner.
With a record of
44 - 44 - 1, fighting out of London, Thomas Johnson!
And introducing the fighter to my right, fighting out of the blue corner.
With a record of
6 - 4 - 0, fighting out of London, Carl Williamson!
The judges for this bout are Donald Grub, Phil Schofield and Richard Clark.
The bell rings for round one and we are underway!
Williamson takes a body kick right on the floating rib. Ouchie.
Johnson clinches.
Johnson pulls guard effortlessly.
Williamson controlling from the guard. I say controlling but really, he's stalling.
My spies in Kung Fu Fighting Club ($299 entry fee) inform me that Williamson has been getting involved in the gym's BJJ sparring sessions. Let's see whether that pays dividends!
Williamson cracks Johnson with a solid left hand.
Johnson has momentary wrist control but Williamson slips an elbow through the middle.

Johnson had isolated an arm as going for a kimura. Williamson defends it easily.
Williamson postures up to throw the ground and pound strikes but they don't connect.
Johnson keeping moving, preventing Williamson from controlling successfully.
We've had a slow start to the round here - hopefully the action picks up.
Johnson tries to land a sweep but no joy.
Johnson is trying to control the position but Williamson postures up.
Williamson postures up and lands some nice ground and pound.
Williamson throws a big elbow that misses.
The fighters are pressed up against the cage, both looking to find a bit of space to work.
Johnson is controlling Williamson's posture.
That's one minute gone in the round.
Johnson trying to control the position.
Williamson lands a couple of digs.
Williamson works over Johnson with some ground and pound from guard.
A big thud reverberates around the arena there as Williamson accidentally thumps the mat. Hopefully he's not broken his hand.
Williamson wants to control from the top but Johnson keeps moving.
Johnson preventing the ground and pound from doing any damage.
Williamson not doing a lot at the moment. He'll have to show some more aggression or the fight will get stood up.
Williamson makes a bit of distance and scores with some ground and pound, still in guard.
Williamson really doesn't want to stay on the ground with Johnson. If he can't get it back to his feet, it's only a matter of time before he'll be tapping out.
Williamson slows down the pace of the fight for a moment. He'll need to remain active if he doesn't want to see the fight stood back up.
Williamson wants to control from the top but Johnson keeps moving.
The referee has motioned to the fighters to stand back up. He just wasn't happy with the level of activity.
Williamson shoots for a takedown but Johnson saw that one coming a mile off and avoided it easily.
That's two minutes gone in the round.
The crowd are hurling abuse towards the fighters... You can hardly blame them though because there isn't a lot going on in the fight.
Johnson tries to shoot in for a takedown. He's got hold of a leg but Williamson swivels and escapes.
Williamson shoots in for a takedown. "I don't think so" says Johnson as he avoids it easily.
Williamson looks for a takedown here. Will he get it? Johnson is fending him off so far but Williamson persists. Nope, Johnson circles away and we're back to standing.
Thomas Johnson has stuffed three takedown attempts in the round now. That's going to take a lot out of Carl Williamson.
Johnson tries to clinch up against the cage, rushing in to close the distance. Williamson manages to break the clinch and circles back to the middle of the mat.
Williamson looks frustrated there after his takedown attempt is stuffed easily.
Johnson seems to be moving with more speed, compared to his last bout. He must have been working on that in the gym.
Johnson works Williamson's body with a nice hook.
Carl Williamson seems to be the more aggressive standup fighter in this bout.
Johnson tries to score a power double leg takedown but Williamson sees that one coming and sprawls well. That will dishearten Johnson somewhat.
That's three minutes gone in the round.
Williamson with a lazy takedown attempt
and Johnson counters with a head kick.
Johnson shoots in with a lovely double leg takedown. Williamson manages to land in full guard to minimise the damage.
Williamson is looking to stand back up but Johnson counters by passing into half guard. Oops... bit sloppy there by Williamson.
Williamson is staying active underneath Johnson, who seems content to just control the action from this position.
Johnson thows a huge punch but Williamson dodges it nicely.
Johnson not throwing his punches with enough precision this time.
Johnson will need to keep those long limbs tucked in whilst he's on the ground, to prevent any submissions.
Johnson is working for a submission of some sort.
Johnson performing his best blanket impression for a moment.
That's four minutes gone in the round.
Johnson is trying to control the action in half guard but Williamson is working away on the bottom, looking perhaps to get back to full guard.
Johnson throwing shots but they're hitting the canvas more than the man.
Johnson is figuring out what he wants to do next.
The ref warns both fighters not to hold the cage as they work up against the meshing.
Johnson missing with the ground and pound from half guard.
We get told so often about how wrestlers don't like to be on their backs. Let's see if Williamson can do anything to dispel that myth.
The crowd thankful this round is nearly over.
Johnson trying to pass the guard but Williamson defending well.
Johnson throwing shots but Williamson is blocking nicely.
And thats the end of the round the fighters go back to their corners.
Thomas Johnson dominated that round.
That's time! Johnson's corner gives him a slap on the ass as he gets ready to fight.
Williamson shoots in for a takedown. "Ole!" shouts Johnson as he jumps to the side.
Johnson throws a two punch combo that lands nicely.
It looks like Carl Williamson has been cut.
Williamson fails with a rather predictable takedown attempt.
Williamson manages to get an easy takedown there - catching Johnson on his heels. He'll look to pass Johnson's guard now, I'm sure.
We've had a slow start to the round here - hopefully the action picks up.
Williamson throwing strikes but missing.
Williamson in full guard, throwing the ground and pound. No damage this time.
Williamson with a couple of shots to the head there. Not particularly brutal.
Johnson looking for submissions from the bottom here. Moving his hips around, possibly looking for an armbar.
Thomas Johnson overall seems to be getting the better of the ground position in the fight so far.
That's one minute gone in the round.
Johnson wants to sweep but no luck.
Williamson cracks Johnson with a solid left hand.
Williamson working some strikes from top position.
Johnson wants to sweep but no luck.
Johnson is trying to control the position but Williamson postures up.
Williamson trying to land body shots but he keeps hitting the mat.
Williamson looking to control the position here, rather than advance.
Williamson scores with a decent looking elbow strike.
Johnson trying to keep a closed guard but Williamson is proving a slippery customer.
Hammerfist, elbow! yells Williamson's corner. There ya go! There ya go!
That's two minutes gone in the round.
My god... these two guys really need to pick up the pace or everyone will leave to go get a beer.
Johnson trying to keep a closed guard but Williamson is proving a slippery customer.
Williamson with a couple of shots to the head there. Not particularly brutal.
Johnson looking to control.
Williamson content to strike from guard, landing some decent shots.
Johnson tries to strike from the bottom.
Johnson is trying to keep Williamson in close.
The referee has decided to stand the fighters back up, so we'll restart on the feet.
Williamson dives in for a single leg takedown but Johnson sprawls and the fighters end up clinched against the cage.
Johnson feinted with a counter takedown.
Thomas Johnson has stuffed three takedown attempts in the round now. That's going to take a lot out of Carl Williamson.
Johnson looking for a takedown here - he's got it.
A big thud reverberates around the arena there as Johnson accidentally thumps the mat. Hopefully he's not broken his hand.
Williamson wants to stand but Johnson is controlling the position.
That's three minutes gone in the round.
Williamson tries to land a sweep but no joy.
Johnson pressing down on his opponent's thigh, looking to pass guard. Williamson is keeping the position for now.
Johnson postures up and lands a big shot to Williamson's brow.
Williamson manages to escape and get back to his feet.
Williamson closes the distance and looks for a trip takedown... aaaand he's got it - Williamson lands in his opponent's guard.
Williamson lands a nice shot whilst sitting in his opponent's guard.
Johnson utilising some decent striking defenses from the guard, preventing the ground and pound.
That's four minutes gone in the round.
Johnson throws a couple of shots from the bottom but they don't land.
Williamson wants to control from the top but Johnson keeps moving.
Williamson passes easily into side control. Nice work.
You can see the frustration on Johnson's face, being in this tough position on the bottom.
Williamson working the ground and pound from side control.
Johnson gets one leg under and gets the fight to half guard.
Johnson actively working from the bottom here.
The crowd thankful this round is nearly over.
Johnson is trying to defend against the ground and pound but Williamson scores with a couple of nice shots.
Johnson wants to control but Williamson is keeping busy.
Williamson winds up and cracks Johnson with a swinging punch to the side of the head.
And thats the end of the round the fighters go back to their corners.
Carl Williamson showed his class in that round. I'd imagine he'll take it on all the scorecards.
The cut man is working on Carl Williamson's cut.
The corners get their ten second warning. Both fighters stand from their stools and stare eachother down, ready to get back to the action. This is the final round!
Johnson looks frustrated there after his takedown attempt is stuffed easily.
Williamson feints the counter takedown.
Williamson stuffs the takedown.
Williamson bobs and weaves into range and then changes levels and scores with a nice takedown into side control.

Johnson throws Williamson to one side and escapes!
Johnson is looking to clinch.
Williamson shoots in for a takedown but doesn't get it.
Williamson tries to score a power double leg takedown but Johnson sees that one coming and sprawls well. That will dishearten Williamson somewhat.
Johnson throws a big counter combination but Williamson scrambles out of danger and avoids any damage.
Williamson fakes an overhand right and shoots for a takedown. Johnson sprawls well initially but Williamson persists and gets the takedown into half guard.
Johnson has one foot on Williamson's thigh - he pushes off and manages to get back to his feet.
That's one minute gone in the round.
Johnson shoots in for a takedown but doesn't get it.
That's three failed takedown attempts in the round for Thomas Johnson. That's going to take a lot out of him.
Both fighters are breathing heavily.
Williamson changes levels and drives through with a really nice takedown into side control. Johnson looks really pissed at himself for not defending that better.
Johnson is not in a great position here, taking some shots.
Johnson is trying to get back to half guard.
Williamson moving around in side mount but really he's just happy to control for now.
Williamson in side control lands a nice looking series of punches and elbows.
Williamson creates a bit of distance and throws down some hard shots.
That's two minutes gone in the round.
Williamson throwing strikes but Johnson manages to buck up and roll into a nice reversal - now he's on top in side control!
Fantastic stuff here - a very entertaining period of action, which has drawn cheers from the crowd.
Williamson is pushing Johnson's head away, looking to escape. Johnson manages to hold on to the position though.
Johnson is looking to take a break and control but Williamson is keeping him honest, looking to work from the bottom.
Johnson tries to cartwheel into mount but he doesn't manage it.
Johnson goes for an armbar! This could be all over! Wait, no, Williamson rolls with the submission and now he's on top in Johnson's guard! Nice work there by Williamson!
That's three minutes gone in the round.
Johnson has Williamson pulled in close to control his posture.
Johnson controls Williamson momentarily but Williamson frees himself.
Williamson postures up to throw the ground and pound strikes but they don't connect.
A big thud reverberates around the arena there as Williamson accidentally thumps the mat. Hopefully he's not broken his hand.
Williamson prevents Johnson from getting back to his feet.
Williamson stands up over Johnson, holding his feet. He dives back in and lands a decent shot to the head.
Williamson connects with a couple of short punches.
Williamson wants to control from the top but Johnson keeps moving.
Williamson content to stall in guard here.
Williamson landing with the ground and pound.
Williamson must be cautious of submissions here, given that his opponent has the superior Jiu Jitsu.
That's four minutes gone in the round.
A few boos can be heard. I'm sure they will multiply if the fighters don't pick up the pace.
Williamson makes a bit of distance and scores with some ground and pound, still in guard.
Johnson wants to sweep here but Williamson controlling him for the moment.
Williamson is just sitting in guard, looking to avoid any submissions.
Williamson scoring with punches to the head and body.
Williamson throwing shots from guard but he's hitting more mat than opponent.
The referee has motioned to the fighters to stand back up. He just wasn't happy with the level of activity.
Williamson shoots for a takedown but Johnson saw that one coming a mile off and avoided it easily.
A head kick misses from Johnson.
Williamson closes the distance and clinches up with Johnson, looking for a takedown. Williamson pushes Johnson against the cage but Johnson circles to the side and manages to break the clinch.
And that's the end of the fight!
That was a close round. You could make an argument for either fighter but I would give it to Thomas Johnson.
I think Johnson has won this one but let's see what the judges have to say. Over to the ring announcer for the scorecards.
Ladies and gentlemen, after 3 rounds of action, we go to the scorecards for a decision.
Judge Donald Grub scores the fight 29:28
Judge Phil Schofield scores the fight 29:28
Judge Richard Clark scores the fight 29:28
In favor of your winner, by unanimous decision... Thomas Johnson!
A very excited looking Thomas Johnson made sure he remembered to thank all the fans both in the arena and on the internet. He said all the coolest people spend all day on MMA websites, which got a big reaction.
|
|
|
|
|
|
|
|
|
|
|
|
|
|
|
|
|
|
|
|
|
|
|
| S |
C
A |
G |
S |
C
B |
G |
|
S |
C |
G |
|
energy
A | B |
|
hype
A | B |
|
pop
A | B |
|
mgr
A | B |
|
FIGHT
RATING
37% |
|
|
|
|
|
|
|
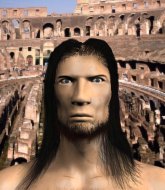
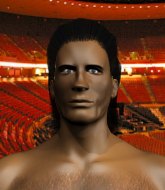
Main event
|
Coming up we have a welterweight MMA rules bout between Tommy Lotus (ranked 0 p4p, 0 weight class) and Paul Maul (ranked 0 p4p, 0 weight class). Lotus comes to the cage accompanied by Eye of the tiger. Both these guys have really solid chins. Will we see a standup war or will they both decide that a knockout is unlikely and try to win the fight elsewhere?
 |
|
 |
| 186 cm
49
172 lbs
33 - 45 - 2 |
|
180 cm
30
182 lbs
17 - 13 - 0 |
BJJ Purple Belt
Excellent boxer
Granite chin |
|
Good wrestler
Excellent boxer
Granite chin |
|
| |
|
Ladies and gentlemen. This fight is 5 rounds, in the welterweight division.
Introducing the fighter to my left, fighting out of the red corner.
With a record of
33 - 45 - 2, fighting out of London, Tommy Lotus!
And introducing the fighter to my right, fighting out of the blue corner.
With a record of
17 - 13 - 0, fighting out of London, Paul Maul!
The judges for this bout are James Atkins, James Glass and Colin Fotheringham.
The bell rings for round one and we are underway!
Maul throws a wild combination but nothing lands.
Lotus shoots in for a takedown. "Ole!" shouts Maul as he jumps to the side.
Maul ducks down and throws a hook to the body.
Lotus tries to clinch up but Maul circles away and keeps his distance.
The crowd cheers as Maul lands an impressive looking overhand right. Lotus doesn't seem phased though.
Lotus tries to close the distance and clinch up against the cage but Maul paws at him with a jab and circles away.
A lazy left from Maul finds it's target.
Lotus has been working on his boxing with his coaches at London MMA Club in the buildup to the fight.
No luck with that takedown attempt from Lotus.
Maul lands a nice shot to the body.
Lotus tries to clinch but is not successful on this occasion.
Maul closes the distance and lands a one-two.
Fantastic stuff here - a very entertaining period of action, which has drawn cheers from the crowd.
Lotus shoots in for a takedown. He's persisting with it as Maul sprawls well. Maul wins this battle and keeps the fight standing. Lotus gets slowly back to his feet.
That's three failed takedown attempts in the round for Tommy Lotus. That's going to take a lot out of him.
Maul lands with a nice body punch.
Maul leaves Lotus with his face pressed against the mat as he sprawls beautifully, defending against a solid takedown attempt.
That's one minute gone in the round.
Lotus fails with a rather predictable takedown attempt.
Lotus moves forwards but Maul connects with a nice, crisp jab.
Maul lands with a cross to side of his opponent's head.
Maul lands a nice hook to Lotus's body. Lotus takes it in his stride and looks to land his own strikes.
Lotus is looking to take this fight into the clinch.
Maul throws a couple of head shots and lands with the final one - a decent hook, which struck Lotus on the side of the head.
Maul throws a one two combo.

Lotus is rocked!
Maul circles and sees the opportunity to plant his feet and throw a really nice straight left hand that drops Lotus to the canvas! Lotus doesn't know where he is but he's trying to survive - Maul keeps piling on the pressure and forces the referee to step in! This one is aaaaaall over!
Ladies and gentlemen, after 1:43 of round 1, we have a winner by way of TKO (Strikes). Paul Maul!
Paul Maul decided to thank the fans in attendance for making a great atmosphere. It seemed to go down pretty well.
|
|
|
|
|
|
|
|
|
|
|
|
|
|
|
|
|
|
|
|
|
|
|
| S |
C
A |
G |
S |
C
B |
G |
|
S |
C |
G |
|
energy
A | B |
|
hype
A | B |
|
pop
A | B |
|
mgr
A | B |
|
FIGHT
RATING
60% |
|
|
|
|
|
|
|
|
|
|
