 |
Gladiators 8 PBP Commentary |
Undercard bout
|
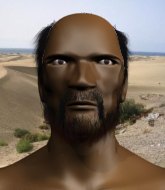
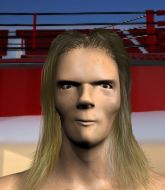
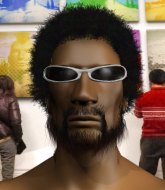
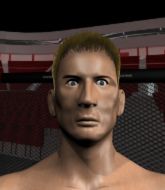
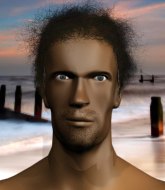
Coming up we have a bantamweight MMA rules bout between Calum Herpich (ranked 0 p4p, 0 weight class) and Ben Bikermann (ranked 0 p4p, 0 weight class). Bikermann comes into a darkened arena with his song building. Metallica - Master of Puppets kicks in, the lights come on and the crowd goes wild! What a showman! Calum Herpich had a look across the cage there at his opponent. He definitely means business
 |
|
 |
| 178 cm
25
134 lbs
3 - 2 - 0 |
|
171 cm
24
135 lbs
1 - 1 - 0 |
BJJ Purple Belt
Solid boxing
Good chin |
|
BJJ Purple Belt
Brawler
Granite chin |
|
| |
|
Ladies and gentlemen. This fight is 3 rounds, in the bantamweight division.
Introducing the fighter to my left, fighting out of the red corner.
With a record of
3 - 2 - 0, fighting out of New York, Calum Herpich!
And introducing the fighter to my right, fighting out of the blue corner.
With a record of
1 - 1 - 0, fighting out of London, Ben Bikermann!
The judges for this bout are Eddie Farnsworth, Columbo Gatti and John Roberts.

The bell rings for round one and we are underway!
Bikermann closes this distance looking for a takedown but Herpich circles away.
Herpich lands a jab followed by a nice looking cross.
Jab, cross, leg kick. Nice combination by Herpich!
Herpich works over Bikermann's head and body with a nice combination.
Herpich tests Bikermann's chin there with a solid looking shot.
A right-left combo lands from Herpich.
We've seen a great period of action over the last minute or so - credit to both fighters for going all out!
Bikermann shoots in for a double leg but Herpich sprawls well. That's going to sap some energy.
Herpich defends well against a solid takedown attempt from Bikermann.
Herpich swung with a counter right hand that didn't connect.
Calum Herpich has stuffed three takedown attempts in the round now. That's going to take a lot out of Ben Bikermann.
Bikermann shoots in but Herpich avoids the takedown attempt easily.
Bikermann shoots in for a takedown. "Ole!" shouts Herpich as he jumps to the side.
Herpich appears to be looking for a big counter.
Herpich displaying good standup as he scores with a three punch combination.
Herpich scores with a sloppy punch to the body. Not much technique there but it did the business.
Herpich lets the fists fly and connects with a left straight followed by a right hook.
Herpich throws a two punch combo that lands nicely.

Bikermann shoots in from a long way out. He's driving through with the takedown attempt and he eventually gets it, landing in Herpich's guard.
Bikermann looks winded!

That's one minute gone in the round.

Herpich working for a triangle but Bikermann defends it easily.
Herpich looking for submissions from the bottom here. Moving his hips around, possibly looking for an armbar.
Bikermann throws a big elbow that misses.
Bikermann has the superior BJJ but he's also working some ground strikes into his gameplan.
Bikermann missing there with some ground and pound from the guard.
The fighters are pressed up against the cage, both looking to find a bit of space to work.
Herpich looking for submissions off his back, moving his hips, looking for an opening.
Herpich working for a triangle but Bikermann defends it easily.
Bikermann trying to control but Herpich is working from the bottom.

That's two minutes gone in the round.
Neither fighter has done anything of merit for a good minute or two here and the crowd are not happy about it.
Bikermann controls the pace of the fight for a moment.
Bikermann landing with the ground and pound.

Bikermann drops back for a leg! It's a sloppy attempt though and Bikermann jumps back into guard quickly, to retain the dominant position.
Bikermann chips away with some ground and pound.
Herpich controls Bikermann momentarily but Bikermann frees himself.
Herpich keeping moving, preventing Bikermann from controlling successfully.
Herpich looking for submissions off his back, moving his hips, looking for an opening.

That's three minutes gone in the round.
Bikermann wants to stand but Herpich has a closed guard, so he can't escape.
Herpich working for a triangle but Bikermann defends it easily.
Herpich working from the bottom, still in full guard. He's managed to get a loose triangle. Bikermann doesn't seem to be doing much to defend here, obviously he feels comfortable in the position. Bikermann manages to throw the legs off his shoulder and he's back into guard - no problem.
Bikermann trying to control but Herpich is working from the bottom.
Bikermann with a couple of shots to the head there. Not particularly brutal.
Herpich is active off his back here, looking for submissions.

That's four minutes gone in the round.
My god... these two guys really need to pick up the pace or everyone will leave to go get a beer.
Bikermann showing good wrestling skills to control the position.
Herpich escapes his hips to the side and looks to be working for an armbar. Bikermann gives him a little smile and shakes his head. No chance.
Herpich throwing his legs up looking for a triangle.
Herpich has momentary wrist control but Bikermann slips an elbow through the middle.
Bikermann working in close now, lands a nice elbow to the side of Herpich's head.
Bikermann works over Herpich with some ground and pound from guard.
Bikermann scores with a decent looking elbow strike.
And thats the end of the round the fighters go back to their corners.
Calum Herpich dominated that round.
The referee calls time. The cornermen exit stage left and we're back to business.

Bikermann fakes high and shoots in for a takedown but Herpich avoids it really well and circles away.
Herpich throws a series of punches but Bikermann avoids them all with ease.
A punch combination from Herpich misses.
Herpich gets caught flat footed, as Bikermann shoots in with a quick takedown into guard.
The ref warns both fighters not to hold the cage as they work up against the meshing.
Bikermann avoids a guillotine attempt easily.
Bikermann working in close now, lands a nice elbow to the side of Herpich's head.
Herpich is trying to control the position from the bottom.
We've had a slow start to the round here - hopefully the action picks up.
Herpich looking for a guillotine here but Bikermann defends easily.
Herpich looking for submissions off his back, moving his hips, looking for an opening.
Both fighters are absolutely exhausted here.
That's one minute gone in the round.
Bikermann works over Herpich with some ground and pound from guard.
Bikermann is trying to work a guillotine from the top, or something like that? Don't know how he thinks he's going to get a finish from there.
Bikermann scoring with punches to the head and body.
Herpich had isolated an arm as going for a kimura. Bikermann defends it easily.
Herpich working for a triangle but Bikermann defends it easily.
Bikermann drops back looking for a submission - "I'm sorry sir, but I'm gunna break your leg" says Bikermann as he cranks on the unfortunate limb! Herpich screams and taps out before any major damage is done! Don't mess with Bikermann! Nice submission victory there!
Ladies and gentlemen, after 2:57 of round 2, we have a winner by way of Submission (Kneebar). Ben Bikermann!
|
|
|
|
|
|
|
|
|
|
|
|
|
|
|
|
|
|
|
|
|
|
|
| S |
C
A |
G |
S |
C
B |
G |
|
S |
C |
G |
|
energy
A | B |
|
hype
A | B |
|
pop
A | B |
|
mgr
A | B |
|
FIGHT
RATING
42% |
|
|
|
|
|
|
|
Undercard bout
|
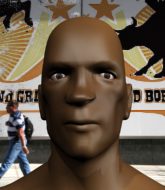
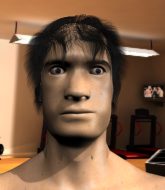
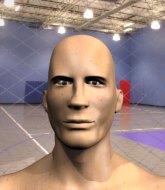
Coming up we have a light heavyweight MMA rules bout between John Skywalker (ranked 0 p4p, 0 weight class) and Carter Mann (ranked 0 p4p, 0 weight class). Carter Mann is the more experienced fighter, so let's see if that makes a difference tonight.
 |
|
 |
| 192 cm
25
212 lbs
1 - 1 - 0 |
|
185 cm
23
205 lbs
5 - 7 - 0 |
BJJ White Belt
Excellent MT
Good chin |
|
BJJ Blue Belt
Excellent boxer
Determined |
|
| |
|
Ladies and gentlemen. This fight is 3 rounds, in the light heavyweight division.
Introducing the fighter to my left, fighting out of the red corner.
With a record of
1 - 1 - 0, fighting out of Las Vegas, John Skywalker!
And introducing the fighter to my right, fighting out of the blue corner.
With a record of
5 - 7 - 0, fighting out of London, Carter Mann!
The judges for this bout are Reed Andrews, Chad Campbell and Joseph Jones.
The bell rings for round one and we are underway!
A big left from Skywalker misses.
We can't be sure of the tactics at this early stage but we have heard that Mann has been working on his takedowns a lot in the buildup to the fight and we can only assume he's going to look to take this to the mat.
Mann is trying hard to land a takedown here. Skywalker sprawls well and keeps this one on the feet.
Skywalker waving his hands out in front of him, looking to distract Mann.
Mann throws a combination but it was largely blocked by Skywalker.
Skywalker ducks down and throws a hook to the body but Mann moves away.
Mann tries a counter takedown but it's more of a dummy move, and he uses it to push himself away.
Mann tries to clinch up but Skywalker circles away and keeps his distance.
Skywalker jabbing away but nothing is landing.
Skywalker looks to score with a jab to the body but Mann is just out of range.
The fighters circling - Skywalker throws out the jab but it was never going to land.
Mann throws a counter combo.
Skywalker looks to land a combination but Mann avoids it well.
Wow, both these guys are really going for it!
Some wild striking there from Mann.
Skywalker misses with a hook.
We've had a slow start to the round here - hopefully the action picks up.
Mann moves forwards but Skywalker connects with a nice, crisp jab.
A looping hook to the body misses from Skywalker. Mann does a little dance to reset his feet.
We've been hearing reports that Skywalker has been drilling takedowns in recent sessions so let's see if that has an impact on the result of this fight.
John Skywalker seems to be the more aggressive standup fighter in this bout.
Mann is pinned up against the cage taking some big shots here. The referee is looking closely deciding whether he should stop the fight.
A combination from Mann does no damage.
We've seen a great period of action over the last minute or so - credit to both fighters for going all out!
Mann drives through with a really nice takedown into side control.
The fighters are pressed up against the cage, both looking to find a bit of space to work.
Skywalker is trying to buck Mann off.
That's one minute gone in the round.
Skywalker wants to control but Mann postures up.
Skywalker wants to get back to his feet but Mann drags him back down.
Skywalker is not content to let Mann control the position.
Mann working away diligently from side control. Landing strikes effectively there - that will score him some points on the judges scorecards.
Skywalker controls the position for a moment.
The ref warns both fighters not to hold the cage as they work up against the meshing.
Mann lands a knee to the body and a forearm to the face.
Mann working the body and head with strikes.
Skywalker tries to get back to half guard but can't.
Skywalker is pushing Mann's head away, looking to escape. Mann manages to hold on to the position though.
Mann is looking to take a break and control but Skywalker is keeping him honest, looking to work from the bottom.
Mann is putting a hurting on Skywalker here, landing some big shots from side control.
That's two minutes gone in the round.
Skywalker tries to buck Mann off but Mann is having none of it.
Mann working the head with strikes.
Mann trying to control the position but Skywalker is working away.
You can see the frustration on Skywalker's face, being in this tough position on the bottom.
Skywalker is looking to reverse the position.
Mann lands a nice forearm strike.
Skywalker on his back here. We all know that wrestlers don't like being on their back so let's see if Skywalker tries to get out of the position.
Mann trying to control the position but Skywalker is working away.
Skywalker knows he needs to get back to his feet asap. He's simply no match for Mann on the ground.
Mann lands a knee to the body and a forearm to the face.
Mann lands a nice forearm strike.
Skywalker is looking to reverse the position.
Mann looking to punish the body of his opponent here but Skywalker is avoiding damage well.
Mann cracks Skywalker with a big right hand but Skywalker just smiles back at him and invites him to have another go.
Skywalker is looking for a sweep.
That's three minutes gone in the round.
Mann throws a knee to the body but it doesn't do much damage.
You can see the frustration on Skywalker's face, being in this tough position on the bottom.
Skywalker is looking to reverse the position.
Mann cracks Skywalker with an elbow. That is naaassty.
Skywalker tries to escape but Mann is in control.
Mann cracks Skywalker with a big elbow.
Skywalker is trying to improve his position.
Skywalker is breathing heavily.
Skywalker is trying to control Mann's posture but Mann avoids it.
Check out the look on Mann's face as he threw that strike - that's one determined fighter!
Mann working away diligently from side control. Landing strikes effectively there - that will score him some points on the judges scorecards.
Mann is putting a hurting on Skywalker here, landing some big shots from side control.
Skywalker on the wrong end of some ground and pound.
Skywalker is trying to get back to half guard.
Mann working the ground and pound.
Mann working the head and body with strikes.
That's four minutes gone in the round.
Mann lands a knee to the body and follows it up with some ground and pound to the head. That will wear Skywalker down.
Mann in side control lands a decent elbow.
Mann trying to control the action but Skywalker is working from the bottom.
Skywalker is positioning himself to get back to half guard.
Mann working the body and head with strikes.
Skywalker takes a nasty elbow to the side of the head.
Skywalker wants to get back to his feet.
Mann wants to lay and pray for a moment but Skywalker keeps working.
Skywalker takes a nasty elbow to the side of the head.
Skywalker is not content to let Mann control the position.
Skywalker takes a couple of big shots there - the referee warns him that he has to defend himself better.
And thats the end of the round the fighters go back to their corners.
Carter Mann dominated that round.
Well, the break between rounds is over. Let's get back to the scrappin!
Mann fakes a strike and closes the distance, dragging Skywalker to the ground. Mann is now in Skywalker's guard.

Skywalker pushes Mann off and gets back to his feet.
Mann misses with a wild combination.
Mann throws a nice looking combination but Skywalker bobs and weaves to avoid any damage.
Skywalker throws a nice hook to the body that draws an oooh from the crowd.
Skywalker misses with an uppercut.
Skywalker throws a shot from downtown. Mann moves away and avoids it.
Skywalker stuffs the takedown.
Mann fails to land the takedown.
Mann lunges in with swinging rights and lefts but Skywalker circles away quickly and effectively.
The crowd cheering loudly, showing their appreciation for the quality fight we're seeing here.
A big right from Skywalker misses.
Mann blocks a jab.
Skywalker is the aggressor but that punch slipped nicely by Mann.
Mann is breathing heavily.
Skywalker lands a nice looking body shot.
Mann shoots in looking for a takedown but Skywalker manages to keep the fight standing, pushing Mann's face into the canvas for good measure before circling away.
John Skywalker has stuffed three takedown attempts in the round now. That's going to take a lot out of Carter Mann.
Skywalker looks to land a right hand but Mann moved out of range.
And an attempted straight right on the counter from Mann! But no joy.
That's one minute gone in the round.
The fighters circling - Skywalker throws out the jab but it was never going to land.
Mann avoids the body shot from Skywalker.
Mann tries to shoot in for a takedown. He's got hold of a leg but Skywalker swivels and escapes.
Nice cross by Skywalker.
Skywalker misses with an uppercut.
Skywalker scores with a shot to the body.
The fighters circling - Skywalker throws out the jab but it was never going to land.
Mann uses good head movement to avoid the hook from Skywalker.
Skywalker swings for the body but Mann moves out of range.
Mann lands an overhand left. A wild punch that just about connected.
Skywalker misses with a jab, cross combination.
A combination from Mann does no damage.
Mann ducks under a wild hook from Skywalker.
A big right from Skywalker misses.
Skywalker fakes low and throws an overhand right that catches Mann on the side of the head.
Mann throws a looping left and ducks down for a takedown. He's got his arms around Skywalker's waist but Skywalker gets an underhook and avoids the takedown by throwing Mann off to one side.
Fantastic stuff here - a very entertaining period of action, which has drawn cheers from the crowd.
Skywalker sizes up Mann with a pawing jab and scores with a straight right down the middle.
That's two minutes gone in the round.
Mann moves out of range of the strikes.
Mann fakes high and swings low for a body shot but Skywalker manages to avoid it.
Skywalker is the aggressor but that punch slipped nicely by Mann.
Skywalker punishes Mann's body with a nice straight punch.
Mann ducks under a wild hook from Skywalker.
Mann on the wrong end of an overhand right that came out of nowhere.
Carter Mann is looking to throw some combinations by the looks of things.
Skywalker swings for the body but Mann moves out of range.
Skywalker throws a jab when Mann was well out of range.
Mann with a poor takedown

and Skywalker counters with a nice double leg into guard.
Skywalker slows down the pace of the fight for a moment. He'll need to remain active if he doesn't want to see the fight stood back up.

Mann wriggles free and stands up.
Skywalker misses with a looping right.
Skywalker stuffs the takedown.
Skywalker is looking to counter punch.
A big right from Skywalker misses.
As Skywalker backs off Mann throws a huge counter combo but Skywalker manages to avoid it all.
That's three minutes gone in the round.
Skywalker dips down and scores with a jab to the body.
Skywalker swings away with a body shot that misses
and Mann counters with a straight right hand.
Mann uses good footwork to avoid the strikes from Skywalker.
Mann fails with a rather predictable takedown attempt.
Skywalker feinted with a counter takedown.
The fighters circling - Skywalker throws out the jab but it was never going to land.
Mann throws a hard body shot but it just misses.
Mann misses with a wild combination.
Skywalker connects with a looping right hand.
Mann tries to clinch there but Skywalker circles away.
Skywalker is trying to close the distance and clinch up, after that failed offence from Mann.
Mann tries to clinch up but Skywalker circles away and keeps his distance.
Mann lunges in with swinging rights and lefts but Skywalker circles away quickly and effectively.
Skywalker ducks down and throws a hook to the body but Mann moves away.
That's four minutes gone in the round.
Nice cross by Skywalker.
Skywalker throws a hook but Mann avoids it easily.
Skywalker is really dominating this fight. Is there anything that Mann can do to turn this around?
Mann ducks under a wild hook from Skywalker.
Mann throws a combination but comes up with nothing but fresh air.
John Skywalker is winning the standup battle so far.
Skywalker cracks a nice hook into Mann's ribs.
This is a great period of action - very entertaining stuff!
Mann closes the distance and takes a jab right on the nose as he does so.
Skywalker jabbing away but nothing is landing.
Skywalker fakes high and swings low for a body shot but Mann manages to avoid it.
Skywalker throws a lazy right hand but Mann sees it coming a mile off and sidesteps it easily.
Mann comes forward and lands a shot to the body, then darts back out of range.
Mann slips under a jab from Skywalker.
Skywalker cracks Mann with an open hand slap.
The crowd applaud the fighters' efforts here as the round comes to an end.
Skywalker misses with an uppercut.
Skywalker throws a hook to the body but it doesn't connect.
Skywalker throws a jab but it's blocked by Mann.
Skywalker takes a jab on the nose there. A little bit of blood seems to be coming out. Hopefully that won't affect his breathing.
And thats the end of the round the fighters go back to their corners.
John Skywalker dominated that second round.
Well, the break between rounds is over. Let's get back to the scrappin! This is the final round!

No luck with that takedown attempt from Mann.
Mann throws a couple of head shots and lands with the final one - a decent hook, which struck Skywalker on the side of the head.
Skywalker lands an overhand right.

It looks like Carter Mann has been cut.
Skywalker throws a lazy right hand but Mann sees it coming a mile off and sidesteps it easily.
Mann fails with a takedown attempt.
Skywalker drops down looking for a counter takedown but Mann sprawls and moves away.
Skywalker defending well as Mann loads up on a big left hand.
Skywalker scores with a jab to the head.
Skywalker throws a body shot but no joy.
Mann takes a big intake of breath there - he's definitely tired.
We've had a slow start to the round here - hopefully the action picks up.
Skywalker punishes Mann's body with a nice straight punch.
Skywalker throws a hook to the side of Mann's head but Mann sees it coming and ducks under it beautifully.
Mann is loading up here, looking for a big counter of his own.
Skywalker scores with a one two! Mann had his feet all tangled up there and couldn't avoid the strikes.
Mann tries for a takedown but Skywalker sees it coming a mile off and avoids it easily.
John Skywalker has stuffed three takedown attempts in the round now. That's going to take a lot out of Carter Mann.
Mann blocks a jab.
That's one minute gone in the round.
Mann uses some good footwork to avoid the body shot by Skywalker.
Mann fails in his attempt to clinch.
Mann throws a combination but it was largely blocked by Skywalker.
John Skywalker is looking to keep the fight on the feet at all costs.
Nice shot by Skywalker.
Skywalker scores with a straight right hand, right through his opponent's guard.
Horrible takedown attempt by Mann or perhaps it was just good defense by Skywalker, which made it look bad.
Skywalker looks to score with a jab to the body but Mann is just out of range.
Skywalker lands a nice looking body shot.
Skywalker lands a slapping body shot.
Skywalker takes a swing at Mann's ribcage but misses.
Mann tries to clinch but Skywalker moves out of range.
A looping hook to the body misses from Skywalker. Mann does a little dance to reset his feet.
Skywalker cracks Mann with a right hand to the side of the head.
Mann lands a jab, followed by a cross and another cross, as Skywalker backs up against the cage.
This is a great period of action - very entertaining stuff!
Mann takes a jab right on the nose. That must have hurt but he shrugs his shoulders and looks to return the favor.
That's two minutes gone in the round.
A jab from Mann misses.
Skywalker throws a jab but it's blocked by Mann.
Mann's hands are dropping dangerously low here and Skywalker connects clean with a right hook that sends him down to one knee! Mann scrambles back to his feet.
Skywalker waving his hands out in front of him, looking to distract Mann.
Mann is looking to clinch but Skywalker is avoiding it.
Skywalker jabbing away but nothing is landing.
The fighters circling - Skywalker throws out the jab but it was never going to land.
Skywalker throws a lazy right hand but Mann sees it coming a mile off and sidesteps it easily.
Skywalker misses with a hook.
Mann fails with an attempt to clinch.
Mann throws a jab to the body, straight down the pipe. Boom. That sent Skywalker stumbling backwards but he manages to regain his composure quickly.
Skywalker pushing out the jab but it's not landing.
Mann ducks under an overhand right and circles away with a smile on his face.
Mann throws a series of punches but Skywalker avoids them all with ease.
Skywalker pushes forward with a 1-2 combination that forces Mann back to the cage. Skywalker follows up with a solid lead hook to the liver.
That's three minutes gone in the round.
Mann tries to clinch up but Skywalker circles away and keeps his distance.
Skywalker throws a hook to the side of Mann's head but Mann sees it coming and ducks under it beautifully.
Mann looked like he wanted to counter with a punch but didn't throw it.
Mann lands a jab to Skywalker's midsection.
Mann tries for a takedown but Skywalker sees it coming a mile off and avoids it easily.
Mann fails with the takedown.
A jab from Skywalker misses.
Mann misses with a double jab.
As Mann tries to get set, Skywalker tries to push him back and clinch up but Mann manages to avoid the attempt.
Skywalker throws a series of punches but Mann moves out of range.
Skywalker defends well against a solid takedown attempt from Mann.
Skywalker looks to land a right hand but Mann moved out of range.
Mann moves out of range of the strikes.
Mann shoots in but Skywalker avoids the takedown attempt easily.
Skywalker misses with a looping right.
Skywalker ducks down and throws a hook to the body but Mann moves away.
That's four minutes gone in the round.
Skywalker throws a body shot but no joy.
A punch combination from Mann misses.
Mann lands an overhand right.
Mann moves out of range as Skywalker strikes.
Skywalker fakes and then throws a beautiful body shot. Mann looks a bit winded and takes a step backwards to take a breath.
This has been an exciting period of action!
Mann throws a hook to the body but it doesn't connect.
A counter left hand to the body from Skywalker misses its target.
Skywalker clobbers Mann with an overhand right that has the crowd gasping. That made a horrendous noise.
Skywalker is the aggressor but that punch slipped nicely by Mann.
Mann closes this distance looking for a takedown but Skywalker circles away.
Skywalker tries to counter with a takedown but Mann is quick to defend against it.
Mann misses the shot to the body.
Skywalker smiles there as he lands a nice right hand right on the button.
Skywalker lands a nice shot that snaps Mann's head back.
Mann moves out of range as Skywalker strikes.
Mann throws a counter combo.
Mann lunges in with swinging rights and lefts but Skywalker circles away quickly and effectively.
Mann has a pretty nasty looking mouse under his right eye.
Mann uses good head movement to avoid the hook from Skywalker.
And that's the end of the fight!
John Skywalker showed his dominance in that final round.
I think Skywalker has won this one but let's see what the judges have to say. Over to the ring announcer for the scorecards.
Ladies and gentlemen, after 3 rounds of action, we go to the scorecards for a decision.
Judge Reed Andrews scores the fight 29:28
Judge Chad Campbell scores the fight 29:28
Judge Joseph Jones scores the fight 29:28
In favor of your winner, by unanimous decision... John Skywalker!
|
|
|
|
|
|
|
|
|
|
|
|
|
|
|
|
|
|
|
|
|
|
|
| S |
C
A |
G |
S |
C
B |
G |
|
S |
C |
G |
|
energy
A | B |
|
hype
A | B |
|
pop
A | B |
|
mgr
A | B |
|
FIGHT
RATING
64% |
|
|
|
|
|
|
|
Undercard bout
|
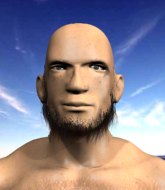
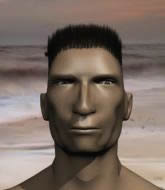
Coming up we have a light heavyweight MMA rules bout between Johnny Powers (ranked 0 p4p, 0 weight class) and Charlie Chiblow (ranked 0 p4p, 0 weight class). On his way into the cage it seems that Johnny Powers has been attacked by a crazed fan! It looks like it might have been the just bleed guy! Luckily Johnny Powers seems to be OK! I thought that lunatic was in prison!?
 |
|
 |
| 180 cm
25
205 lbs
2 - 1 - 0 |
|
180 cm
25
200 lbs
1 - 0 - 0 |
BJJ Blue Belt
Basic striking
Good chin |
|
BJJ Brown Belt
Brawler
Granite chin |
|
| |
|
Ladies and gentlemen. This fight is 3 rounds, in the light heavyweight division.
Introducing the fighter to my left, fighting out of the red corner.
With a record of
2 - 1 - 0, fighting out of New York, Johnny Powers!
And introducing the fighter to my right, fighting out of the blue corner.
With a record of
1 - 0 - 0, fighting out of Montreal, Charlie Chiblow!
The judges for this bout are David Schapiro, Bruno Lombardi and Reed Andrews.
The bell rings for round one and we are underway!
Chiblow shoots for a takedown but Powers saw that one coming a mile off and avoided it easily.
Powers was looking to counter that move with a punch but didn't quite pull the trigger.
Powers closes the distance and after a bit of a stuggle, scores a takedown into Chiblow's guard.
Chiblow lands a beautiful sweep and he's now moved into his opponent's guard.

Chiblow is trying to work a guillotine from the top, or something like that? Don't know how he thinks he's going to get a finish from there.
The fighters are pressed up against the cage, both looking to find a bit of space to work.
Chiblow wants to control from the top but Powers keeps moving.
Chiblow pushes down on Powers's leg and manages to get into half guard.
We've had a slow start to the round here - hopefully the action picks up.
Chiblow looks towards his corner to check for any instructions. The corner give him nothing to work with, so he cracks Powers with a short hammerfist. I guess that's as good as any advice he could get in this position.
Chiblow throwing shots but they're hitting the canvas more than the man.
Chiblow is working for a submission here. He's got hold of the far side arm and he's looking for a kimura. He's cranking on the arm and he's got it! Powers is tapping out! Ouch, that looked like it hurt!
Ladies and gentlemen, after 1:55 of round 1, we have a winner by way of Submission (Kimura). Charlie Chiblow!
|
|
|
|
|
|
|
|
|
|
|
|
|
|
|
|
|
|
|
|
|
|
|
| S |
C
A |
G |
S |
C
B |
G |
|
S |
C |
G |
|
energy
A | B |
|
hype
A | B |
|
pop
A | B |
|
mgr
A | B |
|
FIGHT
RATING
63% |
|
|
|
|
|
|
|
Undercard bout
|
Coming up we have a featherweight MMA rules bout between Benji Cada (ranked 0 p4p, 0 weight class) and Tasha Ventura (ranked 0 p4p, 0 weight class). Tasha Ventura will no doubt be trying to keep this one on the feet, where he has a distinct advantage.
 |
|
 |
| 165 cm
25
155 lbs
3 - 0 - 0 |
|
175 cm
18
155 lbs
1 - 1 - 0 |
BJJ Purple Belt
Counter fighter
Granite chin |
|
Dangerous GnP
Excellent boxer
Good gas tank |
|
| |
|
Ladies and gentlemen. This fight is 3 rounds, in the featherweight division.
Introducing the fighter to my left, fighting out of the red corner.
With a record of
3 - 0 - 0, fighting out of Montreal, Benji Cada!
And introducing the fighter to my right, fighting out of the blue corner.
With a record of
1 - 1 - 0, fighting out of Las Vegas, Tasha Ventura!
The judges for this bout are John Roberts, Alyssa Summers and John Kavanagh.
The bell rings for round one and we are underway!
Cada shoots in for a takedown! He's got it and he's managed to land in side control! That's better than Cada was expecting from the takedown attempt, I'm sure!
Ventura is looking to work his way out of this bad position but Cada is controlling him well.
Cada is pausing for a moment. What's he doing? It looks like he's clearing his nose. Oh dude! He's shot a load of snot all down Ventura's shoulder. That is not cool.
Ventura parries the strikes from Cada easily there. Cada is wary of posturing up too much because it might enable Ventura to escape.
Ventura is letting Cada control him for a moment.
Cada moves into full mount!
Cada is going oldschool here, as he tries to force Ventura to tap using a forearm choke. This isn't 1993 though, so Ventura shrugs it off.
Cada has been looking to land a fair amount of strikes on the ground. He might be looking to soften his opponent up in order to work for a submission.
Cada lands with some vicious ground and pound - can Ventura hang on?
Cada sitting in mount, just looking to control for the moment.
Ventura really doesn't want to stay on the ground with Cada. If he can't get it back to his feet, it's only a matter of time before he'll be tapping out.
That's one minute gone in the round.
Cada is landing with some decent strikes but Ventura is trying to advance his position so the referee is letting the fight continue.
The ref warns both fighters not to hold the cage as they work up against the meshing.
Cada with good strikes from the mount here!
Cada tucks in and makes sure he doesn't lose the dominant position.
We've been hearing that Cada has been drilling a lot of ground and pound in training, so let's see if he get the finish.
Cada working for a guillotine from mount but Ventura is in no mood to give up.
Cada with shots to the head and body - Ventura looks very uncomfortable down there.
Cada connects with a couple of good shots from mount.
Cada can't quite control the action as he would like just now, as Ventura is looking to escape.
Cada has hold of Ventura's left arm, perhaps looking for a submission. The two fighters tussle over control of the isolated limb and Ventura manages to get his arm back to his side and away from danger.
That's two minutes gone in the round.
The crowd are loving this. Great action here.
Cada controlling his opponent.
Cada looking for a guillotine from mount but Ventura is having none of it.
Ventura is flailing around, obviously not happy about being mounted. Cada locks hold of one of his arms and spins for an armbar. He's got it! Ventura is forced to tap!
Ladies and gentlemen, after 3:57 of round 1, we have a winner by way of Submission (Armbar). Benji Cada!
|
|
|
|
|
|
|
|
|
|
|
|
|
|
|
|
|
|
|
|
|
|
|
| S |
C
A |
G |
S |
C
B |
G |
|
S |
C |
G |
|
energy
A | B |
|
hype
A | B |
|
pop
A | B |
|
mgr
A | B |
|
FIGHT
RATING
53% |
|
|
|
|
|
|
|
Undercard bout
|
Coming up we have a bantamweight MMA rules bout between Evan Decon (ranked 0 p4p, 0 weight class) and Tommy Gun (ranked 0 p4p, 0 weight class). Gun comes into a darkened arena with his song building. Turbo kicks in, the lights come on and the crowd goes wild! What a showman! Tommy Gun told me before the fight that he's been watching a lot of DVDs so let's see if that helps him in this one! I can't wait to find out!
 |
|
 |
| 164 cm
26
130 lbs
3 - 0 - 0 |
|
175 cm
25
140 lbs
5 - 1 - 0 |
Good wrestling
Counter fighter
Cuts easily |
|
BJJ White Belt
Excellent boxer
Powerful |
|
| |
|
Ladies and gentlemen. This fight is 5 rounds, in the bantamweight division.
Introducing the fighter to my left, fighting out of the red corner.
With a record of
3 - 0 - 0, fighting out of Los Angeles, Evan Decon!
And introducing the fighter to my right, fighting out of the blue corner.
With a record of
5 - 1 - 0, fighting out of New York, Tommy Gun!
The judges for this bout are Bruno Lombardi, Joseph Jones and Alyssa Summers.
The bell rings for round one and we are underway!
Gun ducks under an overhand right and circles away with a smile on his face.
Gun throws a combination but comes up with nothing but fresh air.
As Gun tries to get set, Decon tries to push him back and clinch up but Gun manages to avoid the attempt.
Tommy Gun seems to be the more aggressive standup fighter in this bout.
Decon showing good head movement there, avoiding the strikes from Gun.
Gun throws a combination but it was largely blocked by Decon.
Gun lunges in with swinging rights and lefts but Decon circles away quickly and effectively.
Decon feinted with a counter takedown.
Gun misses with a series of wild punches.
Decon drops down looking for a counter takedown but Gun sprawls and moves away.
A combination from Gun does no damage.
Decon appears to be looking for a counter takedown.
Decon drives through with a really nice takedown into side control.
Decon controls the position.
Wooooo! Give it up for these two warriors! They are putting on a show!
That's one minute gone in the round.
Decon has hold of Gun's arm. He's looking for a kimura. Gun seems comfortable defending it but Decon has shifted his position slighty and is cranking on the arm! Gun is real pain and he's forced to tap out! Gun is disgusted with himself for not defending it better but Decon couldn't care less - he's delighted!
Ladies and gentlemen, after 1:16 of round 1, we have a winner by way of Submission (Kimura). Evan Decon!
Tommy Gun was interviewed post fight and said 'Today was not my day nd I'll be back.'.
|
|
|
|
|
|
|
|
|
|
|
|
|
|
|
|
|
|
|
|
|
|
|
| S |
C
A |
G |
S |
C
B |
G |
|
S |
C |
G |
|
energy
A | B |
|
hype
A | B |
|
pop
A | B |
|
mgr
A | B |
|
FIGHT
RATING
58% |
|
|
|
|
|
|
|
Undercard bout
|
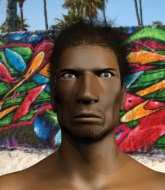
Coming up we have a heavyweight MMA rules bout between Bugurt Bugurtov (ranked 0 p4p, 0 weight class) and Tim Ortiz (ranked 0 p4p, 0 weight class). Both fighters look fresh as a daisy as they make their way towards the cage.
 |
|
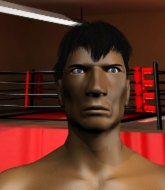 |
| 200 cm
23
280 lbs
8 - 5 - 0 |
|
200 cm
21
276 lbs
8 - 8 - 0 |
Good wrestling
Solid boxing
Cardio machine |
|
Decent wrestler
Solid Muay Thai
Powerful |
|
| |
|
Ladies and gentlemen. This fight is 5 rounds, for the heavyweight championship of the world!
Introducing the champion to my left, fighting out of the red corner.
With a record of
8 - 5 - 0, fighting out of St Petersburg, Bugurt Bugurtov!
And introducing the challenger to my right, fighting out of the blue corner.
With a record of
8 - 8 - 0, fighting out of New York, Tim Ortiz!
The judges for this bout are Reed Andrews, Russell Pearce and Chad Campbell.
The bell rings for round one and we are underway!
Bugurtov blocks a head kick by Ortiz.
Bugurtov defends well against a solid takedown attempt from Ortiz.
Bugurtov throws a chopping leg kick but Ortiz manages to avoid taking any serious damage.
Bugurtov avoids a punch combination nicely.
Bugurt Bugurtov seems to be the more aggressive standup fighter in this bout.
Ortiz has his takedown stuffed
and Bugurtov counters with a nice jab to the body that keeps Ortiz thinking.
Bugurtov scores with a decent looking hook.
Bugurtov has been working on his boxing with his coaches at Russian Bears Training Center in the buildup to the fight.
Ortiz blocks a leg kick.
We've had a slow start to the round here - hopefully the action picks up.
Ortiz tries to close the distance and clinch but Bugurtov swats him to one side with an open hand palm strike and circles away.
Bugurtov tests Ortiz's chin there with a solid looking shot.
Ortiz misses with a takedown attempt. He shot from a bit too far out.
Bugurt Bugurtov has stuffed three takedown attempts in the round now. That's going to take a lot out of Tim Ortiz.
That's one minute gone in the round.
Ortiz stuffs the takedown.
Bugurtov is moving around nicely and scores here with a single head shot.
Bugurtov drops down and drives through with a powerful takedown into guard.
Bugurtov engaging in some classic timewasting tactics.
Ortiz told us pre-fight that he has been working on his escapes in training. Let's see if he can call on some of his new skills to get back to his feet.
Bugurtov prevents Ortiz from getting back to his feet.
Bugurtov controlling from the top position.
Bugurtov landing some decent shots from guard.
That's two minutes gone in the round.
Hammerfist, elbow! yells Bugurtov's corner. There ya go! There ya go!
Bugurtov seems content to control from guard here. He's going to have to remain active though if he doesn't want to get stood back up.
Bugurtov has controlled the position for a good 20 seconds, which will no doubt be starting to frustrate his opponent.
Bugurtov pushes down on Ortiz's leg and manages to get into half guard.
Bugurtov looks towards his corner to check for any instructions. The corner give him nothing to work with, so he cracks Ortiz with a short hammerfist. I guess that's as good as any advice he could get in this position.
That's three minutes gone in the round.
Ortiz is trying to stand.
Bugurtov working some ground and pound from close in. He's looking to maintain this position and strike for a while by the looks of things... although he'll probably advance to full mount in a minute now I've said that.
Ortiz tries to push off, looking to stand up, but Bugurtov manages to move to mount!
We get told so often about how wrestlers don't like to be on their backs. Let's see if Ortiz can do anything to dispel that myth.
Bugurtov lands a big elbow.
Bugurtov putting on the heat here with some good ground and pound!
Ortiz is trying to escape but when you're mounted that's not too easy.
Bugurtov connects with a couple of good shots from mount.
Ortiz is trying to stand.
The fighters are starting to perspire pretty heavily.
Bugurtov landing strikes from the mount and Ortiz is in trouble!
That's four minutes gone in the round.
Bugurtov lands a couple of nice shots there from mount.
Bugurtov looking to finish Ortiz with some ground and pound. This is bad for Ortiz!
The crowd cheering loudly, showing their appreciation for the quality fight we're seeing here.
Bugurtov is landing with some decent strikes but Ortiz is trying to advance his position so the referee is letting the fight continue.

Ortiz is rocked!
Ortiz takes a big shot to the dome and his eyes have rolled back in his head! Bugurtov's killer instinct has kicked in as he finishes the fight with more strikes. Impressive finish.
Ladies and gentlemen, after 4:35 of round 1, we have a winner by way of TKO (Strikes). Bugurt Bugurtov!
Bugurt Bugurtov retains his heavyweight title!
Bugurt Bugurtov bigged himself up after the win. The crowd seemed to love it.
|
|
|
|
|
|
|
|
|
|
|
|
|
|
|
|
|
|
|
|
|
|
|
| S |
C
A |
G |
S |
C
B |
G |
|
S |
C |
G |
|
energy
A | B |
|
hype
A | B |
|
pop
A | B |
|
mgr
A | B |
|
FIGHT
RATING
35% |
|
|
|
|
|
|
|
Undercard bout
|
Coming up we have a welterweight MMA rules bout between Maurice Jenkins (ranked 0 p4p, 0 weight class) and Stans Fleurke (ranked 0 p4p, 0 weight class). These two fighters really are very evenly matched on the feet - it will be fascinating to see who can assert themselves in that aspect of the fight.
 |
|
 |
| 178 cm
25
180 lbs
4 - 2 - 0 |
|
180 cm
26
179 lbs
4 - 2 - 0 |
BJJ Brown Belt
Counter fighter
KO power |
|
Good wrestler
Good kicks
Granite chin |
|
| |
|
Ladies and gentlemen. This fight is 5 rounds, for the welterweight championship of the world!
Introducing the champion to my left, fighting out of the red corner.
With a record of
4 - 2 - 0, fighting out of New York, Maurice Jenkins!
And introducing the challenger to my right, fighting out of the blue corner.
With a record of
4 - 2 - 0, fighting out of New York, Stans Fleurke!
The judges for this bout are Reed Andrews, Russell Pearce and Jorge Garcia.
The bell rings for round one and we are underway!
Fleurke throws a hard body shot but it just misses.
It looked like Jenkins was looking amped, ready to throw a big counter but didn't commit.
Fleurke looks to land a combination but Jenkins avoids it well.
Jenkins chopped to the floor by a nice leg kick but he springs right back up before Fleurke can pounce on him.
Fleurke misses with a low kick.
Jenkins shoots in and scores a nice double leg takedown into half guard.
Jenkins is trying for a kimura here. Fleurke looks like he's in a lot of pain... and he's tapping out! Jenkins wins by kimura!
Ladies and gentlemen, after 0:40 of round 1, we have a winner by way of Submission (Kimura). Maurice Jenkins!
Maurice Jenkins retains his welterweight title!
An out of breath Maurice Jenkins thanked his loyal fans in his post fight interview, giving them credit for his success over the course of his career.
|
|
|
|
|
|
|
|
|
|
|
|
|
|
|
|
|
|
|
|
|
|
|
| S |
C
A |
G |
S |
C
B |
G |
|
S |
C |
G |
|
energy
A | B |
|
hype
A | B |
|
pop
A | B |
|
mgr
A | B |
|
FIGHT
RATING
100% |
|
|
|
|
|
|
|
Co-main event
|
Coming up we have a lightweight MMA rules bout between Reyn Godrigueze (ranked 0 p4p, 0 weight class) and Johny Tucon (ranked 0 p4p, 0 weight class). Reyn Godrigueze had a look across the cage there at his opponent. He definitely means business
 |
|
 |
| 168 cm
19
165 lbs
3 - 0 - 0 |
|
174 cm
27
160 lbs
3 - 3 - 0 |
Good wrestling
Basic striking
Granite chin |
|
BJJ Blue Belt
Good elbows
Tends to cut |
|
| |
|
Ladies and gentlemen. This fight is 5 rounds, for the lightweight championship of the world!
Introducing the champion to my left, fighting out of the red corner.
With a record of
3 - 0 - 0, fighting out of Los Angeles, Reyn Godrigueze!
And introducing the challenger to my right, fighting out of the blue corner.
With a record of
3 - 3 - 0, fighting out of New York, Johny Tucon!
The judges for this bout are Franklyn Lucas, Joseph Jones and John Kavanagh.
The bell rings for round one and we are underway!
No luck for Godrigueze with that takedown attempt.
Tucon is definitely looking for the counter takedowns here.
We've been informed that Tucon has been sparring a lot of Muay Thai in the buildup to this fight so let's see if that has an impact on the result.
Godrigueze shoots for a double leg takedown but Tucon sprawls well. He's pushed Godrigueze's face into the mat and manages to get back to his feet relatively easily.
Tucon swings away but doesn't land with a series of punches.
Godrigueze throwing a counter right hand but Tucon manages to avoid it.
Godrigueze circles away from the clinch attempt.
Godrigueze digs a good hook to Tucon's body.
Godrigueze has been working on his balance at Circuit training gym - message owner for invite, so perhaps that has help him stuff some of the takedown attempts by Tucon.
Tucon misses with a left hand
and Godrigueze cracks him with a counter punch right on the button.
Godrigueze misses with a body shot. Nice footwork from Tucon.
Tucon looks to score with a jab to the body but Godrigueze is just out of range.
Tucon connects with a body shot that sends Godrigueze's belly button to the back.
Tucon looks to score with a jab to the body but Godrigueze is just out of range.
Tucon throws a right and a left that Godrigueze avoids nicely.
We've had a slow start to the round here - hopefully the action picks up.
Godrigueze lands with a nice body punch.
Nice takedown defense from Tucon. No joy for Godrigueze on that attempt.
That's three failed takedown attempts in the round for Reyn Godrigueze. That's going to take a lot out of him.
Tucon fails in his attempt to clinch.
It looked like Godrigueze wanted to counter with a hook but didn't fully commit.
Tucon comes forward and lands a shot to the body, then darts back out of range.
The crowd are loving this. Great action here.
Godrigueze with a poor takedown
and Tucon counters with a good right hand that lands right on the jaw.
That's one minute gone in the round.
Tucon lands a jab, followed by a cross and another cross, as Godrigueze backs up against the cage.
Tucon throws a head kick that misses
and Godrigueze counters with a nice double leg into half guard.
Tucon avoiding damage under a succession of punches from Godrigueze.
Tucon avoiding damage under a succession of punches from Godrigueze.
Tucon avoiding damage under a succession of punches from Godrigueze.
The ref warns both fighters not to hold the cage as they work up against the meshing.
Ground and pound from Godrigueze.
Godrigueze scoring with strikes to the body and head.
Godrigueze not throwing his punches with enough precision this time.
Tucon trying to control but Godrigueze postures up.
Tucon is controlling Godrigueze's trapped leg to prevent Godrigueze from advancing to side control.
Godrigueze is scoring with some nice ground and pound from the dominant position.
That's two minutes gone in the round.
This is a great period of action - very entertaining stuff!
Tucon is trying to defend against the ground and pound but Godrigueze scores with a couple of nice shots.
Tucon is rocked!
Tucon on the receiving end of some nice ground and pound.
Tucon is still in real trouble! Can Godrigueze finish him?
Godrigueze scores with a big shot! Tucon's head bounced off the canvas with a huge thud! More strikes land and the referee has jumped in to save Tucon! He was hurt real bad - good stoppage!
Ladies and gentlemen, after 2:33 of round 1, we have a winner by way of TKO (Strikes). Reyn Godrigueze!
Reyn Godrigueze retains his lightweight title!
Reyn Godrigueze spent the whole post fight interview bigging himself up. It didn't go down that well with the fans after a while as they thought it was a bit arrogant.
|
|
|
|
|
|
|
|
|
|
|
|
|
|
|
|
|
|
|
|
|
|
|
| S |
C
A |
G |
S |
C
B |
G |
|
S |
C |
G |
|
energy
A | B |
|
hype
A | B |
|
pop
A | B |
|
mgr
A | B |
|
FIGHT
RATING
53% |
|
|
|
|
|
|
|
Main event
|
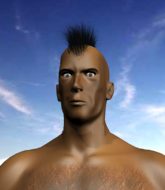
Coming up we have a middleweight MMA rules bout between Holton Hamburger (ranked 0 p4p, 0 weight class) and Anthony Marveux (ranked 0 p4p, 0 weight class). Marveux has chosen King without a crown as his entrance music. Anthony Marveux has the better chin. Will he look to stand and bang today?
 |
|
 |
| 185 cm
26
187 lbs
5 - 2 - 0 |
|
185 cm
26
194 lbs
4 - 3 - 0 |
BJJ Brown Belt
Brawler
Very strong |
|
Good takedowns
Brawler
Granite chin |
|
| |
|
Ladies and gentlemen. This fight is 5 rounds, for the middleweight championship of the world!
Introducing the champion to my left, fighting out of the red corner.
With a record of
5 - 2 - 0, fighting out of New York, Holton Hamburger!
And introducing the challenger to my right, fighting out of the blue corner.
With a record of
4 - 3 - 0, fighting out of New York, Anthony Marveux!
The judges for this bout are Anthony Taglia, Lou da Vinci and Steve Montenegro.
The bell rings for round one and we are underway!
Marveux tries to score a power double leg takedown but Hamburger sees that one coming and sprawls well. That will dishearten Marveux somewhat.
Marveux looks for a takedown here. Will he get it? Hamburger is fending him off so far but Marveux persists. Nope, Hamburger circles away and we're back to standing.
Hamburger feinted with a counter takedown.
Hamburger throws a loose over hand right and dives in with a double leg takedown. Marveux tries to sprawl but it's too late and the fighters hit the mat. Hamburger is in Marveux's guard.
Hamburger sneaks a leg through and gets to half guard. That was like a knife through butter how easily he passed Marveux's guard.
Marveux flails away from the bottom but he's not doing any damage.
Hamburger is looking for a kimura but Marveux is holding onto that half guard position, so it's hard for Hamburger to get the leverage.
Hamburger looking for a kimura but he'll have to free his other leg if he wants to finish that. Perhaps he's just using it as a distraction technique.
Marveux is refusing to be controlled, as Hamburger sits in half guard.
We've had a slow start to the round here - hopefully the action picks up.
Hamburger thumps the canvas. Not on purpose obviously - he just missed Marveux's head.
Hamburger is working for submissions here but there's nothing on.
Marveux wants to improve his position but Hamburger is controlling well.
That's one minute gone in the round.
Marveux has found himself in a tricky position here. He's been working his transitions in training so let's see if he can work his way out of it.
Hamburger seems very keen to just sit and control from half guard but Marveux does not like that idea so much and is remaining active off his back.
Hamburger seems to be working for a kimura but Marveux defends the submission attempt.
The fighters are pressed up against the cage, both looking to find a bit of space to work.
Marveux looking for submissions off his back.
Hamburger is keeping good posture, landing some ground and pound.
Hamburger moves into side control, avoiding a weak kimura attempt from Marveux.
Hamburger tries to move into full mount but can't pass Marveux's legs.
Hamburger throws an elbow but Marveux slips to the side and avoids it well.
Hamburger advances to full mount.
That's two minutes gone in the round.
Hamburger wants to control the pace but Marveux is squirming around nicely.
Marveux looking to escape from mount but he's given up his back!
Marveux showing good submission defense here.
Hamburger is looking to finish the fight by rear naked choke. Marveux knows exactly what he's got planned though, so he's defending well. Maybe a few strikes would soften Marveux for a finish.
Hamburger has got one arm under Marveux's chin. This could be trouble... Marveux trying to control the other hand but Hamburger gets it free and sqeezes tight - just a matter of time now! Yep, Marveux has tapped out! The fight is over!
Ladies and gentlemen, after 2:53 of round 1, we have a winner by way of Submission (RNC). Holton Hamburger!
Holton Hamburger retains his middleweight title!
|
|
|
|
|
|
|
|
|
|
|
|
|
|
|
|
|
|
|
|
|
|
|
| S |
C
A |
G |
S |
C
B |
G |
|
S |
C |
G |
|
energy
A | B |
|
hype
A | B |
|
pop
A | B |
|
mgr
A | B |
|
FIGHT
RATING
33% |
|
|
|
|
|
|
|
|
|
|
