 |
TUF semis 2 PBP Commentary |
Undercard bout
|
|
|
|
Undercard bout
|
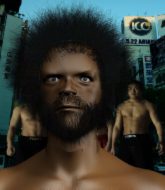
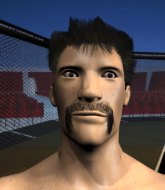
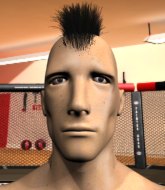
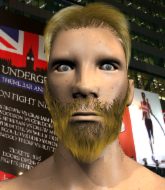
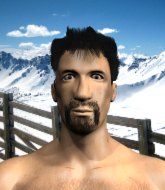
Coming up we have a light heavyweight MMA rules bout between Christoph Griffinsky (ranked 0 p4p, 0 weight class) and Fred Black (ranked 0 p4p, 0 weight class). These two fighters really are very evenly matched on the feet - it will be fascinating to see who can assert themselves in that aspect of the fight.
 |
|
 |
| 182 cm
19
220 lbs
1 - 1 - 0 |
|
175 cm
26
206 lbs
2 - 2 - 0 |
BJJ White Belt
Excellent boxer
Good chin |
|
BJJ Blue Belt
Decent boxing
Determined |
|
| |
|
Ladies and gentlemen. This fight is 3 rounds, in the light heavyweight division.
Introducing the fighter to my left, fighting out of the red corner.
With a record of
1 - 1 - 0, fighting out of Las Vegas, Christoph Griffinsky!
And introducing the fighter to my right, fighting out of the blue corner.
With a record of
2 - 2 - 0, fighting out of New York, Fred Black!
The judges for this bout are Steven Brown, Chris Edwards and James Ackerman.

The bell rings for round one and we are underway!
Black fakes and then throws a beautiful body shot. Griffinsky looks a bit winded and takes a step backwards to take a breath.
Griffinsky rushes forward with a series of wild hooks but Black moves out of range and avoids them all easily.
Griffinsky takes a really solid shot there but just smiles back and shrugs his shoulders.
Griffinsky looks to score with a combo but nothing lands.
Griffinsky keeping his hands up high there, blocking the jab from Black.
Black throws a right and a left that Griffinsky avoids nicely.
Black misses with the combination.
Black misses with a few strikes there.
Black throws a series of punches but Griffinsky avoids them all with ease.
A punch combination from Black misses.
Griffinsky digs a good hook to Black's body.
Black dodges the punch combination from Griffinsky.
Fantastic stuff here - a very entertaining period of action, which has drawn cheers from the crowd.
Black showing good head movement there, avoiding the strikes from Griffinsky.
Griffinsky lands a jab-cross combination.

It looks like Fred Black has been cut.
Black looks to land a right hand but Griffinsky moved out of range.
Griffinsky dodges the punch combination from Black.

That's one minute gone in the round.
Black throws a combination but it was largely blocked by Griffinsky.
Black throws a combination but comes up with nothing but fresh air.
Griffinsky digs a good body shot into Black's ribs.
Black scores with a hook.
Griffinsky with poor footwork there. He got himself in a bit of a tangle, enabling Black to score with a decent uppercut.
Griffinsky connects with a nice looking jab.
Griffinsky swinging wildly here.

Griffinsky sends Black crashing to the mat with a devastating uppercut! Griffinsky is motioning to the referee to let Black up. He wants to try and finish this one on the feet!

Black is rocked!
We've seen a great period of action over the last minute or so - credit to both fighters for going all out!
Black leaves his chin hanging out and Griffinsky seizes the opportunity with an uppercut! Black crumbles to the floor in a heap, and the referee steps in and tends to the downed fighter! What a knockout!
Ladies and gentlemen, after 1:39 of round 1, we have a winner by way of KO (Punch). Christoph Griffinsky!
|
|
|
|
|
|
|
|
|
|
|
|
|
|
|
|
|
|
|
|
|
|
|
| S |
C
A |
G |
S |
C
B |
G |
|
S |
C |
G |
|
energy
A | B |
|
hype
A | B |
|
pop
A | B |
|
mgr
A | B |
|
FIGHT
RATING
85% |
|
|
|
|
|
|
|
Undercard bout
|
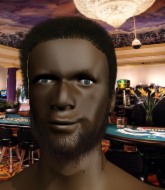
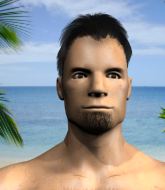
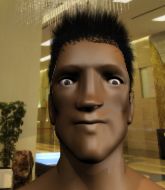
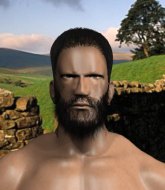
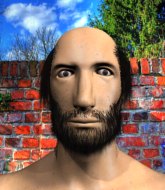
Coming up we have a lightweight MMA rules bout between Jay Codina (ranked 0 p4p, 0 weight class) and Edwin MacCain (ranked 0 p4p, 0 weight class). Codina comes to the cage accompanied by Right back where we started from. Jay Codina had real problems making weight for this fight. After initially coming in at 156.6lbs, he had two hours to make the official fight weight. He made it but it will have taken a lot out of him to cut those extra few pounds. The key to victory for Jay Codina has got to be keeping the fight on the feet.
 |
|
 |
| 190 cm
25
166 lbs
0 - 1 - 0 |
|
175 cm
25
161 lbs
5 - 1 - 0 |
BJJ White Belt
Solid boxing
Cuts easily |
|
Good takedowns
Basic striking
Experienced |
|
| |
|
Ladies and gentlemen. This fight is 3 rounds, in the lightweight division.
Introducing the fighter to my left, fighting out of the red corner.
With a record of
0 - 1 - 0, fighting out of St Petersburg, Jay Codina!
And introducing the fighter to my right, fighting out of the blue corner.
With a record of
5 - 1 - 0, fighting out of Hilo, Edwin MacCain!
The judges for this bout are Daniel Bishop, James Ackerman and Sam Margolis.
The bell rings for round one and we are underway!

MacCain shoots in and bounces Codina off the cage to secure the takedown into guard.
Codina is looking to stand back up... there's a bit of a scramble and MacCain dives into side control.


MacCain tries for a kimura. Not really close to a finish though.
MacCain lands an elbow.
Codina is not content to let MacCain control the position.
MacCain is chipping away with strikes.
That's one minute gone in the round.
MacCain is trying to get an arm triangle but Codina is defending well.
Codina is trying to get back to half guard. He's pushing on MacCain's leg. Oh but that's left an opportunity for MacCain! He's got an arm triangle... it looks tight! He's rotating and Codina has tapped! This one is allllll over!
Ladies and gentlemen, after 1:14 of round 1, we have a winner by way of Submission (Arm Triangle). Edwin MacCain!
|
|
|
|
|
|
|
|
|
|
|
|
|
|
|
|
|
|
|
|
|
|
|
| S |
C
A |
G |
S |
C
B |
G |
|
S |
C |
G |
|
energy
A | B |
|
hype
A | B |
|
pop
A | B |
|
mgr
A | B |
|
FIGHT
RATING
63% |
|
|
|
|
|
|
|
Undercard bout
|
Coming up we have a light heavyweight MMA rules bout between Tim Arntz (ranked 0 p4p, 0 weight class) and Mike Lonestar (ranked 0 p4p, 0 weight class). Mike Lonestar is the more experienced fighter, so let's see if that makes a difference tonight.
 |
|
 |
| 180 cm
26
220 lbs
1 - 3 - 0 |
|
197 cm
25
209 lbs
3 - 2 - 0 |
Good takedowns
Solid boxing
KO power |
|
BJJ Brown Belt
Counter fighter
Knockout power |
|
| |
|
Ladies and gentlemen. This fight is 3 rounds, in the light heavyweight division.
Introducing the fighter to my left, fighting out of the red corner.
With a record of
1 - 3 - 0, fighting out of Las Vegas, Tim Arntz!
And introducing the fighter to my right, fighting out of the blue corner.
With a record of
3 - 2 - 0, fighting out of Sydney, Mike Lonestar!
The judges for this bout are Colin Fotheringham, James Atkins and James Glass.
The bell rings for round one and we are underway!
Arntz throws an uppercut from half a mile away. Lonestar sees it coming and avoids it easily.
Lonestar changes levels for a counter takedown but doesn't follow through with his attempt.
Lonestar takes a really solid shot there but just smiles back and shrugs his shoulders.
Arntz misses with a body shot.
Arntz misses with a straight right.
Tim Arntz seems to be the more aggressive standup fighter in this bout.
Arntz misses with a straight left.
And Lonestar tries to counter it with a takedown but Arntz pushes his down on his head and steps out.
Arntz throws a shot from downtown. Lonestar moves away and avoids it.
Lonestar drops down looking to force a counter takedown but Arntz defends it well.
Arntz swinging wildly here.
Lonestar drops down looking to force a counter takedown but Arntz defends it well.
Arntz throws a body punch but Lonestar moves out of range.
Lonestar with the counter takedown but Arntz avoids it easily.
We've had a slow start to the round here - hopefully the action picks up.
Arntz looks to score with a combo but nothing lands.
Lonestar tries a counter takedown but it's more of a dummy move, and he uses it to push himself away.
Arntz seems to be moving with more speed, compared to his last bout. He must have been working on that in the gym.
Arntz misses with a wild body shot.
Lonestar with the counter takedown but Arntz avoids it easily.
Arntz lands with a good body shot.
Lonestar takes a really solid shot there but just smiles back and shrugs his shoulders.
That's one minute gone in the round.
Arntz keeps the fight on the outside.
Arntz will need to tighten up his combinations if he doesn't want to gas himself out, swinging at thin air.
Lonestar tries a counter takedown but it's more of a dummy move, and he uses it to push himself away.
Lonestar gets cracked there but stands up to it.
Arntz ducks down and throws a hook to the body but Lonestar moves away.
Lonestar ducks under an overhand right and circles away with a smile on his face.
Arntz throws a combination that misses
and Lonestar counters with a driving takedown into guard. Nice work there by Lonestar.
Lonestar drops back looking for a leg! Arntz is in trouble here! The fighters roll with the hold and Arntz manages to kick Lonestar off! Lonestar jumps back into Arntz's guard.
Arntz knows he needs to get back to his feet asap. He's simply no match for Lonestar on the ground.
Arntz wants to stand up but Lonestar is controlling him.

That's two minutes gone in the round.
Lonestar drops back for a leg! It's a sloppy attempt though and Lonestar jumps back into guard quickly, to retain the dominant position.
Arntz wants to stand but Lonestar is controlling the position.
Lonestar thinks about going for a leg but decides against it, in order to maintain the position.
Arntz is looking to get back to his feet but can't, whilst Lonestar is controlling him.
Lonestar thinks about going for a leg but decides against it, in order to maintain the position.
Lonestar pushing down on Arntz's thigh, trying to pass to half guard. He's managed it... Nice work.
The fans in attendance giving it up for the two fighters, who have really let it all hang out in the last minute or so!
Lonestar is working for a kimura but Arntz is defending it quite comfortably.
Arntz is trying to stand back up but Lonestar is controlling him

That's three minutes gone in the round.
Lonestar in half guard on the top. He's looking for a kimura... He's got it locked and he's managed to free his trapped foot. Arntz tries to escape but it's on too tight and he has to tap! Great BJJ skills there from Lonestar!
Ladies and gentlemen, after 3:33 of round 1, we have a winner by way of Submission (Kimura). Mike Lonestar!
|
|
|
|
|
|
|
|
|
|
|
|
|
|
|
|
|
|
|
|
|
|
|
| S |
C
A |
G |
S |
C
B |
G |
|
S |
C |
G |
|
energy
A | B |
|
hype
A | B |
|
pop
A | B |
|
mgr
A | B |
|
FIGHT
RATING
39% |
|
|
|
|
|
|
|
Undercard bout
|
Coming up we have a light heavyweight MMA rules bout between Luke Bresnan (ranked 0 p4p, 0 weight class) and Ian Domman (ranked 0 p4p, 0 weight class). Luke Bresnan looks tired to me. Hopefully he has got enough gas left in the tank to put in a good performance.
 |
|
 |
| 181 cm
26
213 lbs
2 - 2 - 0 |
|
200 cm
26
205 lbs
4 - 3 - 0 |
BJJ Purple Belt
Solid boxing
Big right hand |
|
BJJ Brown Belt
Counter fighter
Solid chin |
|
| |
|
Ladies and gentlemen. This fight is 3 rounds, in the light heavyweight division.
Introducing the fighter to my left, fighting out of the red corner.
With a record of
2 - 2 - 0, fighting out of Las Vegas, Luke Bresnan!
And introducing the fighter to my right, fighting out of the blue corner.
With a record of
4 - 3 - 0, fighting out of New York, Ian Domman!
The judges for this bout are Steven Brown, Chris Edwards and Richard Clark.
The bell rings for round one and we are underway!
Bresnan lunges at Domman with a hook that half lands and is half blocked by Domman's hand.
Domman moves away from the strike by Bresnan.
Bresnan cracks Domman with a nice right hand that draws applause from the crowd.
Sloppy strikes from Bresnan. Those never looked like landing.
Domman slips a jab from Bresnan.
And Domman tries to counter it with a takedown but Bresnan pushes his down on his head and steps out.
Bresnan looks to score with a jab to the body but Domman is just out of range.
We've had a slow start to the round here - hopefully the action picks up.
Bresnan misses the body punch
so Domman counters with a double leg into guard. Good agility.
Bresnan is breathing heavily.
Bresnan looking to sweep here. No luck so far.
Bresnan might be looking to lock onto one of his opponent's long limbs for a submission, whilst we're on the ground.
Domman thinks about going for a leg but decides against it, in order to maintain the position.
Domman is trying to work a guillotine from the top, or something like that? Don't know how he thinks he's going to get a finish from there.
That's one minute gone in the round.
Domman drops back for a leg! It's a sloppy attempt though and Domman jumps back into guard quickly, to retain the dominant position.
Domman drops back looking for a leg! Bresnan is in trouble here! The fighters roll with the hold and Bresnan manages to kick Domman off! Domman jumps back into Bresnan's guard.
Bresnan trying to control the position.
Domman pushing down on Bresnan's thigh, trying to pass to half guard. He's managed it... Nice work.
Domman is working for a kimura but Bresnan is defending it quite comfortably.
Domman seems to be looking for submissions.
Domman is working for submissions here but there's nothing on.
That's two minutes gone in the round.
Domman is trying to work for a kimura. This could be trouble! No, Bresnan has managed to free his arm - good work.
Domman seems like he's working for an arm triangle here. He's freed his trapped foot and he's rotating nicely. Bresnan is in big trouble! He's tapping out! This one is aaaaaaaaaaaall over!
Ladies and gentlemen, after 2:31 of round 1, we have a winner by way of Submission (Arm Triangle). Ian Domman!
|
|
|
|
|
|
|
|
|
|
|
|
|
|
|
|
|
|
|
|
|
|
|
| S |
C
A |
G |
S |
C
B |
G |
|
S |
C |
G |
|
energy
A | B |
|
hype
A | B |
|
pop
A | B |
|
mgr
A | B |
|
FIGHT
RATING
43% |
|
|
|
|
|
|
|
Undercard bout
|
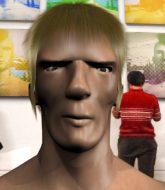
Coming up we have a middleweight MMA rules bout between Combat Device (ranked 0 p4p, 0 weight class) and Jack Mason (ranked 0 p4p, 0 weight class). Device's entrance music is The Way of the Fist - Five Finger Death Punch. A fine choice. Mason comes into a darkened arena with his song building. Motörhead - You Better Run kicks in, the lights come on and the crowd goes wild! What a showman! Both fighters look pumped up here. Let's hope this is a good fight!
 |
|
 |
| 185 cm
26
185 lbs
4 - 2 - 0 |
|
194 cm
19
183 lbs
4 - 1 - 0 |
BJJ White Belt
Decent elbows
Cuts easily |
|
BJJ White Belt
Decent boxing
Can Moonwalk |
|
| |
|
Ladies and gentlemen. This fight is 3 rounds, in the middleweight division.
Introducing the fighter to my left, fighting out of the red corner.
With a record of
4 - 2 - 0, fighting out of Los Angeles, Combat Device!
And introducing the fighter to my right, fighting out of the blue corner.
With a record of
4 - 1 - 0, fighting out of Las Vegas, Jack Mason!
The judges for this bout are James Atkins, William Gold and Sam Margolis.
The bell rings for round one and we are underway!
Nice defenses there by Device.
Device appears to be looking for a big counter.
Mason tests Device's chin there with a solid looking shot.
Device tries to bum rush Mason with a series of wild strikes but Mason uses good footwork to avoid the assault.
Device takes a shot right to the liver - Bas would have been proud of that punch.
Mason throws a series of punches but Device avoids them all with ease.

Device closes the distance and clinches.

Mason pushes off and circles away, back to the middle of the mat.
Device misses with a wild combination.
Mason throws a hook but Device blocks it.
Device misses with a wild combination.
Mason lands a jab followed by a nice looking cross.

It looks like Combat Device has been cut.
Wow, both these guys are really going for it!
The fans in attendance giving it up for the two fighters, who have really let it all hang out in the last minute or so!
Device misses with a two punch combination.
Mason staying out of range there.
A punch lands to the side of Device 's head but he takes it in his stride.
Mason scores with a jab to the head.

Device is rocked!
Good exchange - Device coming out on top.
Oh Device is still all over the place! His legs are completely gone! Will he be able to recover?!!
Device switches off momentarily and Mason cracks him with a monster right hand! Device topples backwards and makes a semi conscious attempt to cover up, as Mason dives in to land one more shot, before the referee has time to call the fight. What a finish by Mason!
Ladies and gentlemen, after 1:56 of round 1, we have a winner by way of KO (Punch). Jack Mason!
An out of breath Jack Mason thanked his loyal fans in his post fight interview, giving them credit for his success over the course of his career.
The defeated Combat Device had this to say: 'Whatever, I'll be back and I'll flatten whoever I get placed in front of.'.
|
|
|
|
|
|
|
|
|
|
|
|
|
|
|
|
|
|
|
|
|
|
|
| S |
C
A |
G |
S |
C
B |
G |
|
S |
C |
G |
|
energy
A | B |
|
hype
A | B |
|
pop
A | B |
|
mgr
A | B |
|
FIGHT
RATING
89% |
|
|
|
|
|
|
|
Undercard bout
|
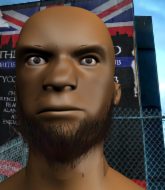
Coming up we have a lightweight MMA rules bout between Henry Teller (ranked 0 p4p, 0 weight class) and Hari Kunwar (ranked 0 p4p, 0 weight class). Chooooooooon! I think Teller might be my favorite fighter, now he's come out to Still Here by Drake. Kunwar has chosen The Kills - Future Starts Slow as his entrance music. Henry Teller could well score a knockout today. He has the power to get to Hari Kunwar's chin.
 |
|
 |
| 179 cm
26
160 lbs
4 - 1 - 0 |
|
167 cm
23
157 lbs
4 - 3 - 0 |
BJJ White Belt
Excellent MT
Good chin |
|
BJJ Purple Belt
Counter fighter
Knockout power |
|
| |
|
Ladies and gentlemen. This fight is 3 rounds, in the lightweight division.
Introducing the fighter to my left, fighting out of the red corner.
With a record of
4 - 1 - 0, fighting out of London, Henry Teller!
And introducing the fighter to my right, fighting out of the blue corner.
With a record of
4 - 3 - 0, fighting out of Las Vegas, Hari Kunwar!
The judges for this bout are Donald Grub, James Atkins and Sam Margolis.
The bell rings for round one and we are underway!
Kunwar tries for a takedown but Teller sees it coming a mile off and avoids it easily.
Teller scores with a nice strike.
Teller throws a right hand that Kunwar ducks under and follows up with a left that Kunwar also avoids with ease.
Kunwar drops down looking to force a counter takedown but Teller defends it well.
Teller throws a lazy body kick
and Kunwar counters with a takedown into side control! That could mean trouble for Teller!
Kunwar trying to control the action but Teller is working from the bottom.

Teller bucks up and manages to escape back to his feet!
Kunwar throws a loose over hand right and dives in with a double leg takedown. Teller tries to sprawl but it's too late and the fighters hit the mat. Kunwar is in Teller's guard.
The fans in attendance giving it up for the two fighters, who have really let it all hang out in the last minute or so!
Kunwar trying to control but Teller is working from the bottom.
The ref warns both fighters not to hold the cage as they work up against the meshing.
Teller pushes Kunwar off for just long enough to get back to his feet. Very athletic spring there.
Teller misses with a jab, cross combination.
That's one minute gone in the round.
A punch lands to the side of Kunwar 's head but he takes it in his stride.
Kunwar looks for a takedown but Teller sprawls well.
A little feinted left hand from Teller on the counter but he doesn't commit to it.
Kunwar is looking to clinch.
Kunwar misses with a takedown
and Teller finishes the little exchange by landing a big kick to the body.
Henry Teller has stuffed three takedown attempts in the round now. That's going to take a lot out of Hari Kunwar.
Kunwar on the wrong end of a decent looking cross there.
Teller connects nicely with a jab. Noted by the judges no doubt.
That's two minutes gone in the round.
Kunwar shoots and misses
and Teller counters with a stiff right hand.
Teller explodes with a nice body kick and back out of range. Nice work.
Teller connects with a looping right hand.
Teller missing with a left hand there. Kunwar was out of range so wasted energy throwing that one.
Henry Teller seems to be the more aggressive standup fighter in this bout.
Kunwar doesn't succeed with the takedown
and Teller connects with a straight left hand counter down the middle.
The crowd are loving this. Great action here.
No luck with that takedown attempt from Kunwar.

Kunwar closes the distance and clinches.
That's three minutes gone in the round.
Teller lands a shot to the body.
Kunwar blocking some punches.
Teller keeps control of Kunwar as he tries to wriggle out of the double underhooks.
Teller swings away with an uppercut that misses.
Teller misses with a hook from the clinch.

Teller's corner calls for him to break the clinch, which he does.
Henry Teller is looking to keep the fight on the feet at all costs.
Teller stuffs a takedown. It's all about dictating where the fight takes place and Teller wants it to stay on the feet.
Teller throws a wild body kick that Kunwar sees coming a mile off.
Teller gets off balance looking for a body kick
and Kunwar decides to take the opportunity to score a takedown. He's landed in Teller's guard.

Kunwar gets to his feet and steps away from his opponent.
Teller is using his reach advantage well here, landing the more effective single shots from range.

That's four minutes gone in the round.
Kunwar takes a punch to the jaw and another one to the bread basket.
Kunwar closes the distance and gets a double leg, slamming Teller to the mat! Teller manages to get full guard.
Teller on his back here. We all know that wrestlers don't like being on their back so let's see if Teller tries to get out of the position.
The crowd cheering loudly, showing their appreciation for the quality fight we're seeing here.
Kunwar is stalling in the full guard.
Teller pushes Kunwar off and scrambles back to his feet.
Kunwar with a lazy takedown attempt
and Teller counters with a lovely straight right hand!
Kunwar's hands are dropping dangerously low here and Teller connects clean with a right hook that sends him down to one knee! Kunwar scrambles back to his feet.
Teller is really peppering his opponent's head with punches.
Teller uses good footwork to get in and out and land a nice right hand before Kunwar has time to react.
Kunwar is rocked!
Are you kidding me?! Teller ducked down and unloaded an uppercut from hell that sent Kunwar clean off his feet! Someone make me a GIF - that's knockout of the night for sure!
Ladies and gentlemen, after 4:57 of round 1, we have a winner by way of KO (Punch). Henry Teller!
After winning the bout, Henry Teller thanked all his fans and promised he'd do even better in his next fight. The crowd seemed to love his humility.
|
|
|
|
|
|
|
|
|
|
|
|
|
|
|
|
|
|
|
|
|
|
|
| S |
C
A |
G |
S |
C
B |
G |
|
S |
C |
G |
|
energy
A | B |
|
hype
A | B |
|
pop
A | B |
|
mgr
A | B |
|
FIGHT
RATING
54% |
|
|
|
|
|
|
|
Undercard bout
|
Coming up we have a lightweight MMA rules bout between Abdul Mahrous (ranked 0 p4p, 0 weight class) and Lean Lang (ranked 0 p4p, 0 weight class). Both these fighters are unbeaten, so somebody's 0 has got to go!I don't know about you partner, but I'm pumped for this one!
 |
|
 |
| 174 cm
25
165 lbs
6 - 0 - 0 |
|
178 cm
27
160 lbs
5 - 0 - 0 |
BJJ Purple Belt
Basic striking
Experienced |
|
BJJ White Belt
Excellent MT
Heavy handed |
|
| |
|
Ladies and gentlemen. This fight is 3 rounds, in the lightweight division.
Introducing the fighter to my left, fighting out of the red corner.
With a record of
6 - 0 - 0, fighting out of Las Vegas, Abdul Mahrous!
And introducing the fighter to my right, fighting out of the blue corner.
With a record of
5 - 0 - 0, fighting out of Amsterdam, Lean Lang!
The judges for this bout are Phil Schofield, Chris Edwards and Colin Fotheringham.
The bell rings for round one and we are underway!
Mahrous with a lazy takedown attempt
and Lang holds on and brings the fighters into a clinch.
Mahrous is working on a leg, looking for a takedown but Lang is defending well.
Lang lands a left hand.
Lang lands a body shot in the clinch.
Lang can't find room to land a body shot as Mahrous controls the action.
A short uppercut from Lang.
Lang gets through Mahrous's defenses to land a nice punch to the side of the head.
Mahrous wants to get back to striking at distance but Lang won't allow it.
We've had a slow start to the round here - hopefully the action picks up.
Mahrous stalls.
Lang digs a right hand underneath Mahrous's ribcage. Mahrous let out a lung full of air as it connected.
Lang lands with a short punch from the clinch.
That's one minute gone in the round.
With the fighters clinched against the cage, Lang creates a bit of distance for himself and scores with a nice uppercut.
Lang lands with a short head shot on the inside.
Lang lands a body punch in the clinch.
Good body shot from Lang.
Lang is working Mahrous over against the cage.
A nice left hand lands by Lang.
Mahrous blocks a body shot from Lang.
Mahrous can't break the clinch.
A left hand lands to the body for Lang.
Mahrous drops down looking for an ankle pick but Lang pulls his leg out and moves away.
That's three failed takedown attempts in the round for Abdul Mahrous. That's going to take a lot out of him.
That's two minutes gone in the round.
Mahrous misses with a takedown
and Lang counters with a lovely shot to the body.
Lang drops Mahrous with a naaaaasty hook - Mahrous is in real trouble here! Lang dives in to side control and pounds out his opponent for a TKO victory! The crowd goes nuts!
Ladies and gentlemen, after 2:13 of round 1, we have a winner by way of TKO (Strikes). Lean Lang!
Abdul Mahrous spoke after the fight, saying 'I'll bounce back, I've came through plenty in life.'.
|
|
|
|
|
|
|
|
|
|
|
|
|
|
|
|
|
|
|
|
|
|
|
| S |
C
A |
G |
S |
C
B |
G |
|
S |
C |
G |
|
energy
A | B |
|
hype
A | B |
|
pop
A | B |
|
mgr
A | B |
|
FIGHT
RATING
44% |
|
|
|
|
|
|
|
Co-main event
|
Coming up we have a light heavyweight MMA rules bout between Alexander Pauwels (ranked 0 p4p, 0 weight class) and Robb Stark (ranked 0 p4p, 0 weight class). Robb Stark told me before the fight that he's been watching a lot of DVDs so let's see if that helps him in this one! I can't wait to find out!
 |
|
 |
| 182 cm
19
212 lbs
3 - 0 - 0 |
|
196 cm
20
216 lbs
3 - 1 - 0 |
Good wrestling
Solid boxing
Very strong |
|
BJJ Purple Belt
Decent boxing
Enjoys gardening |
|
| |
|
Ladies and gentlemen. This fight is 3 rounds, in the light heavyweight division.
Introducing the fighter to my left, fighting out of the red corner.
With a record of
3 - 0 - 0, fighting out of Montreal, Alexander Pauwels !
And introducing the fighter to my right, fighting out of the blue corner.
With a record of
3 - 1 - 0, fighting out of Las Vegas, Robb Stark!
The judges for this bout are Richard Clark, Steven Brown and Colin Fotheringham.
The bell rings for round one and we are underway!
Stark shoots in but no luck this time.
Stark connects with a single shot there.
The crowd cheers as Stark lands an impressive looking overhand right. Pauwels doesn't seem phased though.
Stark lands with a hook. Pauwels tried to avoid it but it clipped the top of his head.
Pauwels connects with a body shot.
Stark tries a low kick but Pauwels avoids it.
Stark uses good head movement to avoid the hook from Pauwels .
Pauwels looks to have improved his striking defense since last time we saw him fight.
Pauwels lands a jab followed by a nice looking cross.
A big left from Stark misses.
Stark is using his reach advantage to land shots from outside his opponent's range.
Left hook, right uppercut from Pauwels .
This has been an exciting period of action!
Stark looks to land a body kick but Pauwels moved away.
Pauwels uses decent footwork to sidestep a right hand from Stark.
Stark throws out a token jab with nothing on it.
No joy there for Stark, who threw a few shots but didn't land.
Pauwels is looking to counter the offense by Stark and move into the clinch.
Pauwels clinches up against the cage.
Pauwels lands a body shot.
Pauwels makes some space for himself and lands an uppercut.
Pauwels lands an uppercut.
Stark is rocked!
Stark looks winded!
That's one minute gone in the round.
A head punch blocked on the inside by Stark.
Stark blocks a punch to the side of the head.
A head punch on the inside from Pauwels fails to land.
Stark wants to break free. God knows he wants to breaaaak freeee.
Pauwels taking a break, stalling in the clinch.
Pauwels lands punches inside but they're not really causing much damage.
Stark is still on wobbly legs! Can Pauwels finish him?
Stark has had enough of the clinch but Pauwels keeps him there for the moment.
Pauwels misses with a punch on the inside.
Stark blocks an uppercut.
Pauwels misses with some punches.
Pauwels misses with a hook from the clinch.
Pauwels working aggressively here.
Stark blocking some punches.
An uppercut on the inside fails to land for Pauwels .
Stark seems to have recovered his senses.
Pauwels lands a hook to the side of the head.
Stark looking for a takedown.
Stark blocks a punch to the side of the head.
Pauwels creates a bit of distance and cracks Stark with a massive left hook! Stark crumples out of camera shot, completely unconscious! He's been Nelmarked! Pauwels stares at him for a moment then struts over to his corner, victorious.
Ladies and gentlemen, after 1:50 of round 1, we have a winner by way of KO (Punch). Alexander Pauwels !
|
|
|
|
|
|
|
|
|
|
|
|
|
|
|
|
|
|
|
|
|
|
|
| S |
C
A |
G |
S |
C
B |
G |
|
S |
C |
G |
|
energy
A | B |
|
hype
A | B |
|
pop
A | B |
|
mgr
A | B |
|
FIGHT
RATING
69% |
|
|
|
|
|
|
|
Main event
|
Coming up we have a super heavyweight MMA rules bout between Mitch Miletich (ranked 0 p4p, 0 weight class) and Dog The Multi Hunter (ranked 0 p4p, 0 weight class). The Multi Hunter has chosen The Multi Hunter theme as his entrance music. Both fighters look fresh as a daisy as they make their way towards the cage.
 |
|
 |
| 181 cm
22
160 lbs
4 - 0 - 0 |
|
165 cm
22
155 lbs
10 - 0 - 0 |
Good wrestling
Solid boxing
Cardio machine |
|
BJJ Brown Belt
Good low kicks
Granite chin |
|
| |
|
Ladies and gentlemen. This fight is 3 rounds, in the super heavyweight division.
Introducing the fighter to my left, fighting out of the red corner.
With a record of
4 - 0 - 0, fighting out of New York, Mitch Miletich!
And introducing the fighter to my right, fighting out of the blue corner.
With a record of
10 - 0 - 0, fighting out of London, Dog The Multi Hunter!
The judges for this bout are Andrew Berry, James Atkins and Richard Clark.
The bell rings for round one and we are underway!
Miletich moves into the clinch successfully.
Miletich lands with a good tight uppercut to the head.
An uppercut on the inside fails to land for The Multi Hunter.
Miletich tries to throw a body punch but The Multi Hunter avoids it by throwing Miletich back against the cage.
The Multi Hunter throws a hook to the body. More of an arm punch but it's all scoring with the judges.
The Multi Hunter fails to land with a short punch on the inside.
Miletich prevents a body shot from The Multi Hunter.
Miletich lands a right hand that snaps the head of The Multi Hunter backwards.
The Multi Hunter's head jolts backwards as he takes an uppercut right on the button!
A nice left hand lands by The Multi Hunter.
The Multi Hunter blocks an uppercut.
The Multi Hunter manages to pull guard. Let's see whether he can land a sub off his back.
The Multi Hunter working from the bottom, still in full guard. He's managed to get a loose triangle. Miletich doesn't seem to be doing much to defend here, obviously he feels comfortable in the position. Miletich manages to throw the legs off his shoulder and he's back into guard - no problem.
The Multi Hunter is active off his back here, looking for submissions.
The Multi Hunter has a loose triangle. He'll be looking to tighten that up but Miletich can see exactly what he's planning and manages to posture up and free himself.
That's one minute gone in the round.
The Multi Hunter looking for subs off his back but Miletich has passed one foot through into half guard.
The Multi Hunter is looking to improve his position.
The fighters are battling for position here. The Multi Hunter manages to regain full guard. Nice work.
The Multi Hunter is working an open guard here, looking to improve his position. No doubt that will leave him open to counters but at least he's being more offensive.
The fighters are pressed up against the cage, both looking to find a bit of space to work.
The Multi Hunter keeping moving, preventing Miletich from controlling successfully.
The ref warns both fighters not to hold the cage as they work up against the meshing.
That's two minutes gone in the round.
Well. There's a bit of a lull in the action here and the crowd are starting to get restless.
Miletich is pushing down on The Multi Hunter's leg trying to pass to half guard. The Multi Hunter is fighting to maintain full guard but Miletich has managed to sneak the leg through.
The Multi Hunter looking for submissions from an awkward position here.
The Multi Hunter is refusing to be controlled, as Miletich sits in half guard.
The Multi Hunter tries to get to full guard but Miletich has control of the leg.
Miletich wants to pass to mount but The Multi Hunter is defending the position.
The fighters are starting to perspire pretty heavily.
The Multi Hunter wants to improve his position but Miletich is controlling well.

Miletich seems to be looking for submissions.
That's three minutes gone in the round.
The Multi Hunter is looking for a sweep. Miletich is wise to his cunning plan and keeps the top position.
Miletich seems to be working for a kimura but The Multi Hunter defends the submission attempt.
The Multi Hunter trying to control but Miletich postures up.
The Multi Hunter is looking to get full guard. It looks like he might be successful but at the last minute Miletich jumps into side control!
The Multi Hunter sneaks back into half guard.
The Multi Hunter is trying to control but Miletich manages to pass to mount!
That's four minutes gone in the round.
Miletich working for a submission but The Multi Hunter is keeping him at bay.
The Multi Hunter wants to hold on but Miletich pushes him away.
The Multi Hunter regains half guard.
The Multi Hunter felt the need to train up his defensive grappling in the buildup to the fight. Presumably he was expecting to be in a difficult position like this, so let's see if he can get out of it.
The Multi Hunter works his way to full guard. Good work.
Miletich trying to control but The Multi Hunter is working from the bottom.
The crowd thankful this round is nearly over.
Miletich wants to pass the guard but The Multi Hunter is keeping the position.
Miletich will need to keep those long limbs tucked in whilst he's on the ground, to prevent any submissions.
Miletich content to stall in guard here.
And thats the end of the round the fighters go back to their corners.
Mitch Miletich dominated that round.
The fighters' corners scream their final instructions, as the referee calls time. Here we go, back to the action!

Miletich chopped to the floor by a nice leg kick but he springs right back up before The Multi Hunter can pounce on him.
A head kick misses from The Multi Hunter.
Miletich slips a jab and a cross from The Multi Hunter.
The Multi Hunter checks a leg kick.
The Multi Hunter feints the counter takedown.
Miletich avoids a lazy jab quite easily.
Miletich avoids the clinch attempt nicely.
Miletich swings away with a leg kick that misses.
The Multi Hunter moves out of range of the leg kick from Miletich.
We've had a slow start to the round here - hopefully the action picks up.
Miletich lands with an uppercut that bounces The Multi Hunter off the cage and back into range.
The Multi Hunter turns his hip over beautifully as he lands a nice leg kick.
We've been told by Miletich's head coaches at The Cooker that he's been working on his takedown defense in preparation for this fight.
Miletich displaying good standup as he scores with a three punch combination.
It looks like Dog The Multi Hunter has been cut.
Miletich blocks a head kick by The Multi Hunter.
Miletich was looking to counter that move with a punch but didn't quite pull the trigger.
The Multi Hunter tries a head kick but it misses.
That's one minute gone in the round.
The Multi Hunter misses with a lunging right hand
letting Miletich counter with a right hand.
The Multi Hunter staying out of range there.
An inside leg kick lands from The Multi Hunter.
Miletich moves out of range of the leg kick from The Multi Hunter.
Miletich tries to clinch but The Multi Hunter is having none of it.
The Multi Hunter tries to keep at a distance but Miletich has taken the fight into the clinch.
A quick uppercut on the inside from Miletich.
The Multi Hunter swings away with an uppercut that misses.
Miletich scores with an uppercut up the middle.
The Multi Hunter scores with an uppercut up the middle.
Miletich pushes The Multi Hunter back against the cage and lands a hook to the side of the head.
The Multi Hunter misses with a short punch on the inside.
Still in the clinch, Miletich scores with a nice short uppercut.
This has been an exciting period of action!
Miletich works for underhooks and lands a body shot in the process.
A short right from Miletich on the inside.
Miletich blocks an uppercut.
An uppercut on the inside fails to land for The Multi Hunter.
That's two minutes gone in the round.
The Multi Hunter fails to land with a short punch on the inside.
The Multi Hunter misses with a hook to the ribs.
Miletich is really dominating this fight. Is there anything that The Multi Hunter can do to turn this around?
Miletich lands with a short shot to the head.
Miletich tries to land a shot to the body but it's blocked.
The Multi Hunter misses with a short punch on the inside.
The Multi Hunter tries to pull guard but can't drag his opponent to the mat. Miletich just stands there and leans against the cage.
Miletich lands a shoulder strike.
Miletich lands a hook that snaps the head of The Multi Hunter backwards.
The Multi Hunter tries a shoulder strike but it doesn't do any damage.
The Multi Hunter swings away with an uppercut that misses.
Miletich lands a shoulder strike that jolts his opponent's head backwards.
The Multi Hunter misses with some punches.
The Multi Hunter lands an uppercut.
Miletich tried to land a shot to the body but connects with The Multi Hunter's elbow.
Miletich goes for a body shot but it's blocked.
Miletich tries to work over The Multi Hunter's body with a swooping hook but it only glances the target.
The Multi Hunter throws a head punch that misses.
The Multi Hunter tries a shoulder strike but it doesn't do any damage.
Miletich lands a short shot on the inside that snaps the head of The Multi Hunter backwards.
The Multi Hunter tries a shoulder strike but it doesn't do any damage.
That's three minutes gone in the round.
A short uppercut from The Multi Hunter.
Miletich lands a shot to the body.
Miletich prevents a body shot from The Multi Hunter.
Miletich manages to break the clinch.
Miletich checks a leg kick.
Miletich appeared to be looking to counter that last move with a leg kick.
Miletich tries a low kick but The Multi Hunter avoids it.
The Multi Hunter takes a step towards his opponent and connects with a left hand, before circling away.
Miletich throws a series of strikes that have The Multi Hunter backpedaling.
Miletich steps to the side to avoid the strikes from The Multi Hunter.
The Multi Hunter scores with a nice right hand.
The Multi Hunter thows a leg kick but Miletich checks it
enabling Miletich to counter with a crisp jab.
The Multi Hunter lands a leg kick and bounces back out of range.
The Multi Hunter takes an uppercut right on the button but keeps his composure.
The fans in attendance giving it up for the two fighters, who have really let it all hang out in the last minute or so!
Miletich misses with an uppercut. The Multi Hunter saw that one coming.
The Multi Hunter throws out a counter right but Miletich avoids it with no problem.
Miletich keeping his hands up high there, blocking the jab from The Multi Hunter.
The Multi Hunter fakes low and throws an overhand right that catches Miletich on the side of the head.
That's four minutes gone in the round.
A solid body kick from The Multi Hunter.
Miletich lands with a thumping leg kick.
The Multi Hunter avoids the body shot from Miletich.
A decent looking cross lands there for Miletich.
The Multi Hunter missing with a left hand there. Miletich was out of range so wasted energy throwing that one.
The Multi Hunter slips a jab from Miletich.
Boom, another hit is landed. "You're gunna get knocked out" taunts Miletich, as that shot connected.
The Multi Hunter drops his hands momentarily and Miletich takes advantage with a crisp shot to the head.
Miletich lands a lovely overhand right.
The Multi Hunter misses with a low kick.
Miletich is using his height advantage well here, landing a good percentage of his punches.
The crowd applaud the fighters' efforts here as the round comes to an end.
The Multi Hunter connects with a solid leg kick.
The Multi Hunter throws a low kick but Miletich avoids it.
Miletich fails with an attempt to clinch.
And thats the end of the round the fighters go back to their corners.
Mitch Miletich dominated that second round.
The cut man is working on Dog The Multi Hunter's cut.
Well, the break between rounds is over. Let's get back to the scrappin! So, we enter the final round. Let's see if either fighter can bring us a finish, or whether we're going to the judges scorecards.

A slow jab from Miletich misses its intended target.
Miletich blocks a head kick by The Multi Hunter.
Miletich lands a vicious shot with the stealth of a sniper and the strength of a viper. Are vipers that strong? I can think of lots of things that are stronger than a viper - not many rhyme with sniper though.
Miletich ducks under a wild hook from The Multi Hunter.
The Multi Hunter takes a body kick right on the floating rib. Ouchie.
Miletich scores with a nice head shot.
The Multi Hunter ducks under a wild hook from Miletich.
A head kick misses from The Multi Hunter.
Miletich lands a head kick!
Decent striking displayed by Miletich there.
The Multi Hunter is rocked!
The Multi Hunter throws the kick towards the body but Miletich avoids it.
The Multi Hunter moving in and out of range nicely, whilst landing the scoring shot.
This is a great period of action - very entertaining stuff!
Miletich closes the distance and pushes The Multi Hunter back into the cage.
That's one minute gone in the round.
Miletich swings wildly with an uppercut but The Multi Hunter uses good head movement to avoid it.
Miletich blocks an uppercut.
A head punch on the inside from The Multi Hunter fails to land.
The Multi Hunter swings away with an uppercut that misses.
The referee calls for Miletich to work.
Miletich has a couple of punches blocked by The Multi Hunter.
The Multi Hunter lands a right uppercut that snaps the head of Miletich backwards.
Miletich tries a shoulder strike but it doesn't do any damage.
The Multi Hunter can't find room to land a body shot as Miletich controls the action.
Miletich lands a left hand.
Miletich doesn't land with the attempted body shot.
Miletich tries to work over The Multi Hunter's body with a swooping hook but it only glances the target.
With the fighters clinched against the cage, Miletich creates a bit of distance for himself and scores with a nice uppercut.
The Multi Hunter misses with a short punch on the inside.
The Multi Hunter tries to work over Miletich's body with a swooping hook but it only glances the target.
Miletich scores with a shoulder strike.
Miletich tries a shoulder strike but it doesn't do any damage.
Miletich has a couple of punches blocked by The Multi Hunter.
Dog The Multi Hunter has stepped it up - he knows he needs a finish here!
That's two minutes gone in the round.
Miletich tries a shoulder strike but it doesn't do any damage.
Mitch Miletich has scored more points in the clinch so far.
Miletich misses with a hook to the ribs.
Miletich scores with a shoulder strike.
Miletich misses with a shot to the kidneys.
Miletich is pushing The Multi Hunter up against the cage, for a bit of lean and pray action. Action being used the in the loosest possible sense of the word.
This has been an exciting period of action!
Miletich lands with a short head shot on the inside.
Miletich throws a punch but it's blocked by The Multi Hunter.
The Multi Hunter misses with a hook from the clinch.
Miletich swings wildly with an uppercut but The Multi Hunter uses good head movement to avoid it.
The Multi Hunter lands a shoulder strike that jolts his opponent's head backwards.
The Multi Hunter misses with a shot to the kidneys.
A hook to the body from The Multi Hunter.
The Multi Hunter lands a right uppercut that snaps the head of Miletich backwards.
Miletich lands a body shot in the clinch.
A short left from Miletich.
The Multi Hunter prevents a body shot from Miletich.
The Multi Hunter throws a punch but it's blocked by Miletich.
That's three minutes gone in the round.
A short right from The Multi Hunter on the inside.
A right hand to the body from Miletich.
Miletich lands a nice shot to the body.
Still in the clinch, Miletich scores with a nice short uppercut.
The Multi Hunter fails to land with a short punch on the inside.
The Multi Hunter lands with a short punch from the clinch.
The Multi Hunter doesn't land with the attempted body shot.
The Multi Hunter working some nice short punches in the clinch.
The Multi Hunter tries to land a shot to the body but it's blocked.
A head punch blocked on the inside by The Multi Hunter.
The Multi Hunter lands with a short head shot on the inside.
A quick uppercut on the inside from Miletich.
A right handed body shot lands from Miletich.
The Multi Hunter takes a big intake of breath there - he's definitely tired.
The Multi Hunter goes for a body shot but it's blocked.
A nice right hand lands inside from Miletich.
A nice right hand lands inside from Miletich.
Wooooo! Give it up for these two warriors! They are putting on a show!
The Multi Hunter's head jolts backwards as he takes an uppercut right on the button!
Miletich throws a hook to the body. More of an arm punch but it's all scoring with the judges.
Miletich scores with an uppercut up the middle.
That's four minutes gone in the round.
The Multi Hunter tries to land a shot to the body but it's blocked.
The Multi Hunter fails to pull guard.
Miletich working some nice short punches in the clinch.
Miletich scores with a nice hook to the head.
With the fighters clinched against the cage, Miletich creates a bit of distance for himself and scores with a nice uppercut.
The Multi Hunter is still on wobbly legs! Can Miletich finish him?
The Multi Hunter misses with a punch to the body.
The Multi Hunter seems to have recovered his senses.
The Multi Hunter goes for a body shot but it's blocked.
Miletich lands on the inside with an uppercut.
Miletich lands a shot to the body.
Miletich lands a nice looking hook to the body, against the cage.
Miletich makes some space for himself and lands an uppercut.
A nice right hand lands inside from Miletich.
A short right from Miletich on the inside.
Miletich lands a nice shot to the body.
Miletich lands a left hand that snaps the head of The Multi Hunter backwards.
The crowd applaud the fighters' efforts here as the round comes to an end.
Still in the clinch, Miletich scores with a nice short uppercut.
A nice left hand lands by Miletich.
Miletich scores with a shoulder strike.
Mitch Miletich is fighting for a decision here - he's started to take the cautious approach.
Miletich throws a big uppercut that drops The Multi Hunter! More strikes from Miletich and the referee jumps in to stop the fight! The Multi Hunter lies dazed against the cage as Miletich celebrates with his cornermen!
Ladies and gentlemen, after 4:57 of round 3, we have a winner by way of TKO (Strikes). Mitch Miletich!
|
|
|
|
|
|
|
|
|
|
|
|
|
|
|
|
|
|
|
|
|
|
|
| S |
C
A |
G |
S |
C
B |
G |
|
S |
C |
G |
|
energy
A | B |
|
hype
A | B |
|
pop
A | B |
|
mgr
A | B |
|
FIGHT
RATING
81% |
|
|
|
|
|
|
|
|
|
|
