 |
QFC Tournament 679 Round 1 PBP Commentary |
Undercard bout
|
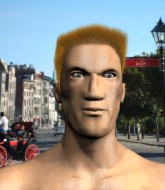
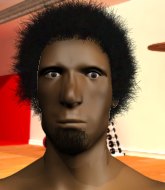
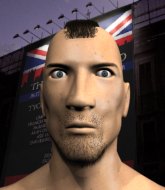
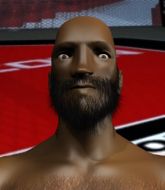
Coming up we have a welterweight MMA rules bout between Von Bader (ranked 0 p4p, 0 weight class) and John Thomas (ranked 0 p4p, 0 weight class). We have two fighters making their debuts here, so let's see who comes out of this one with their first professional victory.
 |
|
 |
| 186 cm
18
175 lbs
0 - 0 - 0 |
|
170 cm
18
179 lbs
0 - 0 - 0 |
Decent wrestler
Counter fighter
Big heart |
|
BJJ White Belt
Excellent boxer
Solid chin |
|
| |
|
Ladies and gentlemen. This fight is 3 rounds, in the welterweight division.
Introducing the fighter to my left, fighting out of the red corner.
With a record of
0 - 0 - 0, fighting out of London, Von Bader!
And introducing the fighter to my right, fighting out of the blue corner.
With a record of
0 - 0 - 0, fighting out of London, John Thomas!
The judges for this bout are Paul Tew, Donald Grub and Richard Clark.

The bell rings for round one and we are underway!
Bader swats away the attempt to clinch by Thomas.
Thomas scores with a sloppy right hand. Bader should have avoided that one.
Thomas bobs and weaves and unloads with a good uppercut.
A lazy left from Thomas finds it's target.
Bader misses with a body shot. Nice footwork from Thomas.
A jab lands there for Thomas.
Thomas lands a lovely overhand right.
Thomas scores with a jab to the head.
Thomas misses with a jab, cross combination.
A slow jab from Bader misses its intended target.

Bader clinches up with Thomas and pushes him back against the cage.
Bader lands a right uppercut that snaps the head of Thomas backwards.
The fans in attendance giving it up for the two fighters, who have really let it all hang out in the last minute or so!
Bader lands with a short head shot on the inside.
Bader prevents Thomas from breaking the clinch.
Thomas is looking to break free of the clinch but Bader has double underhooks.
Bader is working Thomas over against the cage.
Thomas is trying to pull guard but Bader has him pressed against the cage.

That's one minute gone in the round.
Thomas blocking some punches.
Bader swings away with an uppercut that misses.
Bader scores with a nice hook to the head.
Bader misses with a shot to the kidneys.
Bader misses with some punches.
Bader lands with a good tight uppercut to the head.
Bader lands with a right to the head.
A short uppercut from Bader.
Bader makes some space for himself and lands an uppercut.
Bader tried to land a shot to the body but connects with Thomas's elbow.
A quick uppercut on the inside from Bader.
With the fighters clinched against the cage, Bader creates a bit of distance for himself and scores with a nice uppercut.
Bader softening up his opponent with strikes, against the cage.
Wooooo! Give it up for these two warriors! They are putting on a show!
Nice body punch from Bader - that landed with a thud.
Thomas wants to break free but Bader has control.
Bader works on Thomas's body with a couple of short punches.
Thomas can't break the clinch.
Bader lands a body punch - he's looking to wear down Thomas.
Thomas tries to break free but Bader pushes him back against the cage.
Thomas looks winded!

That's two minutes gone in the round.
Bader prevents Thomas from breaking the clinch.
Bader lands a right hand.
Bader lands with a left to the head.
Thomas can't break the clinch.
Bader lands a left hand.
Thomas is trying to work out of this bad position, with his back against the cage.
A short uppercut from Bader.
Bader throws a blind hook that connects with the side of Thomass head.
Bader lands an uppercut.
Bader lands an uppercut.
A short right from Bader on the inside.
Bader lands with a short shot to the head.
Bader lands with a right to the head.
Bader lands a shoulder strike.
Bader throws a hook to the body. More of an arm punch but it's all scoring with the judges.
Bader lands a right hand that snaps the head of Thomas backwards.
A short body shot lands from Bader as the two fighters clinch.
Bader gets through Thomas's defenses to land a nice punch to the side of the head.
Bader pushes Thomas back against the cage and lands a hook to the side of the head.

That's three minutes gone in the round.
Bader lands punches inside but they're not really causing much damage.
A hook to the body from Bader.
Bader is leaning against Thomas and scores with a nice uppercut to the body.
Bader lands a nice uppercut.
Bader lands a left hand that snaps the head of Thomas backwards.
A short right from Bader.
An uppercut to the body lands inside from Bader.
Bader pushes Thomas back against the cage and lands a hook to the side of the head.
Bader cracks Thomas with a nice body shot.
Bader lands a short shot on the inside that snaps the head of Thomas backwards.
An uppercut to the body lands inside from Bader.
A short left from Bader.
We've seen a great period of action over the last minute or so - credit to both fighters for going all out!
Bader lands a shoulder strike.
Bader lands a shoulder strike.
Bader lands with a short shot to the head.
Nice body punch from Bader.
A short body shot lands from Bader as the two fighters clinch.
Bader lands with a short punch from the clinch.
Bader lands on the inside with an uppercut.

That's four minutes gone in the round.
Bader lands with a good tight uppercut to the head.
Bader works on Thomas's body with a couple of short punches.
Bader lands a nice shot to the body.
Bader lands a body shot.
Bader lands a short shot on the inside that snaps the head of Thomas backwards.
Bader stays in close to his opponent and throws a right hand to the body.
Bader digs a right hand into Thomas's ribs. Those have got to be taking their toll on Thomas's gas tank.
Bader lands a right hand that snaps the head of Thomas backwards.
Nice body punch from Bader.
Bader works on Thomas's body with a couple of short punches.
Bader lands an uppercut.
Thomas's head jolts backwards as he takes an uppercut right on the button!
Thomas wants to break the clinch but can't.
Bader lands a hook to the body. It's hard to tell if that hurt Thomas or not.
As the round comes to an end the crowd are showing their appreciation for a great round of action.
A right handed body shot lands from Bader.
Bader lands with a short head shot on the inside.
A right hook to the body lands for Bader.
Bader lands with a right to the head.
Still in the clinch, Bader scores with a nice short uppercut.
And thats the end of the round the fighters go back to their corners.
Von Bader dominated that round.
OK. That's time! The bell goes and we're back to the action.

Bader throws a big shot that misses.
A decent looking cross lands there for Thomas.
Thomas misses with an uppercut.
Bader closes the distance and pushes Thomas back into the cage.
A nice left hand lands by Bader.
Thomas is trying to force a seperation but Bader has the dominant position.
Thomas blocks a punch to the side of the head.
Bader throws a punch but it's blocked by Thomas.
Von Bader has scored more points in the clinch so far.
Thomas working hard to break the clinch.
Bader scores with a shot to the side of Thomas's head.
A short right from Bader.
Bader lands with a short shot to the head.
A nice left hand lands by Bader.
Bader tried to land a shot to the body but connects with Thomas's elbow.
Bader throws a blind hook that connects with the side of Thomass head.
Thomas is breathing heavily.
The crowd cheering loudly, showing their appreciation for the quality fight we're seeing here.
Bader lands a short shot on the inside that snaps the head of Thomas backwards.
Thomas prevents a body shot from Bader.
Bader lands a left hand.
Bader gets through Thomas's defenses to land a nice punch to the side of the head.
That's one minute gone in the round.
Thomas tries to break the clinch but Bader is controlling the position.
A nice left hand lands by Bader.
Bader gets through Thomas's defenses to land a nice punch to the side of the head.
Thomas is trying to force a seperation but Bader has the dominant position.
Bader lands on the inside with an uppercut.
With the fighters clinched against the cage, Bader creates a bit of distance for himself and scores with a nice uppercut.
Bader lands a right hand that snaps the head of Thomas backwards.
A quick uppercut on the inside from Bader.
Bader lands a hook to the body. It's hard to tell if that hurt Thomas or not.
Still in the clinch, Bader scores with a nice short uppercut.
Bader throws a blind hook that connects with the side of Thomass head.
With the fighters clinched against the cage, Bader creates a bit of distance for himself and scores with a nice uppercut.
The fans in attendance giving it up for the two fighters, who have really let it all hang out in the last minute or so!
Bader pushes Thomas back against the cage and lands a hook to the side of the head.
Bader stays in close to his opponent and throws a right hand to the body.
Bader lands a nice uppercut.
Bader throws a blind hook that connects with the side of Thomass head.

Thomas is rocked!
Bader lands a left hand that snaps the head of Thomas backwards.
Thomas is still on wobbly legs! Can Bader finish him?
Bader lands a left hand that snaps the head of Thomas backwards.
That's two minutes gone in the round.
Bader lands a nice shot to the body.
Thomas's head jolts backwards as he takes an uppercut right on the button!
With the fighters clinched against the cage, Bader creates a bit of distance for himself and scores with a nice uppercut.
Bader throws a big uppercut that drops Thomas! More strikes from Bader and the referee jumps in to stop the fight! Thomas lies dazed against the cage as Bader celebrates with his cornermen!
Ladies and gentlemen, after 2:19 of round 2, we have a winner by way of TKO (Strikes). Von Bader!
A less than humble Von Bader misjudged his post fight interview somewhat and came across a little too arrogant whilst trying to hype up his own abilities.
|
|
|
|
|
|
|
|
|
|
|
|
|
|
|
|
|
|
|
|
|
|
|
| S |
C
A |
G |
S |
C
B |
G |
|
S |
C |
G |
|
energy
A | B |
|
hype
A | B |
|
pop
A | B |
|
mgr
A | B |
|
FIGHT
RATING
89% |
|
|
|
|
|
|
|
Undercard bout
|
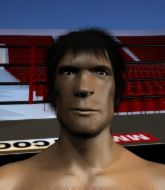
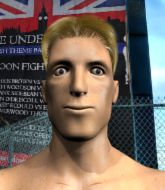
Coming up we have a welterweight MMA rules bout between Calvin Lowder (ranked 0 p4p, 0 weight class) and Nj Mcguigan (ranked 0 p4p, 0 weight class). We have two fighters making their debuts here, so let's see who comes out of this one with their first professional victory.
 |
|
 |
| 180 cm
18
177 lbs
0 - 0 - 0 |
|
170 cm
18
170 lbs
0 - 0 - 0 |
BJJ Purple Belt
Basic striking
Granite chin |
|
BJJ Brown Belt
Counter fighter
Determined |
|
| |
|
Ladies and gentlemen. This fight is 3 rounds, in the welterweight division.
Introducing the fighter to my left, fighting out of the red corner.
With a record of
0 - 0 - 0, fighting out of London, Calvin Lowder!
And introducing the fighter to my right, fighting out of the blue corner.
With a record of
0 - 0 - 0, fighting out of London, Nj Mcguigan!
The judges for this bout are Andrew Berry, Phil Schofield and Steven Brown.
The bell rings for round one and we are underway!
Mcguigan fails with a takedown attempt from distance.
Mcguigan's hands are dropping dangerously low here and Lowder connects clean with a right hook that sends him down to one knee! Mcguigan scrambles back to his feet.
Lowder leaves Mcguigan with his face pressed against the mat as he sprawls beautifully, defending against a solid takedown attempt.
Lowder misses with a double jab.
A little jabbing left from Mcguigan on the counter but it doesn't find it's target.
Lowder lands a straight punch to the body, keeping Mcguigan at a distance.
Lowder takes a swing at Mcguigan's ribcage but misses.
Mcguigan shoots in for a takedown. "Ole!" shouts Lowder as he jumps to the side.
Calvin Lowder has stuffed three takedown attempts in the round now. That's going to take a lot out of Nj Mcguigan.
We've had a slow start to the round here - hopefully the action picks up.
Mcguigan checks a leg kick.

Lowder fakes an overhand right and shoots for a takedown. Mcguigan sprawls well initially but Lowder persists and gets the takedown into half guard.
Mcguigan gets full guard.
Mcguigan trying to keep a closed guard but Lowder is proving a slippery customer.
Lowder trying to control the position from guard on top but Mcguigan is wriggling around, looking for whatever he can.
That's one minute gone in the round.

Mcguigan looking to try and escape his hips here, looking for a submission. It looks like he's going for a triangle but Lowder is defending well. Mcguigan quickly switches to an armbar and extends the arm! Lowder has no choice but to tap, to a very quick submission! Wow, that was lightning fast! Mcguigan celebrates on the cage, with the crowd.
Ladies and gentlemen, after 1:22 of round 1, we have a winner by way of Submission (Armbar). Nj Mcguigan!
|
|
|
|
|
|
|
|
|
|
|
|
|
|
|
|
|
|
|
|
|
|
|
| S |
C
A |
G |
S |
C
B |
G |
|
S |
C |
G |
|
energy
A | B |
|
hype
A | B |
|
pop
A | B |
|
mgr
A | B |
|
FIGHT
RATING
63% |
|
|
|
|
|
|
|
Undercard bout
|
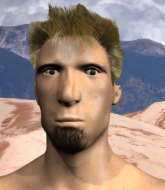
Coming up we have a welterweight MMA rules bout between Stevie West (ranked 0 p4p, 0 weight class) and Marquis Reagent (ranked 0 p4p, 0 weight class). We have two fighters making their debuts here, so let's see who comes out of this one with their first professional victory.
 |
|
 |
| 172 cm
18
177 lbs
0 - 0 - 0 |
|
178 cm
18
177 lbs
0 - 0 - 0 |
Good takedowns
Brawler
Good chin |
|
Good takedowns
Brawler
Granite chin |
|
| |
|
Ladies and gentlemen. This fight is 3 rounds, in the welterweight division.
Introducing the fighter to my left, fighting out of the red corner.
With a record of
0 - 0 - 0, fighting out of London, Stevie West!
And introducing the fighter to my right, fighting out of the blue corner.
With a record of
0 - 0 - 0, fighting out of London, Marquis Reagent!
The judges for this bout are Donald Grub, James Ackerman and Daniel Bishop.
The bell rings for round one and we are underway!
Reagent throws a looping left and ducks down for a takedown. He's got his arms around West's waist but West gets an underhook and avoids the takedown by throwing Reagent off to one side.
West swings for the body but Reagent moves out of range.
West shoots in for a takedown from distance. He catches Reagent napping and manages to drive through into side control!
West moves into full mount!
Reagent sneaks a leg back under and regains half guard and is working straight away to try and get back to guard. He hasn't managed just yet though.
Reagent avoiding damage under a succession of punches from West.
West moves into full mount! Reagent won't be happy about that!
Reagent wants to hold on but West pushes him away.
The ref warns both fighters not to hold the cage as they work up against the meshing.
West trying to control but Reagent is having none of it.
West prevents Reagent from getting the reversal.
That's one minute gone in the round.
West tucks in and makes sure he doesn't lose the dominant position.
West pausing momentarily but resumes with a couple of decent strikes that do a bit of damage.
Reagent tries to hold on but West pushes him away.
Reagent working to try and regain half guard.
Reagent tries to lock up and control but West gives him a forearm to the face and pushes him away.
West trying to control but he's not successful this time.
West working Reagent over with strikes here.
That's two minutes gone in the round.
West tucks in and makes sure he doesn't lose the dominant position.
Reagent tries to reverse the position but West maintains control.
West raining down hammerfists from mount.
Reagent is trying desperately to improve position.
West has been looking to land a fair amount of strikes on the ground. He might be looking to soften his opponent up in order to work for a submission.
That's three minutes gone in the round.
Reagent takes a big shot to the head but keeps on trying to improve his position.
West controlling from mount.
West looking to ground and pound his opponent to a finish here.
West controlling from mount.
Reagent is desperately trying to improve his position but West has a good base and remains in mount.
West lands a heavy elbow.
Reagent can't escape the position.
That's four minutes gone in the round.
Reagent takes a big shot to the head but keeps on trying to improve his position.

West working to secure an arm triangle but it's not happening for him just yet.
West can't quite control the action as he would like just now, as Reagent is looking to escape.
West is working for a guillotine from mount but Reagent frees his head quite easily.
Reagent is trying desperately to improve position.
And thats the end of the round the fighters go back to their corners.
Stevie West dominated that round.
The fighters get back to their feet, the hooter sounds and we're back to the action!
Reagent shoots in for a double leg but West sprawls well. That's going to sap some energy.
Reagent displays good takedown defense there as he swats away a double leg from West.
Stevie West is looking to throw some combinations by the looks of things.
Reagent leaves West with his face pressed against the mat as he sprawls beautifully, defending against a solid takedown attempt.
It seemed like Reagent was going to counter with the hook but didn't fully commit to it.

Reagent looking to shoot here. He's gone for it and he's landed a takedown into side control! Oh, that's bad for West!
Reagent is looking to take a break and control but West is keeping him honest, looking to work from the bottom.
We've had a slow start to the round here - hopefully the action picks up.
West gets one leg under and gets the fight to half guard.
That's one minute gone in the round.
West is holding on to half guard well.
West wants to control but Reagent is keeping busy.
Stevie West overall seems to be getting the better of the ground position in the fight so far.
West tries to roll over but Reagent keeps him under control.
Reagent wants to pass the guard but West is defending well.
Reagent is still trying to improve position.
That's two minutes gone in the round.
There's not a lot going on here and the crowd are letting the fighters know they're not willing to tolerate a lack of action.
West wants to control but Reagent is keeping busy.
Reagent is taking a breather. West says something to him but it's hard to make out. Perhaps he's telling him to get on with it and actually do something.

The referee has motioned to the fighters to stand back up. He just wasn't happy with the level of activity.
Sloppy strikes from Reagent. Those never looked like landing.
West slips a jab and a cross from Reagent.
West stuffs the takedown.
That's three minutes gone in the round.
Reagent keeps the fight on the outside.

Reagent closes the distance and pushes West back into the cage.

Reagent breaks the clinch and we're back to striking at distance.
Reagent changes levels and looks for a double leg takedown. West tries to avoid it but Reagent manages to keep hold of a leg and drag West to the ground. West escapes though and pops straight back up to his feet.
Stevie West has stuffed three takedown attempts in the round now. That's going to take a lot out of Marquis Reagent.
Reagent is breathing heavily.
West throws out a loose jab but Reagent uses good head movement to avoid it.
West clinches up against the cage.
Reagent content to slow the pace in the clinch.

West pushes off and circles away, back to the middle of the mat.
Reagent shoots in but no luck this time.
West seemed to be looking to counter by closing the distance.
Reagent fails miserably with a takedown attempt.
West shapes like he's going to throw a leg kick but settles back down.
That's four minutes gone in the round.
Reagent throws a body kick, spinning off balance
and West counters with a nice double leg into guard.
West is just sitting in guard, looking to avoid any submissions.
West pushes down on Reagent's leg and manages to get into half guard.
West is looking for a kimura but Reagent is holding onto that half guard position, so it's hard for West to get the leverage.
West frees up his trapped foot and advances to mount.
The fans in attendance giving it up for the two fighters, who have really let it all hang out in the last minute or so!
The crowd thankful this round is nearly over.
Reagent looking to escape from mount but he's given up his back!
The crowd hopeful of a finish here - West's supporters are on their feet, screaming for him to go for the rear naked choke.
And thats the end of the round the fighters go back to their corners.
Stevie West dominated that second round.
That's time! Back to the action! Let's hear some noise people - this is the final round!

Reagent throws a hook to the body but it doesn't connect.
Reagent moves out of range as West throws a body kick.
West misses with a body shot. Nice footwork from Reagent.
West closes the distance and clinches.
West could do with losing a few pounds - he looks very soft around the mid section, to put it politely.
West misses with a short punch on the inside.
West breaks the clinch and we're back to striking at distance.
Reagent gets a double leg takedown into West's guard.
West wants to stand up but Reagent is controlling him.
We've had a slow start to the round here - hopefully the action picks up.
Reagent is in close to West's body, working some short punches and elbows.
West keeping full guard, as Reagent tries to pass.
West seems keen to control rather than go for a submission, at least for now.
That's one minute gone in the round.
Reagent wants to control from the top but West keeps moving.
Reagent throwing shots from guard but he's hitting more mat than opponent.
The referee wants the fighters to be more active or he's going to reset them on the feet.
Reagent is standing up over West. West looks to escape but Reagent dives into side control.
West is looking to regain half guard here but Reagent keeps moving and retains side control.
West is working hard here to advance position.
That's two minutes gone in the round.
The crowd are hurling abuse towards the fighters... You can hardly blame them though because there isn't a lot going on in the fight.
West seems a little lost for a moment, as Reagent dominates the positioning.
West manages to land a sweep and he's now on top! Lovely Jiu Jitsu!
West passes into side control, despite Reagent's attempt to control the position.
West tries for a kimura but Reagent is defending well.
Both fighters are breathing heavily.
Reagent is positioning himself to get back to half guard.
That's three minutes gone in the round.
Reagent struggling a bit here.
Reagent is positioning himself to get back to half guard.
Reagent is pushing West's head away, looking to escape. West manages to hold on to the position though.
That's four minutes gone in the round.
The crowd are hurling abuse towards the fighters... You can hardly blame them though because there isn't a lot going on in the fight.
Reagent struggling a bit here.
West cracks Reagent with a big right hand but Reagent just smiles back at him and invites him to have another go.
West tries to stand but Reagent is controlling his head.
Reagent tries to control the position but he's not in luck - West easily slips into full mount!
West trying to control but Reagent is having none of it.
Marquis Reagent has stepped it up - he knows he needs a finish here!
Stevie West is fighting for a decision here - he's started to take the cautious approach.
Boooooooooooooooooooo!!! God, this has been a terrible round. Come on you two, sort yourselves out!
And that's the end of the fight!
Stevie West showed his dominance in that final round.
Well West has outscored his opponent in every aspect of the fight today. Only a scarily incompetent judge or two will keep him from a well deserved win... Over to the ring announcer for the scorecards.
Ladies and gentlemen, after 3 rounds of action, we go to the scorecards for a decision.
Judge Donald Grub scores the fight for Stevie West!
Judge James Ackerman scores the fight for Stevie West!
Judge Daniel Bishop scores the fight for Stevie West!
Stevie West wins by unanimous decision!
|
|
|
|
|
|
|
|
|
|
|
|
|
|
|
|
|
|
|
|
|
|
|
| S |
C
A |
G |
S |
C
B |
G |
|
S |
C |
G |
|
energy
A | B |
|
hype
A | B |
|
pop
A | B |
|
mgr
A | B |
|
FIGHT
RATING
33% |
|
|
|
|
|
|
|
Undercard bout
|
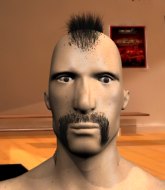
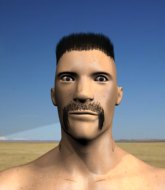
Coming up we have a welterweight MMA rules bout between Kenny Roberts (ranked 0 p4p, 0 weight class) and Brody Caffey (ranked 0 p4p, 0 weight class). We have two fighters making their debuts here, so let's see who comes out of this one with their first professional victory.
 |
|
 |
| 170 cm
18
170 lbs
0 - 0 - 0 |
|
184 cm
18
184 lbs
0 - 0 - 0 |
BJJ Blue Belt
Brawler
KO power |
|
BJJ White Belt
Decent boxing
Prefers standup |
|
| |
|
Ladies and gentlemen. This fight is 3 rounds, in the welterweight division.
Introducing the fighter to my left, fighting out of the red corner.
With a record of
0 - 0 - 0, fighting out of London, Kenny Roberts!
And introducing the fighter to my right, fighting out of the blue corner.
With a record of
0 - 0 - 0, fighting out of London, Brody Caffey!
The judges for this bout are Colin Fotheringham, James Glass and James Ackerman.
The bell rings for round one and we are underway!
Caffey cracks a nice hook into Roberts's ribs.
Roberts dives in and scores a takedown into Caffey's guard.
Roberts drops back looking for a heel hook - he quickly realises he's not going to get it but Caffey manages to dive on top of him before he can escape and now Roberts has Caffey in his guard.

Roberts is looking to cinch up a triangle. Caffey throws the leg off to one side though and gets in tight to Roberts's body to avoid the submission. Roberts has instead reached around Caffey's neck and now has a guillotine! Oh, this is biiiig trouble! Roberts arches his back and squeezes and forces the tap from his hapless opponent.
Ladies and gentlemen, after 0:26 of round 1, we have a winner by way of Submission (Guillotine). Kenny Roberts!
|
|
|
|
|
|
|
|
|
|
|
|
|
|
|
|
|
|
|
|
|
|
|
| S |
C
A |
G |
S |
C
B |
G |
|
S |
C |
G |
|
energy
A | B |
|
hype
A | B |
|
pop
A | B |
|
mgr
A | B |
|
FIGHT
RATING
100% |
|
|
|
|
|
|
|
Undercard bout
|
Coming up we have a welterweight MMA rules bout between Tadhg Glas (ranked 0 p4p, 0 weight class) and Julio Gomez (ranked 0 p4p, 0 weight class). We have two fighters making their debuts here, so let's see who comes out of this one with their first professional victory.
 |
|
 |
| 170 cm
18
175 lbs
0 - 0 - 0 |
|
178 cm
18
183 lbs
0 - 0 - 0 |
BJJ White Belt
Decent elbows
Good chin |
|
BJJ Brown Belt
Counter fighter
Solid chin |
|
| |
|
Ladies and gentlemen. This fight is 3 rounds, in the welterweight division.
Introducing the fighter to my left, fighting out of the red corner.
With a record of
0 - 0 - 0, fighting out of London, Tadhg Glas!
And introducing the fighter to my right, fighting out of the blue corner.
With a record of
0 - 0 - 0, fighting out of London, Julio Gomez!
The judges for this bout are Steven Brown, James Ackerman and Daniel Bishop.
The bell rings for round one and we are underway!
Glas fakes with an overhand right and moves in to clinch with Gomez, pushing him back against the cage.
Glas gets an overhook and lands an elbow to the side of the head.

It looks like Julio Gomez has been cut.
A nice glancing elbow lands by Glas.
Gomez takes an elbow to the forehead.
That has opened up Julio Gomez's cut even more.
Glas comes over the top with an elbow. That landed flush.
The cut above Julio Gomez's eye is starting to cause him problems now.
Gomez looking to slow down the pace here.
Glas comes over the top with an elbow. That landed flush.
Julio Gomez's cut is absolute horrible now. This looks like something out of a horror film with blood covering both fighters.
The referee calls the doctor in to look at Julio Gomez's cut. Oh no, the doctor has called an end to the bout!
Ladies and gentlemen, after 0:30 of round 1, we have a winner by way of TKO (Cut). Tadhg Glas!
|
|
|
|
|
|
|
|
|
|
|
|
|
|
|
|
|
|
|
|
|
|
|
| S |
C
A |
G |
S |
C
B |
G |
|
S |
C |
G |
|
energy
A | B |
|
hype
A | B |
|
pop
A | B |
|
mgr
A | B |
|
FIGHT
RATING
54% |
|
|
|
|
|
|
|
Undercard bout
|
Coming up we have a welterweight MMA rules bout between Don Miranda (ranked 0 p4p, 0 weight class) and Moe Lester (ranked 0 p4p, 0 weight class). We have two fighters making their debuts here, so let's see who comes out of this one with their first professional victory.
 |
|
 |
| 178 cm
18
179 lbs
0 - 0 - 0 |
|
170 cm
18
177 lbs
0 - 0 - 0 |
BJJ Brown Belt
Basic striking
Cuts easily |
|
Good takedowns
Brawler
Intelligent |
|
| |
|
Ladies and gentlemen. This fight is 3 rounds, in the welterweight division.
Introducing the fighter to my left, fighting out of the red corner.
With a record of
0 - 0 - 0, fighting out of London, Don Miranda!
And introducing the fighter to my right, fighting out of the blue corner.
With a record of
0 - 0 - 0, fighting out of London, Moe Lester!
The judges for this bout are Paul Tew, Chris Edwards and Donald Grub.
The bell rings for round one and we are underway!
Lester bobs and weaves into range and then changes levels and scores with a nice takedown into side control.
Miranda is sneaking out the side here. He's bucked Lester off and has taken his back!
Miranda patiently working for the choke. Which fighter will keep their nerve here?
Miranda looking to finish the fight with a rear naked choke. Lester is controlling Miranda 's left arm and he spins nicely into guard.
Lester sitting in guard here, content to control.
Lester's corner are shouting for him to control the position and he seems happy to oblige.
That's one minute gone in the round.
Miranda looking to hit a scissor sweep but Lester is one step ahead there.
Lester content to stall in guard here.
Lester cracks Miranda with a solid left hand.
That's two minutes gone in the round.
Well. There's a bit of a lull in the action here and the crowd are starting to get restless.
Lester stopping the sweep attempt from Miranda.
Lester passes Miranda's right leg, so he's now in half guard.
Ground and pound from Lester.
Miranda wants to get back to full guard.
Lester controlling the pace.
Lester looking for a kimura but he'll have to free his other leg if he wants to finish that. Perhaps he's just using it as a distraction technique.
The fighters are pressed up against the cage, both looking to find a bit of space to work.
Miranda is trying to get back to full guard.
That's three minutes gone in the round.
Lester seems content to maintain position for now, rather than mounting any offense.
Lester is looking for a kimura here.
Miranda is looking to sinch up a guillotine here but Lester pulls his head out easily.
That's four minutes gone in the round.
There's not a lot going on here and the crowd are letting the fighters know they're not willing to tolerate a lack of action.
Miranda gets full guard.
Lester stands up and looks to throw the legs aside to pass to side control. Miranda swivels though and keeps the full guard.
Lester wants to stand and escape but instead Miranda has hit a sweep and he's now on top in guard.

Boooooooooooooooooooo!!! God, this has been a terrible round. Come on you two, sort yourselves out!
Miranda drops back, looking for a kneebar! Lester looks panicked! The fighters roll across the mat, one looking to finish, one looking to escape. Lester looks to have wriggled free... Yes, he's got his leg free and he's dived into side control! Good work there from Lester!
Lester cracks Miranda with a big right hand but Miranda just smiles back at him and invites him to have another go.
And thats the end of the round the fighters go back to their corners.
Moe Lester dominated that round.
The referee calls time. The cornermen exit stage left and we're back to business.
Miranda is trying hard to land a takedown here. Lester sprawls well and keeps this one on the feet.
Miranda fails with the takedown
and Lester counters by clinching up.
Miranda tries to pull guard but Lester won't allow it.
That's three failed takedown attempts in the round for Don Miranda. That's going to take a lot out of him.
Lester successfully pulls guard.
Miranda drops back looking for a heel hook - he quickly realises he's not going to get it but Lester manages to dive on top of him before he can escape and now Miranda has Lester in his guard.
Miranda looking for submissions from the bottom here. Moving his hips around, possibly looking for an armbar.
Lester must be cautious of submissions here, given that his opponent has the superior Jiu Jitsu.
We've had a slow start to the round here - hopefully the action picks up.
Miranda wants to sweep here but Lester controlling him for the moment.
Miranda has his foot on Lester's thigh. He's trying to push off and get in position for a triangle, I think. Lester works his way back into a safe position though.
That's one minute gone in the round.
Lester is taking a break and basically stalling. The referee will not allow him to do that for long.
Miranda wants to sweep but no luck.
Moe Lester has got the better of the ground game so far.
Lester slows down the pace of the fight, as he sits in guard.
Lester trying to control the position from guard on top but Miranda is wriggling around, looking for whatever he can.
Lester would like to get this fight back to the feet but can't get free from the closed guard.
That's two minutes gone in the round.
The crowd are getting on the fighters' backs, as the pace has dropped off in the last minute or so.
Miranda has a loose triangle. He'll be looking to tighten that up but Lester can see exactly what he's planning and manages to posture up and free himself.
Miranda has his foot on Lester's thigh. He's trying to push off and get in position for a triangle, I think. Lester works his way back into a safe position though.
Miranda wants to sweep here but Lester controlling him for the moment.
Lester working in close now, lands a nice elbow to the side of Miranda's head.
The ref warns both fighters not to hold the cage as they work up against the meshing.
Lester not doing a lot at the moment. He'll have to show some more aggression or the fight will get stood up.
Lester wants to get up but he can't break Miranda's closed guard. He needs to be careful trying to break the legs open, as he's open to submissions here.
That's three minutes gone in the round.
Lester won't allow Miranda to sweep him here.
Miranda isolates an arm and boxes in a triangle. Lester stacks Miranda on his neck as he steps over and passes to the side. He's now in a much more dominant position where he can look to do some serious damage. Nice move by Lester!
Miranda tries to get back to half guard but can't.
Lester content to control the pace. The referee will try and keep them active though.
Miranda is looking to reverse the position.
That's four minutes gone in the round.
Neither fighter has done anything of merit for a good minute or two here and the crowd are not happy about it.
Miranda is working hard here to advance position.
If this pace continues, the referee will definitely step in and force a standup.
Miranda sneaks back into half guard.
Lester is working for an americana but Miranda has been sneaky and has managed to get back to half guard, whilst Lester was thinking about the submission.
Miranda is looking for a triangle but Lester pushes his legs off easily.
And thats the end of the round the fighters go back to their corners.
A close second round but Moe Lester will probably get the nod - 10:9.
The minute break is over - no more time for sponges and pep talks - back to the action! Let's hear some noise people - this is the final round!
Miranda doesn't succeed with the takedown
and Lester holds on and brings the fighters into a clinch.
Miranda tries to take the fight to the ground by pulling guard but can't manage it.
Lester pulls guard successfully.
Miranda drops back looking for a submission - "I'm sorry sir, but I'm gunna break your leg" says Miranda as he cranks on the unfortunate limb! Lester screams and taps out before any major damage is done! Don't mess with Miranda! Nice submission victory there!
Ladies and gentlemen, after 0:33 of round 3, we have a winner by way of Submission (Kneebar). Don Miranda!
|
|
|
|
|
|
|
|
|
|
|
|
|
|
|
|
|
|
|
|
|
|
|
| S |
C
A |
G |
S |
C
B |
G |
|
S |
C |
G |
|
energy
A | B |
|
hype
A | B |
|
pop
A | B |
|
mgr
A | B |
|
FIGHT
RATING
31% |
|
|
|
|
|
|
|
Co-main event
|
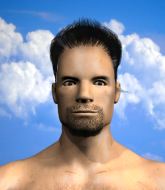
Coming up we have a welterweight MMA rules bout between Tinker Tailor (ranked 0 p4p, 0 weight class) and Rory Kilkenny (ranked 0 p4p, 0 weight class). We have two fighters making their debuts here, so let's see who comes out of this one with their first professional victory.
 |
|
 |
| 180 cm
18
170 lbs
0 - 0 - 0 |
|
185 cm
18
178 lbs
0 - 0 - 0 |
BJJ White Belt
Excellent boxer
Good chin |
|
BJJ White Belt
Solid Muay Thai
Intelligent |
|
| |
|
Ladies and gentlemen. This fight is 3 rounds, in the welterweight division.
Introducing the fighter to my left, fighting out of the red corner.
With a record of
0 - 0 - 0, fighting out of London, Tinker Tailor!
And introducing the fighter to my right, fighting out of the blue corner.
With a record of
0 - 0 - 0, fighting out of London, Rory Kilkenny!
The judges for this bout are Chris Edwards, Richard Clark and Donald Grub.
The bell rings for round one and we are underway!
Kilkenny gets cracked with a nice right hand there by Tailor.
Kilkenny needs to keep his hands up - Tailor had a free shot at his head there.
Tailor tries to clinch up against the cage, rushing in to close the distance. Kilkenny manages to break the clinch and circles back to the middle of the mat.
Tailor walks straight into an uppercut. Luckily it didn't land flush.
Tinker Tailor seems to be the more aggressive standup fighter in this bout.
Tailor misses with a looping right.
Kilkenny wants to counter with a clinch but Tailor pushes him away.
Tailor works the jab nicely.
Kilkenny takes a swing at Tailor's ribcage but misses.
Tailor lands a lovely overhand right.
Kilkenny scores with a jab. Tailor acknowledges it with a nod of the head.
Tailor lands a jab to the nose.
Tailor tries to clinch but Kilkenny is having none of it.
Tailor looks to land a left hand but Kilkenny moved out of range nicely.
Kilkenny is trying to avoid his opponent's strikes and get into the clinch.
Wooooo! Give it up for these two warriors! They are putting on a show!
Kilkenny moves out of range of the strikes.
Tailor throws a combination but comes up with nothing but fresh air.
The fight moves into the clinch position.
Kilkenny lands a hook to the side of the head.
Tailor wants to break free. God knows he wants to breaaaak freeee.
Tailor wants to push off and get back to the center of the mat but Kilkenny has him pressed against the cage.
A short body shot lands from Kilkenny as the two fighters clinch.
A short right from Kilkenny on the inside.
Kilkenny keeps the fight in the clinch, despite Tailor's efforts to push away.
That's one minute gone in the round.
Tailor misses with a shot to the kidneys.
Kilkenny keeps the fight in the clinch, despite Tailor's efforts to push away.
Tailor is trying to force a seperation but Kilkenny has the dominant position.
Kilkenny lands with a right to the head.
A short uppercut from Kilkenny.
A short uppercut from Kilkenny.
Tailor working hard to break the clinch.
Tailor is trying to push Kilkenny away but Kilkenny has him pressed against the cage, so he's going nowhere.
Tailor looks like he'd prefer to be striking at range right now.
Kilkenny working some nice short punches in the clinch.
Kilkenny lands with a short shot to the head.
Kilkenny lands with a short punch from the clinch.
A short right hand to the side of the head by Kilkenny.
Tailor working hard to break the clinch.
Kilkenny digs a right hand underneath Tailor's ribcage. Tailor let out a lung full of air as it connected.
A short uppercut from Kilkenny.
Tailor fails to pull the fight into his guard.
Kilkenny lands a body punch.
Fantastic stuff here - a very entertaining period of action, which has drawn cheers from the crowd.
Kilkenny breaks the clinch and we return to the middle of the mat.
That's two minutes gone in the round.
Tailor throws a nice looking combination but Kilkenny bobs and weaves to avoid any damage.
Kilkenny moves into the clinch.
Kilkenny scores with a nice hook to the head.
Tailor is trying to pull guard but Kilkenny turns him against the cage and we stay in the clinch.
Kilkenny breaks the clinch.
Kilkenny loads up on a big right hand but Tailor slips the punch.
Kilkenny takes a really solid shot there but just smiles back and shrugs his shoulders.
Kilkenny's jab looks to have found its range, popping Tailor under the eye.
Kilkenny moves into range and connects with a jab.

Kilkenny drops Tailor with a hook right on the temple. He thinks about going to the ground but Tailor looks back up at him and smiles so Kilkenny waves him back to his feet - he obviously thinks he can knock him out after that shot landed.

Tailor is rocked!
Tailor uses some good footwork to avoid the body shot by Kilkenny.
Oh Tailor is still all over the place! His legs are completely gone! Will he be able to recover?!!
Tailor moves into range and connects with a jab.
Tailor tries to clinch up against the cage, rushing in to close the distance. Kilkenny manages to break the clinch and circles back to the middle of the mat.
Kilkenny closes the distance and clinches.
Tailor seems to have got his legs back now.
Kilkenny lands a nice uppercut.
Kilkenny lands with a light punch inside.
Tailor takes a shot to the head.
Kilkenny lands a hook that snaps the head of Tailor backwards.
Kilkenny lands a left hand.
Tailor tries to break free but Kilkenny pushes him back against the cage.
That's three minutes gone in the round.
Tailor working hard to break the clinch.
Kilkenny lands an uppercut.
Kilkenny lands a right uppercut that snaps the head of Tailor backwards.
A left hand lands to the body for Kilkenny.
Kilkenny lands punches inside but they're not really causing much damage.
Tailor is looking to break free of the clinch but Kilkenny has double underhooks.
Tailor is trying to push Kilkenny away but Kilkenny has him pressed against the cage, so he's going nowhere.
Tailor is trying to break free.
The pace slowing considerably in the clinch, as Kilkenny takes a break from that fighting nonsense to think about the finer things in life.
A nice left hand lands by Kilkenny.
Tailor is trying to break the clinch but Kilkenny is controlling him.
Kilkenny lands a shoulder strike.
Kilkenny scores with a nice hook to the head.
Tailor can't break the clinch.
Kilkenny lands a shoulder strike.
Kilkenny lands a hook to the side of the head.
A right hook to the body lands for Kilkenny.
Kilkenny makes some space for himself and lands an uppercut.
This is a great period of action - very entertaining stuff!
Tailor wants to get back to striking at distance but Kilkenny won't allow it.
That's four minutes gone in the round.
A quick uppercut on the inside from Kilkenny.
Tailor tries to break free but Kilkenny pushes him back against the cage.
Kilkenny works for underhooks and lands a body shot in the process.
Kilkenny lands a hook to the side of the head.
Kilkenny pushes Tailor back against the cage and lands a hook to the side of the head.
With the fighters clinched against the cage, Kilkenny creates a bit of distance for himself and scores with a nice uppercut.
Kilkenny is working for a takedown up against the cage. He can't get it on this occasion though.
A quick uppercut on the inside from Kilkenny.
Kilkenny works for underhooks and lands a body shot in the process.
Tailor is breathing heavily.
A right hook to the body lands for Kilkenny.
Kilkenny working on landing some head shots here - that one got through nicely.
Tailor wants to break free. God knows he wants to breaaaak freeee.
The fighters are starting to perspire pretty heavily.
Kilkenny lands with a light punch inside.
A shot in the inside from Kilkenny.
As the round comes to an end the crowd are showing their appreciation for a great round of action.
Kilkenny lands with a quick shot inside that doesn't really do much damage.
Nice body punch from Kilkenny.
Kilkenny lands a hook to the side of the head.
Tailor can't break the clinch.
And thats the end of the round the fighters go back to their corners.
Rory Kilkenny dominated that round.
The referee calls time. The cornermen exit stage left and we're back to business.
Kilkenny has managed to clinch.
Kilkenny scores with an uppercut up the middle.
Kilkenny lands a shoulder strike.
Kilkenny pushes Tailor back against the cage and lands a hook to the side of the head.
Kilkenny lands an uppercut.
Tailor wants to get back to striking at distance but Kilkenny won't allow it.
Tailor wants to strike at distance but he can't break free of the clinch.
Tailor tries to throw a body punch but Kilkenny avoids it by throwing Tailor back against the cage.
Still in the clinch, Kilkenny scores with a nice short uppercut.
Kilkenny lands with a short head shot on the inside.
Tailor tries to circle away but Kilkenny has him pinned against the cage.
Kilkenny has been the more effective fighter overall so far.
Kilkenny lands with a short punch from the clinch.
Kilkenny stays in close to his opponent and throws a right hand to the body.
Kilkenny prevents Tailor from breaking the clinch.
Tailor looks like he'd prefer to be striking at range right now.
Kilkenny lands with a quick shot inside that doesn't really do much damage.
This has been an exciting period of action!
Kilkenny slows down the pace here.
Kilkenny lands a shoulder strike that jolts his opponent's head backwards.
That's one minute gone in the round.
Kilkenny lands a hook to the body. It's hard to tell if that hurt Tailor or not.
Kilkenny scores with a nice hook to the head.
Kilkenny lands a right hand.
Kilkenny scores with an uppercut up the middle.
Kilkenny scores with a nice hook to the head.
Kilkenny makes some space for himself and lands an uppercut.
Tailor is trying to work out of this bad position, with his back against the cage.
A left hand lands to the body for Kilkenny.
Both fighters are absolutely exhausted here.
Kilkenny throws a blind hook that connects with the side of Tailors head.
Kilkenny lands with a left to the head.
Kilkenny throws a big uppercut that drops Tailor! More strikes from Kilkenny and the referee jumps in to stop the fight! Tailor lies dazed against the cage as Kilkenny celebrates with his cornermen!
Ladies and gentlemen, after 1:41 of round 2, we have a winner by way of TKO (Strikes). Rory Kilkenny!
|
|
|
|
|
|
|
|
|
|
|
|
|
|
|
|
|
|
|
|
|
|
|
| S |
C
A |
G |
S |
C
B |
G |
|
S |
C |
G |
|
energy
A | B |
|
hype
A | B |
|
pop
A | B |
|
mgr
A | B |
|
FIGHT
RATING
82% |
|
|
|
|
|
|
|
Main event
|
Coming up we have a welterweight MMA rules bout between Toby Mcguire (ranked 0 p4p, 0 weight class) and DJ Camo (ranked 0 p4p, 0 weight class). We have two fighters making their debuts here, so let's see who comes out of this one with their first professional victory.
 |
|
 |
| 170 cm
18
135 lbs
0 - 0 - 0 |
|
184 cm
18
177 lbs
0 - 0 - 0 |
BJJ White Belt
Excellent boxer
Good chin |
|
BJJ White Belt
Excellent boxer
Granite chin |
|
| |
|
Ladies and gentlemen. This fight is 3 rounds, in the welterweight division.
Introducing the fighter to my left, fighting out of the red corner.
With a record of
0 - 0 - 0, fighting out of London, Toby Mcguire!
And introducing the fighter to my right, fighting out of the blue corner.
With a record of
0 - 0 - 0, fighting out of London, DJ Camo!
The judges for this bout are Andrew Berry, Colin Fotheringham and Paul Tew.
The bell rings for round one and we are underway!
Mcguire on the wrong end of an overhand right that came out of nowhere.
Camo lands a beauty of a right hand that gets the crowd cheering.
Mcguire throws an uppercut from half a mile away. Camo sees it coming and avoids it easily.
The fighters circling - Mcguire throws out the jab but it was never going to land.
Mcguire scores with a nice strike.
Mcguire throws a looping overhand right but Camo ducks down to avoid it.
Despite the aggression on Camo's face he doesn't fully commit to the counter.
Camo keeps the fight on the outside.
Camo staying out of range there.
Mcguire throws a nice looking combination but Camo bobs and weaves to avoid any damage.
Camo cracks Mcguire with a hook to the jaw. Both fighters smile at eachother and high-five before getting back down to business.
Camo misses with an uppercut. Mcguire saw that one coming.
Mcguire is looking to counter punch.
Mcguire throws a looping overhand right but Camo ducks down to avoid it.
Mcguire connects with the punch.
Jab from Camo.
We've seen a great period of action over the last minute or so - credit to both fighters for going all out!
Mcguire throws out a loose jab but Camo uses good head movement to avoid it.
Camo moves out of range as Mcguire strikes.
Camo connects with a looping right hand.
Mcguire is rocked!
Camo connects with a nice looking jab.
Oh Mcguire is still all over the place! His legs are completely gone! Will he be able to recover?!!
Camo shakes his hands by his side, trying to relax. Mcguire takes his eyes off the ball for a moment - Camo sees the opportunity and cracks him with a massive hook! Mcguire bends double and collapses on top of himself - he's out! The crowd are going absolutely nuts! Wow, what a knockout!
Ladies and gentlemen, after 0:55 of round 1, we have a winner by way of KO (Punch). DJ Camo!
|
|
|
|
|
|
|
|
|
|
|
|
|
|
|
|
|
|
|
|
|
|
|
| S |
C
A |
G |
S |
C
B |
G |
|
S |
C |
G |
|
energy
A | B |
|
hype
A | B |
|
pop
A | B |
|
mgr
A | B |
|
FIGHT
RATING
96% |
|
|
|
|
|
|
|
|
|
|
