 |
CATCH!!!-KO-2 PBP Commentary |
Undercard bout
|
|
|
|
Undercard bout
|
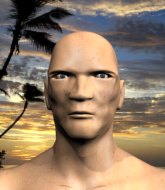
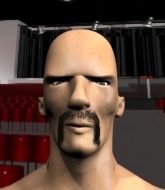
Coming up we have a light heavyweight kickboxing rules bout between He Mu (ranked 0 p4p, 0 weight class) and William Richard Onghole (ranked 0 p4p, 0 weight class). We have two fighters making their debuts here, so let's see who comes out of this one with their first professional victory.
 |
|
 |
| 190 cm
18
215 lbs
0 - 0 - 0 |
|
195 cm
18
220 lbs
0 - 0 - 0 |
Excellent MT
Big right hand
|
|
Excellent MT
Heavy handed
|
|
| |
|
Ladies and gentlemen. This fight is 5 rounds, in the light heavyweight division.
Introducing the fighter to my left, fighting out of the red corner.
With a record of
0 - 0 - 0, fighting out of Tokyo, He Mu!
And introducing the fighter to my right, fighting out of the blue corner.
With a record of
0 - 0 - 0, fighting out of Tokyo, William Richard Onghole!
The judges for this bout are Yukihiro Shimada, Shirou Masuda and Sosuke Kotani.

The bell rings for round one and we are underway!
Mu takes a jab on the nose. He smiles like he loves it and keeps coming.
Onghole misses with the combination.
It looked like Mu was trying to counter with a body shot coming off that last attack from Onghole.
Onghole tried to score with a low kick but Mu checks it.
Mu throws a nice hook to the body that draws an oooh from the crowd.
Mu misses with a body punch
enabling Onghole to counter with a crisp jab.
That's a knee to de groin and it's over and out! Mu crumples to the ground after an illegal strike from Onghole - the referee stops the clock and Mu gets 5 minutes to recover from that one. "I'm sorry" says Onghole. Mu manages to get back to his feet and the fight resumes.
Mu connects with a body shot.
Onghole changes levels and scores with a jab to the body.
Mu fakes a head shot and lands one to the body.
Onghole looks winded!
Mu cracks a nice hook into Onghole's ribs.
This has been an exciting period of action!
Well, he's not going to score with shots like that. A lazy body kick attempt from Mu.
Mu checks the leg kick.
Onghole throws a looping overhand right but Mu ducks down to avoid it.
Mu thinks about countering with a head kick.

That's one minute gone in the round.
A low kick from Onghole is predictable there
and Mu counters with a nice low kick that buckles Onghole's knee momentarily.
Mu connects with a body shot.
Mu throws an overhand right that has Onghole reeling! Mu follows up with more punches and Onghole is out cold! This one is all over!
Ladies and gentlemen, after 1:20 of round 1, we have a winner by way of KO (Punches). He Mu!
|
|
|
|
|
|
|
|
|
|
|
|
|
|
|
|
|
|
|
|
|
|
|
| S |
C
A |
G |
S |
C
B |
G |
|
S |
C |
G |
|
energy
A | B |
|
hype
A | B |
|
pop
A | B |
|
mgr
A | B |
|
FIGHT
RATING
62% |
|
|
|
|
|
|
|
Undercard bout
|
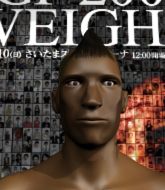
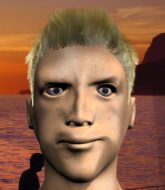
Coming up we have a super heavyweight kickboxing rules bout between Kalba Megomaravaralorivasiskinovaatech (ranked 0 p4p, 0 weight class) and Salah Sudin (ranked 0 p4p, 0 weight class). Megomaravaralorivasiskinovaatech comes to the ring accompanied by Kavkaz Music . Kalba Megomaravaralorivasiskinovaatech had a look across the ring there at his opponent. He definitely means business
 |
|
 |
| 188 cm
30
210 lbs
3 - 13 - 0 |
|
180 cm
19
185 lbs
0 - 1 - 0 |
Brawler
KO power
|
|
Brawler
Solid chin
|
|
| |
|
Ladies and gentlemen. This fight is 5 rounds, in the super heavyweight division.
Introducing the fighter to my left, fighting out of the red corner.
With a record of
3 - 13 - 0, fighting out of Tokyo, Kalba Megomaravaralorivasiskinovaatech!
And introducing the fighter to my right, fighting out of the blue corner.
With a record of
0 - 1 - 0, fighting out of Tokyo, Salah Sudin!
The judges for this bout are Taro Takaoka, Yasuomi Hirokawa and Yuuki Gou.
The bell rings for round one and we are underway!
Megomaravaralorivasiskinovaatech throws a hook to the body but it doesn't connect.
Sudin moves in looking to clinch but Megomaravaralorivasiskinovaatech pushes him off.
Sudin just manages to avoid a counter high kick fromMegomaravaralorivasiskinovaatech.
Sudin has been working on his striking defense in training and it's paying off as Megomaravaralorivasiskinovaatech is landing a low percentage of strikes.
Sudin walks straight into a jab right on the nose. That one stung - he's blinking and trying to clear his head.

Sudin forces Megomaravaralorivasiskinovaatech back against the ropes and clinches.
Sudin avoiding damage as Megomaravaralorivasiskinovaatech throws knees to the body.

Megomaravaralorivasiskinovaatech pushes off and circles away, back to the middle of the mat.
Megomaravaralorivasiskinovaatech gets tackled into the ropes by Sudin. Sudin maintains the clinch.
Megomaravaralorivasiskinovaatech blocks a body shot from Sudin.
Megomaravaralorivasiskinovaatech's corner calls for him to break the clinch, which he does.

Megomaravaralorivasiskinovaatech pushes Sudin up against the ropes in a clinch.
Sudin looks to throw an elbow but misses.
Sudin swings away with an uppercut that misses.
Megomaravaralorivasiskinovaatech blocks a body shot from Sudin.
Sudin lands a damaging elbow.
Megomaravaralorivasiskinovaatech breaks from the clinch.
Sudin fails with an attempt to clinch.
Sudin throws a body punch but Megomaravaralorivasiskinovaatech moves out of range.
Megomaravaralorivasiskinovaatech wings a very wild body shot but it does the job and lands to the midsection.
This has been an exciting period of action!
Megomaravaralorivasiskinovaatech takes the fight into the clinch.
Megomaravaralorivasiskinovaatech's head jolts backwards as he takes an uppercut right on the button!
Megomaravaralorivasiskinovaatech pushes off and circles away, back to the middle of the mat.

Sudin walks into a straight right hand and goes down! Megomaravaralorivasiskinovaatech rushes to a neutral corner so the count doesn't get delayed but Sudin has made it back to his feet on 5. He's OK so we're back to the action.
Sudin has closed the distance and engaged Megomaravaralorivasiskinovaatech in a clinch.
That's one minute gone in the round.
Megomaravaralorivasiskinovaatech throws an elbow that misses.
Megomaravaralorivasiskinovaatech comes over the top with an elbow. That landed flush.
Megomaravaralorivasiskinovaatech tries to land knees in the clinch but Sudin avoids the damage to the body.
Sudin lands an uppercut.
Megomaravaralorivasiskinovaatech breaks from the clinch.
Wow, both these guys are really going for it!
Megomaravaralorivasiskinovaatech throws a head kick that misses and slips in the process. He scrambles back to his feet and the fighters circle.
Megomaravaralorivasiskinovaatech rushes Sudin and presses him up against the ropes.
Sudin lands a shoulder strike that jolts his opponent's head backwards.
Sudin managing to block the knees to the body from Megomaravaralorivasiskinovaatech.
Sudin throws an elbow but it misses.
Megomaravaralorivasiskinovaatech avoids the elbow strike from Sudin, against the ropes.
Sudin is looking to score with knees to the body. Maybe he'll change it up and go body then head. Megomaravaralorivasiskinovaatech is defending well for now.
Megomaravaralorivasiskinovaatech blocks a knee to the body. He'll have a nicely bruised forearm in the morning.
Megomaravaralorivasiskinovaatech blocks the elbow strike.
Sudin blocks an elbow strike from Megomaravaralorivasiskinovaatech.
Megomaravaralorivasiskinovaatech escapes the clinch and we're back to striking.
Sudin throws a sloppy head kick and Megomaravaralorivasiskinovaatech moves out of range easily.
Sudin is looking to take this fight into the clinch.
The fighters circle momentarily. Megomaravaralorivasiskinovaatech darts into range and connects with a nice straight punch.

That's two minutes gone in the round.
This is a great period of action - very entertaining stuff!
Megomaravaralorivasiskinovaatech lands a monster head kick that reverborates around the arena! The crowd goes wild as Sudin crumples to the floor! Megomaravaralorivasiskinovaatech milks the crowd's applause and if that isn't knockout of the night, I will be very surprised!
Ladies and gentlemen, after 2:07 of round 1, we have a winner by way of KO (Head Kick). Kalba Megomaravaralorivasiskinovaatech!
Kalba Megomaravaralorivasiskinovaatech decided to thank the fans in attendance for making a great atmosphere. It seemed to go down pretty well.
|
|
|
|
|
|
|
|
|
|
|
|
|
|
|
|
|
|
|
|
|
|
|
| S |
C
A |
G |
S |
C
B |
G |
|
S |
C |
G |
|
energy
A | B |
|
hype
A | B |
|
pop
A | B |
|
mgr
A | B |
|
FIGHT
RATING
74% |
|
|
|
|
|
|
|
Undercard bout
|
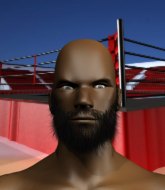
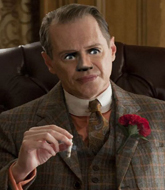
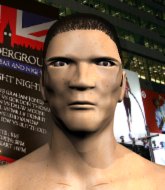
Coming up we have a super heavyweight kickboxing rules bout between Mic Bronson (ranked 0 p4p, 0 weight class) and Jenik Krejza (ranked 0 p4p, 0 weight class). Bronson comes to the ring accompanied by glass candy. Jenik Krejza will no doubt be looking to use his reach advantage to good effect.
 |
|
 |
| 180 cm
23
225 lbs
2 - 0 - 0 |
|
202 cm
27
259 lbs
5 - 16 - 0 |
Solid boxing
Insanely flexible
|
|
Good kicks
Knockout power
|
|
| |
|
Ladies and gentlemen. This fight is 5 rounds, in the super heavyweight division.
Introducing the fighter to my left, fighting out of the red corner.
With a record of
2 - 0 - 0, fighting out of London, Mic Bronson!
And introducing the fighter to my right, fighting out of the blue corner.
With a record of
5 - 16 - 0, fighting out of Tokyo, Jenik Krejza!
The judges for this bout are Taro Takaoka, Ren Mimura and Yasuomi Hirokawa.
The bell rings for round one and we are underway!
Krejza throws a push kick but Bronson slaps the foot to one side.
Bronson wings a very wild body shot but it does the job and lands to the midsection.
Bronson slips a jab and a cross from Krejza.
Krejza closes the distance and clinches.
Krejza is trying to break the clinch but Bronson is controlling him.

Krejza breaks the clinch and we return to the middle of the mat.
Bronson is moving around nicely and scores here with a single head shot.

It looks like Jenik Krejza has been cut.
Bronson pushes Krejza up against the ropes in a clinch.
Krejza's corner calls for him to break the clinch, which he does.
Bronson tries to clinch but Krejza moves out of range.
Bronson moves out of range as Krejza throws a body kick.
Bronson throws a shot to the body.
Krejza looks winded!
Bronson lands a nice looking body shot.
This is a great period of action - very entertaining stuff!
OH! Krejza has been rocked by a huge right hand and is in deep trouble! Bronson smells blood and charges in for the finish! Bronson unloads a vicious overhand right and connects to the jaw of Krejza sending him face first to the canvas! Unbelievable!
Ladies and gentlemen, after 0:50 of round 1, we have a winner by way of KO (Punches). Mic Bronson!
Mic Bronson thanked the fans post fight for their support.
|
|
|
|
|
|
|
|
|
|
|
|
|
|
|
|
|
|
|
|
|
|
|
| S |
C
A |
G |
S |
C
B |
G |
|
S |
C |
G |
|
energy
A | B |
|
hype
A | B |
|
pop
A | B |
|
mgr
A | B |
|
FIGHT
RATING
84% |
|
|
|
|
|
|
|
Undercard bout
|
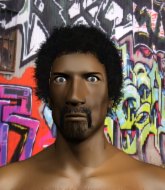
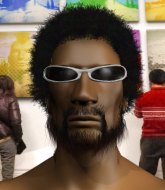
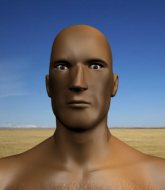
Coming up we have a super heavyweight kickboxing rules bout between Enoch Thompson (ranked 0 p4p, 0 weight class) and Mawzer VaraKolaudov (ranked 0 p4p, 0 weight class). VaraKolaudov comes into a darkened arena with his song building. lachin kicks in, the lights come on and the crowd goes wild! What a showman! Both fighters look fresh as a daisy as they make their way towards the ring.
 |
|
 |
| 195 cm
24
215 lbs
11 - 4 - 2 |
|
195 cm
24
300 lbs
7 - 6 - 0 |
Excellent MT
Cardio machine
|
|
Good kicks
Good gas tank
|
|
| |
|
Ladies and gentlemen. This fight is 5 rounds, in the super heavyweight division.
Introducing the fighter to my left, fighting out of the red corner.
With a record of
11 - 4 - 2, fighting out of New York, Enoch Thompson!
And introducing the fighter to my right, fighting out of the blue corner.
With a record of
7 - 6 - 0, fighting out of Tokyo, Mawzer VaraKolaudov!
The judges for this bout are Hirohito Nitta, Taro Takaoka and Ren Mimura.
The bell rings for round one and we are underway!
Thompson throws a right and a left that VaraKolaudov avoids nicely.
Thompson tries to clinch up.
As Thompson backs off VaraKolaudov throws a huge counter combo but Thompson manages to avoid it all.
Thompson looking to land some kicks to the body here.
VaraKolaudov is clearly looking to counter with head kicks.
VaraKolaudov has been spending a lot of time sparring his boxing in the run up to the fight, trying to sharpen up those hands and look for a knockout.
Thompson lands a nice looking body kick.
Thompson throws a body kick but he was well out of range there.
Thompson throws a two punch combo that lands nicely.
Thompson throws a low kick but it's checked well by VaraKolaudov.
We've had a slow start to the round here - hopefully the action picks up.
Thompson fakes high and swings low for a body shot but VaraKolaudov manages to avoid it.
Thompson clinches with his opponent.
Thompson avoids the elbow strike from VaraKolaudov, against the ropes.
With the fighters up against the ropes, VaraKolaudov throws an elbow but misses.
That's one minute gone in the round.
Thompson misses with a punch on the inside.
A nice glancing elbow lands by VaraKolaudov.
VaraKolaudov blocks a couple of punches on the inside.
VaraKolaudov throws an elbow but it's blocked.
VaraKolaudov is looking to control Thompson's arms but Thompson gets an underhook and turns him. Now VaraKolaudov has his back to the ropes.
VaraKolaudov misses with an elbow strike.
Thompson lands a body punch - he's looking to wear down VaraKolaudov.
Thompson misses with a short punch on the inside.
VaraKolaudov looks to throw an elbow but misses.
Thompson has had enough of the clinch but VaraKolaudov keeps him there for the moment.
Thompson lands a shot to the body.
Thompson lands with a right to the head.
Thompson tries a shoulder strike but it doesn't do any damage.
VaraKolaudov blocks a couple of punches on the inside.
Thompson avoids a wild elbow strike from VaraKolaudov.
VaraKolaudov taking a breather.
Thompson lands a right uppercut that snaps the head of VaraKolaudov backwards.
It looks like Mawzer VaraKolaudov has been cut.
VaraKolaudov tried to land a shot to the body but connects with Thompson's elbow.
Thompson tries to work over VaraKolaudov's body with a swooping hook but it only glances the target.
Thompson blocks an elbow strike.
That's two minutes gone in the round.
Thompson scores with an uppercut up the middle.
Thompson blocks a knee to the body. He'll have a nicely bruised forearm in the morning.
With the two fighters working up against the ropes, VaraKolaudov just misses with a elbow thrown towards Thompson's brow.
The crowd cheering loudly, showing their appreciation for the quality fight we're seeing here.
Thompson tries to stall but VaraKolaudov uses the opportunity to gain a better position.
Thompson avoids a wild elbow strike from VaraKolaudov.
Thompson is leaning against VaraKolaudov and scores with a nice uppercut to the body.
Thompson swings wildly with an uppercut but VaraKolaudov uses good head movement to avoid it.
Thompson stalling in the clinch but VaraKolaudov improves position.
VaraKolaudov tries to work over Thompson's body with a swooping hook but it only glances the target.
Thompson lands a right hand.
Thompson struggles to land a body shot inside as VaraKolaudov controls his hands.
Thompson dodges an elbow strike from VaraKolaudov.
Thompson looking to slow down the pace here.
Both fighters working to control the clinch.
Thompson misses with a shot to the kidneys.
Thompson is trying to slow down the pace of the fight but VaraKolaudov is keeping busy.
Thompson wants to stall.

That's three minutes gone in the round.
VaraKolaudov blocks a couple of punches on the inside.
Thompson misses with a short punch on the inside.
Thompson blocks an elbow strike.
VaraKolaudov throws an elbow but it misses.
Thompson pushes VaraKolaudov back against the ropes and unloads with a body punch.
Thompson lands with a quick shot inside that doesn't really do much damage.
Thompson blocks an elbow strike from VaraKolaudov.
Thompson scores with a shoulder strike.
Thompson has a couple of punches blocked by VaraKolaudov.
Thompson's corner calls for him to break the clinch, which he does.
Thompson has VaraKolaudov up against the ropes in a clinch.
VaraKolaudov leaning his opponent against the ropes.
Good anti-grappling being displayed by Thompson as VaraKolaudov tries to tie him up.
VaraKolaudov throws an elbow but it's blocked.

That's four minutes gone in the round.
VaraKolaudov prevents a body shot from Thompson.
VaraKolaudov is trying to slow down the pace in the clinch, to catch his breath.
With the two fighters working up against the ropes, VaraKolaudov just misses with a elbow thrown towards Thompson's brow.
Thompson managing to block the knees to the body from VaraKolaudov.
VaraKolaudov pushes off and fires off an elbow that misses, before clinching up again, against the ropes.
Thompson avoiding damage as VaraKolaudov throws knees to the body.
Thompson blocks an elbow strike.
VaraKolaudov misses with an elbow strike.
Thompson blocks an elbow strike.
Thompson lands a right hand.
Wooooo! Give it up for these two warriors! They are putting on a show!
A bit of stalling here from VaraKolaudov.
A short body shot lands from Thompson as the two fighters clinch.
A short uppercut from Thompson.
VaraKolaudov misses with a punch to the body.
Thompson lands a body punch - he's looking to wear down VaraKolaudov.
VaraKolaudov misses with a hook to the ribs.
Thompson swings away with an uppercut that misses.
Thompson lands with a light punch inside.
Thompson throws a blind hook that connects with the side of VaraKolaudovs head.
VaraKolaudov trying to stall but Thompson improves his position.
And thats the end of the round the fighters go back to their corners.
Enoch Thompson dominated that round.
The cut man is working on Mawzer VaraKolaudov's cut.
The fighters get back to their feet, the hooter sounds and we're back to the action!

A slow jab from Thompson misses its intended target.
A jab from Thompson misses.
Enoch Thompson seems to be the more aggressive standup fighter in this bout.
Thompson just misses with a punch to the body.
Thompson moves out of the way of the counter high kick fromVaraKolaudov.
Thompson loads up on a big right hand but VaraKolaudov slips the punch.
VaraKolaudov slips under a jab from Thompson.
Thompson fails with an attempt to clinch.
Thompson just misses with a punch to the body.
VaraKolaudov throws a counter combo.
We've had a slow start to the round here - hopefully the action picks up.
Thompson looking to take his opponent's legs away with the low kicks.
A nice leg kick lands there from Thompson.
Thompson tries to score with an inside leg kick but telegraphs it and VaraKolaudov is able to avoid easily.
That's one minute gone in the round.
Thompson throws a nice inside leg kick.
Thompson is really dominating this fight. Is there anything that VaraKolaudov can do to turn this around?
Thompson scores with a crisp jab that stopped VaraKolaudov in his tracks.
VaraKolaudov on the wrong end of a nice low kick. He's acting like it's no big deal but he doesn't want to take many more of those.
Thompson scores with a kick to the body.
Thompson tries to score with a leg kick but it misses it's target.
Thompson throws a leg kick
and VaraKolaudov counters with a series of strikes. Thompson will be more careful next time no doubt.
Thompson tries to clinch but VaraKolaudov moves away
and VaraKolaudov counters with a left and a right that stings Thompson.
Enoch Thompson is winning the standup battle so far.
Thompson throws a low kick but his opponent is out of range.
That's two minutes gone in the round.
Thompson tries to close the distance and clinch up against the ropes but VaraKolaudov paws at him with a jab and circles away.
VaraKolaudov throws a counter combo.
Thompson lands with a straight right. VaraKolaudov didn't see that one coming.
This has been an exciting period of action!
VaraKolaudov ducks under an overhand right and circles away with a smile on his face.
VaraKolaudov uses some good footwork to avoid the body shot by Thompson.
Thompson looks to land a left hand but VaraKolaudov moved out of range nicely.
Thompson cracks the inside of VaraKolaudov's front leg.
Thompson looks to score with a jab to the body but VaraKolaudov is just out of range.
Thompson connects with a lovely right hand, straight down the pipe.
VaraKolaudov slips under a jab.
VaraKolaudov lets it all go there with a big combo counter but none of the punches connected.
That's three minutes gone in the round.
Thompson throws a leg kick
and VaraKolaudov counters with a series of strikes. Thompson will be more careful next time no doubt.
A head kick misses from Thompson.
Thompson feints and then cracks VaraKolaudov's leading leg with a nice low kick. He's obviously looking to slow VaraKolaudov down.
Thompson looks to have improved his striking defense since last time we saw him fight.
VaraKolaudov takes a shot right to the bread basket.
Thompson connects with an inside leg kick.
Thompson swings wildly with a hook that is half blocked by VaraKolaudov.
Thompson tries to clinch up.
Thompson wants to clinch up but VaraKolaudov keeps it at a distance.
VaraKolaudov throws a counter combo.
Thompson connects with a solid leg kick.
Enoch Thompson is looking to keep the fight on the feet at all costs.
That's four minutes gone in the round.
Thompson looks to land a combination but VaraKolaudov avoids it well.
VaraKolaudov is looking for the big counter here.
Thompson fakes high and swings low for a body shot but VaraKolaudov manages to avoid it.
VaraKolaudov is loading up here, looking for a big counter of his own.
Thompson throws a hook to the body but it doesn't connect.
VaraKolaudov unleashes a big counter combination but Thompson bobs and weaves and avoids any damage.
The fighters are starting to perspire pretty heavily.
Thompson feints a straight left to the body, then turns around with a flashy move and hits VaraKolaudovs jaw with a dramatic spinning back fist!
This has been an exciting period of action!
Thompson throws a lazy uppercut
and VaraKolaudov counters with a three punch combination, finished off with a leg kick. Nice work.
Thompson misses with a leg kick
and VaraKolaudov counters with a series of strikes. Thompson will be more careful next time no doubt.
A solid body kick from Thompson.
A nice leg kick lands there from Thompson.
Thompson pushing out the jab but it's not landing.
And thats the end of the round the fighters go back to their corners.
Enoch Thompson dominated that second round.
The cut man is working on Mawzer VaraKolaudov's cut.
Well, the break between rounds is over. Let's get back to the scrappin!

Thompson throws a big shot that misses.
A telegraphed right hand from Thompson misses the target.
VaraKolaudov lets it all go there with a big combo counter but none of the punches connected.
Thompson closes the distance and clinches.
Thompson lands an uppercut.
Thompson fails to land with a short punch on the inside.
VaraKolaudov misses with an elbow strike.
With the two fighters working up against the ropes, VaraKolaudov just misses with a elbow thrown towards Thompson's brow.
VaraKolaudov lands a nice elbow.
Thompson scores with a nice hook to the head.
A bit of stalling here from VaraKolaudov.
We've had a slow start to the round here - hopefully the action picks up.
Thompson lands a nice uppercut.
Thompson breaks the clinch and we're back to striking at distance.
VaraKolaudov circles away from the clinch attempt.
VaraKolaudov blocks a head kick by Thompson.
That's one minute gone in the round.
Thompson misses with a body shot.
As Thompson backs off VaraKolaudov throws a huge counter combo but Thompson manages to avoid it all.
Thompson fails with an attempt to clinch.
VaraKolaudov lets it all go there with a big combo counter but none of the punches connected.
Thompson lands a leg kick that knocks VaraKolaudov off balance momentarily.
VaraKolaudov takes one to the side of the head.
VaraKolaudov takes one to the side of the head.
Thompson with a nice cross.
That has opened up Mawzer VaraKolaudov's cut even more.
VaraKolaudov avoids the body shot from Thompson.
Despite the aggression on VaraKolaudov's face he doesn't fully commit to the counter.
Thompson lands a nice leg kick that just misses VaraKolaudov's sensitive parts.
VaraKolaudov slips a jab from Thompson.
That's two minutes gone in the round.
VaraKolaudov uses decent footwork to sidestep a right hand from Thompson.
A big left from Thompson misses.
VaraKolaudov is looking for the big counter here.
Thompson turns his hip over beautifully as he lands a nice leg kick.
Mawzer VaraKolaudov is looking to throw some combinations by the looks of things.
Thompson lands with a good body shot.
Thompson closes the distance and pushes VaraKolaudov back into the ropes.
This is a great period of action - very entertaining stuff!
A head punch blocked on the inside by VaraKolaudov.
With the fighters clinched against the ropes, Thompson creates a bit of distance for himself and scores with a nice uppercut.
Thompson lands a right uppercut that snaps the head of VaraKolaudov backwards.
Thompson throws a head punch that misses.
Thompson's corner calls for him to break the clinch, which he does.
Thompson tries to clinch but is not successful on this occasion.
That's three minutes gone in the round.
A shot to the liver by Thompson. Beautiful body shot.
VaraKolaudov keeps the fight on the outside.
VaraKolaudov unleashes a big counter combination but Thompson bobs and weaves and avoids any damage.
Thompson takes a swing at VaraKolaudov's ribcage but misses.
Thompson throws a body punch but VaraKolaudov moves out of range.
VaraKolaudov is loading up here, looking for a big counter of his own.
Thompson scores with a shot to the body.
VaraKolaudov's leg has a nasty welt from taking a succession of leg kicks. That must be slowing him down.
Thompson attempts a leg kick but it's missed by a good margin.
Thompson throws a solid leg kick but VaraKolaudov takes the impact on his shin and smiles at Thompson.
A big left from Thompson misses.
That's four minutes gone in the round.
VaraKolaudov dodges the punch combination from Thompson.
VaraKolaudov throws a fast counter high kick but Thompson manages to duck under it in time.
Thompson throws a leg kick that is checked
and VaraKolaudov counters with a one-two to the body.
Thompson takes a swing at VaraKolaudov's ribcage but misses.
VaraKolaudov blocks a leg kick.
The fighters circling - Thompson throws out the jab but it was never going to land.
VaraKolaudov uses good footwork to avoid the strikes from Thompson.
As Thompson backs off VaraKolaudov throws a huge counter combo but Thompson manages to avoid it all.
VaraKolaudov blocks the body kick.
VaraKolaudov throws a big counter head kick but Thompson avoids it with no problem.
Thompson throws a low kick but VaraKolaudov moves out of range easily.
And thats the end of the round the fighters go back to their corners.
Enoch Thompson clearly takes that round.
The cut man is working on Mawzer VaraKolaudov's cut.
That's the end of the interval. I'm sure that seemed a lot quicker than a minute for our two fighters! Back to the action.

Thompson tries to land with a swinging hook to the body but VaraKolaudov was well out of range. Poor timing from Thompson.
VaraKolaudov unleashes a big counter combination but Thompson bobs and weaves and avoids any damage.
Thompson works over VaraKolaudov's head and body with a nice combination.
VaraKolaudov takes a shot right to the liver - Bas would have been proud of that punch.
Thompson cracks VaraKolaudov with an open hand slap.
A jab from Thompson misses.
Thompson feints a straight left to the body, then turns around with a flashy move and hits VaraKolaudovs jaw with a dramatic spinning back fist!
We've had a slow start to the round here - hopefully the action picks up.
Thompson connects with a looping right hand.
Thompson pivots as if he's going to throw a leg kick but stops half way.
Thompson misses with a leg kick.
As Thompson backs off VaraKolaudov throws a huge counter combo but Thompson manages to avoid it all.
That's one minute gone in the round.
Thompson throws a body punch but VaraKolaudov moves out of range.
VaraKolaudov throws a big counter head kick but Thompson avoids it with no problem.
Thompson misses with a looping right.
Thompson throws a leg kick that is checked
and VaraKolaudov counters with a three punch combination, finished off with a leg kick. Nice work.
Thompson throws a hook but VaraKolaudov avoids it easily.
VaraKolaudov lets it all go there with a big combo counter but none of the punches connected.
A slapping leg kick lands for Thompson.
Thompson turns his hip over beautifully as he lands a nice leg kick.
Thompson works VaraKolaudov's body with a nice hook.
Thompson misses with a low kick.
That's two minutes gone in the round.
Thompson throws a body punch but VaraKolaudov moves out of range.
Thompson fails in his attempt to clinch.
VaraKolaudov is loading up here, looking for a big counter of his own.
Thompson pushes forward with a 1-2 combination that forces VaraKolaudov back to the ropes. Thompson follows up with a solid lead hook to the liver.
This fight brought to you by 5M nutrition - it's mmmmm tasty. Nice jab by Thompson.
This has been an exciting period of action!
Thompson takes a step towards his opponent and connects with a left hand, before circling away.
Thompson throws a front kick aimed at VaraKolaudov's knee but VaraKolaudov avoids it well.
Thompson swings and misses with a hook to the body.
VaraKolaudov doesn't fully commit to the body shot counter.
VaraKolaudov moves his head to the side to avoid a jab but walks straight into a cross.
The cut above Mawzer VaraKolaudov's eye is starting to cause him problems now.
That's three minutes gone in the round.
Thompson throws a shot to the body.
Thompson fakes a jab and throws a low kick but VaraKolaudov checks it well.
A countering left hand to the body from VaraKolaudov misses.
VaraKolaudov uses some good footwork to avoid the body shot by Thompson.
Nice body punch from Thompson.
Thompson throws a body shot but no joy.
VaraKolaudov unleashes a big counter combination but Thompson bobs and weaves and avoids any damage.
Thompson looks to clinch
and VaraKolaudov counters with a three punch combo that has Thompson backing up. Thompson nods at VaraKolaudov to acknowledge the strikes.
VaraKolaudov takes one on the button.
VaraKolaudov checks a low kick. Bone on bone - not my idea of a good time.
Thompson moves out of the way of the counter high kick fromVaraKolaudov.
Thompson swings for the body but VaraKolaudov moves out of range.
That's four minutes gone in the round.
The fight stays on the outside here - Thompson looks like he's thinking about clinching though.
VaraKolaudov shapes to counter with a head kick.
Thompson does a little shimmy and throws a leg kick. The leg kick missed by a considerable margin though, making him look a little bit silly for doing the shimmy.
VaraKolaudov lets it all go there with a big combo counter but none of the punches connected.
Thompson throws a leg kick that misses.
VaraKolaudov moves out of range as Thompson strikes.
The fight moves into the clinch position.
A head punch blocked on the inside by VaraKolaudov.
VaraKolaudov has Thompson pressed against the ropes.
And thats the end of the round the fighters go back to their corners.
Enoch Thompson had his way with Mawzer VaraKolaudov in that round.
The cut man is working on Mawzer VaraKolaudov's cut.
OK. That's time! The bell goes and we're back to the action. This is the final round!

Thompson's corner calls for a 1-2. Thompson obliges with the 1 part as he scores the single shot and moves back out of range.
VaraKolaudov avoids a low kick by using good footwork.
Good work by VaraKolaudov as he checks the leg kick.
VaraKolaudov is looking for the big counter here.
Thompson closes the distance and clinches.
VaraKolaudov misses with an elbow over the top.
VaraKolaudov blocks a couple of punches on the inside.
We've had a slow start to the round here - hopefully the action picks up.
VaraKolaudov blocking some punches.
VaraKolaudov prevents a body shot from Thompson.
VaraKolaudov throws an elbow but it misses.
Thompson lands a shoulder strike that jolts his opponent's head backwards.
VaraKolaudov looks to throw an elbow but misses.
VaraKolaudov throws an elbow that misses.
That's one minute gone in the round.
Thompson blocks a body shot from VaraKolaudov.
With the fighters up against the ropes, VaraKolaudov throws an elbow but misses.
Thompson misses with a hook from the clinch.
Thompson lands a nice uppercut.
VaraKolaudov lands a glancing elbow in the clinch.

It looks like Enoch Thompson has been cut.
Thompson fails to land with a short punch on the inside.
Thompson fails to land with a short punch on the inside.
Good anti-grappling being displayed by VaraKolaudov as Thompson tries to tie him up.
VaraKolaudov tries to work over Thompson's body with a swooping hook but it only glances the target.
Thompson throws a blind hook that connects with the side of VaraKolaudovs head.
Thompson blocks the elbow strike.
Thompson can't find room to land a body shot as VaraKolaudov controls the action.
Thompson looking to stall.
Thompson fails to land with a short punch on the inside.
Thompson blocks a knee to the body. He'll have a nicely bruised forearm in the morning.
VaraKolaudov lands a damaging elbow.
That's two minutes gone in the round.
VaraKolaudov misses with an elbow strike.
VaraKolaudov tries to land a knee to the body but he is off balance and Thompson avoids it.
VaraKolaudov trying to control the position but instead, Thompson has worked for underhooks and has pushed VaraKolaudov into the ropes.
Thompson lands a short shot on the inside that snaps the head of VaraKolaudov backwards.
VaraKolaudov looks to throw an elbow but misses.
Thompson misses with some punches.
Thompson avoids the elbow strike from VaraKolaudov, against the ropes.
A real battle for position is taking place between these two warriors.
Thompson trying to control the position but instead, VaraKolaudov has worked for underhooks and has pushed Thompson into the ropes.
Thompson lands with a left to the head.
The crowd cheering loudly, showing their appreciation for the quality fight we're seeing here.
Thompson blocks an elbow strike from VaraKolaudov.
Thompson blocks an elbow strike from VaraKolaudov.
VaraKolaudov is looking to control Thompson's arms but Thompson gets an underhook and turns him. Now VaraKolaudov has his back to the ropes.
That's three minutes gone in the round.
A short right from Thompson on the inside.
Thompson swings wildly with an uppercut but VaraKolaudov uses good head movement to avoid it.
Thompson goes for a body shot but it's blocked.
Enoch Thompson has scored more points in the clinch so far.
VaraKolaudov's head jolts backwards as he takes an uppercut right on the button!
VaraKolaudov just leaning against Thompson, taking a breather.
Thompson lands punches inside but they're not really causing much damage.
Thompson managing to block the knees to the body from VaraKolaudov.
Thompson avoids a wild elbow strike from VaraKolaudov.
Thompson scores with a nice hook to the head.
With the fighters up against the ropes, VaraKolaudov throws an elbow but misses.
Thompson is looking to control VaraKolaudov's arms but VaraKolaudov gets an underhook and turns him. Now Thompson has his back to the ropes.
Thompson lands a left hand.
Thompson taking a breather.
A hook to the body from Thompson.
VaraKolaudov is looking to control Thompson's arms but Thompson gets an underhook and turns him. Now VaraKolaudov has his back to the ropes.
VaraKolaudov taking a breather.
VaraKolaudov taking a breather.
VaraKolaudov is trying to slow the pace down but that's a couple of times in a row that he's tried to get underhooks and Thompson has denied him.
That's four minutes gone in the round.
Thompson misses with a short punch on the inside.
VaraKolaudov's corner are urging him to control the action in the clinch for a moment, rather than mount any serious offense. I'm sure the crowd appreciate those instructions... not.
Thompson lands with a left to the head.
Mawzer VaraKolaudov has stepped it up - he knows he needs a finish here!
VaraKolaudov taking a breather.
The ref breaks the fighters up, due to lack of action by Mawzer VaraKolaudov.
Thompson throws a hook to the body but it doesn't connect.
Thompson throws a right hand that VaraKolaudov ducks under and follows up with a left that VaraKolaudov also avoids with ease.
VaraKolaudov raises up his leg as if looking to counter with a high kick.
Thompson throws a hook to the body but it doesn't connect.
As Thompson backs off VaraKolaudov throws a huge counter combo but Thompson manages to avoid it all.
Wooooo! Give it up for these two warriors! They are putting on a show!
Thompson throws a shot from downtown. VaraKolaudov moves away and avoids it.
VaraKolaudov ducks under a wild hook from Thompson.
Thompson moves into the clinch successfully.
And that's the end of the fight!
Enoch Thompson showed his dominance in that final round.
Well Thompson has outscored his opponent in every aspect of the fight today. Only a scarily incompetent judge or two will keep him from a well deserved win... Over to the ring announcer for the scorecards.
Ladies and gentlemen, after 5 rounds of action, we go to the scorecards for a decision.
Judge Hirohito Nitta scores the fight 50:45
Judge Taro Takaoka scores the fight 50:45
Judge Ren Mimura scores the fight 50:45
In favor of your winner, by unanimous decision... Enoch Thompson!
After the fight, Enoch Thompson was humble in paying tribute to his opponent but made it clear he wants to go on to bigger and better things. It seemed to go down well with the crowd who cheered him loudly.
The defeated Mawzer VaraKolaudov had this to say: 'Wasn't my destiny to win I had fun regardless its about the journey my friends'.
|
|
|
|
|
|
|
|
|
|
|
|
|
|
|
|
|
|
|
|
|
|
|
| S |
C
A |
G |
S |
C
B |
G |
|
S |
C |
G |
|
energy
A | B |
|
hype
A | B |
|
pop
A | B |
|
mgr
A | B |
|
FIGHT
RATING
53% |
|
|
|
|
|
|
|
Undercard bout
|
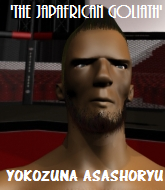
Coming up we have a heavyweight kickboxing rules bout between Mophaf Bungradidoa (ranked 0 p4p, 0 weight class) and Yokozuna Asashoryu (ranked 0 p4p, 0 weight class). Both fighters look fresh as a daisy as they make their way towards the ring.
 |
|
 |
| 178 cm
29
250 lbs
16 - 17 - 0 |
|
212 cm
36
278 lbs
26 - 14 - 0 |
Excellent boxer
Cardio machine
|
|
Lethal high kicks
Good gas tank
|
|
| |
|
Ladies and gentlemen. This fight is 5 rounds, in the heavyweight division.
Introducing the fighter to my left, fighting out of the red corner.
With a record of
16 - 17 - 0, fighting out of Tokyo, Mophaf Bungradidoa!
And introducing the fighter to my right, fighting out of the blue corner.
With a record of
26 - 14 - 0, fighting out of Tokyo, Yokozuna Asashoryu!
The judges for this bout are Yasuomi Hirokawa, Yuuki Gou and Ren Mimura.
The bell rings for round one and we are underway!
Bungradidoa throws a head kick but Asashoryu moves out of range.
Asashoryu throws a head kick that misses.
Asashoryu doesn't react quick enough there as he takes a shot to the body.
Asashoryu throws a head kick that connects with a bit of head and a bit of hand.
It looks like Mophaf Bungradidoa has been cut.
Asashoryu throws a sloppy head kick and Bungradidoa moves out of range easily.
Asashoryu will need to tighten up his combinations if he doesn't want to gas himself out, swinging at thin air.
Bungradidoa seems to be moving with more speed, compared to his last bout. He must have been working on that in the gym.
Asashoryu throws a right and a left that both miss.
Bungradidoa forces Asashoryu back against the ropes and clinches.
Bungradidoa pushes off and circles away, back to the middle of the mat.
A head kick misses from Bungradidoa.
Bungradidoa scores with a head kick. Asashoryu tried to block it but didn't get his arm up in time.
We've seen a great period of action over the last minute or so - credit to both fighters for going all out!
Bungradidoa has managed to clinch.
Bungradidoa breaks the clinch and we're back to striking at distance.
Bungradidoa avoids the head kick by Asashoryu.
Bungradidoa cracks a nice hook into Asashoryu's ribs.
A head kick misses from Asashoryu.
Bungradidoa lifts his leg as if looking to counter with a high kick.
Bungradidoa gets to the clinch - let's see what his plan is here.
Asashoryu working hard to break the clinch.
That's one minute gone in the round.
Bungradidoa escapes the clinch and we're back to striking.
Bungradidoa throws a hard body shot but it just misses.
Bungradidoa has managed to clinch.
Bungradidoa breaks the clinch and we're back to striking at distance.
Bungradidoa throws a right and a left that Asashoryu avoids nicely.
Asashoryu gets tackled into the ropes by Bungradidoa. Bungradidoa maintains the clinch.
Bungradidoa goes for a body shot but it's blocked.
A short body shot lands from Bungradidoa as the two fighters clinch.
Bungradidoa tries to throw a body punch but Asashoryu avoids it by throwing Bungradidoa back against the ropes.
Bungradidoa manages to break the clinch.
Bungradidoa pushes Asashoryu up against the ropes in a clinch.
Bungradidoa manages to break the clinch.
A punch combination from Bungradidoa misses.
Bungradidoa rushes Asashoryu and pushes him back against the ropes in a clinch.
Bungradidoa can't find room to land a body shot as Asashoryu controls the action.
Bungradidoa missing with knees to the body.
That's two minutes gone in the round.
Bungradidoa presses Asashoryu against the ropes and delivers a mid-strength body shot.
Wooooo! Give it up for these two warriors! They are putting on a show!
Bungradidoa is looking to score with knees to the body. Maybe he'll change it up and go body then head. Asashoryu is defending well for now.
Bungradidoa pushes off and circles away, back to the middle of the mat.
Bungradidoa misses with a body shot.
Asashoryu has tried to improve his agility in the runup to this fight.
Asashoryu lands with a head kick! That's gotta hurt.
Bungradidoa on the wrong end of a decent looking cross there.
Asashoryu misses with a body shot. Nice footwork from Bungradidoa.
Bungradidoa tries to clinch
and Asashoryu counters with a good right hand that lands right on the jaw.
Bungradidoa misses with a telegraphed body shot

and Asashoryu counters with a lead uppercut that lands right on the button! Bungradidoa goes down! Will Bungradidoa beat the count? 3,4,5 - he's up! No problem. Let's get back to the action!
Bungradidoa jabs Asashoryu to the body, keeping him at a distance.
Asashoryu drops a shoulder and throws a biiiig uppercut that drops Bungradidoa onto his butt! Bungradidoa pops straight back to his feet to convince the referee that he's OK to continue.

Bungradidoa is rocked!
Asashoryu throws a head kick that misses.
Bungradidoa throws a head kick that misses and slips in the process. He scrambles back to his feet and the fighters circle.
Mophaf Bungradidoa seems to be the more aggressive standup fighter in this bout.
Bungradidoa throws a head kick that misses.
Bungradidoa pushes Asashoryu up against the ropes in a clinch.
Bungradidoa struggles to land a body shot inside as Asashoryu controls his hands.
Bungradidoa breaks the clinch.
Bungradidoa pulls out of a head kick attempt.
Bungradidoa is looking to wear down Asashoryu with body shots, infact he's throwing more body shots than head shots at the moment.
That's three minutes gone in the round.
Bungradidoa tries a switch kick but it misses it's target.
Bungradidoa moves into the clinch.
Bungradidoa's corner calls for him to break the clinch, which he does.
Bungradidoa looks to score with a jab to the body but Asashoryu is just out of range.
Bungradidoa gets to the clinch - let's see what his plan is here.
Bungradidoa is trying to wear down his opponent with knees to the body.
Bungradidoa misses the knee to the body. Nice hip positioning from Asashoryu.
Bungradidoa tries to land a shot to the body but it's blocked.
Asashoryu prevents a body shot from Bungradidoa.
Bungradidoa lands a nice shot to the body.
Bungradidoa trying to land knees to the body.
Bungradidoa escapes the clinch and we're back to striking.
Asashoryu scores a flash knockdown with a right hook that drops Bungradidoa to his hands and knees! The ref pushes Asashoryu away as he looks to land an illegal blow. Bungradidoa got an extra few seconds to recover there, which could have made all the differences as he stumbles back to his feet. The referee looks into his eyes and decides to allow the bout to continue. Can he survive?!
Wooooo! Give it up for these two warriors! They are putting on a show!
Bungradidoa misses with a body shot. Nice footwork from Asashoryu.
OH! Bungradidoa has been rocked by a huge right hand and is in deep trouble! Asashoryu smells blood and charges in for the finish! Asashoryu unloads a vicious overhand right and connects to the jaw of Bungradidoa sending him face first to the canvas! Unbelievable!
Ladies and gentlemen, after 4:55 of round 1, we have a winner by way of KO (Punches). Yokozuna Asashoryu!
Yokozuna Asashoryu was full of energy after the big win and talked about how he thinks he can do big things in this sport. The crowd were appreciative of his determination to succeed.
|
|
|
|
|
|
|
|
|
|
|
|
|
|
|
|
|
|
|
|
|
|
|
| S |
C
A |
G |
S |
C
B |
G |
|
S |
C |
G |
|
energy
A | B |
|
hype
A | B |
|
pop
A | B |
|
mgr
A | B |
|
FIGHT
RATING
72% |
|
|
|
|
|
|
|
Undercard bout
|
Coming up we have a heavyweight kickboxing rules bout between Akira Ishikawa (ranked 0 p4p, 0 weight class) and Jo Smo (ranked 0 p4p, 0 weight class). Ishikawa comes to the ring accompanied by mindshift genki sudo. Smo comes into a darkened arena with his song building. O Le Alofa Lava I Le Manu E kicks in, the lights come on and the crowd goes wild! What a showman! Akira Ishikawa has the better chin. Will he look to stand and bang today?
 |
|
 |
| 150 cm
44
147 lbs
43 - 33 - 1 |
|
180 cm
25
280 lbs
11 - 5 - 0 |
Great low kicks
Granite chin
|
|
Excellent boxer
Powerful
|
|
| |
|
Ladies and gentlemen. This fight is 5 rounds, in the heavyweight division.
Introducing the fighter to my left, fighting out of the red corner.
With a record of
43 - 33 - 1, fighting out of Tokyo, Akira Ishikawa!
And introducing the fighter to my right, fighting out of the blue corner.
With a record of
11 - 5 - 0, fighting out of Tokyo, Jo Smo!
The judges for this bout are Taro Takaoka, Hirohito Nitta and Tatsuya Matsuyama.
The bell rings for round one and we are underway!
Ishikawa clinches up against the ropes.
Ishikawa using the Thai plumb to throw knees but Smo has his back arched nicely, preventing the strike.
Ishikawa misses the knee to the body. Nice hip positioning from Smo.
Smo managing to block the knees to the body from Ishikawa.
Smo takes a knee to the side of the body.
Smo tries to circle away but Ishikawa has him pinned against the ropes.
Ishikawa misses with a knee strike.
Ishikawa is trying to stall.
Smo wants to break free. God knows he wants to breaaaak freeee.
Ishikawa using the Thai clinch to land knees to the body.
Ishikawa blocks a knee to the body. He'll have a nicely bruised forearm in the morning.
Ishikawa lands a knee to the body.
Ishikawa misses with an elbow over the top.
Ishikawa lands a good knee to the midsection. Smo won't want to take too many of those.
Smo takes a knee right on the jaw!
It looks like Jo Smo has been cut.
Ishikawa landing knees to the body.
Smo breaks from the clinch.
Wooooo! Give it up for these two warriors! They are putting on a show!
The fight moves into the clinch position.
Ishikawa is looking to control Smo's arms but Smo gets an underhook and turns him. Now Ishikawa has his back to the ropes.
Ishikawa lands a knee to the head there! That was nasty!
Smo takes an elbow to the temple.
That's one minute gone in the round.
Ishikawa with a knee to the head.
Ishikawa misses with an elbow strike.
Smo has had enough of the clinch and is looking to separate.
Smo looks like he'd prefer to be striking at range right now.
Ishikawa landing knees to the body.
Smo can't break the clinch.
Ishikawa with the Thai clinch, lands a knee to the head.
Ishikawa looking to slow down the pace here.
Ishikawa trying to stall but Smo improves his position.
Ishikawa using the Thai clinch to land knees to the body.
Ishikawa misses with an elbow strike.
Smo is trying to work out of this bad position, with his back against the ropes.
Ishikawa is stalling here.
Ishikawa looks to be in better condition than last time we saw him fight. Obviously he's been working hard on his cardio.
Ishikawa trying to stall but Smo improves his position.
Smo wants to strike at distance but he can't break free of the clinch.
Smo wants to push off and get back to the center of the mat but Ishikawa has him pressed against the ropes.
Smo wants to break free but Ishikawa has control.
An uppercut on the inside fails to land for Smo.
Ishikawa is trying to maintain a safe position but Smo gets an underhook and turns Ishikawa into the ropes.
That's two minutes gone in the round.
Smo can't break the clinch.
Ishikawa putting his Muay Thai to good use. He has Smo in a tight clinch and is doing some damage with knees to the body.
Ishikawa pushes off an throws an elbow but Smo leans to the side and avoids it. We're back to clinching against the ropes.
Ishikawa throws a vicious knee straight up the middle but Smo blocks it with crossed arms.
Ishikawa lands a glancing elbow in the clinch.
Ishikawa is stalling here.
Ishikawa misses with an elbow over the top.
Smo breaks the clinch.
Smo has been working on his striking defense in training and it's paying off as Ishikawa is landing a low percentage of strikes.
Ishikawa moves into range and clinches up with Smo.
Wooooo! Give it up for these two warriors! They are putting on a show!
Smo is trying to push Ishikawa away but Ishikawa has him pressed against the ropes, so he's going nowhere.
Ishikawa working Smo over with knees to the body.
Ishikawa is trying to stall.
Ishikawa misses with a knee to the head.
Ishikawa tries a knee to the head but Smo blocks it.
Smo tries to circle away but Ishikawa has him pinned against the ropes.
Ishikawa prevents Smo from breaking the clinch.
Ishikawa lands a nice knee to the body.
Ishikawa throws a vicious knee straight up the middle but Smo blocks it with crossed arms.
That's three minutes gone in the round.
Knees to the body from Ishikawa.
Ishikawa throws an elbow that misses.
Smo tries to circle away but Ishikawa has him pinned against the ropes.
A real battle for position is taking place between these two warriors.
Ishikawa throws a nice elbow but it doesn't land.
A frustrated look appears on Smo's face as he tries to break the clinch.
Smo breaks the clinch and we're back to striking at distance.
Ishikawa closes the distance and clinches.
Smo is trying to push Ishikawa away but Ishikawa has him pressed against the ropes, so he's going nowhere.
Ishikawa lands an elbow that stopped Smo in his tracks for a moment.
Smo wants to get back to striking at distance but Ishikawa won't allow it.
Smo is trying to work out of this bad position, with his back against the ropes.
Smo breaks the clinch and we return to the middle of the mat.
A punch combination from Smo misses.
Ishikawa gets a clinch.
Smo can't break the clinch.
Ishikawa scores a nice knee to the body.
Smo looks winded!
Ishikawa avoiding damage.
Ishikawa landing some nice looking knees to the body.
That's four minutes gone in the round.
Ishikawa landing knees to the body. They look like they could hurt.
Ishikawa lands an elbow just above Smo 's eye.
This is a great period of action - very entertaining stuff!
Ishikawa stalling in the clinch.
Smo tries a body shot but Ishikawa blocks it.
Ishikawa creates a bit of space for himself and sneaks an elbow through Smo's defenses.
Ishikawa working Smo over with knees to the body.
Ishikawa lands an elbow just above Smo 's eye.
Ishikawa landing knees to the body.
Smo takes a knee right on the jaw!
Knees in the clinch landing for Ishikawa.
Ishikawa connects with a nasty looking knee right to Smo's face.
Ishikawa landing knees to the body.
Smo dodges an elbow strike from Ishikawa.
Ishikawa scores a nice knee to the body.
Ishikawa is stalling here. The referee will be looking to step in if he doesn't pick up the pace.
Ishikawa throws an elbow that misses.
Ishikawa looking to slow down the pace here.
Ishikawa lands an elbow just above Smo 's eye.
And thats the end of the round the fighters go back to their corners.
Akira Ishikawa dominated that round.
The cut man is working on Jo Smo's cut.
The minute break is over - no more time for sponges and pep talks - back to the action!
Ishikawa displays some good footwork, moving neatly out of range as Smo throws out the jab.
Ishikawa rushes Smo and presses him up against the ropes.
Nice elbow from Ishikawa.
Ishikawa is really dominating this fight. Is there anything that Smo can do to turn this around?
Smo avoids a wild elbow strike from Ishikawa.
Smo wants to get back to striking at distance but Ishikawa won't allow it.
Ishikawa putting his Muay Thai to good use. He has Smo in a tight clinch and is doing some damage with knees to the body.
Smo has had enough of the clinch and is looking to separate.
Both fighters working to control the clinch.
It really doesn't seem like the step up in weight is hurting Ishikawa here at all. He's more than holding his own against the bigger man.
Kneeeeees! The crowd are calling for knees to the body. Ishikawa obliges.
Smo can't break the clinch.
Smo is trying to break the clinch but Ishikawa has him pressed against the ropes.
Ishikawa creates a bit of distance and throws an elbow that only just misses.
A frustrated look appears on Smo's face as he tries to break the clinch.
Smo is looking to break free of the clinch but Ishikawa has double underhooks.
We've had a slow start to the round here - hopefully the action picks up.
Smo is trying to break the clinch but Ishikawa is controlling him.
Smo misses with a body punch.
Ishikawa taking a breather.
Ishikawa putting his Muay Thai to good use. He has Smo in a tight clinch and is doing some damage with knees to the body.
Smo misses with a punch to the body.
Both guys are working to get underhooks.
Smo is trying to break the clinch but Ishikawa is controlling him.
That's one minute gone in the round.
Smo blocks an elbow strike from Ishikawa.
Ishikawa is struggling to control the position.
Smo wants to get back to striking at distance but Ishikawa won't allow it.
Ishikawa tries to stall but Smo uses the opportunity to gain a better position.
Ishikawa misses with a knee strike.
Smo wants to push off and get back to the center of the mat but Ishikawa has him pressed against the ropes.
Smo wants to strike at distance but he can't break free of the clinch.
Ishikawa is trying to wear down his opponent with knees to the body.
Smo is trying to push Ishikawa away but Ishikawa has him pressed against the ropes, so he's going nowhere.
Ishikawa gets an overhook and lands an elbow to the side of the head.
Ishikawa trying to control the position but instead, Smo has worked for underhooks and has pushed Ishikawa into the ropes.
A frustrated look appears on Smo's face as he tries to break the clinch.
Smo is trying to work out of this bad position, with his back against the ropes.
Smo misses with a shot to the kidneys.
Ishikawa throws an elbow that misses.
Smo has had enough of the clinch and is looking to separate.
Ishikawa lands a knee to the head.
That's two minutes gone in the round.
Ishikawa taking a breather.
Ishikawa has Smo pressed against the ropes, preventing Smo from circling away and getting back to striking at range.
Ishikawa throws a knee to the head but misses.
Smo tries to break the clinch but Ishikawa is controlling the position.
Smo doesn't land with the attempted body shot.
Smo blocks a knee to the body. He'll have a nicely bruised forearm in the morning.
Smo breaks the clinch.
Ishikawa keeping a good distance there, avoiding the body shot.
Ishikawa gets in close and instigates a clinch.
Both fighters working to control the clinch.
Smo is trying to work out of this bad position, with his back against the ropes.
Smo tries to circle away but Ishikawa has him pinned against the ropes.
Ishikawa lands an elbow inside.
Ishikawa landing some nice looking knees to the body.
The referee is keeping an eye on Ishikawa - much more stalling and he will separate the fighters.
Ishikawa tries to land a knee to the head but misses.
The crowd are loving this. Great action here.
A frustrated look appears on Smo's face as he tries to break the clinch.
Smo manages to break the clinch.
Ishikawa has managed to clinch.
That's three minutes gone in the round.
Ishikawa lands a nice elbow.
Smo wants to break free but Ishikawa has control.
Smo wants to get back to striking at distance but Ishikawa won't allow it.
Smo being controlled against the ropes.
Smo pushes off and circles away, back to the middle of the mat.
Smo tries to keep at a distance but Ishikawa has taken the fight into the clinch.
Smo is trying to break the clinch but Ishikawa has him pressed against the ropes.
Akira Ishikawa has scored more points in the clinch so far.
Ishikawa displaying some good clinch control by pressing Smo up against the ropes.
Smo escapes the clinch and we're back to striking.
Smo misses with a jab and misses with a cross straight after too.
Ishikawa fakes with an overhand right and moves in to clinch with Smo, pushing him back against the ropes.
Ishikawa stalling in the clinch.
Smo can't break the clinch.
Smo is trying to break the clinch but Ishikawa is controlling him.
That's four minutes gone in the round.
Smo blocks an elbow strike from Ishikawa.
Smo tries to break the clinch but Ishikawa is controlling the position.
Ishikawa has Smo pressed against the ropes, preventing Smo from circling away and getting back to striking at range.
Nice elbow from Ishikawa.
Ishikawa is trying to slow down the pace in the clinch, to catch his breath.
Ishikawa leaning against his opponent.
Smo is trying to break free.
Smo takes an elbow to the forehead.
Smo pushes off and fires off an elbow that misses, before clinching up again, against the ropes.
Smo wants to push off and get back to the center of the mat but Ishikawa has him pressed against the ropes.
Ishikawa blocks a couple of punches on the inside.
Smo wants to break the clinch but can't.
Ishikawa unloads a knee to the mid-section.
Smo is breathing heavily.
Ishikawa landing knees to the head.
The fans in attendance giving it up for the two fighters, who have really let it all hang out in the last minute or so!
Ishikawa landing some nice looking knees to the body.
Smo takes a knee to the side of the body.
Ishikawa stalling against the ropes.
Ishikawa creates a bit of space for himself and sneaks an elbow through Smo's defenses.
And thats the end of the round the fighters go back to their corners.
Akira Ishikawa dominated that second round.
The cut man is working on Jo Smo's cut.
That's the end of the round. The referee orders the cornermen out of the ring so we can get back down to business.
Ishikawa rushes Smo and pushes him back against the ropes in a clinch.
Ishikawa creates a bit of space for himself and sneaks an elbow through Smo's defenses.
Smo is trying to work out of this bad position, with his back against the ropes.
Ishikawa looking to stall.
Ishikawa lands an elbow inside.
Smo is trying to push Ishikawa away but Ishikawa has him pressed against the ropes, so he's going nowhere.
Smo is trying to break the clinch but Ishikawa has him pressed against the ropes.
Smo tries a shoulder strike but it doesn't do any damage.
Smo tries to break free but Ishikawa pushes him back against the ropes.
Ishikawa throws an elbow that misses.
Smo is trying to break the clinch but Ishikawa is controlling him.
Smo is trying to break the clinch but Ishikawa is controlling him.
Smo takes an elbow to the forehead.
We've had a slow start to the round here - hopefully the action picks up.
Smo has had enough of the clinch but Ishikawa keeps him there for the moment.
Ishikawa lands a damaging elbow.
Ishikawa is stalling here. The referee will be looking to step in if he doesn't pick up the pace.
Smo wants to strike at distance but he can't break free of the clinch.
Smo tries to break free but Ishikawa pushes him back against the ropes.
That's one minute gone in the round.
The referee is keeping an eye on Ishikawa - much more stalling and he will separate the fighters.
Smo has had enough of the clinch and is looking to separate.
Smo tries to break free but Ishikawa pushes him back against the ropes.
Smo doesn't land with the attempted body shot.
Ishikawa lands a knee to the head.
Smo takes a big intake of breath there - he's definitely tired.
Smo takes an elbow to the temple.
Smo is trying to push Ishikawa away but Ishikawa has him pressed against the ropes, so he's going nowhere.
Ishikawa will no doubt start fighting again in a minute but for now he's just having a little rest, leaning Smo up against the ropes.
Ishikawa throws a nice elbow but it doesn't land.
Smo throws an elbow that misses.
A real battle for position is taking place between these two warriors.
Smo takes an elbow to the forehead.
Ishikawa leaning his opponent against the ropes.
Smo working hard to break the clinch.
Ishikawa lands an elbow that stopped Smo in his tracks for a moment.
That's two minutes gone in the round.
Ishikawa lands an elbow just above Smo 's eye.
Ishikawa throws an elbow but it misses.
Ishikawa taking a breather.
Ishikawa misses with a knee strike.
Smo is looking to score with knees to the body. Maybe he'll change it up and go body then head. Ishikawa is defending well for now.
Ishikawa lands an elbow inside.
Nice elbow from Ishikawa.
The fans in attendance giving it up for the two fighters, who have really let it all hang out in the last minute or so!
Ishikawa looking to slow down the pace here.
Ishikawa's corner are urging him to control the action in the clinch for a moment, rather than mount any serious offense. I'm sure the crowd appreciate those instructions... not.
Ishikawa tries to stall but Smo uses the opportunity to gain a better position.
Knees in the clinch landing for Ishikawa.
Some stalling of biblical proportions here from Ishikawa.
Ishikawa landing knees to the head.
Ishikawa throws a vicious knee straight up the middle but Smo blocks it with crossed arms.
Smo is trying to break the clinch but Ishikawa has him pressed against the ropes.
Ishikawa lands a nice elbow from the clinch.
That's three minutes gone in the round.
Ishikawa creates a bit of distance and throws an elbow that only just misses.
Ishikawa lands a nice elbow.
Ishikawa is looking to control Smo's arms but Smo gets an underhook and turns him. Now Ishikawa has his back to the ropes.
Both guys are working to get underhooks.
Ishikawa creates a bit of space for himself and sneaks an elbow through Smo's defenses.
Smo looks like he'd prefer to be striking at range right now.
Smo is looking to break free of the clinch but Ishikawa has double underhooks.
Ishikawa landing knees to the body. They look like they could hurt.
Ishikawa keeps control of Smo as he tries to wriggle out of the double underhooks.
Ishikawa lands a knee to the head.
A frustrated look appears on Smo's face as he tries to break the clinch.
Smo escapes the clinch and we're back to striking.
Ishikawa checks a leg kick.
Ishikawa swung with a counter punch to the body but it didn't connect.
Ishikawa moves into the clinch.
Ishikawa stalls.
Smo wants to get back to striking at distance but Ishikawa won't allow it.
Smo breaks the clinch and we return to the middle of the mat.
That's four minutes gone in the round.
Ishikawa avoids the head kick by Smo.
Ishikawa darts in and clinches Smo up against the ropes.
Ishikawa working Smo over with knees to the body.
A bit of stalling here from Ishikawa.
Kneeeeees! The crowd are calling for knees to the body. Ishikawa obliges.
Fantastic stuff here - a very entertaining period of action, which has drawn cheers from the crowd.
The fighters are pressed against the ropes, as the pace of the fight slows.
Ishikawa comes over the top with an elbow. That landed flush.
Ishikawa lands a nice knee to the body.
Ishikawa comes over the top with an elbow. That landed flush.
Ishikawa tries to land a knee to the head but misses.
Ishikawa lands a nice knee to the body.
Ishikawa stalling.
Ishikawa crunches a lovely knee into Smo's ribcage.
Ishikawa lands a knee to the body.
Stalling in the clinch from Ishikawa.
Ishikawa is trying to maintain a safe position but Smo gets an underhook and turns Ishikawa into the ropes.
Ishikawa tries to land a knee to the head but Smo blocks with his arms.
And thats the end of the round the fighters go back to their corners.
Akira Ishikawa clearly takes that round.
The cut man is working on Jo Smo's cut.
Well, the break between rounds is over. Let's get back to the scrappin!
Ishikawa gets to the clinch - let's see what his plan is here.
Smo avoids the elbow strike from Ishikawa, against the ropes.
Smo is trying to force a seperation but Ishikawa has the dominant position.
Smo wants to strike at distance but he can't break free of the clinch.
Ishikawa keeps control of Smo as he tries to wriggle out of the double underhooks.
Come on Ishikawa - let's have some action - none of this stalling nonsense.
Ishikawa lands a knee to the head.
Ishikawa stalling the fight.
Smo tried to land a shot to the body but connects with Ishikawa's elbow.
Smo is trying to work out of this bad position, with his back against the ropes.
Ishikawa is trying to slow down the pace in the clinch, to catch his breath.
A frustrated look appears on Smo's face as he tries to break the clinch.
We've had a slow start to the round here - hopefully the action picks up.
Smo pushes off and circles away, back to the middle of the mat.
Ishikawa has managed to clinch.
Smo manages to break the clinch.
The fight stays on the outside here - Ishikawa looks like he's thinking about clinching though.
That's one minute gone in the round.
Smo pulls out of a head kick attempt.
Smo misses with a shot to the body
and Ishikawa connects with a straight left hand counter down the middle.
Smo is absolutely dripping with sweat - he looks exhausted.
Smo throws a sloppy body shot
and Ishikawa counters with a nice uppercut.
Ishikawa moves into range and clinches up with Smo.
Smo avoids a wild elbow strike from Ishikawa.
Ishikawa lands a nice elbow.
With the two fighters working up against the ropes, Ishikawa just misses with a elbow thrown towards Smo's brow.
Smo takes a knee to the side of the body.
Ishikawa landing knees to the body.
Ishikawa looking to slow down the pace here.
With the two fighters working up against the ropes, Ishikawa just misses with a elbow thrown towards Smo's brow.
With the fighters up against the ropes, Ishikawa throws an elbow but misses.
Smo has had enough of the clinch but Ishikawa keeps him there for the moment.
Smo tries to circle away but Ishikawa has him pinned against the ropes.
Ishikawa landing knees to the head.
Smo can't break the clinch.
That's two minutes gone in the round.
Ishikawa connects with a knee to the head.
We've seen a great period of action over the last minute or so - credit to both fighters for going all out!
Ishikawa landing some nice looking knees to the body.
Smo wants to break the clinch but can't.
Ishikawa's corner are urging him to control the action in the clinch for a moment, rather than mount any serious offense. I'm sure the crowd appreciate those instructions... not.
Smo wants to break free. God knows he wants to breaaaak freeee.
Smo is trying to break the clinch but Ishikawa has him pressed against the ropes.
Knees in the clinch landing for Ishikawa.
Ishikawa lands an elbow inside.
Ishikawa creates a bit of distance and throws an elbow that only just misses.
Ishikawa landing knees to the body. They look like they could hurt.
Ishikawa scores a nice knee to the body.
Ishikawa putting his Muay Thai to good use. He has Smo in a tight clinch and is doing some damage with knees to the body.
Ishikawa gets an overhook and lands an elbow to the side of the head.
Ishikawa looking to throw knees to the head but Smo is blocking nicely.
Ishikawa lands a good knee to the midsection. Smo won't want to take too many of those.
Ishikawa tries a knee to the head but he's missed.
Ishikawa looks to throw an elbow but misses.
That's three minutes gone in the round.
Ishikawa lands a nice knee to the body.
Ishikawa is trying to wear down his opponent with knees to the body.
Ishikawa unloads a knee to the mid-section.
Ishikawa lands an elbow just above Smo 's eye.
Ishikawa effectively controlling the action here.
Ishikawa lands an elbow that stopped Smo in his tracks for a moment.
Ishikawa throws an elbow but it's blocked.
Smo is trying to push Ishikawa away but Ishikawa has him pressed against the ropes, so he's going nowhere.
A bit of stalling here from Ishikawa.
Ishikawa lands a nice elbow from the clinch.
Smo can't find room to land a body shot as Ishikawa controls the action.
Ishikawa working Smo over with knees to the body.
Smo wants to break free but Ishikawa has control.
Ishikawa landing some nice looking knees to the body.
Knees to the body from Ishikawa.
Ishikawa lands a nice knee to the body.
The crowd cheering loudly, showing their appreciation for the quality fight we're seeing here.
Ishikawa lands a glancing elbow in the clinch.
That's four minutes gone in the round.
Ishikawa lands a knee to the head there! That was nasty!
Smo wants to break free. God knows he wants to breaaaak freeee.
Ishikawa connects with a nasty looking knee right to Smo's face.
Ishikawa lands a good knee to the midsection. Smo won't want to take too many of those.
Knees to the body from Ishikawa.
Ishikawa utilising his Muay Thai to score with a knee to the body.
Ishikawa displaying some good clinch control by pressing Smo up against the ropes.
Ishikawa crunches a lovely knee into Smo's ribcage.
Smo missing with knees to the body.
Ishikawa connects with a knee to the head.
A knee to the head by Ishikawa.
Ishikawa landing knees to the body. They look like they could hurt.
Kneeeeees! The crowd are calling for knees to the body. Ishikawa obliges.
Both fighters working to control the clinch.
Ishikawa with the Thai clinch, lands a knee to the head.
And thats the end of the round the fighters go back to their corners.
Akira Ishikawa had his way with Jo Smo in that round.
The cut man is working on Jo Smo's cut.
The minute break is over - no more time for sponges and pep talks - back to the action! This is the final round!
Ishikawa gets in close and instigates a clinch.
Smo misses with an elbow over the top.
Ishikawa throws a nice elbow but it doesn't land.
Smo wants to strike at distance but he can't break free of the clinch.
Smo wants to break free. God knows he wants to breaaaak freeee.
Smo is trying to break free.
Ishikawa creates a bit of space for himself and sneaks an elbow through Smo's defenses.
Ishikawa connects with a knee to the head.
Ishikawa is trying to slow down the pace of the fight but Smo is keeping busy.
Smo can't break the clinch.
Smo scores with a shot to the side of Ishikawa's head.
We've had a slow start to the round here - hopefully the action picks up.
Smo is trying to force a seperation but Ishikawa has the dominant position.
Smo takes an elbow to the forehead.
Smo tries to break the clinch but Ishikawa is controlling the position.
Smo can't find room to land a body shot as Ishikawa controls the action.
Smo blocks a knee to the body. He'll have a nicely bruised forearm in the morning.
Smo is trying to force a seperation but Ishikawa has the dominant position.
Smo tries to break the clinch but Ishikawa is controlling the position.
That's one minute gone in the round.
With the fighters up against the ropes, Ishikawa throws an elbow but misses.
Ishikawa with a knee to the head.
Smo is looking to break free of the clinch but Ishikawa has double underhooks.
A frustrated look appears on Smo's face as he tries to break the clinch.
Ishikawa pushes off and fires off an elbow that misses, before clinching up again, against the ropes.
Ishikawa working Smo over with knees to the body.
Smo is wobbling all over the place through exhaustion. Will he make it to the final bell?
Ishikawa stalling.
Ishikawa throws a knee to the head but misses.
Ishikawa crunches a lovely knee into Smo's ribcage.
The referee calls for Ishikawa to work.
Ishikawa unloads a knee to the mid-section.
Ishikawa with the Thai clinch. He's looking to land a big knee but he's not managed it this time.
Smo tries to land a shot to the body but it's blocked.
Ishikawa is looking to control Smo's arms but Smo gets an underhook and turns him. Now Ishikawa has his back to the ropes.
Ishikawa looks to throw an elbow but misses.
Both fighters working to control the clinch.
Ishikawa throws a knee to the head but misses.
Jo Smo has stepped it up - he knows he needs a finish here!
Akira Ishikawa is fighting for a decision here - he's started to take the cautious approach.
That's two minutes gone in the round.
Ishikawa avoiding damage as Smo throws knees to the body.
Ishikawa's corner are urging him to control the action in the clinch for a moment, rather than mount any serious offense. I'm sure the crowd appreciate those instructions... not.
Ishikawa lands an elbow inside that Smo shrugs off.
Nice elbow from Ishikawa.
Smo looks like he'd prefer to be striking at range right now.
A frustrated look appears on Smo's face as he tries to break the clinch.
Ishikawa utilising his Muay Thai to score with a knee to the body.
This has been an exciting period of action!
Ishikawa creates a bit of space for himself and sneaks an elbow through Smo's defenses.
Ishikawa throws a nice elbow but it doesn't land.
Ishikawa throws a knee to the head but misses.
Smo is trying to work out of this bad position, with his back against the ropes.
Ishikawa lands a damaging elbow.
That's three minutes gone in the round.
Smo is trying to break the clinch but Ishikawa has him pressed against the ropes.
Smo wants to strike at distance but he can't break free of the clinch.
Smo tries to break the clinch but Ishikawa is controlling the position.
With the fighters up against the ropes, Ishikawa throws an elbow but misses.
Ishikawa has Smo pressed against the ropes, preventing Smo from circling away and getting back to striking at range.
Ishikawa pushes off an throws an elbow but Smo leans to the side and avoids it. We're back to clinching against the ropes.
Ishikawa putting his Muay Thai to good use. He has Smo in a tight clinch and is doing some damage with knees to the body.
Smo wants to break free. God knows he wants to breaaaak freeee.
Smo has had enough of the clinch and is looking to separate.
Smo wants to get back to striking at distance but Ishikawa won't allow it.
Smo misses with an elbow strike.
Smo working hard to break the clinch.
Ishikawa throws an elbow but it's blocked.
Smo can't break the clinch.
Smo tries to break free but Ishikawa pushes him back against the ropes.
That's four minutes gone in the round.
Well. There's a bit of a lull in the action here and the crowd are starting to get restless.
Smo misses with a hook to the ribs.
Ishikawa keeps the fight in the clinch, despite Smo's efforts to push away.
Ishikawa unloads a knee to the mid-section. Smo lets out a prehistoric sounding urrrrgh.
Smo is trying to force a seperation but Ishikawa has the dominant position.
Smo misses with a hook to the ribs.
Ishikawa pushes off and fires off an elbow that misses, before clinching up again, against the ropes.
Smo tries to circle away but Ishikawa has him pinned against the ropes.
Ishikawa lands a knee to the head.
Smo misses with a shot to the kidneys.
Ishikawa lands a nice elbow.
Smo wants to get back to striking at distance but Ishikawa won't allow it.
The crowd thankful this round is nearly over.
Smo is trying to break the clinch but Ishikawa is controlling him.
Nice body punch from Smo.
Smo tries to break free but Ishikawa pushes him back against the ropes.
Ishikawa avoiding damage as Smo throws knees to the body.
And that's the end of the fight!
Akira Ishikawa showed his dominance in that final round.
Well I reckon that's a shut out for Ishikawa, winning every round. Will the judges agree? They are the ones who matter, even if they are often depressingly incompetent. Over to the ring announcer for the scorecards.
Ladies and gentlemen, after 5 rounds of action, we go to the scorecards for a decision.
Judge Taro Takaoka scores the fight 50:42
Judge Hirohito Nitta scores the fight 50:44
Judge Tatsuya Matsuyama scores the fight 50:42
In favor of your winner, by unanimous decision... Akira Ishikawa!
An intense looking Akira Ishikawa took to the microphone post fight and gave a little speech: 'Yoo I need sponsors thanks everyone have nice day'.
Jo Smo spoke after the fight, saying 'pshhhh what Bull man I can beat that guy easy givme a rematch man '.
|
|
|
|
|
|
|
|
|
|
|
|
|
|
|
|
|
|
|
|
|
|
|
| S |
C
A |
G |
S |
C
B |
G |
|
S |
C |
G |
|
energy
A | B |
|
hype
A | B |
|
pop
A | B |
|
mgr
A | B |
|
FIGHT
RATING
62% |
|
|
|
|
|
|
|
Co-main event
|
Coming up we have a super heavyweight kickboxing rules bout between Ichi Takeshi (ranked 0 p4p, 0 weight class) and Shane Ripgut (ranked 0 p4p, 0 weight class). Shane Ripgut has the better chin. Will he look to stand and bang today?
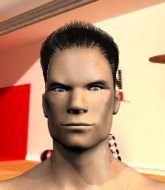 |
|
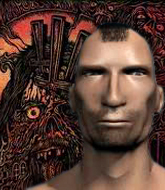 |
| 155 cm
37
138 lbs
21 - 14 - 0 |
|
191 cm
31
260 lbs
19 - 5 - 0 |
Excellent boxer
Insanely flexible
|
|
World class MT
Granite chin
|
|
| |
|
Ladies and gentlemen. This fight is 5 rounds, in the super heavyweight division.
Introducing the fighter to my left, fighting out of the red corner.
With a record of
21 - 14 - 0, fighting out of Tokyo, Ichi Takeshi!
And introducing the fighter to my right, fighting out of the blue corner.
With a record of
19 - 5 - 0, fighting out of Tokyo, Shane Ripgut!
The judges for this bout are Yukihiro Shimada, Ren Mimura and Taro Takaoka.
The bell rings for round one and we are underway!
Ripgut goes for a spinning back kick but it misses.
Takeshi avoids the body shot from Ripgut.
Takeshi throws a shot from downtown. Ripgut moves away and avoids it.
Ripgut throws a series of punches but Takeshi avoids them all with ease.
Ripgut throws a half hearted mid kick.
Ripgut cracks Takeshi with a left hand that drops him to the canvas, up against the ropes! Can Takeshi get back up in time? 3, 4, 5, 6, 7... he's on one knee... 8, 9... he's up! 'Walk towards me' says the referee. Takeshi looks steady enough to continue so we're going to continue!
It looks like Ichi Takeshi has been cut.
Fantastic stuff here - a very entertaining period of action, which has drawn cheers from the crowd.
Takeshi throws a shot to the body.
Ripgut lands a jab to Takeshi's midsection.
A big right followed by a crushing left from Ripgut knocks Takeshi out cold! Ouch - that one's going to be featured in highlight reels for years to come!
Ladies and gentlemen, after 0:29 of round 1, we have a winner by way of KO (Punches). Shane Ripgut!
After winning the bout, Shane Ripgut thanked all his fans and promised he'd do even better in his next fight. The crowd seemed to love his humility.
Ichi Takeshi spoke after the fight, saying 'Son of a!!!! great shame I great shame Sorry I need more strong in spirit. '.
|
|
|
|
|
|
|
|
|
|
|
|
|
|
|
|
|
|
|
|
|
|
|
| S |
C
A |
G |
S |
C
B |
G |
|
S |
C |
G |
|
energy
A | B |
|
hype
A | B |
|
pop
A | B |
|
mgr
A | B |
|
FIGHT
RATING
100% |
|
|
|
|
|
|
|
Main event
|
Coming up we have a light heavyweight kickboxing rules bout between Ryan Ballinger (ranked 0 p4p, 0 weight class) and Carson West (ranked 0 p4p, 0 weight class). Ballinger comes into the arena with When The Man Comes Around - Johnny Cash blaring out of the sound system. Ryan Ballinger could well score a knockout today. He has the power to get to Carson West's chin.
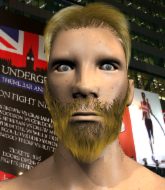 |
|
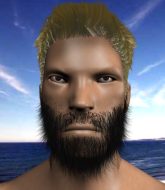 |
| 194 cm
24
202 lbs
2 - 0 - 0 |
|
186 cm
31
208 lbs
4 - 2 - 0 |
World class boxer
Insanely flexible
|
|
World class MT
Good gas tank
|
|
| |
|
Ladies and gentlemen. This fight is 5 rounds, in the light heavyweight division.
Introducing the fighter to my left, fighting out of the red corner.
With a record of
2 - 0 - 0, fighting out of New York, Ryan Ballinger!
And introducing the fighter to my right, fighting out of the blue corner.
With a record of
4 - 2 - 0, fighting out of New York, Carson West!
The judges for this bout are Shigeki Fujiwara, Shirou Masuda and Taro Takaoka.
The bell rings for round one and we are underway!
West misses with a straight left.
West throws a series of punches but Ballinger avoids them all with ease.
Ouch! a nice leg kick from West, right into the meat.
West takes a shot to the eye socket. That's gotta hurt.
West takes a shot to the body in his stride.
Ballinger throws a series of punches but West avoids them all with ease.
West throws a low kick but it's checked well by Ballinger.
Ballinger tries to clinch but is not successful on this occasion.
West throws a head kick that misses
letting Ballinger counter with a right hand.
West blocks a jab.
Ballinger moves to clinch but West breaks away
and Ballinger takes a counter punch right on the button for his troubles.
Ballinger has been working on his boxing with his coaches at The Factory in the buildup to the fight.
Ballinger keeping at a good range here, avoiding a leg kick.
West keeps the fight on the outside.
The fighters circle momentarily. West darts into range and connects with a nice straight punch.
Fantastic stuff here - a very entertaining period of action, which has drawn cheers from the crowd.
Ballinger throws a wild combination but nothing lands.
Both fighters circling a little - Ballinger finishes the exchange with a kick to the body.
Ballinger takes a shot to the nose. Hopefully that hasn't broken it.
West throws a nice looking combination but Ballinger bobs and weaves to avoid any damage.
West closes the distance and presses his opponent up against the ropes.
West pushes off and fires off an elbow that misses, before clinching up again, against the ropes.
That's one minute gone in the round.
A short left from Ballinger.
West keeps the fight in the clinch, despite Ballinger's efforts to push away.
West lands a short shot on the inside that snaps the head of Ballinger backwards.
Ballinger fails to land with a short punch on the inside.
West scores with a shoulder strike.
Ballinger throws a punch but it's blocked by West.
Ballinger swings away with an uppercut that misses.
West tries to land a knee to the head but Ballinger blocks with his arms.
West blocking some punches.
West tries to land knees in the clinch but Ballinger avoids the damage to the body.
Ballinger takes an elbow to the temple.
West tries to land a knee to the head but Ballinger blocks with his arms.
West tries to throw a body punch but Ballinger avoids it by throwing West back against the ropes.
Ballinger tries to work over West's body with a swooping hook but it only glances the target.
With the fighters clinched against the ropes, West creates a bit of distance for himself and scores with a nice uppercut.
West lands a knee to the body.
A nice glancing elbow lands by West.
This has been an exciting period of action!
West lands a right hand.
West throws a knee to the head but misses.
West misses with a hook from the clinch.
That's two minutes gone in the round.
Ballinger swings wildly with an uppercut but West uses good head movement to avoid it.
Ballinger can't find room to land a body shot as West controls the action.
West is working Ballinger over against the ropes.
Nice elbow from West.
Ballinger is trying to break the clinch but West has him pressed against the ropes.
Ballinger avoids a wild elbow strike from West.
West lands a glancing elbow in the clinch.
A quick uppercut on the inside from Ballinger.
West lands a knee to the head there! That was nasty!
It looks like Ryan Ballinger has been cut.
West lands punches inside but they're not really causing much damage.
Ballinger is rocked!
Ballinger swings away with an uppercut that misses.
West pushes Ballinger back against the ropes and lands a hook to the side of the head.
Oh Ballinger is still all over the place! His legs are completely gone! Will he be able to recover?!!
West scores with an uppercut up the middle.
West has control of Ballinger and unloads with a rapid fire barage of elbows, sending Ballinger crashing to the mat! Ballinger looks in big trouble - I don't think he's going to beat the count! He hasn't! The referee has reached 10 and this fight is all over! West looks delighted, as well he should.
Ladies and gentlemen, after 2:47 of round 1, we have a winner by way of TKO (Elbows). Carson West!
Ryan Ballinger was interviewed post fight and said 'You must defeat Sheng Long to stand a chance!'.
|
|
|
|
|
|
|
|
|
|
|
|
|
|
|
|
|
|
|
|
|
|
|
| S |
C
A |
G |
S |
C
B |
G |
|
S |
C |
G |
|
energy
A | B |
|
hype
A | B |
|
pop
A | B |
|
mgr
A | B |
|
FIGHT
RATING
62% |
|
|
|
|
|
|
|
|
|
|
