|
TWGC 11 (155lbs, D1): Sydney Qualifier - Round 1 PBP Commentary |
Undercard bout
|
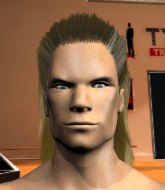
Coming up we have a lightweight Tycoon World Grappling Championship rules bout between Sam Rothstein and Malakai Semerkhet. Rothstein comes to the cage accompanied by Enter The Ninja. Semerkhet has chosen راقصة صغيرة as his entrance music. The crowd giving both fighters a great reception on their way into the arena. That's good to see.
This TWGC bout is 1 fifteen minute round in the lightweight division. Introducing today's competitors. In the red corner, competing out of Sydney, with a TWGC record of 0 wins and 1 losses; Sam Rothstein! And in the blue corner, fighting out of Los Angeles, with a TWGC record of 3 wins and 2 losses; Malakai Semerkhet!
The judges for this bout are Eliza Hachem, Topper Green and Darius Henderson.
Let's get this grappling contest under way! Who will be victorious?
Rothstein looks for a takedown here. Will he get it? Semerkhet is fending him off so far but Rothstein persists. Nope, Semerkhet circles away and we're back to standing.
Rothstein tries to clinch but Semerkhet moves out of range.

Rothstein pushes Semerkhet up against the cage in a clinch.
Rothstein is looking to take this one to the mat.
Rothstein goes for a takedown attempt but Semerkhet pushes him away and we're back to fighting at a distance.
That's three failed takedown attempts in the round for Sam Rothstein. That's going to take a lot out of him.
Rothstein is looking to take this fight into the clinch.
We've had a slow start to the round here - hopefully the action picks up.
Semerkhet swats away the attempt to clinch by Rothstein.
Rothstein sets himself, and Semerkhet steps forward looking for the clinch! Rothstein avoids it this time.
Rothstein clinches with his opponent.

That's one minute gone in the round.
Rothstein is working for takedown but Semerkhet is calmly controlling the position for now.
Rothstein has a body lock and is looking for a takedown. Semerkhet is bouncing around trying to prevent the takedown and somehow he has indeed managed to stay on his feet.
Rothstein is looking to take this one to the mat.
Rothstein has a body lock and is looking for a takedown. Semerkhet is bouncing around trying to prevent the takedown and somehow he has indeed managed to stay on his feet.
Rothstein has Semerkhet pressed up against the cage and is working for takedown. Semerkhet manages to improve position though and keeps the fight standing.
Semerkhet fails to pull guard.
Rothstein can't get the takedown.
Rothstein drops to a knee looking for a takedown but Semerkhet gets the underhooks and prevents it.
Rothstein is trying to work for a single leg takedown but Semerkhet pulls him back up using the underhooks.
Rothstein is trying to drag Semerkhet to the mat but Semerkhet just about manages to keep his footing. He used the cage to his advantage there.
Rothstein can't get the takedown.

That's two minutes gone in the round.
Rothstein is working for a takedown up against the cage. He can't get it on this occasion though.

Semerkhet pulls guard effortlessly.
Rothstein wants to pass the guard but Semerkhet is keeping the position.
Rothstein is working hard here to advance position.
Semerkhet looks more muscular than last time we saw him. He must have been on the weights.
The fighters are pressed up against the cage, both looking to find a bit of space to work.

Rothstein looking to improve position, pressing down on Semerkhet's thigh with his hand. Semerkhet seems to be working to lock up a guilotine though... is Rothstein paying attention? Apparently not! He's locked it up tight! Rothstein's face has turned purple! Will he tap? Will he! YES! He's tapped! Semerkhet picked his opening and made it count! Great finish!
Ladies and gentlemen, after 2:47 of round 1, we have a winner by way of Submission (Guillotine). Malakai Semerkhet!
Malakai Semerkhet decided to hype himself up post fight. It was going well but he went on about it a bit too long and the crowd turned on him a little. |
|
|
|
Undercard bout
|
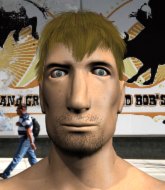
Coming up we have a lightweight Tycoon World Grappling Championship rules bout between Jon Paul Fish and Kevin Johnson. Johnson is bouncing up and down as he enters the arena, backed by Can't Be Touched . Jon Paul Fish has the edge in experience - let's see if he can make that count tonight.
This TWGC bout is 1 fifteen minute round in the lightweight division. Introducing today's competitors. In the red corner, competing out of Las Vegas, with a TWGC record of 0 wins and 0 losses; Jon Paul Fish! And in the blue corner, fighting out of Las Vegas, with a TWGC record of 0 wins and 1 losses; Kevin Johnson!
The judges for this bout are Bruno Hogan, Ron Honeybunn and Donatello Bradman.
The official calls the fighters to the middle and the contest is under way.
Fish closes the distance and clinches.
Fish is defending well against a takedown attempt.

Fish has dropped down and is working for a takedown. Johnson is trying to keep an underhook but Fish manages to get the takedown into half guard. Score +2 for takedown into guard / half guard: Fish (2) vs (0) Johnson
Johnson is looking to improve his position.
Well, if Fish is going to just lie there, perhaps we should talk about what we're having for dinner tonight
I'm having a ham and pineapple pizza
Yum. Can't wait.
Johnson is looking to control Fish's leg but it's slowly edging free. Can Johnson avoid being mounted?
Fish wants to lay and pray for a moment but Johnson keeps working.
Johnson wants to control but Fish is keeping busy.
We've had a slow start to the round here - hopefully the action picks up.

Fish wants to work for an arm triangle but Johnson is really keeping half guard well and defending the submission attempt.
That's one minute gone in the round.
Fish is trying for a guillotine from the top but the pressure isn't in the right place so Johnson is just riding it out for now. Fish eventually gives up the hold.
Fish is keen to just control but Johnson is a slippery customer.
Fish is looking for a kimura here.
Johnson trying to control here but he's found himself mounted! Oh no!
Score +3 for passing guard: Fish (5) vs (0) Johnson
Fish controlling the position easily from mount.
Johnson tries to get back to half guard but can't.
That's two minutes gone in the round.
Fish with some aggressive grappling here. He's looking for submissions here, rather than waiting for the opportunity to counter.
Johnson is wriggling around trying to escape.
Fish tries to control but Johnson wriggling away.
Johnson is trying to escape the mount.
Johnson tries to lock up and control but Fish gives him a forearm to the face and pushes him away.
Fish looking to control but Johnson is working nicely, looking to advance position himself.

That's three minutes gone in the round.
Fish controlling the position easily from mount.
Johnson is wriggling around trying to escape.
Fish is dominating on the ground here - he's now on his opponent's back, looking to sink in the hooks. Johnson is in real trouble.
Score +3 for taking back: Fish (8) vs (0) Johnson
Fish looking to finish the fight with a rear naked choke. Johnson is controlling Fish 's left arm and he spins nicely into guard. Score +2 for sweep to guard / half guard: Fish (8) vs (2) Johnson
Fish trying to control the position here.

That's four minutes gone in the round.
Johnson trying to pass the guard but can't manage it just yet.
Johnson pushes down on Fish's leg and manages to get into half guard.
Fish trying to control from the bottom.
Fish looking to work for a kimura from the bottom.
Fish is doing well to control the position and prevent Johnson from advancing to side control.
Johnson wants to free his trapped foot but Fish is holding on for dear life with his legs.
Fish is defending against the submission attempts here by Johnson.

That's five minutes gone in the round.
Fish is looking to improve his position.
Fish looking to work for a kimura from the bottom.
Fish gets full guard.
Johnson slips effortlessly into side control - very nice. Score +3 for passing guard: Fish (8) vs (5) Johnson
Fish is not content to let Johnson control the position.
Fish is holding Johnson down, trying to stall.

That's six minutes gone in the round.
Fish is trying to get back to half guard. He's pushing on Johnson's leg. He's managed it. Nice work.
Fish tries to get to full guard but Johnson has control of the leg.
Johnson wants to take a breather but Fish is having none of it.
Fish is doing well to avoid being mounted. He's controlling the position at the moment.
Fish looking for submissions from an awkward position here.
Fish is not content to let Johnson control the position.

That's seven minutes gone in the round.
Fish moves into full guard.
Johnson trying to pass the guard but can't manage it just yet.
Fish looking for submissions from the bottom but instead Johnson passes into half guard.
Johnson is thinking about going for an arm triangle but he can't free his leg.
Johnson is taking a breather. Fish says something to him but it's hard to make out. Perhaps he's telling him to get on with it and actually do something.
Johnson seems to be looking for submissions.

That's eight minutes gone in the round.
Fish looking to work for a kimura from the bottom.
Fish trying to hold on to Johnson's head to control him but Johnson postures up.
The ref warns both fighters not to hold the cage as they work up against the meshing.
Johnson is looking for a kimura but he's never going to get it from there.
Johnson is looking to advance position but Fish won't allow it.
Fish keeping control of the leg, stopping his opponent passing to mount.

That's nine minutes gone in the round.
Fish trying to hold on to Johnson's head to control him but Johnson postures up.
Fish gets back to full guard.
Fish is trying to keep Johnson in close.
Johnson passes Fish's right leg, so he's now in half guard.
Fish is in a tricky position but he's been working on his transitions down at The Iron Palace, so we'll see if he gets out of it.
Fish wants to get back to full guard.
Johnson is sneakily working for an arm triangle but Fish sees it coming and defends easily.
Fish is working for an escape here. He's hooked one of Johnson's legs and he's managed to sneak out and take Johnson's back! Score +4 for clean sweep to past guard: Fish (12) vs (5) Johnson
The fighters are pressed up against the cage, both looking to find a bit of space to work.

That's ten minutes gone in the round.
I would not like to be Johnson right now.
Fish tightening his grip on Johnson, looking for the choke.
Will Fish go for the finish here or will he try and keep control of the position?
Fish trying to secure his dominant position for a moment - making sure Johnson doesn't escape.
The crowd hopeful of a finish here - Fish's supporters are on their feet, screaming for him to go for the rear naked choke.

That's eleven minutes gone in the round.
Fish working for a RNC but it's not happening just yet.
Fish looking for the choke but no joy.
Johnson preventing the rear naked choke attempt from Fish.
Johnson trying to control the position but Fish manages to sink in the hooks.
Johnson is having to fend off submission attempts from Fish, who is looking to sink in the choke. Fish doesn't have the hooks in though and Johnson manages to reverse position! He's now on top, in his opponent's guard. Score +2 for sweep to guard / half guard: Fish (12) vs (7) Johnson
Fish has a closed guard, preventing anything of note from happening. Perhaps he's looking to stall.

That's twelve minutes gone in the round.
Fish's ground tactics aren't going to win him many fans. Let's hope he's got fireworks for us if he gets back to his feet because he's not doing much on the ground.
Fish lands a beautiful sweep and he's now moved into his opponent's guard. Score +2 for sweep to guard / half guard: Fish (14) vs (7) Johnson
Fish seems content to control from guard here. He's going to have to remain active though if he doesn't want to get stood back up.
Johnson had isolated an arm as going for a kimura. Fish defends it easily.
Fish trying to control but Johnson is working from the bottom.

That's thirteen minutes gone in the round.
Johnson is avoiding any damage by keeping wrist control.
Fish controlling from the guard. I say controlling but really, he's stalling.
Fish trying to control but Johnson is working from the bottom.
Johnson controls Fish momentarily but Fish frees himself.
Fish trying to control but Johnson is working from the bottom.

That's fourteen minutes gone in the round.
Fish is trying to work a guillotine from the top, or something like that? Don't know how he thinks he's going to get a finish from there.
Fish wants to control from the top but Johnson keeps moving.
Fish preventing the sweep.
Fish is holding a leg here, probably looking for an ankle lock - he drops back and goes for it! Johnson is in trouble! Is it all over??? No! Johnson has escaped and now he's on top! Score +2 for sweep to guard / half guard: Fish (14) vs (9) Johnson
Fish is working an open guard here, looking to improve his position. No doubt that will leave him open to counters but at least he's being more offensive.
Boooooooooooooooooooo!!! God, this has been a terrible round. Come on you two, sort yourselves out!
Johnson passes Fish's right leg, so he's now in half guard.
And that's the end of the fight!
Fish takes the fight on points by 14 to 9.
A determined Jon Paul Fish didn't want to dwell on this fight in his post fight interview. Instead he was more keen to state he wants a title shot. Let's see if he gets it!
In defeat, Kevin Johnson stepped up to the mic, saying 'I want a rematch!'. |
|
|
|
Co-main event
|
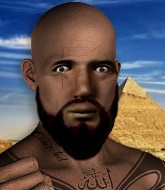
Coming up we have a lightweight Tycoon World Grappling Championship rules bout between Gary Tonon and Renato Cardoso. Cardoso is bobbing his head along to his entrance song: Samba de Janeiro. Buckle up people - heeeeeeeeeere we go!
This TWGC bout is 1 fifteen minute round in the lightweight division. Introducing today's competitors. In the red corner, competing out of Las Vegas, with a TWGC record of 0 wins and 1 losses; Gary Tonon! And in the blue corner, fighting out of Sydney, with a TWGC record of 1 wins and 4 losses; Renato Cardoso!
The judges for this bout are Ben Hemmingworth, Donatello Bradman and Bruno Hogan.
The fighters connect hands in the middle of the mat and we are under way.
Tonon drives through and clinches with Cardoso against the cage.
Cardoso has managed to pull guard. Let's see whether he can work an aggressive guard. It will also be interesting to see what tactics Tonon uses from the top position.
Cardoso trying to keep a closed guard but Tonon is proving a slippery customer.
Cardoso has a loose triangle. He'll be looking to tighten that up but Tonon can see exactly what he's planning and manages to posture up and free himself.
Cardoso is throwing his legs up, looking for submissions. Tonon is aware though and is defending well.
Tonon is trying to work a guillotine from the top, or something like that? Don't know how he thinks he's going to get a finish from there.
Tonon forces his way into half guard.
Tonon is working for a kimura but Cardoso is defending it quite comfortably.
Tonon is trying for a guillotine from the top but the pressure isn't in the right place so Cardoso is just riding it out for now. Tonon eventually gives up the hold.
We've had a slow start to the round here - hopefully the action picks up.
Tonon seems to be working for a kimura but Cardoso defends the submission attempt.
That's one minute gone in the round.
Cardoso trying to hold on to Tonon's head to control him but Tonon postures up.
The fighters are battling for position here. Cardoso manages to regain full guard. Nice work.
Tonon drops back looking for a leg! Cardoso is in trouble here! The fighters roll with the hold and Cardoso manages to kick Tonon off! Tonon jumps back into Cardoso's guard.
Tonon slips effortlessly into side control - very nice. Score +3 for passing guard: Tonon (3) vs (0) Cardoso
Cardoso manages to get back to half guard.
Tonon is trying to work for a kimura. This could be trouble! No, Cardoso has managed to free his arm - good work.
Cardoso moves into full guard.
The fighters are pressed up against the cage, both looking to find a bit of space to work.
Cardoso wants to sweep here but Tonon controlling him for the moment.
Cardoso pulls Tonon in close to prevent any damage.
Cardoso looking to sweep here. No luck so far.
That's two minutes gone in the round.
Tonon avoids a guillotine attempt easily.
Tonon stopping the sweep attempt from Cardoso.
Tonon advances to half guard.
Cardoso won't allow Tonon to pass to mount.
Cardoso wants to improve his position but Tonon is controlling well.
Cardoso is defending against the submission attempts here by Tonon.
Cardoso trying to control but Tonon postures up.
Tonon wants to work for an arm triangle but Cardoso is really keeping half guard well and defending the submission attempt.
Tonon works his way into side control. Score +3 for passing guard: Tonon (6) vs (0) Cardoso
Cardoso is looking for a sweep.
That's three minutes gone in the round.
Cardoso manages to work his way to half guard, despite Tonon's best efforts.
Tonon is looking for an arm triangle, whilst trying to pass to side control. Cardoso doesn't seem that keen to cooperate though. No luck this time Tonon.
Tonon trying to pass the guard but Cardoso defending well.
Cardoso tries to roll over but Tonon keeps him under control.
Tonon is looking for a kimura. It's going to be difficult to finish that from half guard though and Cardoso defends it well.
Cardoso looking for submissions from an awkward position here.
Tonon is looking for a kimura here.
That's four minutes gone in the round.
Tonon wants to pass to mount but Cardoso is defending the position.
Cardoso is looking for a sweep. Tonon is wise to his cunning plan and keeps the top position.
Tonon is trying a forearm choke
I don't think that's going to do much at this level of the game.
Tonon seems to be working for a kimura but Cardoso defends the submission attempt.
Cardoso is looking to improve his position.
Tonon is thinking about going for an arm triangle but he can't free his leg.
Cardoso actively working from the bottom here.
That's five minutes gone in the round.
Cardoso gets full guard.
Tonon advances to half guard.
Cardoso trying to control but Tonon postures up.
Cardoso looking to work for a kimura from the bottom.
Cardoso looking for submissions from an awkward position here.
Cardoso tries to roll over but Tonon keeps him under control.
Tonon is working for a kimura but Cardoso is defending it quite comfortably.
Cardoso tries to get to full guard but Tonon has control of the leg.
Cardoso is looking to sinch up a guillotine here but Tonon pulls his head out easily.
Cardoso is defending against the submission attempts here by Tonon.
That's six minutes gone in the round.
Cardoso manages to get to full guard.
Cardoso is working an open guard here, looking to improve his position. No doubt that will leave him open to counters but at least he's being more offensive.
Cardoso is looking for a guillotine. You can't force these things though and Tonon defends well.
Tonon trying to pass the guard but can't manage it just yet.
Cardoso is throwing his legs up, looking for submissions. Tonon is aware though and is defending well.
Cardoso has a loose triangle. He'll be looking to tighten that up but Tonon can see exactly what he's planning and manages to posture up and free himself.
The ref warns both fighters not to hold the cage as they work up against the meshing.
Cardoso looking for a guillotine here but Tonon defends easily.
Cardoso looks winded!
That's seven minutes gone in the round.
Tonon sneaks a leg through and gets to half guard. That was like a knife through butter how easily he passed Cardoso's guard.
Cardoso trying to control here.
Tonon is thinking about going for an arm triangle but he can't free his leg.
Tonon is looking for a kimura. It's going to be difficult to finish that from half guard though and Cardoso defends it well.
The fighters are battling for position here. Cardoso manages to regain full guard. Nice work.
Tonon is pushing down on Cardoso's leg trying to pass to half guard. Cardoso is fighting to maintain full guard but Tonon has managed to sneak the leg through.
Tonon is working hard to pass the guard. He's done it - he's now in full mount! Trouble for Cardoso! Score +3 for passing guard: Tonon (9) vs (0) Cardoso
Tonon working for a guillotine from mount but Cardoso is in no mood to give up.
Cardoso keeping his composure momentarily, calmly looking to get back to half guard.
That's eight minutes gone in the round.
Cardoso regains half guard.
Cardoso wants to get back to full guard.
Cardoso looking for submissions from an awkward position here.
Tonon is working for a submission here. He's got hold of the far side arm and he's looking for a kimura. He's cranking on the arm and he's got it! Cardoso is tapping out! Ouch, that looked like it hurt!
Ladies and gentlemen, after 8:42 of round 1, we have a winner by way of Submission (Kimura). Gary Tonon!
An out of breath Gary Tonon thanked his loyal fans in his post fight interview, giving them credit for his success over the course of his career. |
|
|
|
Main event
|
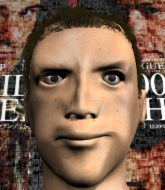
Coming up we have a lightweight Tycoon World Grappling Championship rules bout between Kazuka Fuujin and Noob Saibot. Fuujin's ring entrance music is that housewives' favourite, GAMBLER. The atmosphere really building for this one as we go over to our ring announcer for the fighter introductions!
This TWGC bout is 1 fifteen minute round in the lightweight division. Introducing today's competitors. In the red corner, competing out of Los Angeles, with a TWGC record of 10 wins and 4 losses; Kazuka Fuujin! And in the blue corner, fighting out of Las Vegas, with a TWGC record of 0 wins and 0 losses; Noob Saibot!
The judges for this bout are John Mangel, Skip Squint and Damien Edna.
Let's get this grappling contest under way! Who will be victorious?

Saibot gets a clinch.
Saibot prevents a takedown attempt there.
Fuujin is looking for a takedown.
Fuujin gets double underhooks and manages to take the fight to the ground. Score +2 for takedown into guard / half guard: Fuujin (2) vs (0) Saibot
Fuujin wants to pass the guard but Saibot is keeping the position.
Saibot lands a beautiful sweep and he's now moved into his opponent's guard. Score +2 for sweep to guard / half guard: Fuujin (2) vs (2) Saibot
Fuujin looking to sweep here. No luck so far.
The fighters are pressed up against the cage, both looking to find a bit of space to work.
Saibot is pushing down on Fuujin's leg trying to pass to half guard. Fuujin is fighting to maintain full guard but Saibot has managed to sneak the leg through.
Saibot looking to pass the half guard. Not this time.
Saibot seems very keen to just sit and control from half guard but Fuujin does not like that idea so much and is remaining active off his back.
We've had a slow start to the round here - hopefully the action picks up.
Saibot is thinking about going for an arm triangle but he can't free his leg.
Saibot is thinking about going for an arm triangle but he can't free his leg.
That's one minute gone in the round.
Fuujin is trying to get back to full guard.
Fuujin trying to control here.
Fuujin looking to work for a kimura from the bottom.
Saibot working to pass to mount. He's got his hand pressing down on Fuujin's thigh. Fuujin counters though and makes it back to full guard.
Fuujin escapes his hips to the side and looks to be working for an armbar. Saibot gives him a little smile and shakes his head. No chance.
That's two minutes gone in the round.
Saibot pushes down on Fuujin's leg and manages to get into half guard.
Saibot seems very keen to just sit and control from half guard but Fuujin does not like that idea so much and is remaining active off his back.
Saibot is in a good position here but he's just trying to control... And he's not even managing to do that successfully.
Fuujin is looking to regain full guard. Not this time though.
Saibot passes the guard and advances to mount! Score +3 for passing guard: Fuujin (2) vs (5) Saibot
Saibot is going oldschool here, as he tries to force Fuujin to tap using a forearm choke. This isn't 1993 though, so Fuujin shrugs it off.
That's three minutes gone in the round.
Saibot swings around for an armbar but it's a sloppy attempt and Fuujin is now in Saibot's guard. A big mistake from Saibot there, giving up the dominant position! Score +2 for sweep to guard / half guard: Fuujin (4) vs (5) Saibot
Fuujin stopping the sweep attempt from Saibot.
Saibot looks to be working for a triangle here. Oh, it looks like he might have it! Fuujin has picked Saibot up and slammed him! Saibot can't keep hold of the triangle and Fuujin manages to pass to side control! Score +3 for passing guard: Fuujin (7) vs (5) Saibot
Saibot seems a little lost for a moment, as Fuujin dominates the positioning.
Saibot gets one leg under and gets the fight to half guard.
Saibot makes his way to full guard. A much better position for Saibot.
Saibot wants to hit a switch here but Fuujin passes into full mount! Oh no, disaster for Saibot there! Score +3 for passing guard: Fuujin (10) vs (5) Saibot
Fuujin tries to control but Saibot wriggling away.
That's four minutes gone in the round.
Fuujin controlling from mount.
Fuujin wants to control the pace but Saibot is squirming around nicely.
Saibot is in all sorts of trouble here.
Saibot sneaks a leg under to get to half guard.
Saibot is refusing to be controlled, as Fuujin sits in half guard.
Saibot moves his hips nicely and gets into full guard.
That's five minutes gone in the round.
Fuujin pushing down on Saibot's thigh, trying to pass to half guard. He's managed it... Nice work.
Saibot manages to get to full guard.
Fuujin wants to pass the guard but Saibot is keeping the position.
Saibot working for a triangle but Fuujin defends it easily.
Saibot wants to sweep but no luck.
Fuujin is pushing down on Saibot's leg trying to pass to half guard. Saibot is fighting to maintain full guard but Fuujin has managed to sneak the leg through.
Saibot is looking for a sweep. Fuujin is wise to his cunning plan and keeps the top position.
That's six minutes gone in the round.
The fighters are battling for position here. Saibot manages to regain full guard. Nice work.
Fuujin stays in close to Saibot's body and controls the position.
Fuujin tries to free his leg and advance position but Saibot is retaining full guard.
Saibot manages to sweep nicely, so he's now on top. Fuujin manages to get himself to full guard.
Score +2 for sweep to guard / half guard: Fuujin (10) vs (7) Saibot
Saibot trying to control the position from guard on top but Fuujin is wriggling around, looking for whatever he can.
Saibot advances to half guard.
Fuujin regains full guard. Nicely done.
Fuujin looking for a guillotine here but Saibot defends easily.
Fuujin wants to sweep but no luck.
That's seven minutes gone in the round.
Saibot trying to control the position from guard on top but Fuujin is wriggling around, looking for whatever he can.
Saibot wants to pass the guard but Fuujin is keeping the position.
Fuujin looking to hit a scissor sweep but Saibot is one step ahead there.
Fuujin managing to control the position.
Saibot trying to control the position from guard on top but Fuujin is wriggling around, looking for whatever he can.
Fuujin seems to have improved his submission grappling technique since last time we saw him. Let's see if he can pull off a submission.
The ref warns both fighters not to hold the cage as they work up against the meshing.
That's eight minutes gone in the round.
Saibot pushes down on Fuujin's leg and manages to get into half guard.
Fuujin is looking to regain full guard. Not this time though.
Fuujin trying to hold on to Saibot's head to control him but Saibot postures up.
Saibot is trying to work for a kimura but Fuujin is defending well.
Saibot trying to mount his opponent but Fuujin defends it.
That's nine minutes gone in the round.
Fuujin trying to control but Saibot postures up.
Saibot is figuring out what he wants to do next.
Saibot moves into full mount! Fuujin won't be happy about that! Score +3 for passing guard: Fuujin (10) vs (10) Saibot
Saibot goes for an armbar but he's not got it
Fuujin turns into him and now he's in Saibot's guard.
Score +2 for sweep to guard / half guard: Fuujin (12) vs (10) Saibot
Fuujin stands up and looks to throw the legs aside to pass to side control. Saibot swivels though and keeps the full guard.
That's ten minutes gone in the round.
Fuujin stopping the sweep attempt from Saibot.
Saibot wants to hit a switch here but Fuujin passes into full mount! Oh no, disaster for Saibot there! Score +3 for passing guard: Fuujin (15) vs (10) Saibot
Fuujin can't quite control the action as he would like just now, as Saibot is looking to escape.
Fuujin goes for an armbar but he's not got it
Saibot turns into him and now he's in Fuujin's guard.
Score +2 for sweep to guard / half guard: Fuujin (15) vs (12) Saibot
Saibot sneaks a leg through and gets to half guard. That was like a knife through butter how easily he passed Fuujin's guard.
That's eleven minutes gone in the round.
Saibot trying to pass the guard but Fuujin defending well.
Saibot moves into full mount! Fuujin won't be happy about that! Score +3 for passing guard: Fuujin (15) vs (15) Saibot
Saibot jumps to the side looking to secure the arm triangle
. Ooooh, that looks tight
Fuujin is gargling but he's managed to escape! Nice work there by Fuujin and Saibot has given up the dominant position trying to land that submission.
Saibot tries to advance to mount but Fuujin denies him.
Saibot works to advance to full mount. Fuujin defends for a few seconds but eventually he succumbs. Score +2 for reaching mount: Fuujin (15) vs (17) Saibot
Saibot trying to control but he's not successful this time.
That's twelve minutes gone in the round.
Saibot moves into side control, trying to work for a kimura. That looks painful! Will he finish!!?? No, Fuujin has worked his arm free - good work by Fuujin!
Fuujin sneaks a leg under to get back to half guard.
Saibot trying to pass the guard but Fuujin defending well.
Fuujin manages to get to full guard.
Saibot stands up and looks to throw the legs aside to pass to side control. Fuujin swivels though and keeps the full guard.
Fuujin has an omoplata and is looking to use it perhaps as a submission or perhaps to transition. Saibot is in a bit of discomfort here, but he's managed to free himself and has dived into side control! That didn't work out too well for Fuujin. Score +3 for passing guard: Fuujin (15) vs (20) Saibot
That's thirteen minutes gone in the round.
Saibot is looking to finish here, going for an Americana. Fuujin knows the correct defense though, so he's OK.
Saibot is looking to finish here, going for an Americana. Fuujin knows the correct defense though, so he's OK.
Fuujin prevents Saibot from improving position.
Saibot wants to lay and pray for a moment but Fuujin keeps working.
That's fourteen minutes gone in the round.
Fuujin is sneaking out the side here. He's bucked Saibot off and has taken his back! Score +4 for clean sweep to past guard: Fuujin (19) vs (20) Saibot
Fuujin has the hooks in. Saibot is starting to panic. He's trying to push off one of the legs but he's left his neck open to attack. Fuujin passes his arm under Saibot's neck and tightens up a rear naked choke! This one is surely all over! Yes, Saibot taps!
Ladies and gentlemen, after 14:36 of round 1, we have a winner by way of Submission (RNC). Kazuka Fuujin!
Kazuka Fuujin decided to thank the fans in attendance for making a great atmosphere. It seemed to go down pretty well. |
|
|
|
|
|
|