 |
QFC Tournament 598 Round 2 PBP Commentary |
Undercard bout
|
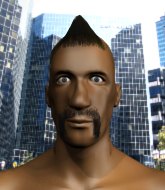
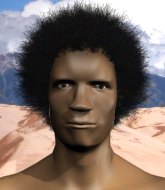
Coming up we have a welterweight MMA rules bout between Lucciano Brazzi (ranked 0 p4p, 0 weight class) and Ben Domingo (ranked 0 p4p, 0 weight class). The key to victory for Lucciano Brazzi has got to be keeping the fight on the feet.
 |
|
 |
| 175 cm
18
165 lbs
1 - 0 - 0 |
|
175 cm
23
177 lbs
1 - 0 - 0 |
BJJ Blue Belt
Brawler
Good chin |
|
Powerful takedowns
Basic striking
Powerful |
|
| |
|
Ladies and gentlemen. This fight is 3 rounds, in the welterweight division.
Introducing the fighter to my left, fighting out of the red corner.
With a record of
1 - 0 - 0, fighting out of Las Vegas, Lucciano Brazzi!
And introducing the fighter to my right, fighting out of the blue corner.
With a record of
1 - 0 - 0, fighting out of Las Vegas, Ben Domingo!
The judges for this bout are Gwen Towbar, Robert Twigg and George Francis.

The bell rings for round one and we are underway!
Brazzi lunges in with an uppercut that skims his opponent's chin.
No luck with that takedown attempt from Domingo.

Brazzi closes the distance and clinches.
Domingo drops down looking for an ankle pick but Brazzi pulls his leg out and moves away.
Brazzi moves into range and clinches up with Domingo.
Brazzi gets underhooks to prevent Domingo's takedown attempt.
Lucciano Brazzi has stuffed three takedown attempts in the round now. That's going to take a lot out of Ben Domingo.
Domingo prevents Brazzi from breaking the clinch.
Brazzi is looking to break free of the clinch but Domingo has double underhooks.
Domingo prevents Brazzi from breaking the clinch.
Domingo drops down looking for an ankle pick but Brazzi pulls his leg out and moves away.
The fight moves into the clinch position.
We've had a slow start to the round here - hopefully the action picks up.
Domingo goes for a takedown in the clinch but Brazzi prevents it.
Domingo drops to a knee looking for a takedown but Brazzi gets the underhooks and prevents it.
Brazzi wants to break free. God knows he wants to breaaaak freeee.

That's one minute gone in the round.

Brazzi escapes the clinch and we're back to striking.
Brazzi stuffs the takedown attempt from Domingo. Domingo gets slowly back to his feet.
Brazzi tries to clinch but is not successful on this occasion.
Domingo misses with a takedown attempt. He shot from a bit too far out.
Brazzi is looking to counter punch.
Brazzi closes the distance and pushes Domingo back into the cage.
Domingo is looking to take this one to the mat.
Domingo wants a takedown.
Domingo looks winded!
Domingo tries to score a body lock takedown but Brazzi shows good agility there to stay on his feet.
Brazzi is trying to force a seperation but Domingo has the dominant position.
Domingo is looking for a takedown.
Domingo tries for a takedown but Brazzi manages to get underhooks.
Domingo keeps control of Brazzi as he tries to wriggle out of the double underhooks.
Brazzi manages to break the clinch.
Domingo tries to keep at a distance but Brazzi has taken the fight into the clinch.

That's two minutes gone in the round.
Brazzi pushes off and circles away, back to the middle of the mat.
Brazzi throws a one two combo.
Domingo gets tackled into the cage by Brazzi. Brazzi maintains the clinch.
Domingo is working for a takedown up against the cage. He can't get it on this occasion though.
Brazzi pushes off and circles away, back to the middle of the mat.
This has been an exciting period of action!
Brazzi pushes Domingo up against the cage in a clinch.
Brazzi pushes off and circles away, back to the middle of the mat.
Domingo gets tackled into the cage by Brazzi. Brazzi maintains the clinch.
Brazzi lands a right hand.
Brazzi pushes Domingo back against the cage and lands a hook to the side of the head.
Brazzi wants to break free. God knows he wants to breaaaak freeee.
Brazzi wants to break free. God knows he wants to breaaaak freeee.
Brazzi lands a left hand that snaps the head of Domingo backwards.
Domingo wants a takedown.
Brazzi's corner calls for him to break the clinch, which he does.
Brazzi clinches up against the cage.
Domingo has Brazzi pressed up against the cage and is working for takedown. Brazzi manages to improve position though and keeps the fight standing.

That's three minutes gone in the round.
Brazzi breaks the clinch and we return to the middle of the mat.
Brazzi fakes with an overhand right and moves in to clinch with Domingo, pushing him back against the cage.
Brazzi has had enough of the clinch and is looking to separate.
A short uppercut from Brazzi.
Domingo has Brazzi pressed up against the cage and is working for takedown. Brazzi manages to improve position though and keeps the fight standing.
Brazzi is trying to break free.
Brazzi's corner calls for him to break the clinch, which he does.
Brazzi pushes Domingo up against the cage in a clinch.
Brazzi breaks the clinch.
Domingo is trying hard to land a takedown here. Brazzi sprawls well and keeps this one on the feet.
Brazzi moves into range and clinches up with Domingo.
Brazzi is trying to push Domingo away but Domingo has him pressed against the cage, so he's going nowhere.
Brazzi is trying to break the clinch but Domingo is controlling him.
Brazzi breaks the clinch.
Domingo takes a hook to the side of the head. I wonder if that's got his ears ringing.
Brazzi tries to clinch there but Domingo circles away.
Brazzi scores with a nice strike.

That's four minutes gone in the round.
Brazzi tries to clinch there but Domingo circles away.
Lucciano Brazzi seems to be the more aggressive standup fighter in this bout.
The fight stays on the outside here - Brazzi looks like he's thinking about clinching though.
A lazy left from Brazzi finds it's target.
Wooooo! Give it up for these two warriors! They are putting on a show!
Brazzi fakes low and throws an overhand right that catches Domingo on the side of the head.
Brazzi throws a right and a left that Domingo avoids nicely.
Domingo is trying hard to land a takedown here. Brazzi sprawls well and keeps this one on the feet.
Brazzi moves into the clinch successfully.
Domingo prevents Brazzi from breaking the clinch.
Brazzi working hard to break the clinch.
Brazzi throws a blind hook that connects with the side of Domingos head.
Brazzi gets underhooks to prevent Domingo's takedown attempt.
Brazzi tries to break the clinch but Domingo is controlling the position.
Brazzi is trying to work out of this bad position, with his back against the cage.
Domingo changes levels and goes for a takedown here. Brazzi fights it off and pushes away nicely.
Brazzi closes the distance and presses his opponent up against the cage.
And that�s the end of the round � the fighters go back to their corners.
Lucciano Brazzi dominated that round.
Well, the break between rounds is over. Let's get back to the scrappin!

Brazzi pushes Domingo up against the cage in a clinch.
Brazzi wants to break the clinch but can't.
Brazzi has had enough of the clinch but Domingo keeps him there for the moment.
Brazzi tries to circle away but Domingo has him pinned against the cage.
Brazzi wants to strike at distance but he can't break free of the clinch.
The fighters are starting to get sweaty, which will make takedowns a bit more tricky.
Brazzi wants to strike at distance but he can't break free of the clinch.
Domingo is trying to drag Brazzi to the mat but Brazzi just about manages to keep his footing. He used the cage to his advantage there.
Domingo has a body lock and is looking for a takedown. Brazzi is bouncing around trying to prevent the takedown and somehow he has indeed managed to stay on his feet.
Lucciano Brazzi has scored more points in the clinch so far.
Brazzi looks like he'd prefer to be striking at range right now.
We've had a slow start to the round here - hopefully the action picks up.
A quick uppercut on the inside from Brazzi.
Domingo can't get the takedown.
Lucciano Brazzi has stuffed three takedown attempts in the round now. That's going to take a lot out of Ben Domingo.
Domingo wants a takedown.
Brazzi can't break the clinch.
Domingo is breathing heavily.
Domingo drops down for a takedown but doesn't get it.
Brazzi wants to break the clinch but can't.
That's one minute gone in the round.
Domingo is working on a leg, looking for a takedown but Brazzi is defending well.
Domingo has dropped down and is looking to force the takedown but it's defended by Brazzi after a bit of a struggle.
Brazzi lands a nice uppercut.
Brazzi tries to break free but Domingo pushes him back against the cage.
Brazzi breaks the clinch and we return to the middle of the mat.
Domingo tries to keep at a distance but Brazzi has taken the fight into the clinch.
Brazzi manages to break the clinch.
Brazzi connects with the punch.
Brazzi lands a jab-cross combination.
Brazzi moves into range and clinches up with Domingo.
Brazzi wants to break free. God knows he wants to breaaaak freeee.
Domingo wants to take the fight to the mat but Brazzi manages to get underhooks and keep the fight in the clinch.
Brazzi lands a short shot on the inside that snaps the head of Domingo backwards.
That's two minutes gone in the round.
Brazzi is trying to break the clinch but Domingo is controlling him.
A quick uppercut on the inside from Brazzi.
The crowd cheering loudly, showing their appreciation for the quality fight we're seeing here.
Brazzi breaks the clinch and we're back to striking at distance.
Brazzi clinches up with Domingo and pushes him back against the cage.
Brazzi tries to break the clinch but Domingo is controlling the position.
Brazzi's corner calls for him to break the clinch, which he does.
Brazzi is looking to clinch but Domingo is avoiding it.
Brazzi rushes Domingo and presses him up against the cage.
Brazzi is defending well against a takedown attempt.
Brazzi tries to break the clinch but Domingo is controlling the position.
Brazzi is trying to break free.
Brazzi has had enough of the clinch and is looking to separate.
Domingo is looking for a takedown up against the cage. Brazzi gets underhooks though and prevents the takedown attempt.
Brazzi has had enough of the clinch and is looking to separate.
Brazzi manages to break the clinch.
Brazzi tries to clinch but Domingo moves out of range.
That's three minutes gone in the round.
Brazzi scores with a sloppy right hand. Domingo should have avoided that one.
The fight moves into the clinch position.
Brazzi wants to break the clinch but can't.
Brazzi working hard to break the clinch.
Brazzi is trying to push Domingo away but Domingo has him pressed against the cage, so he's going nowhere.
Domingo is working on a leg, looking for a takedown but Brazzi is defending well.
A short right from Brazzi.
Domingo can't get the takedown.
Brazzi is trying to break the clinch but Domingo has him pressed against the cage.
Domingo has Brazzi pressed against the cage, preventing Brazzi from circling away and getting back to striking at range.
Brazzi wants to break free. God knows he wants to breaaaak freeee.
Brazzi working on landing some head shots here - that one got through nicely.
Brazzi wants to break free. God knows he wants to breaaaak freeee.
Domingo wants a takedown.
That's four minutes gone in the round.
Brazzi pushes off and circles away, back to the middle of the mat.
Brazzi forces Domingo back against the cage and clinches.
Domingo keeps the fight in the clinch, despite Brazzi's efforts to push away.
Brazzi tries to circle away but Domingo has him pinned against the cage.
Brazzi is trying to break free.
Brazzi's corner calls for him to break the clinch, which he does.
Wow, both these guys are really going for it!
A telegraphed takedown attempt from Domingo is defended easily by Brazzi.
Brazzi takes the fight into the clinch.
Brazzi working hard to break the clinch.
Brazzi breaks the clinch and we return to the middle of the mat.
Domingo fails with the takedown.
And that�s the end of the round � the fighters go back to their corners.
Lucciano Brazzi dominated that second round.
The fighters' corners scream their final instructions, as the referee calls time. Here we go, back to the action! This is the final round!

Domingo takes a jab right on the kisser.
Domingo dives in for a single leg takedown but Brazzi sprawls and the fighters end up clinched against the cage.
Domingo dodges the punch combination from Brazzi.
Domingo is definitely looking for the counter takedowns here.
Domingo shoots in for a takedown but Brazzi shows good takedown defense.
Brazzi is looking to clinch but Domingo is avoiding it.
Domingo fails with a rather predictable takedown attempt.
Lucciano Brazzi has stuffed three takedown attempts in the round now. That's going to take a lot out of Ben Domingo.
Brazzi has closed the distance and engaged Domingo in a clinch.
Brazzi breaks the clinch and we're back to striking at distance.

Domingo scores a trip takedown into side control. Nice.
Brazzi is trying to buck Domingo off.
Domingo takes a big intake of breath there - he's definitely tired.

Domingo decides to stand back up. Domingo steps back and let's Brazzi get back to his feet.
That's one minute gone in the round.
Brazzi getting the better of the striking in that exchange.
Brazzi moves into the clinch.
Domingo goes for a takedown in the clinch but Brazzi prevents it.
A frustrated look appears on Brazzi's face as he tries to break the clinch.
Brazzi breaks the clinch.
Domingo fails with a takedown attempt.
Brazzi closes the distance and lands a one-two.
Brazzi fails with an attempt to clinch.
Brazzi tries to clinch there but Domingo circles away.
Brazzi tries to clinch up against the cage, rushing in to close the distance. Domingo manages to break the clinch and circles back to the middle of the mat.
Brazzi drives through and clinches with Domingo against the cage.
Domingo is working for takedown but Brazzi is calmly controlling the position for now.
That's two minutes gone in the round.
Brazzi is trying to work out of this bad position, with his back against the cage.
Brazzi is looking to break free of the clinch but Domingo has double underhooks.
Brazzi wants to break free but Domingo has control.
Brazzi is defending well against a takedown attempt.
Brazzi lands with a short shot to the head.
Brazzi working on landing some head shots here - that one got through nicely.
Brazzi gets through Domingo's defenses to land a nice punch to the side of the head.
This is a great period of action - very entertaining stuff!
Brazzi pushes off and circles away, back to the middle of the mat.
Brazzi has taken the fight to the clinch.
Brazzi gets underhooks to prevent Domingo's takedown attempt.
Brazzi breaks the clinch and we're back to striking at distance.
Brazzi throws a combination. Domingo tries to block but a couple of punches get through.
Brazzi clinches up with Domingo and pushes him back against the cage.
A frustrated look appears on Brazzi's face as he tries to break the clinch.
Brazzi is defending well against a takedown attempt.
That's three minutes gone in the round.
Brazzi lands a left hand.
Brazzi tries to land knees in the clinch but Domingo avoids the damage to the body.
Domingo keeps the fight in the clinch, despite Brazzi's efforts to push away.
Brazzi lands a nice shot to the body.
Domingo is working on a leg, looking for a takedown but Brazzi is defending well.
Brazzi wants to break free. God knows he wants to breaaaak freeee.
Domingo is working for a takedown up against the cage. He can't get it on this occasion though.
Brazzi is looking to score with knees to the body. Maybe he'll change it up and go body then head. Domingo is defending well for now.
Brazzi is trying to push Domingo away but Domingo has him pressed against the cage, so he's going nowhere.
Brazzi manages to break the clinch.
Brazzi moves in looking to clinch but Domingo pushes him off.
Domingo shoots in for a takedown - he's clinched up with Brazzi but Brazzi pushes him off and we're back to square one.
Brazzi moves in looking to clinch but Domingo pushes him off.
Ben Domingo has stepped it up - he knows he needs a finish here!
That's four minutes gone in the round.
The fight moves into the clinch position.
A frustrated look appears on Brazzi's face as he tries to break the clinch.
Brazzi breaks from the clinch.
Brazzi tries to clinch up.
Lucciano Brazzi is looking to throw some combinations by the looks of things.
Brazzi moves in looking to clinch but Domingo pushes him off.
Brazzi moves in looking to clinch but Domingo pushes him off.
Brazzi keeping a good distance there, avoiding the body shot.
Brazzi's corner calls for a 1, 2 combination and Brazzi duly obliges.
Domingo avoids the clinch attempt nicely.
Brazzi doesn't manage to clinch there - Domingo circles away.
Brazzi lunges in with an uppercut that skims his opponent's chin.
Lucciano Brazzi is looking to keep the fight on the feet at all costs.
The crowd cheering loudly, showing their appreciation for the quality fight we're seeing here.
Domingo looking to throw a kick but he's pulled out of it.
Brazzi lands a jab-cross combination.
Brazzi moves into range and clinches up with Domingo.
Brazzi is really dominating this fight. Is there anything that Domingo can do to turn this around?
Domingo tries to land knees in the clinch but Brazzi avoids the damage to the body.
Lucciano Brazzi is fighting for a decision here - he's started to take the cautious approach.
Brazzi has had enough of the clinch but Domingo keeps him there for the moment.
And that's the end of the fight!
Lucciano Brazzi showed his dominance in that final round.
Well I reckon that's a shut out for Brazzi, winning every round. Will the judges agree? They are the ones who matter, even if they are often depressingly incompetent. Over to the ring announcer for the scorecards.
Ladies and gentlemen, after 3 rounds of action, we go to the scorecards for a decision.
Judge Gwen Towbar scores the fight for Lucciano Brazzi!
Judge Robert Twigg scores the fight for Lucciano Brazzi!
Judge George Francis scores the fight for Lucciano Brazzi!
Lucciano Brazzi wins by unanimous decision!
|
|
|
|
|
|
|
|
|
|
|
|
|
|
|
|
|
|
|
|
|
|
|
| S |
C
A |
G |
S |
C
B |
G |
|
S |
C |
G |
|
energy
A | B |
|
hype
A | B |
|
pop
A | B |
|
mgr
A | B |
|
FIGHT
RATING
56% |
|
|
|
|
|
|
|
Undercard bout
|
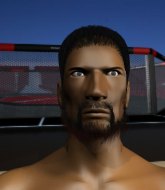
Coming up we have a welterweight MMA rules bout between Christoffer Widda (ranked 0 p4p, 0 weight class) and AL Bundy (ranked 0 p4p, 0 weight class). The fight MMA fans around the world have waited their entire lives for!
 |
|
 |
| 175 cm
22
170 lbs
1 - 0 - 0 |
|
173 cm
18
170 lbs
1 - 0 - 0 |
BJJ Blue Belt
Solid boxing
KO power |
|
BJJ Blue Belt
Brawler
Determined |
|
| |
|
Ladies and gentlemen. This fight is 3 rounds, in the welterweight division.
Introducing the fighter to my left, fighting out of the red corner.
With a record of
1 - 0 - 0, fighting out of Las Vegas, Christoffer Widda!
And introducing the fighter to my right, fighting out of the blue corner.
With a record of
1 - 0 - 0, fighting out of Las Vegas, AL Bundy!
The judges for this bout are Tiny Johnson, Alan Glass and Robert Twigg.
The bell rings for round one and we are underway!
Bundy keeping a good distance there, avoiding the body shot.
Widda takes a solid shot to the body. That one hurt him but he's trying not to show it.
Bundy checks a low kick from Widda.
Widda keeps the fight standing with a nice sprawl.
Widda shoots in for a takedown. "Ole!" shouts Bundy as he jumps to the side.
Widda dips down and scores with a jab to the body.
Widda goes to the watering hole and comes back with a big thumbs up from the judges as he scores a three punch combo.
We've had a slow start to the round here - hopefully the action picks up.
Bundy dives in and grabs Widda's left leg, looking for a takedown. Widda pushes down on Bundy's head and hops out.
Widda is looking to counter the offense by Bundy and move into the clinch.
Widda has a takedown stuffed.
The fight moves into the clinch position.
That's one minute gone in the round.
Bundy changes levels and goes for a takedown here. Widda fights it off and pushes away nicely.
Christoffer Widda has stuffed three takedown attempts in the round now. That's going to take a lot out of AL Bundy.
Widda stuffs the takedown attempt from Bundy. Bundy gets slowly back to his feet.
A slapping body kick lands there for Bundy.
Widda moves into the clinch.
Bundy manages to pull guard.
Widda stays in close to Bundy's body and controls the position.
Widda throwing elbows and punches but not connecting, as Bundy works some decent striking defense from the bottom.

Bundy looking for subs off his back but Widda has passed one foot through into half guard.
That's two minutes gone in the round.

Widda stands up and beckons Bundy to join him on the feet.
Bundy closes this distance looking for a takedown but Widda circles away.
Bundy keeps the fight standing with a nice sprawl.
Bundy steps in looking to counter with the mid kick but it doesn't connect.
Bundy displays good takedown defense there as he swats away a double leg from Widda.
Bundy misses with a jab and misses with a cross straight after too.
Bundy misses with a takedown
and Widda counters nicely by changing levels and landing a hook to the body.
Bundy looks winded!
That's three minutes gone in the round.
Widda lands with an uppercut that bounces Bundy off the cage and back into range.
Bundy tries to keep at a distance but Widda has taken the fight into the clinch.
Bundy tries to take the fight to the ground by pulling guard but can't manage it.
Widda gets underhooks to prevent Bundy's takedown attempt.
Bundy goes for a takedown attempt but Widda pushes him away and we're back to fighting at a distance.
Widda has taken the fight to the clinch.
Bundy tries to pull guard but Widda holds him up against the cage and eventually Bundy drops back down to his feet.

Widda jumps into guard, dragging Bundy to the mat.
That's four minutes gone in the round.
Widda has control of Bundy's left arm, preventing Bundy from doing any damage.
Widda's ground tactics aren't going to win him many fans. Let's hope he's got fireworks for us if he gets back to his feet because he's not doing much on the ground.

Widda is looking for a guillotine. You can't force these things though and Bundy defends well.
Widda is pulling down on Bundy's head to control his posture.
The crowd thankful this round is nearly over.
And that�s the end of the round � the fighters go back to their corners.
Christoffer Widda dominated that round.
That's the end of the interval. I'm sure that seemed a lot quicker than a minute for our two fighters! Back to the action.
Widda rushes Bundy and pushes him back against the cage in a clinch.
Bundy is trying to pull guard but being pressed up against the cage enables Widda to keep the fight standing.
Bundy trying to land knees to the body.
Widda tries to pull guard but can't drag his opponent to the mat. Bundy just stands there and leans against the cage.

Bundy breaks the clinch.

Widda drops Bundy with a beautiful combination! Bundy stares up at his opponent, who ushers him back to his feet - Widda is looking for the KO!

Bundy is rocked!
Widda bobbing and weaving, closes the distance and lands a hook to the side of Bundy's head.
Bundy is still on wobbly legs! Can Widda finish him?
Bundy leaves Widda with his face pressed against the mat as he sprawls beautifully, defending against a solid takedown attempt.
Fantastic stuff here - a very entertaining period of action, which has drawn cheers from the crowd.
Widda fakes high and shoots in for a takedown but Bundy avoids it really well and circles away.
Widda moves out of the way of the counter high kick fromBundy.
Bundy seems to have recovered his senses.
That's three failed takedown attempts in the round for Christoffer Widda. That's going to take a lot out of him.
That's one minute gone in the round.
Nice shot lands for Widda.
Widda shoots in for a takedown. He's persisting with it as Bundy sprawls well. Bundy wins this battle and keeps the fight standing. Widda gets slowly back to his feet.

Bundy moves into the clinch successfully.
Bundy goes for a takedown attempt but Widda pushes him away and we're back to fighting at a distance.
Bundy is looking to take this fight into the clinch.
That's two minutes gone in the round.
Bundy forces Widda back against the cage and clinches.
Widda pulls guard successfully.
Bundy wants to control from the top but Widda keeps moving.
Bundy throws a big right hand that misses.
Widda lands a beautiful sweep and he's now moved into his opponent's guard.

Widda stands up and waves to Bundy to follow him.
Widda is really dominating this fight. Is there anything that Bundy can do to turn this around?
Widda moves into range and throws a combination. A nice jab followed by a hook to the body.
That's three minutes gone in the round.
The fight stays on the outside here - Bundy looks like he's thinking about clinching though.
Widda shoots in looking for a takedown. Bundy tries to sprawl out of it but Widda keeps driving through. The fighters are pinned against the cage. Bundy manages to get underhooks and after a bit of a struggle, circles away and we're back to standing.
Bundy has his takedown stuffed
and Widda cracks him with a counter punch right on the button.
Bundy shoots in with a takedown attempt and he has Widda pinned against the cage. Widda gets the underhooks and manages to circle away.
Bundy takes a step back and watches a body kick go sailing past his mid section.
Christoffer Widda is winning the standup battle so far.
That's four minutes gone in the round.
Widda tries for a takedown but Bundy circles away easily
and Bundy counters with a nice kick to the body.
Widda shoots in for a takedown but doesn't get it.
Bundy lets it all go there with a big combo counter but none of the punches connected.
Widda stuffs the takedown.
Bundy is breathing heavily.
Widda shoots in looking for a takedown but Bundy manages to keep the fight standing, pushing Widda's face into the canvas for good measure before circling away.
Widda shoots in for a double leg but Bundy sprawls well. That's going to sap some energy.
Widda changes levels and looks for a double leg takedown. Bundy tries to avoid it but Widda manages to keep hold of a leg and drag Bundy to the ground. Bundy escapes though and pops straight back up to his feet.
Bundy takes the fight into the clinch.
Bundy manages to break the clinch.
Bundy shoots in for a takedown but Widda shows good takedown defense there and keeps this one on the feet.
A head kick misses from Widda.
And that�s the end of the round � the fighters go back to their corners.
Christoffer Widda dominated that second round.
OK. That's time! The bell goes and we're back to the action. Let's get this one finished - here comes the final round!
Widda dives in and grabs Bundy's left leg, looking for a takedown. Bundy pushes down on Widda's head and hops out.
Widda shoots for a takedown but Bundy saw that one coming a mile off and avoided it easily.
Bundy wants to clinch
and Bundy takes a counter punch right on the button for his troubles.
Bundy stuffs the takedown attempt from Widda. Widda gets slowly back to his feet.
That's three failed takedown attempts in the round for Christoffer Widda. That's going to take a lot out of him.
Widda fails with an attempt to clinch.
Bundy throws a feint and then finishes with a kick to the body.
Christoffer Widda is looking to throw some combinations by the looks of things.
Widda shoots in for a takedown. "I don't think so" says Bundy as he avoids it easily.
We've had a slow start to the round here - hopefully the action picks up.
Bundy shoots in for a takedown but Widda shows good takedown defense.
Widda is looking to take this fight into the clinch.
Both fighters are breathing heavily.
That's one minute gone in the round.
Widda looks for a takedown here. Will he get it? Bundy is fending him off so far but Widda persists. Nope, Bundy circles away and we're back to standing.
Bundy lets loose with a powerful body kick. Widda will feel that in the morning.
Bundy closes the distance and clinches.
Bundy's corner calls for him to break the clinch, which he does.
Widda connects with the punch.
Widda takes a kick to the body and keeps moving.
Bundy goes for a double leg but Widda avoids the attempt and the two fighters end up clinched against the cage as Widda continues to drive forward.
Widda drops down looking for a counter takedown but Bundy sprawls and moves away.
Bundy dives in for a single leg takedown but Widda sprawls and the fighters end up clinched against the cage.
Widda shoots in but Bundy avoids the takedown attempt easily.
Bundy darts in looking for a takedown but Widda gets double underhooks and turns Bundy into the cage.
Widda has closed the distance and engaged Bundy in a clinch.
That's two minutes gone in the round.
Widda on the defensive, avoiding the knees to the body.
Bundy wants to take the fight to the mat but Widda manages to get underhooks and keep the fight in the clinch.
Bundy gets underhooks to prevent Widda's takedown attempt.
Bundy has a body lock and is looking for a takedown. Widda is bouncing around trying to prevent the takedown and somehow he has indeed managed to stay on his feet.
Widda throws a hook to the body. More of an arm punch but it's all scoring with the judges.
Bundy prevents a takedown attempt there.
Widda tries for a takedown but Bundy manages to get underhooks.
The crowd cheering loudly, showing their appreciation for the quality fight we're seeing here.
A bit of stalling here from Bundy.
Widda throws an elbow that misses.
Bundy avoiding damage.
That's three minutes gone in the round.
Bundy has Widda pressed against the cage, preventing Widda from circling away and getting back to striking at range.
Come on Bundy - let's have some action - none of this stalling nonsense.
Widda wants to break free but Bundy has control.
Bundy tries to pull guard but can't drag his opponent to the mat. Widda just stands there and leans against the cage.
Widda has dropped down and is looking to force the takedown but it's defended by Bundy after a bit of a struggle.
Widda gets through Bundy's defenses to land a nice punch to the side of the head.
Christoffer Widda has scored more points in the clinch so far.
Bundy looking for a takedown.
Widda is trying to break free.
Bundy breaks the clinch and we're back to striking at distance.
That's four minutes gone in the round.
The crowd are hurling abuse towards the fighters... You can hardly blame them though because there isn't a lot going on in the fight.
Widda has managed to clinch.
Both fighters working to control the clinch.
Widda is trying to break the clinch but Bundy is controlling him.
Bundy fails to pull guard.
Bundy fails to pull guard.
Widda is trying to break the clinch but Bundy is controlling him.
Widda jumps guard.
Bundy is fighting to break Widda's control of his arms but Widda is doing a good job of controlling the position at the moment.
The crowd thankful this round is nearly over.
Widda wants to sweep here but Bundy controlling him for the moment.
And that's the end of the fight!
That was a close round. You could make an argument for either fighter but I would give it to Christoffer Widda.
Well Widda has outscored his opponent in every aspect of the fight today. Only a scarily incompetent judge or two will keep him from a well deserved win... Over to the ring announcer for the scorecards.
Ladies and gentlemen, after 3 rounds of action, we go to the scorecards for a decision.
Judge Tiny Johnson scores the fight for Christoffer Widda!
Judge Alan Glass scores the fight for Christoffer Widda!
Judge Robert Twigg scores the fight for Christoffer Widda!
Christoffer Widda wins by unanimous decision!
|
|
|
|
|
|
|
|
|
|
|
|
|
|
|
|
|
|
|
|
|
|
|
| S |
C
A |
G |
S |
C
B |
G |
|
S |
C |
G |
|
energy
A | B |
|
hype
A | B |
|
pop
A | B |
|
mgr
A | B |
|
FIGHT
RATING
39% |
|
|
|
|
|
|
|
Co-main event
|
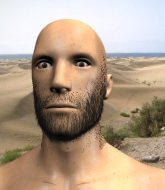
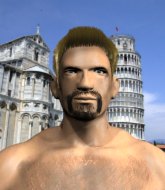
Coming up we have a welterweight MMA rules bout between Rory McDonald (ranked 0 p4p, 0 weight class) and Bob Lardo (ranked 0 p4p, 0 weight class). Rory McDonald could well score a knockout today. He has the power to get to Bob Lardo's chin.
 |
|
 |
| 182 cm
23
182 lbs
1 - 0 - 0 |
|
176 cm
23
178 lbs
1 - 0 - 0 |
BJJ Blue Belt
Brawler
KO power |
|
BJJ White Belt
Excellent boxer
Prefers standup |
|
| |
|
Ladies and gentlemen. This fight is 3 rounds, in the welterweight division.
Introducing the fighter to my left, fighting out of the red corner.
With a record of
1 - 0 - 0, fighting out of Las Vegas, Rory McDonald !
And introducing the fighter to my right, fighting out of the blue corner.
With a record of
1 - 0 - 0, fighting out of Las Vegas, Bob Lardo!
The judges for this bout are Gwen Towbar, Daniel Franklin and Wesley Smith.
The bell rings for round one and we are underway!
Lardo slips under a jab from McDonald .
Lardo lets it all go there with a big combo counter but none of the punches connected.
Well, he's not going to score with shots like that. A lazy body kick attempt from McDonald .
Lardo throws a combination but comes up with nothing but fresh air.
McDonald closes the distance and clinches.
McDonald is trying to stall.
McDonald is looking for a takedown up against the cage. Lardo gets underhooks though and prevents the takedown attempt.
McDonald stalling the fight.
McDonald trying to stall but Lardo improves his position.
Lardo scores with a shoulder strike.
A right handed body shot lands from Lardo.
McDonald goes for a body shot but it's blocked.
We've had a slow start to the round here - hopefully the action picks up.
McDonald fails to land with a short punch on the inside.
McDonald is trying to work out of this bad position, with his back against the cage.
McDonald 's head jolts backwards as he takes an uppercut right on the button!
A frustrated look appears on McDonald 's face as he tries to break the clinch.
McDonald 's head jolts backwards as he takes an uppercut right on the button!
Lardo breaks from the clinch.
That's one minute gone in the round.
Lardo looks to land a combination but McDonald avoids it well.
McDonald doesn't succeed with the takedown
and Lardo counters with a lovely straight right hand!
Lardo lands a nice looking body shot.
McDonald closes the distance and clinches.
Lardo tries to break the clinch but McDonald is controlling the position.
McDonald trying to land knees to the body.
McDonald has a couple of punches blocked by Lardo.
McDonald tried to land a shot to the body but connects with Lardo's elbow.
McDonald wants to stall.
McDonald trying to control the position but instead, Lardo has worked for underhooks and has pushed McDonald into the cage.
McDonald seems a little flustered. He's come in with the intention of controlling the clinch but Lardo is preventing him from doing so, at least for the moment.
Lardo is leaning against McDonald and scores with a nice uppercut to the body.
Lardo wants to break free. God knows he wants to breaaaak freeee.
McDonald using the Thai plumb to throw knees but Lardo has his back arched nicely, preventing the strike.
That's two minutes gone in the round.
McDonald keeps the fight in the clinch, despite Lardo's efforts to push away.
Lardo throws a hook to the body. More of an arm punch but it's all scoring with the judges.
McDonald tries to break free but Lardo pushes him back against the cage.
A short left from Lardo.
McDonald working hard to break the clinch.
A left hand lands to the body for Lardo.
McDonald is trying to push Lardo away but Lardo has him pressed against the cage, so he's going nowhere.
McDonald is breathing heavily.
Lardo manages to break the clinch.
Lardo throws a series of punches but McDonald moves out of range.
Lardo throws a two punch combo that lands nicely.

McDonald is rocked!

It looks like Rory McDonald has been cut.
The crowd cheering loudly, showing their appreciation for the quality fight we're seeing here.
Lardo plants his feet and throws a brutal three punch combo that sends McDonald swiftly into unconsciousness! Right, left, right! Boom, boom, boom! McDonald face plants, battered and bloodied! He might never be the same again after that finish!
Ladies and gentlemen, after 2:45 of round 1, we have a winner by way of KO (Punches). Bob Lardo!
|
|
|
|
|
|
|
|
|
|
|
|
|
|
|
|
|
|
|
|
|
|
|
| S |
C
A |
G |
S |
C
B |
G |
|
S |
C |
G |
|
energy
A | B |
|
hype
A | B |
|
pop
A | B |
|
mgr
A | B |
|
FIGHT
RATING
41% |
|
|
|
|
|
|
|
Main event
|
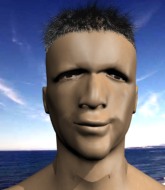
Coming up we have a welterweight MMA rules bout between Donnie Wales (ranked 0 p4p, 0 weight class) and Aaron Gordon (ranked 0 p4p, 0 weight class). Both fighters look pumped up here. Let's hope this is a good fight!
 |
|
 |
| 180 cm
18
170 lbs
1 - 0 - 0 |
|
175 cm
23
177 lbs
1 - 0 - 0 |
BJJ Blue Belt
Brawler
Granite chin |
|
Good wrestler
Brawler
Solid chin |
|
| |
|
Ladies and gentlemen. This fight is 3 rounds, in the welterweight division.
Introducing the fighter to my left, fighting out of the red corner.
With a record of
1 - 0 - 0, fighting out of Las Vegas, Donnie Wales!
And introducing the fighter to my right, fighting out of the blue corner.
With a record of
1 - 0 - 0, fighting out of Las Vegas, Aaron Gordon!
The judges for this bout are Tiny Johnson, Cecil Peabody and Alan Glass.
The bell rings for round one and we are underway!
Wales throws a sloppy head kick and Gordon moves out of range easily.
Wales tries for a takedown but Gordon sees it coming a mile off and avoids it easily.
Gordon shoots in for a takedown. He's persisting with it as Wales sprawls well. Wales wins this battle and keeps the fight standing. Gordon gets slowly back to his feet.
Wales lands a jab followed by a nice looking cross.
Gordon closes the distance, clinches up and gets a nice trip takedown into side control. Very smooth.
The ref warns both fighters not to hold the cage as they work up against the meshing.
Wales prevents Gordon from moving into mount.
Wales tries to work a leg under to get back to half guard but Gordon wriggles his own leg back out and remains in side control.
Wales prevents Gordon from moving into mount.
Wales wants to control but Gordon postures up.
Wales is looking for a sweep.
Gordon passes to full mount! That's big trouble for Wales!
This is a great period of action - very entertaining stuff!
Gordon is working for a guillotine from mount but Wales frees his head quite easily.
Gordon tries to stand up but he's trapped just for the moment.
That's one minute gone in the round.
Gordon moves to take his opponent's back.
Wales tries to break free.
Gordon looking for the choke from the back.
Gordon is working on the RNC. He looks like he's got it but Wales won't tap... Oh, he's out! The ref rips Gordon off his unconscious opponent!
Ladies and gentlemen, after 1:41 of round 1, we have a winner by way of Submission (RNC). Aaron Gordon!
|
|
|
|
|
|
|
|
|
|
|
|
|
|
|
|
|
|
|
|
|
|
|
| S |
C
A |
G |
S |
C
B |
G |
|
S |
C |
G |
|
energy
A | B |
|
hype
A | B |
|
pop
A | B |
|
mgr
A | B |
|
FIGHT
RATING
65% |
|
|
|
|
|
|
|
|
|
|
