 |
The Island Season 3, 170 lbs, Round 3 PBP Commentary |
Undercard bout
|
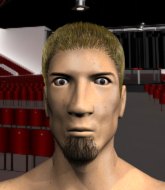
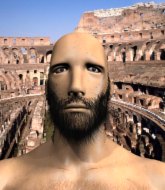
Coming up we have a welterweight MMA rules bout between Mario Barontini (ranked 0 p4p, 0 weight class) and Leo Katona (ranked 0 p4p, 0 weight class). Barontini comes to the cage accompanied by Ride of the Valkyries. Both fighters look fresh as a daisy as they make their way towards the cage.
 |
|
 |
| 177 cm
25
170 lbs
3 - 0 - 0 |
|
189 cm
27
169 lbs
10 - 6 - 0 |
Decent wrestler
Solid boxing
Very quick |
|
BJJ Brown Belt
Brawler
Solid chin |
|
| |
|
Ladies and gentlemen. This fight is 3 rounds, in the welterweight division.
Introducing the fighter to my left, fighting out of the red corner.
With a record of
3 - 0 - 0, fighting out of The Island, Mario Barontini!
And introducing the fighter to my right, fighting out of the blue corner.
With a record of
10 - 6 - 0, fighting out of The Island, Leo Katona!
The judges for this bout are Sandra Marshall, Peter Branson and Santiago Holmes.

The bell rings for round one and we are underway!
Katona misses the shot to the body.

Barontini closes the distance and clinches.

Barontini breaks the clinch and we return to the middle of the mat.
Barontini checks a leg kick.
Barontini appears to be looking for a counter punch to the body.
A punch combination from Katona misses.
Leo Katona seems to be the more aggressive standup fighter in this bout.
Katona shoots in for a takedown - he's clinched up with Barontini but Barontini pushes him off and we're back to square one.
Barontini jabbing away but nothing is landing.

Katona closes the distance and clinches.
We've had a slow start to the round here - hopefully the action picks up.
Katona tries to break the clinch but Barontini is controlling the position.
Barontini breaks from the clinch.
Katona has done a lot of speed work in the buildup to this fight.
Katona is a painfully thin specimen of a man. You do wonder whether a good body kick would snap him clean in two.
Katona has Barontini up against the cage in a clinch.
Katona has had enough of the clinch but Barontini keeps him there for the moment.

That's one minute gone in the round.
Barontini lands a body punch in the clinch.
Barontini definitely looks more muscular than last time we saw him fight.
Barontini breaks from the clinch.
Katona takes a shot to the body in his stride.
Barontini lands a vicious shot with the stealth of a sniper and the strength of a viper. Are vipers that strong? I can think of lots of things that are stronger than a viper - not many rhyme with sniper though.

It looks like Leo Katona has been cut.
Barontini scores with a sloppy punch to the body. Not much technique there but it did the business.
Barontini scores with a jab to the head.
Katona shoots in but doesn't get the takedown
and Barontini counters with a stiff right hand.
Katona closes the distance looking to clinch

and Barontini counters with a crisp right hand that drops Katona! Barontini lets Katona back up to his feet, looking for a finish!

Katona is rocked!
This is a great period of action - very entertaining stuff!
Barontini catches Katona with a right, a left, a right. It's raining punches and Katona forgot an umbrella! Another punch and he's down. This one is over!
Ladies and gentlemen, after 2:58 of round 1, we have a winner by way of KO (Punches). Mario Barontini!
A very excited looking Mario Barontini made sure he remembered to thank all the fans both in the arena and on the internet. He said all the coolest people spend all day on MMA websites, which got a big reaction.
|
|
|
|
|
|
|
|
|
|
|
|
|
|
|
|
|
|
|
|
|
|
|
| S |
C
A |
G |
S |
C
B |
G |
|
S |
C |
G |
|
energy
A | B |
|
hype
A | B |
|
pop
A | B |
|
mgr
A | B |
|
FIGHT
RATING
59% |
|
|
|
|
|
|
|
Undercard bout
|
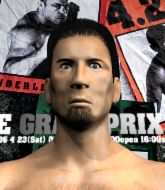
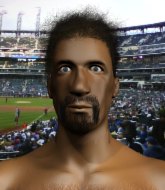
Coming up we have a welterweight MMA rules bout between Lou Hole (ranked 0 p4p, 0 weight class) and Arnolf Karstark (ranked 0 p4p, 0 weight class). Hole's ring entrance music is that housewives' favourite, Louie Louie/ Motorhead. Lou Hole has the better chin. Will he look to stand and bang today?
 |
|
 |
| 178 cm
26
183 lbs
9 - 6 - 0 |
|
187 cm
27
163 lbs
12 - 8 - 0 |
BJJ Purple Belt
Solid boxing
Granite chin |
|
Decent wrestler
Decent boxing
Good gas tank |
|
| |
|
Ladies and gentlemen. This fight is 3 rounds, in the welterweight division.
Introducing the fighter to my left, fighting out of the red corner.
With a record of
9 - 6 - 0, fighting out of The Island, Lou Hole!
And introducing the fighter to my right, fighting out of the blue corner.
With a record of
12 - 8 - 0, fighting out of The Island, Arnolf Karstark!
The judges for this bout are Dirk Anderson, David Hoff and Peter Branson.
The bell rings for round one and we are underway!
No luck for Karstark with that takedown attempt.
Hole connects with a lovely right hand, straight down the pipe.

Hole shoots in for a takedown from distance. He catches Karstark napping and manages to drive through into side control!
Hole trying to control the position but Karstark is working away.

Hole is trying to land an Americana. He has the arm isolated but Karstark is keeping cool and he's avoided the danger for now.
We get told so often about how wrestlers don't like to be on their backs. Let's see if Karstark can do anything to dispel that myth.
Hole misses with a strike but at least he's keeping busy, looking to cause some damage - that will still help him when it comes to the judges scorecards.
We've had a slow start to the round here - hopefully the action picks up.
I wouldn't like to be where Karstark is right now.
Karstark tries to get back to half guard but can't.
That's one minute gone in the round.
Hole goes for an armbar! This could be all over! Wait, no, Karstark rolls with the submission and now he's on top in Hole's guard! Nice work there by Karstark!
Hole has his foot on Karstark's thigh. He's trying to push off and get in position for a triangle, I think. Karstark works his way back into a safe position though.
Hole is looking for a triangle here but Karstark uses the submission attempt to pass into side control.
Hole takes a big shot right to the temple there but he's taken it well.
Karstark really doesn't want to stay on the ground with Hole. If he can't get it back to his feet, it's only a matter of time before he'll be tapping out.
Karstark lands an elbow.
Hole struggling a bit here.
Karstark is a painfully thin specimen of a man. You do wonder whether a good body kick would snap him clean in two.
Karstark working the ground and pound.
Karstark lands a knee to the body and follows it up with some ground and pound to the head. That will wear Hole down.
Hole is looking to reverse the position.

That's two minutes gone in the round.
Karstark has knee on belly momentarily but Hole bucks him off and regains half guard.
Karstark drops an elbow to the side of Hole's head.
The ref warns both fighters not to hold the cage as they work up against the meshing.
Hole is looking to sinch up a guillotine here but Karstark pulls his head out easily.
Karstark scores with a couple of good hammerfists.
Hole is looking to regain full guard. Not this time though.
The fighters are pressed up against the cage, both looking to find a bit of space to work.
Karstark is thwarting Hole's attempts to control the position.
Hole wants to improve his position but Karstark is controlling well.
Hole blocking the ground and pound attempt from Karstark.
Hole tries to roll over but Karstark keeps him under control.

That's three minutes gone in the round.
Hole looking to work for a kimura from the bottom.
Karstark with a momentary lay and pray from half guard.
Hole is not content to let Karstark control the position.
Hole regains full guard. Nicely done.
Hole working for a triangle but Karstark defends it easily.
Hole is active off his back here, looking for submissions.

That's four minutes gone in the round.
Neither fighter has done anything of merit for a good minute or two here and the crowd are not happy about it.
Karstark controlling from the top position.
Karstark working in close now, lands a nice elbow to the side of Hole's head.
Karstark has been taking part in the yoga sessions down at Fitness elite 24/7. Presumably he's going to look for a slick submission... Or maybe he's looking to avoid one.
Karstark wants to control from the top but Hole keeps moving.
Hole trying to strike from the bottom but really, it's not the best position to be doing that from!
Karstark slips nicely into half guard.
Karstark trying to control from half guard but Hole is working away.
The crowd thankful this round is nearly over.
Hole regains full guard. Nicely done.
Karstark wants to pass the guard but Hole is keeping the position.
And thats the end of the round the fighters go back to their corners.
That was a close round but I would say that Lou Hole will probably get the nod.
The corners get their ten second warning. Both fighters stand from their stools and stare eachother down, ready to get back to the action.

The crowd cheers as Karstark lands an impressive looking overhand right. Hole doesn't seem phased though.
Karstark just misses with a punch to the body.
Hole throws a head kick that misses.
Karstark misses with a hook.
Karstark shoots in for a takedown. He's persisting with it as Hole sprawls well. Hole wins this battle and keeps the fight standing. Karstark gets slowly back to his feet.
Karstark darts in looking for a takedown but Hole gets double underhooks and turns Karstark into the cage.
Karstark pushes forward with a 1-2 combination that forces Hole back to the cage. Karstark follows up with a solid lead hook to the liver.
Hole connects with a good right hand that stumbles Karstark. Karstark circles away out of range and recomposes himself.
Lou Hole is looking to throw some combinations by the looks of things.
We've had a slow start to the round here - hopefully the action picks up.
Hole moves out of range of the strikes.
Karstark throws a combination but it was largely blocked by Hole.
Karstark throws an ugly left hook that misses
and Hole counters with a shot to the ribs. That looked like it hurt.
Nice uppercut lands for Karstark. That snapped Hole's head back.
Arnolf Karstark seems to be the more aggressive standup fighter in this bout.
We've seen a great period of action over the last minute or so - credit to both fighters for going all out!
Hole throws a series of punches but Karstark moves out of range.
Karstark misses the shot to the body.
That's one minute gone in the round.
Karstark moves away from the strike by Hole.
Hole takes a swing at Karstark's ribcage but misses.
Karstark looked like he wanted to counter with a punch but didn't throw it.
Karstark throws a right and a left that Hole avoids nicely.
Karstark swinging wildly here.
Hole tries to bum rush Karstark with a series of wild strikes but Karstark uses good footwork to avoid the assault.
Hole darts in trying to clinch

and Karstark counters with a nice double leg into half guard.
Karstark blocks the strikes from Hole.
Hole is looking for a sweep. Karstark is wise to his cunning plan and keeps the top position.
Still in half guard, Karstark seems content to control.
Let's hope that Karstark has the urge to step up the pace any second now because for the last 15 or 20 seconds he's just been holding on tight.
Hole has a hand on Karstark's thigh, trying to get back to full guard. Karstark takes advantage of the position though and mounts him!
That's two minutes gone in the round.
Hole working to try and regain half guard.
Karstark in mount throwing good strikes here, bouncing his opponent's head off the canvas.
We've seen a great period of action over the last minute or so - credit to both fighters for going all out!
Karstark lands a shot to the body, followed up by a shot to the exposed head of his trapped opponent.
Arnolf Karstark has got the better of the ground game so far.
Karstark working Hole over with strikes here.
Karstark landing strikes, looking to finish!
Karstark lands a couple of nice shots there from mount.
Karstark punishing his opponent with strikes.
Hole bucks up and manages to get a nice reversal! He's in guard on the top - nicely done!
Hole scores with a decent looking elbow strike.
That's three minutes gone in the round.
Hole trying to control but Karstark is working from the bottom.
Hole is really struggling to control Karstark but he's trying to hold on to the position.
Hole working some ground and pound from guard but it's not doing any damage.
Karstark has a closed guard, preventing anything of note from happening. Perhaps he's looking to stall.
Hole drops back for a leg but he's not going to get it - he lets go and Karstark dives on top into guard.

Karstark working from the guard for now, landing some ground and pound.
Karstark has been the more effective fighter overall so far.
Karstark with a nice head shot there.
That's four minutes gone in the round.
Hole keeping moving, preventing Karstark from controlling successfully.
Karstark with a nice head shot there.
Hole lands a beautiful sweep and he's now moved into his opponent's guard.

Hole loading up with the ground and pound but he's missing more than he's landing in this flurry.
Hole wants to control from the top but Karstark keeps moving.
Hole trying to land body shots but he keeps hitting the mat.
Hole throwing shots from guard but he's hitting more mat than opponent.
Hole scoring with punches to the head and body.
Karstark managing to control the position.
And thats the end of the round the fighters go back to their corners.
Arnolf Karstark showed his class in that round. I'd imagine he'll take it on all the scorecards.
The fighters get back to their feet, the hooter sounds and we're back to the action! Let's hear some noise people - this is the final round!

Hole throws a jab but it's blocked by Karstark.
The step up in weight doesn't seem to be a problem for Karstark. He's performing admirably here against the bigger man.
Karstark misses with a jab, cross combination.
Hole keeps his opponent at a distance with a nice jab.
Karstark misses with the combination.
Hole tries to clinch up.
Boom, another hit is landed. "You're gunna get knocked out" taunts Hole, as that shot connected.
Karstark misses with a body shot. Nice footwork from Hole.
Hole tries to clinch
enabling Karstark to counter with a crisp jab.
No luck for Hole with that takedown attempt.
We've had a slow start to the round here - hopefully the action picks up.
Karstark slaps away a takedown attempt from Hole, before circling back to the center of the mat.
Karstark fakes an overhand right and shoots for a takedown. Hole sprawls well initially but Karstark persists and gets the takedown into half guard.
The crowd cheering loudly, showing their appreciation for the quality fight we're seeing here.
Hole is trying to get back to full guard.
That's one minute gone in the round.
Hole looking for submissions from an awkward position here.
Karstark working the head and body with strikes.
Hole looking to work for a kimura from the bottom.
Karstark with a momentary lay and pray from half guard.
We're seeing a lot of stalling here from Karstark.
Karstark trying to mount his opponent but Hole defends it.
That's two minutes gone in the round.
Neither fighter has done anything of merit for a good minute or two here and the crowd are not happy about it.
Hole has hold of Karstark's hands but Karstark slips his arm to the side and lands an elbow.
Karstark trying to control from half guard but Hole is working away.
Ground and pound from Karstark.
Karstark not landing any meaningful shots this time.
Hole tries to get to full guard but Karstark has control of the leg.
Hole is trying to maintain the position but Karstark is very close to passing his half guard.
Karstark not throwing his punches with enough precision this time.
The referee wants the fighters to be more active or he's going to reset them on the feet.
Karstark is looking to advance position but Hole won't allow it.
That's three minutes gone in the round.
Hole actively working from the bottom here.
Karstark slows the pace down in half guard.

The ref stands the fighters back up due to a lack of activity.
Hole works the jab nicely.
Karstark slips under a jab.
Karstark is definitely looking for the counter takedowns here.
Hole ducks under a wild hook from Karstark.
Hole lands with a right hand.
Karstark looks to land a combination. Hole sees it coming but can only parry a couple of the shots.
Hole tries to close the distance and clinch but Karstark swats him to one side with an open hand palm strike and circles away.
Karstark feints and as Hole raises his hands in defense, Karstark changes levels and drives through with a takedown into guard.
Hole not looking particularly offensive just at the moment.
That's four minutes gone in the round.
Hole wants to sweep here but Karstark controlling him for the moment.
Hole is active off his back here, looking for submissions.
Karstark must be cautious of submissions here, given that his opponent has the superior Jiu Jitsu.
Both fighters are breathing heavily.
Hole is looking for a triangle here but Karstark uses the submission attempt to pass into side control.
Lou Hole has stepped it up - he knows he needs a finish here!
The fans in attendance giving it up for the two fighters, who have really let it all hang out in the last minute or so!
Karstark is looking to take a break and control but Hole is keeping him honest, looking to work from the bottom.
Karstark lands a decent elbow from side control.
Karstark lands a few punches from side control.
Arnolf Karstark is fighting for a decision here - he's started to take the cautious approach.
Hole seems a little lost for a moment, as Karstark dominates the positioning.
And that's the end of the fight!
Arnolf Karstark comfortably won the final round on my scorecard.
Well Karstark has outworked and out performed his opponent in all aspects of the game today. He was simply too good and the decision should be no more than a formality. Over to the ring announcer for the scorecards.
Ladies and gentlemen, after 3 rounds of action, we go to the scorecards for a decision.
Judge Dirk Anderson scores the fight for Arnolf Karstark!
Judge David Hoff scores the fight for Arnolf Karstark!
Judge Peter Branson scores the fight for Arnolf Karstark!
Arnolf Karstark wins by unanimous decision!
Arnolf Karstark made sure to give a little speech post fight, saying 'Every time there is a prediction for my fights I am always to lose. Sorry Mr. Writer for proving you wrong again. Thanks to Vikai and I want that belt back I'm coming. '.
Lou Hole was interviewed post fight and said 'What can I say you got me man'.
|
|
|
|
|
|
|
|
|
|
|
|
|
|
|
|
|
|
|
|
|
|
|
| S |
C
A |
G |
S |
C
B |
G |
|
S |
C |
G |
|
energy
A | B |
|
hype
A | B |
|
pop
A | B |
|
mgr
A | B |
|
FIGHT
RATING
41% |
|
|
|
|
|
|
|
Co-main event
|
Coming up we have a welterweight MMA rules bout between Quin Kenobi (ranked 0 p4p, 0 weight class) and Ska Asap (ranked 0 p4p, 0 weight class). Over to our ring announcer for the fighter introductions!
 |
|
 |
| 180 cm
26
170 lbs
9 - 4 - 0 |
|
180 cm
27
170 lbs
13 - 4 - 1 |
Good takedowns
Basic striking
Very quick |
|
Good wrestler
Basic striking
Granite chin |
|
| |
|
Ladies and gentlemen. This fight is 3 rounds, in the welterweight division.
Introducing the fighter to my left, fighting out of the red corner.
With a record of
9 - 4 - 0, fighting out of The Island, Quin Kenobi!
And introducing the fighter to my right, fighting out of the blue corner.
With a record of
13 - 4 - 1, fighting out of The Island, Ska Asap!
The judges for this bout are Santiago Holmes, Dirk Anderson and Peter Branson.
The bell rings for round one and we are underway!
Kenobi slaps away a takedown attempt from Asap, before circling back to the center of the mat.
Kenobi displays good takedown defense there as he swats away a double leg from Asap.
Asap scores with a takedown into Kenobi's guard.
Kenobi can't do much from the bottom at the moment, as Asap controls the pace.
Kenobi is trying to control the position but Asap postures up.
Asap stays in close to Kenobi's body and controls the position.
Asap trying to pass the guard but can't manage it just yet.
We've had a slow start to the round here - hopefully the action picks up.
Kenobi tries to land a sweep but no joy.
Asap showing good wrestling skills to control the position.
That's one minute gone in the round.
Kenobi manages to sweep nicely, so he's now on top. Asap manages to get himself to full guard.
Kenobi trying to control the position from guard on top but Asap is wriggling around, looking for whatever he can.
Asap tries to land a sweep but no joy.
Kenobi passes easily into side control. Nice work.
Asap tries to work a leg under to get back to half guard but Kenobi wriggles his own leg back out and remains in side control.
That's two minutes gone in the round.

Kenobi has had enough of the ground for now and decides to stand.
Asap stuffs a takedown. It's all about dictating where the fight takes place and Asap wants it to stay on the feet.
Kenobi tries to sprawl but Asap drives through with a takedown into half guard.
Kenobi trying to control here.
Kenobi looks to be in better condition than last time we saw him fight. Obviously he's been working hard on his cardio.
Asap seems content to maintain position for now, rather than mounting any offense.
Kenobi is looking to improve his position.
Kenobi trying to control here.
The fighters are pressed up against the cage, both looking to find a bit of space to work.
Asap is taking a breather. Kenobi says something to him but it's hard to make out. Perhaps he's telling him to get on with it and actually do something.
Both fighters have adopted an aggressive gameplan on the ground!
Kenobi wants to get back to full guard.
That's three minutes gone in the round.
Asap is just sitting in half guard, waiting for something to happen.
Kenobi is looking to control Asap's leg but it's slowly edging free. Can Kenobi avoid being mounted?
Asap controlling the action here.
The referee has motioned to the fighters to stand back up. He just wasn't happy with the level of activity.
Asap shoots in but no luck this time.
Quin Kenobi has stuffed three takedown attempts in the round now. That's going to take a lot out of Ska Asap.
Kenobi dives in and grabs Asap's left leg, looking for a takedown. Asap pushes down on Kenobi's head and hops out.
Asap shoots in for a takedown but Kenobi shows good takedown defense there and keeps this one on the feet.
Horrible takedown attempt by Asap or perhaps it was just good defense by Kenobi, which made it look bad.
Kenobi changes levels looking for a counter takedown but doesn't commit.
That's four minutes gone in the round.
Asap shoots in for a takedown. He's persisting with it as Kenobi sprawls well. Kenobi wins this battle and keeps the fight standing. Asap gets slowly back to his feet.
Kenobi appears to be looking for a counter takedown.
Asap drops down and drives through with a powerful takedown into guard.
Asap engaging in some classic timewasting tactics.
Asap loading up with the ground and pound but he's missing more than he's landing in this flurry.
Asap wants to pass the guard but Kenobi is keeping the position.
Boooooooooooooooooooo!!! God, this has been a terrible round. Come on you two, sort yourselves out!
Kenobi working a defensive guard here.
Asap slows down the pace of the fight, as he sits in guard.
And thats the end of the round the fighters go back to their corners.
Ska Asap dominated that round.
The fighters' corners scream their final instructions, as the referee calls time. Here we go, back to the action!
Asap shoots for a double leg takedown but Kenobi sprawls well. He's pushed Asap's face into the mat and manages to get back to his feet relatively easily.
Asap dives in and grabs Kenobi's left leg, looking for a takedown. Kenobi pushes down on Asap's head and hops out.
Asap closes the distance and scores a nice trip takedown into half guard. Kenobi did well to prevent Asap getting side control.
Kenobi preventing any damage for now, controlling his opponent's head.
Kenobi trying to control but Asap postures up.
Asap is taking a breather. Kenobi says something to him but it's hard to make out. Perhaps he's telling him to get on with it and actually do something.
Asap has been the more effective fighter overall so far.
Kenobi is trying to get back to full guard.
We've had a slow start to the round here - hopefully the action picks up.
Kenobi has no desire to be mounted, so is trying to control. Asap is working away from the top position though.
Kenobi gets full guard.
The ref warns both fighters not to hold the cage as they work up against the meshing.
Kenobi lands a beautiful sweep and he's now moved into his opponent's guard.
That's one minute gone in the round.
Kenobi looking to sit in guard and control but Asap gets the butterfly guard and sweeps. He's now in the guard on the top.
Asap pushes down on Kenobi's leg and manages to get into half guard.
Asap wants to stand but Kenobi has hold of a leg and an arm, so he's trapped for now.
Asap missing with some ground and pound from the half guard.
Asap controlling the action here.
Kenobi works his way to full guard. Good work.
That's two minutes gone in the round.
Asap postures up and lands some nice ground and pound.
Kenobi looking to control the pace of the fight rather than finish it.
Asap stands up and looks to throw the legs aside to pass to side control. Kenobi swivels though and keeps the full guard.
Asap wanted to stand there but Kenobi had control of the position.
Asap stays in close to Kenobi's body and controls the position.
Asap postures up.
It looks like the ref is thinking about a standup.
Kenobi can't do much from the bottom at the moment, as Asap controls the pace.
The referee decides to stand the fighters back up.
That's three minutes gone in the round.
Asap tries to score a power double leg takedown but Kenobi sees that one coming and sprawls well. That will dishearten Asap somewhat.
Quin Kenobi has stuffed three takedown attempts in the round now. That's going to take a lot out of Ska Asap.
Asap fails with the takedown.
Kenobi drops down looking for a counter takedown but Asap sprawls and moves away.
No luck for Asap with that takedown attempt.
Asap drops down and drives through with a powerful takedown into guard.
Kenobi looking for submissions from the bottom here. Moving his hips around, possibly looking for an armbar.
Kenobi is trying to keep Asap in close.
Asap pressing down on his opponent's thigh, looking to pass guard. Kenobi is keeping the position for now.
That's four minutes gone in the round.
Asap stays in close to Kenobi's body and controls the position.
Asap has decided he wants to stand but the closed guard of Kenobi is proving hard to escape from.
The referee looks like he's ready to step in and stand the fighters back up.
Kenobi looking to control.
The referee decides to stand the fighters back up.
Boooooooooooooooooooo!!! God, this has been a terrible round. Come on you two, sort yourselves out!
Asap closes the distance, clinches up and gets a nice trip takedown into side control. Very smooth.
Asap fails to land a wild elbow strike.
Asap is maintaining the dominant position - no doubt Kenobi will start to get frustrated soon if he's not already.
And thats the end of the round the fighters go back to their corners.
Ska Asap showed his class in that round. I'd imagine he'll take it on all the scorecards.
That's time! Kenobi's corner gives him a slap on the ass as he gets ready to fight. Let's hear some noise people - this is the final round!
Asap looking to score a takedown here. Kenobi is defending well but Asap drives through and ends up in Kenobi's guard.
Asap controlling from the top position.
Kenobi tries to land a sweep but no joy.
Asap is frustrating his opponent with some stalling tactics from top position.
Kenobi controls Asap momentarily but Asap frees himself.
We've had a slow start to the round here - hopefully the action picks up.
Asap seems content to control from guard here. He's going to have to remain active though if he doesn't want to get stood back up.
That's one minute gone in the round.
Asap stands up and looks to throw the legs aside to pass to side control. Kenobi swivels though and keeps the full guard.
The referee has stepped in and called for a break in the action. We'll restart on the feet.
Asap shoots in and drives through. Kenobi sprawls well.
Asap dives in and grabs Kenobi's left leg, looking for a takedown. Kenobi pushes down on Asap's head and hops out.
Kenobi wants to take advantage of his opponent's missed offense by moving into the clinch.
Asap slaps away a takedown attempt from Kenobi, before circling back to the center of the mat.
Asap with the counter takedown but Kenobi avoids it easily.
Asap darts in looking for a takedown but Kenobi gets double underhooks and turns Asap into the cage.
Quin Kenobi has stuffed three takedown attempts in the round now. That's going to take a lot out of Ska Asap.
Asap shoots in for a takedown. "Ole!" shouts Kenobi as he jumps to the side.
A really sloppy takedown attempt there from Kenobi.
Asap fakes high and shoots in for a takedown but Kenobi avoids it really well and circles away.
That's two minutes gone in the round.
Asap shoots in and gets a takedown into Kenobi's guard.
Kenobi working a defensive guard here.
Kenobi is pulling down on Asap's head to control his posture.
Asap trying to pass the guard but can't manage it just yet.
Asap is frustrating his opponent with some stalling tactics from top position.
Asap's corner are shouting for him to control the position and he seems happy to oblige.
Asap won't allow Kenobi to sweep him here.
That's three minutes gone in the round.
Asap is intent on slowing down the pace of the fight, simply looking to control.
Kenobi is trying to stand up but he's not managed so far.
The referee has motioned to the fighters to stand back up. He just wasn't happy with the level of activity.
Kenobi misses with a body shot. Nice footwork from Asap.
Asap shoots in but Kenobi avoids the takedown attempt easily.
Asap misses with a takedown attempt
and Kenobi holds on and brings the fighters into a clinch.
Kenobi has hold of a leg and is looking for a trip takedown. Asap avoids it nicely though and we remain in the clinch.
Kenobi pushes off and circles away, back to the middle of the mat.
Quin Kenobi is looking to throw some combinations by the looks of things.
Kenobi closes the distance, clinches up and gets a nice trip takedown into side control. Very smooth.
Asap tries to bench press Kenobi off him but Kenobi keeps the position.
Kenobi is looking to take a break and control but Asap is keeping him honest, looking to work from the bottom.
That's four minutes gone in the round.
Kenobi advances nicely into full mount.
Asap is desperately trying to improve his position but Kenobi has a good base and remains in mount.
Kenobi trying to control but Asap is having none of it.
The crowd thankful this round is nearly over.
Kenobi gets to his feet and calls his opponent to stand. Here come the fireworks!
And that's the end of the fight!
Quin Kenobi showed his dominance in that final round.
I think Asap has won this one but let's see whether the judges agree with me. Over to the ring announcer for the scorecards.
Ladies and gentlemen, after 3 rounds of action, we go to the scorecards for a decision.
Judge Santiago Holmes scores the fight for Ska Asap!
Judge Dirk Anderson scores the fight for Ska Asap!
Judge Peter Branson scores the fight for Ska Asap!
Ska Asap wins by unanimous decision!
A loyal slave to those sponsorship dollars, Ska Asap made sure he mentioned Vikai Gear, along with how happy he was to win his fight.
|
|
|
|
|
|
|
|
|
|
|
|
|
|
|
|
|
|
|
|
|
|
|
| S |
C
A |
G |
S |
C
B |
G |
|
S |
C |
G |
|
energy
A | B |
|
hype
A | B |
|
pop
A | B |
|
mgr
A | B |
|
FIGHT
RATING
28% |
|
|
|
|
|
|
|
Main event
|
Coming up we have a welterweight MMA rules bout between Tony Bullard (ranked 0 p4p, 0 weight class) and Archie Nelson (ranked 0 p4p, 0 weight class). Bullard comes to the cage accompanied by Wrecking Ball. Nelson has chosen I Have a Dream as his entrance music, which hasn't gone down very well with the crowd. I don't know about you partner, but I'm pumped for this one!
 |
|
 |
| 175 cm
27
170 lbs
14 - 1 - 0 |
|
170 cm
26
171 lbs
7 - 4 - 0 |
Decent wrestler
Excellent MT
Granite chin |
|
Powerful takedowns
Basic striking
Good gas tank |
|
| |
|
Ladies and gentlemen. This fight is 3 rounds, in the welterweight division.
Introducing the fighter to my left, fighting out of the red corner.
With a record of
14 - 1 - 0, fighting out of The Island, Tony Bullard!
And introducing the fighter to my right, fighting out of the blue corner.
With a record of
7 - 4 - 0, fighting out of The Island, Archie Nelson!
The judges for this bout are Winston Alpacca, Michael Johnstone and Dirk Anderson.
The bell rings for round one and we are underway!
Nelson has his takedown stuffed
and Nelson takes a counter punch right on the button for his troubles.
Nelson tries to bum rush Bullard with a series of wild strikes but Bullard uses good footwork to avoid the assault.
Nelson misses with a body shot. Nice footwork from Bullard.
An attempted straight right counter from Bullard misses the target.
Nelson fakes high and shoots in for a takedown but Bullard avoids it really well and circles away.
Nelson looks frustrated there after his takedown attempt is stuffed easily.
Tony Bullard has stuffed three takedown attempts in the round now. That's going to take a lot out of Archie Nelson.
Bullard displays good takedown defense there as he swats away a double leg from Nelson.
Nelson shoots in for a takedown. "Ole!" shouts Bullard as he jumps to the side.
Bullard was looking to counter that move with a punch but didn't quite pull the trigger.
We've had a slow start to the round here - hopefully the action picks up.
Well, he's not going to score with shots like that. A lazy body kick attempt from Nelson.
Bullard throwing a counter right hand but Nelson manages to avoid it.
Nelson misses with a takedown attempt. He shot from a bit too far out.
Nelson shoots in for a takedown. He's persisting with it as Bullard sprawls well. Bullard wins this battle and keeps the fight standing. Nelson gets slowly back to his feet.
That's one minute gone in the round.
Good exchange - Bullard coming out on top.
Bullard lunges at Nelson with a hook that half lands and is half blocked by Nelson's hand.
Nelson misses with a takedown attempt - Bullard sprawls well and throws a nice strike on the way out which just misses.
Bullard is looking to counter punch.
Bullard stuffs the takedown attempt from Nelson. Nelson gets slowly back to his feet.
Nelson fails with a takedown attempt.
Nelson shoots in looking for a takedown. Bullard tries to sprawl out of it but Nelson keeps driving through. The fighters are pinned against the cage. Bullard manages to get underhooks and after a bit of a struggle, circles away and we're back to standing.
Bullard connects with a body shot that sends Nelson's belly button to the back.
That's two minutes gone in the round.
Nelson throws out a token jab with nothing on it.
Nelson shoots for a double leg takedown but Bullard sprawls well. He's pushed Nelson's face into the mat and manages to get back to his feet relatively easily.
Nelson walks straight into a jab right on the nose. That one stung - he's blinking and trying to clear his head.
Bullard moving in and out of range nicely, whilst landing the scoring shot.
Nelson tries to drive through with a takedown attempt but Bullard defends well and Nelson ends up having to push Bullard into the cage where they will battle it out in the clinch.
The crowd are loving this. Great action here.
Bullard smiles there as he lands a nice right hand right on the button.
Nelson is rocked!
Bullard moves out of range of the body kick.
Nelson throws a hook to the side of Bullard's head but Bullard sees it coming and ducks under it beautifully.
Nelson misses with a takedown attempt. He shot from a bit too far out.
Nelson scores with a big left there. The judges will like that one.
Nelson will have to do better than that with his takedown attempts.
Bullard lands the left hand.
Nelson is still on wobbly legs! Can Bullard finish him?
Nelson misses with a takedown attempt
and Bullard counters with a nice right hand that sends Nelson toppling to the canvas! Nelson scrambles and gets back to his feet - can Bullard finish him?!
Nelson displays some good footwork, moving neatly out of range as Bullard throws out the jab.
Nelson fails with the takedown.
That's three minutes gone in the round.
Nelson shoots in for a takedown - he's clinched up with Bullard but Bullard pushes him off and we're back to square one.
Nelson seems to have recovered his senses.
Archie Nelson seems to be the more aggressive standup fighter in this bout.
A telegraphed right hand from Bullard misses the target.
Nelson on the wrong end of a nice hook.
Bullard lunges in with swinging rights and lefts but Nelson circles away quickly and effectively.
Nelson misses with a takedown attempt - Bullard sprawls well and throws a nice strike on the way out which just misses.
Bullard keeping a good distance there, avoiding the body shot.
Nelson darts in looking for a takedown but Bullard gets double underhooks and turns Nelson into the cage.
Nelson doesn't succeed with the takedown
and Bullard counters with a lovely straight right hand!
Nelson closes the distance and clinches up with Bullard, looking for a takedown. Nelson pushes Bullard against the cage but Bullard circles to the side and manages to break the clinch.
Nelson is looking to land body kicks.
Bullard throws a good cross that connects.
That's four minutes gone in the round.
Nelson shoots in for a takedown. He's persisting with it as Bullard sprawls well. Bullard wins this battle and keeps the fight standing. Nelson gets slowly back to his feet.
Nelson waving his hands out in front of him, looking to distract Bullard.
Nelson throws a body kick but he was well out of range there.
Bullard swung with a counter punch to the body but it didn't connect.
Tony Bullard is looking to keep the fight on the feet at all costs.
Nelson shoots for a takedown but Bullard saw that one coming a mile off and avoided it easily.
Bullard plants his feet and throws a brutal three punch combo that sends Nelson swiftly into unconsciousness! Right, left, right! Boom, boom, boom! Nelson face plants, battered and bloodied! He might never be the same again after that finish!
Ladies and gentlemen, after 4:28 of round 1, we have a winner by way of KO (Punches). Tony Bullard!
A less than humble Tony Bullard misjudged his post fight interview somewhat and came across a little too arrogant whilst trying to hype up his own abilities.
The defeated Archie Nelson had this to say: 'best 2 of 3?'.
|
|
|
|
|
|
|
|
|
|
|
|
|
|
|
|
|
|
|
|
|
|
|
| S |
C
A |
G |
S |
C
B |
G |
|
S |
C |
G |
|
energy
A | B |
|
hype
A | B |
|
pop
A | B |
|
mgr
A | B |
|
FIGHT
RATING
50% |
|
|
|
|
|
|
|
|
|
|

