 |
VCC 2 PBP Commentary |
Undercard bout
|
|
|
|
Undercard bout
|
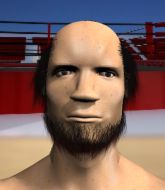
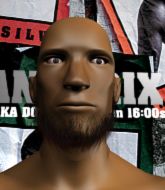
Coming up we have a light heavyweight MMA rules bout between Kemba Walker (ranked 0 p4p, 0 weight class) and Reggie Marlow (ranked 0 p4p, 0 weight class). Reggie Marlow has the power to score a knockout today if he connects clean with Kemba Walker's chin.
 |
|
 |
| 193 cm
21
211 lbs
1 - 0 - 0 |
|
185 cm
25
205 lbs
0 - 1 - 0 |
Good wrestling
Counter fighter
Good chin |
|
BJJ Blue Belt
Lethal high kicks
Granite chin |
|
| |
|
Ladies and gentlemen. This fight is 3 rounds, in the light heavyweight division.
Introducing the fighter to my left, fighting out of the red corner.
With a record of
1 - 0 - 0, fighting out of Sydney, Kemba Walker!
And introducing the fighter to my right, fighting out of the blue corner.
With a record of
0 - 1 - 0, fighting out of Sydney, Reggie Marlow!
The judges for this bout are Summer Carpenter, Skip Squint and John Mangel.

The bell rings for round one and we are underway!
Marlow throws a lazy body kick

and Walker counters with a shoot takedown. Marlow fights it but they end up in guard.
Walker looking to control the position here, rather than advance.
Walker wants to control from the top but Marlow keeps moving.
Marlow is trying to stand up but he's not managed so far.
Marlow looks more muscular than last time we saw him. He must have been on the weights.
Marlow keeping moving, preventing Walker from controlling successfully.
We've had a slow start to the round here - hopefully the action picks up.
Walker is frustrating his opponent with some stalling tactics from top position.
Marlow is trying to control the position but Walker postures up.
Walker has to be careful here, sitting in the guard of a superior BJJ player.

That's one minute gone in the round.
Walker controls the pace of the fight for a moment.
Marlow is trying to control the position from the bottom.

The referee has motioned to the fighters to stand back up. He just wasn't happy with the level of activity.
Marlow throws a sloppy head kick
and Walker counters with a single leg into guard. Marlow didn't expect that.
Marlow keeping moving, preventing Walker from controlling successfully.

Walker has gone for a leg lock! Marlow slips out almost immediately though and dives into Walker's guard.

Walker managing to control the position.
Walker working a defensive guard here.
Walker knows he needs to get back to his feet asap. He's simply no match for Marlow on the ground.

That's two minutes gone in the round.
Marlow wants to control from the top but Walker keeps moving.
Marlow tries to stand but Walker is controlling from the bottom.
Walker on his back here. We all know that wrestlers don't like being on their back so let's see if Walker tries to get out of the position.
Walker keeping moving, preventing Marlow from controlling successfully.
Marlow in full guard, throwing the ground and pound. No damage this time.
The fighters are starting to perspire pretty heavily.
Marlow trying to control the position from guard on top but Walker is wriggling around, looking for whatever he can.

Marlow drops back for a leg but he's not going to get it - he lets go and Walker dives on top into guard.

Walker looking to sit in guard and control but Marlow gets the butterfly guard and sweeps. He's now in the guard on the top.

That's three minutes gone in the round.
Walker is doing well to control the posture of his opponent and prevent any damage.
Marlow engaging in some classic timewasting tactics.
The fighters are pressed up against the cage, both looking to find a bit of space to work.
Marlow trying to control but Walker is working from the bottom.
Walker looking to sweep here. No luck so far.
The ref warns both fighters not to hold the cage as they work up against the meshing.
Walker is trying to control the position from the bottom.

That's four minutes gone in the round.
A few boos can be heard. I'm sure they will multiply if the fighters don't pick up the pace.
Marlow drops back looking for a heel hook - he quickly realises he's not going to get it but Walker manages to dive on top of him before he can escape and now Marlow has Walker in his guard.
Walker won't allow Marlow to get back to his feet.
Marlow trying to keep a closed guard but Walker is proving a slippery customer.
Boooooooooooooooooooo!!! God, this has been a terrible round. Come on you two, sort yourselves out!
Marlow has a loose triangle. He'll be looking to tighten that up but Walker can see exactly what he's planning and manages to posture up and free himself.
Marlow is trying to keep Walker in close.
And thats the end of the round the fighters go back to their corners.
Kemba Walker dominated that round.
OK. That's time! The bell goes and we're back to the action.

Marlow turns his hip over beautifully as he lands a nice leg kick.
Walker is really dominating this fight. Is there anything that Marlow can do to turn this around?
Marlow lands a high kick!

It looks like Kemba Walker has been cut.
Marlow misses with a half-hearted attempt at a head kick.
Thud! ouch! good body kick from Marlow - that will leave a mark!
Marlow is looking to clinch.
Marlow misses with a head kick.
We've had a slow start to the round here - hopefully the action picks up.
Marlow misses with a half-hearted attempt at a head kick.
Walker feinted with a counter takedown.
Marlow pulls out of a head kick attempt.
Walker feinted with a counter takedown.
Marlow is looking to clinch but Walker is avoiding it.
A head kick misses from Marlow.
That's one minute gone in the round.
No luck for Marlow with that takedown attempt.
Walker is looking to counter with a shot to the body.
Walker feints and as Marlow raises his hands in defense, Walker changes levels and drives through with a takedown into guard.
Marlow wants to get back to his feet but Walker is in a dominant position and won't allow it.
Marlow had isolated an arm as going for a kimura. Walker defends it easily.
Walker content to stall in guard here.
That's two minutes gone in the round.
Marlow wants to stand and escape but Walker is having none of it.
Marlow tries to land a sweep but no joy.
Walker looking to sit in guard and control but Marlow gets the butterfly guard and sweeps. He's now in the guard on the top.
Walker is working from a closed guard but he's struggling to control his opponent.
Marlow wants to control from the top but Walker keeps moving.
Walker has his hands on Marlow's head, controlling the position.
Walker manages to sweep nicely, so he's now on top. Marlow manages to get himself to full guard.
That's three minutes gone in the round.
Walker wants to control from the top but Marlow keeps moving.
Marlow not looking particularly offensive just at the moment.
Marlow is looking to get back to his feet but can't, whilst Walker is controlling him.
Marlow keeping moving, preventing Walker from controlling successfully.
Kemba Walker overall seems to be getting the better of the ground position in the fight so far.
Marlow has his foot on Walker's thigh. He's trying to push off and get in position for a triangle, I think. Walker works his way back into a safe position though.
That's four minutes gone in the round.
The crowd are showing their displeasure at the lack of action as loud boos ring out around the arena.
Walker looking to sit in guard and control but Marlow gets the butterfly guard and sweeps. He's now in the guard on the top.
Walker is working an open guard here, looking to improve his position. No doubt that will leave him open to counters but at least he's being more offensive.
Walker trying to control the position.
Walker keeping moving, preventing Marlow from controlling successfully.
Walker looking for submissions off his back, moving his hips, looking for an opening.
Boooooooooooooooooooo!!! God, this has been a terrible round. Come on you two, sort yourselves out!
Marlow trying to control the position from guard on top but Walker is wriggling around, looking for whatever he can.
And thats the end of the round the fighters go back to their corners.
Reggie Marlow showed his class in that round. I'd imagine he'll take it on all the scorecards.
The cut man is working on Kemba Walker's cut.
That's time! Walker's corner gives him a slap on the ass as he gets ready to fight. And we move into the final round!

Walker takes a push kick to the midsection and stumbles backwards.
Walker keeps the fight standing with a nice sprawl.
Walker attempts a counter takedown but Marlow avoids it well and moves away.
Marlow plants his feet and lands a nice head kick!
Reggie Marlow seems to be the more aggressive standup fighter in this bout.
Marlow throws a sloppy head kick and Walker moves out of range easily.
We've had a slow start to the round here - hopefully the action picks up.
Marlow tries a switch kick but it misses it's target.
Marlow throws a sloppy head kick
and Walker counters with a nice double leg into half guard.
Marlow wants to get back to his feet.
That's one minute gone in the round.
Walker wants to work for an arm triangle but Marlow is really keeping half guard well and defending the submission attempt.
Walker is looking for a kimura here.
Walker wants to work for an arm triangle but Marlow is really keeping half guard well and defending the submission attempt.
Marlow has no desire to be mounted, so is trying to control. Walker is working away from the top position though.
Walker is trying to control. Marlow wants to improve his position but can't escape this time.
That's two minutes gone in the round.
The crowd are hurling abuse towards the fighters... You can hardly blame them though because there isn't a lot going on in the fight.
Walker throwing punches and elbows but they're not doing any damage.
Marlow is trying to get back to full guard.
The referee decides to stand the fighters back up.
Walker blocks a head kick by Marlow.
Walker changes levels looking for a counter takedown but doesn't commit.
Marlow dances in quickly and lands a nice inside leg kick on Walker. That did some damage!
Walker fails to land the takedown.
A head kick misses from Marlow.
Marlow throws a head kick that misses
and Walker counters with a nice double leg into side control. Marlow won't be happy with that.
Walker is trying to land an Americana. He has the arm isolated but Marlow is keeping cool and he's avoided the danger for now.
That's three minutes gone in the round.
Marlow wants to escape from the position here - easier said than done!
Walker goes for an armbar! This could be all over! Wait, no, Marlow rolls with the submission and now he's on top in Walker's guard! Nice work there by Marlow!
Marlow postures up to throw the ground and pound strikes but they don't connect.
Marlow drops back for a leg! It's a sloppy attempt though and Marlow jumps back into guard quickly, to retain the dominant position.
Walker looking to sweep here. No luck so far.
Walker is trying to keep Marlow in close.
That's four minutes gone in the round.
Marlow postures up to throw the ground and pound strikes but they don't connect.
Walker working a defensive guard here.
Marlow wants to control from the top but Walker keeps moving.
Walker controlling Marlow's posture.
Walker keeping moving, preventing Marlow from controlling successfully.
Marlow is fighting to break Walker's control of his arms but Walker is doing a good job of controlling the position at the moment.
The crowd thankful this round is nearly over.
Marlow postures up as if he's going to throw some strikes but drops back for an ankle! Walker is in big trouble! He looks ready to tap! But no, he's escaped and dives on top of Marlow, into his guard.
And that's the end of the fight!
Kemba Walker showed his dominance in that final round.
I think Walker has won this one but let's see what the judges have to say. Over to the ring announcer for the scorecards.
Ladies and gentlemen, after 3 rounds of action, we go to the scorecards for a decision.
Judge Summer Carpenter scores the fight 29:28
Judge Skip Squint scores the fight 29:28
Judge John Mangel scores the fight 29:28
In favor of your winner, by unanimous decision... Kemba Walker!
|
|
|
|
|
|
|
|
|
|
|
|
|
|
|
|
|
|
|
|
|
|
|
| S |
C
A |
G |
S |
C
B |
G |
|
S |
C |
G |
|
energy
A | B |
|
hype
A | B |
|
pop
A | B |
|
mgr
A | B |
|
FIGHT
RATING
26% |
|
|
|
|
|
|
|
Undercard bout
|
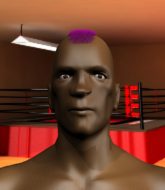
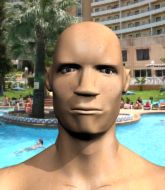
Coming up we have a welterweight MMA rules bout between Mateo Da Vinci (ranked 0 p4p, 0 weight class) and Caiman Hendrix (ranked 0 p4p, 0 weight class). Caiman Hendrix told me before the fight that he's been watching a lot of DVDs so let's see if that helps him in this one! I can't wait to find out!
 |
|
 |
| 180 cm
24
171 lbs
1 - 0 - 0 |
|
182 cm
18
175 lbs
6 - 2 - 0 |
BJJ Blue Belt
Counter fighter
Cuts easily |
|
Dangerous GnP
Counter fighter
Tends to cut |
|
| |
|
Ladies and gentlemen. This fight is 3 rounds, in the welterweight division.
Introducing the fighter to my left, fighting out of the red corner.
With a record of
1 - 0 - 0, fighting out of Sydney, Mateo Da Vinci!
And introducing the fighter to my right, fighting out of the blue corner.
With a record of
6 - 2 - 0, fighting out of Sydney, Caiman Hendrix!
The judges for this bout are Damien Edna, Francis DeMontford and Eliza Hachem.
The bell rings for round one and we are underway!
Da Vinci drives through with a takedown into guard.
Hendrix throwing his legs up looking for a triangle.
Hendrix is working the butterfly guard. He manages to land a nice scissor sweep and is now in half guard on the top. Nice move.
Da Vinci is trying to control but can't.
Da Vinci is refusing to be controlled, as Hendrix sits in half guard.
Hendrix throwing punches and elbows but they're not doing any damage.
Da Vinci is trying to stand up here but Hendrix is controlling him well.
We've had a slow start to the round here - hopefully the action picks up.
Da Vinci is looking to regain full guard. Not this time though.
Da Vinci wants to control but Hendrix is keeping busy.
Da Vinci is trying to get back to full guard.
That's one minute gone in the round.
Da Vinci tries to kick Hendrix off but Hendrix keeps his base steady and stays in half guard.
Hendrix is stalling here. Da Vinci is in no mood to hang around though. He's locked up a kimura from the bottom! Hendrix seems to be keeping calm but he's forced to roll out of the hold and Da Vinci has ended up in side control on the top. Nice work.
Hendrix is trying to improve his position.
Da Vinci is trying to ground and pound but Hendrix uses the momentary lack of control by Da Vinci to regain half guard.
Hendrix is trying to stand back up but Da Vinci is controlling him
Da Vinci not throwing his punches with enough precision this time.
Hendrix wants to control but Da Vinci is keeping busy and won't allow it.
Da Vinci not throwing his punches with enough precision this time.
That's two minutes gone in the round.
Hendrix blocking the ground and pound attempt from Da Vinci.
Da Vinci seems to be taking a bit of a break to think of his next move. He lands a short punch in the meantime.
The fighters are starting to get a bit slippery now, which will make submissions a bit more difficult.
Da Vinci seems to be looking for submissions.
Hendrix trying to hold on to Da Vinci's head to control him but Da Vinci postures up.
Da Vinci drops an elbow to the side of Hendrix's head.
Da Vinci wants to advance to full mount but Hendrix doesn't think that's going to happen and regains full guard instead.
Hendrix is throwing his legs up, looking for submissions. Da Vinci is aware though and is defending well.
Da Vinci lands a couple of elbows.
The ref warns both fighters not to hold the cage as they work up against the meshing.
Da Vinci in full guard, throwing the ground and pound. No damage this time.
That's three minutes gone in the round.
Da Vinci is looking to advance position but Hendrix has hit a scissor sweep - now he's on top in mount!
Da Vinci is trying to stand.
Da Vinci is trying desperately to improve position.
Hendrix lands a couple of good shots and Da Vinci has given up his back, trying to escape the position!
Hendrix is hanging on to Da Vinci's back as he tries to escape.
Hendrix working for a choke but Da Vinci is defending well.
Da Vinci is keeping busy.
Da Vinci is displaying good submission defense - not really looking in danger of submitting to the rear naked choke at the moment. That could change in an instant of course if Hendrix gets his way!
Da Vinci trying to get back to his feet but Hendrix is in full control for now.
That's four minutes gone in the round.
Da Vinci tries to escape the position - he's now mounted. Is that better or worse? Hard to tell!
Hendrix working away from the top, dropping strikes.
Da Vinci sneaks a leg back under and regains half guard and is working straight away to try and get back to guard. He hasn't managed just yet though.
Hendrix looks towards his corner to check for any instructions. The corner give him nothing to work with, so he cracks Da Vinci with a short hammerfist. I guess that's as good as any advice he could get in this position.
Hendrix is scoring with some nice ground and pound from the dominant position.
Fantastic stuff here - a very entertaining period of action, which has drawn cheers from the crowd.
Hendrix trying to control the action but Da Vinci is working from the bottom.
Both fighters have adopted an aggressive gameplan on the ground!
Hendrix not throwing his punches with enough precision this time.
And thats the end of the round the fighters go back to their corners.
A close round but Caiman Hendrix will probably get the nod.
That's time! Back to the action!
Da Vinci shoots in and gets a takedown into Hendrix's guard.
Hendrix is throwing his legs up, looking for submissions. Da Vinci is aware though and is defending well.
Da Vinci throwing strikes but missing.
Da Vinci trying to control the position from guard on top but Hendrix is wriggling around, looking for whatever he can.
Da Vinci keeps in close for a moment and lands a decent shot to the side of Hendrix's head.
Da Vinci has to be careful here, sitting in the guard of a superior BJJ player.
Da Vinci won't allow Hendrix to sweep him here.
We've been hearing that Da Vinci has been drilling a lot of ground and pound in training, so let's see if he get the finish.
We've had a slow start to the round here - hopefully the action picks up.
Da Vinci throws an elbow that misses. Hendrix uses the momentum to reverse the position. He's now in Da Vinci's guard. Nice move by Hendrix!
Da Vinci wants to stand but Hendrix is controlling the position.
Hendrix postures up as if he's going to throw some strikes but drops back for an ankle! Da Vinci is in big trouble! He looks ready to tap! But no, he's escaped and dives on top of Hendrix, into his guard.
That's one minute gone in the round.
Da Vinci throws a strike but Hendrix rolls with it and manages to sweep. Now he's in guard on top.
Da Vinci is trying to control the position from the bottom.
Da Vinci looking for a sweep. Not yet Da Vinci, not yet.

Da Vinci uses the cage to get back to his feet.
Hendrix fails with a rather predictable takedown attempt.
Hendrix tries to clinch
and Da Vinci counters with a shoot takedown into half guard.
Hendrix taking some punishment here, with Da Vinci in his half guard.
That's two minutes gone in the round.
Da Vinci thows a wild elbow that connects with the canvas.
Hendrix slips a foot under and gets full guard. Nice work.
Hendrix controls Da Vinci momentarily but Da Vinci frees himself.
The fighters are pressed up against the cage, both looking to find a bit of space to work.
Da Vinci landing some decent shots from guard.
We've seen a great period of action over the last minute or so - credit to both fighters for going all out!
Da Vinci trying to control the position from guard on top but Hendrix is wriggling around, looking for whatever he can.
Hendrix not looking particularly offensive just at the moment.
Da Vinci stands up over Hendrix, holding his feet. He dives back in and lands a decent shot to the head.
Da Vinci throwing strikes but missing.
That's three minutes gone in the round.
Da Vinci missing there with some ground and pound from the guard.
Hammerfist, elbow! yells Da Vinci's corner. There ya go! There ya go!
Da Vinci avoids a guillotine attempt easily.
Da Vinci lands a couple of decent looking shots.
Da Vinci in full guard, throwing the ground and pound. No damage this time.
Da Vinci working in close now, lands a nice elbow to the side of Hendrix's head.
Da Vinci lands a nice shot whilst sitting in his opponent's guard.
Mateo Da Vinci overall seems to be getting the better of the ground position in the fight so far.
Hendrix is working from a closed guard but he's struggling to control his opponent.
Da Vinci content to stall in guard here.
That's four minutes gone in the round.
Hendrix is trying to control the position from the bottom.
Hendrix has momentary wrist control but Da Vinci slips an elbow through the middle.
Da Vinci throwing strikes but missing.
Da Vinci is really dominating this fight. Is there anything that Hendrix can do to turn this around?
Da Vinci is working Hendrix over from the guard. He should look to pass the guard and do a little more damage with these strikes.
The crowd thankful this round is nearly over.
Da Vinci throws a strike but Hendrix rolls with it and manages to sweep. Now he's in guard on top.
Da Vinci is working the butterfly guard. He manages to land a nice scissor sweep and is now in half guard on the top. Nice move.
Da Vinci lands a big shot. The thud that echoes around the arena is like music to the fans' ears.
And thats the end of the round the fighters go back to their corners.
Mateo Da Vinci dominated that second round.
That's time! Da Vinci's corner gives him a slap on the ass as he gets ready to fight. Let's hear some noise people - this is the final round!
Da Vinci dives in for a single leg takedown but Hendrix sprawls and the fighters end up clinched against the cage.
Hendrix is definitely looking for the counter takedowns here.
Da Vinci closes the distance, clinches up and gets a nice trip takedown into side control. Very smooth.
Hendrix is trying to control Da Vinci's posture but Da Vinci avoids it.
Hendrix misses with an elbow from the bottom.
Hendrix taking a bit of punishment here - Da Vinci scoring with strikes.
Da Vinci has knee on belly momentarily but Hendrix bucks him off and regains half guard.
Hendrix is looking to regain full guard. Not this time though.
We've had a slow start to the round here - hopefully the action picks up.
That's one minute gone in the round.
Hendrix trying to hold on to Da Vinci's head to control him but Da Vinci postures up.
Da Vinci thumps the canvas. Not on purpose obviously - he just missed Hendrix's head.
The fighters are battling for position here. Hendrix manages to regain full guard. Nice work.
Hendrix keeping full guard, as Da Vinci tries to pass.
Hendrix is working from a closed guard but he's struggling to control his opponent.
Da Vinci content to strike from guard, landing some decent shots.
Da Vinci slips nicely into half guard.
That's two minutes gone in the round.
Da Vinci prevents Hendrix from standing back up.
Hendrix holds on for dear life, maintaining half guard for now.
Da Vinci drops an elbow to the side of Hendrix's head.
Da Vinci throwing shots but Hendrix is blocking nicely.
Hendrix tries to get to full guard but Da Vinci has control of the leg.
Da Vinci is scoring with some nice ground and pound from the dominant position.
Hendrix gets full guard.
Da Vinci avoids a guillotine attempt easily.
Hendrix takes a big intake of breath there - he's definitely tired.
That's three minutes gone in the round.
Da Vinci trying to pass the guard but can't manage it just yet.
Da Vinci lands a nice shot whilst sitting in his opponent's guard.
Da Vinci throwing elbows and punches but not connecting, as Hendrix works some decent striking defense from the bottom.
Da Vinci with a flurry of punches that miss.
Da Vinci works over Hendrix with some ground and pound from guard.
Hendrix doesn't do any damage with a couple of strikes from the bottom.
Da Vinci passes into half guard.
Hendrix has no desire to be mounted, so is trying to control. Da Vinci is working away from the top position though.
Hendrix manages to get to full guard.
That's four minutes gone in the round.
Hendrix is working from a closed guard but he's struggling to control his opponent.
Hendrix wants to control but instead he gets his guard passed and Da Vinci is now in half guard.
Da Vinci seems to be taking a bit of a break to think of his next move. He lands a short punch in the meantime.
Boooooooooooooooooooo!!! God, this has been a terrible round. Come on you two, sort yourselves out!
Da Vinci works his foot free and advances to mount.
Da Vinci raining down hammerfists from mount.
And that's the end of the fight!
Mateo Da Vinci showed his dominance in that final round.
Well Da Vinci has outscored his opponent in every aspect of the fight today. Only a scarily incompetent judge or two will keep him from a well deserved win... Over to the ring announcer for the scorecards.
Ladies and gentlemen, after 3 rounds of action, we go to the scorecards for a decision.
Judge Damien Edna scores the fight 29:28
Judge Francis DeMontford scores the fight 29:28
Judge Eliza Hachem scores the fight 29:28
In favor of your winner, by unanimous decision... Mateo Da Vinci!
A relieved looking Mateo Da Vinci thanked the fans for their support and gave the usual line about them being amazing. They seemed to believe that he actually meant it.
|
|
|
|
|
|
|
|
|
|
|
|
|
|
|
|
|
|
|
|
|
|
|
| S |
C
A |
G |
S |
C
B |
G |
|
S |
C |
G |
|
energy
A | B |
|
hype
A | B |
|
pop
A | B |
|
mgr
A | B |
|
FIGHT
RATING
36% |
|
|
|
|
|
|
|
Undercard bout
|
Coming up we have a welterweight MMA rules bout between Michael Hayes (ranked 0 p4p, 0 weight class) and Ritchie Lampbert (ranked 0 p4p, 0 weight class). Over to our ring announcer for the fighter introductions!
 |
|
 |
| 185 cm
24
170 lbs
0 - 1 - 0 |
|
182 cm
21
178 lbs
0 - 2 - 0 |
Good takedowns
Brawler
Very quick |
|
BJJ Blue Belt
Excellent boxer
Determined |
|
| |
|
Ladies and gentlemen. This fight is 3 rounds, in the welterweight division.
Introducing the fighter to my left, fighting out of the red corner.
With a record of
0 - 1 - 0, fighting out of Sydney, Michael Hayes!
And introducing the fighter to my right, fighting out of the blue corner.
With a record of
0 - 2 - 0, fighting out of Sydney, Ritchie Lampbert!
The judges for this bout are Steve Erwin, Francis DeMontford and Darius Henderson.
The bell rings for round one and we are underway!
Lampbert jabs at Hayes's body.
Lampbert lands a right hook to the body.

Lampbert looking to score a takedown here. Hayes is defending well but Lampbert drives through and ends up in Hayes's guard.
Hayes looking for subs off his back but Lampbert has passed one foot through into half guard.
Lampbert takes a deep breath and rests his weight momentarily on top of his opponent, to control the position.
Hayes has improved his flexibility recently so we will have to see if he can use that to his advantage.
We've had a slow start to the round here - hopefully the action picks up.
The fighters are battling for position here. Hayes manages to regain full guard. Nice work.
Lampbert is taking a break and basically stalling. The referee will not allow him to do that for long.
Lampbert trying to control the position from guard on top but Hayes is wriggling around, looking for whatever he can.
That's one minute gone in the round.
Lampbert seems content to control from guard here. He's going to have to remain active though if he doesn't want to get stood back up.
Hayes has his foot on Lampbert's thigh. He's trying to push off and get in position for a triangle, I think. Lampbert works his way back into a safe position though.
Hayes is looking to cinch up a triangle. Lampbert throws the leg off to one side though and gets in tight to Hayes's body to avoid the submission. Hayes has instead reached around Lampbert's neck and now has a guillotine! Oh, this is biiiig trouble! Hayes arches his back and squeezes and forces the tap from his hapless opponent.
Ladies and gentlemen, after 1:46 of round 1, we have a winner by way of Submission (Guillotine). Michael Hayes!
|
|
|
|
|
|
|
|
|
|
|
|
|
|
|
|
|
|
|
|
|
|
|
| S |
C
A |
G |
S |
C
B |
G |
|
S |
C |
G |
|
energy
A | B |
|
hype
A | B |
|
pop
A | B |
|
mgr
A | B |
|
FIGHT
RATING
45% |
|
|
|
|
|
|
|
Undercard bout
|
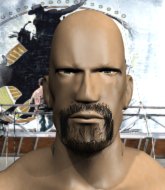
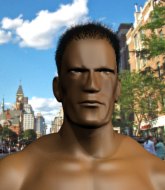
Coming up we have a heavyweight MMA rules bout between Domenic Gatto (ranked 0 p4p, 0 weight class) and Eddie Kiely (ranked 0 p4p, 0 weight class). Domenic Gatto has a significant reach advantage - let's see if he can make it count.
 |
|
 |
| 220 cm
25
255 lbs
5 - 0 - 0 |
|
195 cm
22
265 lbs
1 - 1 - 0 |
BJJ Blue Belt
Solid boxing
Big heart |
|
Good takedowns
Decent boxing
Determined |
|
| |
|
Ladies and gentlemen. This fight is 3 rounds, in the heavyweight division.
Introducing the fighter to my left, fighting out of the red corner.
With a record of
5 - 0 - 0, fighting out of Sydney, Domenic Gatto!
And introducing the fighter to my right, fighting out of the blue corner.
With a record of
1 - 1 - 0, fighting out of Sydney, Eddie Kiely!
The judges for this bout are Hugh Johnson, Skip Squint and Donatello Bradman.
The bell rings for round one and we are underway!
Kiely takes one on the chin but seems OK.
Domenic Gatto seems to be the more aggressive standup fighter in this bout.
Kiely is looking to take this fight into the clinch.
Gatto lands a powerful looking uppercut that connected with his opponent's jaw.
Gatto throws a lazy right hand but Kiely sees it coming a mile off and sidesteps it easily.
Kiely keeps the fight on the outside.
Kiely wants to clinch up but Gatto keeps it at a distance.
Gatto is looking to counter punch.
Kiely stuffs a takedown. It's all about dictating where the fight takes place and Kiely wants it to stay on the feet.
Kiely tries to close the distance and clinch but Gatto swats him to one side with an open hand palm strike and circles away.
Kiely tries to close the distance and clinch but Gatto swats him to one side with an open hand palm strike and circles away.
A nice combination there by Gatto.
Kiely is looking to take this fight into the clinch.
We've had a slow start to the round here - hopefully the action picks up.
Kiely tries to clinch but is not successful on this occasion.
Gatto moves out of range as Kiely strikes.
Kiely wants to clinch up but Gatto keeps it at a distance.

Gatto closes the distance and clinches.
Gatto is trying to break free.
Gatto has had enough of the clinch and is looking to separate.
That's one minute gone in the round.

Kiely manages to break the clinch.
Gatto lands with a straight right. Kiely didn't see that one coming.
Gatto tries for a takedown but Kiely circles away easily
and Kiely counters with a left to the body.
Eddie Kiely is looking to keep the fight on the feet at all costs.

Kiely drops Gatto with a beautiful combination! Gatto stares up at his opponent, who ushers him back to his feet - Kiely is looking for the KO!

Gatto is rocked!
It looks like Domenic Gatto has been cut.
Gatto throws a nice looking combination but Kiely bobs and weaves to avoid any damage.
Gatto is using his reach advantage well here, landing the more effective single shots from range.
Kiely throws a nice hook to the body that draws an oooh from the crowd.
The fans in attendance giving it up for the two fighters, who have really let it all hang out in the last minute or so!
Gatto swings away but doesn't land with a series of punches.
Kiely avoids the clinch attempt nicely.
Gatto pushes Kiely up against the cage in a clinch.
Kiely scores with a shoulder strike.
Kiely looks more muscular than last time we saw him. He must have been on the weights.
Kiely pushes off and circles away, back to the middle of the mat.
Gatto throws a wild combination but nothing lands.
Gatto scores with a sloppy right hand. Kiely should have avoided that one.
Gatto really does look like a pencil wearing a pair of gloves. Let's hope he has a gameplan to suit that ridiculous body shape.
Kiely tries to clinch up against the cage, rushing in to close the distance. Gatto manages to break the clinch and circles back to the middle of the mat.
Gatto fakes a head punch and goes low to the body. Nicely done.
Kiely tries to clinch but is not successful on this occasion.
Kiely avoids the clinch attempt nicely.
That's two minutes gone in the round.
Gatto changes levels and looks for a double leg takedown. Kiely tries to avoid it but Gatto manages to keep hold of a leg and drag Kiely to the ground. Kiely escapes though and pops straight back up to his feet.
That's three failed takedown attempts in the round for Domenic Gatto. That's going to take a lot out of him.
Kiely misses with a jab, cross combination.

Gatto tries to keep at a distance but Kiely has taken the fight into the clinch.
Kiely misses the knee to the body. Nice hip positioning from Gatto.
Kiely misses with a hook to the ribs.
Kiely breaks the clinch and we're back to striking at distance.
Gatto looks to land a body kick but Kiely moved away.
Kiely moves in looking to clinch but Gatto pushes him off.
Gatto takes a shot right to the liver - Bas would have been proud of that punch.
Gatto is breathing heavily.
Oooooh!!! Kiely has knocked Gatto down with a huge combo! Kiely steps away and waves a wobbly Gatto back to his feet! This one might not go much longer!
Oh Gatto is still all over the place! His legs are completely gone! Will he be able to recover?!!
Gatto misses with a double jab.
Kiely rushes forward with a series of wild hooks but Gatto moves out of range and avoids them all easily.
Gatto is looking for a counter combo.
Kiely punishes Gatto's body with a nice straight punch.
Kiely wants to clinch up but Gatto keeps it at a distance.
Kiely fails in his attempt to clinch.
Kiely scores with a sloppy punch to the body. Not much technique there but it did the business.
Kiely tries to clinch up but Gatto circles away and keeps his distance.
Kiely lands a jab and follows it up with a massive straight that knocks Gatto out cold! Gatto is crumpled in the corner, his head only propped up by the cage! That's one for the organiziational promos right there! Wow, what a finish!
Ladies and gentlemen, after 2:58 of round 1, we have a winner by way of KO (Punches). Eddie Kiely!
|
|
|
|
|
|
|
|
|
|
|
|
|
|
|
|
|
|
|
|
|
|
|
| S |
C
A |
G |
S |
C
B |
G |
|
S |
C |
G |
|
energy
A | B |
|
hype
A | B |
|
pop
A | B |
|
mgr
A | B |
|
FIGHT
RATING
72% |
|
|
|
|
|
|
|
Co-main event
|
Coming up we have a heavyweight MMA rules bout between Edward Kelly (ranked 0 p4p, 0 weight class) and Frederick Bowles (ranked 0 p4p, 0 weight class). Edward Kelly has the better chin. Will he look to stand and bang today?
 |
|
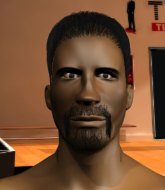 |
| 185 cm
25
230 lbs
5 - 1 - 0 |
|
225 cm
26
265 lbs
2 - 3 - 0 |
Decent wrestler
Counter fighter
Self confident |
|
BJJ Purple Belt
Good kicks
Very confident |
|
| |
|
Ladies and gentlemen. This fight is 3 rounds, in the heavyweight division.
Introducing the fighter to my left, fighting out of the red corner.
With a record of
5 - 1 - 0, fighting out of Sydney, Edward Kelly!
And introducing the fighter to my right, fighting out of the blue corner.
With a record of
2 - 3 - 0, fighting out of Sydney, Frederick Bowles!
The judges for this bout are Summer Carpenter, Hugh Johnson and Chris Dean.
The bell rings for round one and we are underway!
Bowles falls off balance throwing a combination
and Kelly counters with a nice double leg into guard.
Bowles is working from a closed guard but he's struggling to control his opponent.
Bowles is in a good position here but he's just trying to control... And he's not even managing to do that successfully.
Kelly postures up in Bowles's guard and throws a big left but Bowles blocks it.
Bowles has his foot on Kelly's thigh. He's trying to push off and get in position for a triangle, I think. Kelly works his way back into a safe position though.
Kelly working in close now, lands a nice elbow to the side of Bowles's head.
Kelly looking to pass the guard.
Kelly scoring with some ground and pound.
Kelly has to be careful here, sitting in the guard of a superior BJJ player.
We've had a slow start to the round here - hopefully the action picks up.
Bowles has control of Kelly's left arm, preventing Kelly from doing any damage.
Kelly throwing elbows and punches but not connecting, as Bowles works some decent striking defense from the bottom.
That's one minute gone in the round.
Bowles keeping moving, preventing Kelly from controlling successfully.
Kelly chips away with some ground and pound.
A big thud reverberates around the arena there as Kelly accidentally thumps the mat. Hopefully he's not broken his hand.
Kelly lands a couple of elbows.
Kelly throwing shots from guard but he's hitting more mat than opponent.
Kelly working some ground and pound from guard but it's not doing any damage.
Bowles is a painfully thin specimen of a man. You do wonder whether a good body kick would snap him clean in two.
Bowles keeping full guard, as Kelly tries to pass.
Kelly keeps in close for a moment and lands a decent shot to the side of Bowles's head.
The ref warns both fighters not to hold the cage as they work up against the meshing.
Bowles is looking to stand up but Kelly isn't so interested in that idea.
Kelly chips away with some ground and pound.
Bowles is looking to stand up but Kelly isn't so interested in that idea.
That's two minutes gone in the round.
Kelly is sitting in guard, working some ground and pound.
Bowles tries to land a sweep but no joy.
Kelly landing with the ground and pound.
The fighters are starting to perspire pretty heavily.
Kelly is working the ground and pound from guard. He might want to try advancing position though to get more of an impact.
Kelly in full guard, throwing the ground and pound. No damage this time.
Kelly with a couple of shots to the head there. Not particularly brutal.
Kelly might be looking to lock onto one of his opponent's long limbs for a submission, whilst we're on the ground.
Bowles throwing some rather feeble looking strikes off his back.
Bowles looking for a sweep. Not yet Bowles, not yet.
Kelly keeps in close for a moment and lands a decent shot to the side of Bowles's head.

Bowles is rocked!
Kelly knows he needs to get back to his feet asap. He's simply no match for Bowles on the ground.
Kelly loads up on a big left hand. Bowles felt that one! He's just covering up now, not defending himself intelligently - Kelly looks towards the ref and unloads with 3 more big shots and the ref has no choice but to stop the fight! Bowles can't hide his disappointment, as Kelly celebrates the victory.
Ladies and gentlemen, after 3:58 of round 1, we have a winner by way of TKO (Strikes). Edward Kelly!
|
|
|
|
|
|
|
|
|
|
|
|
|
|
|
|
|
|
|
|
|
|
|
| S |
C
A |
G |
S |
C
B |
G |
|
S |
C |
G |
|
energy
A | B |
|
hype
A | B |
|
pop
A | B |
|
mgr
A | B |
|
FIGHT
RATING
34% |
|
|
|
|
|
|
|
Main event
|
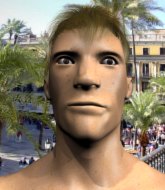
Coming up we have a welterweight MMA rules bout between Rodrigo Damm (ranked 0 p4p, 0 weight class) and Joe Hogan (ranked 0 p4p, 0 weight class). Hogan has chosen Bite It You Scum by GG ALLIN as his entrance music. Rodrigo Damm had real problems making weight for this fight. After initially coming in at 171.0lbs, he had two hours to make the official fight weight. He made it but it will have taken a lot out of him to cut those extra few pounds. Joe Hogan acknowledges the crowd's support as he enters the cage.
 |
|
 |
| 182 cm
18
179 lbs
0 - 0 - 0 |
|
177 cm
25
170 lbs
5 - 0 - 0 |
BJJ Purple Belt
Brawler
Good chin |
|
BJJ White Belt
Excellent MT
Determined |
|
| |
|
Ladies and gentlemen. This fight is 3 rounds, in the welterweight division.
Introducing the fighter to my left, fighting out of the red corner.
With a record of
0 - 0 - 0, fighting out of Sydney, Rodrigo Damm!
And introducing the fighter to my right, fighting out of the blue corner.
With a record of
5 - 0 - 0, fighting out of Sydney, Joe Hogan!
The judges for this bout are Ben Hemmingworth, Ron Honeybunn and Ben Watson.
The bell rings for round one and we are underway!
Damm is looking to clinch.
Hogan throws a sloppy head kick and Damm moves out of range easily.
As Hogan backs away, Damm returns fire with a leg kick that just misses.
Hogan lands with a nice body kick.
Damm throws a jab, cross combination which is slipped
and Hogan counters with a body kick that brings a smile to the face of both fighters.
Damm doesn't succeed with the takedown
and Damm takes a counter punch right on the button for his troubles.
Hogan lands with a slapping head kick.
Hogan's coach down at Madz **21 Elite coaches** was telling us pre-fight that they have been working on Hogan's balance. Obviously they view that as a key factor in the outcome of this fight.
Hogan pulls out of a head kick attempt.
Damm is trying to close the distance and clinch up, after that failed offence from Hogan.
Damm takes a nice looking leg kick right on the meat of his thigh there.
That's a knee to de groin and it's over and out! Damm crumples to the ground after an illegal strike from Hogan - the referee stops the clock and Damm gets 5 minutes to recover from that one. "I'm sorry" says Hogan. Damm manages to get back to his feet and the fight resumes.
Nice uppercut there from Hogan.
Damm is breathing heavily.
The crowd cheering loudly, showing their appreciation for the quality fight we're seeing here.
Damm with a poor takedown
and Hogan counters with a leg kick.
That's one minute gone in the round.
Damm on the wrong end of a nice jab.
A good leg kick by Hogan.
Hogan lands a leg kick. The shin dug right into the meat of the thigh.
Hogan feints with a shoulder and throws a nice leg kick to Damm's calf.
Hogan lands a leg kick that knocks Damm off balance momentarily.
Damm with a poor takedown
and Hogan makes the exchange count by landing a cracking kick to the body. Damm really felt that one!
That's three failed takedown attempts in the round for Rodrigo Damm. That's going to take a lot out of him.
Good leg kick by Hogan there. It's the ones that make that thud noise that hurt and that was an almighty thud.
Hogan scores with a nice body kick.
Damm steps to his left, right into the path of a big body kick from Hogan. That one must have hurt.
Hogan pushes Damm away with a front kick.
Wooooo! Give it up for these two warriors! They are putting on a show!
Hogan scores with a jab to the jaw.
Hogan lands a nice shot that snaps Damm's head back.
That's two minutes gone in the round.
A jab from Hogan does it's job there.
Damm is rocked!
Damm is holding his hands too far apart here. Hogan throws a hard, straight punch right down the pipe and BOOM! Damm is out! That punch landed square on the jaw - what a shot!
Ladies and gentlemen, after 2:16 of round 1, we have a winner by way of KO (Punch). Joe Hogan!
Joe Hogan tried to hype himself up post fight but didn't word it too well and it ended up with him sounding like a bit of a tool.
|
|
|
|
|
|
|
|
|
|
|
|
|
|
|
|
|
|
|
|
|
|
|
| S |
C
A |
G |
S |
C
B |
G |
|
S |
C |
G |
|
energy
A | B |
|
hype
A | B |
|
pop
A | B |
|
mgr
A | B |
|
FIGHT
RATING
59% |
|
|
|
|
|
|
|
|
|
|
