 |
EP 4: Afterlife PBP Commentary |
Undercard bout
|
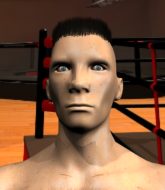
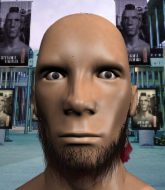
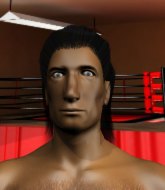
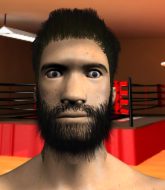
Coming up we have a light heavyweight MMA rules bout between AJ McKenzie (ranked 0 p4p, 0 weight class) and Young Buck (ranked 0 p4p, 0 weight class). AJ McKenzie has a significant reach advantage - let's see if he can make it count.
 |
|
 |
| 190 cm
18
221 lbs
1 - 0 - 0 |
|
170 cm
19
218 lbs
0 - 1 - 0 |
BJJ White Belt
Solid boxing
Big right hand |
|
BJJ White Belt
Excellent boxer
Powerful |
|
| |
|
Ladies and gentlemen. This fight is 3 rounds, in the light heavyweight division.
Introducing the fighter to my left, fighting out of the red corner.
With a record of
1 - 0 - 0, fighting out of Las Vegas, AJ McKenzie!
And introducing the fighter to my right, fighting out of the blue corner.
With a record of
0 - 1 - 0, fighting out of Las Vegas, Young Buck!
The judges for this bout are Frank Dennis, George Francis and Tiny Johnson.

The bell rings for round one and we are underway!
Buck moves into range and connects with a jab.
Buck throws a hard body shot but it just misses.
McKenzie changes levels and looks for a double leg takedown. Buck tries to avoid it but McKenzie manages to keep hold of a leg and drag Buck to the ground. Buck escapes though and pops straight back up to his feet.
McKenzie ducks under a wild hook from Buck.
A swing and a miss from Buck.
McKenzie is looking to counter the offense by Buck and move into the clinch.
Buck misses with a two punch combination.
A looping hook to the body misses from McKenzie. Buck does a little dance to reset his feet.
Buck throws a hook but McKenzie avoids it easily.
Some wild striking there from Buck.
McKenzie definitely looks more muscular than last time we saw him fight.
McKenzie throws a body punch but Buck moves out of range.
As McKenzie backs off Buck throws a huge counter combo but McKenzie manages to avoid it all.
We've had a slow start to the round here - hopefully the action picks up.
Buck looks to score with a combo but nothing lands.
McKenzie is looking to counter the offense by Buck and move into the clinch.
McKenzie shoots in for a takedown. "Ole!" shouts Buck as he jumps to the side.
McKenzie throws a looping left and ducks down for a takedown. He's got his arms around Buck's waist but Buck gets an underhook and avoids the takedown by throwing McKenzie off to one side.
Buck swings away with a counter right hand but no contact made.
That's three failed takedown attempts in the round for AJ McKenzie. That's going to take a lot out of him.

That's one minute gone in the round.
McKenzie lands with a straight right. Buck didn't see that one coming.
Buck lands a jab. Then a cross. Then finally a nice hook to the body. Good work there by Buck.
Buck lands with a shot to the body.
McKenzie misses with a takedown attempt - Buck sprawls well and throws a nice strike on the way out which just misses.
Buck misses with a looping right.
Buck looks to throw the jab but McKenzie is out of range.
McKenzie appears to be looking for a big counter.
McKenzie cracks Buck with an open hand slap.
Young Buck is looking to keep the fight on the feet at all costs.
Buck throws a right and a left that McKenzie avoids nicely.

McKenzie darts in and clinches Buck up against the ropes.
Buck avoiding damage as McKenzie throws knees to the body.
Buck working hard to break the clinch.
Buck stalling in the clinch but McKenzie improves position.

That's two minutes gone in the round.
McKenzie has Buck pressed up against the ropes and is working for takedown. Buck manages to improve position though and keeps the fight standing.
McKenzie drops down for a takedown but doesn't get it.
A head punch on the inside from McKenzie fails to land.
The crowd cheering loudly, showing their appreciation for the quality fight we're seeing here.
McKenzie is looking to take this one to the mat.
McKenzie is trying to pull guard but Buck turns him against the ropes and we stay in the clinch.
McKenzie has Buck pressed up against the ropes and is working for takedown. Buck manages to improve position though and keeps the fight standing.
McKenzie misses with a punch on the inside.
Buck stops a takedown attempt from McKenzie.
Buck gets double underhooks to prevent a takedown attempt from McKenzie.

That's three minutes gone in the round.

Buck breaks the clinch and we're back to striking at distance.
Buck throws a nice looking combination but McKenzie bobs and weaves to avoid any damage.
McKenzie looked to counter that last move with a leg kick but didn't pull the trigger.
Buck has worked on his takedown defense in the runup to this fight and it is paying off so far.
McKenzie uses some good footwork to avoid the body shot by Buck.
McKenzie avoids the body shot from Buck.
Young Buck seems to be the more aggressive standup fighter in this bout.
A combination from Buck does no damage.
McKenzie darts in and clinches Buck up against the ropes.

McKenzie manages to break the clinch.
McKenzie takes a shot right to the bread basket.
Buck doesn't react quick enough there as he takes a shot to the body.
Buck rushes forward with a series of wild hooks but McKenzie moves out of range and avoids them all easily.

That's four minutes gone in the round.
McKenzie misses the shot to the body.
Buck swings away with a counter right hand but no contact made.
McKenzie misses with a leg kick.
Buck throws a shot to the body.
Buck throws a hook to the body but it doesn't connect.
Buck throws a right hand that McKenzie ducks under and follows up with a left that McKenzie also avoids with ease.
We've seen a great period of action over the last minute or so - credit to both fighters for going all out!
Buck misses with a few strikes there.
McKenzie looks frustrated there after his takedown attempt is stuffed easily.
Buck lands with a cross to side of his opponent's head.
McKenzie looks to score with a combo but nothing lands.
Buck cracks a nice hook into McKenzie's ribs.
And thats the end of the round the fighters go back to their corners.
Young Buck dominated that round.
The fighters' corners scream their final instructions, as the referee calls time. Here we go, back to the action!

Buck throws a lazy right hand but McKenzie sees it coming a mile off and sidesteps it easily.
McKenzie is on the wrong end of a nice combination from Buck.

It looks like AJ McKenzie has been cut.
McKenzie slips a jab and a cross from Buck.
Buck uses good footwork to get in and out and land a nice right hand before McKenzie has time to react.
Buck throws a right hand that McKenzie ducks under and follows up with a left that McKenzie also avoids with ease.
Buck misses with a straight right.
McKenzie seemed to be looking to counter by closing the distance.
Buck tests McKenzie's chin there with a solid looking shot.
McKenzie moves out of range of the strikes.
McKenzie ducks under a wild hook from Buck.
McKenzie seemed to be looking to counter by closing the distance.
Buck looks to land a combination but McKenzie avoids it well.
McKenzie takes a punch to the jaw and another one to the bread basket.
The fans in attendance giving it up for the two fighters, who have really let it all hang out in the last minute or so!
McKenzie swings for the body but Buck moves out of range.
Buck stuns McKenzie with a nice body shot, before stepping back out of range.
That's one minute gone in the round.
Buck scores with a sloppy punch to the body. Not much technique there but it did the business.
McKenzie ducks under a wild hook from Buck.
McKenzie seemed to be looking to counter by closing the distance.
Buck will need to tighten up his combinations if he doesn't want to gas himself out, swinging at thin air.
Buck misses with a wild combination.
McKenzie is moving around nicely and scores here with a single head shot.
Buck misses with a wild body shot.
McKenzie avoids a lazy jab quite easily.
McKenzie is looking to counter punch.
McKenzie avoids the body shot from Buck.
McKenzie has a takedown stuffed.
Buck has been the more effective fighter overall so far.
That's two minutes gone in the round.
McKenzie lands with a good body shot.
McKenzie misses with a body shot. Nice footwork from Buck.
McKenzie is looking to wear down Buck with body shots, infact he's throwing more body shots than head shots at the moment.
McKenzie steps to the side to avoid the strikes from Buck.
Buck misses with a right hand
enabling McKenzie to counter with a crisp jab.
Buck throws a hard body shot but it just misses.
Buck misses the shot to the body.
Buck misses with a hook. McKenzie ducked under it nicely.
McKenzie half commits to a counter takedown before pushing away, out of range.
McKenzie throws a body punch but Buck moves out of range.
This is a great period of action - very entertaining stuff!
This fight brought to you by 5M nutrition - it's mmmmm tasty. Nice jab by McKenzie.
Buck looks to score with a jab to the body but McKenzie is just out of range.
McKenzie tries to counter with a takedown but Buck is quick to defend against it.
Buck fakes a head shot and lands one to the body.
That's three minutes gone in the round.
McKenzie tries to clinch but is not successful on this occasion.
Buck appears to be waiting to throw a counter punch to the body.
Buck rushes in with a sloppy looking punch
and McKenzie counters with a nice uppercut.
McKenzie lands a glancing blow to the side of Buck's head.
Buck showing good head movement there, avoiding the strikes from McKenzie.
Buck feints the counter takedown.
Buck tries to bum rush McKenzie with a series of wild strikes but McKenzie uses good footwork to avoid the assault.
Buck takes a jab right on the kisser.
Buck scores with a reasonable looking shot to the body. McKenzie doesn't seem bothered though.
Buck stuffs the takedown attempt from McKenzie. McKenzie gets slowly back to his feet.
Buck is the aggressor but that punch slipped nicely by McKenzie.
Buck avoids a low kick by using good footwork.
That's four minutes gone in the round.
Buck misses with a body shot.
McKenzie appears to be looking for a big counter.
McKenzie takes a shot to the body in his stride.
McKenzie looks to land a body kick but Buck moved away.
McKenzie walks into a jab.
This is a great period of action - very entertaining stuff!
Nice straight punches there by Buck. You know Roy Jones Jr respects the hands of Buck.
Buck misses with a wild combination.
McKenzie fails with a takedown attempt from distance.
Buck throws out a counter right but McKenzie avoids it with no problem.
That's three failed takedown attempts in the round for AJ McKenzie. That's going to take a lot out of him.
Buck swings for the body but McKenzie moves out of range.
McKenzie attempts a counter takedown but Buck avoids it well and moves away.
McKenzie moves in looking to clinch but Buck pushes him off.
McKenzie is looking to clinch but Buck is avoiding it.
The fighters circling - Buck throws out the jab but it was never going to land.
And thats the end of the round the fighters go back to their corners.
Young Buck showed his class in that round. I'd imagine he'll take it on all the scorecards.
The cut man is working on AJ McKenzie's cut.
That's time! Back to the action! Let's hear some noise people - this is the final round!

Buck misses with a double jab.
Buck lands with a straight right. McKenzie didn't see that one coming.
Buck misses with a few strikes there.
A slow jab from Buck misses its intended target.
McKenzie tries to counter by moving into the clinch but Buck manages to circle out of the way.
Buck bobs and weaves well there to avoid the strikes.
McKenzie defending well as Buck loads up on a big left hand.
Buck misses the shot to the body.
Buck throws a hook but McKenzie blocks it.
McKenzie seemed to be looking to counter by closing the distance.
McKenzie scores with a body shot.
We've had a slow start to the round here - hopefully the action picks up.
Buck swings wildly with a right hand that was never going to find it's target.
Buck throws out a token jab with nothing on it.
McKenzie drives through and clinches with Buck against the ropes.
McKenzie throws an elbow that misses.
That's one minute gone in the round.
McKenzie tries to stall but Buck uses the opportunity to gain a better position.
McKenzie misses with a body punch.
A bit of stalling here from McKenzie.
McKenzie breaks from the clinch.
McKenzie ducks under a wild hook from Buck.
Buck throws out a token jab with nothing on it.
McKenzie drops down looking for a counter takedown but Buck sprawls and moves away.
Buck fakes a jab and then connects with a hook.
McKenzie shoots in for a takedown but Buck shows good takedown defense there and keeps this one on the feet.
McKenzie waving his hands out in front of him, looking to distract Buck.
Buck throws a big shot that misses.
McKenzie staying out of range there.
AJ McKenzie has stepped it up - he knows he needs a finish here!
Young Buck is fighting for a decision - hopefully he's judged it right and he's actually winning the fight.
That's two minutes gone in the round.
Buck catches McKenzie with a nice straight right. He seems pissed - ooooh, it's on now! On like donkey kong!
Buck loads up on a big right hand but McKenzie slips the punch.
Buck is moving around nicely and scores here with a single head shot.
McKenzie keeping a good distance there, avoiding the body shot.
McKenzie pushing out the jab but it's not landing.
McKenzie with a jab.
Buck rushes forward with a series of wild hooks but McKenzie moves out of range and avoids them all easily.
McKenzie fails with a takedown attempt.
We've seen a great period of action over the last minute or so - credit to both fighters for going all out!
McKenzie clinches up with Buck and pushes him back against the ropes.
McKenzie breaks from the clinch.
That's three minutes gone in the round.
McKenzie just misses with a punch to the body.
Buck looks like he wants to counter punch here.
McKenzie slips a jab and a cross from Buck.
McKenzie tries to close the distance and clinch but Buck swats him to one side with an open hand palm strike and circles away.
Buck stooping low to avoid any incoming strikes and then lunges in with an uppercut come cross that lands flush.
McKenzie tries to clinch up.
Buck appears to be waiting to throw a counter punch to the body.
McKenzie closes the distance and presses his opponent up against the ropes.
McKenzie can't find room to land a body shot as Buck controls the action.
A battle for position here, against the ropes.
McKenzie tries for a takedown. No joy.
That's three failed takedown attempts in the round for AJ McKenzie. That's going to take a lot out of him.
Buck is trying to break free.
That's four minutes gone in the round.
McKenzie tries a body shot but Buck blocks it.
A quick uppercut on the inside from McKenzie.
Buck's corner calls for him to break the clinch, which he does.
McKenzie throws a jab but it's blocked by Buck.
Buck throws a hard body shot but it just misses.
McKenzie misses with a two punch combination.
Young Buck is looking to throw some combinations by the looks of things.
McKenzie throws a jab to the body, straight down the pipe. Boom. That sent Buck stumbling backwards but he manages to regain his composure quickly.
Buck ducks down and throws a hook to the body.
McKenzie throws the left hand but Buck avoids the punch easily.
It seemed like Buck was going to counter with the hook but didn't fully commit to it.
McKenzie is using his height advantage well here, landing a good percentage of his punches.
Buck lands with a straight right. McKenzie didn't see that one coming.
Fantastic stuff here - a very entertaining period of action, which has drawn cheers from the crowd.
McKenzie throws a predictable looking body shot
and Buck counters with a crisp hook to the side of the head.
And that's the end of the fight!
Young Buck comfortably won the final round on my scorecard.
I've got Buck winning every round here. Surely the decision will go his way and he'll pick up a well deserved decision victory. Over to the ring announcer for the scorecards.
Ladies and gentlemen, after 3 rounds of action, we go to the scorecards for a decision.
Judge Frank Dennis scores the fight 27:30
Judge George Francis scores the fight 27:30
Judge Tiny Johnson scores the fight 27:30
In favor of your winner, by unanimous decision... Young Buck!
The defeated AJ McKenzie had this to say: 'Great fight thank Buck its over!'.
|
|
|
|
|
|
|
|
|
|
|
|
|
|
|
|
|
|
|
|
|
|
|
| S |
C
A |
G |
S |
C
B |
G |
|
S |
C |
G |
|
energy
A | B |
|
hype
A | B |
|
pop
A | B |
|
mgr
A | B |
|
FIGHT
RATING
51% |
|
|
|
|
|
|
|
Undercard bout
|
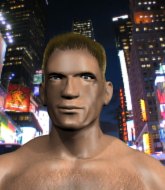
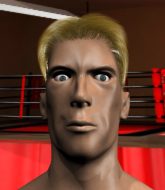
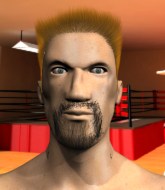
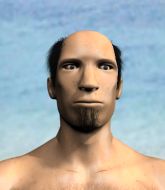
Coming up we have a lightweight MMA rules bout between Johnny Johnson (ranked 0 p4p, 0 weight class) and Tapor Breakbones (ranked 0 p4p, 0 weight class). The key to victory for Johnny Johnson has got to be keeping the fight on the feet.
 |
|
 |
| 162 cm
30
155 lbs
5 - 0 - 0 |
|
180 cm
25
155 lbs
1 - 2 - 0 |
BJJ Purple Belt
Excellent boxer
Granite chin |
|
BJJ Brown Belt
Brawler
Tends to cut |
|
| |
|
Ladies and gentlemen. This fight is 3 rounds, in the lightweight division.
Introducing the fighter to my left, fighting out of the red corner.
With a record of
5 - 0 - 0, fighting out of Las Vegas, Johnny Johnson!
And introducing the fighter to my right, fighting out of the blue corner.
With a record of
1 - 2 - 0, fighting out of Las Vegas, Tapor Breakbones!
The judges for this bout are Alan Glass, Frank Dennis and George Francis.
The bell rings for round one and we are underway!
Johnson clinches up against the ropes.
A right handed body shot lands from Johnson.
Johnson lands a hook to the body. It's hard to tell if that hurt Breakbones or not.
Johnson lands a shoulder strike.
Johnson scores with an uppercut up the middle.
Breakbones fails to pull the fight into his guard.
Johnson lands a shoulder strike.
I was talking to Johnson's coach per-fight and he was telling me that they'd been working on the clinch in the runup to this fight.
Breakbones tries to take the fight to the ground by pulling guard but can't manage it.
Breakbones drops to a knee looking for a takedown but Johnson gets the underhooks and prevents it.
Johnny Johnson has stuffed three takedown attempts in the round now. That's going to take a lot out of Tapor Breakbones.
A short right from Johnson on the inside.
Johnson lands a right hand.
Breakbones is working for a takedown up against the ropes. He can't get it on this occasion though.
Johnson lands a right uppercut that snaps the head of Breakbones backwards.
Johnson scores with a shoulder strike.
Fantastic stuff here - a very entertaining period of action, which has drawn cheers from the crowd.
Johnson lands with a right to the head.
Johnson working on landing some head shots here - that one got through nicely.
Breakbones goes for a takedown in the clinch but Johnson prevents it.
That's one minute gone in the round.
Johnson lands a left hand that snaps the head of Breakbones backwards.
Johnson lands a shot to the body.
Johnson lands a left hand.
Breakbones is looking to break free of the clinch but Johnson has double underhooks.
Johnson lands a body punch.
Johnson scores with a hook to the body.
Johnson scores with a shot to the side of Breakbones's head.
Johnson working on landing some head shots here - that one got through nicely.
Breakbones misses with a body punch.
Johnson lands a shoulder strike that jolts his opponent's head backwards.
A short right from Johnson.
A body shot lands from Johnson.
A short left from Johnson.

Breakbones is rocked!
Johnson swings wildly with an uppercut but Breakbones uses good head movement to avoid it.
Breakbones is still on wobbly legs! Can Johnson finish him?
This is a great period of action - very entertaining stuff!
Johnson throws a punch but it's blocked by Breakbones.
Johnson misses with a short punch on the inside.
Breakbones seems to have recovered his senses.
A right handed body shot lands from Johnson.
That's two minutes gone in the round.
Nice body punch from Johnson.
A nice left hand lands by Johnson.
A short left from Johnson.
Johnson dips a shoulder and cracks Breakbones with a mighty uppercut! Breakbones falls back against the ropes and Johnson unloads with a barrage of strikes! Breakbones is completely out with his eyes open, only supported by the ropes! Save him ref! Eventually the ref decides to do his job and jumps in - Johnson screams abuse at the incompetent official before going over to celebrate with his corner. Brutal stuff!
Ladies and gentlemen, after 2:22 of round 1, we have a winner by way of TKO (Strikes). Johnny Johnson!
Our winner, Johnny Johnson, made sure he spent some time buttering up the crowd during his post fight interview, which will no doubt bring him a few more fans.
|
|
|
|
|
|
|
|
|
|
|
|
|
|
|
|
|
|
|
|
|
|
|
| S |
C
A |
G |
S |
C
B |
G |
|
S |
C |
G |
|
energy
A | B |
|
hype
A | B |
|
pop
A | B |
|
mgr
A | B |
|
FIGHT
RATING
58% |
|
|
|
|
|
|
|
Undercard bout
|
Coming up we have a welterweight MMA rules bout between Snich Clinchwork (ranked 0 p4p, 0 weight class) and Aidan McVeigh (ranked 0 p4p, 0 weight class). McVeigh is bobbing his head along to his entrance song: E-Dubble - Let Me Oh. Aidan McVeigh has the better chin. Will he look to stand and bang today?
 |
|
 |
| 185 cm
19
182 lbs
1 - 0 - 0 |
|
185 cm
26
183 lbs
9 - 4 - 0 |
BJJ White Belt
Excellent MT
Very strong |
|
BJJ White Belt
Good kicks
Granite chin |
|
| |
|
Ladies and gentlemen. This fight is 3 rounds, in the welterweight division.
Introducing the fighter to my left, fighting out of the red corner.
With a record of
1 - 0 - 0, fighting out of Las Vegas, Snich Clinchwork !
And introducing the fighter to my right, fighting out of the blue corner.
With a record of
9 - 4 - 0, fighting out of Las Vegas, Aidan McVeigh!
The judges for this bout are Alan Glass, Daniel Franklin and Robert Twigg.
The bell rings for round one and we are underway!
McVeigh attempts a low kick but it misses it's target.
McVeigh scoring well with a low kick there.
An inside leg kick from McVeigh misses.
Clinchwork is looking to counter with a body kick.
Clinchwork moves out of range as McVeigh throws a body kick.
McVeigh misses with a head kick.
A punch combination from McVeigh misses.
Clinchwork definitely looks more muscular than last time we saw him fight.
McVeigh keeps the fight on the outside.
McVeigh with a nice looking leg kick. You could hear that one land in a back row.
Clinchwork avoids a low kick by using good footwork.
Clinchwork tries to clinch but is not successful on this occasion.
Aidan McVeigh seems to be the more aggressive standup fighter in this bout.
McVeigh throws a low kick, looking for Clinchwork 's leg but Clinchwork calmly moves out of range.
Clinchwork looked to counter that last move with a leg kick but didn't pull the trigger.
Clinchwork tries to clinch up against the ropes, rushing in to close the distance. McVeigh manages to break the clinch and circles back to the middle of the mat.
Clinchwork fails with an attempt to clinch.
Clinchwork tries to clinch but McVeigh is having none of it.
McVeigh appeared to try and counter that last move with a leg kick.
We've had a slow start to the round here - hopefully the action picks up.
Clinchwork tries to clinch up.
Like a baseball bat into the meat of his leg there - nice leg kick by McVeigh.
Clinchwork instigates a clinch.
Clinchwork has McVeigh pressed against the ropes, preventing McVeigh from circling away and getting back to striking at range.
Clinchwork throws a vicious knee straight up the middle but McVeigh blocks it with crossed arms.
Clinchwork landing knees to the body. They look like they could hurt.
That's one minute gone in the round.
Clinchwork keeps the fight in the clinch, despite McVeigh's efforts to push away.
Clinchwork prevents McVeigh from breaking the clinch.
McVeigh takes a knee to the side of the body.
McVeigh looks winded!
Clinchwork tries a knee to the head but he's missed.
McVeigh wants to get back to striking at distance but Clinchwork won't allow it.
McVeigh breaks from the clinch.
Clinchwork moves in looking to clinch but McVeigh pushes him off.
Clinchwork connects with a leg kick. McVeigh looked like he was expecting something else and didn't defend it.
McVeigh attempts a low kick but it misses it's target.
Clinchwork rushes McVeigh and presses him up against the ropes.
Clinchwork with an attempt at a knee that misses.
Clinchwork unloads a knee to the mid-section. McVeigh lets out a prehistoric sounding urrrrgh.
Clinchwork scores with a knee to the head.
McVeigh wants to break the clinch but can't.
Clinchwork landing knees to the body.
Clinchwork lands a knee to the head.

It looks like Aidan McVeigh has been cut.
The fans in attendance giving it up for the two fighters, who have really let it all hang out in the last minute or so!
Clinchwork with a knee to the head.
Clinchwork using the Thai clinch to land knees to the body.
That's two minutes gone in the round.
Clinchwork with the Thai clinch, lands a knee to the head.
Clinchwork lands a knee to the head there! That was nasty!
Clinchwork keeps control of McVeigh as he tries to wriggle out of the double underhooks.
Clinchwork using the Thai clinch to land knees to the body.
Clinchwork lands a good knee to the midsection. McVeigh won't want to take too many of those.
Clinchwork with the Thai clinch, lands a knee to the head.
Clinchwork lands a nice knee to the body.
McVeigh takes a knee to the side of the body.
Clinchwork with a knee to the head.
A nice glancing elbow lands by Clinchwork .
McVeigh wants to strike at distance but he can't break free of the clinch.
A knee to the head by Clinchwork .
McVeigh takes a knee right on the jaw!
McVeigh takes a knee right on the jaw!
Clinchwork throws a knee to the head but misses.
McVeigh working hard to break the clinch.
McVeigh tries to break the clinch but Clinchwork is controlling the position.
McVeigh tries to break the clinch but Clinchwork is controlling the position.
That's three minutes gone in the round.
McVeigh can't break the clinch.
Clinchwork lands a knee to the head there! That was nasty!
McVeigh is rocked!
That has opened up Aidan McVeigh's cut even more.
Clinchwork putting his Muay Thai to good use. He has McVeigh in a tight clinch and is doing some damage with knees to the body.
McVeigh is still on wobbly legs! Can Clinchwork finish him?
Clinchwork lands a nice elbow.
Clinchwork lands a big knee! That's hurt McVeigh! Oh, he's all over the place! Clinchwork lands another knee that sends McVeigh to the floor and the referee steps in to end the fight!
Ladies and gentlemen, after 3:21 of round 1, we have a winner by way of TKO (Strikes). Snich Clinchwork !
|
|
|
|
|
|
|
|
|
|
|
|
|
|
|
|
|
|
|
|
|
|
|
| S |
C
A |
G |
S |
C
B |
G |
|
S |
C |
G |
|
energy
A | B |
|
hype
A | B |
|
pop
A | B |
|
mgr
A | B |
|
FIGHT
RATING
62% |
|
|
|
|
|
|
|
Undercard bout
|
Coming up we have a middleweight MMA rules bout between Greg Smith (ranked 0 p4p, 0 weight class) and Travis Davies (ranked 0 p4p, 0 weight class). Both these guys have really solid chins. Will we see a standup war or will they both decide that a knockout is unlikely and try to win the fight elsewhere?
 |
|
 |
| 188 cm
21
190 lbs
0 - 1 - 0 |
|
185 cm
27
194 lbs
6 - 7 - 0 |
BJJ White Belt
Great elbows
Very strong |
|
BJJ Blue Belt
Decent boxing
Good gas tank |
|
| |
|
Ladies and gentlemen. This fight is 3 rounds, in the middleweight division.
Introducing the fighter to my left, fighting out of the red corner.
With a record of
0 - 1 - 0, fighting out of Las Vegas, Greg Smith!
And introducing the fighter to my right, fighting out of the blue corner.
With a record of
6 - 7 - 0, fighting out of Las Vegas, Travis Davies!
The judges for this bout are Robert Twigg, George Francis and Alan Glass.
The bell rings for round one and we are underway!
Thud! ouch! good body kick from Smith - that will leave a mark!
Davies looks for a takedown here. Will he get it? Smith is fending him off so far but Davies persists. Nope, Smith circles away and we're back to standing.
Davies tries to close the distance and clinch but Smith swats him to one side with an open hand palm strike and circles away.
Davies fakes high and shoots in for a takedown but Smith avoids it really well and circles away.

Davies moves into the clinch.
Smith leaning against his opponent.
Smith throws a hook to the body. More of an arm punch but it's all scoring with the judges.
Davies takes an elbow to the forehead.
Smith looking to throw knees to the head but Davies is blocking nicely.
Smith with the Thai clinch. He's looking to land a big knee but he's not managed it this time.
Smith trying to control the position but instead, Davies has worked for underhooks and has pushed Smith into the ropes.
We've had a slow start to the round here - hopefully the action picks up.
Davies misses the knee to the body. Nice hip positioning from Smith.
Davies wants to push off and get back to the center of the mat but Smith has him pressed against the ropes.
Smith looking to slow down the pace here.
Smith is defending well against a takedown attempt.
Greg Smith has stuffed three takedown attempts in the round now. That's going to take a lot out of Travis Davies.
That's one minute gone in the round.
A short left from Smith.
Smith working some nice short punches in the clinch.
Smith lands a nice elbow from the clinch.
Smith stops a takedown attempt from Davies.
Smith lands a right uppercut that snaps the head of Davies backwards.
Davies drops to a knee looking for a takedown but Smith gets the underhooks and prevents it.
Davies tries to pull guard but can't drag his opponent to the mat. Smith just stands there and leans against the ropes.
Smith pushes Davies back against the ropes and lands a hook to the side of the head.
Smith throws a blind hook that connects with the side of Daviess head.
Smith slows down the pace here.
Davies goes for a takedown in the clinch but Smith prevents it.
Both guys are working to get underhooks.
Smith throws a vicious knee straight up the middle but Davies blocks it with crossed arms.
Davies is trying to drag Smith to the mat but Smith just about manages to keep his footing. He used the ropes to his advantage there.
That's two minutes gone in the round.
Davies has hold of a leg and is looking for a trip takedown. Smith avoids it nicely though and we remain in the clinch.
Smith lands an elbow that stopped Davies in his tracks for a moment.
Smith lands with a short shot to the head.
The crowd are loving this. Great action here.
Smith is trying to slow down the pace in the clinch, to catch his breath.
Smith lands with a light punch inside.
Smith tries to land a knee to the head but misses.
Smith gets through Davies's defenses to land a nice punch to the side of the head.
Smith using the Thai plumb to throw knees but Davies has his back arched nicely, preventing the strike.
Davies has been looking to improve his clinch game in recent weeks. Smith seems to have the measure of him in the clinch so far, so let's see if Davies can turn it around.
Smith looking to throw knees to the head but Davies is blocking nicely.
Smith comes over the top with an elbow. That landed flush.
Smith pressing his opponent against the ropes.
Smith gets an overhook and lands an elbow to the side of the head.
Smith lands an elbow inside.
Smith landing knees to the head.
That's three minutes gone in the round.
Smith lands a knee to the head.
Smith pushes Davies back against the ropes and lands a hook to the side of the head.
Davies is trying to pull guard but Smith turns him against the ropes and we stay in the clinch.
Davies is trying to push Smith away but Smith has him pressed against the ropes, so he's going nowhere.
A left hand lands to the body for Smith.
Smith stops a takedown attempt from Davies.
Davies goes for a takedown attempt but Smith pushes him away and we're back to fighting at a distance.
Davies shakes his hands off, looking to compose himself, but takes a jab to the jaw whilst he does it.
Greg Smith is looking to keep the fight on the feet at all costs.
Davies wants to clinch up but Smith keeps it at a distance.
Smith scores with a jab.
Smith lands a head kick. Davies smiles back at him and beckons him forward.
Smith swinging wildly here.
A head kick misses from Davies.
Davies avoids the clinch attempt nicely.
Smith misses with a series of wild punches.
That's four minutes gone in the round.
The fans in attendance giving it up for the two fighters, who have really let it all hang out in the last minute or so!
Davies swings away but doesn't land with a series of punches.
Greg Smith seems to be the more aggressive standup fighter in this bout.
Davies tries to clinch up.
Davies tries to close the distance and clinch up against the ropes but Smith paws at him with a jab and circles away.
Davies avoids the head kick by Smith.
It seemed like Davies was going to counter with the hook but didn't fully commit to it.
Wow, both these guys are really going for it!
A combination from Smith does no damage.
Smith forces Davies back against the ropes and clinches.
Davies looking for a takedown.
Smith has Davies pressed against the ropes, preventing Davies from circling away and getting back to striking at range.
Still in the clinch, Smith scores with a nice short uppercut.
Davies wants a takedown but no success here.
Smith with the Thai clinch, lands a knee to the head.
Smith goes for a body shot but it's blocked.
Smith tries to land a knee to the head but misses.
Smith lands a nice elbow from the clinch.
Smith is pressed up against the ropes. Davies has hold of a leg and is looking to drag Smith down to the mat. Smith avoids the attempt though and has circled away. We're back to striking at a distance.
Smith gets a clinch.
And thats the end of the round the fighters go back to their corners.
Greg Smith dominated that round.
The minute break is over - no more time for sponges and pep talks - back to the action!
Smith fails in his attempt to clinch.
Davies shoots in for a takedown. "I don't think so" says Smith as he avoids it easily.
It looked like Smith was looking amped, ready to throw a big counter but didn't commit.

Davies drops down and drives through with a powerful takedown into guard.
Davies throwing elbows and punches but not connecting, as Smith works some decent striking defense from the bottom.
Davies throwing strikes but missing.
Smith can't do much from the bottom at the moment, as Davies controls the pace.
Davies working in close now, lands a nice elbow to the side of Smith's head.
We've had a slow start to the round here - hopefully the action picks up.
Smith preventing the ground and pound from doing any damage.
That's one minute gone in the round.
Davies trying to control but Smith is working from the bottom.
We've had a lack of effective grappling in the last minute or so, which could well see a referee standup.
Davies working some ground and pound from guard but it's not doing any damage.

The referee has decided to stand the fighters back up, so we'll restart on the feet.
Davies shoots in for a takedown - he's clinched up with Smith but Smith pushes him off and we're back to square one.
Davies swings away but doesn't land with a series of punches.
The fight moves into the clinch position.
An uppercut to the body lands inside from Smith.
Davies is working on a leg, looking for a takedown but Smith is defending well.
Greg Smith has stuffed three takedown attempts in the round now. That's going to take a lot out of Travis Davies.
Davies has hold of one of Smith's legs. Smith is fighting the takedown attempt but Davies gets the trip and lands the takedown into guard.
Smith is trying to stand up but he's not managed so far.
Smith is really dominating this fight. Is there anything that Davies can do to turn this around?
Davies trying to control but Smith is working from the bottom.
That's two minutes gone in the round.
Davies throwing strikes but missing.
Smith knows he needs to get back to his feet asap. He's simply no match for Davies on the ground.
Davies looking to sit in guard and control but Smith gets the butterfly guard and sweeps. He's now in the guard on the top.

Davies punching to the body, from the bottom.

Davies had isolated an arm as going for a kimura. Smith defends it easily.
Davies had isolated an arm as going for a kimura. Smith defends it easily.
That's three minutes gone in the round.
Davies working for a triangle but Smith defends it easily.
Davies has the superior BJJ but he's also working some ground strikes into his gameplan.
Davies is working the butterfly guard. He manages to land a nice scissor sweep and is now in half guard on the top. Nice move.

That's four minutes gone in the round.
Davies is keen to just control but Smith is a slippery customer.
Davies not throwing his punches with enough precision this time.
Davies is working for a submission here. He's got hold of the far side arm and he's looking for a kimura. He's cranking on the arm and he's got it! Smith is tapping out! Ouch, that looked like it hurt!
Ladies and gentlemen, after 4:45 of round 2, we have a winner by way of Submission (Kimura). Travis Davies!
|
|
|
|
|
|
|
|
|
|
|
|
|
|
|
|
|
|
|
|
|
|
|
| S |
C
A |
G |
S |
C
B |
G |
|
S |
C |
G |
|
energy
A | B |
|
hype
A | B |
|
pop
A | B |
|
mgr
A | B |
|
FIGHT
RATING
51% |
|
|
|
|
|
|
|
Undercard bout
|
Coming up we have a heavyweight MMA rules bout between Julio Cortez (ranked 0 p4p, 0 weight class) and Johnny Yager (ranked 0 p4p, 0 weight class). Both fighters really staring each other down here, as Johnny Yager enters the ring!
 |
|
 |
| 188 cm
25
248 lbs
4 - 2 - 0 |
|
220 cm
19
260 lbs
6 - 5 - 0 |
Good takedowns
Brawler
Experienced |
|
BJJ White Belt
Decent boxing
Powerful |
|
| |
|
Ladies and gentlemen. This fight is 3 rounds, in the heavyweight division.
Introducing the fighter to my left, fighting out of the red corner.
With a record of
4 - 2 - 0, fighting out of Las Vegas, Julio Cortez !
And introducing the fighter to my right, fighting out of the blue corner.
With a record of
6 - 5 - 0, fighting out of Las Vegas, Johnny Yager!
The judges for this bout are Alan Glass, Robert Twigg and Daniel Franklin.
The bell rings for round one and we are underway!
Cortez fails with the takedown.
Cortez shoots in for a takedown. "I don't think so" says Yager as he avoids it easily.
Yager looks like he wants to counter punch here.
Cortez with a poor takedown
and Yager counters with a right hand to the body.
That's three failed takedown attempts in the round for Julio Cortez . That's going to take a lot out of him.
Cortez is breathing heavily.
Yager dips to his left and cracks Cortez with an uppercut!
Yager moves in looking to clinch but Cortez pushes him off.
Yager wobbles Cortez with a right hand and the left hook that follows puts him on his rear! Yager dives in with a huge flying punch that connects right on the button and puts Cortez to sleep! - What a violent and spectacular finish!
Ladies and gentlemen, after 0:23 of round 1, we have a winner by way of KO (Punches). Johnny Yager!
A very excited looking Johnny Yager made sure he remembered to thank all the fans both in the arena and on the internet. He said all the coolest people spend all day on MMA websites, which got a big reaction.
|
|
|
|
|
|
|
|
|
|
|
|
|
|
|
|
|
|
|
|
|
|
|
| S |
C
A |
G |
S |
C
B |
G |
|
S |
C |
G |
|
energy
A | B |
|
hype
A | B |
|
pop
A | B |
|
mgr
A | B |
|
FIGHT
RATING
100% |
|
|
|
|
|
|
|
Co-main event
|
Coming up we have a light heavyweight MMA rules bout between Qasem Suleimani (ranked 0 p4p, 0 weight class) and Chris Johnson (ranked 0 p4p, 0 weight class). Suleimani's ring entrance music is that housewives' favourite, Busta Rhymes - Arab Money. Well, I have no idea who's going to take this one!
 |
|
 |
| 186 cm
20
219 lbs
2 - 1 - 0 |
|
195 cm
26
205 lbs
4 - 8 - 0 |
Good wrestling
World class boxer
Granite chin |
|
Good takedowns
Solid Muay Thai
Granite chin |
|
| |
|
Ladies and gentlemen. This fight is 3 rounds, in the light heavyweight division.
Introducing the fighter to my left, fighting out of the red corner.
With a record of
2 - 1 - 0, fighting out of Las Vegas, Qasem Suleimani!
And introducing the fighter to my right, fighting out of the blue corner.
With a record of
4 - 8 - 0, fighting out of Las Vegas, Chris Johnson!
The judges for this bout are George Francis, Cecil Peabody and Daniel Franklin.
The bell rings for round one and we are underway!
Johnson takes a solid shot to the body. That one hurt him but he's trying not to show it.
Suleimani throws a shot to the body.
Suleimani lands a glancing blow to the side of Johnson's head.
Johnson drops his hands momentarily and Suleimani takes advantage with a crisp shot to the head.
Suleimani uses good footwork to get in and out and land a nice right hand before Johnson has time to react.
Suleimani lunges in with an uppercut that skims his opponent's chin.
Suleimani lands a slapping body shot.
Johnson takes a body punch but keeps moving.
Johnson misses with a wild combination.
A quick step to the side and Suleimani tries to counter with a shot to the body but it doesn't connect.
Wooooo! Give it up for these two warriors! They are putting on a show!
Suleimani looks to score with a jab to the body but Johnson is just out of range.
Suleimani cracks Johnson with a hook to the jaw. Both fighters smile at eachother and high-five before getting back down to business.
A jab from Suleimani finds it's way through Johnson's defenses.
That's one minute gone in the round.
Johnson takes a jab right on the kisser.
Suleimani fakes a head shot and lands one to the body.
Qasem Suleimani seems to be the more aggressive standup fighter in this bout.
Suleimani misses with a body shot. Nice footwork from Johnson.
Suleimani lands with a good body shot.
Suleimani jabs. That one connects to the head of his opponent.
Suleimani stuffs the takedown attempt from Johnson. Johnson gets slowly back to his feet.
Johnson tries to move into range but Suleimani moves to the side and lands with a nice right hand.
Suleimani cracks a nice hook into Johnson's ribs.
Suleimani is really peppering his opponent's head with punches.
Johnson with a lazy takedown attempt
and Suleimani counters with a right hand to the body.
Johnson looks winded!
That's two minutes gone in the round.
Donk. Suleimani catches Johnson right on the button with a cross.
We've seen a great period of action over the last minute or so - credit to both fighters for going all out!
Suleimani scores with a nice head shot.
It looks like Chris Johnson has been cut.
Suleimani connects with a hook to the side of his opponent's head.

Suleimani lands a big uppercut and Johnson crumbles to the floor! The ref thinks about stopping the fight but Johnson looks OK. Suleimani waves Johnson back to his feet!
Johnson is rocked!
Suleimani circles and sees the opportunity to plant his feet and throw a really nice straight left hand that drops Johnson to the canvas! Johnson doesn't know where he is but he's trying to survive - Suleimani keeps piling on the pressure and forces the referee to step in! This one is aaaaaall over!
Ladies and gentlemen, after 2:30 of round 1, we have a winner by way of TKO (Strikes). Qasem Suleimani!
After winning the bout, Qasem Suleimani thanked all his fans and promised he'd do even better in his next fight. The crowd seemed to love his humility.
|
|
|
|
|
|
|
|
|
|
|
|
|
|
|
|
|
|
|
|
|
|
|
| S |
C
A |
G |
S |
C
B |
G |
|
S |
C |
G |
|
energy
A | B |
|
hype
A | B |
|
pop
A | B |
|
mgr
A | B |
|
FIGHT
RATING
68% |
|
|
|
|
|
|
|
Main event
|
Coming up we have a welterweight MMA rules bout between Shock Zhou (ranked 0 p4p, 0 weight class) and Chris Cruz (ranked 0 p4p, 0 weight class). I'm sure you'll be fascinated to know that I was talking to some pointless Z list celebrity before the fight and he thought that Chris Cruz was going to win. Let's see if he was right.
 |
|
 |
| 177 cm
26
178 lbs
12 - 7 - 0 |
|
180 cm
30
175 lbs
6 - 2 - 0 |
Good wrestling
Excellent boxer
Very quick |
|
Good wrestler
World class boxer
Good gas tank |
|
| |
|
Ladies and gentlemen. This fight is 3 rounds, in the welterweight division.
Introducing the fighter to my left, fighting out of the red corner.
With a record of
12 - 7 - 0, fighting out of Sydney, Shock Zhou!
And introducing the fighter to my right, fighting out of the blue corner.
With a record of
6 - 2 - 0, fighting out of Sydney, Chris Cruz!
The judges for this bout are Chris Downing, Robert Twigg and Alan Glass.
The bell rings for round one and we are underway!
Cruz works his jab well there, keeping his opponent at a distance.
Zhou bobs and weaves well there to avoid the strikes.
Cruz tries to close the distance and clinch up against the ropes but Zhou paws at him with a jab and circles away.
It looked like Zhou was trying to counter with a body shot coming off that last attack from Cruz.
Zhou tries a switch kick but it misses it's target.
Cruz misses with a double jab.
Cruz connects with a body shot.
Cruz on the wrong end of a decent looking cross there.
Zhou dances in quickly and lands a nice inside leg kick on Cruz. That did some damage!
Zhou throws a nice inside leg kick.
Cruz closes the distance and presses his opponent up against the ropes.
Cruz misses with some punches.
Cruz misses with a hook to the ribs.
Cruz tries to land a shot to the body but it's blocked.
Cruz keeps the fight in the clinch, despite Zhou's efforts to push away.
Cruz lands a right uppercut that snaps the head of Zhou backwards.
Wooooo! Give it up for these two warriors! They are putting on a show!
A short uppercut from Zhou.
That's one minute gone in the round.
Cruz misses with a hook to the ribs.
Zhou is trying to force a seperation but Cruz has the dominant position.
Zhou breaks the clinch.
Cruz swings away but doesn't land with a series of punches.
Cruz swings for the body but Zhou moves out of range.
Cruz throws a jab, cross combination which is slipped
and Zhou counters with a straight right hand.
Cruz fakes a head punch and goes low to the body. Nicely done.
Cruz misses with a combination
letting Zhou counter with a right hand.
Cruz takes a kick to the body and keeps moving.
Zhou throws a monster uppercut resembling something out of street fighter but it doesn't land.
Cruz is trying to avoid his opponent's strikes and get into the clinch.
Zhou throws a sloppy head kick and Cruz moves out of range easily.
Cruz misses with a double jab
and Zhou counters with a series of strikes that really hurt Cruz! The ref looks into his eyes and sees nobody home - he's called the fight! This one is all over!
Ladies and gentlemen, after 1:58 of round 1, we have a winner by way of TKO (Strikes). Shock Zhou!
Shock Zhou seemed lost for words in his post fight interview but he remembered to thank his fans and directed everyone to his website.
|
|
|
|
|
|
|
|
|
|
|
|
|
|
|
|
|
|
|
|
|
|
|
| S |
C
A |
G |
S |
C
B |
G |
|
S |
C |
G |
|
energy
A | B |
|
hype
A | B |
|
pop
A | B |
|
mgr
A | B |
|
FIGHT
RATING
47% |
|
|
|
|
|
|
|
|
|
|
