 |
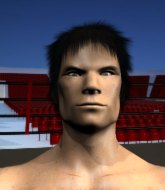
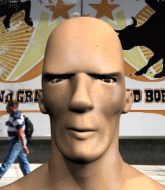
UFC - Choe vs. Mamrou PBP Commentary |
Undercard bout
|
Coming up we have a light heavyweight MMA rules bout between Ed Fazio (ranked 0 p4p, 0 weight class) and Toyoki Kawamura (ranked 0 p4p, 0 weight class). Fazio's ring entrance music is that housewives' favourite, The Mob Rules. Ed Fazio has the edge in experience - let's see if he can make that count tonight.
 |
|
 |
| 186 cm
19
212 lbs
1 - 2 - 0 |
|
178 cm
19
212 lbs
1 - 1 - 0 |
Decent wrestler
Basic striking
Very quick |
|
BJJ White Belt
Excellent MT
Good gas tank |
|
| |
|
Ladies and gentlemen. This fight is 3 rounds, in the light heavyweight division.
Introducing the fighter to my left, fighting out of the red corner.
With a record of
1 - 2 - 0, fighting out of Tokyo, Ed Fazio!
And introducing the fighter to my right, fighting out of the blue corner.
With a record of
1 - 1 - 0, fighting out of Tokyo, Toyoki Kawamura!
The judges for this bout are Shirou Masuda, Shigeki Fujiwara and Hirohito Nitta.

The bell rings for round one and we are underway!
Fazio throws out a token jab with nothing on it.
Kawamura swings for the body but Fazio moves out of range.
Fazio checks a low kick from Kawamura.
Kawamura walks into a stiff left hand from Fazio.
Kawamura misses with an attempted mid kick.
Kawamura tries to clinch but is not successful on this occasion.
Fazio circles away from the clinch attempt.

Kawamura shoots in for a takedown from distance. He catches Fazio napping and manages to drive through into side control!
Fazio is moving his hips around well on the bottom and has managed to get back to half guard.
Fazio is doing well to control the position and prevent Kawamura from advancing to side control.
Fazio is trying to get back to full guard.
Fazio definitely looks more muscular than last time we saw him fight.
Fazio manages to get to full guard.
Fazio looking for a sweep. Not yet Fazio, not yet.
The crowd cheering loudly, showing their appreciation for the quality fight we're seeing here.
Kawamura wants to control from the top but Fazio keeps moving.
Fazio wants to sweep here but Kawamura controlling him for the moment.
Kawamura must be cautious of submissions here, given that his opponent has the superior Jiu Jitsu.

That's one minute gone in the round.
Fazio is working hard here to advance position.
Fazio is avoiding any damage by keeping wrist control.
Fazio manages to land a sweep and now he's in mount on top!
Fazio lands a big elbow.
Kawamura felt the need to train up his defensive grappling in the buildup to the fight. Presumably he was expecting to be in a difficult position like this, so let's see if he can get out of it.
The fighters are pressed up against the cage, both looking to find a bit of space to work.
Kawamura squirming around on the bottom, looking to escape.
Kawamura tries to reverse the position but Fazio maintains control.
Fazio lands with some vicious ground and pound - can Kawamura hang on?
Kawamura really doesn't want to stay on the ground with Fazio. If he can't get it back to his feet, it's only a matter of time before he'll be tapping out.

That's two minutes gone in the round.
Fazio looking to ground and pound his opponent to a finish here.
Wooooo! Give it up for these two warriors! They are putting on a show!
Fazio with a couple of short strikes.
The ref warns both fighters not to hold the cage as they work up against the meshing.
Fazio looking to finish Kawamura with some ground and pound. This is bad for Kawamura!
Fazio lands a couple of nice shots there from mount.
Fazio scores with a couple of good head shots there.
Fazio sitting in mount, just looking to control for the moment.
A nice elbow there by Fazio.
The fighters are starting to get a bit slippery now, which will make submissions a bit more difficult.
Fazio landing strikes from the mount.
Kawamura takes a big shot to the head but keeps on trying to improve his position.

Kawamura is rocked!
Kawamura takes a big shot to the dome and his eyes have rolled back in his head! Fazio's killer instinct has kicked in as he finishes the fight with more strikes. Impressive finish.
Ladies and gentlemen, after 3:55 of round 1, we have a winner by way of TKO (Strikes). Ed Fazio!
After winning the bout, Ed Fazio thanked all his fans and promised he'd do even better in his next fight. The crowd seemed to love his humility.
Toyoki Kawamura was interviewed post fight and said 'Team Goroshi - Kore Fight Nutrition - OMG They Clinched Kenny - FNPFC'.
|
|
|
|
|
|
|
|
|
|
|
|
|
|
|
|
|
|
|
|
|
|
|
| S |
C
A |
G |
S |
C
B |
G |
|
S |
C |
G |
|
energy
A | B |
|
hype
A | B |
|
pop
A | B |
|
mgr
A | B |
|
FIGHT
RATING
71% |
|
|
|
|
|
|
|
Undercard bout
|
|
|
|
Undercard bout
|
Coming up we have a heavyweight MMA rules bout between Vinny Tamaso (ranked 0 p4p, 0 weight class) and Sinuhe Walli (ranked 0 p4p, 0 weight class). Chooooooooon! I think Tamaso might be my favorite fighter, now he's come out to Comin to your city. The crowd giving both fighters a great reception on their way into the arena. That's good to see.
 |
|
 |
| 194 cm
19
248 lbs
2 - 1 - 0 |
|
190 cm
19
220 lbs
2 - 1 - 0 |
BJJ Blue Belt
Excellent boxer
Very quick |
|
BJJ White Belt
Excellent MT
Solid chin |
|
| |
|
Ladies and gentlemen. This fight is 3 rounds, in the heavyweight division.
Introducing the fighter to my left, fighting out of the red corner.
With a record of
2 - 1 - 0, fighting out of Tokyo, Vinny Tamaso!
And introducing the fighter to my right, fighting out of the blue corner.
With a record of
2 - 1 - 0, fighting out of Tokyo, Sinuhe Walli!
The judges for this bout are Sosuke Kotani, Taro Takaoka and Tatsuya Matsuyama.
The bell rings for round one and we are underway!
Tamaso looking to take his opponent's legs away with the low kicks.
Walli lands with a cross to side of his opponent's head.
Tamaso fakes a jab and scores with a low kick.

Tamaso shoots in and scores a nice double leg takedown into half guard.
We may be looking at a referee standup if the pace doesn't pick up soon.
Tamaso not landing any meaningful shots this time.
Tamaso throwing punches and elbows but they're not doing any damage.
Tamaso thows a huge punch but Walli dodges it nicely.
Tamaso not landing any meaningful shots this time.
Tamaso missing with some ground and pound from the half guard.
Tamaso wants to control but Walli is keeping him busy.
Tamaso seems content to maintain position for now, rather than mounting any offense.
This is a great period of action - very entertaining stuff!
Tamaso missing with some ground and pound from the half guard.
That's one minute gone in the round.
Tamaso slips a nice elbow through Walli's hands, connecting with Walli's forehead.
Tamaso is controlling the pace.
Tamaso looks to score some points with some ground and pound.
Walli wants to get back to full guard.
Tamaso lands with an elbow from half guard - that looked like it hurt.
Tamaso missing with some ground and pound from the half guard.
That's two minutes gone in the round.
The fans in attendance giving it up for the two fighters, who have really let it all hang out in the last minute or so!
Walli trying to hold on to Tamaso's head to control him but Tamaso postures up.
Walli looks more muscular than last time we saw him. He must have been on the weights.
Tamaso throwing shots but they're hitting the canvas more than the man.
Walli on the receiving end of some nice ground and pound.

It looks like Sinuhe Walli has been cut.
Tamaso has been looking to land a fair amount of strikes on the ground. He might be looking to soften his opponent up in order to work for a submission.
Tamaso is looking to take a break and control but Walli is keeping him honest, looking to work from the bottom.
Tamaso is controlling the pace.
Tamaso lands a big shot. The thud that echoes around the arena is like music to the fans' ears.

That's three minutes gone in the round.
Tamaso is controlling the pace.
Tamaso throwing shots but Walli is blocking nicely.
Tamaso not landing any meaningful shots this time.
Walli is in trouble now - Tamaso has advanced to mount!
Walli in a bad spot here, taking shots to the head.
We've seen a great period of action over the last minute or so - credit to both fighters for going all out!
Tamaso sitting in mount, just looking to control for the moment.
Tamaso looking to ground and pound his opponent to a finish here.

That's four minutes gone in the round.
Tamaso breaks from Walli's wrist control and lands an elbow.
The cut above Sinuhe Walli's eye is starting to cause him problems now.
Tamaso breaks from Walli's wrist control and lands an elbow.
Sinuhe Walli's cut is absolute horrible now. This looks like something out of a horror film with blood covering both fighters.
The referee calls the doctor in to look at Sinuhe Walli's cut. Oh no, the doctor has called an end to the bout!
Ladies and gentlemen, after 4:35 of round 1, we have a winner by way of TKO (Cut). Vinny Tamaso!
A relieved looking Vinny Tamaso thanked the fans for their support and gave the usual line about them being amazing. They seemed to believe that he actually meant it.
|
|
|
|
|
|
|
|
|
|
|
|
|
|
|
|
|
|
|
|
|
|
|
| S |
C
A |
G |
S |
C
B |
G |
|
S |
C |
G |
|
energy
A | B |
|
hype
A | B |
|
pop
A | B |
|
mgr
A | B |
|
FIGHT
RATING
40% |
|
|
|
|
|
|
|
Undercard bout
|
Coming up we have a lightweight MMA rules bout between Tournament Winner (ranked 0 p4p, 0 weight class) and Anti Hero (ranked 0 p4p, 0 weight class). Both these guys have really solid chins. Will we see a standup war or will they both decide that a knockout is unlikely and try to win the fight elsewhere?
 |
|
 |
| 181 cm
20
160 lbs
2 - 0 - 0 |
|
174 cm
19
164 lbs
2 - 1 - 0 |
BJJ Blue Belt
Solid boxing
Cardio machine |
|
Good wrestler
Basic striking
Granite chin |
|
| |
|
Ladies and gentlemen. This fight is 3 rounds, in the lightweight division.
Introducing the fighter to my left, fighting out of the red corner.
With a record of
2 - 0 - 0, fighting out of St Petersburg, Tournament Winner!
And introducing the fighter to my right, fighting out of the blue corner.
With a record of
2 - 1 - 0, fighting out of New York, Anti Hero!
The judges for this bout are Shirou Masuda, Kenichi Hosakawa and Yukihiro Yamamoto.
The bell rings for round one and we are underway!
Winner leaves Hero with his face pressed against the mat as he sprawls beautifully, defending against a solid takedown attempt.
Hero fails with a takedown attempt from distance.
Hero swings widly with a right hand
and Winner cracks him with a counter punch right on the button.
Winner takes a step towards his opponent and connects with a left hand, before circling away.
Winner ducks under an overhand right and circles away with a smile on his face.
Hero looks for a takedown here. Will he get it? Winner is fending him off so far but Hero persists. Nope, Winner circles away and we're back to standing.
Tournament Winner has stuffed three takedown attempts in the round now. That's going to take a lot out of Anti Hero.
Hero misses the jab.
Hero shoots in but doesn't get the takedown
and Winner cracks him with a counter punch right on the button.
Winner gets caught flat footed, as Hero shoots in with a quick takedown into guard.
Hero is looking to work some ground and pound but Winner has wrist control.
Hero throws a big right hand that misses.
The crowd cheering loudly, showing their appreciation for the quality fight we're seeing here.
Winner utilising some decent striking defenses from the guard, preventing the ground and pound.
Hero has the superior BJJ but he's also working some ground strikes into his gameplan.
Hero working some strikes from top position.
That's one minute gone in the round.
Winner tries to land a sweep but no joy.
Winner keeping moving, preventing Hero from controlling successfully.
Hero won't allow Winner to sweep him here.
The ref warns both fighters not to hold the cage as they work up against the meshing.
Winner controls Hero momentarily but Hero frees himself.
Hero missing there with some ground and pound from the guard.
Hero throws a big elbow that misses.
Hero tries to free his leg and advance position but Winner is retaining full guard.
Winner avoiding any damage from the ground and pound.
That's two minutes gone in the round.
Hero throws a big elbow that misses.
Hero throws a big elbow that misses.
Winner is looking to get back to his feet but can't, whilst Hero is controlling him.
Hero throwing elbows and punches but not connecting, as Winner works some decent striking defense from the bottom.
Hero with a flurry of punches that miss.
Hero lands a nice shot whilst sitting in his opponent's guard.
Winner wants to get back to his feet but Hero is in a dominant position and won't allow it.
Hero looking to pass the guard.
Hero trying to land body shots but he keeps hitting the mat.
The fighters are pressed up against the cage, both looking to find a bit of space to work.
That's three minutes gone in the round.
Hero stopping the sweep attempt from Winner.
Winner is trying to stand up but he's not managed so far.
Hero keeps in close for a moment and lands a decent shot to the side of Winner's head.
Hero scoring with punches to the head and body.
Winner wants to stand but Hero is controlling the position.
Winner avoiding any damage from the ground and pound.
That's four minutes gone in the round.
Hero wants to control from the top but Winner keeps moving.
Hero postures up in Winner's guard and throws a big left but Winner blocks it.
Winner working the defensive guard well to avoid strikes from Hero.
Hero postures up and lands some nice ground and pound.
Hero throwing shots from guard but he's hitting more mat than opponent.
Hero makes a bit of distance and scores with some ground and pound, still in guard.
Wooooo! Give it up for these two warriors! They are putting on a show!
Winner keeping moving, preventing Hero from controlling successfully.
As the round comes to an end the crowd are showing their appreciation for a great round of action.
Winner knows he needs to get back to his feet asap. He's simply no match for Hero on the ground.
And that�s the end of the round � the fighters go back to their corners.
Anti Hero dominated that round.
That's time! Winner's corner gives him a slap on the ass as he gets ready to fight.

Winner moves forwards but Hero connects with a nice, crisp jab.
Hero throws a hook but Winner blocks it.
Hero throws a shot to the body.
Hero thows a body shot but no joy.
Winner takes a shot to the nose. Hopefully that hasn't broken it.
Hero swings for the body but Winner moves out of range.
Hero has done a lot of speed work in the buildup to this fight.
A telegraphed right hand from Winner misses the target.
Winner slips under a jab.
Hero takes a swing at Winner's ribcage but misses.
Hero throws a jab but it's blocked by Winner.
Hero moves away from the strike by Winner.
Winner steps to the side to avoid the strikes from Hero.
Hero looks for a takedown but Winner sprawls well.
That's one minute gone in the round.
Winner moves out of range of the strikes.
Hero misses with an uppercut
and Winner cracks him with a counter punch right on the button.
Winner lands a right hook to the body.
Hero is really struggling to land any decent head shots against his taller opponent.
Winner throws out a token jab with nothing on it.
Hero missing with a left hand there. Winner was out of range so wasted energy throwing that one.
Hero misses the body punch

and Winner counters into the clinch. Nicely done.
Hero has Winner pressed against the cage.
Hero misses with a short punch on the inside.
A short right hand to the side of the head by Winner.
Winner avoiding damage as Hero throws knees to the body.
That's two minutes gone in the round.
Hero misses with a punch to the body.
Hero is working for takedown but Winner is calmly controlling the position for now.
Winner working aggressively here.
Hero misses with a hook from the clinch.
Hero changes levels and goes for a takedown here. Winner fights it off and pushes away nicely.
Tournament Winner has stuffed three takedown attempts in the round now. That's going to take a lot out of Anti Hero.
Hero misses with an uppercut. Winner saw that one coming.
Hero misses with a telegraphed body shot
and Winner counters with a quick right hand to the jaw.
The fans in attendance giving it up for the two fighters, who have really let it all hang out in the last minute or so!
Hero fails with a takedown attempt.
Hero throws a poor cross that misses
and Winner counters with a good right hand that lands right on the jaw.
Hero throws a lazy right hand but Winner sees it coming a mile off and sidesteps it easily.
Hero just misses with a punch to the body.
That's three minutes gone in the round.
Hero misses with a body shot. Nice footwork from Winner.
Winner looks to have improved his striking defense since last time we saw him fight.
Winner is using his height advantage well here, landing a good percentage of his punches.
Hero misses the jab.
Winner lands with a cross.
Tournament Winner is winning the standup battle so far.
Winner slips under a jab.
Hero missing with a left hand there. Winner was out of range so wasted energy throwing that one.
Hero rushes in with a sloppy looking punch
and Winner counters with a straight right hand.
Hero throws a jab, cross combination which is slipped
and Winner counters by moving into the clinch.
Hero stalls.
Winner blocks a body shot from Hero.
Winner stops a takedown attempt from Hero.
Winner blocks an uppercut.
That's four minutes gone in the round.
Hero stalling.
Hero swings wildly with an uppercut but Winner uses good head movement to avoid it.
Winner lands a hook to the side of the head.
A head punch on the inside from Winner fails to land.
Winner avoiding damage as Hero throws knees to the body.
Hero is looking to score with knees to the body. Maybe he'll change it up and go body then head. Winner is defending well for now.
Winner swings wildly with an uppercut but Hero uses good head movement to avoid it.
Hero tries for a takedown. No joy.
As the round comes to an end the crowd are showing their appreciation for a great round of action.
Winner lands punches inside but they're not really causing much damage.
We've seen a great period of action over the last minute or so - credit to both fighters for going all out!
Winner lands an uppercut.
Hero can't find room to land a body shot as Winner controls the action.
And that�s the end of the round � the fighters go back to their corners.
A close second round but Anti Hero will probably get the nod - 10:9.
That's the end of the round. The referee orders the cornermen out of the cage so we can get back down to business. This is the final round!

Hero swings and misses with a hook to the body.
Hero looks to score with a jab to the body but Winner is just out of range.
A looping hook to the body misses from Hero. Winner does a little dance to reset his feet.
Winner lands with a shot to the body.
Hero shoots for a double leg takedown but Winner sprawls well. He's pushed Hero's face into the mat and manages to get back to his feet relatively easily.
Hero throws out a token jab with nothing on it.
Hero throws a looping overhand right but Winner ducks down to avoid it.
Hero swings and misses with a hook to the body.
A decent looking cross lands there for Winner.
Hero throws a hook to the side of Winner's head but Winner sees it coming and ducks under it beautifully.
A swing and a miss from Hero.
A shot to the body from Hero misses
and Winner connects with a straight left hand counter down the middle.
Winner throws a good cross that connects.
That's one minute gone in the round.
Hero closes the distance and clinches up, looking for a takedown. He shifts his weight and gets a nice trip into half guard.
Hero seems content to maintain position for now, rather than mounting any offense.
Winner wants to get back to full guard.
Hero thumps the canvas. Not on purpose obviously - he just missed Winner's head.
Winner is trying to get back to full guard.
Winner on his back here. We all know that wrestlers don't like being on their back so let's see if Winner tries to get out of the position.
Hero is stalling here. Winner is in no mood to hang around though. He's locked up a kimura from the bottom! Hero seems to be keeping calm but he's forced to roll out of the hold and Winner has ended up in side control on the top. Nice work.
Hero gets back to half guard.
That's two minutes gone in the round.
Winner wants to lay and pray for a moment but Hero keeps working.
Anti Hero has got the better of the ground game so far.

The ref stands the fighters back up. Tournament Winner wasn't doing enough on the ground.
Hero tries to land with a swinging hook to the body but Winner was well out of range. Poor timing from Hero.
Winner uses decent footwork to sidestep a right hand from Hero.
Winner lands with a shot to the body.
Hero swings wildly with a right hand that was never going to find it's target.
That's three minutes gone in the round.
Hero misses with a shot to the body
and Winner counters with a crisp hook to the side of the head.
Hero looks frustrated there after his takedown attempt is stuffed easily.
Hero takes a swing at Winner's ribcage but misses.
Hero jabbing away but nothing is landing.
Hero needs to keep his hands up - Winner had a free shot at his head there.
Winner clinches.
Winner misses with a punch on the inside.
Winner has a couple of punches blocked by Hero.
Hero misses with a body punch.
Hero throws a head punch that misses.
Tournament Winner has stepped it up - he knows he needs a finish here!
Hero blocking some punches.
That's four minutes gone in the round.
A head punch blocked on the inside by Hero.
The referee calls for Hero to work.
Winner misses with a punch on the inside.
Winner lands a nice shot to the body.
Hero blocks a punch to the side of the head.
As the round comes to an end the crowd are showing their appreciation for a great round of action.
Winner on the defensive, avoiding the knees to the body.
A head punch blocked on the inside by Hero.
We've seen a great period of action over the last minute or so - credit to both fighters for going all out!
Winner lands a right hand.
And that's the end of the fight!
That was a close round. You could make an argument for either fighter but I would give it to Tournament Winner.
I think Hero has won this one but let's see whether the judges agree with me. Over to the ring announcer for the scorecards.
Ladies and gentlemen, after 3 rounds of action, we go to the scorecards for a decision.
Judge Shirou Masuda scores the fight 28:29
Judge Kenichi Hosakawa scores the fight 28:29
Judge Yukihiro Yamamoto scores the fight 28:29
In favor of your winner, by unanimous decision... Anti Hero!
|
|
|
|
|
|
|
|
|
|
|
|
|
|
|
|
|
|
|
|
|
|
|
| S |
C
A |
G |
S |
C
B |
G |
|
S |
C |
G |
|
energy
A | B |
|
hype
A | B |
|
pop
A | B |
|
mgr
A | B |
|
FIGHT
RATING
51% |
|
|
|
|
|
|
|
Undercard bout
|
|
|
|
Undercard bout
|
Coming up we have a lightweight MMA rules bout between Ragnhildur Haraldsson (ranked 0 p4p, 0 weight class) and Delphino Atlantis (ranked 0 p4p, 0 weight class). The key to victory for Ragnhildur Haraldsson has got to be keeping the fight on the feet.
 |
|
 |
| 170 cm
19
160 lbs
5 - 0 - 0 |
|
175 cm
19
159 lbs
4 - 1 - 0 |
BJJ Blue Belt
Good kicks
KO power |
|
Good takedowns
Counter fighter
Very confident |
|
| |
|
Ladies and gentlemen. This fight is 3 rounds, in the lightweight division.
Introducing the fighter to my left, fighting out of the red corner.
With a record of
5 - 0 - 0, fighting out of Tokyo, Ragnhildur Haraldsson!
And introducing the fighter to my right, fighting out of the blue corner.
With a record of
4 - 1 - 0, fighting out of Los Angeles, Delphino Atlantis!
The judges for this bout are Tatsuya Matsuyama, Sosuke Kotani and Kenichi Hosakawa.
The bell rings for round one and we are underway!
Haraldsson tries to land with a swinging hook to the body but Atlantis was well out of range. Poor timing from Haraldsson.
Haraldsson misses with a looping left.
Haraldsson ducks down and throws a hook to the body but Atlantis moves away.
Haraldsson scores with a one two! Atlantis had his feet all tangled up there and couldn't avoid the strikes.
A good leg kick by Haraldsson.
Haraldsson throws a half hearted mid kick.
Haraldsson misses with a low kick.
Haraldsson scores with a punch to the gut of his opponent.
Haraldsson ducks down and throws a hook to the body but Atlantis moves away.
Haraldsson looks to land a combination but Atlantis avoids it well.
That's one minute gone in the round.
A leg kick checked by Atlantis.
Atlantis takes a shot right to the bread basket.
Haraldsson lands the left hand.
Haraldsson looks to land a left hand but Atlantis moved out of range nicely.
Haraldsson throws a hard body shot but it just misses.
Haraldsson uses good footwork to get in and out and land a nice right hand before Atlantis has time to react.
Haraldsson is looking to wear down Atlantis with body shots, infact he's throwing more body shots than head shots at the moment.
Atlantis takes a body punch that cleary hurt but he's trying not to show any weakness.
Haraldsson is moving around nicely and scores here with a single head shot.
The fans in attendance giving it up for the two fighters, who have really let it all hang out in the last minute or so!
Haraldsson swings and misses with a hook to the body.
That's two minutes gone in the round.
Haraldsson throws a leg kick
so Atlantis counters with a double leg into guard. Good agility.
Atlantis trying to pass the guard but can't manage it just yet.
Haraldsson trying to keep a closed guard but Atlantis is proving a slippery customer.
Atlantis slips nicely into half guard.
Atlantis is working hard to pass the guard. He's done it - he's now in full mount! Trouble for Haraldsson!
Haraldsson is squirming around, avoiding Atlantis's attempts to control the action.
Haraldsson tries to hold on but Atlantis pushes him away.
That's three minutes gone in the round.

Haraldsson has left one of his arms exposed and Atlantis doesn't need a second invitation. He's isolated it and locked on a tight armbar. Haraldsson screams and taps out, obviously in a lot of pain. Hopefully there isn't permanent damage to that arm.
Ladies and gentlemen, after 3:24 of round 1, we have a winner by way of Submission (Armbar). Delphino Atlantis!
|
|
|
|
|
|
|
|
|
|
|
|
|
|
|
|
|
|
|
|
|
|
|
| S |
C
A |
G |
S |
C
B |
G |
|
S |
C |
G |
|
energy
A | B |
|
hype
A | B |
|
pop
A | B |
|
mgr
A | B |
|
FIGHT
RATING
36% |
|
|
|
|
|
|
|
Undercard bout
|
Coming up we have a middleweight MMA rules bout between Okrim Rimdor (ranked 0 p4p, 0 weight class) and Jadaveon Hall (ranked 0 p4p, 0 weight class). Both these guys have solid standup skills and neither is particularly fantastic on the ground, so let's hope for a nice standup war!
 |
|
 |
| 185 cm
26
180 lbs
2 - 2 - 0 |
|
184 cm
26
179 lbs
3 - 1 - 0 |
BJJ Blue Belt
Solid boxing
KO power |
|
Decent wrestler
Excellent boxer
Prefers standup |
|
| |
|
Ladies and gentlemen. This fight is 3 rounds, in the middleweight division.
Introducing the fighter to my left, fighting out of the red corner.
With a record of
2 - 2 - 0, fighting out of Tokyo, Okrim Rimdor!
And introducing the fighter to my right, fighting out of the blue corner.
With a record of
3 - 1 - 0, fighting out of Tokyo, Jadaveon Hall!
The judges for this bout are Tatsuya Matsuyama, Yukihiro Shimada and Ren Mimura.
The bell rings for round one and we are underway!
Rimdor swings for the body but Hall moves out of range.
Hall with a body punch. A glancing blow.
Rimdor throws a nice looking combination but Hall bobs and weaves to avoid any damage.
Hall takes a step towards his opponent and connects with a left hand, before circling away.

It looks like Okrim Rimdor has been cut.
Rimdor shoots and misses

and Hall counters with a crisp one two that drops Rimdor! Hall thinks about following him to the mat for a moment but instead steps back and waves Rimdor to his feet! Rimdor is in big trouble!

Rimdor is rocked!
Rimdor is breathing heavily.
This is a great period of action - very entertaining stuff!
Hall lands with a jab that stuns his opponent. Rimdor is looking to close the distance but Hall sees it coming and throws a beautiful knee! Rimdor crumbles to the mat and that's all she wrote! Let's hope Rimdor is OK because that was naaaaaasty!
Ladies and gentlemen, after 0:21 of round 1, we have a winner by way of KO (Knee). Jadaveon Hall!
|
|
|
|
|
|
|
|
|
|
|
|
|
|
|
|
|
|
|
|
|
|
|
| S |
C
A |
G |
S |
C
B |
G |
|
S |
C |
G |
|
energy
A | B |
|
hype
A | B |
|
pop
A | B |
|
mgr
A | B |
|
FIGHT
RATING
100% |
|
|
|
|
|
|
|
Undercard bout
|
Coming up we have a welterweight MMA rules bout between Major Major (ranked 0 p4p, 0 weight class) and Itsu Hitigaki (ranked 0 p4p, 0 weight class). Major comes to the cage accompanied by Iron Man. Hitigaki has chosen The Whistler as his entrance music, which hasn't gone down very well with the crowd. Both fighters look fresh as a daisy as they make their way towards the cage.
 |
|
 |
| 185 cm
26
170 lbs
3 - 1 - 1 |
|
175 cm
26
153 lbs
4 - 4 - 0 |
BJJ Purple Belt
Brawler
KO power |
|
BJJ Blue Belt
Brawler
Determined |
|
| |
|
Ladies and gentlemen. This fight is 3 rounds, in the welterweight division.
Introducing the fighter to my left, fighting out of the red corner.
With a record of
3 - 1 - 1, fighting out of Tokyo, Major Major!
And introducing the fighter to my right, fighting out of the blue corner.
With a record of
4 - 4 - 0, fighting out of Tokyo, Itsu Hitigaki!
The judges for this bout are Shirou Masuda, Hirohito Nitta and Yukihiro Yamamoto.
The bell rings for round one and we are underway!
Nice body kick there by Major.
Hitigaki fails in his attempt to clinch.
Hitigaki gets taken down but at least he's managed to land in guard.
Hitigaki looks more muscular than last time we saw him. He must have been on the weights.
Major throwing strikes but missing.
Hitigaki utilising some decent striking defenses from the guard, preventing the ground and pound.
Major throws an elbow that misses. Hitigaki uses the momentum to reverse the position. He's now in Major's guard. Nice move by Hitigaki!
Major throws a couple of shots from the bottom but they don't land.
Major wants to stand up but Hitigaki is controlling him.
Major is trying to control the position from the bottom.

Major looking for a guillotine here but Hitigaki defends easily.
That's one minute gone in the round.
Major looking for a sweep. Not yet Major, not yet.
Hitigaki got a little sloppy there for a moment and Major has worked his way into a loose triangle - can he finish it?! No, Hitigaki has managed to get both his arms back between Major's legs - danger averted.
Major is trying to control the position but Hitigaki postures up.
Major doesn't do any damage with a couple of strikes from the bottom.
Hitigaki must be cautious of submissions here, given that his opponent has the superior Jiu Jitsu.
Hitigaki trying to control the position from guard on top but Major is wriggling around, looking for whatever he can.
Major had isolated an arm as going for a kimura. Hitigaki defends it easily.
That's two minutes gone in the round.
Major looking to sweep using the butterfly guard but Hitigaki puts pay to that idea as he passes nicely into half guard.
Major has been looking to land a fair amount of strikes on the ground. He might be looking to soften his opponent up in order to work for a submission.
Major throws a strike from the bottom but Hitigaki passes into side control!
Major looking for a sweep but Hitigaki has passed into full mount! Oh no!
Hitigaki controlling from the full mount.
Hitigaki trying to control but he's not successful this time.
That's three minutes gone in the round.
Major tries to reverse the position but Hitigaki maintains control.
You get the feeling that Major really doesn't like being in this position too much.
Major tries to hold on but Hitigaki pushes him away.
Major wants to use the cage to get back to his feet here.
Major is trying desperately to improve position.
Major sneaks a leg back under and regains half guard and is working straight away to try and get back to guard. He hasn't managed just yet though.
That's four minutes gone in the round.
Major pushes Hitigaki off looking to stand but Hitigaki dives back in and keeps control.
Major is trying to get back to full guard.
Major is trying to stand.
Hitigaki prevents Major from improving his position.
Major pushes Hitigaki off looking to stand but Hitigaki dives back in and keeps control.
Major preventing any damage for now, controlling his opponent's head.
The crowd applaud the fighters efforts here as the round comes to an end.
Hitigaki wants to take a breather but Major is having none of it.
And that�s the end of the round � the fighters go back to their corners.
Major Major dominated that round.
Well, the break between rounds is over. Let's get back to the scrappin!
Hitigaki moves in looking to clinch but Major pushes him off.
Major has his front leg slapped to the side - a nice low kick landing there from Hitigaki.
Major shoots in for a takedown but Hitigaki shows good takedown defense there and keeps this one on the feet.
Major swats away the attempt to clinch by Hitigaki.
Major tries a switch kick but it misses it's target.
Hitigaki slaps away a takedown attempt from Major, before circling back to the center of the mat.
Major uses some good footwork to avoid the body shot by Hitigaki.
Hitigaki tries to clinch up but Major circles away and keeps his distance.
Hitigaki tries to clinch up but Major circles away and keeps his distance.
Nice takedown defense from Hitigaki. No joy for Major on that attempt.
That's three failed takedown attempts in the round for Major Major. That's going to take a lot out of him.
Hitigaki tries to clinch up.
Major misses the shot to the body.
Major tries to close the distance and clinch up but Hitigaki swats him away and circles back towards the center.
Hitigaki tries to clinch up
and Major decides to take the opportunity to score a takedown. He's landed in Hitigaki's guard.
That's one minute gone in the round.
Major throwing strikes but missing.
Major would like to get this fight back to the feet but can't get free from the closed guard.
Hitigaki is doing well to control the posture of his opponent and prevent any damage.
Major postures up and lands a big shot to Hitigaki's brow.
Major throws a big elbow that misses.
Major trying to control the position from guard on top but Hitigaki is wriggling around, looking for whatever he can.
Hitigaki trying to keep a closed guard but Major is proving a slippery customer.
The fighters are pressed up against the cage, both looking to find a bit of space to work.
That's two minutes gone in the round.

Hitigaki scrambles and gets back to his feet.
Hitigaki tries to close the distance and clinch but Major swats him to one side with an open hand palm strike and circles away.
Major Major is looking to throw some combinations by the looks of things.
Hitigaki moves in looking to clinch but Major pushes him off.
Major gets a clinch.
Major decides to pull guard.
Major has an active guard here but Hitigaki has managed to pass into half guard.
The fans in attendance giving it up for the two fighters, who have really let it all hang out in the last minute or so!
Major wants to get back to full guard.
That's three minutes gone in the round.
Major gets full guard.
Major is trying to keep Hitigaki in close.
Major keeping moving, preventing Hitigaki from controlling successfully.
Major not looking particularly offensive just at the moment.
Major wants to sweep here but Hitigaki controlling him for the moment.
Major is looking for a guillotine. You can't force these things though and Hitigaki defends well.
Hitigaki postures up.
The ref warns both fighters not to hold the cage as they work up against the meshing.
That's four minutes gone in the round.
Major is striking from the bottom but Hitigaki uses the opportunity to pass into half guard.
Major misses with some strikes from the bottom.
Major works his way to full guard. Good work.
Major is working from a closed guard but he's struggling to control his opponent.
As the round comes to an end the crowd are showing their appreciation for a great round of action.
Hitigaki slows down the pace of the fight for a moment. He'll need to remain active if he doesn't want to see the fight stood back up.
And that�s the end of the round � the fighters go back to their corners.
Major Major dominated that second round.
That's time! Back to the action! Let's get this one finished - here comes the final round!
Hitigaki is looking to clinch.
Major ducks down and throws a hook to the body but Hitigaki moves away.
Hitigaki moves in looking to clinch but Major pushes him off.
Hitigaki uses some good footwork to avoid the body shot by Major.
Major goes for a double leg but Hitigaki avoids the attempt and the two fighters end up clinched against the cage as Hitigaki continues to drive forward.
Hitigaki has Major pressed against the cage, preventing Major from circling away and getting back to striking at range.
Hitigaki throws an elbow that misses.
Major is trying to pull guard but being pressed up against the cage enables Hitigaki to keep the fight standing.
Major blocks a punch to the side of the head.
The pace slowing considerably in the clinch, as Major takes a break from that fighting nonsense to think about the finer things in life.
Major blocks a body shot from Hitigaki.
Major jumps guard but Hitigaki stands there with Major around his waist. Major gives up and drops back to his feet. We remain in the clinch.
That's three failed takedown attempts in the round for Major Major. That's going to take a lot out of him.
That's one minute gone in the round.
Major is trying to pull guard but being pressed up against the cage enables Hitigaki to keep the fight standing.
Major is trying to drag Hitigaki to the mat but Hitigaki just about manages to keep his footing. He used the cage to his advantage there.
Major tries to pull guard but Hitigaki forces him back to his feet, against the cage.
Both fighters are breathing heavily.
Hitigaki misses with an elbow over the top.
Hitigaki lands a body punch - he's looking to wear down Major.
Hitigaki is trying to slow down the pace of the fight but Major is keeping busy.
Major tries to score a body lock takedown but Hitigaki shows good agility there to stay on his feet.
Major is trying to pull guard but Hitigaki has him pressed against the cage.

Major's corner calls for him to break the clinch, which he does.
That's two minutes gone in the round.
Major tries to score a power double leg takedown but Hitigaki sees that one coming and sprawls well. That will dishearten Major somewhat.

Hitigaki moves into the clinch successfully.
The referee calls for Hitigaki to work.
Hitigaki tries to land a shot to the body but it's blocked.
A real battle for position is taking place between these two warriors.
Hitigaki misses with a hook from the clinch.
Major wants to strike at distance but he can't break free of the clinch.
Major tries for a takedown but Hitigaki manages to get underhooks.
Major is trying to drag Hitigaki to the mat but Hitigaki just about manages to keep his footing. He used the cage to his advantage there.
Major throws a punch but it's blocked by Hitigaki.
That's three minutes gone in the round.
Hitigaki lands a right uppercut that snaps the head of Major backwards.
Hitigaki is stalling here. The referee will be looking to step in if he doesn't pick up the pace.
Hitigaki is looking to control Major's arms but Major gets an underhook and turns him. Now Hitigaki has his back to the cage.
Major misses with a punch to the body.
Major tries for a takedown. No joy.
Both fighters working to control the clinch.
Major tries to pull guard but Hitigaki holds him up against the cage and eventually Major drops back down to his feet.
Major Major is fighting for a decision here - he's started to take the cautious approach.
Major fails to pull the fight into his guard.
That's four minutes gone in the round.
Hitigaki stalling in the clinch but Major improves position.
Major breaks from the clinch.
Hitigaki dips down and scores with a jab to the body.
Hitigaki tries to clinch up against the cage, rushing in to close the distance. Major manages to break the clinch and circles back to the middle of the mat.
Hitigaki throws a push kick but Major slaps the foot to one side.
Hitigaki gets caught napping as Major dives in and scores a takedown. Hitigaki manages to retain guard.
Major postures up.
The crowd applaud the fighters efforts here as the round comes to an end.
Major is intent on slowing down the pace of the fight, simply looking to control.
And that's the end of the fight!
I would just about give that final round to Itsu Hitigaki.
I think Major has won this one but let's see what the judges have to say. Over to the ring announcer for the scorecards.
Ladies and gentlemen, after 3 rounds of action, we go to the scorecards for a decision.
Judge Shirou Masuda scores the fight 29:28
Judge Hirohito Nitta scores the fight 29:28
Judge Yukihiro Yamamoto scores the fight 30:28
In favor of your winner, by unanimous decision... Major Major!
During a confident post fight interview, Major Major thanked all his fans. He seemed very genuine when describing how motivated his fans keep him.
|
|
|
|
|
|
|
|
|
|
|
|
|
|
|
|
|
|
|
|
|
|
|
| S |
C
A |
G |
S |
C
B |
G |
|
S |
C |
G |
|
energy
A | B |
|
hype
A | B |
|
pop
A | B |
|
mgr
A | B |
|
FIGHT
RATING
44% |
|
|
|
|
|
|
|
Co-main event
|
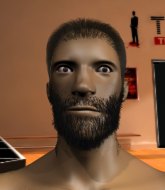
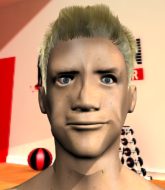
Coming up we have a welterweight MMA rules bout between Takamura Mamrou (ranked 0 p4p, 0 weight class) and David Choe (ranked 0 p4p, 0 weight class). Mamrou comes into the arena with The Whistler blaring out of the sound system. Choe has chosen DVDASA Theme Song as his entrance music. Takamura Mamrou has a significant reach advantage - let's see if he can make it count.
 |
|
 |
| 185 cm
23
180 lbs
5 - 2 - 0 |
|
173 cm
24
160 lbs
6 - 0 - 0 |
BJJ Blue Belt
Solid boxing
KO power |
|
Decent wrestler
Solid Muay Thai
Knockout power |
|
| |
|
Ladies and gentlemen. This fight is 5 rounds, for the welterweight championship of the world!
Introducing the champion to my left, fighting out of the red corner.
With a record of
5 - 2 - 0, fighting out of Tokyo, Takamura Mamrou!
And introducing the challenger to my right, fighting out of the blue corner.
With a record of
6 - 0 - 0, fighting out of Tokyo, David Choe!
The judges for this bout are Yukihiro Yamamoto, Sosuke Kotani and Shigeki Fujiwara.
The bell rings for round one and we are underway!
Mamrou misses with a hook
and Choe counters into the clinch. Nicely done.
Knees to the body from Choe.
Choe is working for a takedown up against the cage. He can't get it on this occasion though.
Some stalling of biblical proportions here from Choe.
Mamrou tries to break the clinch but Choe is controlling the position.
Choe is trying to drag Mamrou to the mat but Mamrou just about manages to keep his footing. He used the cage to his advantage there.
Nice elbow from Choe.
It looks like Takamura Mamrou has been cut.
Choe misses with a punch to the body.
Choe working Mamrou over with knees to the body.
Choe using the Thai clinch to land knees to the body.
Choe taking a break, stalling in the clinch.
Mamrou has been talking about how he's improved his wrestling in the run up to the fight so let's see if that's enough to sway the balance.
Mamrou blocks a knee to the body. He'll have a nicely bruised forearm in the morning.
We've been informed that Choe has been sparring a lot of Muay Thai in the buildup to this fight so let's see if that has an impact on the result.
Mamrou is working on a leg, looking for a takedown but Choe is defending well.
That's one minute gone in the round.
Choe has Mamrou pressed up against the cage. He's trying to work for a single leg takedown. Choe pulls back from the cage and twists to the side, sending Mamrou tumbling to the mat - Choe dives into Mamrou's guard.
Choe sitting in guard here, content to control.
Choe tries to free his leg and advance position but Mamrou is retaining full guard.
Choe trying to control the position from guard on top but Mamrou is wriggling around, looking for whatever he can.
Choe's corner is telling him to maintain position.
Choe throwing shots from guard but he's hitting more mat than opponent.
Choe pressing down on his opponent's thigh, looking to pass guard. Mamrou is keeping the position for now.
Choe passes Mamrou's left leg - he's now in half guard.
That's two minutes gone in the round.
Choe seems to be working for a kimura but Mamrou defends the submission attempt.
Choe throwing shots but Mamrou is blocking nicely.
Choe uses his free foot to push down on Mamrou's thigh. Eventually he works his other foot free and he's advanced to mount - this is trouble for Mamrou.
Choe looking to ground and pound but Mamrou is blocking nicely.
Fantastic stuff here - a very entertaining period of action, which has drawn cheers from the crowd.
Choe looking to control but Mamrou is working nicely, looking to advance position himself.
The fighters are pressed up against the cage, both looking to find a bit of space to work.
That's three minutes gone in the round.
Choe sitting in mount, just looking to control for the moment.
Choe working for a guillotine from mount but Mamrou is in no mood to give up.
Mamrou tries to hold on but Choe postures up.
Mamrou is squirming around, avoiding Choe's attempts to control the action.
That's four minutes gone in the round.
Mamrou is working to get back to half guard.
Choe tries to control but Mamrou wriggling away.
Choe punching from mount but Mamrou doing a good job of avoiding damage.
As the round comes to an end the crowd are showing their appreciation for a great round of action.
Choe trying to control but Mamrou is having none of it.
The referee warns Mamrou that he has to improve his position here as he takes two more clean shots to the head.
And that�s the end of the round � the fighters go back to their corners.
David Choe dominated that round.
The cut man is working on Takamura Mamrou's cut.
That's time! Back to the action!
Mamrou misses the shot to the body.
Mamrou rushes in with a sloppy looking punch
and Choe counters by moving into the clinch.
Choe putting his Muay Thai to good use. He has Mamrou in a tight clinch and is doing some damage with knees to the body.
Mamrou's head jolts backwards as he takes an uppercut right on the button!
Choe connects with a nasty looking knee right to Mamrou's face.
Choe misses with a body punch.
Mamrou can't break the clinch.
Choe is working on a leg, looking for a takedown but Mamrou is defending well.
Choe digs a right hand underneath Mamrou's ribcage. Mamrou let out a lung full of air as it connected.
Choe using the Thai clinch to land knees to the body.
Mamrou is trying to force a seperation but Choe has the dominant position.
Good body shot from Choe.
Wooooo! Give it up for these two warriors! They are putting on a show!
Choe using the Thai clinch to land knees to the body.
Mamrou avoiding damage as Choe throws knees to the body.
That's one minute gone in the round.
Choe misses the knee to the body. Nice hip positioning from Mamrou.
Choe has dropped down and is looking to force the takedown but it's defended by Mamrou after a bit of a struggle.
Knees in the clinch landing for Choe.
Choe with an attempt at a knee that misses.
The fighters are pressed against the cage, as the pace of the fight slows.
Choe tries to throw a body punch but Mamrou avoids it by throwing Choe back against the cage.
That's two minutes gone in the round.
Choe goes for a body shot but it's blocked.
Mamrou stops a takedown attempt from Choe.
Takamura Mamrou has stuffed three takedown attempts in the round now. That's going to take a lot out of David Choe.
A short right from Choe.
Mamrou is trying to force a seperation but Choe has the dominant position.
Choe scores a nice knee to the body.
Choe tries to land a shot to the body but it's blocked.
Choe misses with a punch to the body.
Choe goes for a takedown in the clinch but Mamrou prevents it.
Mamrou on the defensive, avoiding the knees to the body.
Choe has picked Mamrou up - he's going for a ride! Choe dumps his opponent to the mat with a thud and settles into half guard.
The crowd are loving this. Great action here.
Choe trying to pass the guard but Mamrou defending well.
That's three minutes gone in the round.
Mamrou is refusing to be controlled, as Choe sits in half guard.
Choe prevents Mamrou from improving his position.
Mamrou holds on for dear life, maintaining half guard for now.
Choe is pressing down on Mamrou's thigh, looking to free his foot. Mamrou is holding on for now.
Choe seems very keen to just sit and control from half guard but Mamrou does not like that idea so much and is remaining active off his back.
Choe is looking for a kimura. It's going to be difficult to finish that from half guard though and Mamrou defends it well.
That's four minutes gone in the round.
Choe wants to pass the guard but Mamrou is defending well.
Choe sitting in half guard, looking to land shots. Mamrou defending well though.
The step up in weight doesn't seem to be a problem for Choe. He's performing admirably here against the bigger man.
Mamrou pushes Choe off looking to stand but Choe dives back in and keeps control.
Choe passes to side control.
Choe is looking for a kimura. He might have it! No, Mamrou has escaped the position, nice work there.
As the round comes to an end the crowd are showing their appreciation for a great round of action.
Choe is trying to get an arm triangle but Mamrou is defending well.
And that�s the end of the round � the fighters go back to their corners.
David Choe showed his class in that round. I'd imagine he'll take it on all the scorecards.
The cut man is working on Takamura Mamrou's cut.
The corners get their ten second warning. Both fighters stand from their stools and stare eachother down, ready to get back to the action.
Choe darts in and clinches Mamrou up against the cage.
Choe tries a body shot but Mamrou blocks it.
Mamrou prevents the takedown attempt.
Choe wants a takedown.
Choe will no doubt start fighting again in a minute but for now he's just having a little rest, leaning Mamrou up against the cage.
Mamrou has hold of a leg and is looking for a trip takedown. Choe avoids it nicely though and we remain in the clinch.
Choe scores a nice knee to the body.
Choe lands a shoulder strike that jolts his opponent's head backwards.
Mamrou has a couple of punches blocked by Choe.
That's one minute gone in the round.
Choe lands a knee to the body.
Both fighters are breathing heavily.
Choe lands a nice knee to the body.
Choe works for underhooks and lands a body shot in the process.
Choe has been the more effective fighter overall so far.
Choe lands a nice shot to the body.
Choe is working Mamrou over against the cage.
Choe putting his Muay Thai to good use. He has Mamrou in a tight clinch and is doing some damage with knees to the body.
This has been an exciting period of action!
The referee is keeping an eye on Choe - much more stalling and he will separate the fighters.
Choe lands a body punch - he's looking to wear down Mamrou.
Choe tries to land a knee to the head but Mamrou blocks with his arms.
Choe has hold of one of Mamrou's legs. Mamrou is fighting the takedown attempt but Choe gets the trip and lands the takedown into guard.
Choe trying to pass the guard but can't manage it just yet.
That's two minutes gone in the round.
Choe slows down the pace of the fight for a moment. He'll need to remain active if he doesn't want to see the fight stood back up.
Choe stands and throws Mamrou's legs to the side, diving into side control.
Choe has worked his way into a potential kimura here. Mamrou is trying to get out of the position but his squirming has just got him deeper into trouble. Choe yanks on the arm and Mamrou is forced to tap due to a very painful looking submission! Nice work by Choe.
Ladies and gentlemen, after 2:36 of round 3, we have a winner by way of Submission (Kimura). David Choe! David Choe retains his welterweight title!
David Choe made sure to give a little speech post fight, saying 'I AM THE BEST ARTIST IN THE WORLD! SHOUTOUT TO DVDASA!'.
|
|
|
|
|
|
|
|
|
|
|
|
|
|
|
|
|
|
|
|
|
|
|
| S |
C
A |
G |
S |
C
B |
G |
|
S |
C |
G |
|
energy
A | B |
|
hype
A | B |
|
pop
A | B |
|
mgr
A | B |
|
FIGHT
RATING
83% |
|
|
|
|
|
|
|
Main event
|
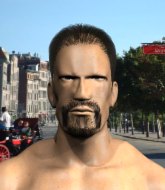
Coming up we have a bantamweight MMA rules bout between Paul Smith (ranked 0 p4p, 0 weight class) and Helmut Doerner (ranked 0 p4p, 0 weight class). Smith comes to the cage accompanied by call to prayer. Doerner has chosen Balls to the Wall by Accept as his entrance music. Man, I cannot wait for this one!
 |
|
 |
| 169 cm
32
135 lbs
19 - 8 - 0 |
|
170 cm
33
140 lbs
15 - 19 - 0 |
Abu Dhabi Champ
World class boxer
Insanely flexible |
|
Excellent grappler
Decent boxing
Good gas tank |
|
| |
|
Ladies and gentlemen. This fight is 3 rounds, in the bantamweight division.
Introducing the fighter to my left, fighting out of the red corner.
With a record of
19 - 8 - 0, fighting out of London, Paul Smith!
And introducing the fighter to my right, fighting out of the blue corner.
With a record of
15 - 19 - 0, fighting out of St Petersburg, Helmut Doerner!
The judges for this bout are Taro Takaoka, Yukihiro Shimada and Shigeki Sano.
The bell rings for round one and we are underway!
Smith scores with a three punch combo!
Doerner keeping his hands up high there, blocking the jab from Smith.
Doerner takes one on the chin but seems OK.
Smith throws a lazy right hand but Doerner sees it coming a mile off and sidesteps it easily.
Doerner shoots in with a takedown attempt and he has Smith pinned against the cage. Smith gets the underhooks and manages to circle away.
A really sloppy takedown attempt there from Doerner.
Doerner throws a looping overhand right but Smith ducks down to avoid it.
Smith missing with a left hand there. Doerner was out of range so wasted energy throwing that one.
A big left from Smith misses.
Doerner shoots for a takedown but Smith saw that one coming a mile off and avoided it easily.
Paul Smith has stuffed three takedown attempts in the round now. That's going to take a lot out of Helmut Doerner.
Doerner has his hands up protecting his head but a hook from Smith finds it's way round the side to connect with Doerner's head.
We've seen a great period of action over the last minute or so - credit to both fighters for going all out!
Doerner moves in looking to clinch but Smith pushes him off.
That's one minute gone in the round.
A bone on bone clash there as Doerner blocks the leg kick.
A head kick by Doerner misses
and Smith counters with a quick right hand to the jaw.
Doerner clobbers Smith with an overhand right that has the crowd gasping. That made a horrendous noise.
Doerner looks to land a combination but Smith avoids it well.
Smith paws at his opponent with the jab and then lunges in with a straight, right on the button.
Doerner is rocked!
Smith steps to the side to avoid the strikes from Doerner.
Doerner is still on wobbly legs! Can Smith finish him?

Smith cracks Doerner with a big right hand that sends him to the floor! Doerner looks wobbly but he's sprung back up to his feet straight away� can Smith finish him?
Wooooo! Give it up for these two warriors! They are putting on a show!
Smith throws an overhand right that drops Doerner like a sack of potatoes! Smith dives in to finish the fight with more strikes and this one is all over!
Ladies and gentlemen, after 1:41 of round 1, we have a winner by way of TKO (Strikes). Paul Smith!
Post fight, Paul Smith took to the microphone: 'The Jihad has arrived. The Order 777 is ready to fight. The future will judge us as the resistance when liberals were begging the enemy to takeover. No surrender, ever!'.
The defeated Helmut Doerner had this to say: 'I will cripple this fool in Abu Dhabi'.
|
|
|
|
|
|
|
|
|
|
|
|
|
|
|
|
|
|
|
|
|
|
|
| S |
C
A |
G |
S |
C
B |
G |
|
S |
C |
G |
|
energy
A | B |
|
hype
A | B |
|
pop
A | B |
|
mgr
A | B |
|
FIGHT
RATING
68% |
|
|
|
|
|
|
|
|
|
|
