 |
disobedience 136 PBP Commentary |
Undercard bout
|
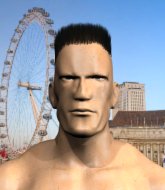
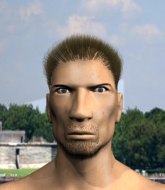
Coming up we have a light heavyweight MMA rules bout between Julle Bulle (ranked 0 p4p, 0 weight class) and William Wellington (ranked 0 p4p, 0 weight class). Both fighters will be looking to make this an exciting fight for the fans, I'm sure!
 |
|
 |
| 190 cm
21
217 lbs
4 - 2 - 0 |
|
188 cm
25
205 lbs
5 - 4 - 1 |
BJJ Blue Belt
Solid Muay Thai
Cardio machine |
|
BJJ Purple Belt
Decent boxing
Heavy handed |
|
| |
|
Ladies and gentlemen. This fight is 3 rounds, in the light heavyweight division.
Introducing the fighter to my left, fighting out of the red corner.
With a record of
4 - 2 - 0, fighting out of Sydney, Julle Bulle!
And introducing the fighter to my right, fighting out of the blue corner.
With a record of
5 - 4 - 1, fighting out of Sydney, William Wellington!
The judges for this bout are Summer Carpenter, Bruno Hogan and Skip Squint.

The bell rings for round one and we are underway!
Wellington shoots in for a takedown - he's clinched up with Bulle but Bulle pushes him off and we're back to square one.
Wellington lands a really nice looking cross but Bulle seems unphased.
Wellington fails miserably with a takedown attempt.

Bulle gets tackled into the cage by Wellington. Wellington maintains the clinch.
Wellington takes a knee right on the jaw!
Bulle lands a good knee to the midsection. Wellington won't want to take too many of those.
Bulle working aggressively here.
Bulle misses the knee to the body. Nice hip positioning from Wellington.

Wellington breaks the clinch and we're back to striking at distance.
Like a baseball bat into the meat of his leg there - nice leg kick by Bulle.
Wellington misses with a jab and misses with a cross straight after too.
Wellington misses with a telegraphed body shot
and Bulle counters with a good right hand that lands right on the jaw.

That's one minute gone in the round.
Wellington moves out of range of the body kick from Bulle.
Julle Bulle seems to be the more aggressive standup fighter in this bout.
Bulle cracks the inside of Wellington's front leg.
A head kick misses from Bulle.
Bulle throws a head kick but Wellington moves out of range.
Bulle throws the kick towards the body but Wellington avoids it.
Bulle throws a combination that misses
and Wellington counters with a lovely shot to the body.
Wellington shoots in and drives through. Bulle sprawls well.
Julle Bulle has stuffed three takedown attempts in the round now. That's going to take a lot out of William Wellington.
Bulle looks to score with a jab to the body but Wellington is just out of range.

Bulle takes the fight into the clinch.
Bulle's corner are urging him to control the action in the clinch for a moment, rather than mount any serious offense. I'm sure the crowd appreciate those instructions... not.
Wellington can't get the takedown.

That's two minutes gone in the round.
Wellington wants to break free but Bulle has control.
Bulle displaying some good clinch control by pressing Wellington up against the cage.
Wellington is working on a leg, looking for a takedown but Bulle is defending well.
The pace really dropping off here, momentarily.
Wellington tries to score a body lock takedown but Bulle shows good agility there to stay on his feet.

That's three minutes gone in the round.
Wellington fails to pull the fight into his guard.
Wellington is looking to take this one to the mat.
I was talking to Bulle's coach per-fight and he was telling me that they'd been working on the clinch in the runup to this fight.
Wellington working hard to break the clinch.
Wellington wants a takedown.
Wellington wants to break free. God knows he wants to breaaaak freeee.
Wellington tries to take the fight to the ground by pulling guard but can't manage it.
Wellington tries to take the fight to the ground by pulling guard but can't manage it.
Bulle stalling here - the referee won't stand for too much of that.
Bulle with an attempt at a knee that misses.
Wellington using the Thai plumb to throw knees but Bulle has his back arched nicely, preventing the strike.

That's four minutes gone in the round.
The referee is keeping an eye on Bulle - much more stalling and he will separate the fighters.
Wellington wants to stall.
The pace slowing considerably in the clinch, as Bulle takes a break from that fighting nonsense to think about the finer things in life.
Wellington tries to pull guard but Bulle holds him up against the cage and eventually Wellington drops back down to his feet.
Wellington is trying to work for a single leg takedown but Bulle pulls him back up using the underhooks.
The crowd applaud the fighters efforts here as the round comes to an end.
Wellington misses with some punches.
Bulle tries to land a knee to the head but Wellington blocks with his arms.
And thats the end of the round the fighters go back to their corners.
Julle Bulle dominated that round.
The corners get their ten second warning. Both fighters stand from their stools and stare eachother down, ready to get back to the action.

That's a knee to de groin and it's over and out! Wellington crumples to the ground after an illegal strike from Bulle - the referee stops the clock and Wellington gets 5 minutes to recover from that one. "I'm sorry" says Bulle. Wellington manages to get back to his feet and the fight resumes.
A telegraphed takedown attempt from Wellington is defended easily by Bulle.
Bulle throws a right and a left that both miss.
Bulle throws a right high kick that is partially blocked by Wellington.
Wellington fakes high and shoots in for a takedown but Bulle avoids it really well and circles away.
Wellington shoots in but no luck this time.
Julle Bulle has stuffed three takedown attempts in the round now. That's going to take a lot out of William Wellington.
Wellington takes a kick to the body and keeps moving.
Bulle throws a head kick but Wellington moves out of range.
Bulle looks for the body kick but Wellington saw that one coming.
That's one minute gone in the round.
Bulle throws a wild body kick that Wellington sees coming a mile off.
Julle Bulle is winning the standup battle so far.
Wellington shoots in looking for a takedown but Bulle manages to keep the fight standing, pushing Wellington's face into the canvas for good measure before circling away.
Wellington is trying hard to land a takedown here. Bulle sprawls well and keeps this one on the feet.
Bulle has closed the distance and engaged Wellington in a clinch.
Wellington goes for a takedown attempt but Bulle pushes him away and we're back to fighting at a distance.
Bulle fakes a jab and scores with a low kick.
Wellington dives in for a single leg takedown but Bulle sprawls and the fighters end up clinched against the cage.
Bulle misses with a knee strike.
Bulle with an attempt at a knee that misses.
The referee is keeping an eye on Bulle - much more stalling and he will separate the fighters.
That's two minutes gone in the round.
Wellington fails to pull guard.
Stalling in the clinch from Bulle.
Wellington is looking to break free of the clinch but Bulle has double underhooks.
Bulle controlling the action here for a moment.
Wellington is trying to drag Bulle to the mat but Bulle just about manages to keep his footing. He used the cage to his advantage there.
Wellington drops to a knee looking for a takedown but Bulle gets the underhooks and prevents it.
That's three minutes gone in the round.
Bulle is clearly stalling here... Pick up the pace son.
Bulle tries to land knees in the clinch but Wellington avoids the damage to the body.
Wellington has hold of a leg and is looking for a trip takedown. Bulle avoids it nicely though and we remain in the clinch.
Wellington stalling the fight.
That's four minutes gone in the round.
Wellington is trying to pull guard but Bulle has him pressed against the cage.
Bulle blocking some punches.
Julle Bulle has scored more points in the clinch so far.
A short right from Bulle on the inside.
Wellington looking to slow down the pace here.
Bulle scores with a shoulder strike.
Wellington jumps guard but Bulle stands there with Wellington around his waist. Wellington gives up and drops back to his feet. We remain in the clinch.
Bulle lands a right hand that snaps the head of Wellington backwards.
The crowd applaud the fighters efforts here as the round comes to an end.
Bulle stalling against the cage.
And thats the end of the round the fighters go back to their corners.
Julle Bulle dominated that second round.
That's the end of the round. The referee orders the cornermen out of the cage so we can get back down to business. Ladies and gentlemen, this is the final round!

Bulle throws a head kick that half lands.
Wellington shoots in for a takedown. "Ole!" shouts Bulle as he jumps to the side.
Wellington throws a looping left and ducks down for a takedown. He's got his arms around Bulle's waist but Bulle gets an underhook and avoids the takedown by throwing Wellington off to one side.
Bulle has Wellington up against the cage in a clinch.
Bulle lands with a light punch inside.
Wellington is trying desperately to land a takedown but Bulle is having absolutely none of it. This is turning into a bit of a nightmare for Wellington.
Bulle misses with a knee to the head.
Wellington stalling in the clinch but Bulle improves position.
Bulle gets through Wellington's defenses to land a nice punch to the side of the head.
Bulle lands a right hand.
That's one minute gone in the round.
Come on Bulle - let's have some action - none of this stalling nonsense.
Wellington fails to pull guard.
Julle Bulle has stuffed three takedown attempts in the round now. That's going to take a lot out of William Wellington.
Bulle tries to stall but Wellington uses the opportunity to gain a better position.
Wellington is looking to score with knees to the body. Maybe he'll change it up and go body then head. Bulle is defending well for now.
Bulle has Wellington pushed against the cage.
Wellington misses with a short punch on the inside.
Bulle is looking to control Wellington's arms but Wellington gets an underhook and turns him. Now Bulle has his back to the cage.
Bulle swings away with an uppercut that misses.
Wellington jumps guard but Bulle stands there with Wellington around his waist. Wellington gives up and drops back to his feet. We remain in the clinch.
That's two minutes gone in the round.
Bulle is defending well against a takedown attempt.
Bulle swings away with an uppercut that misses.
A quick uppercut on the inside from Bulle.
Wellington wants a takedown.
Wellington is working on a leg, looking for a takedown but Bulle is defending well.
Bulle just leaning against Wellington, taking a breather.
Bulle lands with a light punch inside.
That's three minutes gone in the round.
Wellington is working for a takedown up against the cage. He can't get it on this occasion though.
Bulle is pushing Wellington up against the cage, for a bit of lean and pray action. Action being used the in the loosest possible sense of the word.
Wellington taking a breather.
Bulle stalls.
A battle for position here, against the cage.
Bulle stops a takedown attempt from Wellington.
That's four minutes gone in the round.
Bulle landing knees to the body. They look like they could hurt.
Bulle stalling here - the referee won't stand for too much of that.
Bulle misses with some punches.
William Wellington has stepped it up - he knows he needs a finish here!
A knee to the head by Bulle.
Bulle utilising his Muay Thai to score with a knee to the body.
Wellington drops down for a takedown but doesn't get it.
The crowd applaud the fighters efforts here as the round comes to an end.
Wellington misses with a hook to the ribs.
And that's the end of the fight!
Julle Bulle showed his dominance in that final round.
Well Bulle has outscored his opponent in every aspect of the fight today. Only a scarily incompetent judge or two will keep him from a well deserved win... Over to the ring announcer for the scorecards.
Ladies and gentlemen, after 3 rounds of action, we go to the scorecards for a decision.
Judge Summer Carpenter scores the fight 30:27
Judge Bruno Hogan scores the fight 30:27
Judge Skip Squint scores the fight 30:27
In favor of your winner, by unanimous decision... Julle Bulle!
|
|
|
|
|
|
|
|
|
|
|
|
|
|
|
|
|
|
|
|
|
|
|
| S |
C
A |
G |
S |
C
B |
G |
|
S |
C |
G |
|
energy
A | B |
|
hype
A | B |
|
pop
A | B |
|
mgr
A | B |
|
FIGHT
RATING
42% |
|
|
|
|
|
|
|
Undercard bout
|
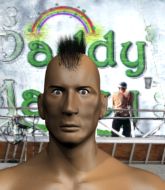
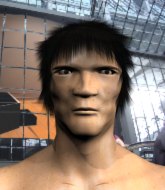
Coming up we have a welterweight MMA rules bout between Danny Glover (ranked 0 p4p, 0 weight class) and Fuzzy Khan (ranked 0 p4p, 0 weight class). Fuzzy Khan has the better chin. Will he look to stand and bang today?
 |
|
 |
| 180 cm
25
181 lbs
8 - 3 - 0 |
|
186 cm
21
183 lbs
5 - 2 - 1 |
BJJ Purple Belt
Excellent boxer
KO power |
|
BJJ Blue Belt
Good kicks
Knockout power |
|
| |
|
Ladies and gentlemen. This fight is 3 rounds, in the welterweight division.
Introducing the fighter to my left, fighting out of the red corner.
With a record of
8 - 3 - 0, fighting out of Sydney, Danny Glover!
And introducing the fighter to my right, fighting out of the blue corner.
With a record of
5 - 2 - 1, fighting out of Sydney, Fuzzy Khan!
The judges for this bout are Eliza Hachem, Hugh Johnson and Donatello Bradman.
The bell rings for round one and we are underway!
Glover throws a right hand that misses
and Khan counters by clinching up.
Khan lands a hook to the body. It's hard to tell if that hurt Glover or not.
Glover jumps guard but his hands slip and he falls flat on his back. Well, he's made himself look a right mug there, as Khan walks away with a smile on his face. Glover gets slowly back to his feet and shakes his head.
Khan staying out of range there.
Khan darts in and clinches Glover up against the cage.
Khan lands with a right to the head.
Khan lands a knee to the body.
Glover jumps guard but Khan stands there with Glover around his waist. Glover gives up and drops back to his feet. We remain in the clinch.
Glover fails to pull guard.
That's three failed takedown attempts in the round for Danny Glover. That's going to take a lot out of him.
Khan with the Thai clinch, lands a knee to the head.

It looks like Danny Glover has been cut.
Khan lands an elbow that stopped Glover in his tracks for a moment.
Wooooo! Give it up for these two warriors! They are putting on a show!
A knee to the head by Khan.

Glover is rocked!
Khan lands a big knee! That's hurt Glover! Oh, he's all over the place! Khan lands another knee that sends Glover to the floor and the referee steps in to end the fight!
Ladies and gentlemen, after 0:53 of round 1, we have a winner by way of TKO (Strikes). Fuzzy Khan!
Danny Glover spoke after the fight, saying 'I lost because my opponent spiked my drink with snake venom last night at the bar. I feel sick. '.
|
|
|
|
|
|
|
|
|
|
|
|
|
|
|
|
|
|
|
|
|
|
|
| S |
C
A |
G |
S |
C
B |
G |
|
S |
C |
G |
|
energy
A | B |
|
hype
A | B |
|
pop
A | B |
|
mgr
A | B |
|
FIGHT
RATING
78% |
|
|
|
|
|
|
|
Undercard bout
|
Coming up we have a lightweight MMA rules bout between Zach Brooks (ranked 0 p4p, 0 weight class) and Dixie Normous (ranked 0 p4p, 0 weight class). Brooks comes to the cage accompanied by Aqua Teen Hunger Force theme song. This should be a great matchup!
 |
|
 |
| 183 cm
27
160 lbs
2 - 4 - 1 |
|
180 cm
21
170 lbs
11 - 3 - 0 |
BJJ Purple Belt
Solid boxing
Experienced |
|
Excellent grappler
Counter fighter
Good gas tank |
|
| |
|
Ladies and gentlemen. This fight is 3 rounds, in the lightweight division.
Introducing the fighter to my left, fighting out of the red corner.
With a record of
2 - 4 - 1, fighting out of Sydney, Zach Brooks!
And introducing the fighter to my right, fighting out of the blue corner.
With a record of
11 - 3 - 0, fighting out of Sydney, Dixie Normous!
The judges for this bout are Francis DeMontford, Bruno Hogan and Hugh Johnson.
The bell rings for round one and we are underway!
Brooks lands with a nice body kick.

Brooks shoots in from a long way out. He's driving through with the takedown attempt and he eventually gets it, landing in Normous's guard.
Normous looking for a sweep. Not yet Normous, not yet.

Normous has his foot on Brooks's thigh. He's trying to push off and get in position for a triangle, I think. Brooks works his way back into a safe position though.
Brooks prevents Normous from getting back to his feet.
Normous keeping moving, preventing Brooks from controlling successfully.
Brooks has to be careful here, sitting in the guard of a superior BJJ player.
Brooks is trying to tuck his arms in to keep them safe but Normous has managed to isolate one of them and has got a loose triangle. Brooks is looking to defend but Normous has done well to lock his legs together - this could be big trouble for Brooks! Normous pulls down on the head and a little smile comes across his face - he knows he's got it. Yep, Brooks taps out and this one is all over!
Ladies and gentlemen, after 0:38 of round 1, we have a winner by way of Submission (Triangle). Dixie Normous!
Dixie Normous decided to thank the fans in attendance for making a great atmosphere. It seemed to go down pretty well.
Zach Brooks was interviewed post fight and said 'ouch'.
|
|
|
|
|
|
|
|
|
|
|
|
|
|
|
|
|
|
|
|
|
|
|
| S |
C
A |
G |
S |
C
B |
G |
|
S |
C |
G |
|
energy
A | B |
|
hype
A | B |
|
pop
A | B |
|
mgr
A | B |
|
FIGHT
RATING
68% |
|
|
|
|
|
|
|
Co-main event
|
Coming up we have a heavyweight MMA rules bout between Lyes Badaoui (ranked 0 p4p, 0 weight class) and Mack Luster (ranked 0 p4p, 0 weight class). Well, I have no idea who's going to take this one!
 |
|
 |
| 202 cm
22
284 lbs
9 - 3 - 0 |
|
195 cm
22
230 lbs
4 - 0 - 0 |
BJJ Purple Belt
Solid boxing
Cardio machine |
|
Good wrestler
World class MT
Good gas tank |
|
| |
|
Ladies and gentlemen. This fight is 3 rounds, in the heavyweight division.
Introducing the fighter to my left, fighting out of the red corner.
With a record of
9 - 3 - 0, fighting out of Sydney, Lyes Badaoui!
And introducing the fighter to my right, fighting out of the blue corner.
With a record of
4 - 0 - 0, fighting out of Sydney, Mack Luster!
The judges for this bout are Ben Watson, Chris Dean and Ben Hemmingworth.
The bell rings for round one and we are underway!
Luster throws a series of punches but Badaoui avoids them all with ease.
Badaoui throws a looping overhand right but Luster ducks down to avoid it.
Badaoui has his front leg slapped to the side - a nice low kick landing there from Luster.
A cross from Luster lands.
Badaoui closes this distance looking for a takedown but Luster circles away.
Luster cracks Badaoui with a nice right hand that draws applause from the crowd.
Badaoui gets a clinch.
Badaoui lands a nice uppercut.
Luster stays in close to his opponent and throws a right hand to the body.
Badaoui fails to land with a short punch on the inside.
Luster working aggressively here.
The crowd are loving this. Great action here.
Still in the clinch, Luster scores with a nice short uppercut.
Badaoui is looking for a takedown.
Badaoui misses with a hook from the clinch.
Badaoui is looking to control Luster's arms but Luster gets an underhook and turns him. Now Badaoui has his back to the cage.
Badaoui misses with a hook from the clinch.
Badaoui has a couple of punches blocked by Luster.
Good anti-grappling being displayed by Luster as Badaoui tries to tie him up.
Luster scores with a nice hook to the head.
That's one minute gone in the round.
Luster throws a blind hook that connects with the side of Badaouis head.
Badaoui looking to slow down the pace here.
Luster scores with a hook to the body.
Luster lands a shoulder strike that jolts his opponent's head backwards.
Badaoui lands a left hand that snaps the head of Luster backwards.
Luster misses with a body punch.
Luster lands with a left to the head.
The crowd are loving this. Great action here.
A short uppercut from Luster.
Luster stays in close to his opponent and throws a right hand to the body.
Luster lands with a quick shot inside that doesn't really do much damage.
Badaoui is looking to control Luster's arms but Luster gets an underhook and turns him. Now Badaoui has his back to the cage.
Luster pushes Badaoui back against the cage and lands a hook to the side of the head.
Luster lands a nice uppercut.
Badaoui misses with some punches.
Badaoui is looking to control Luster's arms but Luster gets an underhook and turns him. Now Badaoui has his back to the cage.
Badaoui tries for a takedown but Luster manages to get underhooks.
That's three failed takedown attempts in the round for Lyes Badaoui. That's going to take a lot out of him.
Luster lands a left hand that snaps the head of Badaoui backwards.
Luster throws a blind hook that connects with the side of Badaouis head.
That's two minutes gone in the round.
Luster lands a body punch in the clinch.
Luster presses Badaoui against the cage and delivers a mid-strength body shot.
Badaoui is breathing heavily.
Badaoui swings away with an uppercut that misses.
Badaoui tries to work over Luster's body with a swooping hook but it only glances the target.
Badaoui has a body lock and is looking for a takedown. Luster is bouncing around trying to prevent the takedown and somehow he has indeed managed to stay on his feet.
A short uppercut from Luster.
Badaoui gets through Luster's defenses to land a nice punch to the side of the head.
Luster lands a nice uppercut.
A short left from Luster.
Badaoui goes for a takedown in the clinch but Luster prevents it.
Badaoui throws a punch but it's blocked by Luster.
Badaoui misses with some punches.
Luster works for underhooks and lands a body shot in the process.
Badaoui swings away with an uppercut that misses.
Badaoui has a body lock and is looking for a takedown. Luster is bouncing around trying to prevent the takedown and somehow he has indeed managed to stay on his feet.
Luster blocks a couple of punches on the inside.
Badaoui trying to land knees to the body.
That's three minutes gone in the round.
Badaoui trying to control the position but instead, Luster has worked for underhooks and has pushed Badaoui into the cage.
Luster lands a nice shot to the body.
Luster lands a right hand.
Nice body punch from Luster.
A short right from Luster on the inside.
Luster is leaning against Badaoui and scores with a nice uppercut to the body.
Luster working on landing some head shots here - that one got through nicely.
Luster lands a nice uppercut.
This has been an exciting period of action!
Luster is leaning against Badaoui and scores with a nice uppercut to the body.
A short right hand to the side of the head by Luster.
Luster lands with a short punch from the clinch.
Luster breaks the clinch and we return to the middle of the mat.
Badaoui chopped to the floor by a nice leg kick but he springs right back up before Luster can pounce on him.
Luster gets a clinch.
Luster pushes Badaoui back against the cage and lands a hook to the side of the head.
Luster scores with a hook to the body.
With the two fighters working up against the cage, Badaoui just misses with a elbow thrown towards Luster's brow.
That's four minutes gone in the round.
Luster lands a body shot in the clinch.
Luster cracks Badaoui with a nice body shot.
Luster cracks Badaoui with a nice body shot.
Luster lands with a good tight uppercut to the head.
Luster scores with a shoulder strike.
Luster scores with an uppercut up the middle.
Badaoui is working on a leg, looking for a takedown but Luster is defending well.
Luster cracks Badaoui with a nice body shot.
A hook to the body from Luster.
Luster working on landing some head shots here - that one got through nicely.
A short right from Luster on the inside.
Luster lands a shoulder strike.
Luster lands a left hand that snaps the head of Badaoui backwards.
Badaoui fails to land with a short punch on the inside.
The crowd are going absolutely nuts as the round comes to an end - what a fantastic round of action!
Luster presses Badaoui against the cage and delivers a mid-strength body shot.
Luster throws a blind hook that connects with the side of Badaouis head.
Luster lands an uppercut.
A left hand lands to the body for Luster.
And thats the end of the round the fighters go back to their corners.
Mack Luster dominated that round.
Well, the break between rounds is over. Let's get back to the scrappin!
Both fighters circling a little - Luster finishes the exchange with a kick to the body.
The step up in weight doesn't seem to be a problem for Luster. He's performing admirably here against the bigger man.
Luster lands with a nice body kick.
Luster buckles his opponent's knee momentarily with a nice leg kick.
Luster with a nice cross.
Luster fakes and then throws a beautiful body shot. Badaoui looks a bit winded and takes a step backwards to take a breath.
Luster cracks Badaoui with a good jab.
Luster pushes Badaoui away with a front kick.
The fans in attendance giving it up for the two fighters, who have really let it all hang out in the last minute or so!
Luster throws a nice outside leg kick.
Luster moves into range and lands a nice body kick.
Badaoui misses with a takedown attempt. He shot from a bit too far out.
Luster lands a leg kick and bounces back out of range.
Luster catches Badaoui with a nice straight right. He seems pissed - ooooh, it's on now! On like donkey kong!
Badaoui takes a jab on the nose there. A little bit of blood seems to be coming out. Hopefully that won't affect his breathing.
Badaoui is rocked!
Luster steps in with a hook that catches Badaoui right on the chin and knocks him to the floor! Luster follows him down with more strikes and that's all she wrote! Badaoui looks absolutely devastated.
Ladies and gentlemen, after 0:57 of round 2, we have a winner by way of TKO (Strikes). Mack Luster!
|
|
|
|
|
|
|
|
|
|
|
|
|
|
|
|
|
|
|
|
|
|
|
| S |
C
A |
G |
S |
C
B |
G |
|
S |
C |
G |
|
energy
A | B |
|
hype
A | B |
|
pop
A | B |
|
mgr
A | B |
|
FIGHT
RATING
100% |
|
|
|
|
|
|
|
Main event
|
Coming up we have a super heavyweight MMA rules bout between Misuaksual Ropuitururapthlaka (ranked 0 p4p, 0 weight class) and Toni Eerkilaa (ranked 0 p4p, 0 weight class). Chooooooooon! I think Ropuitururapthlaka might be my favorite fighter, now he's come out to One - Metallica. Over to our ring announcer for the fighter introductions!
 |
|
 |
| 196 cm
29
295 lbs
13 - 3 - 0 |
|
207 cm
22
300 lbs
7 - 4 - 0 |
Powerful takedowns
Brawler
Very quick |
|
Good wrestler
World class boxer
Good gas tank |
|
| |
|
Ladies and gentlemen. This fight is 5 rounds, for the super heavyweight championship of the world!
Introducing the champion to my left, fighting out of the red corner.
With a record of
13 - 3 - 0, fighting out of Tokyo, Misuaksual Ropuitururapthlaka!
And introducing the challenger to my right, fighting out of the blue corner.
With a record of
7 - 4 - 0, fighting out of Helsinki, Toni Eerkilaa!
The judges for this bout are Ben Hemmingworth, Ben Watson and Donatello Bradman.
The bell rings for round one and we are underway!
Ropuitururapthlaka fails with a rather predictable takedown attempt.
Eerkilaa lands three nice shots there - that looked like it hurt!
It looks like Misuaksual Ropuitururapthlaka has been cut.

Oooooh!!! Eerkilaa has knocked Ropuitururapthlaka down with a huge combo! Eerkilaa steps away and waves a wobbly Ropuitururapthlaka back to his feet! This one might not go much longer!
We've seen a great period of action over the last minute or so - credit to both fighters for going all out!
Eerkilaa cracks Ropuitururapthlaka with a brutal left hook that knocks him out cold! This one is over in a flash! Game over!
Ladies and gentlemen, after 0:13 of round 1, we have a winner by way of KO (Punch). Toni Eerkilaa!
Toni Eerkilaa is the new super heavyweight champion!
|
|
|
|
|
|
|
|
|
|
|
|
|
|
|
|
|
|
|
|
|
|
|
| S |
C
A |
G |
S |
C
B |
G |
|
S |
C |
G |
|
energy
A | B |
|
hype
A | B |
|
pop
A | B |
|
mgr
A | B |
|
FIGHT
RATING
100% |
|
|
|
|
|
|
|
|
|
|
