 |
Clark vs. Tipps RPG FC 1 PBP Commentary |
Undercard bout
|
|
|
|
Undercard bout
|
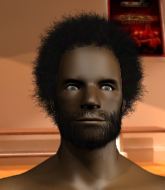
Coming up we have a light heavyweight MMA rules bout between Amin Rubinstein (ranked 0 p4p, 0 weight class) and James Gabrial (ranked 0 p4p, 0 weight class). James Gabrial has the power to score a knockout today if he connects clean with Amin Rubinstein's chin.
 |
|
 |
| 197 cm
22
218 lbs
3 - 1 - 0 |
|
188 cm
22
210 lbs
2 - 2 - 0 |
Decent wrestler
Excellent MT
Insanely flexible |
|
BJJ Blue Belt
Counter fighter
Granite chin |
|
| |
|
Ladies and gentlemen. This fight is 3 rounds, in the light heavyweight division.
Introducing the fighter to my left, fighting out of the red corner.
With a record of
3 - 1 - 0, fighting out of Las Vegas, Amin Rubinstein!
And introducing the fighter to my right, fighting out of the blue corner.
With a record of
2 - 2 - 0, fighting out of Las Vegas, James Gabrial!
The judges for this bout are Stewart Dunkirk, Chris Downing and Robert Twigg.

The bell rings for round one and we are underway!

Rubinstein rushes Gabrial and presses him up against the cage.
Rubinstein lands a damaging elbow.

It looks like James Gabrial has been cut.
Rubinstein connects with a knee to the head.
Rubinstein lands a nice elbow.
Rubinstein lands a nice elbow.
Nice elbow from Rubinstein.
That has opened up James Gabrial's cut even more.
Rubinstein stalls.
Gabrial is looking for a takedown.
Gabrial is trying to work for a single leg takedown but Rubinstein pulls him back up using the underhooks.
Rubinstein with the Thai clinch, lands a knee to the head.
The cut above James Gabrial's eye is starting to cause him problems now.
Gabrial tries to jump guard but he falls flat on his backside. Rubinstein smiles and moves away.
Amin Rubinstein has stuffed three takedown attempts in the round now. That's going to take a lot out of James Gabrial.
Rubinstein scores with a nice head shot.

That's one minute gone in the round.
Rubinstein lands a jab-cross combination.
Rubinstein stooping low to avoid any incoming strikes and then lunges in with an uppercut come cross that lands flush.
Gabrial misses with a takedown attempt
and Rubinstein counters with a good right hand that lands right on the jaw.
Rubinstein gets in close and instigates a clinch.
Gabrial's coach down at BLACKSMITH GYM - THE 25 Coach Las Vegas Mega-Gym was telling us pre-fight that they have been working on Gabrial's balance. Obviously they view that as a key factor in the outcome of this fight.
Nice elbow from Rubinstein.
Gabrial takes a knee right on the jaw!
James Gabrial's cut is absolute horrible now. This looks like something out of a horror film with blood covering both fighters.
The referee calls the doctor in to look at James Gabrial's cut. Oh no, the doctor has called an end to the bout!
Ladies and gentlemen, after 1:52 of round 1, we have a winner by way of TKO (Cut). Amin Rubinstein!
|
|
|
|
|
|
|
|
|
|
|
|
|
|
|
|
|
|
|
|
|
|
|
| S |
C
A |
G |
S |
C
B |
G |
|
S |
C |
G |
|
energy
A | B |
|
hype
A | B |
|
pop
A | B |
|
mgr
A | B |
|
FIGHT
RATING
39% |
|
|
|
|
|
|
|
Undercard bout
|
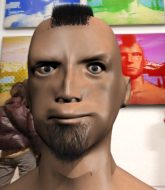
Coming up we have a featherweight MMA rules bout between Ken Takashi (ranked 0 p4p, 0 weight class) and Ooga Booga (ranked 0 p4p, 0 weight class). Both these guys have really solid chins. Will we see a standup war or will they both decide that a knockout is unlikely and try to win the fight elsewhere?
 |
|
 |
| 171 cm
19
147 lbs
0 - 0 - 0 |
|
170 cm
21
150 lbs
1 - 1 - 0 |
BJJ Blue Belt
Basic striking
KO power |
|
BJJ Blue Belt
Decent boxing
Granite chin |
|
| |
|
Ladies and gentlemen. This fight is 3 rounds, in the featherweight division.
Introducing the fighter to my left, fighting out of the red corner.
With a record of
0 - 0 - 0, fighting out of Las Vegas, Ken Takashi!
And introducing the fighter to my right, fighting out of the blue corner.
With a record of
1 - 1 - 0, fighting out of Las Vegas, Ooga Booga!
The judges for this bout are Wesley Smith, Robert Twigg and Tiny Johnson.
The bell rings for round one and we are underway!
Booga throws a hard body shot but it just misses.
Booga pushing out the jab but it's not landing.
Takashi closes the distance and presses his opponent up against the cage.
A nice glancing elbow lands by Takashi.
It looks like Ooga Booga has been cut.
Takashi landing knees to the body.

Takashi escapes the clinch and we're back to striking.
Takashi swings away but doesn't land with a series of punches.
Takashi takes a really solid shot there but just smiles back and shrugs his shoulders.
Takashi wants to clinch up but Booga keeps it at a distance.
Nice shot by Takashi.
Booga thows a left - swing and a miss!
Booga looks to land a left hand but Takashi moved out of range nicely.
Booga misses with a jab, cross combination.
Takashi shoots in for a takedown - he's clinched up with Booga but Booga pushes him off and we're back to square one.
Good shot there by Booga.
The crowd cheering loudly, showing their appreciation for the quality fight we're seeing here.
Booga wings a very wild body shot but it does the job and lands to the midsection.
Takashi takes one on the chin but keeps coming.
That's one minute gone in the round.
Booga avoids the clinch attempt nicely.
Wow, both these guys are really going for it!
Booga throws a hook but Takashi blocks it.
Booga lunges in with swinging rights and lefts but Takashi circles away quickly and effectively.
Booga misses with a straight left.
Takashi slips a jab and a cross from Booga.
Ooga Booga is looking to keep the fight on the feet at all costs.
Takashi throws a combination but comes up with nothing but fresh air.
Booga missing with a left hand there. Takashi was out of range so wasted energy throwing that one.
Booga misses with a hook. Takashi ducked under it nicely.
Well, he's not going to score with shots like that. A lazy body kick attempt from Takashi.
Booga throws a jab when Takashi was well out of range.
Takashi tries a head kick but it misses.
The fighters circling - Booga throws out the jab but it was never going to land.
Booga throws a right and a left that both miss.
Takashi uses good footwork to avoid the strikes from Booga.
Takashi steps to the side to avoid the strikes from Booga.
Takashi lands with a thumping leg kick.
Takashi throws out a powerful jab.

That's two minutes gone in the round.
Booga lunges in with an uppercut that skims his opponent's chin.
Takashi ducks right into an uppercut from Booga.
Takashi lands an overhand right.
Fantastic stuff here - a very entertaining period of action, which has drawn cheers from the crowd.
Takashi tries to land a leg kick but Booga saw it coming and moves away.
Takashi ducks under an overhand right and circles away with a smile on his face.
Takashi throws a nice looking combination but Booga bobs and weaves to avoid any damage.
Takashi dips down and scores with a jab to the body.

Takashi shoots in with a lovely double leg takedown. Booga manages to land in full guard to minimise the damage.
The referee must be thinking about standing these guys back up.
Takashi postures up in Booga's guard and throws a big left but Booga blocks it.
Takashi works over Booga with some ground and pound from guard.
The fighters are pressed up against the cage, both looking to find a bit of space to work.
Takashi advances to half guard.
Takashi wants to take a breather but Booga is having none of it.
Takashi thows a wild elbow that connects with the canvas.

Takashi wants to work for an arm triangle but Booga is really keeping half guard well and defending the submission attempt.

That's three minutes gone in the round.
Booga is trying to stand.
Booga is trying to get back to full guard.
Takashi is trying to control. Booga wants to improve his position but can't escape this time.
Takashi tries to stand but can't do so whilst Booga controls his leg.
Takashi seems very keen to just sit and control from half guard but Booga does not like that idea so much and is remaining active off his back.

We're going to have a standup here because Ken Takashi wasn't active enough for the referee's liking.
Booga gets tackled into the cage by Takashi. Takashi maintains the clinch.
Takashi's corner calls for him to break the clinch, which he does.

That's four minutes gone in the round.
Booga throws a looping overhand right but Takashi ducks down to avoid it.
Takashi buckles his opponent's knee momentarily with a nice leg kick.
Takashi has closed the distance and engaged Booga in a clinch.
Takashi lands a shot to the body.
Takashi pushes off and circles away, back to the middle of the mat.
Takashi uses good head movement to avoid the hook from Booga.
Takashi scores with a slapping inside leg kick.
Booga throws a wild combination but nothing lands.
Takashi tries to land with a swinging hook to the body but Booga was well out of range. Poor timing from Takashi.
Takashi clinches up with Booga and pushes him back against the cage.
This is a great period of action - very entertaining stuff!
Takashi lands a hook to the side of the head.
The crowd are going absolutely nuts as the round comes to an end - what a fantastic round of action!
Takashi pushes off and circles away, back to the middle of the mat.
Booga lands a straight punch to the body, keeping Takashi at a distance.
We've been informed that Booga has been working hard on his conditioning in the buildup to the fight.
Takashi keeps Booga at a distance using the push kick.
And thats the end of the round the fighters go back to their corners.
Ken Takashi dominated that round.
The cut man is working on Ooga Booga's cut.
The fighters' corners scream their final instructions, as the referee calls time. Here we go, back to the action!

Takashi throws a right and a left that both miss.
Takashi uses decent footwork to sidestep a right hand from Booga.
Takashi fakes with an overhand right and moves in to clinch with Booga, pushing him back against the cage.
Takashi pushes off and circles away, back to the middle of the mat.
Takashi uses decent footwork to sidestep a right hand from Booga.
Takashi throws a head kick but Booga moves out of range.
Takashi tries to clinch up against the cage, rushing in to close the distance. Booga manages to break the clinch and circles back to the middle of the mat.
The crowd cheers as Booga lands an impressive looking overhand right. Takashi doesn't seem phased though.
Booga misses with a two punch combination.
Booga rushes in with a sloppy looking punch
and Takashi counters with a head kick.
The fighters circling - Booga throws out the jab but it was never going to land.
Takashi darts in and out, connecting with a jab.
Booga uses good head movement to avoid the hook from Takashi.
Booga missing with a left hand there. Takashi was out of range so wasted energy throwing that one.
Ken Takashi is winning the standup battle so far.
Takashi scores to the head and body with a nice combination!
This is a great period of action - very entertaining stuff!
Takashi lets loose with a powerful body kick. Booga will feel that in the morning.
Ken Takashi is looking to throw some combinations by the looks of things.
Sloppy strikes from Booga. Those never looked like landing.
That's one minute gone in the round.
Takashi connects with a crisp jab.
Booga throws a series of punches but Takashi avoids them all with ease.
Takashi misses with a straight left.
Booga swings away but doesn't land with a series of punches.
Takashi gets a clinch.
Takashi manages to break the clinch.
Booga lands a body shot.
Takashi clinches up with Booga and pushes him back against the cage.
Takashi breaks the clinch.
Takashi ducks low and lands a nice hook to the body of his opponent.
Sloppy strikes from Booga. Those never looked like landing.
Jab by Takashi.
Takashi staying out of range there.
Takashi darts in looking for a takedown but Booga gets double underhooks and turns Takashi into the cage.
Takashi keeps the fight in the clinch, despite Booga's efforts to push away.
That's two minutes gone in the round.
Takashi is struggling to control the position.
Takashi tries to work over Booga's body with a swooping hook but it only glances the target.
Booga is working hard here but doesn't seem to be able to control effectively, up against the cage.
Takashi's corner calls for him to break the clinch, which he does.
Fantastic stuff here - a very entertaining period of action, which has drawn cheers from the crowd.
Some wild striking there from Booga.
Takashi fails with an attempt to clinch.
Booga takes a jab right on the kisser.
That's three minutes gone in the round.
Takashi misses with a looping left.
Sloppy strikes from Booga. Those never looked like landing.
Boom, another hit is landed. "You're gunna get knocked out" taunts Booga, as that shot connected.
Booga swinging wildly here.
Booga misses with a looping right.
Booga is the aggressor but that punch slipped nicely by Takashi.
Takashi is looking to clinch.
Takashi showing good head movement there, avoiding the strikes from Booga.
Booga is breathing heavily.
Sloppy strikes from Booga. Those never looked like landing.
Takashi throws a right high kick that is partially blocked by Booga.
Booga just misses with a punch to the body.
Booga moves out of range of the body kick from Takashi.
Takashi shoots in for a takedown. "I don't think so" says Booga as he avoids it easily.
Booga lunges in with swinging rights and lefts but Takashi circles away quickly and effectively.
That's four minutes gone in the round.
Takashi throws a nice inside leg kick.
Takashi tries to clinch up.
Takashi throws a head kick that misses and slips in the process. He scrambles back to his feet and the fighters circle.
Takashi darts in and clinches Booga up against the cage.
Knees in the clinch landing for Takashi.
This is a great period of action - very entertaining stuff!
Knees in the clinch landing for Takashi.
Booga takes a knee to the side of the body.
Takashi crunches a lovely knee into Booga's ribcage.
A shot in the inside from Takashi.
As the round comes to an end the crowd are showing their appreciation for a great round of action.
Takashi lands a knee to the body.
Takashi content to slow the pace in the clinch.
And thats the end of the round the fighters go back to their corners.
Ken Takashi dominated that second round.
The cut man is working on Ooga Booga's cut.
The minute break is over - no more time for sponges and pep talks - back to the action! This is the final round!

Booga misses with a hook
and Takashi counters with a flying knee. Nice.
Booga throws a hook to the body but it doesn't connect.
Takashi avoids a lazy jab quite easily.
Some wild striking there from Booga.
Takashi fails with a rather predictable takedown attempt.
Takashi staying out of range there.
Takashi misses with the combination.
Booga swings and misses with a hook to the body.
Takashi takes one on the chin but seems OK.
Booga misses with a looping left.
Booga just misses with a punch to the body.
Booga misses with a looping left.
Booga lands with a straight right. Takashi didn't see that one coming.
Booga takes a big intake of breath there - he's definitely tired.
Good shot there by Takashi.
That's one minute gone in the round.
Booga throws a jab when Takashi was well out of range.
Takashi scores with a push kick.
Takashi looks to land a body kick but Booga moved away.
Takashi slips under a jab.
Booga throws a lazy right hand but Takashi sees it coming a mile off and sidesteps it easily.
Booga checks a leg kick.
Booga ducks under a wild hook from Takashi.
Booga moves out of range of the strikes.
Booga throws an uppercut from half a mile away. Takashi sees it coming and avoids it easily.
Booga throws a monster uppercut resembling something out of street fighter but it doesn't land.
Takashi ducks down and throws a hook to the body but Booga moves away.
A decent looking cross lands there for Takashi.
Booga throws a hook but Takashi blocks it.
Booga tries to bum rush Takashi with a series of wild strikes but Takashi uses good footwork to avoid the assault.
Takashi waving his hands out in front of him, looking to distract Booga.
Takashi shoots in for a takedown. "I don't think so" says Booga as he avoids it easily.
That's two minutes gone in the round.
The fighters circling - Booga throws out the jab but it was never going to land.
Booga looks to land a combination but Takashi avoids it well.
Takashi moves into the clinch.
Takashi lands a knee to the head.
Booga blocking some punches.
Takashi breaks the clinch and we return to the middle of the mat.
Booga avoids a punch combination nicely.
We've seen a great period of action over the last minute or so - credit to both fighters for going all out!
Booga throws out a token jab with nothing on it.
Takashi rushes forward with a series of wild hooks but Booga moves out of range and avoids them all easily.
Takashi looks to land a right hand but Booga moved out of range.
Takashi connects with a leg kick. Booga looked like he was expecting something else and didn't defend it.
Takashi throws a low kick, looking for Booga's leg but Booga calmly moves out of range.
That's three minutes gone in the round.
Takashi walks into a stiff left hand from Booga.
Booga might want to mix his strikes up a bit more. He's just going for head shots at the moment and that can become a bit predictable.
Takashi is pinned up against the cage taking some big shots here. The referee is looking closely deciding whether he should stop the fight.
Takashi moves away from the strike by Booga.
Booga throws a combination but comes up with nothing but fresh air.
Booga jabbing away but nothing is landing.
Takashi throws a nice hook to the body that draws an oooh from the crowd.
Booga connects with a right hand. Takashi shakes it off.
Takashi uses decent footwork to sidestep a right hand from Booga.
Takashi tries to bum rush Booga with a series of wild strikes but Booga uses good footwork to avoid the assault.
Takashi tries to clinch there but Booga circles away.
Takashi keeps Booga at a distance using the push kick.
Ken Takashi is fighting for a decision here - he's started to take the cautious approach.
Takashi keeping his hands up high there, blocking the jab from Booga.
Takashi lands the left hand.
Booga blocks a head kick by Takashi.
Booga steps to his left, right into the path of a big body kick from Takashi. That one must have hurt.
Booga throws a nice looking combination but Takashi bobs and weaves to avoid any damage.
That's four minutes gone in the round.
Takashi moves into range and clinches up with Booga.
Booga is looking to break free of the clinch but Takashi has double underhooks.
Takashi lands an elbow inside.
Takashi lands an elbow that stopped Booga in his tracks for a moment.
The crowd are loving this. Great action here.
Takashi has a couple of punches blocked by Booga.
Takashi lands an elbow inside that Booga shrugs off.
Ooga Booga has stepped it up - he knows he needs a finish here!
Takashi misses with a shot to the kidneys.
Ken Takashi has scored more points in the clinch so far.
As the round comes to an end the crowd are showing their appreciation for a great round of action.
Takashi escapes the clinch and we're back to striking.
The crowd cheers as Takashi lands an impressive looking overhand right. Booga doesn't seem phased though.
Booga has his front leg slapped to the side - a nice low kick landing there from Takashi.
And that's the end of the fight!
Ken Takashi showed his dominance in that final round.
Well Takashi has outscored his opponent in every aspect of the fight today. Only a scarily incompetent judge or two will keep him from a well deserved win... Over to the ring announcer for the scorecards.
Ladies and gentlemen, after 3 rounds of action, we go to the scorecards for a decision.
Judge Wesley Smith scores the fight 30:27
Judge Robert Twigg scores the fight 30:27
Judge Tiny Johnson scores the fight 30:27
In favor of your winner, by unanimous decision... Ken Takashi!
|
|
|
|
|
|
|
|
|
|
|
|
|
|
|
|
|
|
|
|
|
|
|
| S |
C
A |
G |
S |
C
B |
G |
|
S |
C |
G |
|
energy
A | B |
|
hype
A | B |
|
pop
A | B |
|
mgr
A | B |
|
FIGHT
RATING
76% |
|
|
|
|
|
|
|
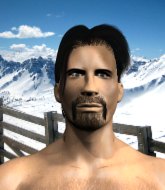
Undercard bout
|
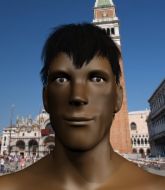
Coming up we have a heavyweight MMA rules bout between Dudu Paraiba (ranked 0 p4p, 0 weight class) and Tiger Khaybulaev (ranked 0 p4p, 0 weight class). Dudu Paraiba has the better chin. Will he look to stand and bang today?
 |
|
 |
| 198 cm
30
273 lbs
11 - 13 - 0 |
|
190 cm
25
270 lbs
1 - 0 - 0 |
Abu Dhabi Champ
Solid boxing
Cardio machine |
|
Good takedowns
Counter fighter
Can Moonwalk |
|
| |
|
Ladies and gentlemen. This fight is 3 rounds, in the heavyweight division.
Introducing the fighter to my left, fighting out of the red corner.
With a record of
11 - 13 - 0, fighting out of Tokyo, Dudu Paraiba!
And introducing the fighter to my right, fighting out of the blue corner.
With a record of
1 - 0 - 0, fighting out of Las Vegas, Tiger Khaybulaev!
The judges for this bout are Stewart Dunkirk, Tiny Johnson and Alan Glass.
The bell rings for round one and we are underway!
Paraiba scores with a nice takedown into half guard. Let's see what he's got on the ground.
The referee claps his hands together and tells the fighters to work.
Khaybulaev won't allow Paraiba to pass to mount.

Khaybulaev looking for submissions off his back.
Khaybulaev looking for submissions from an awkward position here.
The ref warns both fighters not to hold the cage as they work up against the meshing.
Paraiba is working for a kimura but Khaybulaev is defending it quite comfortably.
Paraiba wants to work for an arm triangle but Khaybulaev is really keeping half guard well and defending the submission attempt.
Paraiba is sneakily working for an arm triangle but Khaybulaev sees it coming and defends easily.
Paraiba trying to control the action but Khaybulaev is working from the bottom.
Khaybulaev actively working from the bottom here.
Paraiba wants to pass the guard but Khaybulaev is defending well.
Khaybulaev looking to work for a kimura from the bottom.
That's one minute gone in the round.
Khaybulaev looking for submissions off his back.
Khaybulaev tries to roll over but Paraiba keeps him under control.
Paraiba is keen to just control but Khaybulaev is a slippery customer.
Still in half guard, Paraiba seems content to control.
Paraiba working over Khaybulaev with some ground and pound. Khaybulaev looks like he wants out of this position, which is understandable.
Paraiba looks towards his corner to check for any instructions. The corner give him nothing to work with, so he cracks Khaybulaev with a short hammerfist. I guess that's as good as any advice he could get in this position.
The crowd cheering loudly, showing their appreciation for the quality fight we're seeing here.
Paraiba is trying to work for a kimura. This could be trouble! No, Khaybulaev has managed to free his arm - good work.
Paraiba is looking for an arm triangle, whilst trying to pass to side control. Khaybulaev doesn't seem that keen to cooperate though. No luck this time Paraiba.
Paraiba is trying to control. Khaybulaev wants to improve his position but can't escape this time.
That's two minutes gone in the round.
Paraiba lands with a punch from half guard.
Paraiba works his way into side control.
Khaybulaev gives up the full mount - oops, sloppy defensive grappling there!
Paraiba tucks in and makes sure he doesn't lose the dominant position.
Khaybulaev is looking to improve his position but Paraiba isn't that keen on the idea.
The fighters are pressed up against the cage, both looking to find a bit of space to work.
Paraiba working the ground and pound effectively.

Khaybulaev is rocked!
It looks like Tiger Khaybulaev has been cut.
Paraiba working for a submission here. He's tucked his head under his opponent's arm, looking for an arm triangle. He's hopped off into side control, looking to tighten the submission... is it going to work? He's given up a good position looking for it. Khaybulaev looks OK. Oh, I spoke too soon, he's out! That must have been tighter than I thought! Excellent work there by Paraiba! Submission of the night perhaps?
Ladies and gentlemen, after 3:56 of round 1, we have a winner by way of Submission (Arm Triangle). Dudu Paraiba!
Dudu Paraiba decided to thank the fans in attendance for making a great atmosphere. It seemed to go down pretty well.
|
|
|
|
|
|
|
|
|
|
|
|
|
|
|
|
|
|
|
|
|
|
|
| S |
C
A |
G |
S |
C
B |
G |
|
S |
C |
G |
|
energy
A | B |
|
hype
A | B |
|
pop
A | B |
|
mgr
A | B |
|
FIGHT
RATING
77% |
|
|
|
|
|
|
|
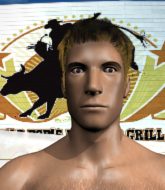
Undercard bout
|
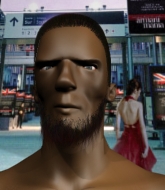
Coming up we have a heavyweight MMA rules bout between Tony Brown (ranked 0 p4p, 0 weight class) and Tim Sakuragi (ranked 0 p4p, 0 weight class). Brown comes to the cage accompanied by Earth Angel. Tony Brown has the edge in experience - let's see if he can make that count tonight.
 |
|
 |
| 192 cm
25
265 lbs
1 - 0 - 0 |
|
185 cm
18
255 lbs
1 - 0 - 0 |
Decent wrestler
Counter fighter
Good chin |
|
BJJ White Belt
Decent boxing
Solid chin |
|
| |
|
Ladies and gentlemen. This fight is 3 rounds, in the heavyweight division.
Introducing the fighter to my left, fighting out of the red corner.
With a record of
1 - 0 - 0, fighting out of Las Vegas, Tony Brown!
And introducing the fighter to my right, fighting out of the blue corner.
With a record of
1 - 0 - 0, fighting out of Las Vegas, Tim Sakuragi!
The judges for this bout are Robert Twigg, Stewart Dunkirk and Frank Dennis.
The bell rings for round one and we are underway!
The crowd cheers as Sakuragi lands an impressive looking overhand right. Brown doesn't seem phased though.
Sakuragi misses with a leg kick.
Brown looks frustrated there after his takedown attempt is stuffed easily.
A jab from Sakuragi does it's job there.
Sakuragi throws a sloppy head kick and Brown moves out of range easily.
Sakuragi stuns Brown with a nice body shot, before stepping back out of range.
Sakuragi should think about turning a few of those tyres round his middle into muscle if he wants people to take him seriously as an athlete.
Sakuragi moves in looking to clinch but Brown pushes him off.
Sakuragi shoots in for a double leg but Brown sprawls well. That's going to sap some energy.
Brown takes a solid shot to the body. That one hurt him but he's trying not to show it.
Nice shot lands for Sakuragi.
Brown misses with a jab, cross combination.
Tim Sakuragi seems to be the more aggressive standup fighter in this bout.
Brown throws a looping left and ducks down for a takedown. He's got his arms around Sakuragi's waist but Sakuragi gets an underhook and avoids the takedown by throwing Brown off to one side.
Brown goes for a double leg but Sakuragi avoids the attempt and the two fighters end up clinched against the cage as Sakuragi continues to drive forward.
That's three failed takedown attempts in the round for Tony Brown. That's going to take a lot out of him.
That's one minute gone in the round.
Sakuragi looking to slow down the pace here.
Sakuragi is trying to force a seperation but Brown has the dominant position.
Sakuragi lands a right hand that snaps the head of Brown backwards.
Brown tries to score a body lock takedown but Sakuragi shows good agility there to stay on his feet.
Sakuragi working Brown over with knees to the body.
Brown is breathing heavily.
Sakuragi tries to break the clinch but Brown is controlling the position.
Sakuragi is looking to break free of the clinch but Brown has double underhooks.
Brown blocks a couple of punches on the inside.
Brown tries to pull guard but Sakuragi forces him back to his feet, against the cage.
That's two minutes gone in the round.

Sakuragi breaks from the clinch.
Sakuragi tries to clinch but is not successful on this occasion.
Brown showing good head movement there, avoiding the strikes from Sakuragi.
Nice uppercut lands for Sakuragi. That snapped Brown's head back.
The crowd cheering loudly, showing their appreciation for the quality fight we're seeing here.
Sakuragi keeps the fight standing with a nice sprawl.
Sakuragi jabs Brown to the body, keeping him at a distance.
Danga de danga de dang - Sakuragi scores with a four punch combination!
Tim Sakuragi is looking to keep the fight on the feet at all costs.
Brown throws the overhand right but ducks down into a quick takedown attempt. Sakuragi was covering up waiting for the punch and Brown finishes the takedown easily into guard.
The referee is pacing around the two fighters - he looks like he's thinking about a standup.
Sakuragi working a defensive guard here.
That's three minutes gone in the round.
Brown wants to control from the top but Sakuragi keeps moving.
Sakuragi trying to control the position.
Sakuragi tries to land a sweep but no joy.
That's four minutes gone in the round.
A few boos can be heard. I'm sure they will multiply if the fighters don't pick up the pace.

The ref stands the fighters back up, due to lack of action by Tim Sakuragi.
Sakuragi misses with a combination
and Brown counters with a nice body shot.
Sakuragi bobs and weaves and unloads with a good uppercut.
Brown avoids a punch combination nicely.
Sakuragi throws a nice looking combination but Brown bobs and weaves to avoid any damage.
Brown displays some good footwork, moving neatly out of range as Sakuragi throws out the jab.
As the round comes to an end the crowd are showing their appreciation for a great round of action.
Brown fails to land with the punch combination there - jab, cross, hook, miss, miss, miss.
Sakuragi throws a hook but Brown blocks it.
Sakuragi walks forward and throws out a flicking leg kick. Brown checks it nicely though, as he moves to the side.
And thats the end of the round the fighters go back to their corners.
Tim Sakuragi dominated that round.
That's the end of the interval. I'm sure that seemed a lot quicker than a minute for our two fighters! Back to the action.
Brown looks to throw the jab but Sakuragi is out of range.
A left and a right from Sakuragi both land. Nice combination.
A telegraphed takedown attempt from Brown is defended easily by Sakuragi.
Sakuragi finds nothing but air with that leg kick attempt.
Sakuragi dips to his left and cracks Brown with an uppercut!
Jab, jab by Sakuragi - just one landing.
Sakuragi moves into range and connects with a jab.
Sakuragi tries to clinch up but Brown circles away and keeps his distance.
We're hearing some news coming in from back stage. It's official - Sakuragi has eaten all the pies!
Brown will have to do better than that with his takedown attempts.
Sakuragi scores with a big left there. The judges will like that one.
Sakuragi has been working his punching technique in the buildup to the fight and it appears to be paying off.
Tony Brown is looking to throw some combinations by the looks of things.
That's one minute gone in the round.

Brown gets tackled into the cage by Sakuragi. Sakuragi maintains the clinch.
Sakuragi can't find room to land a body shot as Brown controls the action.
Brown manages to pull guard.
Brown pulls Sakuragi in close to prevent any damage.
Brown manages to sweep nicely, so he's now on top. Sakuragi manages to get himself to full guard.
Brown sitting in guard here, content to control.

Sakuragi is working an open guard so Brown takes the opportunity to get back to his feet.
That's two minutes gone in the round.
Brown fails with a takedown attempt.
That's three failed takedown attempts in the round for Tony Brown. That's going to take a lot out of him.
Brown takes a shot to the nose. Hopefully that hasn't broken it.
Sakuragi lands a powerful looking uppercut that connected with his opponent's jaw.
This has been an exciting period of action!
Brown has his head snapped back a nice jab. A little nod from Brown there as he acknowledges the shot.
Sakuragi misses with a jab and misses with a cross straight after too.
Sakuragi cracks a nice hook into Brown's ribs.
Tim Sakuragi seems to be getting the better of the standup.
Sakuragi throws a shot to the body.
Brown tries to shoot in for a takedown. He's got hold of a leg but Sakuragi swivels and escapes.
Both fighters are absolutely exhausted here.
Sakuragi fails in his attempt to clinch.
That's three minutes gone in the round.
Sakuragi with a body punch. A glancing blow.
A bone on bone clash there as Sakuragi blocks the leg kick.
Sloppy strikes from Sakuragi. Those never looked like landing.
Brown looks to land a combination but Sakuragi avoids it well.
Sakuragi lands a jab to Brown's midsection.
Sakuragi fails to land with the punch combination there - jab, cross, hook, miss, miss, miss.
Brown fails with a takedown attempt.
Sakuragi ducks low and lands a nice hook to the body of his opponent.
Sakuragi lands a leg kick. The shin dug right into the meat of the thigh.
That's four minutes gone in the round.
Boom, another hit is landed. "You're gunna get knocked out" taunts Sakuragi, as that shot connected.
Brown takes a jab on the nose there. A little bit of blood seems to be coming out. Hopefully that won't affect his breathing.
Sakuragi lands a leg kick. The shin dug right into the meat of the thigh.
Sakuragi scores with a jab to the jaw of his opponent.
Brown blocks the body kick.
Sakuragi lands a jab to the head.
This has been an exciting period of action!
Sakuragi lands a straight punch to the body, keeping Brown at a distance.
Sloppy strikes from Brown. Those never looked like landing.
As the round comes to an end the crowd are showing their appreciation for a great round of action.
Brown walks into a jab.
Sakuragi lands with a right hand.
And thats the end of the round the fighters go back to their corners.
Tim Sakuragi showed his class in that round. I'd imagine he'll take it on all the scorecards.
That's the end of the interval. I'm sure that seemed a lot quicker than a minute for our two fighters! Back to the action. This is the final round!
Sakuragi fails in his attempt to clinch.
Sakuragi avoids the clinch attempt nicely.
Sakuragi cracks a nice hook into Brown's ribs.
Brown tries to clinch
and Sakuragi counters with a shot to the ribs. That looked like it hurt.
Brown closes the distance, clinches up and gets a nice trip takedown into side control. Very smooth.
Sakuragi wants to control but Brown postures up.
Sakuragi trying to control but Brown flips him over like a cheap hooker and has his back!
Sakuragi is defending well here and trying to improve his position.
Sakuragi wants to control his opponent's hands but Brown gets his hands free.
Brown has good solid back control here.
Sakuragi takes a big intake of breath there - he's definitely tired.
That's one minute gone in the round.
Brown seems to have a rather negative gameplan on the ground. He seems keen to just score the takedown and hold down Sakuragi for as long as he can get away with.
You can see the frustration on Sakuragi's face
He knows he is in trouble unless he improves his position sooner rather than later.
Brown keeps control of the position easily here as Sakuragi tries to buck him off.
The referee must be thinking about standing these guys back up.
Brown is not going to allow Sakuragi to sit and survive in this position.
That's two minutes gone in the round.
Brown keeps control of the position easily here as Sakuragi tries to buck him off.

It looks like we're going to have a standup here. Neither fighter is doing enough on the ground.
Sakuragi connects with a slap. Keep your fist closed son.
Brown shoots in for a takedown. "I don't think so" says Sakuragi as he avoids it easily.
Brown takes a solid shot to the body. That one hurt him but he's trying not to show it.
Sakuragi lands a right hook to the body.
That's three minutes gone in the round.
Nice jab there from Sakuragi.
Brown gets a double leg takedown into Sakuragi's guard.
Brown is stalling in the full guard.
Brown's ground tactics aren't going to win him many fans. Let's hope he's got fireworks for us if he gets back to his feet because he's not doing much on the ground.
If this pace continues, the referee will definitely step in and force a standup.
The fighters are pressed up against the cage, both looking to find a bit of space to work.
The ref stands the fighters back up. Tony Brown wasn't doing enough on the ground.
Sakuragi lands a jab-cross combination.
That's four minutes gone in the round.
Brown fails to land the takedown.
Sakuragi pushes forward with a 1-2 combination that forces Brown back to the cage. Sakuragi follows up with a solid lead hook to the liver.
This has been an exciting period of action!
Sakuragi lands three nice shots there - that looked like it hurt!
Brown decides to change it up a bit and drives through with a nice takedown into half guard.
Sakuragi tries to get to full guard but Brown has control of the leg.
Tony Brown has stepped it up - he knows he needs a finish here!
As the round comes to an end the crowd are showing their appreciation for a great round of action.
Brown keeping composed on the top, looking to control the action.
And that's the end of the fight!
That was a close round. You could make an argument for either fighter but I would give it to Tony Brown.
I think Sakuragi has won this one but let's see whether the judges agree with me. Over to the ring announcer for the scorecards.
Ladies and gentlemen, after 3 rounds of action, we go to the scorecards for a decision.
Judge Robert Twigg scores the fight 28:29
Judge Stewart Dunkirk scores the fight 28:29
Judge Frank Dennis scores the fight 28:29
In favor of your winner, by unanimous decision... Tim Sakuragi!
In defeat, Tony Brown stepped up to the mic, saying 'So what!'.
|
|
|
|
|
|
|
|
|
|
|
|
|
|
|
|
|
|
|
|
|
|
|
| S |
C
A |
G |
S |
C
B |
G |
|
S |
C |
G |
|
energy
A | B |
|
hype
A | B |
|
pop
A | B |
|
mgr
A | B |
|
FIGHT
RATING
56% |
|
|
|
|
|
|
|
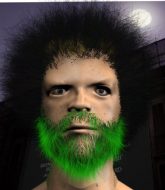
Undercard bout
|
Coming up we have a bantamweight MMA rules bout between Kamil Cwirko (ranked 0 p4p, 0 weight class) and Maniek King (ranked 0 p4p, 0 weight class). Kamil Cwirko has the better chin. Will he look to stand and bang today?
 |
|
 |
| 175 cm
22
130 lbs
0 - 2 - 0 |
|
183 cm
24
130 lbs
2 - 1 - 0 |
BJJ White Belt
Excellent boxer
Granite chin |
|
BJJ Blue Belt
Decent boxing
Determined |
|
| |
|
Ladies and gentlemen. This fight is 3 rounds, in the bantamweight division.
Introducing the fighter to my left, fighting out of the red corner.
With a record of
0 - 2 - 0, fighting out of Las Vegas, Kamil Cwirko!
And introducing the fighter to my right, fighting out of the blue corner.
With a record of
2 - 1 - 0, fighting out of Las Vegas, Maniek King!
The judges for this bout are Tiny Johnson, Frank Dennis and George Francis.
The bell rings for round one and we are underway!
King misses with a jab and misses with a cross straight after too.
Cwirko clinches with his opponent.
King swings away with an uppercut that misses.
King can't break the clinch.
A frustrated look appears on King's face as he tries to break the clinch.
Cwirko blocks a punch to the side of the head.
The referee calls for King to work.
King lands a short shot on the inside that snaps the head of Cwirko backwards.
King wants to break the clinch but can't.
King scores with a shot to the side of Cwirko's head.
A hook to the body from King.
Cwirko has a couple of punches blocked by King.
King tries to break free but Cwirko pushes him back against the cage.
King lands a hook to the body. It's hard to tell if that hurt Cwirko or not.
King makes some space for himself and lands an uppercut.
That's one minute gone in the round.
Cwirko lands with a left to the head.
King is looking to break free of the clinch but Cwirko has double underhooks.
The referee calls for King to work.

King manages to pull guard. Let's see whether he can land a sub off his back.
The referee wants the fighters to be more active or he's going to reset them on the feet.
King trying to punch from his back but it's not doing any damage.
King lands a good elbow from the bottom.
King lands a couple of decent looking body shots there.
King tries to strike from the bottom.
King trying to strike off his back.
Cwirko knows he needs to get back to his feet asap. He's simply no match for King on the ground.
King will have to put a bit more behind his punches if he's going to do any damage from this position.
King throwing short punches from the bottom.
Cwirko really does look like a pencil wearing a pair of gloves. Let's hope he has a gameplan to suit that ridiculous body shape.
There's a bit of a scramble here and now King is on top in guard.

King gets to his feet and steps away from his opponent.
King throws a nice looking combination but Cwirko bobs and weaves to avoid any damage.
That's two minutes gone in the round.
Cwirko throws a right and a left that King avoids nicely.
Cwirko has King up against the cage in a clinch.
This has been an exciting period of action!
King using the Thai plumb to throw knees but Cwirko has his back arched nicely, preventing the strike.
King is trying to push Cwirko away but Cwirko has him pressed against the cage, so he's going nowhere.
A shot in the inside from King.
Cwirko using the Thai plumb to throw knees but King has his back arched nicely, preventing the strike.
King looks like he'd prefer to be striking at range right now.
Cwirko breaks the clinch and we return to the middle of the mat.
King swinging wildly here.
Cwirko looks for a takedown but King sprawls well.
King scores a trip takedown into side control. Nice.
The fighters are pressed up against the cage, both looking to find a bit of space to work.
That's three minutes gone in the round.
King working the ground and pound.
King stands up.
King swinging wildly here.
Cwirko tries to drive through with a takedown attempt but King defends well and Cwirko ends up having to push King into the cage where they will battle it out in the clinch.
King has Cwirko pressed up against the cage. He's trying to work for a single leg takedown. King pulls back from the cage and twists to the side, sending Cwirko tumbling to the mat - King dives into Cwirko's guard.
King content to stall in guard here.
King postures up and lands some nice ground and pound.
King stands up from Cwirko's guard - King perhaps looking for a knockout.
That's four minutes gone in the round.
King throws a right and a left that both miss.
King thows a body shot but no joy.
Cwirko moves into the clinch successfully.
This has been an exciting period of action!
King holding his opponent close, against the cage.
King is trying to push Cwirko away but Cwirko has him pressed against the cage, so he's going nowhere.
King has had enough of the clinch but Cwirko keeps him there for the moment.
The two fighters are working to gain dominance in the clinch.
As the round comes to an end the crowd are showing their appreciation for a great round of action.
With the two fighters working up against the cage, King just misses with a elbow thrown towards Cwirko's brow.
King has managed to pull guard. Let's see whether he can work an aggressive guard. It will also be interesting to see what tactics Cwirko uses from the top position.
King striking from his own guard.
And thats the end of the round the fighters go back to their corners.
Maniek King dominated that round.
That's time! Back to the action!
Cwirko has King up against the cage in a clinch.
King scores with a shoulder strike.
King has hold of one of Cwirko's legs. Cwirko is fighting the takedown attempt but King gets the trip and lands the takedown into guard.
King gets to his feet and steps away from his opponent.
Cwirko closes the distance and clinches up with King, looking for a takedown. Cwirko pushes King against the cage but King circles to the side and manages to break the clinch.
Maniek King seems to be the more aggressive standup fighter in this bout.
King moves into the clinch.
Some stalling of biblical proportions here from King.
King has had enough of the clinch and is looking to separate.
Cwirko keeps the fight in the clinch, despite King's efforts to push away.
King working hard to break the clinch.
King is trying to trip Cwirko. He has hold of a leg but Cwirko is hopping around, keeping his balance for the moment. King persists though and gets the takedown into guard.
Both fighters really going for it on the ground here!
That's one minute gone in the round.
King gets to his feet - Cwirko follows without any prompting.
King misses with a double jab.
Cwirko dives in for a single leg takedown but King sprawls and the fighters end up clinched against the cage.
Cwirko keeps the fight in the clinch, despite King's efforts to push away.
King jumps into guard, dragging Cwirko to the mat.
King trying to punch from his back but it's not doing any damage.
King striking off his back but it's not causing Cwirko any problems.
King trying to punch from his back but it's not doing any damage.
King lands a couple of decent looking body shots there.
King thows some rabbit punches from the bottom but they don't do any damage.
King throws a couple of weedy looking strikes off his back.
King trying to strike off his back.
There's a bit of a scramble here and now King is on top in guard.
King connects with a couple of short punches.
That's two minutes gone in the round.
King decides to stand up and beckons his opponent to follow.
The fans in attendance giving it up for the two fighters, who have really let it all hang out in the last minute or so!
King gets to the clinch - let's see what his plan is here.
King scores with a nice hook to the head.
A short left from King.
King manages to pull guard. Let's see whether he can land a sub off his back.
King doesn't do any damage with a couple of strikes from the bottom.
King throws a couple of weedy looking strikes off his back.
King throwing some rather feeble looking strikes off his back.
King striking off his back but it's not causing Cwirko any problems.
Cwirko throws an elbow that misses. King uses the momentum to reverse the position. He's now in Cwirko's guard. Nice move by King!
Both fighters are absolutely exhausted here.
King stands up from guard. Let's bang!
Cwirko shoots in for a takedown but doesn't get it.
That's three failed takedown attempts in the round for Kamil Cwirko. That's going to take a lot out of him.
Cwirko gets tackled into the cage by King. King maintains the clinch.
That's three minutes gone in the round.
King working hard to break the clinch.
King is trying to break free.
King gets double underhooks and manages to take the fight to the ground.
King decides he's had enough of playing guard and decides to stand. Come on Cwirko, up you get!
Cwirko gets taken down but at least he's managed to land in guard.
King stands up from Cwirko's guard - King perhaps looking for a knockout.
King closes the distance and pushes Cwirko back into the cage.
Wooooo! Give it up for these two warriors! They are putting on a show!
King tries to circle away but Cwirko has him pinned against the cage.
King lands a left hand.
That's four minutes gone in the round.
King is trying to break the clinch but Cwirko has him pressed against the cage.
Maniek King seems to be working more effectively in the clinch in the fight so far.
King pushes Cwirko back against the cage and unloads with a body punch.
Cwirko breaks the clinch and we're back to striking at distance.
Excellent takedown into side control there by King.
King decides to stand back up.
Cwirko showing good head movement there, avoiding the strikes from King.
King shoots in with a lovely double leg takedown. Cwirko manages to land in full guard to minimise the damage.
Cwirko trying to punch from his back but it's not doing any damage.
King has the superior BJJ but he's also working some ground strikes into his gameplan.
The crowd are going absolutely nuts as the round comes to an end - what a fantastic round of action!
King landing some decent shots from guard.
King is frustrating his opponent with some stalling tactics from top position.
And thats the end of the round the fighters go back to their corners.
Maniek King showed his class in that round. I'd imagine he'll take it on all the scorecards.
The referee calls time. The cornermen exit stage left and we're back to business. Ladies and gentlemen, this is the final round!
King closes the distance and clinches.
An uppercut on the inside fails to land for King.
King lands a left hand that snaps the head of Cwirko backwards.
King lands a nice trip takedown into half guard.
King stands up out of the half guard.
Cwirko shoots in looking for a double leg takedown. King defends it nicely.
King fails to land with the punch combination there - jab, cross, hook, miss, miss, miss.
King fakes a strike and closes the distance, dragging Cwirko to the ground. King is now in Cwirko's guard.
Both fighters are breathing heavily.
We've seen a great period of action over the last minute or so - credit to both fighters for going all out!
King won't allow Cwirko to get back to his feet.
King content to strike from guard, landing some decent shots.
That's one minute gone in the round.
King is pushing down on Cwirko's leg trying to pass to half guard. Cwirko is fighting to maintain full guard but King has managed to sneak the leg through.
King lands a big shot. The thud that echoes around the arena is like music to the fans' ears.
King stands up out of the half guard.
King comes forward and lands a shot to the body, then darts back out of range.
King lets the fists fly and connects with a left straight followed by a right hook.
Cwirko walks into a straight right hand from King.
King rushes Cwirko and presses him up against the cage.
The two fighters are working to gain dominance in the clinch.
King can't break the clinch.
King blocks a punch to the side of the head.
King decides to pull guard.
King has been the more effective fighter overall so far.
King striking from the bottom here.
King throws some sloppy strikes off his back.
That's two minutes gone in the round.
The crowd are loving this. Great action here.
King tries to strike from the bottom.
King bucks up whilst keeping hold of a body lock, managing to reverse the position. Now he's in top in Cwirko's guard.
King stands and steps away. Cwirko gets to his feet too and we're back to the striking game.
King lands three nice shots there - that looked like it hurt!
King drives through with a really nice takedown into side control.
Cwirko wings away with a couple of strikes but they don't land.
King working the ground and pound.
A lull in the action here as King stalls from top position.
Cwirko tries to work a leg under to get back to half guard but King wriggles his own leg back out and remains in side control.
Cwirko takes a big shot right to the temple there but he's taken it well.
King staying calm.
King decides to stand up, so the ref orders Cwirko to his feet.
That's three minutes gone in the round.
King fakes with an overhand right and moves in to clinch with Cwirko, pushing him back against the cage.
King is trying to break free.
King has Cwirko pressed up against the cage. He's trying to work for a single leg takedown. King pulls back from the cage and twists to the side, sending Cwirko tumbling to the mat - King dives into Cwirko's guard.
King passes Cwirko's right leg, so he's now in half guard.
King decides to stand and escape the position.
King manages to get an easy takedown there - catching Cwirko on his heels. He'll look to pass Cwirko's guard now, I'm sure.
King is stalling in the full guard.
Kamil Cwirko has stepped it up - he knows he needs a finish here!
This is a great period of action - very entertaining stuff!
King pushes down on Cwirko's leg and manages to get into half guard.
That's four minutes gone in the round.
Cwirko is trying to defend against the ground and pound but King scores with a couple of nice shots.
Maniek King is fighting for a decision - hopefully he's judged it right and he's actually winning the fight.
Cwirko on the receiving end of some nice ground and pound.
King seems content to maintain position for now, rather than mounting any offense.
King's corner are shouting for him to control the position and he seems happy to oblige.
Cwirko missing with punches from the bottom.
The crowd are going absolutely nuts as the round comes to an end - what a fantastic round of action!
King stands up from half guard.
Cwirko takes a jab right on the nose. That must have hurt but he shrugs his shoulders and looks to return the favor.
And that's the end of the fight!
Maniek King comfortably won the final round on my scorecard.
Well King has outworked and out performed his opponent in all aspects of the game today. He was simply too good and the decision should be no more than a formality. Over to the ring announcer for the scorecards.
Ladies and gentlemen, after 3 rounds of action, we go to the scorecards for a decision.
Judge Tiny Johnson scores the fight 25:30
Judge Frank Dennis scores the fight 26:30
Judge George Francis scores the fight 26:30
In favor of your winner, by unanimous decision... Maniek King!
|
|
|
|
|
|
|
|
|
|
|
|
|
|
|
|
|
|
|
|
|
|
|
| S |
C
A |
G |
S |
C
B |
G |
|
S |
C |
G |
|
energy
A | B |
|
hype
A | B |
|
pop
A | B |
|
mgr
A | B |
|
FIGHT
RATING
100% |
|
|
|
|
|
|
|
Co-main event
|
|
|
|
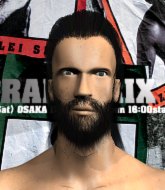
Main event
|
Coming up we have a bantamweight MMA rules bout between John Clark (ranked 0 p4p, 0 weight class) and Ryan Tipps (ranked 0 p4p, 0 weight class). Tipps has chosen MC Hammer - U Can't Touch This as his entrance music. Both fighters look fresh as a daisy as they make their way towards the cage.
 |
|
 |
| 150 cm
25
135 lbs
2 - 0 - 0 |
|
176 cm
24
143 lbs
0 - 0 - 0 |
Good takedowns
Brawler
KO power |
|
BJJ White Belt
Excellent boxer
Solid chin |
|
| |
|
Ladies and gentlemen. This fight is 3 rounds, in the bantamweight division.
Introducing the fighter to my left, fighting out of the red corner.
With a record of
2 - 0 - 0, fighting out of Las Vegas, John Clark!
And introducing the fighter to my right, fighting out of the blue corner.
With a record of
0 - 0 - 0, fighting out of New York, Ryan Tipps!
The judges for this bout are Chris Downing, Alan Glass and Wesley Smith.
The bell rings for round one and we are underway!
Clark drives through with a takedown into Tipps's guard. Let's see what he can do from the top position.
The ref warns both fighters not to hold the cage as they work up against the meshing.
The referee is pacing around the two fighters - he looks like he's thinking about a standup.
Clark not doing a lot at the moment. He'll have to show some more aggression or the fight will get stood up.
Tipps working the defensive guard well to avoid strikes from Clark.
Clark tries to free his leg and advance position but Tipps is retaining full guard.
Clark seems content to control from guard here. He's going to have to remain active though if he doesn't want to get stood back up.
Tipps is looking to get back to his feet but can't, whilst Clark is controlling him.
Clark thinks about going for a leg but decides against it, in order to maintain the position.
Clark pushes down on Tipps's leg and manages to get into half guard.
That's one minute gone in the round.
Clark is thinking about going for an arm triangle but he can't free his leg.
Clark is trying for a kimura here. Tipps looks like he's in a lot of pain... and he's tapping out! Clark wins by kimura!
Ladies and gentlemen, after 1:32 of round 1, we have a winner by way of Submission (Kimura). John Clark!
The defeated Ryan Tipps had this to say: 'Tips for wins? just kidding, just got to get back on track.'.
|
|
|
|
|
|
|
|
|
|
|
|
|
|
|
|
|
|
|
|
|
|
|
| S |
C
A |
G |
S |
C
B |
G |
|
S |
C |
G |
|
energy
A | B |
|
hype
A | B |
|
pop
A | B |
|
mgr
A | B |
|
FIGHT
RATING
34% |
|
|
|
|
|
|
|
|
|
|
