 |
QFC Tournament 336 Round 1 PBP Commentary |
Undercard bout
|
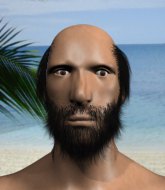
Coming up we have a lightweight MMA rules bout between Renzo Gracie (ranked 0 p4p, 0 weight class) and Matheus Batista (ranked 0 p4p, 0 weight class). We have two fighters making their debuts here, so let's see who comes out of this one with their first professional victory.
 |
|
 |
| 174 cm
24
154 lbs
0 - 0 - 0 |
|
150 cm
18
130 lbs
0 - 0 - 0 |
Good takedowns
Brawler
Good chin |
|
BJJ Blue Belt
Brawler
Determined |
|
| |
|
Ladies and gentlemen. This fight is 3 rounds, in the lightweight division.
Introducing the fighter to my left, fighting out of the red corner.
With a record of
0 - 0 - 0, fighting out of The Island, Renzo Gracie!
And introducing the fighter to my right, fighting out of the blue corner.
With a record of
0 - 0 - 0, fighting out of The Island, Matheus Batista!
The judges for this bout are , and .

The bell rings for round one and we are underway!
Gracie leaves Batista with his face pressed against the mat as he sprawls beautifully, defending against a solid takedown attempt.
Gracie changes levels and looks for a double leg takedown. Batista tries to avoid it but Gracie manages to keep hold of a leg and drag Batista to the ground. Batista escapes though and pops straight back up to his feet.
Gracie fails with the takedown.
Batista shoots in for a takedown but Gracie shows good takedown defense.

Gracie changes levels and drives through with a really nice takedown into side control. Batista looks really pissed at himself for not defending that better.
Batista should think about turning a few of those tyres round his middle into muscle if he wants people to take him seriously as an athlete.

Gracie decides to stand back up. Gracie steps back and let's Batista get back to his feet.

Batista pushes Gracie up against the cage in a clinch.
Gracie can't get the takedown.
That's three failed takedown attempts in the round for Renzo Gracie. That's going to take a lot out of him.
Gracie has a body lock and is looking for a takedown. Batista is bouncing around trying to prevent the takedown and somehow he has indeed managed to stay on his feet.
Batista has dropped down and is looking to force the takedown but it's defended by Gracie after a bit of a struggle.
Gracie is trying to slow down the pace of the fight but Batista is keeping busy.
Gracie is looking to take this one to the mat.

That's one minute gone in the round.
Gracie tries to break the clinch but Batista is controlling the position.
Gracie is trying to force a seperation but Batista has the dominant position.
A short right from Batista.

Batista jumps into guard, dragging Gracie to the mat.

Gracie drops back for a leg! It's a sloppy attempt though and Gracie jumps back into guard quickly, to retain the dominant position.
Gracie tries to stand but Batista is controlling from the bottom.
Batista throwing strikes off his back to little effect.
Batista seems keen to control rather than go for a submission, at least for now.
Gracie gets to his feet. Batista looking to butt scoot but the ref puts an end to that. On your feet son!

That's two minutes gone in the round.
Gracie shoots in for a takedown but Batista shows good takedown defense there and keeps this one on the feet.
Batista looks frustrated there after his takedown attempt is stuffed easily.
Batista stuffs the takedown attempt from Gracie. Gracie gets slowly back to his feet.
Gracie is breathing heavily.
Gracie fails with a takedown attempt from distance.
Gracie shoots in from a long way out. He's driving through with the takedown attempt and he eventually gets it, landing in Batista's guard.
This has been an exciting period of action!
Gracie won't allow Batista to sweep him here.
Batista wants to get back to his feet but he's too absorbed in his own little project and Gracie manages to pass to side control.

That's three minutes gone in the round.
Batista is trying to stand.
Gracie seems to be working for a kimura but Batista defends the submission attempt.
Batista is trying to maintain the position but Gracie is very close to passing his half guard.
Gracie is working for a kimura but Batista is defending it quite comfortably.

That's four minutes gone in the round.
Gracie is looking for a kimura but he's never going to get it from there.
Batista tries to roll over but Gracie keeps him under control.
As the round comes to an end the crowd are showing their appreciation for a great round of action.
Gracie stands up and beckons Batista to join him on the feet.
And thats the end of the round the fighters go back to their corners.
Renzo Gracie dominated that round.
The referee calls time. The cornermen exit stage left and we're back to business.

Gracie darts in looking for a takedown but Batista gets double underhooks and turns Gracie into the cage.
Gracie changes levels and goes for a takedown here. Batista fights it off and pushes away nicely.
Batista tries to close the distance and clinch up but Gracie swats him away and circles back towards the center.
Batista closes the distance and clinches.
Gracie has dropped down and is looking to force the takedown but it's defended by Batista after a bit of a struggle.
That's three failed takedown attempts in the round for Renzo Gracie. That's going to take a lot out of him.
Batista is stalling here.
Gracie tries to score a body lock takedown but Batista shows good agility there to stay on his feet.
Batista jumps guard but his hands slip and he falls flat on his back. Well, he's made himself look a right mug there, as Gracie walks away with a smile on his face. Batista gets slowly back to his feet and shakes his head.
Batista fails miserably with a takedown attempt.
That's one minute gone in the round.
Gracie fails with a rather predictable takedown attempt.
Gracie shoots in and drives through. Batista sprawls well.
Both fighters are absolutely exhausted here.
Gracie dives in and grabs Batista's left leg, looking for a takedown. Batista pushes down on Gracie's head and hops out.
Batista scores with a one two! Gracie had his feet all tangled up there and couldn't avoid the strikes.
Renzo Gracie is looking to throw some combinations by the looks of things.
Batista misses with a jab, cross combination.
Gracie shoots for a takedown but Batista saw that one coming a mile off and avoided it easily.
No luck for Batista with that takedown attempt.
Batista wants to clinch.
Batista fails with the takedown.
That's two minutes gone in the round.
Batista throws a nice hook to the body that draws an oooh from the crowd.
Gracie stuffs the takedown attempt from Batista. Batista gets slowly back to his feet.
Nice takedown defense from Gracie. No joy for Batista on that attempt.
Gracie looking to shoot here. He's gone for it and he's landed a takedown into side control! Oh, that's bad for Batista!
Batista really doesn't want to stay on the ground with Gracie. If he can't get it back to his feet, it's only a matter of time before he'll be tapping out.
The fans in attendance giving it up for the two fighters, who have really let it all hang out in the last minute or so!
Gracie swings around for an armbar but Batista sees it coming a mile off and turns beautifully into Gracie's guard.
Gracie tries to land a sweep but no joy.
That's three minutes gone in the round.
Gracie keeping full guard, as Batista tries to pass.
Batista looking to sit in guard and control but Gracie gets the butterfly guard and sweeps. He's now in the guard on the top.
Gracie gets to his feet. Batista looking to butt scoot but the ref puts an end to that. On your feet son!
No luck for Batista with that takedown attempt.
Gracie darts in and lands a nice takedown into half guard.
That's four minutes gone in the round.
Gracie seems to be working for a kimura but Batista defends the submission attempt.
Fantastic stuff here - a very entertaining period of action, which has drawn cheers from the crowd.
Gracie is trying for a guillotine from the top but the pressure isn't in the right place so Batista is just riding it out for now. Gracie eventually gives up the hold.
As the round comes to an end the crowd are showing their appreciation for a great round of action.
Gracie decides to stand and escape the position.
And thats the end of the round the fighters go back to their corners.
Renzo Gracie dominated that second round.
The minute break is over - no more time for sponges and pep talks - back to the action! This is the final round!

Nice sprawl there from Batista as Gracie shoots in.
Gracie dives in for a single leg takedown but Batista sprawls and the fighters end up clinched against the cage.
Batista managing to block the knees to the body from Gracie.
Gracie has dropped down and is looking to force the takedown but it's defended by Batista after a bit of a struggle.
That's three failed takedown attempts in the round for Renzo Gracie. That's going to take a lot out of him.
Gracie goes for a takedown in the clinch but Batista prevents it.
Batista pulls guard.

Gracie got a little sloppy there for a moment and Batista has worked his way into a loose triangle - can he finish it?! No, Gracie has managed to get both his arms back between Batista's legs - danger averted.
Batista working a defensive guard here.
Gracie passes Batista's left leg - he's now in half guard.
Both fighters are breathing heavily.
That's one minute gone in the round.
Batista is looking to escape.
Gracie is trying for a kimura here. Batista looks like he's in a lot of pain... and he's tapping out! Gracie wins by kimura!
Ladies and gentlemen, after 1:46 of round 3, we have a winner by way of Submission (Kimura). Renzo Gracie!
|
|
|
|
|
|
|
|
|
|
|
|
|
|
|
|
|
|
|
|
|
|
|
| S |
C
A |
G |
S |
C
B |
G |
|
S |
C |
G |
|
energy
A | B |
|
hype
A | B |
|
pop
A | B |
|
mgr
A | B |
|
FIGHT
RATING
100% |
|
|
|
|
|
|
|
Undercard bout
|
|
|
|
Undercard bout
|
Coming up we have a lightweight MMA rules bout between Solas Mireno (ranked 0 p4p, 0 weight class) and Zene Zamora (ranked 0 p4p, 0 weight class). We have two fighters making their debuts here, so let's see who comes out of this one with their first professional victory.
 |
|
 |
| 178 cm
18
135 lbs
0 - 0 - 0 |
|
183 cm
20
158 lbs
0 - 0 - 0 |
BJJ Blue Belt
Brawler
Cuts easily |
|
BJJ White Belt
Solid Muay Thai
Determined |
|
| |
|
Ladies and gentlemen. This fight is 3 rounds, in the lightweight division.
Introducing the fighter to my left, fighting out of the red corner.
With a record of
0 - 0 - 0, fighting out of The Island, Solas Mireno!
And introducing the fighter to my right, fighting out of the blue corner.
With a record of
0 - 0 - 0, fighting out of The Island, Zene Zamora!
The judges for this bout are , and .
The bell rings for round one and we are underway!
Mireno dives in for a single leg takedown but Zamora sprawls and the fighters end up clinched against the cage.
Zamora has a body lock and is looking for a takedown. Mireno is bouncing around trying to prevent the takedown and somehow he has indeed managed to stay on his feet.
Mireno has a body lock and is looking for a takedown. Zamora is bouncing around trying to prevent the takedown and somehow he has indeed managed to stay on his feet.
Zamora lands with a short shot to the head.
Mireno blocks a couple of punches on the inside.
A head punch blocked on the inside by Mireno.
Zamora jumps guard but Mireno stands there with Zamora around his waist. Zamora gives up and drops back to his feet. We remain in the clinch.
Mireno prevents a takedown attempt there.
Solas Mireno has stuffed three takedown attempts in the round now. That's going to take a lot out of Zene Zamora.

Mireno manages to break the clinch.
Mireno shoots in for a takedown. He's persisting with it as Zamora sprawls well. Zamora wins this battle and keeps the fight standing. Mireno gets slowly back to his feet.
Zamora moves in looking to clinch but Mireno pushes him off.
Mireno gets tackled into the cage by Zamora. Zamora maintains the clinch.
That's one minute gone in the round.
Mireno is working for takedown but Zamora is calmly controlling the position for now.
Zamora goes for a takedown in the clinch but Mireno prevents it.
Zamora gets the body lock takedown. After a quick scramble, Mireno regains guard.
Zamora drops back looking for a heel hook - he quickly realises he's not going to get it but Mireno manages to dive on top of him before he can escape and now Zamora has Mireno in his guard.
Zamora throws a couple of shots from the bottom but they don't land.
Mireno throws a big right hand that misses.
Mireno with a flurry of punches that miss.
Mireno thinks about going for a leg but decides against it, in order to maintain the position.
Mireno is just sitting in guard, looking to avoid any submissions.
Zamora really doesn't want to stay on the ground with Mireno. If he can't get it back to his feet, it's only a matter of time before he'll be tapping out.
That's two minutes gone in the round.
Mireno trying to control but Zamora is working from the bottom.
Mireno stops Zamora from standing up.
Zamora keeping moving, preventing Mireno from controlling successfully.
Zamora wants to get back to his feet but he's too absorbed in his own little project and Mireno manages to pass to side control.
Wooooo! Give it up for these two warriors! They are putting on a show!
Zamora won't allow Mireno to pass to mount.
Mireno missing with some ground and pound from the half guard.
Mireno has been looking to land a fair amount of strikes on the ground. He might be looking to soften his opponent up in order to work for a submission.
That's three minutes gone in the round.
Zamora is trying to stand back up but Mireno is controlling him
Zamora looks winded!
Mireno is pressing down on Zamora's thigh, looking to free his foot. Zamora is holding on for now.
Zamora is trying to stand up here but Mireno is controlling him well.
Mireno trying to control the pace.
Mireno is looking for a kimura here.
Mireno missing with the ground and pound from half guard.
That's four minutes gone in the round.
Mireno missing with the ground and pound from half guard.
Mireno stands, ready to strike. The ref makes him back up and allows Zamora to get to his feet.
Mireno shoots in for a takedown - he's clinched up with Zamora but Zamora pushes him off and we're back to square one.

Mireno fakes with an overhand right and moves in to clinch with Zamora, pushing him back against the cage.
Mireno manages to break the clinch.
As the round comes to an end the crowd are showing their appreciation for a great round of action.
Mireno clinches up with Zamora and pushes him back against the cage.
Mireno breaks the clinch and we're back to striking at distance.
And thats the end of the round the fighters go back to their corners.
That was a close round but I would say that Solas Mireno will probably get the nod.
That's the end of the interval. I'm sure that seemed a lot quicker than a minute for our two fighters! Back to the action.
Mireno closes the distance and clinches.
Zamora gets underhooks to prevent Mireno's takedown attempt.
Mireno pulls guard effortlessly.
Mireno has butterfly guard. He's looking to stand up here. He pushes Zamora off him and springs to his feet nicely. The crowd applauds.
Zamora tries to close the distance and clinch up but Mireno swats him away and circles back towards the center.
Mireno misses with a jab and misses with a cross straight after too.
Mireno clinches with his opponent.

Zamora manages to break the clinch.
Mireno fails to land the takedown.
Both fighters are absolutely exhausted here.
Mireno tries a head kick but it misses.
That's one minute gone in the round.
Mireno clinches up with Zamora and pushes him back against the cage.
Mireno taking a break, stalling in the clinch.
Zamora lands a left hand.
Mireno really does look like a pencil wearing a pair of gloves. Let's hope he has a gameplan to suit that ridiculous body shape.
Mireno breaks from the clinch.
Mireno forces Zamora back against the cage and clinches.
Mireno is fighting off a takedown attempt but Zamora is just too persistent for him and manages to trip Mireno to the mat. Mireno regains guard as soon as the fighters hit the mat.
Zamora makes a bit of distance and scores with some ground and pound, still in guard.
Mireno not looking particularly offensive just at the moment.
Solas Mireno overall seems to be getting the better of the ground position in the fight so far.
Mireno is adopting a defensive guard.
Mireno trying to keep a closed guard but Zamora is proving a slippery customer.
Zamora wants to control from the top but Mireno keeps moving.
That's two minutes gone in the round.
Zamora has gone for a leg lock! Mireno slips out almost immediately though and dives into Zamora's guard.
This is a great period of action - very entertaining stuff!
Zamora keeping moving, preventing Mireno from controlling successfully.

We're going to have a standup here because Solas Mireno wasn't active enough for the referee's liking.
Zamora stuffs the takedown.
That's three failed takedown attempts in the round for Solas Mireno. That's going to take a lot out of him.
Mireno avoids the clinch attempt nicely.
Zamora scores with a takedown into Mireno's guard.
Zamora trying to control the position from guard on top but Mireno is wriggling around, looking for whatever he can.
That's three minutes gone in the round.
Zamora has decided he wants to stand but the closed guard of Mireno is proving hard to escape from.
Mireno is trying to keep Zamora in close.
Mireno working from the bottom, still in full guard. He's managed to get a loose triangle. Zamora doesn't seem to be doing much to defend here, obviously he feels comfortable in the position. Zamora manages to throw the legs off his shoulder and he's back into guard - no problem.
Zamora trying to control but Mireno is working from the bottom.
Mireno escapes his hips to the side and looks to be working for an armbar. Zamora gives him a little smile and shakes his head. No chance.
Zamora content to strike from guard, landing some decent shots.
That's four minutes gone in the round.
Zamora is holding a leg here, probably looking for an ankle lock - he drops back and goes for it! Mireno is in trouble! Is it all over??? No! Mireno has escaped and now he's on top!
Mireno showing good wrestling skills to control the position.
Zamora wants to stand but Mireno is controlling the position.
As the round comes to an end the crowd are showing their appreciation for a great round of action.
Mireno looking to control the position here, rather than advance.
And thats the end of the round the fighters go back to their corners.
That was a close second round but I would say that Solas Mireno will probably get the nod.
That's time! Back to the action! And we move into the final round!
Mireno shoots and misses
and Zamora counters with a body kick that brings a smile to the face of both fighters.
Zamora closes the distance and looks for a trip takedown... aaaand he's got it - Zamora lands in his opponent's guard.
Zamora is looking to work some ground and pound but Mireno has wrist control.
Zamora is holding a leg here, probably looking for an ankle lock - he drops back and goes for it! Mireno is in trouble! Is it all over??? No! Mireno has escaped and now he's on top!
Mireno trying to control the position from guard on top but Zamora is wriggling around, looking for whatever he can.
Zamora looking for subs off his back but Mireno has passed one foot through into half guard.
Zamora takes a big intake of breath there - he's definitely tired.
Mireno looks over to his corner - he wants some instructions but his corner are not responding.
That's one minute gone in the round.
Mireno passes to full mount!
Mireno takes a little breather and maintains the position. The referee will be looking for him to stay active from such a dominant position though.
We get told so often about how wrestlers don't like to be on their backs. Let's see if Zamora can do anything to dispel that myth.
Mireno looking to ground and pound but Zamora is blocking nicely.
Zamora wants to use the cage to get back to his feet here.
That's two minutes gone in the round.
Mireno trying to control but Zamora is having none of it.
The fighters are pressed up against the cage, both looking to find a bit of space to work.
Mireno wants to finish this one by submission but Zamora is holding onto his waist, trying to prevent any attacks from Mireno.
Mireno is in full mount, looking to secure a guillotine but Zamora is surviving well by controlling Mireno's body position as best he can.
Zamora is desperately trying to improve his position but Mireno has a good base and remains in mount.
Mireno misses with a head shot.
That's three minutes gone in the round.
Mireno throws an elbow from mount that misses. Lucky escape for Zamora because Mireno loaded up on that one.
Mireno punching from mount but Zamora doing a good job of avoiding damage.
Mireno content just to control the position here.
Mireno looking to ground and pound but Zamora is blocking nicely.
Mireno misses with a series of strikes from mount. He'll no doubt be working on his ground and pound when he gets back to the gym.
Mireno thuds his fist into the canvas! Oooouch!
Zamora is in a horrible position here, under a barrage of strikes, he's managing to avoid any damage.
Mireno looking for an armbar but decides to keep the dominant position instead.
That's four minutes gone in the round.
Zamora trying desperately to get to his feet.
Zamora takes a big shot to the head but keeps on trying to improve his position.
Zamora tries to buck Mireno off but Mireno takes his back!
Mireno is staying calm and holding on to the back position, whilst working on a rear naked choke. Zamora is defending well though. Mireno let's go of the attempt for now.
Zamora is trying to stand back up.
And that's the end of the fight!
Solas Mireno showed his dominance in that final round.
Well Mireno has outscored his opponent in every aspect of the fight today. Only a scarily incompetent judge or two will keep him from a well deserved win... Over to the ring announcer for the scorecards.
Ladies and gentlemen, after 3 rounds of action, we go to the scorecards for a decision.
Judge Andi Peters scores the fight for Solas Mireno!
Judge Gordon Ramsey scores the fight for Solas Mireno!
Judge Frank Skinner scores the fight for Solas Mireno!
Solas Mireno wins by unanimous decision!
|
|
|
|
|
|
|
|
|
|
|
|
|
|
|
|
|
|
|
|
|
|
|
| S |
C
A |
G |
S |
C
B |
G |
|
S |
C |
G |
|
energy
A | B |
|
hype
A | B |
|
pop
A | B |
|
mgr
A | B |
|
FIGHT
RATING
45% |
|
|
|
|
|
|
|
Undercard bout
|
Coming up we have a lightweight MMA rules bout between Benoit Jutras (ranked 0 p4p, 0 weight class) and Navich Kabirov (ranked 0 p4p, 0 weight class). We have two fighters making their debuts here, so let's see who comes out of this one with their first professional victory.
 |
|
 |
| 176 cm
23
162 lbs
0 - 0 - 0 |
|
178 cm
19
135 lbs
0 - 0 - 0 |
Decent wrestler
Brawler
Granite chin |
|
BJJ Blue Belt
Brawler
Determined |
|
| |
|
Ladies and gentlemen. This fight is 3 rounds, in the lightweight division.
Introducing the fighter to my left, fighting out of the red corner.
With a record of
0 - 0 - 0, fighting out of The Island, Benoit Jutras!
And introducing the fighter to my right, fighting out of the blue corner.
With a record of
0 - 0 - 0, fighting out of The Island, Navich Kabirov!
The judges for this bout are , and .
The bell rings for round one and we are underway!
Kabirov moves out of range of the strikes.
Jutras throws the overhand right but ducks down into a quick takedown attempt. Kabirov was covering up waiting for the punch and Jutras finishes the takedown easily into guard.
Jutras postures up and lands some nice ground and pound.
Jutras with a flurry of punches that miss.
Kabirov keeping full guard, as Jutras tries to pass.
Jutras trying to control but Kabirov is working from the bottom.
Kabirov is trying to control the position but Jutras postures up.
Jutras throws a big right hand that misses.
The fighters are pressed up against the cage, both looking to find a bit of space to work.
Kabirov throwing his legs up looking for a triangle.
Kabirov tries to strike from the bottom.
Jutras postures up in Kabirov's guard and throws a big left but Kabirov blocks it.
That's one minute gone in the round.
Kabirov working from the bottom, still in full guard. He's managed to get a loose triangle. Jutras doesn't seem to be doing much to defend here, obviously he feels comfortable in the position. Jutras manages to throw the legs off his shoulder and he's back into guard - no problem.
Jutras looking to pass the guard.
Kabirov is trying to control the position from the bottom.
We get told so often about how wrestlers don't like to be on their backs. Let's see if Kabirov can do anything to dispel that myth.
Jutras drops back for a leg! It's a sloppy attempt though and Jutras jumps back into guard quickly, to retain the dominant position.
Jutras stopping the sweep attempt from Kabirov.
Kabirov is working from a closed guard but he's struggling to control his opponent.
That's two minutes gone in the round.
Jutras slips nicely into half guard.
Kabirov gets back to full guard.
Jutras postures up and lands some nice ground and pound.
Jutras throwing strikes from guard but Kabirov blocks nicely.
Kabirov working the defensive guard well to avoid strikes from Jutras.
Jutras wants to control from the top but Kabirov keeps moving.
Jutras postures up and lands a big shot to Kabirov's brow.
Jutras wants to control from the top but Kabirov keeps moving.
We've seen a great period of action over the last minute or so - credit to both fighters for going all out!
Jutras with a nice head shot there.
That's three minutes gone in the round.
Jutras controls from within his opponent's guard.
Jutras postures up.
Jutras passes Kabirov's right leg, so he's now in half guard.
Jutras tries to pass to full mount but Kabirov defends it.
Kabirov is a painfully thin specimen of a man. You do wonder whether a good body kick would snap him clean in two.
Jutras is sneakily working for an arm triangle but Kabirov sees it coming and defends easily.
Kabirov on the receiving end of some nice ground and pound.
Kabirov misses with some strikes from the bottom.
Jutras prevents Kabirov from improving his position.
Kabirov looks winded!
Jutras is keen to just control but Kabirov is a slippery customer.
Kabirov avoiding damage under a succession of punches from Jutras.
That's four minutes gone in the round.
Jutras seems content to maintain position for now, rather than mounting any offense.
Kabirov has no desire to be mounted, so is trying to control. Jutras is working away from the top position though.

Neither fighter is doing enough for the referee's liking and he's decided to stand them back up.
Jutras shoots in for a takedown and gets it. Let's see what he's got on the mat.
The fans in attendance giving it up for the two fighters, who have really let it all hang out in the last minute or so!
Jutras postures up and scores with a shot to the body and a follow up elbow to the head.
As the round comes to an end the crowd are showing their appreciation for a great round of action.
Jutras wants to pass the guard but Kabirov is keeping the position.
Kabirov keeping moving, preventing Jutras from controlling successfully.
And thats the end of the round the fighters go back to their corners.
Benoit Jutras dominated that round.
That's time! Back to the action!
Kabirov gets taken down but at least he's managed to land in guard.
Kabirov wants to sweep but no luck.
Kabirov not looking particularly offensive just at the moment.
Jutras wants to control from the top but Kabirov keeps moving.
Kabirov tries to land a sweep but no joy.
Jutras wants to control from the top but Kabirov keeps moving.
The referee has ruled that neither fighter is active enough on the ground and has stood them back up.
Jutras shoots in looking for a takedown. Kabirov tries to sprawl out of it but Jutras keeps driving through. The fighters are pinned against the cage. Kabirov manages to get underhooks and after a bit of a struggle, circles away and we're back to standing.
Kabirov closes the distance and clinches up with Jutras, looking for a takedown. Kabirov pushes Jutras against the cage but Jutras circles to the side and manages to break the clinch.
Kabirov is breathing heavily.
That's one minute gone in the round.
Kabirov shoots in but Jutras avoids the takedown attempt easily.
Jutras scores with a takedown into Kabirov's guard.
Jutras trying to land body shots but he keeps hitting the mat.
Jutras cracks Kabirov with a solid left hand.
Jutras postures up and scores with a shot to the body and a follow up elbow to the head.
Jutras lands a couple of digs.

Kabirov is rocked!
Jutras works over Kabirov with some ground and pound from guard.
Kabirov is still in real trouble! Can Jutras finish him?
Jutras trying to pass the guard but can't manage it just yet.
Jutras is in close to Kabirov's body, working some short punches and elbows.
This is a great period of action - very entertaining stuff!
Jutras advances position into side control!
Kabirov seems to have recovered his senses.
Jutras connects with a decent looking elbow from side control that caused Kabirov some visible discomfort.
That's two minutes gone in the round.
Jutras in side control lands a decent elbow.
Jutras is putting a hurting on Kabirov here, landing some big shots from side control.
Jutras staying calm.
Jutras cracks Kabirov with a big elbow.
Jutras works a knee to the body and follows up with a nice elbow to the head.
Kabirov is looking to regain half guard here but Jutras keeps moving and retains side control.
Jutras working away diligently from side control. Landing strikes effectively there - that will score him some points on the judges scorecards.
Jutras creates a bit of distance and throws down some hard shots.
Jutras looking for an arm triangle but it's way too loose to do anything.
That's three minutes gone in the round.
Kabirov is moving his hips around well on the bottom and has managed to get back to half guard.
Jutras wants to stand but Kabirov has hold of a leg and an arm, so he's trapped for now.
Kabirov is trying to defend against the ground and pound but Jutras scores with a couple of nice shots.
Jutras tries to pass the half guard into mount. Kabirov knows what he's doing though and prevents the attempt.
Kabirov is not content to let Jutras control the position.
Jutras thumps the canvas. Not on purpose obviously - he just missed Kabirov's head.
Kabirov looking to work for a kimura from the bottom.
Jutras is looking for a kimura here.
That's four minutes gone in the round.
Jutras working the head and body with strikes.
Jutras works his way into full mount!
Jutras can't quite control the action as he would like just now, as Kabirov is looking to escape.
The ref warns both fighters not to hold the cage as they work up against the meshing.
As the round comes to an end the crowd are showing their appreciation for a great round of action.
Jutras lands a shot to the body, followed up by a shot to the exposed head of his trapped opponent.
Jutras is in the full mount, landing strikes.
And thats the end of the round the fighters go back to their corners.
Benoit Jutras dominated that second round.
That's time! Back to the action! This is the final round!
Kabirov gets taken down but at least he's managed to land in guard.
Kabirov will have to put a bit more behind his punches if he's going to do any damage from this position.
Jutras scoring with punches to the head and body.
Jutras postures up to throw the ground and pound strikes but they don't connect.
Jutras stands up and looks to throw the legs aside to pass to side control. Kabirov swivels though and keeps the full guard.
Jutras sitting in guard here, content to control.
Jutras throwing elbows and punches but not connecting, as Kabirov works some decent striking defense from the bottom.
Jutras has to be careful here, sitting in the guard of a superior BJJ player.
Kabirov can't keep his opponent in guard - Jutras advances to half guard, no doubt looking to mount.
Jutras passes the guard and advances to mount!
Kabirov takes a big intake of breath there - he's definitely tired.
That's one minute gone in the round.
Jutras landing strikes from the mount.
Jutras with a couple of short strikes.
Jutras raining down hammerfists from mount.
Jutras drops a big elbow. That's hurt Kabirov! More shots from Jutras and the ref steps in! The fight is over!
Ladies and gentlemen, after 1:41 of round 3, we have a winner by way of TKO (Strikes). Benoit Jutras!
|
|
|
|
|
|
|
|
|
|
|
|
|
|
|
|
|
|
|
|
|
|
|
| S |
C
A |
G |
S |
C
B |
G |
|
S |
C |
G |
|
energy
A | B |
|
hype
A | B |
|
pop
A | B |
|
mgr
A | B |
|
FIGHT
RATING
100% |
|
|
|
|
|
|
|
Undercard bout
|
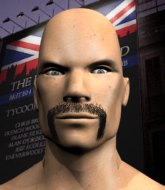
Coming up we have a lightweight MMA rules bout between Terrance Lambert (ranked 0 p4p, 0 weight class) and Marc Hawkins (ranked 0 p4p, 0 weight class). Hawkins has chosen Disturbed - Down With The Sickness as his entrance music. We have two fighters making their debuts here, so let's see who comes out of this one with their first professional victory.
 |
|
 |
| 160 cm
23
143 lbs
0 - 0 - 0 |
|
170 cm
23
160 lbs
0 - 0 - 0 |
BJJ White Belt
Solid boxing
Good chin |
|
BJJ White Belt
Decent boxing
Intelligent |
|
| |
|
Ladies and gentlemen. This fight is 3 rounds, in the lightweight division.
Introducing the fighter to my left, fighting out of the red corner.
With a record of
0 - 0 - 0, fighting out of The Island, Terrance Lambert!
And introducing the fighter to my right, fighting out of the blue corner.
With a record of
0 - 0 - 0, fighting out of The Island, Marc Hawkins!
The judges for this bout are , and .
The bell rings for round one and we are underway!
Hawkins fails with a rather predictable takedown attempt.
Lambert throws a jab, cross combination which is slipped
and Hawkins connects with a straight left hand counter down the middle.
Lambert throws a head kick that half lands.
Lambert fakes the leg kick and cracks Hawkins in the body.
A combination from Lambert does no damage.
Lambert throws a hook but Hawkins avoids it easily.
Lambert turns his hip over beautifully as he lands a nice leg kick.
Hawkins keeping a good distance there, avoiding the body shot.
Hawkins bobs and weaves well there to avoid the strikes.
Lambert pushes forward with a 1-2 combination that forces Hawkins back to the cage. Lambert follows up with a solid lead hook to the liver.
This is a great period of action - very entertaining stuff!
Hawkins blocks a head kick by Lambert.
Lambert tries a head kick but it misses.
Hawkins misses with a takedown attempt. He shot from a bit too far out.
Terrance Lambert seems to be the more aggressive standup fighter in this bout.
Nice takedown defense from Lambert. No joy for Hawkins on that attempt.
Terrance Lambert has stuffed three takedown attempts in the round now. That's going to take a lot out of Marc Hawkins.
That's one minute gone in the round.
Lambert takes a swing at Hawkins's ribcage but misses.
Lambert misses with a jab and misses with a cross straight after too.
Hawkins takes a thudding leg kick, right into the meat of the thigh.
Lambert jabs Hawkins to the body, keeping him at a distance.
Jab, jab by Lambert - just one landing.
Hawkins shoots in for a takedown - he's clinched up with Lambert but Lambert pushes him off and we're back to square one.
A right-left combo lands from Lambert.
Lambert misses with a jab and misses with a cross straight after too.
Lambert fakes high and swings low for a body shot but Hawkins manages to avoid it.
Lambert throws a jab, cross combination which is slipped
and Hawkins counters with a lovely shot to the body.
Lambert cracks the inside of Hawkins's front leg.
Terrance Lambert is looking to keep the fight on the feet at all costs.
Hawkins instigates a clinch.
That's two minutes gone in the round.
Hawkins lands a takedown into guard.
Fantastic stuff here - a very entertaining period of action, which has drawn cheers from the crowd.

Hawkins stands up from guard. Let's bang!
Hawkins lands with a good body shot.
Hawkins is looking to score with low kicks.
Lambert falls off balance throwing a combination
and Hawkins counters with a nice body shot.
Hawkins tries to score with an inside leg kick but telegraphs it and Lambert is able to avoid easily.
Lambert throws a combination that misses
and Hawkins counters with a nice shoot takedown that brings the fighters to the ground.
Lambert is breathing heavily.
Lambert pushes Hawkins off for just long enough to get back to his feet. Very athletic spring there.
Hawkins lands a jab to Lambert's midsection.
Hawkins avoids the body shot from Lambert.
That's three minutes gone in the round.
Lambert smiles there as he lands a nice right hand right on the button.
Lambert throws a series of punches but Hawkins moves out of range.
Hawkins shoots in for a takedown but doesn't get it.
Hawkins fakes an overhand right and shoots for a takedown. Lambert sprawls well initially but Hawkins persists and gets the takedown into half guard.
Hawkins wants to lay and pray for a moment but Lambert keeps working.
Lambert has one foot on Hawkins's thigh - he pushes off and manages to get back to his feet.
Lambert scores with a nice right hand.
Hawkins checks a low kick. Bone on bone - not my idea of a good time.
Lambert tries to land a front kick but Hawkins steps back. That was a bit too telegraphed.
Hawkins fakes an overhand right and shoots for a takedown. Lambert sprawls well initially but Hawkins persists and gets the takedown into half guard.
Hawkins performing his best blanket impression for a moment.
Wooooo! Give it up for these two warriors! They are putting on a show!
Lambert avoiding damage under a succession of punches from Hawkins.
That's four minutes gone in the round.
Lambert is trying to stand.
Hawkins is looking to take a break and control but Lambert is keeping him honest, looking to work from the bottom.
Lambert on his back here. We all know that wrestlers don't like being on their back so let's see if Lambert tries to get out of the position.
We've had a lack of effective grappling in the last minute or so, which could well see a referee standup.
Lambert wants to get back to his feet.

OK we're going to have a standup here. Marc Hawkins hasn't been effective enough on the ground and the referee wants a restart.
Hawkins lands a nice looking body shot.
Hawkins shoots in looking for a takedown but Lambert manages to keep the fight standing, pushing Hawkins's face into the canvas for good measure before circling away.
The crowd are going absolutely nuts as the round comes to an end - what a fantastic round of action!
Lambert misses with a combination
and Hawkins counters with a crisp hook to the side of the head.
Lambert will need to tighten up his combinations if he doesn't want to gas himself out, swinging at thin air.
And thats the end of the round the fighters go back to their corners.
That was a close round but I would say that Terrance Lambert will probably get the nod.
The fighters get back to their feet, the hooter sounds and we're back to the action!
Hawkins fails in his attempt to clinch.
Terrance Lambert is winning the standup battle so far.
Lambert checks a low kick from Hawkins.
Lambert tries a switch kick but it misses it's target.
Lambert throws a head kick that misses.
Hawkins moves out of range of the body kick.
Lambert misses with a double jab.
Lambert lands a right hook to the body.
Lambert misses with a double jab.
Lambert misses with a lunging right hand
and Hawkins counters with a lovely straight right hand!
Both fighters are absolutely exhausted here.
Hawkins tries to clinch but is not successful on this occasion.
Lambert throws a hook but Hawkins avoids it easily.
Lambert throws a hook but Hawkins blocks it.
That's one minute gone in the round.
Lambert throws a body kick but he was well out of range there.
Lambert fakes a couple of low kicks, before throwing one on the third attempt. It connects and Hawkins has to reset his feet before getting ready to engage.
Lambert fails to land with a series of punches.
Sloppy strikes from Lambert. Those never looked like landing.
It really doesn't seem like the step up in weight is hurting Lambert here at all. He's more than holding his own against the bigger man.
Lambert takes a solid shot to the body. That one hurt him but he's trying not to show it.
Lambert misses with a low kick as Hawkins jumps back.
Lambert throws a head kick but Hawkins moves out of range.
Lambert scores with a spinning back kick!
Lambert throws a left and a right that both miss
and Hawkins counters with a left and a right that stings Lambert.
Hawkins closes the distance and presses his opponent up against the cage.
Hawkins wants a takedown.
Lambert is looking to break free of the clinch but Hawkins has double underhooks.
That's two minutes gone in the round.
Lambert gets double underhooks to prevent a takedown attempt from Hawkins.
Hawkins is trying to drag Lambert to the mat but Lambert just about manages to keep his footing. He used the cage to his advantage there.
Terrance Lambert has stuffed three takedown attempts in the round now. That's going to take a lot out of Marc Hawkins.
Lambert tries to break free but Hawkins pushes him back against the cage.
Lambert is trying to break free.
That's three minutes gone in the round.
Lambert manages to break the clinch.
Lambert swings away but doesn't land with a series of punches.
Hawkins is throwing a lot of body shots here, looking to wear down Lambert rather than just go for the knockout.
Hawkins throws a right and a left that Lambert avoids nicely.
Lambert misses with the combination.
Hawkins defending well as Lambert loads up on a big left hand.
Hawkins uses some good footwork to avoid the body shot by Lambert.
Lambert misses with a half-hearted attempt at a head kick.
Hawkins scores with a nice head shot.
Hawkins shoots in for a takedown. He's persisting with it as Lambert sprawls well. Lambert wins this battle and keeps the fight standing. Hawkins gets slowly back to his feet.
Lambert misses with a combination
and Hawkins counters with a nice double leg into side control. Lambert won't be happy with that.
That's four minutes gone in the round.
Hawkins scoring with punches and elbows.
The fans in attendance giving it up for the two fighters, who have really let it all hang out in the last minute or so!
Hawkins is looking for a kimura. He might have it! No, Lambert has escaped the position, nice work there.
Lambert pushes Hawkins away and creates a bit of space to escape. He's almost out here... but no, Hawkins gets a good hold of his legs and remains firmly in side control.
Lambert is not content to let Hawkins control the position.
Lambert is trying to stand back up. He's worked his way up against the cage but Hawkins has just dragged him back down to the mat.
Hawkins stands up.
Lambert will need to tighten up his combinations if he doesn't want to gas himself out, swinging at thin air.
As the round comes to an end the crowd are showing their appreciation for a great round of action.
Hawkins instigates a clinch.
And thats the end of the round the fighters go back to their corners.
Marc Hawkins showed his class in that round. I'd imagine he'll take it on all the scorecards.
That's time! Back to the action! This is the final round!
Hawkins throws a looping left and ducks down for a takedown. He's got his arms around Lambert's waist but Lambert gets an underhook and avoids the takedown by throwing Hawkins off to one side.
Hawkins moves into range and throws a lovely three punch combination.
Hawkins is looking to clinch but Lambert is avoiding it.
Lambert tries to bum rush Hawkins with a series of wild strikes but Hawkins uses good footwork to avoid the assault.
Lambert misses with a jab to the body
and Hawkins counters with a lovely shot to the body.
Hawkins showing good head movement there, avoiding the strikes from Lambert.
A telegraphed takedown attempt from Hawkins is defended easily by Lambert.
Hawkins avoids a punch combination nicely.
Lambert throws a hard body shot but it just misses.
Both fighters are breathing heavily.
That's one minute gone in the round.
Lambert misses with a right hand
and Hawkins counters with a straight punch to the midsection.
Lambert attempts a low kick but it misses it's target.
Lambert misses with a two punch combination.
A clash of legs there as Hawkins blocks the low kick.
Hawkins shoots in and bounces Lambert off the cage to secure the takedown into guard.
Lambert working the defensive guard well to avoid strikes from Hawkins.
Lambert avoiding any damage from the ground and pound.
Lambert has managed to wall walk up one of the corner posts to get back to his feet. Hawkins is pushing him up against the cage, looking to control the position.
Lambert is looking to break free of the clinch but Hawkins has double underhooks.
That's two minutes gone in the round.
Lambert is trying to work out of this bad position, with his back against the cage.
Hawkins tries to pull guard but Lambert forces him back to his feet, against the cage.
Terrance Lambert has stuffed three takedown attempts in the round now. That's going to take a lot out of Marc Hawkins.
Hawkins tries to pull guard but Lambert won't allow it.
Lambert breaks the clinch and we return to the middle of the mat.
Lambert misses with a leg kick
and Hawkins counters with a lovely shot to the body.
Lambert throws a left and a right that both miss
and Lambert takes a counter punch right on the button for his troubles.
Wooooo! Give it up for these two warriors! They are putting on a show!
Lambert throws a lazy uppercut
and Hawkins counters with a good right hand that lands right on the jaw.
Hawkins darts in looking for a takedown but Lambert gets double underhooks and turns Hawkins into the cage.
Lambert wants to get back to striking at distance but Hawkins won't allow it.
Hawkins goes for a takedown in the clinch but Lambert prevents it.
That's three minutes gone in the round.
Hawkins is looking to take this one to the mat.
Hawkins tries to pull guard but Lambert won't allow it.
Lambert wants to break the clinch but can't.
Lambert is trying to force a seperation but Hawkins has the dominant position.
Hawkins prevents Lambert from breaking the clinch.
Hawkins fails to pull guard.
That's four minutes gone in the round.
Lambert is pressed up against the cage. Hawkins has hold of a leg and is looking to drag Lambert down to the mat. Lambert avoids the attempt though and has circled away. We're back to striking at a distance.
Good standup being displayed there by Lambert as he connects with a hook.
Hawkins drops down and drives through with a powerful takedown into guard.
Lambert has managed to wall walk up one of the corner posts to get back to his feet. Hawkins is pushing him up against the cage, looking to control the position.
Hawkins goes for a takedown attempt but Lambert pushes him away and we're back to fighting at a distance.
Lambert misses with a double jab
so Hawkins counters with a double leg into guard. Good agility.
This is a great period of action - very entertaining stuff!
Lambert wants to stand up but Hawkins is controlling him.
As the round comes to an end the crowd are showing their appreciation for a great round of action.
Hawkins stays in close to Lambert's body and controls the position.
And that's the end of the fight!
Marc Hawkins comfortably won the final round on my scorecard.
I think Hawkins has won this one but let's see whether the judges agree with me. Over to the ring announcer for the scorecards.
Ladies and gentlemen, after 3 rounds of action, we go to the scorecards for a decision.
Judge Andi Peters scores the fight for Marc Hawkins!
Judge Gordon Ramsey scores the fight for Marc Hawkins!
Judge Frank Skinner scores the fight for Marc Hawkins!
Marc Hawkins wins by unanimous decision!
Marc Hawkins spent the whole post fight interview bigging himself up. It didn't go down that well with the fans after a while as they thought it was a bit arrogant.
|
|
|
|
|
|
|
|
|
|
|
|
|
|
|
|
|
|
|
|
|
|
|
| S |
C
A |
G |
S |
C
B |
G |
|
S |
C |
G |
|
energy
A | B |
|
hype
A | B |
|
pop
A | B |
|
mgr
A | B |
|
FIGHT
RATING
70% |
|
|
|
|
|
|
|
Undercard bout
|
|
|
|
Co-main event
|
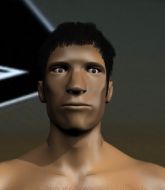
Coming up we have a lightweight MMA rules bout between David Hormone (ranked 0 p4p, 0 weight class) and Bill Jones (ranked 0 p4p, 0 weight class). We have two fighters making their debuts here, so let's see who comes out of this one with their first professional victory.
 |
|
 |
| 224 cm
21
149 lbs
0 - 0 - 0 |
|
175 cm
20
165 lbs
0 - 0 - 0 |
BJJ Blue Belt
Brawler
KO power |
|
BJJ Blue Belt
Brawler
Granite chin |
|
| |
|
Ladies and gentlemen. This fight is 3 rounds, in the lightweight division.
Introducing the fighter to my left, fighting out of the red corner.
With a record of
0 - 0 - 0, fighting out of The Island, David Hormone!
And introducing the fighter to my right, fighting out of the blue corner.
With a record of
0 - 0 - 0, fighting out of The Island, Bill Jones!
The judges for this bout are , and .
The bell rings for round one and we are underway!
Jones gets a takedown into half guard.
The referee is pacing around the two fighters - he looks like he's thinking about a standup.
Jones trying to control the action but Hormone is working from the bottom.
Jones prevents Hormone from improving his position.
Hormone is not content to let Jones control the position.
Jones is looking to advance position but Hormone won't allow it.
Jones throwing shots but Hormone is blocking nicely.
That's one minute gone in the round.
Jones uses his free foot to push down on Hormone's thigh. Eventually he works his other foot free and he's advanced to mount - this is trouble for Hormone.
Hormone flailing away with punches but nothing is landing.
Jones takes a little breather and maintains the position. The referee will be looking for him to stay active from such a dominant position though.
Hormone wants to hold on but Jones pushes him away.
Jones controlling his opponent.
Hormone tries to hold on but Jones pushes him away.
Jones throws an elbow from mount that misses. Lucky escape for Hormone because Jones loaded up on that one.
Jones trying to control but Hormone is having none of it.
That's two minutes gone in the round.
Jones avoids the attempt from Hormone to control.
Jones looking to finish with strikes here!
Hormone swinging wildly from the bottom but he's not landing.
Hormone is desperately trying to improve his position but Jones has a good base and remains in mount.
Hormone wriggling around on the bottom manages to avoid the strikes thrown by Jones.
Hormone really trying hard to get back to half guard here.
That's three minutes gone in the round.
Jones looking to control and managing it successfully.
Hormone tries to lock up and control but Jones gives him a forearm to the face and pushes him away.
Jones takes a little breather and maintains the position. The referee will be looking for him to stay active from such a dominant position though.
Jones thowing strikes but they're hitting the gloves, not doing any damage.
Hormone working to try and regain half guard.
That's four minutes gone in the round.
Hormone manages to regain half guard. Good work.
Jones wants to get back to his feet.
Jones seems to be looking for submissions.
Hormone works his way to full guard. Good work.
The crowd applaud the fighters efforts here as the round comes to an end.
Hormone has a loose triangle. He'll be looking to tighten that up but Jones can see exactly what he's planning and manages to posture up and free himself.
Jones looking to pass the guard.
And thats the end of the round the fighters go back to their corners.
Bill Jones dominated that round.
That's the end of the interval. I'm sure that seemed a lot quicker than a minute for our two fighters! Back to the action.
Jones looks for a takedown here. Will he get it? Hormone is fending him off so far but Jones persists. Nope, Hormone circles away and we're back to standing.
Hormone displays good takedown defense there as he swats away a double leg from Jones.
Hormone throws an overhand right that lands on Jones's shoulder, as Jones tries to avoid the shot.
A combination from Jones does no damage.
Jones tries a head kick but it misses.
Hormone closes this distance looking for a takedown but Jones circles away.
Jones wants to clinch.
Jones stuffs a takedown. It's all about dictating where the fight takes place and Jones wants it to stay on the feet.
Hormone drives through and clinches with Jones against the cage.
That's one minute gone in the round.
Jones is trying to pull guard but Hormone turns him against the cage and we stay in the clinch.
David Hormone has stuffed three takedown attempts in the round now. That's going to take a lot out of Bill Jones.
Hormone lands a body punch.
Hormone tries to break the clinch but Jones is controlling the position.
Jones gets control of Hormone's arms and successfully pulls guard. Jones will no doubt be looking for submissions off his back.
Jones has Hormone pulled in close to control his posture.
Jones wants to hit a switch here but Hormone passes into full mount! Oh no, disaster for Jones there!
Hormone controlling the position easily from mount.
The referee warns Jones that he has to improve his position here as he takes two more clean shots to the head.
That's two minutes gone in the round.
Hormone with good strikes from the mount here!
The ref warns both fighters not to hold the cage as they work up against the meshing.
Hormone raining down hammerfists from mount.
Hormone really does look like a pencil wearing a pair of gloves. Let's hope he has a gameplan to suit that ridiculous body shape.
Hormone gets to his feet and calls his opponent to stand. Here come the fireworks!
The crowd are loving this. Great action here.
Jones looks frustrated there after his takedown attempt is stuffed easily.
Jones is breathing heavily.
A really sloppy takedown attempt there from Hormone.
Jones throws a hook to the body but it doesn't connect.
Jones closes this distance looking for a takedown but Hormone circles away.
Jones leaves Hormone with his face pressed against the mat as he sprawls beautifully, defending against a solid takedown attempt.
That's three minutes gone in the round.
Jones tries to check the leg kick but that clearly hurt him.
David Hormone is looking to throw some combinations by the looks of things.
Jones takes a jab on the nose there. A little bit of blood seems to be coming out. Hopefully that won't affect his breathing.
Hormone throws the overhand right but ducks down into a quick takedown attempt. Jones was covering up waiting for the punch and Hormone finishes the takedown easily into guard.
Jones keeping moving, preventing Hormone from controlling successfully.
Hormone won't allow Jones to get back to his feet.
Hormone pushing down on Jones's thigh, trying to pass to half guard. He's managed it... Nice work.
Hormone throwing punches and elbows but they're not doing any damage.
That's four minutes gone in the round.
Hormone takes advantage of the dominant position to land a couple of big hammer fists.
Jones manages to get to full guard.
Hormone scoring with some ground and pound.
Hormone drops back for a leg! It's a sloppy attempt though and Hormone jumps back into guard quickly, to retain the dominant position.
The fans in attendance giving it up for the two fighters, who have really let it all hang out in the last minute or so!
Jones throws his legs up looking for a submission but Hormone uses it to pass to side control.
As the round comes to an end the crowd are showing their appreciation for a great round of action.
Jones is not content to let Hormone control the position.
And thats the end of the round the fighters go back to their corners.
David Hormone dominated that second round.
The minute break is over - no more time for sponges and pep talks - back to the action! So, we enter the final round. Let's see if either fighter can bring us a finish, or whether we're going to the judges scorecards.
Hormone tries to clinch but Jones is having none of it.
Jones leaves Hormone with his face pressed against the mat as he sprawls beautifully, defending against a solid takedown attempt.
Hormone closes the distance, clinches up and gets a nice trip takedown into side control. Very smooth.
Jones is looking for a sweep.
Hormone wants to lay and pray for a moment but Jones keeps working.
Jones is trying to control Hormone's posture but Hormone avoids it.
Hormone trying to control the action but Jones is working from the bottom.
That's one minute gone in the round.
Hormone thinks about going for a far side armbar but bails out and retains the dominant position instead.
Hormone decides to stand back up.
Jones stuffs the takedown.
Both fighters are breathing heavily.
Jones tries to clinch but Hormone is having none of it.
Sloppy strikes from Jones. Those never looked like landing.
Jones throws a wild combination but nothing lands.
That's two minutes gone in the round.
Jones gets caught napping as Hormone dives in and scores a takedown. Jones manages to retain guard.
Hormone won't allow Jones to sweep him here.
David Hormone overall seems to be getting the better of the ground position in the fight so far.
Hormone working some ground and pound from guard but it's not doing any damage.
Jones keeping moving, preventing Hormone from controlling successfully.
Jones is trying to keep Hormone in close.
Jones wants to sweep here but Hormone controlling him for the moment.
That's three minutes gone in the round.
The ref stands the fighters back up. David Hormone wasn't doing enough on the ground.
Jones avoids a low kick by using good footwork.
A solid leg kick lands there for Hormone.
Jones throws a head kick that misses.
Jones throws the kick towards the body but Hormone avoids it.
Jones stuffs the takedown.
That's three failed takedown attempts in the round for David Hormone. That's going to take a lot out of him.
Jones gets a takedown into half guard.
Hormone blocking the ground and pound attempt from Jones.
Hormone works his way to full guard. Good work.
That's four minutes gone in the round.
Hormone is looking for a triangle but Jones pushes his legs off easily.
Hormone is looking to stand up but Jones isn't so interested in that idea.
Hormone keeping moving, preventing Jones from controlling successfully.
Jones trying to pass the guard but can't manage it just yet.
The crowd applaud the fighters efforts here as the round comes to an end.
Hormone wants to sweep but no luck.
Jones trying to control the position from guard on top but Hormone is wriggling around, looking for whatever he can.
And that's the end of the fight!
David Hormone showed his dominance in that final round.
Well Hormone has outscored his opponent in every aspect of the fight today. Only a scarily incompetent judge or two will keep him from a well deserved win... Over to the ring announcer for the scorecards.
Ladies and gentlemen, after 3 rounds of action, we go to the scorecards for a decision.
Judge Andi Peters scores the fight for David Hormone!
Judge Gordon Ramsey scores the fight for David Hormone!
Judge Frank Skinner scores the fight for David Hormone!
David Hormone wins by unanimous decision!
|
|
|
|
|
|
|
|
|
|
|
|
|
|
|
|
|
|
|
|
|
|
|
| S |
C
A |
G |
S |
C
B |
G |
|
S |
C |
G |
|
energy
A | B |
|
hype
A | B |
|
pop
A | B |
|
mgr
A | B |
|
FIGHT
RATING
44% |
|
|
|
|
|
|
|
Main event
|
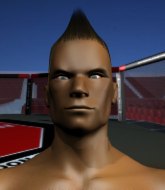
Coming up we have a lightweight MMA rules bout between Hughie Beauchemin (ranked 0 p4p, 0 weight class) and Nico Storm (ranked 0 p4p, 0 weight class). We have two fighters making their debuts here, so let's see who comes out of this one with their first professional victory.
 |
|
 |
| 172 cm
18
162 lbs
0 - 0 - 0 |
|
178 cm
19
155 lbs
0 - 0 - 0 |
BJJ White Belt
Dangerous knees
Cuts easily |
|
BJJ White Belt
Good kicks
Intelligent |
|
| |
|
Ladies and gentlemen. This fight is 3 rounds, in the lightweight division.
Introducing the fighter to my left, fighting out of the red corner.
With a record of
0 - 0 - 0, fighting out of The Island, Hughie Beauchemin!
And introducing the fighter to my right, fighting out of the blue corner.
With a record of
0 - 0 - 0, fighting out of The Island, Nico Storm!
The judges for this bout are , and .
The bell rings for round one and we are underway!
Storm throws a head kick that misses
and Beauchemin counters with a head kick. That will keep Storm thinking before he tries any more sloppy attacks!
Storm wants to clinch.
Storm throws a leg kick
and Beauchemin counters with a head kick. That will keep Storm thinking before he tries any more sloppy attacks!
Beauchemin leaves Storm with his face pressed against the mat as he sprawls beautifully, defending against a solid takedown attempt.
Storm shoots in and gets a takedown into half guard. Storm showed some decent athleticism there.
The referee must be thinking about standing these guys back up.
Storm escapes and gets back to his feet.
Nico Storm seems to be the more aggressive standup fighter in this bout.
That's one minute gone in the round.
Storm shoots for a takedown but Beauchemin saw that one coming a mile off and avoided it easily.
Storm closes the distance and clinches.
Beauchemin is trying to push Storm away but Storm has him pressed against the cage, so he's going nowhere.
Beauchemin landing knees to the body. They look like they could hurt.
Beauchemin connects with a knee to the head.
Beauchemin is looking to break free of the clinch but Storm has double underhooks.
Knees to the body from Beauchemin.
Storm fails to pull the fight into his guard.
Hughie Beauchemin has stuffed three takedown attempts in the round now. That's going to take a lot out of Nico Storm.
Storm looks winded!
Beauchemin with the Thai clinch, lands a knee to the head.
Storm is rocked!
The crowd are loving this. Great action here.
Beauchemin with a knee to the head.
Storm is still on wobbly legs! Can Beauchemin finish him?
Beauchemin working the clinch nicely. Storm is working for position but Beauchemin cracks him with a big knee to the head! Storm crumples up against the cage and Beauchemin lands two more shots before the ref can save Storm! This one is all over!
Ladies and gentlemen, after 1:51 of round 1, we have a winner by way of TKO (Knee & Punches). Hughie Beauchemin!
|
|
|
|
|
|
|
|
|
|
|
|
|
|
|
|
|
|
|
|
|
|
|
| S |
C
A |
G |
S |
C
B |
G |
|
S |
C |
G |
|
energy
A | B |
|
hype
A | B |
|
pop
A | B |
|
mgr
A | B |
|
FIGHT
RATING
54% |
|
|
|
|
|
|
|
|
|
|

