 |
Extreme MMA-2 PBP Commentary |
Undercard bout
|
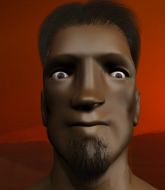
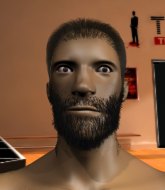
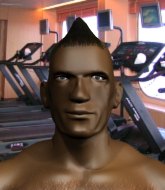
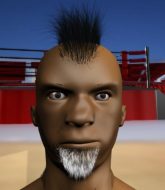
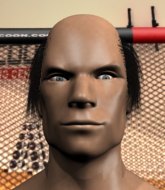
Coming up we have a bantamweight MMA rules bout between Samuel Etherton (ranked 0 p4p, 0 weight class) and Torben Hansen (ranked 0 p4p, 0 weight class). Over to our ring announcer for the fighter introductions!
 |
|
 |
| 165 cm
20
135 lbs
0 - 10 - 0 |
|
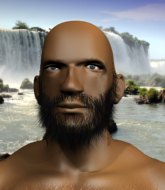
164 cm
24
135 lbs
1 - 2 - 0 |
BJJ Blue Belt
Brawler
Experienced |
|
BJJ Blue Belt
Decent boxing
Granite chin |
|
| |
|
Ladies and gentlemen. This fight is 3 rounds, in the bantamweight division.
Introducing the fighter to my left, fighting out of the red corner.
With a record of
0 - 10 - 0, fighting out of Sydney, Samuel Etherton!
And introducing the fighter to my right, fighting out of the blue corner.
With a record of
1 - 2 - 0, fighting out of Sydney, Torben Hansen!
The judges for this bout are Winston Howard, Eliza Hachem and Bruno Hogan.

The bell rings for round one and we are underway!
A punch combination from Hansen misses.
A head kick misses from Etherton.

Etherton is looking for a takedown here. He's shot in and has managed to get it, finishing up in Hansen's half guard.
It looks like Etherton is going to stand back up.

Etherton is thinking about going for an arm triangle but he can't free his leg.
Etherton is looking for an arm triangle, whilst trying to pass to side control. Hansen doesn't seem that keen to cooperate though. No luck this time Etherton.
Etherton is trying to work for a kimura but Hansen is defending well.

That's one minute gone in the round.
Hansen is looking for a sweep. Etherton is wise to his cunning plan and keeps the top position.
Etherton seems very keen to just sit and control from half guard but Hansen does not like that idea so much and is remaining active off his back.

That's two minutes gone in the round.
The crowd are starting to boo a lack of action.
Etherton trying to mount his opponent but Hansen defends it.

Etherton decides he's had enough of the ground and stands up.
Etherton looks to have improved his striking defense since last time we saw him fight.

Etherton tries to keep at a distance but Hansen has taken the fight into the clinch.
Etherton manages to get underhooks and slows down the pace for a moment.
A frustrated look appears on Etherton's face as he tries to break the clinch.

That's three minutes gone in the round.

Etherton breaks from the clinch.
Etherton shoots in with a takedown attempt and he has Hansen pinned against the cage. Hansen gets the underhooks and manages to circle away.
Hansen's coach down at Build Up Crossfit was telling us pre-fight that they have been working on Hansen's balance. Obviously they view that as a key factor in the outcome of this fight.
Hansen pulls out of a head kick attempt.
Hansen clinches up against the cage.
Hansen wants to push off and get back to the center of the mat but Etherton has him pressed against the cage.
Etherton tries to take the fight to the ground by pulling guard but can't manage it.
Hansen wants a takedown.
Etherton keeps control of Hansen as he tries to wriggle out of the double underhooks.
Hansen gets underhooks to prevent Etherton's takedown attempt.
That's three failed takedown attempts in the round for Samuel Etherton. That's going to take a lot out of him.

That's four minutes gone in the round.
Etherton tries to pull guard but Hansen forces him back to his feet, against the cage.
Etherton tries to pull guard but can't drag his opponent to the mat. Hansen just stands there and leans against the cage.
Etherton jumps guard but Hansen turns him against the cage and keeps the fight standing.
Etherton lands a nice trip takedown into half guard.
Etherton moves into full mount! Hansen won't be happy about that!
This is a great period of action - very entertaining stuff!
Hansen is trying to escape the mount.
The ref warns both fighters not to hold the cage as they work up against the meshing.
The crowd applaud the fighters efforts here as the round comes to an end.
Etherton working for a submission but Hansen is keeping him at bay.
And thats the end of the round the fighters go back to their corners.
Samuel Etherton dominated that round.
The referee calls time. The cornermen exit stage left and we're back to business.

Etherton darts in trying to clinch
and Hansen counters with a three punch combo that has Etherton backing up. Etherton nods at Hansen to acknowledge the strikes.
Hansen shoots for a double leg takedown but Etherton sprawls well. He's pushed Hansen's face into the mat and manages to get back to his feet relatively easily.
Hansen defends well against a solid takedown attempt from Etherton.
Hansen has a takedown stuffed.
Hansen fails miserably with a takedown attempt.
Samuel Etherton has stuffed three takedown attempts in the round now. That's going to take a lot out of Torben Hansen.
Hansen rushes Etherton and presses him up against the cage.
Etherton lands with a good tight uppercut to the head.
Etherton misses with a shot to the kidneys.
That's one minute gone in the round.
Etherton can't get the takedown.
Etherton tries to pull guard but can't drag his opponent to the mat. Hansen just stands there and leans against the cage.
Etherton's corner are urging him to control the action in the clinch for a moment, rather than mount any serious offense. I'm sure the crowd appreciate those instructions... not.
Hansen can't break the clinch.
Etherton trying to land knees to the body.
Etherton looking for a takedown.
Etherton fails to pull guard.
That's two minutes gone in the round.
Hansen wants to strike at distance but he can't break free of the clinch.
Hansen wants to break free. God knows he wants to breaaaak freeee.
Etherton is trying to pull guard but Hansen turns him against the cage and we stay in the clinch.
Etherton tries to pull guard but Hansen forces him back to his feet, against the cage.
Hansen has had enough of the clinch and is looking to separate.
Hansen is trying to work out of this bad position, with his back against the cage.
Etherton manages to pull guard.
Etherton looking for submissions from the bottom here. Moving his hips around, possibly looking for an armbar.
Etherton controls Hansen momentarily but Hansen frees himself.
That's three minutes gone in the round.
Etherton is wriggling around but Hansen manages to pass to half guard.
Hansen controlling the pace.
Etherton tries to get to full guard but Hansen has control of the leg.
That's four minutes gone in the round.
Etherton trying to control here.
Etherton tries to get to full guard but Hansen has control of the leg.

We're going to have a standup here because Samuel Etherton wasn't active enough for the referee's liking.
Hansen lands a jab-cross combination.
Etherton shoots in for a takedown. "I don't think so" says Hansen as he avoids it easily.
Hansen looks for a takedown but Etherton sprawls well.
The crowd applaud the fighters efforts here as the round comes to an end.
Hansen rushes forward with a series of wild hooks but Etherton moves out of range and avoids them all easily.
And thats the end of the round the fighters go back to their corners.
A close second round but Torben Hansen will probably get the nod - 10:9.
That's the end of the round. The referee orders the cornermen out of the cage so we can get back down to business. The crowd applaud as we get ready to start the final round!

Hansen slaps away a takedown attempt from Etherton, before circling back to the center of the mat.

Hansen manages to get an easy takedown there - catching Etherton on his heels. He'll look to pass Etherton's guard now, I'm sure.
Hansen looking to pass the guard.
Hansen engaging in some classic timewasting tactics.
Hansen stopping the sweep attempt from Etherton.
That's one minute gone in the round.
Etherton is trying to control the position from the bottom.
The ref stands the fighters back up. Samuel Etherton wasn't doing enough on the ground.
Hansen fails with a takedown attempt from distance.
Etherton fakes with the hands and throws a leg kick but Hansen is out of range.
Etherton shoots in for a takedown but doesn't get it.
Hansen moves out of range of the strikes.
Etherton pivots as if he's going to throw a leg kick but stops half way.
That's two minutes gone in the round.
Etherton avoids the clinch attempt nicely.
The fight stays on the outside here - Hansen looks like he's thinking about clinching though.
Etherton fails miserably with a takedown attempt.
That's three failed takedown attempts in the round for Samuel Etherton. That's going to take a lot out of him.
A combination from Etherton does no damage.
Nice sprawl there from Hansen as Etherton shoots in.
Both fighters are breathing heavily.
Hansen misses with the combination.
Hansen lands a jab followed by a nice looking cross.
Etherton shoots for a takedown but Hansen saw that one coming a mile off and avoided it easily.
Hansen throws a wild body kick that Etherton sees coming a mile off.
That's three minutes gone in the round.
Etherton stuffs the takedown.
Etherton fails with a rather predictable takedown attempt.
Hansen throws a right and a left that both miss.
Hansen avoids the clinch attempt nicely.
A really sloppy takedown attempt there from Etherton.
Etherton wants to clinch.
Some wild striking there from Hansen.
That's four minutes gone in the round.
Hansen tries to clinch up.
Hansen stuffs a takedown. It's all about dictating where the fight takes place and Hansen wants it to stay on the feet.
Hansen fails with a rather predictable takedown attempt.
Hansen dives in and grabs Etherton's left leg, looking for a takedown. Etherton pushes down on Hansen's head and hops out.
Hansen uses good footwork to get in and out and land a nice right hand before Etherton has time to react.
Samuel Etherton is looking to throw some combinations by the looks of things.
Etherton keeps the fight on the outside.
Etherton dives in and grabs Hansen's left leg, looking for a takedown. Hansen pushes down on Etherton's head and hops out.
A really sloppy takedown attempt there from Etherton.
The crowd applaud the fighters efforts here as the round comes to an end.
Etherton shoots in looking for a takedown. Hansen tries to sprawl out of it but Etherton keeps driving through. The fighters are pinned against the cage. Hansen manages to get underhooks and after a bit of a struggle, circles away and we're back to standing.
And that's the end of the fight!
Torben Hansen comfortably won the final round on my scorecard.
I think Hansen has won this one but let's see whether the judges agree with me. Over to the ring announcer for the scorecards.
Ladies and gentlemen, after 3 rounds of action, we go to the scorecards for a decision.
Judge Winston Howard scores the fight for Samuel Etherton!
Judge Eliza Hachem scores the fight for Samuel Etherton!
Judge Bruno Hogan scores the fight for Torben Hansen!
Samuel Etherton wins by split decision!
A relieved looking Samuel Etherton thanked the fans for their support and gave the usual line about them being amazing. They seemed to believe that he actually meant it.
|
|
|
|
|
|
|
|
|
|
|
|
|
|
|
|
|
|
|
|
|
|
|
| S |
C
A |
G |
S |
C
B |
G |
|
S |
C |
G |
|
energy
A | B |
|
hype
A | B |
|
pop
A | B |
|
mgr
A | B |
|
FIGHT
RATING
32% |
|
|
|
|
|
|
|
Undercard bout
|
|
|
|
Undercard bout
|
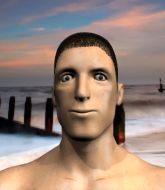
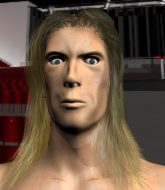
Coming up we have a bantamweight MMA rules bout between Steffan Stove (ranked 0 p4p, 0 weight class) and Reshat Mati (ranked 0 p4p, 0 weight class). Reshat Mati looks lathargic as he enters the arena. Wake up son, you're about to have a fight!
 |
|
 |
| 165 cm
20
134 lbs
2 - 0 - 0 |
|
157 cm
18
131 lbs
0 - 1 - 0 |
BJJ White Belt
Brawler
KO power |
|
BJJ Blue Belt
Brawler
Very confident |
|
| |
|
Ladies and gentlemen. This fight is 3 rounds, in the bantamweight division.
Introducing the fighter to my left, fighting out of the red corner.
With a record of
2 - 0 - 0, fighting out of Sydney, Steffan Stove!
And introducing the fighter to my right, fighting out of the blue corner.
With a record of
0 - 1 - 0, fighting out of Sydney, Reshat Mati!
The judges for this bout are Summer Carpenter, Winston Howard and John Mangel.
The bell rings for round one and we are underway!
Nice uppercut there from Stove.
Stove connects with a looping left hand that seems like it dazed Mati momentarily.
Mati tries a switch kick but it misses it's target.
Stove looks to score with a jab to the body but Mati is just out of range.
Mati closes the distance and clinches up with Stove, looking for a takedown. Mati pushes Stove against the cage but Stove circles to the side and manages to break the clinch.
Mati walks into a stiff left hand from Stove.
Mati fakes high and shoots in for a takedown but Stove avoids it really well and circles away.
Stove scores with a leg kick.
Mati looks winded!
Stove works the jab nicely.

Mati is rocked!
Wooooo! Give it up for these two warriors! They are putting on a show!
Mati walks straight into a right hand from Stove - that's dropped him! Stove jumps into mount and starts pounding away - can he finish?! More strikes go undefended and the referee has to dive in to save Mati from any more punishment! Mati complains about the stoppage but falls over as he tries to stand back up, so it was clearly a good stoppage.
Ladies and gentlemen, after 0:48 of round 1, we have a winner by way of TKO (Punches). Steffan Stove!
|
|
|
|
|
|
|
|
|
|
|
|
|
|
|
|
|
|
|
|
|
|
|
| S |
C
A |
G |
S |
C
B |
G |
|
S |
C |
G |
|
energy
A | B |
|
hype
A | B |
|
pop
A | B |
|
mgr
A | B |
|
FIGHT
RATING
64% |
|
|
|
|
|
|
|
Undercard bout
|
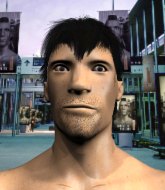
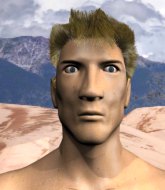
Coming up we have a light heavyweight MMA rules bout between Adam Jacobson (ranked 0 p4p, 0 weight class) and Zozo Kozozo (ranked 0 p4p, 0 weight class). Zozo Kozozo acknowledges the crowd's support as he enters the cage.
 |
|
 |
| 190 cm
19
205 lbs
7 - 1 - 0 |
|
180 cm
18
205 lbs
1 - 1 - 0 |
BJJ Brown Belt
Counter fighter
Big heart |
|
BJJ White Belt
Brawler
Very confident |
|
| |
|
Ladies and gentlemen. This fight is 3 rounds, in the light heavyweight division.
Introducing the fighter to my left, fighting out of the red corner.
With a record of
7 - 1 - 0, fighting out of Los Angeles, Adam Jacobson!
And introducing the fighter to my right, fighting out of the blue corner.
With a record of
1 - 1 - 0, fighting out of Sydney, Zozo Kozozo!
The judges for this bout are Eliza Hachem, Hugh Johnson and Bruno Hogan.
The bell rings for round one and we are underway!
Jacobson stuffs the takedown.
Jacobson tries to clinch but Kozozo is having none of it.
Kozozo has closed the distance and engaged Jacobson in a clinch.

Kozozo's corner calls for him to break the clinch, which he does.
The fight stays on the outside here - Kozozo looks like he's thinking about clinching though.
Nice sprawl there from Jacobson as Kozozo shoots in.
Kozozo should think about turning a few of those tyres round his middle into muscle if he wants people to take him seriously as an athlete.
Kozozo tries a head kick but it misses.
Jacobson moves in looking to clinch but Kozozo pushes him off.
Kozozo pushes Jacobson up against the cage in a clinch.
Jacobson keeps control of Kozozo as he tries to wriggle out of the double underhooks.
Jacobson manages to pull guard.
We could do with one of the fighters taking the initiative a bit more on the ground - they're both waiting to capitalize on a mistake.
It looks like the ref is thinking about a standup.
Jacobson looking for a sweep. Not yet Jacobson, not yet.
That's one minute gone in the round.
Kozozo is sitting in close to Jacobson's body. Jacobson has gone for a guillotine from the bottom. Oh damn, that looks pretty tight! Kozozo is panicking - it looks like this one could be all over! Yes, Kozozo is tapping! That was a very nice submission by Jacobson.
Ladies and gentlemen, after 1:19 of round 1, we have a winner by way of Submission (Guillotine). Adam Jacobson!
|
|
|
|
|
|
|
|
|
|
|
|
|
|
|
|
|
|
|
|
|
|
|
| S |
C
A |
G |
S |
C
B |
G |
|
S |
C |
G |
|
energy
A | B |
|
hype
A | B |
|
pop
A | B |
|
mgr
A | B |
|
FIGHT
RATING
29% |
|
|
|
|
|
|
|
Undercard bout
|
|
|
|
Undercard bout
|
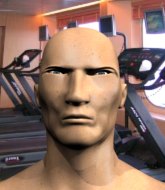
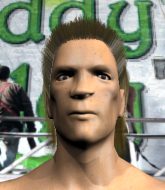
Coming up we have a heavyweight MMA rules bout between Patrick Harper (ranked 0 p4p, 0 weight class) and Nathan Jones (ranked 0 p4p, 0 weight class). Buckle up people - heeeeeeeeeere we go!
 |
|
 |
| 183 cm
18
263 lbs
1 - 0 - 0 |
|
195 cm
24
282 lbs
1 - 1 - 0 |
BJJ Blue Belt
Counter fighter
KO power |
|
Decent wrestler
Decent boxing
Tends to cut |
|
| |
|
Ladies and gentlemen. This fight is 3 rounds, in the heavyweight division.
Introducing the fighter to my left, fighting out of the red corner.
With a record of
1 - 0 - 0, fighting out of Sydney, Patrick Harper!
And introducing the fighter to my right, fighting out of the blue corner.
With a record of
1 - 1 - 0, fighting out of Sydney, Nathan Jones!
The judges for this bout are Skip Squint, Damien Edna and Hugh Johnson.
The bell rings for round one and we are underway!
Jones takes a step towards his opponent and connects with a left hand, before circling away.
Jones throws a combination that misses

and Harper holds on and brings the fighters into a clinch.
Harper manages to pull guard. Let's see whether he can land a sub off his back.
We've had a lack of effective grappling in the last minute or so, which could well see a referee standup.
Jones wants to stand and escape but instead Harper has hit a sweep and he's now on top in guard.
Harper slips effortlessly into side control - very nice.
Jones is trying to buck Harper off.
Harper wants to control but Jones is keeping him busy.
Harper tries for a kimura but Jones is defending well.
That's one minute gone in the round.
Harper controlling the position.
Jones is not content to let Harper control the position.
The ref warns both fighters not to hold the cage as they work up against the meshing.
Jones managing to avoid any damage from the strikes thrown by Harper.
We get told so often about how wrestlers don't like to be on their backs. Let's see if Jones can do anything to dispel that myth.
The referee asks Harper politely if he wouldn't mind getting on with it and actually doing something. Harper prefers to stall for the moment though.
Jones tries to work a leg under to get back to half guard but Harper wriggles his own leg back out and remains in side control.
Harper trying to control the action but Jones is working from the bottom.
Sloppy strikes there by Harper.
That's two minutes gone in the round.
Jones is not content to let Harper control the position.
Harper prevents Jones from escaping the position.
Harper tries for an arm triangle. That looks pretty tight to me. Is this one over!?! Possibly, maybe, no Harper has let go of the choke. Obviously it wasn't as tight as we thought!
Harper is looking to take a break and control but Jones is keeping him honest, looking to work from the bottom.
Jones is working hard to escape and get back to his feet. After a battle for position, Harper asserts his dominance and retains side control.
Jones should think about turning a few of those tyres round his middle into muscle if he wants people to take him seriously as an athlete.
That's three minutes gone in the round.
Harper trying to control the position but Jones is working away.
You can see the frustration on Jones's face, being in this tough position on the bottom.
Harper lands a decent elbow from side control.

It looks like Nathan Jones has been cut.
Harper trying to control the action but Jones is working from the bottom.
That's four minutes gone in the round.
Jones is working hard to escape and get back to his feet. After a battle for position, Harper asserts his dominance and retains side control.
Harper tries for a kimura. Not really close to a finish though.
Harper wants to control but Jones is keeping him busy.
And thats the end of the round the fighters go back to their corners.
Patrick Harper dominated that round.
The cut man is working on Nathan Jones's cut.
The referee calls time. The cornermen exit stage left and we're back to business.
A slow jab from Jones misses its intended target.
Jones fakes low and throws an overhand right that catches Harper on the side of the head.
Jones lands a lovely overhand right.
Harper moves his head to the side to avoid a jab but walks straight into a cross.
Jones pushes forward with a 1-2 combination that forces Harper back to the cage. Jones follows up with a solid lead hook to the liver.
The crowd cheering loudly, showing their appreciation for the quality fight we're seeing here.
Jones uses some good footwork to avoid the body shot by Harper.
Harper throws a looping left and ducks down for a takedown. He's got his arms around Jones's waist but Jones gets an underhook and avoids the takedown by throwing Harper off to one side.
Harper is looking to clinch but Jones is avoiding it.
Harper fails with the takedown.
We've been informed that Jones has been working hard on his conditioning in the buildup to the fight.
Jones throws a hook to the side of Harper's head but Harper sees it coming and ducks under it beautifully.
Patrick Harper seems to be the more aggressive standup fighter in this bout.
That's one minute gone in the round.
Harper closes the distance and pushes Jones back into the cage.
Harper is trying to pull guard but being pressed up against the cage enables Jones to keep the fight standing.
That's three failed takedown attempts in the round for Patrick Harper. That's going to take a lot out of him.
Harper fails to pull the fight into his guard.
Jones avoiding damage as Harper throws knees to the body.
Harper keeps control of Jones as he tries to wriggle out of the double underhooks.
Harper pulls guard.
Harper seems to have improved his submission grappling technique since last time we saw him. Let's see if he can pull off a submission.
Harper lands a beautiful switch and he's in full mount! That could spell trouble for Jones!
Harper tries to control but Jones wriggling away.
Patrick Harper overall seems to be getting the better of the ground position in the fight so far.
The referee warns Jones that he has to improve his position here as he takes two more clean shots to the head.
That's two minutes gone in the round.
Wooooo! Give it up for these two warriors! They are putting on a show!
Harper trying to control but Jones is having none of it.
Jones really wants to buck Harper off and get back to his feet.
Harper is in the full mount, landing strikes.
That has opened up Nathan Jones's cut even more.
Harper tries to control but Jones wriggling away.
Jones is really trying hard to get back to his feet.
Harper landing strikes, looking to finish!
Nathan Jones's cut is absolute horrible now. This looks like something out of a horror film with blood covering both fighters.
The referee calls the doctor in to look at Nathan Jones's cut. Oh no, the doctor has called an end to the bout!
Ladies and gentlemen, after 3:57 of round 2, we have a winner by way of TKO (Cut). Patrick Harper!
A victorious Patrick Harper thanked his army of followers in his post fight interview, telling people to make sure they follow him on Twitter.
|
|
|
|
|
|
|
|
|
|
|
|
|
|
|
|
|
|
|
|
|
|
|
| S |
C
A |
G |
S |
C
B |
G |
|
S |
C |
G |
|
energy
A | B |
|
hype
A | B |
|
pop
A | B |
|
mgr
A | B |
|
FIGHT
RATING
32% |
|
|
|
|
|
|
|
Undercard bout
|
Coming up we have a middleweight MMA rules bout between Vincent Dapalong (ranked 0 p4p, 0 weight class) and Sam Langford (ranked 0 p4p, 0 weight class). Both fighters look fresh as a daisy as they make their way towards the cage.
 |
|
 |
| 180 cm
24
180 lbs
5 - 3 - 0 |
|
171 cm
29
175 lbs
9 - 4 - 0 |
BJJ Blue Belt
World class boxer
Insanely flexible |
|
BJJ Purple Belt
Decent boxing
Granite chin |
|
| |
|
Ladies and gentlemen. This fight is 3 rounds, in the middleweight division.
Introducing the fighter to my left, fighting out of the red corner.
With a record of
5 - 3 - 0, fighting out of Sydney, Vincent Dapalong!
And introducing the fighter to my right, fighting out of the blue corner.
With a record of
9 - 4 - 0, fighting out of Sydney, Sam Langford !
The judges for this bout are Winston Howard, John Mangel and Bruno Hogan.
The bell rings for round one and we are underway!
Dapalong misses with a body shot. Nice footwork from Langford .
Langford shoots in for a takedown but Dapalong shows good takedown defense there and keeps this one on the feet.
Langford misses with a takedown attempt. He shot from a bit too far out.
Dapalong ducks down and throws a hook to the body but Langford moves away.
Dapalong uses decent footwork to sidestep a right hand from Langford .
Langford fails to land with the punch combination there - jab, cross, hook, miss, miss, miss.
Langford shoots in for a takedown but doesn't get it.
Vincent Dapalong has stuffed three takedown attempts in the round now. That's going to take a lot out of Sam Langford .
Langford shoots in for a takedown but doesn't get it.
No joy there for Dapalong, who threw a few shots but didn't land.
A punch combination from Dapalong misses.
Langford shoots in but Dapalong avoids the takedown attempt easily.
Langford throws a right hand that Dapalong ducks under and follows up with a left that Dapalong also avoids with ease.
Langford looks frustrated there after his takedown attempt is stuffed easily.
Langford throws an ugly left hook that misses
and Dapalong counters with a three punch combo that has Langford backing up. Langford nods at Dapalong to acknowledge the strikes.
The crowd are loving this. Great action here.
Dapalong throws a wild combination but nothing lands.
Dapalong lets the fists fly and connects with a left straight followed by a right hook.
Langford has a takedown stuffed.
Langford looks winded!
Langford shoots for a double leg takedown but Dapalong sprawls well. He's pushed Langford 's face into the mat and manages to get back to his feet relatively easily.
That's one minute gone in the round.
Langford throws a looping left and ducks down for a takedown. He's got his arms around Dapalong's waist but Dapalong gets an underhook and avoids the takedown by throwing Langford off to one side.
Dapalong throws a combination but it was largely blocked by Langford .
Langford walks straight into a jab right on the nose. That one stung - he's blinking and trying to clear his head.
Dapalong throws a good cross that connects.
Langford tries for a takedown but Dapalong sees it coming a mile off and avoids it easily.
Langford shoots in for a takedown but Dapalong shows good takedown defense.
Sam Langford seems to be the more aggressive standup fighter in this bout.
Dapalong fakes a head punch and goes low to the body. Nicely done.
Dapalong rushes forward with a series of wild hooks but Langford moves out of range and avoids them all easily.
Dapalong swinging wildly here.
Langford throws a lazy uppercut
and Dapalong connects with a straight left hand counter down the middle.
The fans in attendance giving it up for the two fighters, who have really let it all hang out in the last minute or so!
Dapalong misses with the combination.
Dapalong swinging wildly here.
Langford shoots in for a double leg but Dapalong sprawls well. That's going to sap some energy.
That's two minutes gone in the round.
Langford takes a big uppercut there. He seems a bit wobbly but no, he's OK.
Langford lands a jab to the nose.
Langford misses with a takedown attempt. He shot from a bit too far out.
Dapalong lands a big right hand and follows it up with an uppercut. Oh and another big punch and a knee - Langford can't take much more of this! Another big shot to the jaw from Dapalong and Langford drops to the floor. Beaten and bloodied - he had enough there. A vicious beatdown by Dapalong.
Ladies and gentlemen, after 2:17 of round 1, we have a winner by way of TKO (Strikes). Vincent Dapalong!
After winning the bout, Vincent Dapalong thanked all his fans and promised he'd do even better in his next fight. The crowd seemed to love his humility.
|
|
|
|
|
|
|
|
|
|
|
|
|
|
|
|
|
|
|
|
|
|
|
| S |
C
A |
G |
S |
C
B |
G |
|
S |
C |
G |
|
energy
A | B |
|
hype
A | B |
|
pop
A | B |
|
mgr
A | B |
|
FIGHT
RATING
68% |
|
|
|
|
|
|
|
Undercard bout
|
Coming up we have a light heavyweight MMA rules bout between Ng Mui (ranked 0 p4p, 0 weight class) and Blargo McBlargo (ranked 0 p4p, 0 weight class). Both fighters look fresh as a daisy as they make their way towards the cage.
 |
|
 |
| 186 cm
24
204 lbs
9 - 6 - 0 |
|
195 cm
26
210 lbs
9 - 3 - 0 |
Good wrestling
Excellent boxer
Granite chin |
|
Good wrestler
Decent boxing
Powerful |
|
| |
|
Ladies and gentlemen. This fight is 3 rounds, in the light heavyweight division.
Introducing the fighter to my left, fighting out of the red corner.
With a record of
9 - 6 - 0, fighting out of Sydney, Ng Mui!
And introducing the fighter to my right, fighting out of the blue corner.
With a record of
9 - 3 - 0, fighting out of Sydney, Blargo McBlargo!
The judges for this bout are Damien Edna, Bruno Hogan and Steve Erwin.
The bell rings for round one and we are underway!
Mui stuffs the takedown attempt from McBlargo. McBlargo gets slowly back to his feet.
McBlargo changes levels and looks for a double leg takedown. Mui tries to avoid it but McBlargo manages to keep hold of a leg and drag Mui to the ground. Mui escapes though and pops straight back up to his feet.
A jab from Mui misses.
McBlargo chopped to the floor by a nice leg kick but he springs right back up before Mui can pounce on him.
Mui misses with the combination.
No luck with that takedown attempt from McBlargo.
Ng Mui has stuffed three takedown attempts in the round now. That's going to take a lot out of Blargo McBlargo.
McBlargo is looking for a takedown here. He's shot in and has managed to get it, finishing up in Mui's half guard.
Mui is not content to let McBlargo control the position.
The fighters are pressed up against the cage, both looking to find a bit of space to work.
Mui looks like he's trying to stand up.
Mui is refusing to be controlled, as McBlargo sits in half guard.
Mui has one foot on McBlargo's thigh - he pushes off and manages to get back to his feet.
The crowd are loving this. Great action here.
Mui stuffs the takedown.
McBlargo avoids the head kick by Mui.
McBlargo fails with a takedown attempt.
That's one minute gone in the round.
McBlargo fails to land the takedown.
Mui misses with a body shot.
A combination from Mui does no damage.
Mui looks to have improved his striking defense since last time we saw him fight.
McBlargo avoids a punch combination nicely.
Mui wings a very wild body shot but it does the job and lands to the midsection.
Mui throws a right and a left that McBlargo avoids nicely.
McBlargo closes this distance looking for a takedown but Mui circles away.
McBlargo looks frustrated there after his takedown attempt is stuffed easily.
Mui scores with a big left there. The judges will like that one.
It looks like Blargo McBlargo has been cut.
McBlargo defending well as Mui loads up on a big left hand.
Mui scores with a head kick.
The crowd cheering loudly, showing their appreciation for the quality fight we're seeing here.
McBlargo checks a low kick. Bone on bone - not my idea of a good time.
McBlargo blocks a head kick by Mui.
McBlargo throws a looping left and ducks down for a takedown. He's got his arms around Mui's waist but Mui gets an underhook and avoids the takedown by throwing McBlargo off to one side.
That's two minutes gone in the round.
McBlargo wants to stay close but Mui steps back to make room for something. McBlargo seems frozen to the spot and bam! huge swing of the leg from Mui and McBlargo drops like he has been shot! A huge head kick and it's all over!
Ladies and gentlemen, after 2:08 of round 1, we have a winner by way of KO (Head Kick). Ng Mui!
|
|
|
|
|
|
|
|
|
|
|
|
|
|
|
|
|
|
|
|
|
|
|
| S |
C
A |
G |
S |
C
B |
G |
|
S |
C |
G |
|
energy
A | B |
|
hype
A | B |
|
pop
A | B |
|
mgr
A | B |
|
FIGHT
RATING
68% |
|
|
|
|
|
|
|
Co-main event
|
Coming up we have a welterweight MMA rules bout between Alvaro Gynowski (ranked 0 p4p, 0 weight class) and Karl Hungus (ranked 0 p4p, 0 weight class). Hungus is bobbing his head along to his entrance song: Marilyn Manson - Sweet Dreams. I don't know about you partner, but I'm pumped for this one!
 |
|
 |
| 180 cm
21
170 lbs
0 - 0 - 0 |
|
186 cm
32
183 lbs
25 - 18 - 0 |
Good wrestling
World class boxer
Big right hand |
|
Good wrestler
Excellent boxer
Good gas tank |
|
| |
|
Ladies and gentlemen. This fight is 3 rounds, in the welterweight division.
Introducing the fighter to my left, fighting out of the red corner.
With a record of
0 - 0 - 0, fighting out of Sydney, Alvaro Gynowski!
And introducing the fighter to my right, fighting out of the blue corner.
With a record of
25 - 18 - 0, fighting out of Tokyo, Karl Hungus!
The judges for this bout are Winston Howard, Skip Squint and Bruno Hogan.
The bell rings for round one and we are underway!
Gynowski closes the distance and pushes Hungus back into the cage.
Hungus pulls Gynowski into guard.
The referee is asking the fighters to pick up the pace.

Hungus working for a triangle but Gynowski defends it easily.
Hungus looking to sweep here. No luck so far.
Gynowski pressing down on his opponent's thigh, looking to pass guard. Hungus is keeping the position for now.
The fighters are pressed up against the cage, both looking to find a bit of space to work.
Hungus has his foot on Gynowski's thigh. He's trying to push off and get in position for a triangle, I think. Gynowski works his way back into a safe position though.
The ref warns both fighters not to hold the cage as they work up against the meshing.
The crowd cheering loudly, showing their appreciation for the quality fight we're seeing here.
Gynowski wants to control from the top but Hungus keeps moving.
Hungus is working actively from the bottom, looking for submissions. He's escaped his hips to the side and he's going for an armbar! Gynowski has his hands clasped together but Hungus extends and breaks Gynowski's desperate grasp, forcing a tap out due to armbar! Nice BJJ displayed there by Hungus.
Ladies and gentlemen, after 0:59 of round 1, we have a winner by way of Submission (Armbar). Karl Hungus!
Karl Hungus managed to slip a mention for his sponsors, Project Mayhem, into his post fight interview.
|
|
|
|
|
|
|
|
|
|
|
|
|
|
|
|
|
|
|
|
|
|
|
| S |
C
A |
G |
S |
C
B |
G |
|
S |
C |
G |
|
energy
A | B |
|
hype
A | B |
|
pop
A | B |
|
mgr
A | B |
|
FIGHT
RATING
61% |
|
|
|
|
|
|
|
Main event
|
Coming up we have a heavyweight MMA rules bout between Cosme Cosme (ranked 0 p4p, 0 weight class) and Steve Austin (ranked 0 p4p, 0 weight class). Over to our ring announcer for the fighter introductions!
 |
|
 |
| 186 cm
36
250 lbs
22 - 12 - 1 |
|
199 cm
31
220 lbs
13 - 6 - 0 |
Good wrestling
Lethal high kicks
Insanely flexible |
|
BJJ Brown Belt
Excellent MT
Good gas tank |
|
| |
|
Ladies and gentlemen. This fight is 5 rounds, for the heavyweight championship of the world!
Introducing the champion to my left, fighting out of the red corner.
With a record of
22 - 12 - 1, fighting out of Sydney, Cosme Cosme!
And introducing the challenger to my right, fighting out of the blue corner.
With a record of
13 - 6 - 0, fighting out of Sydney, Steve Austin!
The judges for this bout are Damien Edna, Summer Carpenter and Steve Erwin.
The bell rings for round one and we are underway!
Cosme throws a chopping leg kick but Austin manages to avoid taking any serious damage.
Austin takes a thudding leg kick, right into the meat of the thigh.
Cosme lands with a head kick! That's gotta hurt.
It looks like Steve Austin has been cut.
Cosme moves into the clinch.
Austin can't find room to land a body shot as Cosme controls the action.
Austin throws a head punch that misses.
Austin misses with an elbow strike.
The fans in attendance giving it up for the two fighters, who have really let it all hang out in the last minute or so!
Austin creates a bit of space for himself and sneaks an elbow through Cosme's defenses.
Cosme on the defensive, avoiding the knees to the body.
Austin tries to land a knee to the body but he is off balance and Cosme avoids it.
Cosme controlling the action here for a moment.
Austin has a couple of punches blocked by Cosme.
Austin throws an elbow but it's blocked.
Cosme blocks a couple of punches on the inside.
Cosme has dropped down and is working for a takedown. Austin is trying to keep an underhook but Cosme manages to get the takedown into half guard.
That's one minute gone in the round.
Cosme stops Austin from getting back to his feet.
Cosme is keen to just control but Austin is a slippery customer.
Cosme stops Austin from getting back to his feet.
Cosme seems to be working for a kimura but Austin defends the submission attempt.
Cosme stops Austin from getting back to his feet.

Austin manages to create a bit of space in order to work his way back to his feet. Cosme keeps hold of his opponent and drives him back against the cage.
With the two fighters working up against the cage, Austin just misses with a elbow thrown towards Cosme's brow.
Cosme avoiding damage as Austin throws knees to the body.
Cosme blocks a knee to the body. He'll have a nicely bruised forearm in the morning.
Austin throws an elbow but it's blocked.
Cosme blocks a knee to the body. He'll have a nicely bruised forearm in the morning.
Austin looks to throw an elbow but misses.
Austin working aggressively here.
That's two minutes gone in the round.
Austin misses with a punch on the inside.
Austin misses with some punches.
Cosme's corner calls for him to break the clinch, which he does.
Cosme looks to have improved his striking defense since last time we saw him fight.
Cosme throws a leg kick but Austin sees it coming and checks it nicely.
Cosme doesn't manage to clinch there - Austin circles away.
Cosme fails to land the takedown.
Good work by Austin as he checks the leg kick.
Wooooo! Give it up for these two warriors! They are putting on a show!
Cosme pulls out of a head kick attempt.
Cosme is looking to slow Austin down with leg kicks.
Austin blocks a head kick by Cosme.
A lazy body kick from Cosme
and Austin counters with a leg kick.
That's three minutes gone in the round.
Cosme finds nothing but air with that leg kick attempt.
Cosme throws a poor cross that misses
and Austin counters with a series of strikes. Cosme will be more careful next time no doubt.
Cosme throws a leg kick that is checked
and Austin counters with a crisp hook to the side of the head.
The crowd are loving this. Great action here.
Cosme throws a leg kick but Austin moved away.
Cosme throws a push kick but Austin slaps the foot to one side.
Cosme fakes a jab and scores with a low kick.
Steve Austin is looking to keep the fight on the feet at all costs.
Cosme throws a head kick but Austin moves out of range.
Cosme tries a switch kick but it misses it's target.
Cosme misses with a kick to the body
and Austin counters nicely by changing levels and landing a hook to the body.
Cosme lands a leg kick that knocks Austin off balance momentarily.
That's four minutes gone in the round.
Cosme darts in and lands a nice takedown into half guard.
Cosme is working for a kimura but Austin is defending it quite comfortably.
Austin wants to get back to his feet.
Austin on the receiving end of some nice ground and pound.
Cosme trying to pass the guard but Austin defending well.
Cosme looking for a kimura but he'll have to free his other leg if he wants to finish that. Perhaps he's just using it as a distraction technique.
The ref warns both fighters not to hold the cage as they work up against the meshing.
Austin is trying to stand back up but Cosme is controlling him
And thats the end of the round the fighters go back to their corners.
That was a close round but I would say that Cosme Cosme will probably get the nod.
The cut man is working on Steve Austin's cut.
OK. That's time! The bell goes and we're back to the action.
Austin takes one on the button.
Cosme fakes a couple of low kicks, before throwing one on the third attempt. It connects and Austin has to reset his feet before getting ready to engage.
Cosme Cosme is looking to throw some combinations by the looks of things.
Cosme scores with a nice takedown into half guard. Let's see what he's got on the ground.
Austin avoiding damage under a succession of punches from Cosme.
Austin wants to get back to his feet.
Cosme is looking for a kimura but Austin is holding onto that half guard position, so it's hard for Cosme to get the leverage.
Austin manages to escape and get back to his feet!
This is a great period of action - very entertaining stuff!
Austin avoids a kick to the body.
Austin stumbles momentarily as he takes a strong leg kick from Cosme.
Cosme closes the distance and lands a one-two.
A decent looking body kick lands there for Cosme.
Cosme moves into range and clinches up with Austin.
That's one minute gone in the round.
Cosme is clearly stalling here... Pick up the pace son.
An uppercut on the inside fails to land for Austin.
Cosme breaks the clinch and we return to the middle of the mat.
Cosme shoots in for a takedown - he's clinched up with Austin but Austin pushes him off and we're back to square one.
Cosme attempts a low kick but it misses it's target.
Cosme misses with a takedown attempt - Austin sprawls well and throws a nice strike on the way out which just misses.
Austin keeps the fight on the outside.
That's two minutes gone in the round.
Cosme chopping away at his opponent's legs.
Austin moves out of range of the leg kick from Cosme.
Austin uses decent footwork to sidestep a right hand from Cosme.
A low kick from Cosme misses
and Cosme takes a counter punch right on the button for his troubles.
The crowd cheering loudly, showing their appreciation for the quality fight we're seeing here.
Cosme darts in and lands a nice takedown into half guard.
The fighters are pressed up against the cage, both looking to find a bit of space to work.
Austin wants to get back to his feet.
Cosme wants to pass the guard but Austin is defending well.
Cosme thumps the canvas. Not on purpose obviously - he just missed Austin's head.
That's three minutes gone in the round.
Cosme prevents Austin from standing back up.
Cosme Cosme overall seems to be getting the better of the ground position in the fight so far.
Cosme is thinking about going for an arm triangle but he can't free his leg.
Austin is defending against the submission attempts here by Cosme.
Austin is trying to stand back up but Cosme is controlling him
Cosme is thinking about going for an arm triangle but he can't free his leg.
Austin is looking to escape.
Austin is breathing heavily.
Cosme is nestled in close to Austin, controlling him well. He's worked in a nice elbow to the side of the head as well, for good measure.
That's four minutes gone in the round.
Cosme prevents Austin from standing back up.
Cosme is working for a submission of some sort.
Cosme in half guard on the top. He's looking for a kimura... He's got it locked and he's managed to free his trapped foot. Austin tries to escape but it's on too tight and he has to tap! Great BJJ skills there from Cosme!
Ladies and gentlemen, after 4:28 of round 2, we have a winner by way of Submission (Kimura). Cosme Cosme!
Cosme Cosme is the new heavyweight champion!
|
|
|
|
|
|
|
|
|
|
|
|
|
|
|
|
|
|
|
|
|
|
|
| S |
C
A |
G |
S |
C
B |
G |
|
S |
C |
G |
|
energy
A | B |
|
hype
A | B |
|
pop
A | B |
|
mgr
A | B |
|
FIGHT
RATING
46% |
|
|
|
|
|
|
|
|
|
|
