 |
ICON:SP 5 PBP Commentary |
Undercard bout
|
|
|
|
Undercard bout
|
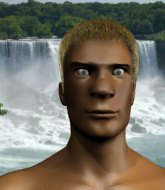
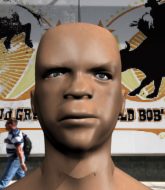
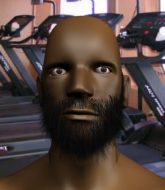
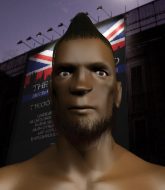
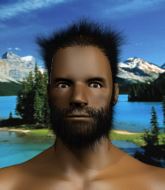
Coming up we have a light heavyweight MMA rules bout between Otto Kaikkonen (ranked 0 p4p, 0 weight class) and Perry Straps (ranked 0 p4p, 0 weight class). Kaikkonen's ring entrance music is that housewives' favourite, Duran Duran - WIld Boys. Straps has chosen Oldies Rap as his entrance music. Perry Straps acknowledges the crowd's support as he enters the cage.
 |
|
 |
| 187 cm
37
205 lbs
16 - 31 - 0 |
|
175 cm
24
205 lbs
4 - 4 - 0 |
BJJ Blue Belt
Brawler
Experienced |
|
BJJ Brown Belt
Counter fighter
Determined |
|
| |
|
Ladies and gentlemen. This fight is 3 rounds, in the light heavyweight division.
Introducing the fighter to my left, fighting out of the red corner.
With a record of
16 - 31 - 0, fighting out of St Petersburg, Otto Kaikkonen!
And introducing the fighter to my right, fighting out of the blue corner.
With a record of
4 - 4 - 0, fighting out of St Petersburg, Perry Straps!
The judges for this bout are Valeri Chadov, Aleksandr Martynov and Viktor Lagutenko.

The bell rings for round one and we are underway!
Kaikkonen scores with a jab to the jaw of his opponent.
Straps walks straight into a jab right on the nose. That one stung - he's blinking and trying to clear his head.

It looks like Perry Straps has been cut.
Straps loses concentration momentarily and Kaikkonen pounces with a three punch combo! Right, left, right! Straps crashes face first to the mat, out cold! Kaikkonen finishes this one with a fantastically precise combo! Great stuff.
Ladies and gentlemen, after 0:11 of round 1, we have a winner by way of KO (Punches). Otto Kaikkonen!
|
|
|
|
|
|
|
|
|
|
|
|
|
|
|
|
|
|
|
|
|
|
|
| S |
C
A |
G |
S |
C
B |
G |
|
S |
C |
G |
|
energy
A | B |
|
hype
A | B |
|
pop
A | B |
|
mgr
A | B |
|
FIGHT
RATING
100% |
|
|
|
|
|
|
|
Undercard bout
|
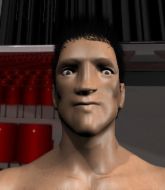
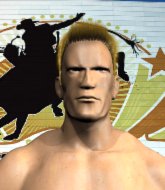
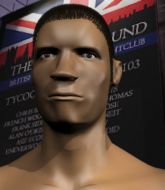
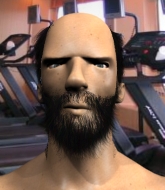
Coming up we have a featherweight MMA rules bout between XyD ZyD (ranked 0 p4p, 0 weight class) and Kenny Hill (ranked 0 p4p, 0 weight class). The crowd seem to be enjoying Hill's choice of entrance music: Its Raining Men. Kenny Hill looks lathargic as he enters the arena. Wake up son, you're about to have a fight!
 |
|
 |
| 155 cm
19
140 lbs
1 - 1 - 0 |
|
167 cm
28
135 lbs
7 - 9 - 0 |
BJJ White Belt
Great elbows
KO power |
|
BJJ Blue Belt
Brawler
Determined |
|
| |
|
Ladies and gentlemen. This fight is 3 rounds, in the featherweight division.
Introducing the fighter to my left, fighting out of the red corner.
With a record of
1 - 1 - 0, fighting out of Las Vegas, XyD ZyD!
And introducing the fighter to my right, fighting out of the blue corner.
With a record of
7 - 9 - 0, fighting out of St Petersburg, Kenny Hill!
The judges for this bout are Dmitry Maklakov, Sergei Dronov and Aleksei Zolotukhin.
The bell rings for round one and we are underway!
Nice shot by ZyD.
That's a knee to de groin and it's over and out! Hill crumples to the ground after an illegal strike from ZyD - the referee stops the clock and Hill gets 5 minutes to recover from that one. "I'm sorry" says ZyD. Hill manages to get back to his feet and the fight resumes.
Hill scores with a shot to the body.
ZyD lands with a thumping leg kick.
Hill looks winded!

ZyD lands a big head kick that sends Hill tumbling to the mat! ZyD takes a step backwards and waves Hill back to his feet - he wants the finish!

Hill is rocked!
This is a great period of action - very entertaining stuff!
ZyD ducks down and throws a hook to the body but Hill moves away.
Hill is still on wobbly legs! Can ZyD finish him?
A slow jab from ZyD misses its intended target.
A head kick misses from ZyD.
Hill walks forward, straight into a front kick from ZyD.
Hill stumbles momentarily as he takes a strong leg kick from ZyD.
ZyD scores with a sloppy right hand. Hill should have avoided that one.
ZyD fakes a right and follows up with a big left that drops Hill to one knee - oooooh, he's wobbly! Hill looks to clinch but ZyD throws him off and pummels him into the canvas! Hill taps out under the strikes! The fight is over!
Ladies and gentlemen, after 0:41 of round 1, we have a winner by way of Submission (Strikes). XyD ZyD!
|
|
|
|
|
|
|
|
|
|
|
|
|
|
|
|
|
|
|
|
|
|
|
| S |
C
A |
G |
S |
C
B |
G |
|
S |
C |
G |
|
energy
A | B |
|
hype
A | B |
|
pop
A | B |
|
mgr
A | B |
|
FIGHT
RATING
100% |
|
|
|
|
|
|
|
Undercard bout
|
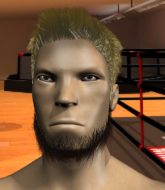
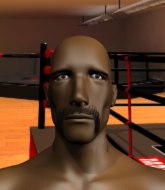
Coming up we have a middleweight MMA rules bout between Bob Bailey (ranked 0 p4p, 0 weight class) and Rusty Griswold (ranked 0 p4p, 0 weight class). Griswold has chosen Hooking Up The Lights as his entrance music. This should be a great matchup!
 |
|
 |
| 187 cm
32
195 lbs
15 - 20 - 0 |
|
180 cm
34
196 lbs
24 - 11 - 0 |
Good wrestling
Basic striking
Cardio machine |
|
Olympic wrestler
Basic striking
Powerful |
|
| |
|
Ladies and gentlemen. This fight is 3 rounds, in the middleweight division.
Introducing the fighter to my left, fighting out of the red corner.
With a record of
15 - 20 - 0, fighting out of St Petersburg, Bob Bailey!
And introducing the fighter to my right, fighting out of the blue corner.
With a record of
24 - 11 - 0, fighting out of St Petersburg, Rusty Griswold!
The judges for this bout are Sergei Dronov, Konstantin Menshow and Fedor Mirinova.
The bell rings for round one and we are underway!
Bailey misses with a takedown

and Griswold decides to take the opportunity to score a takedown. He's landed in Bailey's guard.
Griswold cracks Bailey with a solid left hand.
Griswold wants to control from the top but Bailey keeps moving.
Bailey is trying to control the position but Griswold postures up.
The ref warns both fighters not to hold the cage as they work up against the meshing.
Griswold trying to land body shots but he keeps hitting the mat.
Griswold scores with a decent looking elbow strike.
We've seen a great period of action over the last minute or so - credit to both fighters for going all out!
Griswold postures up and lands a big shot to Bailey's brow.
Griswold lands a nice shot whilst sitting in his opponent's guard.
Bailey wants to sweep but no luck.
Bailey has momentary wrist control but Griswold slips an elbow through the middle.
Bailey tries to land a sweep but no joy.
Bailey controlling the position.
Griswold wants to control from the top but Bailey keeps moving.
Griswold missing there with some ground and pound from the guard.

That's one minute gone in the round.
Griswold trying to control the position from guard on top but Bailey is wriggling around, looking for whatever he can.
Griswold might have to switch it up a bit here because his efforts to control Bailey haven't been going to plan, at least at the current moment in time.

The ref stands the fighters back up, due to lack of action by Rusty Griswold.
No luck with that takedown attempt from Griswold.

Griswold tries to sprawl but Bailey drives through with a takedown into half guard.
Griswold is pressing down on Bailey's left leg trying to get back to full guard. He's managed it.
Bailey is taking a break and basically stalling. The referee will not allow him to do that for long.
Griswold wants to sweep but no luck.
Bailey has to be careful here, sitting in the guard of a superior BJJ player.
Bailey is frustrating his opponent with some stalling tactics from top position.
Griswold tries to strike from the bottom.

That's two minutes gone in the round.
Griswold keeping moving, preventing Bailey from controlling successfully.
We must be close to a standup if these guys don't pick up the pace.

Bob Bailey has forced the referee to step in and bring the fight back to the feet.
Bailey misses with a takedown attempt. He shot from a bit too far out.
Bailey misses with a takedown attempt - Griswold sprawls well and throws a nice strike on the way out which just misses.
That's three failed takedown attempts in the round for Bob Bailey. That's going to take a lot out of him.
Bailey shoots for a double leg takedown but Griswold sprawls well. He's pushed Bailey's face into the mat and manages to get back to his feet relatively easily.
The crowd are loving this. Great action here.
Bailey tries for a takedown but Griswold circles away easily
and Griswold decides to take the opportunity to score a takedown. He's landed in Bailey's guard.
Griswold has the superior BJJ but he's also working some ground strikes into his gameplan.
Bailey wants to hit a switch here but Griswold passes into full mount! Oh no, disaster for Bailey there!
Bailey tries to lock up and control but Griswold gives him a forearm to the face and pushes him away.

That's three minutes gone in the round.
Griswold raining down hammerfists from mount.
Bailey is looking to improve his position but Griswold isn't that keen on the idea.
Griswold looking to ground and pound his opponent to a finish here.
Griswold scoring with strikes but Bailey is staying in there.

It looks like Bob Bailey has been cut.
Bailey is working to get back to half guard.
Wooooo! Give it up for these two warriors! They are putting on a show!
Griswold postures up and cracks his opponent a couple of times before moving back into close ground control. Bailey looks a forlorn figure.
Griswold in mount throwing good strikes here, bouncing his opponent's head off the canvas.
Bailey is looking to get to half guard.
Griswold with the ground and pound from mount.

That's four minutes gone in the round.
Griswold dominating with strikes here.
The fighters are pressed up against the cage, both looking to find a bit of space to work.
Bailey is bucking up trying to escape but Griswold cracks him with another couple of good strikes.

Bailey is rocked!
Griswold controlling his opponent.
Oh Bailey is still in real trouble! Will he be able to recover?!!
Griswold working Bailey over with strikes here.
Griswold postures up and lands a whopping elbow - oh that's hurt Bailey bigstyle! Two more strikes land for Griswold and the fight is over!
Ladies and gentlemen, after 4:41 of round 1, we have a winner by way of TKO (Strikes). Rusty Griswold!
|
|
|
|
|
|
|
|
|
|
|
|
|
|
|
|
|
|
|
|
|
|
|
| S |
C
A |
G |
S |
C
B |
G |
|
S |
C |
G |
|
energy
A | B |
|
hype
A | B |
|
pop
A | B |
|
mgr
A | B |
|
FIGHT
RATING
78% |
|
|
|
|
|
|
|
Undercard bout
|
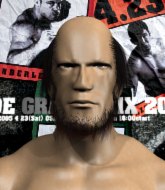
Coming up we have a welterweight MMA rules bout between Totoy Mola (ranked 0 p4p, 0 weight class) and Chad Hardy (ranked 0 p4p, 0 weight class). Hardy is bouncing up and down as he enters the arena, backed by Run this town. Over to our ring announcer for the fighter introductions!
 |
|
 |
| 180 cm
27
170 lbs
6 - 4 - 0 |
|
184 cm
23
175 lbs
5 - 2 - 0 |
BJJ Brown Belt
Brawler
KO power |
|
Good wrestler
Decent boxing
Powerful |
|
| |
|
Ladies and gentlemen. This fight is 3 rounds, in the welterweight division.
Introducing the fighter to my left, fighting out of the red corner.
With a record of
6 - 4 - 0, fighting out of St Petersburg, Totoy Mola!
And introducing the fighter to my right, fighting out of the blue corner.
With a record of
5 - 2 - 0, fighting out of St Petersburg, Chad Hardy!
The judges for this bout are Aleksei Zolotukhin, Aleksandr Martynov and Vladimir Khabensky.
The bell rings for round one and we are underway!
Mola with a poor takedown
and Mola takes a counter punch right on the button for his troubles.
Totoy Mola seems to be the more aggressive standup fighter in this bout.
Mola with a lazy takedown attempt
and Hardy counters with a leg kick that reverborates around the arena.
Hardy comes forward and lands a shot to the body, then darts back out of range.
Hardy scores with a decent looking hook.
Hardy scores with a sloppy punch to the body. Not much technique there but it did the business.
Mola gets his takedown attempt stuffed easily
and he gets countered with a snapping leg kick.
That's three failed takedown attempts in the round for Totoy Mola. That's going to take a lot out of him.
Mola doesn't succeed with the takedown
and Hardy connects with a straight left hand counter down the middle.
Mola is breathing heavily.
We've seen a great period of action over the last minute or so - credit to both fighters for going all out!
Mola doesn't succeed with the takedown
and Hardy counters with a lovely straight right hand!
Mola fails with the takedown
and Mola takes a counter punch right on the button for his troubles.
Hardy scores with a jab to the body.
Mola takes a hook to the side of the head. I wonder if that's got his ears ringing.
Hardy lands a jab to the head.
Mola is rocked!
Hardy scores with a sloppy punch to the body. Not much technique there but it did the business.
Oh Mola is still all over the place! His legs are completely gone! Will he be able to recover?!!
Hardy cracks Mola with a big right hand that sees him stumbling back against the cage! Mola falls to his knees and Hardy doesn't need a second invitatation - he rushes in and fires off several unanswered shots that force the referee to stop the fight! This one is all over!
Ladies and gentlemen, after 0:59 of round 1, we have a winner by way of TKO (Strikes). Chad Hardy!
Chad Hardy really struggled to get his t-shirt on before his hand was raised. Making sure that Hopkins Athletics ($6 shirts!) logo gets some air time is pretty tricky when you're all sweaty.
|
|
|
|
|
|
|
|
|
|
|
|
|
|
|
|
|
|
|
|
|
|
|
| S |
C
A |
G |
S |
C
B |
G |
|
S |
C |
G |
|
energy
A | B |
|
hype
A | B |
|
pop
A | B |
|
mgr
A | B |
|
FIGHT
RATING
100% |
|
|
|
|
|
|
|
Undercard bout
|
Coming up we have a lightweight MMA rules bout between Jason Hardy (ranked 0 p4p, 0 weight class) and Barney Lee (ranked 0 p4p, 0 weight class). Hardy comes to the cage accompanied by Coming home -Dirty money. Lee has chosen On To The Next One as his entrance music. Both fighters really staring each other down here, as Barney Lee enters the cage!
 |
|
 |
| 180 cm
32
160 lbs
11 - 4 - 1 |
|
182 cm
31
170 lbs
23 - 16 - 1 |
Good wrestling
Solid boxing
Granite chin |
|
Good wrestler
World class boxer
Good gas tank |
|
| |
|
Ladies and gentlemen. This fight is 3 rounds, in the lightweight division.
Introducing the fighter to my left, fighting out of the red corner.
With a record of
11 - 4 - 1, fighting out of St Petersburg, Jason Hardy!
And introducing the fighter to my right, fighting out of the blue corner.
With a record of
23 - 16 - 1, fighting out of New York, Barney Lee!
The judges for this bout are Konstantin Menshow, Aleksandr Martynov and Igor Prikhodko.
The bell rings for round one and we are underway!
Lee throws a hook to the side of Hardy's head but Hardy sees it coming and ducks under it beautifully.
The fight stays on the outside here - Hardy looks like he's thinking about clinching though.
Jason Hardy seems to be the more aggressive standup fighter in this bout.
Hardy just misses with a punch to the body.
Lee scores with a jab to the jaw of his opponent.
The fight stays on the outside here - Hardy looks like he's thinking about clinching though.
Hardy with a poor takedown
and Lee counters with a crisp hook to the side of the head.
Hardy on the wrong end of a nice hook.
The crowd are loving this. Great action here.
Hardy slips a straight right by Lee.
Lee circles away from the clinch attempt.
Hardy looks frustrated there after his takedown attempt is stuffed easily.
Good leg kick by Lee there. It's the ones that make that thud noise that hurt and that was an almighty thud.
That's one minute gone in the round.
Lee lands a powerful looking uppercut that connected with his opponent's jaw.
Hardy just misses with a punch to the body.
Hardy misses with a looping right.
A big right from Hardy misses.
Lee scores with a nice right hand.
Hardy on the wrong end of a nice hook.
Hardy tries to clinch but is not successful on this occasion.
Hardy throws an ugly left hook that misses
and Lee counters with a lovely straight right hand!
We've seen a great period of action over the last minute or so - credit to both fighters for going all out!
Lee connects with a crisp jab.
Hardy is rocked!
Hardy closes the distance and takes a jab right on the nose as he does so.
Oh Hardy is still all over the place! His legs are completely gone! Will he be able to recover?!!
That's two minutes gone in the round.
Hardy throws a combination. Lee tries to block but a couple of punches get through.
Hardy seems to have got his legs back now.

Hardy has closed the distance and engaged Lee in a clinch.
Lee presses Hardy against the cage and delivers a mid-strength body shot.
Lee lands a hook that snaps the head of Hardy backwards.
Lee digs a right hand underneath Hardy's ribcage. Hardy let out a lung full of air as it connected.
Hardy's head jolts backwards as he takes an uppercut right on the button!
Hardy swings wildly with an uppercut but Lee uses good head movement to avoid it.
Lee blocks a body shot from Hardy.
Lee scores with a nice hook to the head.
Lee lands a right uppercut that snaps the head of Hardy backwards.
Hardy misses with a punch on the inside.
Lee is working Hardy over against the cage.
An uppercut on the inside fails to land for Hardy.
Lee presses Hardy against the cage and delivers a mid-strength body shot.
Hardy is breathing heavily.
That's three minutes gone in the round.
A left hand lands to the body for Lee.
Lee lands a right hand.
Lee lands an uppercut.
Hardy has a couple of punches blocked by Lee.
Lee lands with a short shot to the head.
A short body shot lands from Lee as the two fighters clinch.
Hardy misses with a shot to the kidneys.
A left hand lands to the body for Lee.
A nice right hand lands inside from Lee.
We've seen a great period of action over the last minute or so - credit to both fighters for going all out!
Still in the clinch, Lee scores with a nice short uppercut.
An uppercut to the body lands inside from Lee.
Hardy takes a shot to the head.
Lee digs a right hand into Hardy's ribs. Those have got to be taking their toll on Hardy's gas tank.
A right hook to the body lands for Lee.
Lee lands a left hand.
A left hand lands to the body for Lee.
Lee lands on the inside with an uppercut.
A left hand lands to the body for Lee.
Lee lands a right hand.
That's four minutes gone in the round.
Lee lands a nice looking hook to the body, against the cage.
A short right from Lee.
Lee lands with a light punch inside.
Lee throws a blind hook that connects with the side of Hardys head.
Lee cracks Hardy with a nice body shot.

Lee drops Hardy onto one knee with a big uppercut from the clinch! Hardy is propped up by the cage and works his way back to his feet!
Lee throws a hook to the body. More of an arm punch but it's all scoring with the judges.
Lee lands a hook to the side of the head.
A right hook to the body lands for Lee.
Lee throws a hook to the body. More of an arm punch but it's all scoring with the judges.
Lee stays in close to his opponent and throws a right hand to the body.
Hardy takes a shot to the head.
Lee pushes Hardy against the cage. Lee is working some dirty boxing. Lee pushes off with a quick right hook! Hardy goes down! Hardy tries to stand but stumbles back to his kness! Lee moves in to finish and the ref steps in to prevent any more damage!
Ladies and gentlemen, after 4:48 of round 1, we have a winner by way of TKO (Strikes). Barney Lee!
Barney Lee seemed lost for words in his post fight interview but he remembered to thank his fans and directed everyone to his website.
|
|
|
|
|
|
|
|
|
|
|
|
|
|
|
|
|
|
|
|
|
|
|
| S |
C
A |
G |
S |
C
B |
G |
|
S |
C |
G |
|
energy
A | B |
|
hype
A | B |
|
pop
A | B |
|
mgr
A | B |
|
FIGHT
RATING
90% |
|
|
|
|
|
|
|
Undercard bout
|
Coming up we have a light heavyweight MMA rules bout between Captain Beefheart (ranked 0 p4p, 0 weight class) and Duke On Roids (ranked 0 p4p, 0 weight class). On Roids has chosen Duke Nukem Quotes! as his entrance music. Duke On Roids has the eye of the tiger tonight.
 |
|
 |
| 182 cm
27
223 lbs
14 - 10 - 0 |
|
188 cm
30
210 lbs
21 - 13 - 0 |
Good wrestling
World class boxer
Cardio machine |
|
Good wrestler
World class MT
Good gas tank |
|
| |
|
Ladies and gentlemen. This fight is 3 rounds, in the light heavyweight division.
Introducing the fighter to my left, fighting out of the red corner.
With a record of
14 - 10 - 0, fighting out of Tokyo, Captain Beefheart!
And introducing the fighter to my right, fighting out of the blue corner.
With a record of
21 - 13 - 0, fighting out of New York, Duke On Roids!
The judges for this bout are Fedor Mirinova, Valeri Chadov and Aleksandr Martynov.
The bell rings for round one and we are underway!
Beefheart shapes like he's going to throw a leg kick but settles back down.
Beefheart throws a body punch but On Roids moves out of range.
On Roids misses with a half-hearted attempt at a head kick.
Beefheart misses with the combination.
A low kick from Beefheart is predictable there
and On Roids counters with an outside leg kick.
On Roids wants to clinch up but Beefheart keeps it at a distance.
Beefheart keeps the fight on the outside.
On Roids lands a nice leg kick that just misses Beefheart's sensitive parts.
Duke On Roids seems to be the more aggressive standup fighter in this bout.
No luck for On Roids with that takedown attempt.
Beefheart swats away the attempt to clinch by On Roids.
On Roids swinging wildly here.
Beefheart tries to move into range but On Roids moves to the side and lands with a nice right hand.
That's one minute gone in the round.
On Roids uses good footwork to get in and out, landing a nice hook.
Beefheart takes a shot right to the liver - Bas would have been proud of that punch.
Jab, jab by Beefheart - just one landing.
Beefheart blocks a head kick by On Roids.
Beefheart clinches with his opponent.
On Roids has a couple of punches blocked by Beefheart.
On Roids avoiding damage as Beefheart throws knees to the body.
On Roids lands a left hand.
Beefheart lands with a left to the head.
On Roids tries to land a shot to the body but it's blocked.
On Roids lands punches inside but they're not really causing much damage.
On Roids struggles to land a body shot inside as Beefheart controls his hands.
That's two minutes gone in the round.
Beefheart pushes off an throws an elbow but On Roids leans to the side and avoids it. We're back to clinching against the cage.
Wooooo! Give it up for these two warriors! They are putting on a show!
On Roids is stalling here.
On Roids working on landing some head shots here - that one got through nicely.
A short left from Beefheart.
On Roids misses with some punches.
Beefheart fails to land with a short punch on the inside.
On Roids is looking for a takedown up against the cage. Beefheart gets underhooks though and prevents the takedown attempt.
Beefheart lands a shot to the body.
On Roids avoiding damage as Beefheart throws knees to the body.
On Roids makes some space for himself and lands an uppercut.
Beefheart throws a head punch that misses.
Beefheart blocks an uppercut.
On Roids lands with a short punch from the clinch.
That's three minutes gone in the round.
On Roids is trying to drag Beefheart to the mat but Beefheart just about manages to keep his footing. He used the cage to his advantage there.
Captain Beefheart has stuffed three takedown attempts in the round now. That's going to take a lot out of Duke On Roids.
On Roids tries to stall but Beefheart uses the opportunity to gain a better position.
On Roids leaning his opponent against the cage.
Beefheart throws an elbow but it's blocked.
Beefheart misses with a punch on the inside.
On Roids is stalling here.
A short right from Beefheart.
On Roids is looking for a takedown.
Beefheart throws a punch but it's blocked by On Roids.
That's four minutes gone in the round.
On Roids tries to throw a body punch but Beefheart avoids it by throwing On Roids back against the cage.
Beefheart blocking some punches.
Beefheart throws an elbow but it misses.
A short body shot lands from On Roids as the two fighters clinch.
On Roids is stalling here.
On Roids has a couple of punches blocked by Beefheart.
A head punch blocked on the inside by Beefheart.
Beefheart prevents On Roids from breaking the clinch.
On Roids gets a nice trip takedown into half guard.
We've seen a great period of action over the last minute or so - credit to both fighters for going all out!
The referee looks like he's ready to step in and stand the fighters back up.
On Roids is looking to take a break and control but Beefheart is keeping him honest, looking to work from the bottom.
The crowd are going absolutely nuts as the round comes to an end - what a fantastic round of action!
Beefheart gets full guard.
On Roids tries to free his leg and advance position but Beefheart is retaining full guard.
And thats the end of the round the fighters go back to their corners.
Duke On Roids dominated that round.
The minute break is over - no more time for sponges and pep talks - back to the action!

Beefheart throws a right hand that misses
and On Roids counters with a head kick. That will keep Beefheart thinking before he tries any more sloppy attacks!
Beefheart throws a hook to the side of On Roids's head but On Roids sees it coming and ducks under it beautifully.
Beefheart circles away from the clinch attempt.
Beefheart swings and misses with a hook to the body.

On Roids has closed the distance and engaged Beefheart in a clinch.
On Roids lands with a quick shot inside that doesn't really do much damage.
Beefheart lands a glancing elbow in the clinch.
Duke On Roids seems to be working more effectively in the clinch in the fight so far.
On Roids scores with an uppercut up the middle.
Beefheart blocks a couple of punches on the inside.
On Roids goes for a takedown attempt but Beefheart pushes him away and we're back to fighting at a distance.
Wooooo! Give it up for these two warriors! They are putting on a show!
A combination from On Roids does no damage.
That's one minute gone in the round.
A nice leg kick lands there from On Roids.
On Roids moves away from the strike by Beefheart.
On Roids throws a head kick that misses.
On Roids tries to clinch up
and Beefheart counters by moving into the clinch. Good anticipation by Beefheart.
On Roids goes for a body shot but it's blocked.
Beefheart tries to land knees in the clinch but On Roids avoids the damage to the body.
The referee calls for On Roids to work.
On Roids doesn't land with the attempted body shot.
A bit of stalling here from On Roids.
Beefheart prevents a takedown attempt there.
That's two minutes gone in the round.
On Roids struggles to land a body shot inside as Beefheart controls his hands.
On Roids stalling in the clinch but Beefheart improves position.
On Roids stalls.
On Roids fails to land with a short punch on the inside.
Beefheart lands punches inside but they're not really causing much damage.
On Roids has hold of a leg and is looking for a trip takedown. Beefheart avoids it nicely though and we remain in the clinch.
Captain Beefheart has stuffed three takedown attempts in the round now. That's going to take a lot out of Duke On Roids.
With the fighters up against the cage, Beefheart throws an elbow but misses.
On Roids lands with a quick shot inside that doesn't really do much damage.
We've seen a great period of action over the last minute or so - credit to both fighters for going all out!
On Roids stalling in the clinch.
On Roids scores with a nice hook to the head.
On Roids misses with a body punch.
That's three minutes gone in the round.
On Roids goes for a takedown in the clinch but Beefheart prevents it.
On Roids changes levels and goes for a takedown here. Beefheart fights it off and pushes away nicely.
On Roids keeps the fight on the outside.
On Roids throws a combination but comes up with nothing but fresh air.
On Roids moves in looking to clinch but Beefheart pushes him off.
On Roids scores with a shot to the body.
On Roids lands a body shot.
On Roids tries to clinch up against the cage, rushing in to close the distance. Beefheart manages to break the clinch and circles back to the middle of the mat.
On Roids tries a switch kick but it misses it's target.
On Roids tries to clinch up.
That's four minutes gone in the round.
Beefheart dances in quickly and lands a nice inside leg kick on On Roids. That did some damage!
The fight stays on the outside here - On Roids looks like he's thinking about clinching though.
Duke On Roids seems to be getting the better of the standup.
Beefheart throws a nice outside leg kick.
A leg kick checked by On Roids.
Beefheart defends well against a solid takedown attempt from On Roids.
Wooooo! Give it up for these two warriors! They are putting on a show!
On Roids checks a leg kick.
On Roids thows a body shot but no joy.
Beefheart defending well as On Roids loads up on a big left hand.
As the round comes to an end the crowd are showing their appreciation for a great round of action.
On Roids swings away with a body shot that misses
letting Beefheart counter with a right hand.
On Roids chopped to the floor by a nice leg kick but he springs right back up before Beefheart can pounce on him.
Beefheart misses with a low kick.
And thats the end of the round the fighters go back to their corners.
Duke On Roids showed his class in that round. I'd imagine he'll take it on all the scorecards.
Well, the break between rounds is over. Let's get back to the scrappin! Ladies and gentlemen, this is the final round!

Beefheart circles away from the clinch attempt
and Beefheart holds on and brings the fighters into a clinch.
Beefheart blocking some punches.
An uppercut on the inside fails to land for Beefheart.
Beefheart has On Roids pushed against the cage.
An uppercut on the inside fails to land for On Roids.
On Roids stalling in the clinch.
Beefheart tries to land a knee to the body but he is off balance and On Roids avoids it.
Beefheart lands with a short head shot on the inside.
It looks like Duke On Roids has been cut.
A head punch on the inside from On Roids fails to land.
Beefheart blocks a body shot from On Roids.
The referee is keeping an eye on On Roids - much more stalling and he will separate the fighters.
That's one minute gone in the round.
On Roids fails to land with a short punch on the inside.
Beefheart prevents a body shot from On Roids.
On Roids throws a head punch that misses.
On Roids misses with a short punch on the inside.
Beefheart swings away with an uppercut that misses.
A head punch on the inside from On Roids fails to land.
Beefheart throws a blind hook that connects with the side of On Roidss head.
On Roids throws a head punch that misses.
On Roids misses with a hook to the ribs.
On Roids misses with a punch to the body.
A head punch on the inside from On Roids fails to land.
On Roids is trying to stall.
That's two minutes gone in the round.
On Roids throws a punch but it's blocked by Beefheart.
Beefheart tries to land a knee to the body but he is off balance and On Roids avoids it.
On Roids stalling in the clinch but Beefheart improves position.
On Roids misses with a hook from the clinch.
On Roids goes for a takedown in the clinch but Beefheart prevents it.
Good anti-grappling being displayed by Beefheart as On Roids tries to tie him up.
Beefheart prevents the takedown attempt.
A right handed body shot lands from Beefheart.
On Roids is clearly stalling here... Pick up the pace son.
On Roids tries to land a shot to the body but it's blocked.
Captain Beefheart has stepped it up - he knows he needs a finish here!
That's three minutes gone in the round.
On Roids fails to land with a short punch on the inside.
On Roids blocks the elbow strike.
On Roids tried to land a shot to the body but connects with Beefheart's elbow.
On Roids misses with a body punch.
Nice body punch from On Roids - that landed with a thud.
A head punch blocked on the inside by Beefheart.
A head punch on the inside from On Roids fails to land.
On Roids can't find room to land a body shot as Beefheart controls the action.
On Roids has double underhooks and is working for a body lock takedown. He's got it. The fighters land in half guard but Beefheart regains guard immediately.
On Roids throws a big right hand that misses.
On Roids throwing strikes from guard but Beefheart blocks nicely.
That's four minutes gone in the round.
Beefheart avoiding any damage from the ground and pound.
Duke On Roids is fighting for a decision - hopefully he's judged it right and he's actually winning the fight.
Beefheart is working from a closed guard but he's struggling to control his opponent.
On Roids trying to control but Beefheart is working from the bottom.
On Roids slows down the pace of the fight, as he sits in guard.
Beefheart looking to control.
The crowd applaud the fighters efforts here as the round comes to an end.

Beefheart pushes On Roids off and gets back to his feet.
Captain Beefheart is looking to keep the fight on the feet at all costs.
This is a great period of action - very entertaining stuff!
Beefheart stuffs the takedown.
And that's the end of the fight!
Duke On Roids comfortably won the final round on my scorecard.
Well On Roids has outworked and out performed his opponent in all aspects of the game today. He was simply too good and the decision should be no more than a formality. Over to the ring announcer for the scorecards.
Ladies and gentlemen, after 3 rounds of action, we go to the scorecards for a decision.
Judge Fedor Mirinova scores the fight 27:30
Judge Valeri Chadov scores the fight 27:30
Judge Aleksandr Martynov scores the fight 27:30
In favor of your winner, by unanimous decision... Duke On Roids!
An out of breath and clearly excited Duke On Roids thanked Ultra Fight Gear for their help and support (and free stuff they sent him).
|
|
|
|
|
|
|
|
|
|
|
|
|
|
|
|
|
|
|
|
|
|
|
| S |
C
A |
G |
S |
C
B |
G |
|
S |
C |
G |
|
energy
A | B |
|
hype
A | B |
|
pop
A | B |
|
mgr
A | B |
|
FIGHT
RATING
72% |
|
|
|
|
|
|
|
Undercard bout
|
Coming up we have a lightweight MMA rules bout between Ryan Taylor (ranked 0 p4p, 0 weight class) and Glen Starner (ranked 0 p4p, 0 weight class). Taylor comes to the cage accompanied by Jump Around by House of Pain. Both fighter's entrance songs getting the crowd jumping here.
 |
|
 |
| 170 cm
31
167 lbs
15 - 7 - 0 |
|
172 cm
29
165 lbs
13 - 8 - 0 |
Good wrestling
Excellent boxer
Very quick |
|
ADCC Champion
World class boxer
Good gas tank |
|
| |
|
Ladies and gentlemen. This fight is 3 rounds, in the lightweight division.
Introducing the fighter to my left, fighting out of the red corner.
With a record of
15 - 7 - 0, fighting out of St Petersburg, Ryan Taylor!
And introducing the fighter to my right, fighting out of the blue corner.
With a record of
13 - 8 - 0, fighting out of Amsterdam, Glen Starner!
The judges for this bout are Vladimir Khabensky, Konstantin Menshow and Aleksei Zolotukhin.
The bell rings for round one and we are underway!
Taylor clinches up against the cage.
Taylor is looking for a takedown.
Taylor drops to a knee looking for a takedown but Starner gets the underhooks and prevents it.
Starner misses with a short punch on the inside.
Taylor tries to pull guard but Starner won't allow it.
That's three failed takedown attempts in the round for Ryan Taylor. That's going to take a lot out of him.
Starner is trying to stall.
Taylor changes levels and goes for a takedown here. Starner fights it off and pushes away nicely.
Starner throws out a token jab with nothing on it.
Starner throws a right hand that Taylor ducks under and follows up with a left that Taylor also avoids with ease.
Starner lands a jab followed by a vicious hook that sends Taylor sprawling to the canvas. Starner follows him down, looking for the kill. Can Taylor hang on?
Taylor is rocked!
It looks like Ryan Taylor has been cut.
The fighters are pressed up against the cage, both looking to find a bit of space to work.
The crowd cheering loudly, showing their appreciation for the quality fight we're seeing here.
It looks like the ref is thinking about a standup.
Starner uses his free foot to push down on Taylor's thigh. Eventually he works his other foot free and he's advanced to mount - this is trouble for Taylor.
Oh Taylor is still in real trouble! Will he be able to recover?!!
Starner lands a heavy shot. That's hurt Taylor! Starner sees the opportunity and turns up the heat - strike after strike land to the defenseless Taylor and the ref dives in to save him! This one is all over!
Ladies and gentlemen, after 1:58 of round 1, we have a winner by way of KO (Strikes). Glen Starner!
Glen Starner decided to thank the fans in attendance for making a great atmosphere. It seemed to go down pretty well.
|
|
|
|
|
|
|
|
|
|
|
|
|
|
|
|
|
|
|
|
|
|
|
| S |
C
A |
G |
S |
C
B |
G |
|
S |
C |
G |
|
energy
A | B |
|
hype
A | B |
|
pop
A | B |
|
mgr
A | B |
|
FIGHT
RATING
100% |
|
|
|
|
|
|
|
Co-main event
|
Coming up we have a welterweight MMA rules bout between Snabbo Smido (ranked 0 p4p, 0 weight class) and Roger Marsden (ranked 0 p4p, 0 weight class). Smido kept the crowd waiting but all that was forgotten when his ring entrance music started. The incomparable musical genius that is Breathe. Both these guys have really solid chins. Will we see a standup war or will they both decide that a knockout is unlikely and try to win the fight elsewhere?
 |
|
 |
| 179 cm
36
182 lbs
25 - 19 - 0 |
|
225 cm
34
185 lbs
16 - 16 - 0 |
Good wrestling
Excellent boxer
Insanely flexible |
|
ADCC Champion
World class boxer
Granite chin |
|
| |
|
Ladies and gentlemen. This fight is 3 rounds, in the welterweight division.
Introducing the fighter to my left, fighting out of the red corner.
With a record of
25 - 19 - 0, fighting out of St Petersburg, Snabbo Smido!
And introducing the fighter to my right, fighting out of the blue corner.
With a record of
16 - 16 - 0, fighting out of St Petersburg, Roger Marsden!
The judges for this bout are Aleksandr Martynov, Vladimir Khabensky and Ivan Kurochkin.
The bell rings for round one and we are underway!
A big right from Marsden misses.
Marsden uses decent footwork to sidestep a right hand from Smido.
Nice sprawl there from Smido as Marsden shoots in.
Smido avoids the body shot from Marsden.
Marsden looking to shoot here. He's gone for it and he's landed a takedown into side control! Oh, that's bad for Smido!
Smido is trying to control Marsden's posture but Marsden avoids it.

Marsden swings around for an armbar but Smido sees it coming a mile off and turns beautifully into Marsden's guard.
Smido throwing strikes but missing.
Marsden looking for submissions from the bottom here. Moving his hips around, possibly looking for an armbar.
Smido keeps in close for a moment and lands a decent shot to the side of Marsden's head.
Marsden is throwing his legs up, looking for submissions. Smido is aware though and is defending well.
The crowd cheering loudly, showing their appreciation for the quality fight we're seeing here.
Marsden looking for a sweep. Not yet Marsden, not yet.
That's one minute gone in the round.
Marsden has an active guard here but Smido has managed to pass into half guard.
Marsden looking for submissions off his back.
Marsden wants to improve his position but Smido is controlling well.
Smido stalling away here and it's allowed Marsden to slip out his trapped foot and regain full guard.
Smido engaging in some classic timewasting tactics.
Smido stands up and waves to Marsden to follow him.
That's two minutes gone in the round.
Marsden chopped to the floor by a nice leg kick but he springs right back up before Smido can pounce on him.
Smido takes an uppercut right on the button but keeps his composure.
Smido dances in quickly and lands a nice inside leg kick on Marsden. That did some damage!
Marsden misses with an uppercut. Smido saw that one coming.
Smido keeps the fight standing with a nice sprawl.
Marsden swings for the body but Smido moves out of range.
Smido moves out of range as Marsden strikes.
Marsden misses with a series of wild punches.
This has been an exciting period of action!
Marsden throws a hard body shot but it just misses.
Marsden connects with the punch.
Marsden throws a body punch but Smido moves out of range.
That's three minutes gone in the round.
Nice takedown defense from Marsden. No joy for Smido on that attempt.
Smido misses with a straight left.
Marsden misses the shot to the body.
Smido lands with a good body shot.
Smido uses some good footwork to avoid the body shot by Marsden.
Smido lands with a hook. Marsden tried to avoid it but it clipped the top of his head.
Marsden tries to shoot in for a takedown. He's got hold of a leg but Smido swivels and escapes.
Snabbo Smido has stuffed three takedown attempts in the round now. That's going to take a lot out of Roger Marsden.
Marsden tests Smido's chin there with a solid looking shot.
Smido lands with a nice low kick. That'll leave a bruise.
Smido bobs and weaves into range and then changes levels and scores with a nice takedown into side control.
The ref warns both fighters not to hold the cage as they work up against the meshing.
Smido working the head and body with strikes.
This is a great period of action - very entertaining stuff!
Smido looking to control but instead Marsden has slipped a leg in, to regain half guard.
Marsden is a painfully thin specimen of a man. You do wonder whether a good body kick would snap him clean in two.
Marsden looking for submissions from an awkward position here.
That's four minutes gone in the round.
Smido is figuring out what he wants to do next.
Marsden tries to roll over but Smido keeps him under control.
Smido passes to full mount!
Marsden taking shots to the head.
As the round comes to an end the crowd are showing their appreciation for a great round of action.
Marsden manages to regain half guard. Good work.
Marsden looking for submissions from an awkward position here.
And thats the end of the round the fighters go back to their corners.
That was a close round but I would say that Snabbo Smido will probably get the nod.
That's the end of the interval. I'm sure that seemed a lot quicker than a minute for our two fighters! Back to the action.
Marsden scores with a one two! Smido had his feet all tangled up there and couldn't avoid the strikes.
Marsden fakes high and swings low for a body shot but Smido manages to avoid it.
Smido thows a left - swing and a miss!
Marsden throws a nice hook to the body that draws an oooh from the crowd.
Marsden throws a right and a left that both miss.
Smido displays good takedown defense there as he swats away a double leg from Marsden.
Smido displays some good footwork, moving neatly out of range as Marsden throws out the jab.
Roger Marsden seems to be the more aggressive standup fighter in this bout.
Smido avoids the body shot from Marsden.
Smido keeping a good distance there, avoiding the body shot.
Marsden moves out of range of the strikes.
Marsden throws a good cross that connects.
Marsden bobs and weaves and throws out a fast jab that snaps Smido's head backwards.
Smido takes one to the side of the head.
Marsden misses with a body punch
and Smido counters with a takedown into side control! That could mean trouble for Marsden!
That's one minute gone in the round.
Smido happy to just control the position for now.
Smido is working Marsden over with some ground and pound from side control.
Smido misses with an attempted head punch from side control.
Smido slows the pace down.
Smido scores with a couple of short elbows.
Smido slows the pace down.
Marsden is positioning himself to get back to half guard.
Marsden is not in a great position here, taking some shots.
That's two minutes gone in the round.
Marsden sneaks a leg under to get back to half guard.
Marsden looking for submissions off his back.
Marsden is refusing to be controlled, as Smido sits in half guard.
Smido not throwing his punches with enough precision this time.
The fans in attendance giving it up for the two fighters, who have really let it all hang out in the last minute or so!
Marsden blocking the ground and pound attempt from Smido.
Smido is nestled in close to Marsden, controlling him well. He's worked in a nice elbow to the side of the head as well, for good measure.
Smido prevents Marsden from improving his position.
That's three minutes gone in the round.
Smido missing with the ground and pound from half guard.
Smido is trying to control. Marsden wants to improve his position but can't escape this time.
Marsden is looking to sinch up a guillotine here but Smido pulls his head out easily.
Marsden is in trouble now - Smido has advanced to mount!
Smido with a couple of short strikes.
Smido landing shots from mount.
Smido lands a big shot there that rocks Marsden but he's holding on and managing to survive for now.
Marsden is in all sorts of trouble here.
Smido looking to control and managing it successfully.
That's four minutes gone in the round.
The crowd are loving this. Great action here.
Smido lands a big shot there that rocks Marsden but he's holding on and managing to survive for now.
Smido lands a couple of nice shots there from mount.
Marsden takes a big shot to the head but keeps on trying to improve his position.
Smido is landing with some decent strikes but Marsden is trying to advance his position so the referee is letting the fight continue.
The fighters are pressed up against the cage, both looking to find a bit of space to work.
The crowd are going absolutely nuts as the round comes to an end - what a fantastic round of action!
Smido lands an elbow that was bordering on illegal but the referee lets it go with a warning.
Smido pausing momentarily but resumes with a couple of decent strikes that do a bit of damage.
Marsden is rocked!
Smido content just to control the position here.
Marsden is still in real trouble! Can Smido finish him?
Smido lands a big elbow - Marsden is in trouble! More strikes from the mount and Marsden is forced to tap out!
Ladies and gentlemen, after 4:56 of round 2, we have a winner by way of Submission (Strikes). Snabbo Smido!
Snabbo Smido thanked the fans post fight for their support.
|
|
|
|
|
|
|
|
|
|
|
|
|
|
|
|
|
|
|
|
|
|
|
| S |
C
A |
G |
S |
C
B |
G |
|
S |
C |
G |
|
energy
A | B |
|
hype
A | B |
|
pop
A | B |
|
mgr
A | B |
|
FIGHT
RATING
43% |
|
|
|
|
|
|
|
Main event
|
Coming up we have a featherweight MMA rules bout between Sigvard Aurelius (ranked 0 p4p, 0 weight class) and Lager Assassin (ranked 0 p4p, 0 weight class). Aurelius's ring entrance music is that housewives' favourite, Marcia Carolus Rex. Assassin has chosen yes as his entrance music. Man, I cannot wait for this one!
 |
|
 |
| 156 cm
35
148 lbs
26 - 7 - 2 |
|
170 cm
34
149 lbs
31 - 11 - 1 |
Good wrestling
World class boxer
Cardio machine |
|
ADCC Champion
World class boxer
Good gas tank |
|
| |
|
Ladies and gentlemen. This fight is 5 rounds, for the featherweight championship of the world!
Introducing the champion to my left, fighting out of the red corner.
With a record of
26 - 7 - 2, fighting out of St Petersburg, Sigvard Aurelius!
And introducing the challenger to my right, fighting out of the blue corner.
With a record of
31 - 11 - 1, fighting out of London, Lager Assassin!
The judges for this bout are Dmitry Maklakov, Fedor Mirinova and Valeri Chadov.
The bell rings for round one and we are underway!
Aurelius shakes his hands off, looking to compose himself, but takes a jab to the jaw whilst he does it.
Aurelius circles away from the clinch attempt.
Assassin slips in close and lands a nice hook before moving back out of range.
Aurelius keeps the fight on the outside.
Aurelius swings for the body but Assassin moves out of range.
Assassin closes the distance and presses his opponent up against the cage.
Aurelius blocks a punch to the side of the head.
Assassin misses with a punch on the inside.
Assassin swings away with an uppercut that misses.
Aurelius blocks a body shot from Assassin.
Aurelius lands a nice shot to the body.
Aurelius takes a shot to the head.
An uppercut on the inside fails to land for Assassin.
That's one minute gone in the round.
Aurelius misses with a shot to the kidneys.
Still in the clinch, Aurelius scores with a nice short uppercut.
Aurelius blocking some punches.
A short right from Aurelius on the inside.
Assassin tries for a takedown but Aurelius manages to get underhooks.
Assassin makes some space for himself and lands an uppercut.
Assassin fails to land with a short punch on the inside.
Assassin tries to land a shot to the body but it's blocked.
Assassin lands with a light punch inside.
Assassin doesn't land with the attempted body shot.
Assassin misses with a short punch on the inside.
Aurelius blocks a couple of punches on the inside.
Aurelius works for underhooks and lands a body shot in the process.
An uppercut on the inside fails to land for Assassin.
Aurelius blocking some punches.
A right handed body shot lands from Aurelius.
That's two minutes gone in the round.
We've seen a great period of action over the last minute or so - credit to both fighters for going all out!
Aurelius can't find room to land a body shot as Assassin controls the action.
Aurelius pushes Assassin back against the cage and lands a hook to the side of the head.
Assassin throws a punch but it's blocked by Aurelius.
Aurelius lands a nice looking hook to the body, against the cage.
Assassin throws a blind hook that connects with the side of Aureliuss head.
Assassin misses with a short punch on the inside.
Assassin tries for a takedown but Aurelius manages to get underhooks.

Aurelius breaks from the clinch.
Assassin shoots in but Aurelius avoids the takedown attempt easily.
Sigvard Aurelius has stuffed three takedown attempts in the round now. That's going to take a lot out of Lager Assassin.
A good leg kick by Aurelius.
Assassin punishes Aurelius's body with a nice straight punch.
That's three minutes gone in the round.
Aurelius throws a half hearted mid kick.
Assassin fails to land with the punch combination there - jab, cross, hook, miss, miss, miss.
Assassin drives through with a really nice takedown into side control.
Aurelius can't do much from the bottom here.
Assassin misses with an attempted head punch from side control.
Aurelius struggling a bit here.
Assassin throwing strikes but missing, from side control.
An elbow from Assassin crashes against the mat.
That's four minutes gone in the round.
Aurelius struggling a bit here.
Assassin trying to control the action but Aurelius is working from the bottom.
Assassin lands a nice forearm strike.
The ground and pound from Assassin seems to be hitting the mat more than his opponent.
Fantastic stuff here - a very entertaining period of action, which has drawn cheers from the crowd.
Aurelius gets one leg under and gets the fight to half guard.
Assassin thows a huge punch but Aurelius dodges it nicely.
As the round comes to an end the crowd are showing their appreciation for a great round of action.
Assassin drops an elbow to the side of Aurelius's head.
Assassin trying to pass the guard but Aurelius defending well.
Aurelius might be looking to lock onto one of his opponent's long limbs for a submission, whilst we're on the ground.
Aurelius avoiding damage under a succession of punches from Assassin.
And thats the end of the round the fighters go back to their corners.
Lager Assassin dominated that round.
The referee calls time. The cornermen exit stage left and we're back to business.
Assassin lands a vicious shot with the stealth of a sniper and the strength of a viper. Are vipers that strong? I can think of lots of things that are stronger than a viper - not many rhyme with sniper though.
Aurelius defends well against a solid takedown attempt from Assassin.
Assassin throws a hook but Aurelius blocks it.
Aurelius avoids the clinch attempt nicely.
The fight stays on the outside here - Assassin looks like he's thinking about clinching though.
Assassin tries to clinch up against the cage, rushing in to close the distance. Aurelius manages to break the clinch and circles back to the middle of the mat.
Assassin throws a left and a right that both miss
and Aurelius counters with a quick right hand to the jaw.
Assassin tries to close the distance and clinch up but Aurelius swats him away and circles back towards the center.
That's one minute gone in the round.
Assassin misses with a body shot.
Assassin misses with a hook. Aurelius ducked under it nicely.
Assassin throws a big shot that misses.
Assassin clinches with his opponent.
Aurelius lands a body punch in the clinch.
Aurelius prevents the takedown attempt.
Assassin misses with a punch on the inside.
Assassin lands a shoulder strike that jolts his opponent's head backwards.
Assassin swings wildly with an uppercut but Aurelius uses good head movement to avoid it.
Aurelius can't break the clinch.
That's two minutes gone in the round.
Aurelius lands a hook that snaps the head of Assassin backwards.
Assassin throws a head punch that misses.
Aurelius can't find room to land a body shot as Assassin controls the action.
Assassin goes for a takedown in the clinch but Aurelius prevents it.
Sigvard Aurelius has stuffed three takedown attempts in the round now. That's going to take a lot out of Lager Assassin.
Assassin tries to land a shot to the body but it's blocked.
Aurelius blocking some punches.
Aurelius works for underhooks and lands a body shot in the process.
A battle for position here, against the cage.
Assassin goes for a takedown attempt but Aurelius pushes him away and we're back to fighting at a distance.
We've seen a great period of action over the last minute or so - credit to both fighters for going all out!
Aurelius moves out of range as Assassin strikes.
That's three minutes gone in the round.
Aurelius connects with a high kick.
Aurelius moves out of range as Assassin strikes.
Lager Assassin seems to be the more aggressive standup fighter in this bout.
Assassin tests Aurelius's chin there with a solid looking shot.
Aurelius is pinned up against the cage taking some big shots here. The referee is looking closely deciding whether he should stop the fight.
Assassin fails with a takedown attempt from distance.
A big left from Assassin misses.
Aurelius lands a nice leg kick that just misses Assassin's sensitive parts.
That's four minutes gone in the round.
Aurelius throws a body kick that digs right into the meat.
Assassin tries to clinch
and Aurelius counters with an inside leg kick.
The crowd cheering loudly, showing their appreciation for the quality fight we're seeing here.
Aurelius staying out of range there.
Assassin clinches with his opponent.
Assassin working aggressively here.
Aurelius breaks the clinch and we're back to striking at distance.
Aurelius moves out of range of the strikes.
As the round comes to an end the crowd are showing their appreciation for a great round of action.
Aurelius misses with a low kick as Assassin jumps back.
Aurelius misses with a body kick.
And thats the end of the round the fighters go back to their corners.
That was a close second round but I would say that Sigvard Aurelius will probably get the nod.
The fighters get back to their feet, the hooter sounds and we're back to the action!
Aurelius checks a low kick from Assassin.
Assassin fails with a takedown attempt.
Aurelius keeping at a good range here, avoiding a leg kick.
Lager Assassin seems to be getting the better of the standup.
Assassin is looking to take this fight into the clinch.
Assassin shoots for a double leg takedown but Aurelius sprawls well. He's pushed Assassin's face into the mat and manages to get back to his feet relatively easily.
Assassin sees a low kick coming and goes to check it, but it's actually a body kick and it thuds into his unprotected ribs.
Aurelius throws a right hand that Assassin ducks under and follows up with a left that Assassin also avoids with ease.
That's one minute gone in the round.
Nice defenses there by Aurelius.
Aurelius keeping his hands up high there, blocking the jab from Assassin.
Aurelius is looking to land body kicks.
Assassin lands a jab to the head.
Nice takedown defense from Aurelius. No joy for Assassin on that attempt.
Sigvard Aurelius has stuffed three takedown attempts in the round now. That's going to take a lot out of Lager Assassin.
Assassin rushes Aurelius and pushes him back against the cage in a clinch.
Assassin misses with a short punch on the inside.
Aurelius misses with a punch to the body.
Assassin misses with a punch on the inside.
That's two minutes gone in the round.
Aurelius lands with a quick shot inside that doesn't really do much damage.
Assassin's head jolts backwards as he takes an uppercut right on the button!
Aurelius's corner calls for him to break the clinch, which he does.
Aurelius looks to land a body kick but Assassin moved away.
Assassin swings and misses with a hook to the body.
Assassin fakes high and swings low for a body shot but Aurelius manages to avoid it.
Aurelius gets cracked there but stands up to it.
Assassin is using his reach advantage to land shots from outside his opponent's range.
Assassin looking for a takedown here - he's got it.
This is a great period of action - very entertaining stuff!
Aurelius pulls Assassin in to control the position.
That's three minutes gone in the round.
Assassin makes a bit of distance and scores with some ground and pound, still in guard.
Assassin trying to control but Aurelius is working from the bottom.
The ref warns both fighters not to hold the cage as they work up against the meshing.
Assassin stands up and looks to throw the legs aside to pass to side control. Aurelius swivels though and keeps the full guard.
Aurelius wants to sweep but no luck.
Aurelius preventing the ground and pound from doing any damage.
Assassin throwing strikes but missing.
Assassin with a flurry of punches that miss.
Assassin preventing the sweep.
Aurelius is working hard here to advance position.
The fighters are pressed up against the cage, both looking to find a bit of space to work.
That's four minutes gone in the round.
Aurelius managing to control the position.
Assassin throwing strikes but missing.
Aurelius working the defensive guard well to avoid strikes from Assassin.
Assassin pushing down on Aurelius's thigh, trying to pass to half guard. He's managed it... Nice work.
Assassin is thwarting Aurelius's attempts to control the position.
Assassin has the superior BJJ but he's also working some ground strikes into his gameplan.
The crowd applaud the fighters efforts here as the round comes to an end.
Assassin throwing shots but they're hitting the canvas more than the man.
Aurelius trying to control but Assassin postures up.
And thats the end of the round the fighters go back to their corners.
Lager Assassin really dominated that round.
That's time! Aurelius's corner gives him a slap on the ass as he gets ready to fight.

Assassin lands a vicious shot with the stealth of a sniper and the strength of a viper. Are vipers that strong? I can think of lots of things that are stronger than a viper - not many rhyme with sniper though.
Assassin throws an uppercut from half a mile away. Aurelius sees it coming and avoids it easily.
Aurelius slips a jab and a cross from Assassin.
Assassin misses with the combination.
Assassin ducks down and throws a hook to the body but Aurelius moves away.
Assassin avoids the body shot from Aurelius.
That's one minute gone in the round.
Assassin tries to land with a swinging hook to the body but Aurelius was well out of range. Poor timing from Assassin.
Assassin fails in his attempt to clinch.
A left lands for Assassin.
A left lands for Assassin.
Aurelius misses with a two punch combination.
Aurelius takes a jab on the nose there. A little bit of blood seems to be coming out. Hopefully that won't affect his breathing.
Aurelius gets caught on his heels momentarily as he allows Assassin to score an easy takedown into full guard.
Assassin scoring with punches to the head and body.
That's two minutes gone in the round.
Assassin in full guard, throwing the ground and pound. No damage this time.
Aurelius working the defensive guard well to avoid strikes from Assassin.
Aurelius controls Assassin momentarily but Assassin frees himself.
Assassin throws a big elbow that misses.
We've seen a great period of action over the last minute or so - credit to both fighters for going all out!
Assassin stopping the sweep attempt from Aurelius.
Assassin throwing shots from guard but he's hitting more mat than opponent.
Assassin stands and throws Aurelius's legs to the side, diving into side control.
That's three minutes gone in the round.
Aurelius is trying to get back to half guard. He's pushing on Assassin's leg. He's managed it. Nice work.
Assassin is keeping good posture, landing some ground and pound.
Assassin throwing punches and elbows but they're not doing any damage.
Aurelius trying to hold on to Assassin's head to control him but Assassin postures up.
Assassin is trying a forearm choke
I don't think that's going to do much at this level of the game.
Assassin wants to take a breather but Aurelius is having none of it.
That's four minutes gone in the round.
Aurelius is looking to control Assassin's leg but it's slowly edging free. Can Aurelius avoid being mounted?
Assassin missing with some ground and pound from the half guard.
Assassin throwing shots but they're hitting the canvas more than the man.
Aurelius is positioning himself well to prevent Assassin advancing to mount.
Assassin not throwing his punches with enough precision this time.
Assassin thows a wild elbow that connects with the canvas.
The crowd applaud the fighters efforts here as the round comes to an end.
Assassin throwing shots but they're hitting the canvas more than the man.
Assassin throwing shots but Aurelius is blocking nicely.
Assassin not landing any meaningful shots this time.
And thats the end of the round the fighters go back to their corners.
Lager Assassin dominated that fourth round.
The fighters get back to their feet, the hooter sounds and we're back to the action! Let's hear some noise people - this is the final round!

Assassin doesn't manage to clinch there - Aurelius circles away.
Aurelius goes for a spinning back kick but it misses.
Assassin moves into range and throws a combination. A nice jab followed by a hook to the body.
Aurelius pulls out of a head kick attempt.
Assassin feints a jab promting Aurelius to slip. Assassin then demonstrates his capabilities by jabbing again. Aurelius slips again and ducks right into an uppercut.
Assassin shoots in for a takedown! He's got it and he's managed to land in side control! That's better than Assassin was expecting from the takedown attempt, I'm sure!
Aurelius manages to get back to half guard.
That's one minute gone in the round.
Aurelius blocking the ground and pound attempt from Assassin.
Assassin wants to pass to mount but Aurelius is defending the position.
Assassin is working for submissions here but there's nothing on.
Aurelius wants to control but Assassin is keeping busy and won't allow it.
Assassin looking for a kimura but he'll have to free his other leg if he wants to finish that. Perhaps he's just using it as a distraction technique.
Aurelius regains full guard. Nicely done.
Sigvard Aurelius has stepped it up - he knows he needs a finish here!
That's two minutes gone in the round.
Assassin postures up and lands a big shot to Aurelius's brow.
Assassin throwing strikes but missing.
Assassin pushing down on Aurelius's thigh, trying to pass to half guard. He's managed it... Nice work.
Aurelius is doing well to control the position and prevent Assassin from advancing to side control.
Aurelius won't allow Assassin to pass to mount.
Assassin throws a strike but Aurelius avoids it easily and moves to full guard.
Assassin stands up and looks to throw the legs aside to pass to side control. Aurelius swivels though and keeps the full guard.
That's three minutes gone in the round.
Aurelius looking to hit a scissor sweep but Assassin is one step ahead there.
Aurelius bucks up whilst keeping hold of a body lock, managing to reverse the position. Now he's in top in Assassin's guard.
Assassin looking for submissions from the bottom but instead Aurelius passes into side control.
Assassin sneaks a leg under to get back to half guard.
Aurelius is figuring out what he wants to do next.
The fighters are battling for position here. Assassin manages to regain full guard. Nice work.
That's four minutes gone in the round.
Assassin looking for subs off his back but Aurelius has passed one foot through into half guard.
Lager Assassin is fighting for a decision - hopefully he's judged it right and he's actually winning the fight.
Assassin desperately trying to maintain half guard.
Assassin tries to roll over but Aurelius keeps him under control.
Assassin trying to control but Aurelius postures up.
The crowd applaud the fighters efforts here as the round comes to an end.
Assassin regains full guard. Nicely done.
The crowd are loving this. Great action here.
Assassin not looking particularly offensive just at the moment.
Aurelius loading up with the ground and pound but he's missing more than he's landing in this flurry.
And that's the end of the fight!
Lager Assassin comfortably won the final round on my scorecard.
Well Assassin has outworked and out performed his opponent in all aspects of the game today. He was simply too good and the decision should be no more than a formality. Over to the ring announcer for the scorecards.
Ladies and gentlemen, after 5 rounds of action, we go to the scorecards for a decision.
Judge Dmitry Maklakov scores the fight 46:49
Judge Fedor Mirinova scores the fight 46:49
Judge Valeri Chadov scores the fight 46:49
In favor of your winner, by unanimous decision... Lager Assassin! Lager Assassin retains his featherweight title!
Lager Assassin managed to slip a mention for his sponsors, GTI - 1337 sponsors VERSUS, into his post fight interview.
|
|
|
|
|
|
|
|
|
|
|
|
|
|
|
|
|
|
|
|
|
|
|
| S |
C
A |
G |
S |
C
B |
G |
|
S |
C |
G |
|
energy
A | B |
|
hype
A | B |
|
pop
A | B |
|
mgr
A | B |
|
FIGHT
RATING
94% |
|
|
|
|
|
|
|
|
|
|
