 |
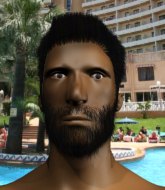
UFL 7: Tayahma vs Philip PBP Commentary |
Undercard bout
|
|
|
|
Undercard bout
|
|
|
|
Undercard bout
|
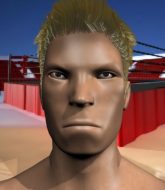
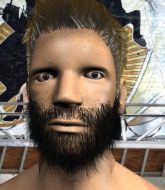
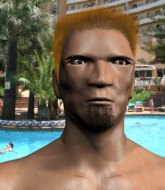
Coming up we have a middleweight MMA rules bout between Lee Sun Zi (ranked 0 p4p, 0 weight class) and Len Tendo (ranked 0 p4p, 0 weight class). Tendo has chosen si tu estuvieras aqui as his entrance music. Len Tendo has the better chin. Will he look to stand and bang today?
 |
|
 |
| 188 cm
25
195 lbs
0 - 0 - 0 |
|
175 cm
18
185 lbs
1 - 2 - 0 |
BJJ White Belt
Solid boxing
Self confident |
|
BJJ White Belt
Excellent MT
Prefers standup |
|
| |
|
Ladies and gentlemen. This fight is 3 rounds, in the middleweight division.
Introducing the fighter to my left, fighting out of the red corner.
With a record of
0 - 0 - 0, fighting out of Tokyo, Lee Sun Zi!
And introducing the fighter to my right, fighting out of the blue corner.
With a record of
1 - 2 - 0, fighting out of Tokyo, Len Tendo!
The judges for this bout are Taro Takaoka, Shirou Masuda and Hirohito Nitta.

The bell rings for round one and we are underway!
Sun Zi delivers a nice body kick.
Sun Zi scores with a head kick.
Tendo throws a head kick that misses.
Sun Zi avoids a kick to the body.
Tendo throws a head kick that misses and slips in the process. He scrambles back to his feet and the fighters circle.
Thud! ouch! good body kick from Tendo - that will leave a mark!
The fans in attendance giving it up for the two fighters, who have really let it all hang out in the last minute or so!
Tendo throws a sloppy head kick

and Sun Zi counters with a head kick that drops Tendo to the mat! Tendo scrambles across the canvas and gets back to his feet, still wobbly!

Tendo is rocked!

It looks like Len Tendo has been cut.
Sun Zi throws a sloppy head kick and Tendo moves out of range easily.
Sun Zi steps to his left, right into the path of a big body kick from Tendo. That one must have hurt.
Tendo pulls out of a head kick attempt.
Tendo tries to land a front kick but Sun Zi steps back. That was a bit too telegraphed.
Tendo misses with a half-hearted attempt at a head kick.
Sun Zi moves out of range of the body kick from Tendo.
An inside leg kick lands from Tendo.
Sun Zi closes this distance looking for a takedown but Tendo circles away.
Sun Zi is breathing heavily.

That's one minute gone in the round.
Tendo throws a head kick that misses.
A head kick misses from Tendo.
Sun Zi tries to clinch but fails miserably
and Tendo counters with an inside leg kick.
Tendo throws a head kick that misses.
Sun Zi is looking to clinch but Tendo is avoiding it.
Len Tendo is looking to keep the fight on the feet at all costs.
Sun Zi tries to close the distance and clinch up but Tendo swats him away and circles back towards the center.
That's a knee to de groin and it's over and out! Sun Zi crumples to the ground after an illegal strike from Tendo - the referee stops the clock and Sun Zi gets 5 minutes to recover from that one. "I'm sorry" says Tendo. Sun Zi manages to get back to his feet and the fight resumes.
Tendo throws a sloppy head kick and Sun Zi moves out of range easily.
Sun Zi fails with the takedown
and Tendo counters with a body kick.
Tendo throws a head kick that misses.
Tendo connects with a high kick.
Tendo misses with a half-hearted attempt at a head kick.
Len Tendo seems to be the more aggressive standup fighter in this bout.

That's two minutes gone in the round.
Tendo misses with a half-hearted attempt at a head kick.
A head kick misses from Tendo.
Sun Zi shoots in for a takedown. "I don't think so" says Tendo as he avoids it easily.
That's three failed takedown attempts in the round for Lee Sun Zi. That's going to take a lot out of him.
The crowd cheering loudly, showing their appreciation for the quality fight we're seeing here.
Tendo scoring well with a low kick there.
Sun Zi fails to land the takedown.
Sun Zi fails with the takedown
and Tendo counters with an inside leg kick.
Tendo scores with a head kick. Sun Zi tried to block it but didn't get his arm up in time.
Tendo gets cracked with a nice right hand there by Sun Zi.
Sun Zi gets his takedown attempt stuffed easily
and Tendo counters with a solid body kick.

That's three minutes gone in the round.
Tendo throws a front kick that sends Sun Zi stumbling back into the cage.
Tendo misses with a half-hearted attempt at a head kick.
Tendo pulls out of a head kick attempt.
Tendo tries a head kick but it misses.
Tendo pulls out of a head kick attempt.
Sun Zi throws a head kick that misses.
Sun Zi is looking to clinch but Tendo is avoiding it.
Tendo lets loose with a powerful body kick. Sun Zi will feel that in the morning.
Sun Zi tries for a takedown but Tendo circles away easily
and Tendo counters with a thumping low kick.
Sun Zi blocks a head kick by Tendo.
Sun Zi changes levels and looks for a double leg takedown. Tendo tries to avoid it but Sun Zi manages to keep hold of a leg and drag Tendo to the ground. Tendo escapes though and pops straight back up to his feet.

That's four minutes gone in the round.
Tendo pulls out of a head kick attempt.
Tendo avoids a kick to the body.
Sun Zi will be looking to protect his midsection after taking some solid kicks to the body.
Tendo scores with a head kick.
Sun Zi tries to clinch up against the cage, rushing in the close the distance. Tendo manages to break the clinch and circles back to the middle of the mat.
Sun Zi tries to clinch up.
Sun Zi misses with a takedown
and Tendo counters with a head kick.
Tendo tries a head kick but it misses.
Tendo scores with a kick to the body.
The crowd are going absolutely nuts as the round comes to an end - what a fantastic round of action!
Sun Zi fakes a head shot and lands one to the body.
The crowd are loving this. Great action here.
Tendo looking to take his opponent's legs away with the low kicks.
Tendo throws a head kick that misses
and Sun Zi counters with a kick to the head that grazes his opponent. Tendo is lucky that one didn't land flush.
And thats the end of the round the fighters go back to their corners.
That was a close round but I would say that Lee Sun Zi will probably get the nod.
The cut man is working on Len Tendo's cut.
That's time! Sun Zi's corner gives him a slap on the ass as he gets ready to fight.

Tendo throws a head kick that misses and slips in the process. He scrambles back to his feet and the fighters circle.
Sun Zi tries for a takedown but Tendo circles away easily
and Tendo counters with a body kick that brings a smile to the face of both fighters.
Tendo throws a head kick that half lands.
Tendo throws a head kick that misses and slips in the process. He scrambles back to his feet and the fighters circle.
Tendo throws a right high kick that is partially blocked by Sun Zi.

Sun Zi is rocked!
Tendo lands a big head kick that sends Sun Zi to the canvas! Tendo follows up with strikes from the mount that forces the ref to step in and stop the fight!
Ladies and gentlemen, after 0:35 of round 2, we have a winner by way of TKO (Strikes). Len Tendo!
An out of breath Len Tendo thanked his loyal fans in his post fight interview, giving them credit for his success over the course of his career.
|
|
|
|
|
|
|
|
|
|
|
|
|
|
|
|
|
|
|
|
|
|
|
| S |
C
A |
G |
S |
C
B |
G |
|
S |
C |
G |
|
energy
A | B |
|
hype
A | B |
|
pop
A | B |
|
mgr
A | B |
|
FIGHT
RATING
100% |
|
|
|
|
|
|
|
Undercard bout
|
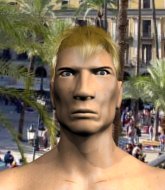
Coming up we have a super heavyweight MMA rules bout between Jimmy Thompson (ranked 0 p4p, 0 weight class) and Matheus Dias (ranked 0 p4p, 0 weight class). Jimmy Thompson could well score a knockout today. He has the power to get to Matheus Dias's chin.
 |
|
 |
| 224 cm
19
289 lbs
1 - 1 - 0 |
|
225 cm
25
300 lbs
1 - 1 - 0 |
Dangerous GnP
Good knees
Granite chin |
|
BJJ Blue Belt
Solid Muay Thai
Tends to cut |
|
| |
|
Ladies and gentlemen. This fight is 3 rounds, in the super heavyweight division.
Introducing the fighter to my left, fighting out of the red corner.
With a record of
1 - 1 - 0, fighting out of Tokyo, Jimmy Thompson!
And introducing the fighter to my right, fighting out of the blue corner.
With a record of
1 - 1 - 0, fighting out of Tokyo, Matheus Dias!
The judges for this bout are Shirou Masuda, Yukihiro Yamamoto and Shigeki Sano.
The bell rings for round one and we are underway!

Dias moves into the clinch.

Dias pushes off and circles away, back to the middle of the mat.
Thompson shoots in looking for a takedown but Dias manages to keep the fight standing, pushing Thompson's face into the canvas for good measure before circling away.
Dias instigates a clinch.
Dias's corner calls for him to break the clinch, which he does.

The fight moves into the clinch position.
Dias creates a bit of space for himself and sneaks an elbow through Thompson's defenses.

It looks like Jimmy Thompson has been cut.
Dias on the defensive, avoiding the knees to the body.
Dias breaks the clinch.
Dias closes the distance and pushes Thompson back into the cage.
Dias is trying to break the clinch but Thompson is controlling him.
Thompson tries to throw a body punch but Dias avoids it by throwing Thompson back against the cage.
Dias tries to land a knee to the head but misses.
Dias is trying to break the clinch but Thompson has him pressed against the cage.
Dias with a knee to the head.
We've seen a great period of action over the last minute or so - credit to both fighters for going all out!
Dias's corner calls for him to break the clinch, which he does.
Dias scores with a jab to the jaw of his opponent.
Dias instigates a clinch.
That's one minute gone in the round.
Dias pushes off and circles away, back to the middle of the mat.
Dias darts in and clinches Thompson up against the cage.
Dias can't break the clinch.
Dias breaks the clinch.
Dias has Thompson up against the cage in a clinch.
Dias's corner calls for him to break the clinch, which he does.
Dias clinches with his opponent.
Thompson with an attempt at a knee that misses.
Thompson lands a knee to the head.
It looks like Matheus Dias has been cut.
Dias blocks a couple of punches on the inside.
We've seen a great period of action over the last minute or so - credit to both fighters for going all out!
Dias drops to a knee looking for a takedown but Thompson gets the underhooks and prevents it.
Dias wants to push off and get back to the center of the mat but Thompson has him pressed against the cage.
Knees in the clinch landing for Thompson.

Dias decides to pull guard.
The fighters are pressed up against the cage, both looking to find a bit of space to work.
That's two minutes gone in the round.
We may be looking at a referee standup if the pace doesn't pick up soon.
Thompson trying to control the position from guard on top but Dias is wriggling around, looking for whatever he can.
Thompson throws an elbow that misses. Dias uses the momentum to reverse the position. He's now in Thompson's guard. Nice move by Dias!
Dias slows down the pace of the fight for a moment. He'll need to remain active if he doesn't want to see the fight stood back up.
We could do with one of the fighters taking the initiative a bit more on the ground - they're both waiting to capitalize on a mistake.

The ref stands the fighters back up because Jimmy Thompson just wasn't active enough.
Dias rushes Thompson and pushes him back against the cage in a clinch.
That's three minutes gone in the round.
Dias manages to break the clinch.
Dias closes the distance and clinches.
Thompson tries to score a body lock takedown but Dias shows good agility there to stay on his feet.
Thompson lands on the inside with an uppercut.
Dias wants to strike at distance but he can't break free of the clinch.
Thompson has Dias pressed against the cage, preventing Dias from circling away and getting back to striking at range.
Dias breaks from the clinch.
Thompson looks frustrated there after his takedown attempt is stuffed easily.
That's three failed takedown attempts in the round for Jimmy Thompson. That's going to take a lot out of him.
Thompson is breathing heavily.
Nice takedown defense from Thompson. No joy for Dias on that attempt.
Dias shoots in for a takedown but Thompson shows good takedown defense there and keeps this one on the feet.
The fight moves into the clinch position.
Thompson is looking for a takedown up against the cage. Dias gets underhooks though and prevents the takedown attempt.
Dias is trying to push Thompson away but Thompson has him pressed against the cage, so he's going nowhere.
That's four minutes gone in the round.
A short uppercut from Thompson.
Thompson has a body lock and is looking for a takedown. Dias is bouncing around trying to prevent the takedown and somehow he has indeed managed to stay on his feet.
Thompson tries to land knees in the clinch but Dias avoids the damage to the body.
Dias wants to push off and get back to the center of the mat but Thompson has him pressed against the cage.
Thompson goes for a takedown in the clinch but Dias prevents it.
Thompson misses with a shot to the kidneys.
Fantastic stuff here - a very entertaining period of action, which has drawn cheers from the crowd.
Dias effectively controlling the action here.
Dias's corner calls for him to break the clinch, which he does.
Dias has closed the distance and engaged Thompson in a clinch.
Dias looks like he'd prefer to be striking at range right now.
Dias breaks the clinch and we're back to striking at distance.
The crowd are going absolutely nuts as the round comes to an end - what a fantastic round of action!
Dias pushes Thompson up against the cage in a clinch.
Dias tries to break the clinch but Thompson is controlling the position.
Dias breaks the clinch.
Dias moves into the clinch.
And thats the end of the round the fighters go back to their corners.
Matheus Dias dominated that round.
Both fighters have cut men working on them during the interval.
OK. That's time! The bell goes and we're back to the action.
Dias moves into the clinch.
The fighters are going at a pretty good pace and they're both starting to sweat now.
Dias can't get the takedown.
Dias connects with a knee to the head.
Dias tries to score a body lock takedown but Thompson shows good agility there to stay on his feet.
Thompson is working for a takedown up against the cage. He can't get it on this occasion though.
Dias unloads a knee to the mid-section.
Dias holding his opponent close, against the cage.
We've seen a great period of action over the last minute or so - credit to both fighters for going all out!
Dias is trying to pull guard but Thompson has him pressed against the cage.
Jimmy Thompson has stuffed three takedown attempts in the round now. That's going to take a lot out of Matheus Dias.
Thompson misses with a knee strike.
Thompson tries to land a knee to the head but misses.
Dias lands a knee to the body.
Dias pulls Thompson into guard.
Dias is working the butterfly guard. He manages to land a nice scissor sweep and is now in half guard on the top. Nice move.
Both fighters are absolutely exhausted here.
Still in half guard, Dias seems content to control.
That's one minute gone in the round.
The referee must be thinking about standing these guys back up.
Dias's corner are shouting for him to control the position and he seems happy to oblige.

OK we're going to have a standup here. Matheus Dias hasn't been effective enough on the ground and the referee wants a restart.
Dias moves into the clinch.
That's two minutes gone in the round.
Dias breaks the clinch and we're back to striking at distance.
Dias closes the distance and pushes Thompson back into the cage.
Dias breaks the clinch and we return to the middle of the mat.
Dias clinches up with Thompson and pushes him back against the cage.
Dias breaks the clinch and we return to the middle of the mat.
Thompson defends well against a solid takedown attempt from Dias.
Dias goes for a high kick. It partially lands.
This is a great period of action - very entertaining stuff!
Dias has taken the fight to the clinch.
Dias using the Thai clinch to land knees to the body.
Thompson takes an elbow to the temple.
Dias breaks from the clinch.
Thompson gets tackled into the cage by Dias. Dias maintains the clinch.
Dias pulls Thompson into guard.
Dias bucks up whilst keeping hold of a body lock, managing to reverse the position. Now he's in top in Thompson's guard.
That's three minutes gone in the round.

Dias gets to his feet - Thompson follows without any prompting.
The fight moves into the clinch position.
Thompson keeps control of Dias as he tries to wriggle out of the double underhooks.
Dias putting his Muay Thai to good use. He has Thompson in a tight clinch and is doing some damage with knees to the body.
Dias is looking to take this one to the mat.
Matheus Dias seems to be working more effectively in the clinch in the fight so far.
Dias lands a glancing elbow in the clinch.
Thompson tries to land a knee to the body but he is off balance and Dias avoids it.
Dias breaks from the clinch.
Dias darts in and clinches Thompson up against the cage.
Dias pushes off and circles away, back to the middle of the mat.
Dias fails with a takedown attempt from distance.
Dias looks for a takedown but Thompson sprawls well.
That's four minutes gone in the round.
Dias moves into the clinch.
The crowd cheering loudly, showing their appreciation for the quality fight we're seeing here.
Dias looks like he'd prefer to be striking at range right now.
Dias manages to break the clinch.
Dias tries to score a power double leg takedown but Thompson sees that one coming and sprawls well. That will dishearten Dias somewhat.
Dias gets a clinch.
Dias has been the more effective fighter overall so far.
The crowd are going absolutely nuts as the round comes to an end - what a fantastic round of action!
Dias escapes the clinch and we're back to striking.
Dias clinches up with Thompson and pushes him back against the cage.
Thompson utilising his Muay Thai to score with a knee to the body.
Dias escapes the clinch and we're back to striking.
And thats the end of the round the fighters go back to their corners.
Matheus Dias showed his class in that round. I'd imagine he'll take it on all the scorecards.
Both fighters have cut men working on them during the interval.
The corners get their ten second warning. Both fighters stand from their stools and stare eachother down, ready to get back to the action. This is the final round!

Thompson shoots in but no luck this time.
Dias forces Thompson back against the cage and clinches.
Dias breaks the clinch and we return to the middle of the mat.
Dias closes the distance and clinches.
Dias stalling in the clinch but Thompson improves position.
Thompson tries for a takedown but Dias manages to get underhooks.
Dias escapes the clinch and we're back to striking.
Dias gets a clinch.
Thompson with an attempt at a knee that misses.
A frustrated look appears on Dias's face as he tries to break the clinch.
Thompson tries to land a knee to the head but Dias blocks with his arms.
Dias breaks from the clinch.
Dias lands a jab-cross combination.
Both fighters are breathing heavily.
The fans in attendance giving it up for the two fighters, who have really let it all hang out in the last minute or so!
Dias takes the fight into the clinch.
Thompson prevents Dias from breaking the clinch.
That's one minute gone in the round.
Dias breaks the clinch.
Dias has taken the fight to the clinch.
Thompson is trying to wear down his opponent with knees to the body.
Dias escapes the clinch and we're back to striking.
Dias moves into range and clinches up with Thompson.
Dias escapes the clinch and we're back to striking.
Dias moves into range and clinches up with Thompson.
Thompson keeps control of Dias as he tries to wriggle out of the double underhooks.
Dias breaks the clinch and we're back to striking at distance.
Nice takedown defense from Thompson. No joy for Dias on that attempt.
Dias lands a jab, followed by a cross and another cross, as Thompson backs up against the cage.
Dias lands three nice shots there - that looked like it hurt!
That's two minutes gone in the round.
Fantastic stuff here - a very entertaining period of action, which has drawn cheers from the crowd.
Dias avoids the clinch attempt nicely.
Matheus Dias seems to be getting the better of the standup.
Dias takes the fight into the clinch.
Thompson has Dias pressed against the cage, preventing Dias from circling away and getting back to striking at range.
Dias stops a takedown attempt from Thompson.
That's three failed takedown attempts in the round for Jimmy Thompson. That's going to take a lot out of him.
Dias with the Thai clinch, lands a knee to the head.
Dias wants to strike at distance but he can't break free of the clinch.
Dias lands an elbow inside that Thompson shrugs off.
Thompson with an attempt at a knee that misses.
Dias lands a hook to the side of the head.
Some stalling of biblical proportions here from Dias.
Dias breaks from the clinch.
Dias scores to the head and body with a nice combination!
Dias clinches with his opponent.
That's three minutes gone in the round.
Dias escapes the clinch and we're back to striking.
Dias has managed to clinch.
Dias prevents a takedown attempt there.
Dias's corner calls for him to break the clinch, which he does.
Thompson shoots in looking for a takedown but Dias manages to keep the fight standing, pushing Thompson's face into the canvas for good measure before circling away.
Dias has closed the distance and engaged Thompson in a clinch.
Matheus Dias is fighting for a decision - hopefully he's judged it right and he's actually winning the fight.
Thompson tries a knee to the head but Dias blocks it.
Thompson can't get the takedown.
Thompson has hold of a leg and is looking for a trip takedown. Dias avoids it nicely though and we remain in the clinch.
Dias breaks the clinch and we return to the middle of the mat.
Dias clinches.
That's four minutes gone in the round.
A nice glancing elbow lands by Dias.
Thompson is looking to score with knees to the body. Maybe he'll change it up and go body then head. Dias is defending well for now.
Dias manages to break the clinch.
Jimmy Thompson is looking to throw some combinations by the looks of things.
Thompson gets tackled into the cage by Dias. Dias maintains the clinch.
Dias escapes the clinch and we're back to striking.
Jimmy Thompson has stepped it up - he knows he needs a finish here!
Dias rushes Thompson and presses him up against the cage.
The fans in attendance giving it up for the two fighters, who have really let it all hang out in the last minute or so!
Thompson trying to land knees to the body.
Dias manages to break the clinch.
Dias has closed the distance and engaged Thompson in a clinch.
The crowd are going absolutely nuts as the round comes to an end - what a fantastic round of action!
Dias breaks from the clinch.
Dias shoots in and gets a takedown into Thompson's guard.
Dias decides he's had enough of playing guard and decides to stand. Come on Thompson, up you get!
And that's the end of the fight!
Matheus Dias comfortably won the final round on my scorecard.
Well Dias has outworked and out performed his opponent in all aspects of the game today. He was simply too good and the decision should be no more than a formality. Over to the ring announcer for the scorecards.
Ladies and gentlemen, after 3 rounds of action, we go to the scorecards for a decision.
Judge Shirou Masuda scores the fight 27:30
Judge Yukihiro Yamamoto scores the fight 27:30
Judge Shigeki Sano scores the fight 27:30
In favor of your winner, by unanimous decision... Matheus Dias!
|
|
|
|
|
|
|
|
|
|
|
|
|
|
|
|
|
|
|
|
|
|
|
| S |
C
A |
G |
S |
C
B |
G |
|
S |
C |
G |
|
energy
A | B |
|
hype
A | B |
|
pop
A | B |
|
mgr
A | B |
|
FIGHT
RATING
100% |
|
|
|
|
|
|
|
Undercard bout
|
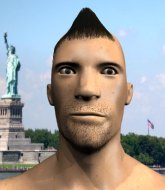
Coming up we have a heavyweight MMA rules bout between Leif GW (ranked 0 p4p, 0 weight class) and Daiki Hitoshi (ranked 0 p4p, 0 weight class). Daiki Hitoshi has the power to score a knockout today if he connects clean with Leif GW's chin.
 |
|
 |
| 180 cm
25
240 lbs
1 - 0 - 0 |
|
187 cm
18
243 lbs
1 - 1 - 0 |
BJJ Purple Belt
Basic striking
Big heart |
|
BJJ Purple Belt
Counter fighter
Solid chin |
|
| |
|
Ladies and gentlemen. This fight is 3 rounds, in the heavyweight division.
Introducing the fighter to my left, fighting out of the red corner.
With a record of
1 - 0 - 0, fighting out of Tokyo, Leif GW!
And introducing the fighter to my right, fighting out of the blue corner.
With a record of
1 - 1 - 0, fighting out of Tokyo, Daiki Hitoshi!
The judges for this bout are Shigeki Fujiwara, Taro Takaoka and Yukihiro Shimada.
The bell rings for round one and we are underway!
GW doesn't succeed with the takedown
and GW takes a counter punch right on the button for his troubles.
GW shoots and misses
and Hitoshi counters with a shoot takedown. GW fights it but they end up in guard.
GW is breathing heavily.
The referee looks like he's ready to step in and stand the fighters back up.
Hitoshi trying to pass the guard but can't manage it just yet.
Hitoshi sneaks a leg through and gets to half guard. That was like a knife through butter how easily he passed GW's guard.
We've seen a great period of action over the last minute or so - credit to both fighters for going all out!

Hitoshi is sneakily working for an arm triangle but GW sees it coming and defends easily.
GW is trying to maintain the position but Hitoshi is very close to passing his half guard.
Hitoshi is trying for a guillotine from the top but the pressure isn't in the right place so GW is just riding it out for now. Hitoshi eventually gives up the hold.
Hitoshi is sneakily working for an arm triangle but GW sees it coming and defends easily.
Hitoshi is looking for a kimura. It's going to be difficult to finish that from half guard though and GW defends it well.
Hitoshi seems to be working for a kimura but GW defends the submission attempt.
That's one minute gone in the round.
GW is trying to get back to full guard.
Hitoshi seems like he's working for an arm triangle here. He's freed his trapped foot and he's rotating nicely. GW is in big trouble! He's tapping out! This one is aaaaaaaaaaaall over!
Ladies and gentlemen, after 1:34 of round 1, we have a winner by way of Submission (Arm Triangle). Daiki Hitoshi!
After the fight, Daiki Hitoshi was humble in paying tribute to his opponent but made it clear he wants to go on to bigger and better things. It seemed to go down well with the crowd who cheered him loudly.
|
|
|
|
|
|
|
|
|
|
|
|
|
|
|
|
|
|
|
|
|
|
|
| S |
C
A |
G |
S |
C
B |
G |
|
S |
C |
G |
|
energy
A | B |
|
hype
A | B |
|
pop
A | B |
|
mgr
A | B |
|
FIGHT
RATING
67% |
|
|
|
|
|
|
|
Undercard bout
|
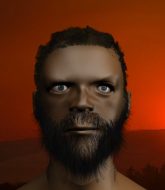
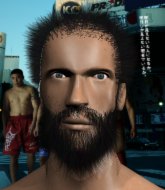
Coming up we have a heavyweight MMA rules bout between Tmothy Aztec (ranked 0 p4p, 0 weight class) and Kyrie Lirving (ranked 0 p4p, 0 weight class). Tmothy Aztec has the edge in experience - let's see if he can make that count tonight.
 |
|
 |
| 180 cm
22
225 lbs
2 - 3 - 0 |
|
178 cm
18
267 lbs
0 - 1 - 0 |
BJJ Blue Belt
Solid boxing
Self confident |
|
BJJ White Belt
Decent boxing
Tends to cut |
|
| |
|
Ladies and gentlemen. This fight is 3 rounds, in the heavyweight division.
Introducing the fighter to my left, fighting out of the red corner.
With a record of
2 - 3 - 0, fighting out of Tokyo, Tmothy Aztec!
And introducing the fighter to my right, fighting out of the blue corner.
With a record of
0 - 1 - 0, fighting out of Tokyo, Kyrie Lirving!
The judges for this bout are Shigeki Fujiwara, Tatsuya Matsuyama and Ren Mimura.
The bell rings for round one and we are underway!
Aztec throws a looping left and ducks down for a takedown. He's got his arms around Lirving's waist but Lirving gets an underhook and avoids the takedown by throwing Aztec off to one side.
Aztec gets a clinch.
Lirving is trying to work out of this bad position, with his back against the cage.
Lirving has had enough of the clinch but Aztec keeps him there for the moment.
A frustrated look appears on Aztec's face as he tries to break the clinch.
Lirving goes for a body shot but it's blocked.
Aztec has Lirving pressed against the cage, preventing Lirving from circling away and getting back to striking at range.

Aztec has managed to pull guard. Let's see whether he can work an aggressive guard. It will also be interesting to see what tactics Lirving uses from the top position.
Lirving tries to free his leg and advance position but Aztec is retaining full guard.
Lirving trying to control the position from guard on top but Aztec is wriggling around, looking for whatever he can.
Lirving looking to sit in guard and control but Aztec gets the butterfly guard and sweeps. He's now in the guard on the top.
Aztec stops Lirving from standing up.
That's one minute gone in the round.
Aztec passes Lirving's right leg, so he's now in half guard.
Aztec performing his best blanket impression for a moment.
Lirving is trying to maintain the position but Aztec is very close to passing his half guard.
Aztec content to sit in half guard and control for a moment.

Aztec decides to return to a standing position.
That's two minutes gone in the round.
Aztec shoots in and drives through. Lirving sprawls well.
Aztec shoots in for a double leg but Lirving sprawls well. That's going to sap some energy.
That's three failed takedown attempts in the round for Tmothy Aztec. That's going to take a lot out of him.
Aztec shoots in looking for a takedown. Lirving tries to sprawl out of it but Aztec keeps driving through. The fighters are pinned against the cage. Lirving manages to get underhooks and after a bit of a struggle, circles away and we're back to standing.
Aztec fakes high and shoots in for a takedown but Lirving avoids it really well and circles away.
Aztec shoots in for a takedown - he's clinched up with Lirving but Lirving pushes him off and we're back to square one.
Lirving closes this distance looking for a takedown but Aztec circles away.
Lirving closes the distance and clinches.
Lirving drops down looking for an ankle pick but Aztec pulls his leg out and moves away.
That's three minutes gone in the round.
Aztec clinches.
Lirving tries for a takedown but Aztec manages to get underhooks.
Aztec successfully pulls guard.
Aztec wriggles free and stands up.
Aztec shoots in for a takedown - he's clinched up with Lirving but Lirving pushes him off and we're back to square one.
Aztec is looking to clinch but Lirving is avoiding it.
Lirving fakes a strike and closes the distance, dragging Aztec to the ground. Lirving is now in Aztec's guard.
Aztec not looking particularly offensive just at the moment.
That's four minutes gone in the round.
Lirving missing there with some ground and pound from the guard.
Lirving trying to control but Aztec is working from the bottom.
Lirving is sitting in guard, working some ground and pound.
We've seen a great period of action over the last minute or so - credit to both fighters for going all out!
Lirving wants to control from the top but Aztec keeps moving.
Lirving really doesn't want to stay on the ground with Aztec. If he can't get it back to his feet, it's only a matter of time before he'll be tapping out.
Lirving looking to pass the guard.
As the round comes to an end the crowd are showing their appreciation for a great round of action.
Lirving wants to stand but Aztec has a closed guard, so he can't escape.
And thats the end of the round the fighters go back to their corners.
A close round but Kyrie Lirving will probably get the nod.
That's the end of the round. The referee orders the cornermen out of the cage so we can get back down to business.
Lirving wants to land a leg kick but Aztec is out of range.
Lirving is looking to clinch.
A big left from Lirving misses.
Lirving tries to clinch but Aztec moves out of range.
Lirving leaves Aztec with his face pressed against the mat as he sprawls beautifully, defending against a solid takedown attempt.
Aztec moves into range and clinches up with Lirving.
Lirving lands a nice trip takedown into half guard.

Aztec looking for submissions from an awkward position here.
Lirving seems very keen to just sit and control from half guard but Aztec does not like that idea so much and is remaining active off his back.
Lirving trying to pass the guard but Aztec defending well.
That's one minute gone in the round.
Aztec wants to get back to his feet.
Lirving tries to stand and escape but Aztec is controlling the position.
Aztec moves his hips nicely and gets into full guard.
Lirving sitting in guard here, content to control.
Aztec keeping moving, preventing Lirving from controlling successfully.
The fighters are pressed up against the cage, both looking to find a bit of space to work.
That's two minutes gone in the round.
OK we're going to have a standup here. Kyrie Lirving hasn't been effective enough on the ground and the referee wants a restart.
Aztec shoots for a takedown but Lirving saw that one coming a mile off and avoided it easily.
Aztec looks for a takedown but Lirving sprawls well.
That's three failed takedown attempts in the round for Tmothy Aztec. That's going to take a lot out of him.
Aztec fails with a takedown attempt.
Aztec dips to his left and cracks Lirving with an uppercut!
It looks like Kyrie Lirving has been cut.
Lirving is trying hard to land a takedown here. Aztec sprawls well and keeps this one on the feet.
Tmothy Aztec is looking to throw some combinations by the looks of things.
Aztec throws a head kick that misses.
We're hearing some news coming in from back stage. It's official - Lirving has eaten all the pies!
Aztec blocks the body kick.
Aztec shoots in but no luck this time.
Both fighters are absolutely exhausted here.
That's three minutes gone in the round.
Aztec keeps the fight standing with a nice sprawl.
Lirving shoots in but Aztec avoids the takedown attempt easily.
Aztec just misses with a punch to the body.
A really sloppy takedown attempt there from Aztec.
Lirving moves in looking to clinch but Aztec pushes him off.
Nice takedown defense from Lirving. No joy for Aztec on that attempt.
Aztec shoots in for a takedown but Lirving shows good takedown defense.
A really sloppy takedown attempt there from Aztec.
That's four minutes gone in the round.
Nice takedown defense from Aztec. No joy for Lirving on that attempt.
Lirving fails to land the takedown.
Aztec slips under a jab.
Aztec is trying hard to land a takedown here. Lirving sprawls well and keeps this one on the feet.
Lirving looks for a takedown but Aztec sprawls well.
Lirving tries to work over Aztec's front leg with a kick but Aztec checks it.
The crowd applaud the fighters efforts here as the round comes to an end.
Lirving darts in and clinches Aztec up against the cage.
Lirving can't break the clinch.
And thats the end of the round the fighters go back to their corners.
Kyrie Lirving showed his class in that round. I'd imagine he'll take it on all the scorecards.
The cut man is working on Kyrie Lirving's cut.
Well, the break between rounds is over. Let's get back to the scrappin! And we move into the final round!
Lirving changes levels and looks for a double leg takedown. Aztec tries to avoid it but Lirving manages to keep hold of a leg and drag Aztec to the ground. Aztec escapes though and pops straight back up to his feet.
The fight moves into the clinch position.
Aztec is looking to break free of the clinch but Lirving has double underhooks.
Aztec manages to pull guard.
Aztec utilising some decent striking defenses from the guard, preventing the ground and pound.
Aztec trying to strike from the bottom but really, it's not the best position to be doing that from!
Aztec looking for a guillotine here but Lirving defends easily.
Aztec keeping moving, preventing Lirving from controlling successfully.
That's one minute gone in the round.
Lirving drops back looking for a heel hook - he quickly realises he's not going to get it but Aztec manages to dive on top of him before he can escape and now Lirving has Aztec in his guard.
Aztec controls from within his opponent's guard.
Lirving wants to stand up but Aztec is controlling him.
Aztec not doing a lot at the moment. He'll have to show some more aggression or the fight will get stood up.
That's two minutes gone in the round.
Lirving is trying to keep Aztec in close.
We may be looking at a referee standup if the pace doesn't pick up soon.
Lirving can't keep his opponent in guard - Aztec advances to half guard, no doubt looking to mount.
Aztec is trying to control the action in half guard but Lirving is working away on the bottom, looking perhaps to get back to full guard.
Aztec gets to his feet - back to striking we go!
Aztec misses with the combination.
Aztec lands a jab-cross combination.
That's three minutes gone in the round.
Aztec throws a looping left and ducks down for a takedown. He's got his arms around Lirving's waist but Lirving gets an underhook and avoids the takedown by throwing Aztec off to one side.
Both fighters are breathing heavily.
Aztec circles away from the clinch attempt.
Aztec keeps the fight on the outside.
Lirving throws a leg kick but Aztec sees it coming and moves out of range.
Lirving fails miserably with a takedown attempt.
Aztec clinches up against the cage.
Lirving tries to pull guard but Aztec holds him up against the cage and eventually Lirving drops back down to his feet.
Tmothy Aztec has stuffed three takedown attempts in the round now. That's going to take a lot out of Kyrie Lirving.
Lirving prevents a takedown attempt there.
That's four minutes gone in the round.
Lirving tries to break free but Aztec pushes him back against the cage.
Lirving wants to push off and get back to the center of the mat but Aztec has him pressed against the cage.
Lirving wants to break free but Aztec has control.
Aztec jumps into guard, dragging Lirving to the mat.
Lirving is looking to stand up but Aztec won't let him.
Aztec is working an open guard here, looking to improve his position. No doubt that will leave him open to counters but at least he's being more offensive.
Aztec has a loose triangle. He'll be looking to tighten that up but Lirving can see exactly what he's planning and manages to posture up and free himself.
The crowd applaud the fighters efforts here as the round comes to an end.
Aztec looking to sweep using the butterfly guard but Lirving puts pay to that idea as he passes nicely into half guard.
And that's the end of the fight!
Tmothy Aztec showed his dominance in that final round.
I think Lirving has won this one but let's see whether the judges agree with me. Over to the ring announcer for the scorecards.
Ladies and gentlemen, after 3 rounds of action, we go to the scorecards for a decision.
Judge Shigeki Fujiwara scores the fight 28:29
Judge Tatsuya Matsuyama scores the fight 29:29
Judge Ren Mimura scores the fight 28:29
In favor of your winner, by majority decision... Kyrie Lirving!
|
|
|
|
|
|
|
|
|
|
|
|
|
|
|
|
|
|
|
|
|
|
|
| S |
C
A |
G |
S |
C
B |
G |
|
S |
C |
G |
|
energy
A | B |
|
hype
A | B |
|
pop
A | B |
|
mgr
A | B |
|
FIGHT
RATING
48% |
|
|
|
|
|
|
|
Undercard bout
|
Coming up we have a lightweight MMA rules bout between Nick Terry (ranked 0 p4p, 0 weight class) and Peace Braquis (ranked 0 p4p, 0 weight class). Terry's entrance music is Roam by The Story So Far. A fine choice. Braquis has chosen Enter Sandman as his entrance music. This should be fireworks!
 |
|
 |
| 169 cm
25
140 lbs
2 - 3 - 0 |
|
169 cm
19
150 lbs
1 - 1 - 0 |
Good wrestling
Basic striking
Granite chin |
|
BJJ Blue Belt
Counter fighter
Can Moonwalk |
|
| |
|
Ladies and gentlemen. This fight is 3 rounds, in the lightweight division.
Introducing the fighter to my left, fighting out of the red corner.
With a record of
2 - 3 - 0, fighting out of Tokyo, Nick Terry!
And introducing the fighter to my right, fighting out of the blue corner.
With a record of
1 - 1 - 0, fighting out of Tokyo, Peace Braquis!
The judges for this bout are Taro Takaoka, Shigeki Sano and Kenichi Hosakawa.
The bell rings for round one and we are underway!
Braquis fails with the takedown.
Terry feints and as Braquis raises his hands in defense, Terry changes levels and drives through with a takedown into guard.
We must be close to a standup if these guys don't pick up the pace.
Terry trying to land body shots but he keeps hitting the mat.
Braquis can't keep his opponent in guard - Terry advances to half guard, no doubt looking to mount.
Terry not throwing his punches with enough precision this time.
Terry prevents Braquis from improving his position.
Braquis on the receiving end of some nice ground and pound.
Terry throwing punches and elbows but they're not doing any damage.
Braquis avoiding damage under a succession of punches from Terry.
Braquis wants to control but Terry is keeping busy and won't allow it.
Terry scores with a couple of good hammerfists.
Braquis is trying to defend against the ground and pound but Terry scores with a couple of nice shots.
That's one minute gone in the round.
Terry wants to pass to mount but Braquis is defending the position.
Terry throwing shots but they're hitting the canvas more than the man.
Braquis blocking the ground and pound attempt from Terry.
Nice strikes from Terry there.
Terry thows a huge punch but Braquis dodges it nicely.
Terry scoring with strikes to the body and head.
Terry throwing shots but they're hitting the canvas more than the man.
Braquis on the receiving end of some nice ground and pound.
Braquis trying to hold on to Terry's head to control him but Terry postures up.
Terry looks towards his corner to check for any instructions. The corner give him nothing to work with, so he cracks Braquis with a short hammerfist. I guess that's as good as any advice he could get in this position.
Terry working over Braquis with some ground and pound. Braquis looks like he wants out of this position, which is understandable.
That's two minutes gone in the round.
Braquis wants to improve his position but Terry is controlling well.
Braquis regains full guard. Nicely done.
Fantastic stuff here - a very entertaining period of action, which has drawn cheers from the crowd.
Terry landing with the ground and pound.
Braquis trying to keep a closed guard but Terry is proving a slippery customer.
Terry pressing down on his opponent's thigh, looking to pass guard. Braquis is keeping the position for now.
Terry connects with a couple of short punches.
Terry wants to pass the guard but Braquis is keeping the position.
Braquis has momentary wrist control but Terry slips an elbow through the middle.
That's three minutes gone in the round.
Terry trying to land body shots but he keeps hitting the mat.
Terry loading up with the ground and pound but he's missing more than he's landing in this flurry.
Braquis throwing his legs up looking for a triangle.
Terry scores with a decent looking elbow strike.
Braquis has his foot on Terry's thigh. He's trying to push off and get in position for a triangle, I think. Terry works his way back into a safe position though.
Terry postures up and lands some nice ground and pound.
Terry stopping the sweep attempt from Braquis.
The fighters are pressed up against the cage, both looking to find a bit of space to work.
Terry makes a bit of distance and scores with some ground and pound, still in guard.
That's four minutes gone in the round.
Terry with a couple of shots to the head there. Not particularly brutal.
Terry postures up and scores with a shot to the body and a follow up elbow to the head.
Terry working in close now, lands a nice elbow to the side of Braquis's head.
Terry keeps in close for a moment and lands a decent shot to the side of Braquis's head.
This has been an exciting period of action!
Terry throwing elbows and punches but not connecting, as Braquis works some decent striking defense from the bottom.
Braquis is working an open guard here, looking to improve his position. No doubt that will leave him open to counters but at least he's being more offensive.
Terry tries to free his leg and advance position but Braquis is retaining full guard.
Terry is working the ground and pound from guard. He might want to try advancing position though to get more of an impact.
As the round comes to an end the crowd are showing their appreciation for a great round of action.
Braquis looking to sweep here. No luck so far.
Terry landing some decent shots from guard.
Terry throwing shots from guard but he's hitting more mat than opponent.
And thats the end of the round the fighters go back to their corners.
Nick Terry dominated that round.
That's the end of the round. The referee orders the cornermen out of the cage so we can get back down to business.
A really sloppy takedown attempt there from Braquis.
Braquis scores with a punch to the gut of his opponent.
Terry dives in and scores a takedown into Braquis's guard.
Terry is looking to work some ground and pound but Braquis has wrist control.
A big thud reverberates around the arena there as Terry accidentally thumps the mat. Hopefully he's not broken his hand.
Terry forces his way into half guard.
The referee walks around the fighters to get a better view of the action. Terry lands a nice short elbow.
Terry thows a wild elbow that connects with the canvas.
Braquis keeping his head moving to avoid the ground and pound.
Braquis is looking to regain full guard. Not this time though.
Terry takes advantage of the dominant position to land a couple of big hammer fists.
Terry has been looking to land a fair amount of strikes on the ground. He might be looking to soften his opponent up in order to work for a submission.
That's one minute gone in the round.
Braquis pushes Terry off looking to stand but Terry dives back in and keeps control.
Terry lands a big shot. The thud that echoes around the arena is like music to the fans' ears.
Braquis is rocked!
Terry is nestled in close to Braquis, controlling him well. He's worked in a nice elbow to the side of the head as well, for good measure.
Braquis is still in real trouble! Can Terry finish him?
Terry lands a big elbow - Braquis is out of it! He's waving his arms around but his eyes are closed and he's not intelligently defending himself - the ref has no choice but to jump in and stop the fight! This one is in the books! A TKO win for Terry!
Ladies and gentlemen, after 1:38 of round 2, we have a winner by way of TKO (Strikes). Nick Terry!
A relieved looking Nick Terry thanked the fans for their support and gave the usual line about them being amazing. They seemed to believe that he actually meant it.
|
|
|
|
|
|
|
|
|
|
|
|
|
|
|
|
|
|
|
|
|
|
|
| S |
C
A |
G |
S |
C
B |
G |
|
S |
C |
G |
|
energy
A | B |
|
hype
A | B |
|
pop
A | B |
|
mgr
A | B |
|
FIGHT
RATING
100% |
|
|
|
|
|
|
|
Undercard bout
|
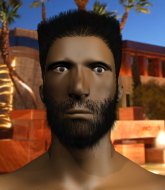
Coming up we have a light heavyweight MMA rules bout between Kratos Gorkhain (ranked 0 p4p, 0 weight class) and Frank Fernandez (ranked 0 p4p, 0 weight class). Both fighters look fresh as a daisy as they make their way towards the cage.
 |
|
 |
| 180 cm
25
200 lbs
2 - 2 - 0 |
|
182 cm
26
210 lbs
3 - 3 - 0 |
BJJ Blue Belt
Basic striking
Good chin |
|
BJJ Brown Belt
Counter fighter
Good gas tank |
|
| |
|
Ladies and gentlemen. This fight is 3 rounds, in the light heavyweight division.
Introducing the fighter to my left, fighting out of the red corner.
With a record of
2 - 2 - 0, fighting out of Tokyo, Kratos Gorkhain!
And introducing the fighter to my right, fighting out of the blue corner.
With a record of
3 - 3 - 0, fighting out of Tokyo, Frank Fernandez!
The judges for this bout are Hirohito Nitta, Yasuomi Hirokawa and Sosuke Kotani.
The bell rings for round one and we are underway!
Gorkhain lands a two punch combo.
Gorkhain fakes and then throws a beautiful body shot. Fernandez looks a bit winded and takes a step backwards to take a breath.
Fernandez shoots in looking for a double leg takedown. Gorkhain defends it nicely.
Gorkhain lands a body shot.
Gorkhain looks to land a combination. Fernandez sees it coming but can only parry a couple of the shots.
Fernandez showing good head movement there, avoiding the strikes from Gorkhain.
Gorkhain leaves Fernandez with his face pressed against the mat as he sprawls beautifully, defending against a solid takedown attempt.
Gorkhain fails to land with the punch combination there - jab, cross, hook, miss, miss, miss.
Fernandez doesn't manage to clinch there - Gorkhain circles away.
Gorkhain throws a combination but comes up with nothing but fresh air.
Gorkhain misses with a two punch combination.
That's one minute gone in the round.
Gorkhain swinging wildly here.
Gorkhain tries to bum rush Fernandez with a series of wild strikes but Fernandez uses good footwork to avoid the assault.
Gorkhain throws a combination but it was largely blocked by Fernandez.
The fight stays on the outside here - Fernandez looks like he's thinking about clinching though.
Fernandez tries to clinch up but Gorkhain circles away and keeps his distance.
Gorkhain throws a right and a left that both miss.
Gorkhain throws a right and a left that both miss.
Gorkhain looks to score with a jab to the body but Fernandez is just out of range.
Kratos Gorkhain seems to be the more aggressive standup fighter in this bout.
No joy there for Gorkhain, who threw a few shots but didn't land.
Fernandez gets a clinch.
Fernandez drops down looking for an ankle pick but Gorkhain pulls his leg out and moves away.
Kratos Gorkhain has stuffed three takedown attempts in the round now. That's going to take a lot out of Frank Fernandez.
That's two minutes gone in the round.
Fernandez looks frustrated there after his takedown attempt is stuffed easily.
Gorkhain swinging wildly here.
Fernandez fails with a rather predictable takedown attempt.
Fernandez fails with the takedown.
Gorkhain throws a nice looking combination but Fernandez bobs and weaves to avoid any damage.
Fernandez will have to do better than that with his takedown attempts.
That's three minutes gone in the round.
Fernandez doesn't react quick enough there as he takes a shot to the body.
Fernandez misses with a takedown attempt. He shot from a bit too far out.
Fernandez throws a looping left and ducks down for a takedown. He's got his arms around Gorkhain's waist but Gorkhain gets an underhook and avoids the takedown by throwing Fernandez off to one side.
Gorkhain misses with a body shot.
Fernandez showing good head movement there, avoiding the strikes from Gorkhain.
Gorkhain feints a jab promting Fernandez to slip. Gorkhain then demonstrates his capabilities by jabbing again. Fernandez slips again and ducks right into an uppercut.
No luck for Fernandez with that takedown attempt.
Gorkhain throws a right and a left that both miss.
That's four minutes gone in the round.
Gorkhain throws a combination but comes up with nothing but fresh air.
Gorkhain displays good takedown defense there as he swats away a double leg from Fernandez.
Gorkhain throws a nice hook to the body that draws an oooh from the crowd.
Gorkhain misses with a jab and misses with a cross straight after too.
Gorkhain lands with a nice combination. Fernandez backs away looking to recover.
Gorkhain is breathing heavily.
Gorkhain tries to land with a swinging hook to the body but Fernandez was well out of range. Poor timing from Gorkhain.
Fernandez fails with an attempt to clinch.
Some wild striking there from Gorkhain.
The crowd applaud the fighters efforts here as the round comes to an end.
Gorkhain misses with a wild combination.
Gorkhain misses with a wild combination.
And thats the end of the round the fighters go back to their corners.
Kratos Gorkhain dominated that round.
The referee calls time. The cornermen exit stage left and we're back to business.
Fernandez tries to clinch up against the cage, rushing in the close the distance. Gorkhain manages to break the clinch and circles back to the middle of the mat.
Gorkhain comes forward and lands a shot to the body, then darts back out of range.
Gorkhain misses with a few strikes there.
Fernandez fails miserably with a takedown attempt.
Fernandez has a takedown stuffed.
Fernandez tries to clinch up.
Fernandez avoids a punch combination nicely.
Fernandez shoots in for a takedown but doesn't get it.
Kratos Gorkhain has stuffed three takedown attempts in the round now. That's going to take a lot out of Frank Fernandez.
Gorkhain fails to land with the punch combination there - jab, cross, hook, miss, miss, miss.
Gorkhain is looking to wear down Fernandez with body shots, infact he's throwing more body shots than head shots at the moment.
That's one minute gone in the round.
Gorkhain throws a right and a left that Fernandez avoids nicely.
The fight stays on the outside here - Fernandez looks like he's thinking about clinching though.
Gorkhain swinging wildly here.
Gorkhain looks to score with a combo but nothing lands.
Some wild striking there from Gorkhain.
Fernandez showing good head movement there, avoiding the strikes from Gorkhain.
Both fighters are absolutely exhausted here.
Gorkhain throws a wild combination but nothing lands.
Fernandez looks frustrated there after his takedown attempt is stuffed easily.
That's two minutes gone in the round.
Gorkhain throws a combination but comes up with nothing but fresh air.
Fernandez shoots for a takedown but Gorkhain saw that one coming a mile off and avoided it easily.
Fernandez tries to clinch but Gorkhain is having none of it.
Gorkhain lands a glancing blow to the side of Fernandez's head.
Fernandez shoots in for a takedown - he's clinched up with Gorkhain but Gorkhain pushes him off and we're back to square one.
Fernandez is trying desperately to land a takedown but Gorkhain is having absolutely none of it. This is turning into a bit of a nightmare for Fernandez.
Gorkhain misses with a jab and misses with a cross straight after too.
Fernandez walks into a left hand.
Kratos Gorkhain is looking to keep the fight on the feet at all costs.
Gorkhain dips down and scores with a jab to the body.
Gorkhain throws a combination but comes up with nothing but fresh air.
Gorkhain swats away the attempt to clinch by Fernandez.
That's three minutes gone in the round.
Fernandez shoots in but Gorkhain avoids the takedown attempt easily.
Gorkhain throws a series of punches but Fernandez avoids them all with ease.
Fernandez tries to clinch but is not successful on this occasion.
Fernandez dodges the punch combination from Gorkhain.
Gorkhain stuffs a takedown. It's all about dictating where the fight takes place and Gorkhain wants it to stay on the feet.
Gorkhain looks to score with a jab to the body but Fernandez is just out of range.
Fernandez shoots in with a takedown attempt and he has Gorkhain pinned against the cage. Gorkhain gets the underhooks and manages to circle away.
Gorkhain lets the fists fly and connects with a left straight followed by a right hook.
That's four minutes gone in the round.
No luck for Fernandez with that takedown attempt.
A looping hook to the body misses from Gorkhain. Fernandez does a little dance to reset his feet.
Gorkhain throws a hard body shot but it just misses.
Fernandez doesn't manage to clinch there - Gorkhain circles away.
Some wild striking there from Gorkhain.
Fernandez shoots in for a takedown but doesn't get it.
A punch combination from Gorkhain misses.
Fernandez looks for a takedown but Gorkhain sprawls well.
And thats the end of the round the fighters go back to their corners.
Kratos Gorkhain dominated that second round.
OK. That's time! The bell goes and we're back to the action. Let's hear some noise people - this is the final round!
Gorkhain just misses with a punch to the body.
Gorkhain getting the better of the striking in that exchange.
Gorkhain throws a combination but it was largely blocked by Fernandez.
Gorkhain throws a combination but it was largely blocked by Fernandez.
A looping hook to the body misses from Gorkhain. Fernandez does a little dance to reset his feet.
Gorkhain rushes forward with a series of wild hooks but Fernandez moves out of range and avoids them all easily.
Fernandez fails with a takedown attempt.
Gorkhain cracks a nice hook into Fernandez's ribs.
Gorkhain throws a nice looking combination but Fernandez bobs and weaves to avoid any damage.
Both fighters are breathing heavily.
Gorkhain throws a nice looking combination but Fernandez bobs and weaves to avoid any damage.
That's one minute gone in the round.
A telegraphed right hand from Gorkhain misses the target.
Gorkhain throws a looping overhand right but Fernandez ducks down to avoid it.
Gorkhain stuffs the takedown.
Gorkhain throws a nice looking combination but Fernandez bobs and weaves to avoid any damage.
Fernandez slips a jab and a cross from Gorkhain.
Kratos Gorkhain is looking to throw some combinations by the looks of things.
Fernandez avoids a punch combination nicely.
Fernandez shoots in and gets a takedown into Gorkhain's guard.
Fernandez passes Gorkhain's right leg, so he's now in half guard.
Gorkhain is not content to let Fernandez control the position.
Fernandez seems like he's working for an arm triangle here. He's freed his trapped foot and he's rotating nicely. Gorkhain is in big trouble! He's tapping out! This one is aaaaaaaaaaaall over!
Ladies and gentlemen, after 2:55 of round 3, we have a winner by way of Submission (Arm Triangle). Frank Fernandez!
|
|
|
|
|
|
|
|
|
|
|
|
|
|
|
|
|
|
|
|
|
|
|
| S |
C
A |
G |
S |
C
B |
G |
|
S |
C |
G |
|
energy
A | B |
|
hype
A | B |
|
pop
A | B |
|
mgr
A | B |
|
FIGHT
RATING
69% |
|
|
|
|
|
|
|
Co-main event
|
|
|
|
Main event
|
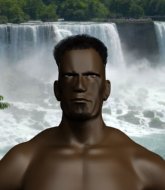
Coming up we have a heavyweight MMA rules bout between Sadahiro Tayahma (ranked 0 p4p, 0 weight class) and Kayo Philip (ranked 0 p4p, 0 weight class). Kayo Philip is the more experienced fighter, so let's see if that makes a difference tonight.
 |
|
 |
| 198 cm
26
255 lbs
1 - 0 - 0 |
|
175 cm
25
235 lbs
4 - 0 - 0 |
BJJ White Belt
Excellent boxer
Cardio machine |
|
Good takedowns
Basic striking
Granite chin |
|
| |
|
Ladies and gentlemen. This fight is 5 rounds, for the heavyweight championship of the world!
Introducing the champion to my left, fighting out of the red corner.
With a record of
1 - 0 - 0, fighting out of Tokyo, Sadahiro Tayahma!
And introducing the challenger to my right, fighting out of the blue corner.
With a record of
4 - 0 - 0, fighting out of Tokyo, Kayo Philip!
The judges for this bout are Shigeki Sano, Taro Takaoka and Tatsuya Matsuyama.
The bell rings for round one and we are underway!
Tayahma lands with an uppercut that bounces Philip off the cage and back into range.
Philip shoots in looking for a single leg takedown. Tayahma is trying to defend but Philip finishes it well and ends up in half guard. Let's see if he can advance position further.
We're hearing some news coming in from back stage. It's official - Philip has eaten all the pies!
Philip is trying to work for a kimura but Tayahma is defending well.
Philip passes to full mount!
Philip throwing shots from mount but they're not landing.
Tayahma on his back here. We all know that wrestlers don't like being on their back so let's see if Tayahma tries to get out of the position.
Tayahma wriggling around on the bottom manages to avoid the strikes thrown by Philip.
Philip looking to isolate an arm here. Tayahma doesn't see it coming and as Philip extends the arm, he's forced to tap out! Nice submission by Philip!
Ladies and gentlemen, after 0:48 of round 1, we have a winner by way of Submission (Armbar). Kayo Philip!
Kayo Philip is the new heavyweight champion!
Kayo Philip seemed lost for words in his post fight interview but he remembered to thank his fans and directed everyone to his website.
|
|
|
|
|
|
|
|
|
|
|
|
|
|
|
|
|
|
|
|
|
|
|
| S |
C
A |
G |
S |
C
B |
G |
|
S |
C |
G |
|
energy
A | B |
|
hype
A | B |
|
pop
A | B |
|
mgr
A | B |
|
FIGHT
RATING
53% |
|
|
|
|
|
|
|
|
|
|

