 |
GAMMA: Contenders #192 PBP Commentary |
Undercard bout
|
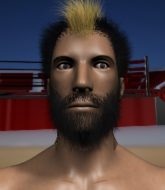
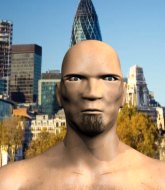
Coming up we have a heavyweight MMA rules bout between Asmodeus Ashimodai (ranked 0 p4p, 0 weight class) and Marco Magnin (ranked 0 p4p, 0 weight class). Ashimodai's entrance music is Right By My Side. A fine choice. We have two fighters making their debuts here, so let's see who comes out of this one with their first professional victory.
 |
|
 |
| 211 cm
20
280 lbs
0 - 0 - 0 |
|
191 cm
18
250 lbs
0 - 0 - 0 |
BJJ Purple Belt
Excellent MT
Good chin |
|
BJJ White Belt
Counter striker
Heavy handed |
|
| |
|
Ladies and gentlemen. This fight is 3 rounds, in the heavyweight division.
Introducing the fighter to my left, fighting out of the red corner.
With a record of
0 - 0 - 0, fighting out of Las Vegas, Asmodeus Ashimodai!
And introducing the fighter to my right, fighting out of the blue corner.
With a record of
0 - 0 - 0, fighting out of Las Vegas, Marco Magnin!
The judges for this bout are Frank Dennis, Cecil Peabody and Stewart Dunkirk.

The bell rings for round one and we are underway!
Ashimodai tries to close the distance and clinch but Magnin swats him to one side with an open hand palm strike and circles away.
Ashimodai tries to clinch but Magnin moves out of range.
Ashimodai throws a head kick that half lands.
Magnin tries to close the distance and clinch up but Ashimodai swats him away and circles back towards the center.
Ashimodai tries to clinch but Magnin moves out of range.
Ashimodai throws a hard body shot but it just misses.
A telegraphed right hand from Magnin misses the target.
Magnin misses with a wild body shot.
Magnin misses with a hook
and Ashimodai counters with a one-two to the body.

The fight moves into the clinch position.
Ashimodai is clearly stalling here... Pick up the pace son.
Magnin misses with a body punch.
Ashimodai is working hard here but doesn't seem to be able to control effectively, up against the cage.
Ashimodai has a couple of punches blocked by Magnin.

That's one minute gone in the round.
Magnin is trying to force a seperation but Ashimodai has the dominant position.
A short right hand to the side of the head by Ashimodai.
Magnin is trying to break free.
Ashimodai is looking to control Magnin's arms but Magnin gets an underhook and turns him. Now Ashimodai has his back to the cage.
Ashimodai misses with the head strike.
Ashimodai keeps the fight in the clinch, despite Magnin's efforts to push away.
Ashimodai has a couple of punches blocked by Magnin.
An uppercut on the inside fails to land for Ashimodai.
Ashimodai prevents Magnin from breaking the clinch.
Magnin working hard to break the clinch.
Ashimodai doesn't land with the attempted body shot.
A head punch blocked on the inside by Magnin.
Magnin is trying to break the clinch but Ashimodai has him pressed against the cage.
Magnin wants to break free. God knows he wants to breaaaak freeee.
Ashimodai goes for a body shot but it's blocked.
Magnin tries to circle away but Ashimodai has him pinned against the cage.
Magnin is trying to break free.
Ashimodai swings wildly with an uppercut but Magnin uses good head movement to avoid it.
Ashimodai misses with a body punch.

That's two minutes gone in the round.
Ashimodai tries to throw a body punch but Magnin avoids it by throwing Ashimodai back against the cage.
Ashimodai prevents Magnin from breaking the clinch.
Ashimodai looking to slow down the pace here.
Magnin misses with a short punch on the inside.
A head punch on the inside from Ashimodai fails to land.
Magnin is trying to force a seperation but Ashimodai has the dominant position.
Ashimodai doesn't land with the attempted body shot.
Magnin working hard to break the clinch.
Magnin wants to break free but Ashimodai has control.
Ashimodai swings away with an uppercut that misses.

Ashimodai escapes the clinch and we're back to striking.
We've seen a great period of action over the last minute or so - credit to both fighters for going all out!
Ashimodai fails in his attempt to clinch.
Ashimodai wants to clinch.
Ashimodai tries to clinch but is not successful on this occasion.

That's three minutes gone in the round.
Ashimodai has taken the fight to the clinch.
A right hook to the body lands for Ashimodai.
Magnin is trying to break the clinch but Ashimodai has him pressed against the cage.
Magnin blocks an uppercut.
Magnin tries a shoulder strike but it doesn't do any damage.
Magnin wants to break free. God knows he wants to breaaaak freeee.
Magnin stalling in the clinch but Ashimodai improves position.
Ashimodai misses with the head strike.
Magnin has had enough of the clinch but Ashimodai keeps him there for the moment.
Ashimodai working aggressively here.
Magnin has had enough of the clinch but Ashimodai keeps him there for the moment.
Magnin is looking to break free of the clinch but Ashimodai has double underhooks.
A frustrated look appears on Magnin's face as he tries to break the clinch.
Ashimodai misses with some punches.
Magnin is trying to break the clinch but Ashimodai is controlling him.
Magnin can't find room to land a body shot as Ashimodai controls the action.
Magnin has had enough of the clinch and is looking to separate.
Ashimodai is working hard here but doesn't seem to be able to control effectively, up against the cage.

That's four minutes gone in the round.
Ashimodai working aggressively here.
Ashimodai has a couple of punches blocked by Magnin.
Ashimodai tries to land a shot to the body but it's blocked.
Ashimodai dictating the pace here, as the fighters clinch against the cage.
An uppercut on the inside fails to land for Ashimodai.
This is a great period of action - very entertaining stuff!
Ashimodai pushes off and circles away, back to the middle of the mat.
Ashimodai tries to clinch up against the cage, rushing in the close the distance. Magnin manages to break the clinch and circles back to the middle of the mat.
Magnin throws a hard body shot but it just misses.
Magnin circles away from the clinch attempt.
Ashimodai has managed to clinch.
Ashimodai is trying to maintain a safe position but Magnin gets an underhook and turns Ashimodai into the cage.
As the round comes to an end the crowd are showing their appreciation for a great round of action.
Magnin is looking to break free of the clinch but Ashimodai has double underhooks.
Ashimodai struggles to land a body shot inside as Magnin controls his hands.
Magnin tries to break the clinch but Ashimodai is controlling the position.
Magnin wants to break free but Ashimodai has control.
And thats the end of the round the fighters go back to their corners.
Asmodeus Ashimodai dominated that round.
That's the end of the interval. I'm sure that seemed a lot quicker than a minute for our two fighters! Back to the action.

Magnin fakes a head punch and goes low to the body. Nicely done.
Magnin misses with a right hand
and Ashimodai connects with a straight left hand counter down the middle.
Ashimodai is looking to clinch.
Magnin scores with a reasonable looking shot to the body. Ashimodai doesn't seem bothered though.
Asmodeus Ashimodai seems to be the more aggressive standup fighter in this bout.
Magnin throws a body punch but Ashimodai moves out of range.
Magnin moving in and out of range nicely, whilst landing the scoring shot.

It looks like Asmodeus Ashimodai has been cut.
This is a great period of action - very entertaining stuff!
Ashimodai rushes Magnin and pushes him back against the cage in a clinch.
Ashimodai keeps control of Magnin as he tries to wriggle out of the double underhooks.
Magnin can't break the clinch.
Ashimodai working aggressively here.
Ashimodai stalling.
Magnin is working hard here but doesn't seem to be able to control effectively, up against the cage.
Still in the clinch, Ashimodai scores with a nice short uppercut.
Magnin wants to break free but Ashimodai has control.
Magnin blocking some punches.
That's one minute gone in the round.
Magnin has had enough of the clinch and is looking to separate.
Ashimodai has Magnin pressed against the cage, preventing Magnin from circling away and getting back to striking at range.
Ashimodai misses with a punch to the body.
A head punch blocked on the inside by Magnin.
A short right from Ashimodai on the inside.
Magnin can't find room to land a body shot as Ashimodai controls the action.
Magnin fails to pull the fight into his guard.
Ashimodai tries to stall but Magnin uses the opportunity to gain a better position.
Ashimodai has Magnin pressed against the cage.
A head punch on the inside from Magnin fails to land.
Magnin is looking for a takedown.
Magnin is trying to push Ashimodai away but Ashimodai has him pressed against the cage, so he's going nowhere.
Ashimodai blocks a couple of punches on the inside.
Both guys are working to get underhooks.
Magnin blocking some punches.
Magnin has had enough of the clinch but Ashimodai keeps him there for the moment.
Magnin trying to stall but Ashimodai improves his position.
Ashimodai misses with the head strike.
That's two minutes gone in the round.
A right handed body shot lands from Ashimodai.
Ashimodai blocking some punches.
Magnin misses with a hook to the ribs.
Ashimodai throws a punch but it's blocked by Magnin.
Magnin wants to break free. God knows he wants to breaaaak freeee.
Magnin has had enough of the clinch but Ashimodai keeps him there for the moment.
Magnin's head jolts backwards as he takes an uppercut right on the button!
The crowd cheering loudly, showing their appreciation for the quality fight we're seeing here.
Both fighters working to control the clinch.
Magnin tries to break the clinch but Ashimodai is controlling the position.
Ashimodai is trying to slow down the pace in the clinch, to catch his breath.
Ashimodai tries to land a shot to the body but it's blocked.
Ashimodai misses with some punches.
Ashimodai misses with a punch on the inside.
Magnin blocks a couple of punches on the inside.
Ashimodai wants to strike at distance but he can't break free of the clinch.
A short right hand to the side of the head by Ashimodai.
A nice left hand lands by Ashimodai.
That's three minutes gone in the round.
Magnin blocking some punches.
Ashimodai is working Magnin over against the cage.
Ashimodai has Magnin pressed against the cage, preventing Magnin from circling away and getting back to striking at range.
Asmodeus Ashimodai has scored more points in the clinch so far.
Magnin looking to slow down the pace here.
Ashimodai lands a left hand that snaps the head of Magnin backwards.
Magnin blocking some punches.
A short left from Magnin.
Magnin blocks a couple of punches on the inside.
Ashimodai lands with a short head shot on the inside.
Magnin blocks an uppercut.
Ashimodai makes some space for himself and lands an uppercut.
Magnin is looking to break free of the clinch but Ashimodai has double underhooks.
Magnin has dropped down and is looking to force the takedown but it's defended by Ashimodai after a bit of a struggle.
Asmodeus Ashimodai has stuffed three takedown attempts in the round now. That's going to take a lot out of Marco Magnin.
Ashimodai misses with a punch to the body.
Magnin is looking to break free of the clinch but Ashimodai has double underhooks.
Magnin working hard to break the clinch.
Ashimodai tries to work over Magnin's body with a swooping hook but it only glances the target.
That's four minutes gone in the round.
Ashimodai scores with a shoulder strike.
The fans in attendance giving it up for the two fighters, who have really let it all hang out in the last minute or so!
Magnin blocks a punch to the side of the head.
Magnin wants to push off and get back to the center of the mat but Ashimodai has him pressed against the cage.
A head punch blocked on the inside by Magnin.
Ashimodai has a couple of punches blocked by Magnin.
Magnin is trying to slow down the pace in the clinch, to catch his breath.
Ashimodai misses with some punches.
Ashimodai leaning against his opponent.
A shot in the inside from Ashimodai.
Ashimodai misses with a hook from the clinch.
Magnin has had enough of the clinch but Ashimodai keeps him there for the moment.
Magnin blocks a punch to the side of the head.
The crowd are going absolutely nuts as the round comes to an end - what a fantastic round of action!
Ashimodai blocking some punches.
Magnin has had enough of the clinch but Ashimodai keeps him there for the moment.
Magnin tries to circle away but Ashimodai has him pinned against the cage.
Magnin misses with some punches.
Magnin blocks an uppercut.
And thats the end of the round the fighters go back to their corners.
That was a close second round but I would say that Asmodeus Ashimodai will probably get the nod.
The cut man is working on Asmodeus Ashimodai's cut.
The referee calls time. The cornermen exit stage left and we're back to business. This is the final round!

The fight stays on the outside here - Ashimodai looks like he's thinking about clinching though.
Magnin takes a head kick and keeps coming.
Magnin checks a low kick from Ashimodai.
Magnin throws a nice looking combination but Ashimodai bobs and weaves to avoid any damage.
Ashimodai has managed to clinch.
Magnin wants to push off and get back to the center of the mat but Ashimodai has him pressed against the cage.
Ashimodai tries to land a shot to the body but it's blocked.
Ashimodai misses with a shot to the kidneys.
Ashimodai misses with a punch to the body.
Magnin blocking some punches.
The referee is keeping an eye on Ashimodai - much more stalling and he will separate the fighters.
Ashimodai misses with a hook from the clinch.
Ashimodai tried to land a shot to the body but connects with Magnin's elbow.
Magnin is trying to break the clinch but Ashimodai is controlling him.
That's one minute gone in the round.
A frustrated look appears on Magnin's face as he tries to break the clinch.
Ashimodai swings away with an uppercut that misses.
Magnin has had enough of the clinch but Ashimodai keeps him there for the moment.
Ashimodai lands punches inside but they're not really causing much damage.
Ashimodai tries to work over Magnin's body with a swooping hook but it only glances the target.
Magnin blocking some punches.
Ashimodai has a couple of punches blocked by Magnin.
Magnin looks like he'd prefer to be striking at range right now.
Magnin wants to push off and get back to the center of the mat but Ashimodai has him pressed against the cage.
Ashimodai lands with a right to the head.
Magnin can't break the clinch.
Ashimodai misses with a short punch on the inside.
Still in the clinch, Ashimodai scores with a nice short uppercut.
Ashimodai fails to land with a short punch on the inside.
Ashimodai misses with a punch on the inside.
Magnin is looking to break free of the clinch but Ashimodai has double underhooks.
Ashimodai breaks the clinch and we return to the middle of the mat.
Ashimodai moves into range and lands a nice leg kick.
That's two minutes gone in the round.
Ashimodai takes a hook to the side of the head. I wonder if that's got his ears ringing.
This is a great period of action - very entertaining stuff!
Magnin gets in close and tags Ashimodai with a short punch that almost sends Ashimodai to the mat! Oh Ashimodai is in big trouble! He turns his back on Magnin, trying to create some distance but Magnin rushes him, striking wildly and Ashimodai goes down! The referee tackles Magnin into the cage to end the fight! Magnin is one violent man!
Ladies and gentlemen, after 2:12 of round 3, we have a winner by way of TKO (Strikes). Marco Magnin!
|
|
|
|
|
|
|
|
|
|
|
|
|
|
|
|
|
|
|
|
|
|
|
| S |
C
A |
G |
S |
C
B |
G |
|
S |
C |
G |
|
energy
A | B |
|
hype
A | B |
|
pop
A | B |
|
mgr
A | B |
|
FIGHT
RATING
100% |
|
|
|
|
|
|
|
Undercard bout
|
|
|
|
Undercard bout
|
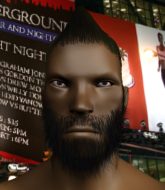
Coming up we have a light heavyweight MMA rules bout between Lucifer Diabolus (ranked 0 p4p, 0 weight class) and Arvo Laar (ranked 0 p4p, 0 weight class). Laar has chosen some random 90's estonia dance song i found on youtube as his entrance music. These two fighters really are very evenly matched on the feet - it will be fascinating to see who can assert themselves in that aspect of the fight.
 |
|
 |
| 200 cm
20
215 lbs
0 - 0 - 0 |
|
182 cm
19
213 lbs
1 - 6 - 0 |
Dangerous GnP
Solid boxing
Self confident |
|
BJJ Blue Belt
Decent boxing
Solid chin |
|
| |
|
Ladies and gentlemen. This fight is 3 rounds, in the light heavyweight division.
Introducing the fighter to my left, fighting out of the red corner.
With a record of
0 - 0 - 0, fighting out of Las Vegas, Lucifer Diabolus!
And introducing the fighter to my right, fighting out of the blue corner.
With a record of
1 - 6 - 0, fighting out of Las Vegas, Arvo Laar!
The judges for this bout are Robert Twigg, Chris Downing and Wesley Smith.
The bell rings for round one and we are underway!
Laar misses with a jab and misses with a cross straight after too.
Diabolus keeping a good distance there, avoiding the body shot.
Diabolus tries to clinch but is not successful on this occasion.
Laar lands a leg kick. The shin dug right into the meat of the thigh.
Nice body kick there by Diabolus.
Diabolus connects with a solid leg kick.
Diabolus lands with a head kick! That's gotta hurt.

It looks like Arvo Laar has been cut.
The crowd cheering loudly, showing their appreciation for the quality fight we're seeing here.
Laar tries to bum rush Diabolus with a series of wild strikes but Diabolus uses good footwork to avoid the assault.
Diabolus tries a head kick but it misses.
Laar misses with a leg kick
and Diabolus counters with a good right hand that lands right on the jaw.
Diabolus thumps Laar with a low kick.
Laar misses with the combination.
Laar thows a body shot but no joy.
Arvo Laar seems to be the more aggressive standup fighter in this bout.
Laar throws a combination that misses
and he gets countered with a snapping leg kick.
Laar tries to check the leg kick but that clearly hurt him.
Laar looks gassed!
Laar swats away the attempt to clinch by Diabolus.
Diabolus tries to close the distance and clinch but Laar swats him to one side with an open hand palm strike and circles away.
Laar circles away from the clinch attempt.
Diabolus with a nice looking leg kick. You could hear that one land in a back row.
Laar walks straight into a jab right on the nose. That one stung - he's blinking and trying to clear his head.
That's one minute gone in the round.
Laar on the receiving end of a decent leg kick there by Diabolus. Diabolus obviously looking to wear him down.
Laar on the wrong end of a nice low kick. He's acting like it's no big deal but he doesn't want to take many more of those.
Diabolus moves into range and lands a nice leg kick.
Diabolus misses with a half-hearted attempt at a head kick.
Laar gets cracked there but stands up to it.
Diabolus moves in looking to clinch but Laar pushes him off.
The fight stays on the outside here - Diabolus looks like he's thinking about clinching though.
Like a baseball bat into the meat of his leg there - nice leg kick by Diabolus.
We've seen a great period of action over the last minute or so - credit to both fighters for going all out!
Diabolus is moving around nicely and scores here with a single head shot.
Laar fails to land with the punch combination there - jab, cross, hook, miss, miss, miss.
Laar throws a leg kick but Diabolus checks it.
Jab, jab by Diabolus - just one landing.
Diabolus chopping away at his opponent's legs.
Laar blocks a head kick by Diabolus.
Laar on the receiving end of a decent leg kick there by Diabolus. Diabolus obviously looking to wear him down.
Ouch! a nice leg kick from Diabolus, right into the meat.
Diabolus throws a leg kick which misses Laar's front leg but catches the back leg as Laar tries to avoid it.
That's two minutes gone in the round.
Nice uppercut lands for Diabolus. That snapped Laar's head back.
Laar takes a thudding leg kick, right into the meat of the thigh.
Laar sees a low kick coming and goes to check it, but it's actually a body kick and it thuds into his unprotected ribs.
Diabolus lands with a thumping leg kick.
A thudding body kick lands there by Diabolus!
Both fighters circling a little - Diabolus finishes the exchange with a kick to the body.
Diabolus scores with a slapping inside leg kick.
Diabolus keeps Laar at a distance using the push kick.
Laar takes a really solid shot there but just smiles back and shrugs his shoulders.
Diabolus throws a head kick but Laar moves out of range.
Laar misses with a series of wild punches.
Laar's leg has a nasty welt from taking a succession of leg kicks. That must be slowing him down.
Diabolus lands with a nice low kick. That'll leave a bruise.
Diabolus throws a nice outside leg kick.
Diabolus fails with an attempt to clinch.
Diabolus throws a head kick that misses and slips in the process. He scrambles back to his feet and the fighters circle.
Diabolus is using his reach advantage well here, landing the more effective single shots from range.
Laar misses with a jab and misses with a cross straight after too.
Diabolus throws a nice inside leg kick.
That's three minutes gone in the round.
Diabolus connects with a high kick.
Laar thows a leg kick but Diabolus checks it
and Diabolus counters with a nice body kick.

Diabolus lands a big head kick that sends Laar tumbling to the mat! Diabolus takes a step backwards and waves Laar back to his feet - he wants the finish!

Laar is rocked!
The crowd cheering loudly, showing their appreciation for the quality fight we're seeing here.
Diabolus is looking to slow Laar down with leg kicks.
Diabolus doesn't manage to clinch there - Laar circles away.
Diabolus tries a head kick but it misses.
Diabolus tries to clinch up against the cage, rushing in the close the distance. Laar manages to break the clinch and circles back to the middle of the mat.
Diabolus connects with a solid leg kick.
Both fighters circling a little - Diabolus finishes the exchange with a kick to the body.
Laar tries to close the distance and clinch but Diabolus swats him to one side with an open hand palm strike and circles away.
Diabolus tries a head kick but it misses.
Diabolus throws a head kick but Laar moves out of range.
Laar fails to land with a series of punches.
Laar will need to tighten up his combinations if he doesn't want to gas himself out, swinging at thin air.
Diabolus dodges the punch combination from Laar.
Diabolus throws a head kick that misses.
That's four minutes gone in the round.
Laar swinging wildly here.
Laar falls off balance throwing a combination
and Diabolus counters with an inside leg kick.
Diabolus jabs Laar to the body, keeping him at a distance.
Diabolus lands a big head kick that sends Laar tumbling to the mat! Diabolus takes a step backwards and waves Laar back to his feet - he wants the finish!
Diabolus lands a big head kick that sends Laar tumbling to the mat! Diabolus takes a step backwards and waves Laar back to his feet - he wants the finish!
Laar is still on wobbly legs! Can Diabolus finish him?
Diabolus feints a jab and as Laar dips his head, Diabolus unleashes a brutal head kick that catches Laar right on the jaw! Timbeeer! Laar falls backwards in slow motion, only propped up by the cage! Diabolus smiles a psychotic smile as he stares down his unconscious opponent. That is a scary man.
Ladies and gentlemen, after 4:32 of round 1, we have a winner by way of KO (Head Kick). Lucifer Diabolus!
Lucifer Diabolus decided to thank the fans in attendance for making a great atmosphere. It seemed to go down pretty well.
|
|
|
|
|
|
|
|
|
|
|
|
|
|
|
|
|
|
|
|
|
|
|
| S |
C
A |
G |
S |
C
B |
G |
|
S |
C |
G |
|
energy
A | B |
|
hype
A | B |
|
pop
A | B |
|
mgr
A | B |
|
FIGHT
RATING
100% |
|
|
|
|
|
|
|
Co-main event
|
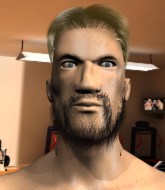
Coming up we have a heavyweight MMA rules bout between Hildebert Fabian (ranked 0 p4p, 0 weight class) and Roman Pavluchenko (ranked 0 p4p, 0 weight class). Fabian comes to the cage accompanied by Exibit A. Roman Pavluchenko has the better chin. Will he look to stand and bang today?
 |
|
 |
| 195 cm
24
277 lbs
7 - 3 - 0 |
|
205 cm
24
280 lbs
0 - 2 - 0 |
Good wrestling
Basic striking
Very quick |
|
Good wrestler
World class boxer
Good gas tank |
|
| |
|
Ladies and gentlemen. This fight is 3 rounds, in the heavyweight division.
Introducing the fighter to my left, fighting out of the red corner.
With a record of
7 - 3 - 0, fighting out of Las Vegas, Hildebert Fabian !
And introducing the fighter to my right, fighting out of the blue corner.
With a record of
0 - 2 - 0, fighting out of Las Vegas, Roman Pavluchenko!
The judges for this bout are Robert Twigg, Cecil Peabody and Tiny Johnson.
The bell rings for round one and we are underway!
Fabian tries to clinch but Pavluchenko is having none of it.
Pavluchenko misses with a head kick.
Pavluchenko throws a hard body shot but it just misses.
Wow, both these guys are really going for it!
Pavluchenko lands with a right hand.

Pavluchenko has managed to clinch.
Fabian pushes off an throws an elbow but Pavluchenko leans to the side and avoids it. We're back to clinching against the cage.
Fabian tries to pull guard but can't drag his opponent to the mat. Pavluchenko just stands there and leans against the cage.
Fabian wants a takedown but no success here.
Pavluchenko managing to block the knees to the body from Fabian .

Pavluchenko has moved round to his opponent's back and is looking for a suplex! Oh snap! He's tossed Fabian clear over his head and slammed him to the mat!
The ref warns both fighters not to hold the cage as they work up against the meshing.
The fans in attendance giving it up for the two fighters, who have really let it all hang out in the last minute or so!
Fabian covers up after that shot from Pavluchenko.
Fabian tries to escape the position - he's now mounted. Is that better or worse? Hard to tell!
Fabian is writhing around trying to get back to his feet.

Pavluchenko looking to secure an arm triangle but Fabian defends it well.
Pavluchenko raining down hammerfists from mount.

Fabian is rocked!
Pavluchenko looking for an armbar but decides to keep the dominant position instead.
That's one minute gone in the round.
Pavluchenko wants to control the pace but Fabian is squirming around nicely.
Pavluchenko looking to control and managing it successfully.
Pavluchenko scores with a couple of good head shots there.
Pavluchenko postures up and throws a massive shot that knocks Fabian out cold! Two more strikes to his unconscious opponent for good luck and this one is all over! Pavluchenko goes absolutely crazy with his corner! Wow, you can see how much that win means to him!
Ladies and gentlemen, after 1:48 of round 1, we have a winner by way of KO (Strikes). Roman Pavluchenko!
|
|
|
|
|
|
|
|
|
|
|
|
|
|
|
|
|
|
|
|
|
|
|
| S |
C
A |
G |
S |
C
B |
G |
|
S |
C |
G |
|
energy
A | B |
|
hype
A | B |
|
pop
A | B |
|
mgr
A | B |
|
FIGHT
RATING
92% |
|
|
|
|
|
|
|
Main event
|
Coming up we have a welterweight MMA rules bout between Cody Boyd (ranked 0 p4p, 0 weight class) and Zack Khan (ranked 0 p4p, 0 weight class). Cody Boyd has the edge in experience - let's see if he can make that count tonight.
 |
|
 |
| 180 cm
19
170 lbs
3 - 4 - 0 |
|
183 cm
19
178 lbs
1 - 1 - 0 |
BJJ Blue Belt
Counter striker
Experienced |
|
BJJ Purple Belt
Brawler
Solid chin |
|
| |
|
Ladies and gentlemen. This fight is 3 rounds, in the welterweight division.
Introducing the fighter to my left, fighting out of the red corner.
With a record of
3 - 4 - 0, fighting out of Las Vegas, Cody Boyd!
And introducing the fighter to my right, fighting out of the blue corner.
With a record of
1 - 1 - 0, fighting out of Las Vegas, Zack Khan!
The judges for this bout are Tiny Johnson, Cecil Peabody and Stewart Dunkirk.
The bell rings for round one and we are underway!
Left hook, right uppercut from Boyd.
Khan fails with the takedown
enabling Boyd to counter with a crisp jab.
Khan gets his takedown attempt stuffed easily
and Boyd counters with a one-two to the body.
Boyd rushes forward with a series of wild hooks but Khan moves out of range and avoids them all easily.
Boyd displays good takedown defense there as he swats away a double leg from Khan.
Cody Boyd has stuffed three takedown attempts in the round now. That's going to take a lot out of Zack Khan.
Khan with a lazy takedown attempt
and Boyd counters with a left and a right that stings Khan.
Khan checks a leg kick.
Khan pulls out of a head kick attempt.
Khan has his takedown stuffed
and Boyd counters with a left and a right that stings Khan.
That's one minute gone in the round.
Khan shoots and misses
and Boyd counters with a three punch combo that has Khan backing up. Khan nods at Boyd to acknowledge the strikes.
Khan doesn't succeed with the takedown

and Boyd decides to take the opportunity to score a takedown. He's landed in Khan's guard.
Khan is working from a closed guard but he's struggling to control his opponent.
Boyd with a flurry of punches that miss.
Boyd wants to pass the guard but Khan is keeping the position.
The fighters are pressed up against the cage, both looking to find a bit of space to work.
Khan controls Boyd momentarily but Boyd frees himself.
Khan looking for submissions from the bottom here. Moving his hips around, possibly looking for an armbar.
Khan looks gassed!
Khan has a closed guard, preventing Boyd from standing up.
That's two minutes gone in the round.
Boyd working some ground and pound from guard but it's not doing any damage.
Boyd would like to get this fight back to the feet but can't get free from the closed guard.
Boyd postures up in Khan's guard and throws a big left but Khan blocks it.
Boyd has to be careful here, sitting in the guard of a superior BJJ player.
We've seen a great period of action over the last minute or so - credit to both fighters for going all out!
Khan wants to sweep here but Boyd controlling him for the moment.
Boyd is looking to stand up but Khan won't let him.
Boyd throws a strike but Khan rolls with it and manages to sweep. Now he's in guard on top.
Khan slows down the pace of the fight for a moment. He'll need to remain active if he doesn't want to see the fight stood back up.
Khan wants to control from the top but Boyd keeps moving.
That's three minutes gone in the round.
Boyd is looking to get back to his feet but can't, whilst Khan is controlling him.
Khan forces his way into half guard.
Boyd is working for an escape here. He's hooked one of Khan's legs and he's managed to sneak out and take Khan's back!
Khan manages to reverse the position and now he's in Boyd's guard. Nice work there by Khan.
Boyd keeping moving, preventing Khan from controlling successfully.
Khan is in a good position here but he's just trying to control... And he's not even managing to do that successfully.
That's four minutes gone in the round.
Khan is holding a leg here, probably looking for an ankle lock - he drops back and goes for it! Boyd is in trouble! Is it all over??? No! Boyd has escaped and now he's on top!
Khan tries to land a sweep but no joy.
Boyd trying to pass the guard but can't manage it just yet.
Boyd with a flurry of punches that miss.
Boyd with a flurry of punches that miss.
Khan wants to sweep here but Boyd controlling him for the moment.
Boyd postures up to throw the ground and pound strikes but they don't connect.
As the round comes to an end the crowd are showing their appreciation for a great round of action.
Boyd throwing shots from guard but he's hitting more mat than opponent.
Khan had isolated an arm as going for a kimura. Boyd defends it easily.
And thats the end of the round the fighters go back to their corners.
Cody Boyd dominated that round.
The fighters' corners scream their final instructions, as the referee calls time. Here we go, back to the action!
Boyd throws a low kick but it's checked well by Khan.
Boyd tries to close the distance and clinch up against the cage but Khan paws at him with a jab and circles away.
Khan tries to score a power double leg takedown but Boyd sees that one coming and sprawls well. That will dishearten Khan somewhat.
Khan looks for a takedown but Boyd sprawls well.
We've had a slow start to the round here - hopefully the action picks up.
Horrible takedown by Khan or perhaps it was just good defense by Boyd which made him look bad.
Cody Boyd has stuffed three takedown attempts in the round now. That's going to take a lot out of Zack Khan.
That's one minute gone in the round.
Khan misses with a takedown
and Boyd counters with a shoot takedown into half guard.
Khan is breathing heavily.
Boyd passes the half guard and he's now in mount! Big trouble for Khan!
Khan manages to regain half guard. Good work.

Khan makes some distance and scrambles quickly back to his feet. Nice work!
Boyd throws a series of punches but Khan moves out of range.
Khan misses with a takedown attempt
and Boyd counters with a two punch combo.
Khan gets his takedown attempt stuffed easily
and Boyd counters with a nice single leg takedown and he's in Khan's guard now.
That's two minutes gone in the round.
This is a great period of action - very entertaining stuff!
Boyd loading up with the ground and pound but he's missing more than he's landing in this flurry.
Khan utilising some decent striking defenses from the guard, preventing the ground and pound.
Boyd wanted to stand there but Khan had control of the position.
Boyd trying to control the position from guard on top but Khan is wriggling around, looking for whatever he can.
Boyd in full guard, throwing the ground and pound. No damage this time.
Boyd working some ground and pound from guard but it's not doing any damage.
Boyd postures up in Khan's guard and throws a big left but Khan blocks it.
Boyd avoids a guillotine attempt easily.
Boyd is pushing down on Khan's leg trying to pass to half guard. Khan is fighting to maintain full guard but Boyd has managed to sneak the leg through.
That's three minutes gone in the round.
Khan is looking to improve his position.
Khan keeping his head moving to avoid the ground and pound.
Boyd not landing any meaningful shots this time.
Boyd sitting in half guard, looking to land shots. Khan defending well though.
Boyd throwing shots but Khan is blocking nicely.
Boyd sitting in half guard, looking to land shots. Khan defending well though.
Boyd knows he needs to get back to his feet asap. He's simply no match for Khan on the ground.
Boyd missing with some ground and pound from the half guard.
Boyd tries to stand but can't do so whilst Khan controls his leg.
Khan trying to control from the bottom.
Boyd not throwing his punches with enough precision this time.
That's four minutes gone in the round.
Boyd thumps the canvas. Not on purpose obviously - he just missed Khan's head.
Boyd not landing any meaningful shots this time.
Boyd missing with the ground and pound from half guard.
Boyd misses with a head shot. Khan uses the momentum to regain guard.
Boyd with a flurry of punches that miss.
Boyd throws a big right hand that misses.
Khan trying to punch from his back but it's not doing any damage.
Boyd throwing strikes from guard but Khan blocks nicely.
As the round comes to an end the crowd are showing their appreciation for a great round of action.
There's a bit of a scramble here and now Khan is on top in guard.
Cody Boyd overall seems to be getting the better of the ground position in the fight so far.
This has been an exciting period of action!
Boyd wants to stand up but Khan is controlling him.
And thats the end of the round the fighters go back to their corners.
Cody Boyd dominated that second round.
Well, the break between rounds is over. Let's get back to the scrappin! This is the final round!
Khan tries to shoot in for a takedown. He's got hold of a leg but Boyd swivels and escapes.
Boyd scores with a one two! Khan had his feet all tangled up there and couldn't avoid the strikes.
Khan with a poor takedown
and Boyd counters with a two punch combo.
Cody Boyd is looking to throw some combinations by the looks of things.
Boyd stuffs the takedown.
Cody Boyd has stuffed three takedown attempts in the round now. That's going to take a lot out of Zack Khan.
Boyd lands with a two punch combination before moving back out of range.
Khan misses with a takedown attempt
and Boyd counters with a three punch combo that has Khan backing up. Khan nods at Boyd to acknowledge the strikes.
Both fighters are breathing heavily.
Boyd looking for a takedown here - he's got it.
Boyd postures up to throw the ground and pound strikes but they don't connect.
That's one minute gone in the round.
Boyd throwing elbows and punches but not connecting, as Khan works some decent striking defense from the bottom.
Khan is trying to keep Boyd in close.
Boyd postures up in Khan's guard and throws a big left but Khan blocks it.
Khan wants to sweep here but Boyd controlling him for the moment.
Boyd trying to land body shots but he keeps hitting the mat.
Khan preventing the ground and pound from doing any damage.
Boyd working some ground and pound from guard but it's not doing any damage.
A big thud reverberates around the arena there as Boyd accidentally thumps the mat. Hopefully he's not broken his hand.
Khan preventing the ground and pound from doing any damage.
Boyd throws a big elbow that misses.
Khan looking to control.
That's two minutes gone in the round.
Khan might have to switch it up a bit here because his efforts to control Boyd kaven't been going to plan, at least at the current moment in time.
Boyd wants to stand but Khan has a closed guard, so he can't escape.
Khan preventing the ground and pound from doing any damage.
Boyd throwing elbows and punches but not connecting, as Khan works some decent striking defense from the bottom.
The ref warns both fighters not to hold the cage as they work up against the meshing.
Khan lands a beautiful switch and he's in full mount! That could spell trouble for Boyd!
Khan can't quite control the action as he would like just now, as Boyd is looking to escape.
Boyd working to try and regain half guard.
That's three minutes gone in the round.
Boyd regains half guard.
Khan wants to take a breather but Boyd is having none of it.
Boyd looks like he's trying to stand up.
Boyd tries to get to full guard but Khan has control of the leg.
Khan seems very keen to just sit and control from half guard but Boyd does not like that idea so much and is remaining active off his back.
Khan not landing any meaningful shots this time.
That's four minutes gone in the round.
Boyd is defending against the submission attempts here by Khan.
Khan is pressing down on Boyd's thigh, looking to free his foot. Boyd is holding on for now.
Boyd wants to control but Khan is keeping busy and won't allow it.
Boyd makes his way to full guard. A much better position for Boyd.
Boyd is working an open guard here, looking to improve his position. No doubt that will leave him open to counters but at least he's being more offensive.
The crowd applaud the fighters efforts here as the round comes to an end.
Khan trying to control but Boyd is working from the bottom.
And that's the end of the fight!
Cody Boyd showed his dominance in that final round.
Well Boyd has outscored his opponent in every aspect of the fight today. Only a scarily incompetent judge or two will keep him from a well deserved win... Over to the ring announcer for the scorecards.
Ladies and gentlemen, after 3 rounds of action, we go to the scorecards for a decision.
Judge Tiny Johnson scores the fight for Cody Boyd!
Judge Cecil Peabody scores the fight for Cody Boyd!
Judge Stewart Dunkirk scores the fight for Cody Boyd!
Cody Boyd wins by unanimous decision!
|
|
|
|
|
|
|
|
|
|
|
|
|
|
|
|
|
|
|
|
|
|
|
| S |
C
A |
G |
S |
C
B |
G |
|
S |
C |
G |
|
energy
A | B |
|
hype
A | B |
|
pop
A | B |
|
mgr
A | B |
|
FIGHT
RATING
46% |
|
|
|
|
|
|
|
|
|
|
